Connect with us

Wood Stove

How To Connect Stove Pipe To Wood Stove

Published

on

An image depicting a step-by-step guide on connecting a stove pipe to a wood stove

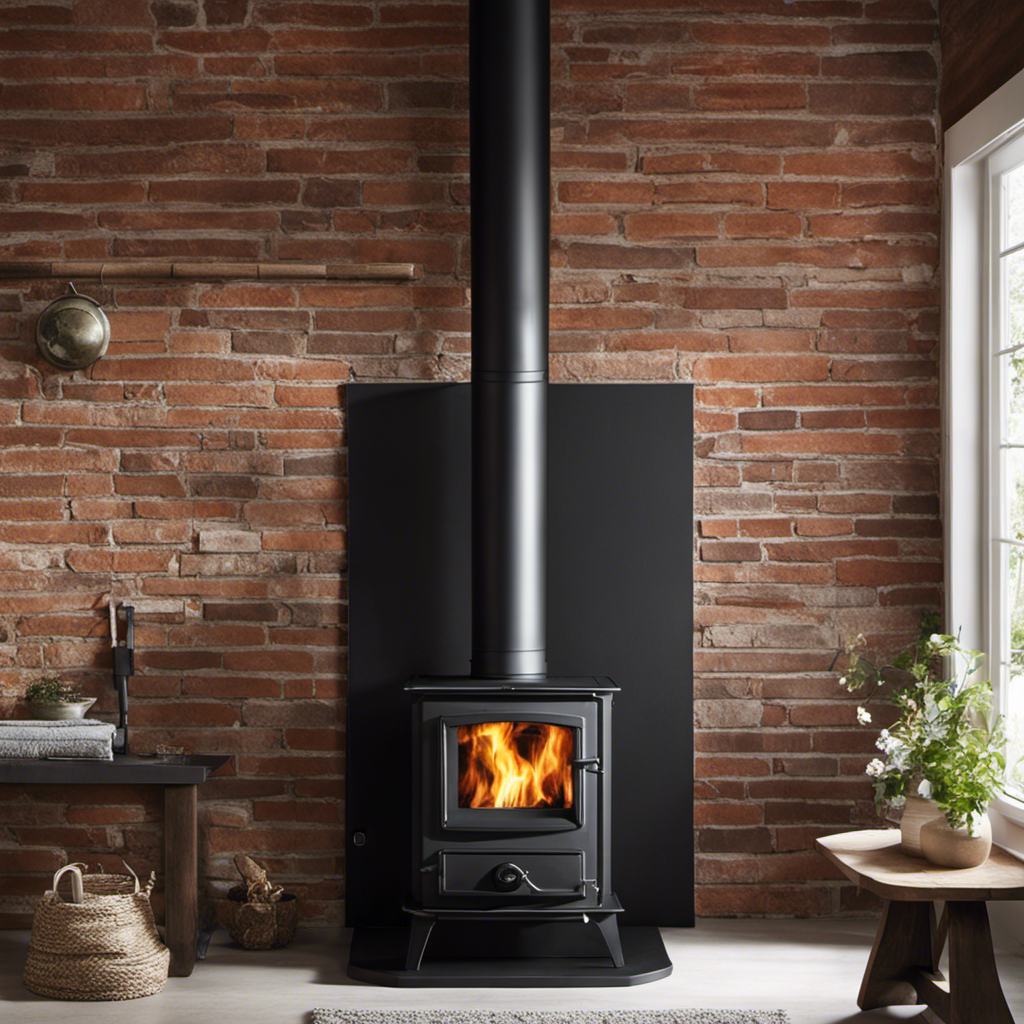
As someone who enjoys DIY projects, I understand how crucial it is to correctly install a stove pipe on your wood stove. In this manual, I will guide you through the comprehensive process of connecting the stove pipe to your wood stove.

From choosing the right materials to securing and sealing the joints, I’ll provide you with the knowledge and precision you need to ensure a safe and efficient connection.

Let’s get started!

Key Takeaways

  • Stainless steel is the preferred material for stove pipes due to its durability and heat resistance.
  • Accurate measurements and clean cuts are crucial for proper installation of the stove pipe.
  • The stove pipe collar should be installed securely with screws and sealed with high-temperature sealant or gasket material.
  • When connecting stove pipe sections, ensure tight seals by aligning the male and female ends and twisting them clockwise to lock into place.

Choosing the Right Stove Pipe Material

I prefer using stainless steel stove pipe for its durability and heat resistance. When it comes to choosing the right stove pipe material, there are several factors to consider.

One of the most important considerations is the size of the stove pipe. The size of the stove pipe you choose will depend on the size of your wood stove and the length of the pipe needed to connect it to the chimney. It’s crucial to ensure that the stove pipe is properly sized to allow for proper ventilation and efficient operation of the wood stove.

In addition to choosing the right stove pipe size, it’s also important to consider the advantages of different stove pipe materials. Stainless steel is a popular choice due to its durability and ability to withstand high temperatures. It also has excellent corrosion resistance, making it suitable for both indoor and outdoor installations. Another advantage of stainless steel stove pipe is that it’s easy to clean and maintain, ensuring that it will last for many years.

Advertisement

Overall, choosing the right stove pipe material is essential for the proper functioning and longevity of your wood stove. By considering the stove pipe size and the advantages of different materials, you can make an informed decision that will ensure a safe and efficient wood stove installation.

Measuring and Cutting the Stove Pipe

To ensure a proper fit, I’ll measure and cut the stove pipe accordingly. Achieving accuracy in measurements is crucial for a successful installation. Here are three key steps to ensure precision and efficiency in measuring and cutting the stove pipe:

  1. Measurements: Before cutting the stove pipe, it’s essential to measure the distance from the wood stove to the wall or chimney. Use a measuring tape or ruler to accurately determine the length needed for the stove pipe. Take multiple measurements to ensure consistency and accuracy.

  2. Marking: Once you’ve the measurements, mark the stove pipe accordingly. Use a pencil or marker to make clear and visible marks on the pipe. You can use a straight edge or a level to ensure straight lines and accurate markings.

  3. Cutting Techniques: When it comes to cutting the stove pipe, there are a few techniques you can employ. One option is to use a pipe cutter specifically designed for stove pipes. This tool provides clean and precise cuts. Alternatively, you can use a reciprocating saw or a hacksaw with a metal-cutting blade. Remember to wear safety goggles and gloves when cutting the pipe.

Attaching the Stove Pipe to the Wood Stove

The attachment of the stove pipe is crucial for proper ventilation and functionality. When it comes to wood stove maintenance, ensuring the stove pipe is securely connected is of utmost importance. Not only does it allow for the efficient flow of smoke and gases, but it also ensures the safety of your home and prevents any potential fire hazards.

To begin, make sure to clean the connection point on the wood stove thoroughly. Any debris or ash can interfere with a proper seal. Next, carefully align the stove pipe with the flue collar on the wood stove. It’s essential to use the appropriate size of stove pipe that matches the collar’s diameter to ensure a secure fit. Once aligned, slide the stove pipe onto the flue collar, making sure it fits snugly.

To ensure a tight and secure connection, use pipe screws or clamps to fasten the stove pipe to the collar. This will prevent any accidental disconnections and maintain the proper ventilation of the wood stove. Additionally, regularly inspect the stove pipe for any signs of damage or wear, as this can compromise its safety and functionality.

Advertisement

Now that the stove pipe is securely attached to the wood stove, we can move on to the next step in the installation process: installing the stove pipe collar.

Installing the Stove Pipe Collar

Now that the attachment is complete, I can move on to installing the collar for the stove pipe. The stove pipe collar is an important component that connects the stove pipe to the wood stove and helps create a secure and efficient connection.

Here are the steps to install the stove pipe collar correctly:

  1. Measure and mark the location: Start by measuring the diameter of the stove pipe. Use this measurement to mark the corresponding spot on the wood stove where the collar will be installed.

  2. Cut the hole: Using a hole saw or a jigsaw, carefully cut a hole in the marked spot on the wood stove. Make sure the hole is slightly smaller than the diameter of the collar to ensure a snug fit.

  3. Install the collar: Place the stove pipe collar into the hole you just cut. Ensure that it fits securely and snugly. Fasten the collar to the wood stove using screws or other appropriate fasteners.

When installing the stove pipe collar, it’s important to avoid common installation mistakes such as:

  • Installing a collar that’s too large or too small for the stove pipe, which can lead to leaks and inefficiency.

  • Not securing the collar properly, which can result in a loose connection and potential safety hazards.

  • Failing to use high-temperature sealant or gasket material around the collar, which can cause smoke or gases to escape.

With the stove pipe collar properly installed, I can now proceed to connecting the stove pipe sections.

Advertisement

Connecting the Stove Pipe Sections

With the collar securely in place, I can now join the sections of the pipe together. Connecting the stove pipe sections is a crucial step in the installation process, as it ensures proper ventilation and efficient operation of the wood stove. To begin, I carefully align the male end of one section with the female end of the other section. I make sure that the seams overlap to create a tight seal. Next, I insert the crimped end of the male section into the female end, twisting it clockwise until it locks into place. This creates a secure connection that prevents any leaks or gaps. I repeat this process for each section of the stove pipe until I reach the desired height for the chimney.

Properly connecting the stove pipe sections is essential for the safe and effective operation of the wood stove. By creating a tight seal, it prevents any smoke or gases from leaking into the living space. This not only ensures the health and safety of the occupants but also helps maintain optimal air quality. Additionally, a secure connection allows for proper ventilation, which is crucial for the efficient burning of the wood and the removal of any combustion byproducts.

Once all the sections are connected, I proceed to install the chimney cap. This cap serves as a protective barrier, preventing rain, snow, debris, and animals from entering the chimney. It also helps improve the overall draft, ensuring that the wood stove operates at its highest efficiency. By following these steps and ensuring proper ventilation, I can confidently enjoy the warmth and comfort provided by my wood stove.

Securing and Sealing the Stove Pipe Joints

To ensure a tight seal and prevent any leaks or gaps, I use high-temperature silicone to secure and seal the joints of the stove pipe. This is an important step in the installation process to ensure the safe and efficient operation of the wood stove.

Here are three sealing techniques that can help prevent common installation mistakes:

Advertisement
  1. Apply silicone: Before connecting the stove pipe sections, apply a bead of high-temperature silicone around the male end of one section. This will create a tight seal when the sections are joined together.

  2. Tighten the clamps: When connecting the sections, make sure to tighten the clamps securely. This will prevent any movement or separation of the pipes, which can lead to leaks or gaps.

  3. Inspect for gaps: After connecting the sections and securing them with clamps, inspect the joints for any gaps or spaces. If you notice any, apply additional silicone to seal them completely.

Adding a Stove Pipe Damper

Adding a stove pipe damper is a crucial step in ensuring efficient and safe wood stove operation. By controlling the airflow, the damper allows you to regulate the burn rate and temperature, reducing fuel consumption and preventing overheating.

Proper installation is essential, as it needs to be placed in the correct position and secured tightly to prevent any air leakage.

Importance of Damper

I’ll explain why the damper is important when connecting the stove pipe to the wood stove. The damper plays a crucial role in regulating the airflow within the stove pipe and wood stove system.

Here’s why it’s important:

  1. Improved Efficiency: A properly functioning damper ensures that the stove operates at peak efficiency by controlling the amount of air entering the stove pipe. This helps to maintain a consistent and optimal burn rate, resulting in better heat output and fuel consumption.

  2. Safety: The damper allows for effective control of the draft, preventing backdrafts and reducing the risk of smoke or harmful gases entering your home. This is particularly important for maintaining good indoor air quality and preventing potential health hazards.

  3. Troubleshooting: If you’re experiencing issues with smoke lingering in your home or difficulty in getting the fire started, the damper should be one of the first components to check. A malfunctioning damper can cause poor combustion and hinder proper ventilation.

Proper Damper Installation

Installing the damper correctly ensures proper airflow control and prevents potential issues with the wood stove system. There are different types of dampers that can be used, including manual dampers, automatic dampers, and bypass dampers. Each type has its own advantages and installation requirements.

Advertisement

When installing a damper, it’s important to follow these tips to ensure proper functioning:

  1. Choose the right damper type for your wood stove system.
  2. Install the damper in a location that allows for easy access and operation.
  3. Make sure the damper is properly sealed to prevent any air leakage.
  4. Follow the manufacturer’s instructions for installation and use.

Benefits of Using Damper

Using a damper allows me to control the airflow in my system and maximize its efficiency. Here are three key benefits of using a damper:

  1. Improved Energy Efficiency: By adjusting the damper, I can regulate the amount of air entering the system, which in turn controls the combustion process. This helps me achieve optimal fuel consumption and maximize heat output, ultimately saving me energy and money.

  2. Enhanced Comfort: A properly functioning damper ensures that the desired amount of heated air is distributed throughout the space. This allows me to maintain a consistent and comfortable temperature in my home.

  3. Reduced Environmental Impact: By efficiently controlling the airflow, a damper helps reduce the emission of harmful pollutants into the environment. This promotes cleaner and healthier indoor and outdoor air quality.

To ensure the continued benefits of using a damper, regular maintenance is essential. This includes inspecting the damper for any signs of damage, cleaning it regularly to remove any debris or soot buildup, and lubricating the moving parts as needed. If any issues arise, such as difficulty opening or closing the damper, unusual noises, or excessive smoke, troubleshooting the damper should be done promptly to address and resolve the problem.

Inspecting and Maintaining the Stove Pipe Connection

I’m checking the stove pipe connection to make sure it’s in good condition. Inspecting and maintaining the stove pipe connection is essential to ensure proper functioning of your wood stove. One important aspect of maintenance is maintaining stove pipe insulation. This helps to prevent heat loss and ensures efficient heat transfer from the stove to the surrounding area. Insulation can deteriorate over time, so it’s important to regularly check for any signs of wear or damage. If you notice any areas where the insulation is worn or missing, it’s important to replace it to maintain optimal performance.

Another common issue with stove pipe connections is leaks. Leaks can occur due to poor installation or wear and tear over time. To troubleshoot stove pipe leaks, it’s important to visually inspect the connection for any gaps or loose fittings. You can also use a smoke test to identify any leaks. Simply light a stick of incense and hold it near the connection. If you notice the smoke being drawn into the connection, it indicates a leak.

To make it easier to understand, here’s a table summarizing the key points:

Advertisement
Maintenance Tips for Stove Pipe Connection
Regularly check stove pipe insulation
Replace worn or missing insulation
Visually inspect for gaps or loose fittings
Perform a smoke test to identify leaks

Frequently Asked Questions

Can I Use Any Type of Stove Pipe Material for My Wood Stove?

Yes, you can use various types of stove pipe materials for your wood stove.

There are different wood stove pipe options available, such as stainless steel, galvanized steel, and black steel.

Each material has its own benefits, depending on factors like durability and heat resistance.

Stainless steel is known for its longevity and corrosion resistance, while galvanized and black steel offer cost-effective options.

It’s essential to choose a stove pipe material that meets your specific needs and complies with local building codes.

Advertisement

How Often Should I Inspect and Maintain the Stove Pipe Connection?

Inspecting and maintaining the stove pipe connection is crucial for the safe operation of your wood stove. Regular inspections are necessary to ensure that the connection remains secure and free from any damage or leaks. The frequency of inspections will depend on how often you use your wood stove, but it’s generally recommended to inspect the connection at least once a year.

Regular maintenance, such as cleaning and tightening any loose fittings, will help prolong the lifespan of the stove pipe and ensure optimal performance.

Can I Connect Multiple Stove Pipe Sections Together Without Using a Collar?

When it comes to stove pipe installation and ensuring a proper stove pipe connection, it’s important to consider the use of a collar. Collars are designed to securely join the sections together, providing a tight seal and preventing any leaks or gaps.

Connecting multiple stove pipe sections without a collar may not be recommended. Without a collar, there’s a higher risk of improper connection and potential safety hazards.

Therefore, it’s advisable to use a collar for a secure and efficient stove pipe installation.

Advertisement

What Is the Purpose of Adding a Stove Pipe Damper?

Adding a stove pipe damper is like giving your wood stove a secret weapon. It helps control the flow of air and heat, giving you more control over your fire.

When installing a stove pipe damper, make sure to follow the manufacturer’s instructions. It should be placed in the horizontal section of the stove pipe, close to the stove.

This allows you to easily adjust the airflow and maximize the efficiency of your wood stove.

Are There Any Specific Safety Precautions I Need to Take When Securing and Sealing the Stove Pipe Joints?

When it comes to securing and sealing stove pipe joints, there are important safety precautions to consider. Proper ventilation requirements for wood stoves should be followed to ensure the safe operation of the stove.

It’s crucial to avoid common mistakes when connecting the stove pipe to a wood stove, such as using improper materials or not properly securing the joints.

Advertisement

Taking these precautions will help prevent any potential hazards and ensure the efficient and safe use of your wood stove.

Conclusion

In conclusion, connecting a stove pipe to a wood stove requires careful consideration and precise execution.

By choosing the right stove pipe material, measuring and cutting accurately, attaching securely, and sealing effectively, you can create a reliable and efficient connection.

Don’t forget to add a stove pipe damper for better control of the airflow.

Regular inspections and maintenance will ensure the longevity and safety of your stove pipe connection.

Advertisement

So, take your time, follow the steps, and enjoy the warmth and comfort of your wood stove.

Terra grew up with a soul deeply connected to nature. Her earliest memories are of sun-drenched meadows, whispering woods, and the rhythmic dance of waves on a moonlit night. Every gust of wind, rustling leaf, and distant horizon beckoned her with tales waiting to be told.

Continue Reading
Advertisement

Wood Stove

How Long Does It Take Wood To Ignite Aftee Being Put In A Wood Stove

Published

on

By

An image capturing the mesmerizing scene of a wood stove, with a bed of glowing embers beneath carefully stacked logs, as tendrils of thin smoke gracefully curl upwards, depicting the anticipation of wood slowly igniting

I must admit, the wait for wood to catch fire in a wood stove can seem never-ending. However, do not worry, as in this article, I will share some strategies and tips to speed up the process.

From understanding the temperature and moisture content of the wood to choosing the right type and preparing it efficiently, we’ll explore all the factors that affect wood ignition time.

So let’s dive in and get that fire blazing in no time!

Key Takeaways

  • Weather conditions and moisture content of the wood can affect the ignition time.
  • Properly seasoned wood with around 20% moisture content ignites more easily.
  • Smaller wood logs and softer woods tend to ignite faster than larger and harder woods.
  • Proper wood storage and preparation, such as keeping it off the ground, using fire starters, and maintaining airflow, can help ensure faster ignition in a wood stove.

Factors Affecting Wood Ignition Time

I’m curious about the factors that can affect the time it takes for wood to ignite in a wood stove.

One of the key factors is the weather conditions. Cold and damp weather can make it harder for the wood to catch fire, as moisture content in the wood can be high. It’s important to ensure that the wood is properly seasoned and has a moisture content of around 20% for optimal ignition.

Another factor to consider is the size of the wood logs. Smaller logs tend to ignite more quickly as they’ve a larger surface area exposed to the heat source.

Advertisement

Additionally, the type of wood being used can also affect ignition time, with softer woods igniting faster than harder woods.

Temperature and Moisture Content of Wood

The optimal moisture content for wood is around 20%, which ensures efficient ignition in a wood stove. The wood ignition process is influenced by various factors, and the moisture content plays a critical role in determining how quickly the wood will ignite.

When wood is too wet, it requires more energy to burn off the excess moisture before it can reach its ignition point. On the other hand, if the wood is too dry, it may ignite too quickly and burn too rapidly, leading to inefficient combustion and wasted energy.

Therefore, it’s essential to properly store wood to maintain its moisture content within the optimal range. Proper wood storage involves keeping the wood off the ground, covering it to protect it from rain or snow, and allowing for proper airflow to prevent excessive moisture buildup.

Type of Wood and Its Density

I prefer using hardwoods like oak or maple due to their density and their ability to burn longer and provide more heat. When it comes to wood species selection, it’s important to consider the impact of wood moisture content. Here are three key points to keep in mind:

Advertisement
  1. Moisture content affects combustion efficiency: Wet wood contains a higher moisture content, which leads to incomplete combustion and the production of more smoke and pollutants. Dry hardwoods, on the other hand, burn more efficiently and produce less smoke.

  2. Heat output is influenced by wood density: Hardwoods have a higher density compared to softwoods, resulting in a higher heat output. This means that hardwoods like oak and maple can provide more warmth and keep your space cozy for a longer period of time.

  3. Longer burn time with hardwoods: Due to their density, hardwoods burn at a slower rate, allowing for a longer burn time per log. This means less frequent refueling and a more consistent heat source.

Preparing Wood for Efficient Ignition

To ensure efficient ignition, I always make sure to properly split and dry my firewood. Proper wood storage is essential for achieving this. It’s important to store the firewood in a well-ventilated area, off the ground and protected from moisture. This allows the wood to dry properly and reduces the risk of it being damp or rotting.

When it comes to igniting the wood in a wood stove, using fire starters or kindling can greatly speed up the process. These small pieces of flammable material help create a hot and sustained flame, which in turn ignites the larger pieces of wood.

By incorporating these techniques, you can ensure a faster and more efficient ignition in your wood stove.

Now, let’s move on to some tips for faster wood ignition in a wood stove.

Tips for Faster Wood Ignition in a Wood Stove

Using kindling and ensuring proper airflow are key to achieving faster wood ignition in a wood stove. When it comes to stubborn wood that’s difficult to ignite, there are several ignition techniques that can be employed:

Advertisement
  1. Preparation: Properly seasoned wood with a moisture content below 20% is essential for efficient ignition. This ensures that the wood is dry enough to catch fire quickly.

  2. Kindling: Creating a bed of small, dry kindling underneath the larger logs helps to ignite the fire faster. Kindling acts as a fuel source that ignites easily and produces enough heat to catch the larger logs on fire.

  3. Airflow: Adequate airflow is crucial for wood ignition. By opening the damper or adjusting the air vents, you can ensure that enough oxygen is getting to the fire, promoting faster ignition.

While some may consider using accelerants to speed up wood ignition, it’s important to note that this can be dangerous and may result in uncontrollable fires or the release of harmful chemicals. It’s recommended to rely on proper ignition techniques and patience for a safe and efficient wood ignition process.

Frequently Asked Questions

Can I Use Treated Wood in My Wood Stove?

Using pressure treated wood in a wood stove is not recommended due to the chemicals it releases when burned. It is safer to use untreated wood or other alternatives for faster ignition.

What Is the Best Type of Wood to Use for Faster Ignition in a Wood Stove?

Fast burning woods like pine or fir can ignite in a wood stove within minutes. To ensure efficient wood stove usage, it’s important to choose dry, seasoned firewood and properly maintain the stove.

Are There Any Safety Precautions I Should Take When Igniting Wood in a Wood Stove?

When igniting wood in a wood stove, it is important to take safety precautions. Keep a fire extinguisher nearby and ensure proper ventilation. Additionally, the moisture content of the wood can affect its ignition time.

Can I Use Wood Chips or Sawdust for Ignition in a Wood Stove?

I can use wood chips or sawdust for ignition in a wood stove. They are effective fire starters for faster ignition. The small size and high surface area make them ignite quickly, reducing the time needed for the wood to catch fire.

Advertisement

How Does the Size of the Wood Affect Its Ignition Time in a Wood Stove?

Moisture content significantly affects wood ignition in a wood stove. Smaller pieces of wood ignite faster due to increased surface area. However, larger pieces provide longer burn times. Consider the advantages and disadvantages of each for efficient use in a wood stove.

Conclusion

After careful analysis of the factors affecting wood ignition time, it’s safe to say that wood doesn’t ignite instantly in a wood stove. Contrary to popular belief, wood requires time to reach its ignition point, which is influenced by factors such as temperature, moisture content, and wood density.

To expedite the process, it’s crucial to choose the right type of wood and ensure it’s properly prepared. So, if you were expecting an immediate burst of flames, you might’ve to wait a little longer.

Continue Reading

Wood Stove

Why Does Your Wood Stove Smoke

Published

on

By

An image capturing a rustic, cozy living room

Dealing with the smoke from your wood stove can be a real nuisance. But don’t worry, I’m here to provide some tips on how to manage it.

Understanding the root causes of this predicament is crucial. Insufficient airflow, improper wood selection, damaged chimney, inadequate maintenance, and incorrect installation are the major culprits.

Let’s delve into each of these factors to uncover the secrets behind why your wood stove may be producing that bothersome smoke.

Key Takeaways

  • Blocked vents disrupt combustion process and lead to incomplete burning and smoke generation.
  • Burning wet or high-moisture wood results in inefficient burning and increased creosote buildup.
  • Cracked or deteriorating chimney can cause leaks and smoke entry.
  • Inadequate stove maintenance, including dirty burners and clogged flue, can lead to smoke issues.

Insufficient Airflow

I’m having trouble with my wood stove smoking because there’s not enough airflow. A common cause of insufficient airflow is blocked vents. When the vents are blocked, the combustion process is disrupted, leading to incomplete burning of the wood and the generation of smoke.

To ensure efficient combustion and minimize smoke, it’s crucial to maintain clear and unobstructed vents. Blocked vents can result from a buildup of creosote or debris, so regular cleaning is essential.

Additionally, proper placement of the stove is crucial to ensure adequate airflow. Make sure that the stove is positioned away from any obstructions, such as furniture or curtains, that might impede the flow of air.

Advertisement

Improper Wood Selection

To prevent excessive smoke and poor combustion, it’s important to avoid burning wet wood or wood with high moisture content, as it can result in inefficient burning and increased creosote buildup. When burning seasoned firewood, which has a moisture content of around 20% or less, the wood burns more efficiently, producing less smoke and providing more heat output. Seasoned firewood has been properly dried for at least six months, allowing the moisture content to decrease significantly. This ensures that the wood burns cleanly and effectively in your wood stove. However, if you burn wood with high moisture content, it will create more smoke and reduce the overall efficiency of your stove. This can also lead to a higher risk of creosote buildup in your chimney, which can be dangerous and increase the chance of a chimney fire. Therefore, it’s crucial to always use dry, seasoned firewood to prevent excessive smoke and maintain proper combustion in your wood stove.

Now, let’s discuss another potential reason for excessive smoke: a damaged or leaky chimney.

Damaged or Leaky Chimney

A damaged or leaky chimney can cause smoke to enter your home, which can be hazardous to your health and safety. It’s important to address any issues with your chimney promptly to ensure the proper functioning of your wood stove.

Here are three signs of a damaged chimney that you should be aware of:

  1. Cracked or crumbling mortar: If you notice any cracks or crumbling in the mortar joints of your chimney, it could indicate water damage or structural issues. This can lead to leaks and smoke entering your home.

  2. Rusty or deteriorating chimney cap: The chimney cap plays a crucial role in keeping out rain, snow, debris, and animals. If it’s rusty or deteriorating, it may not be able to perform its function effectively, allowing smoke to escape into your living space.

  3. Smoke stains or odors: If you notice smoke stains on the walls or ceilings near your chimney or detect a persistent smoky odor in your home, it could be a sign of a leaky chimney. This should be addressed promptly to prevent further damage and potential health risks.

When faced with a damaged chimney, there are various repair options available, such as chimney relining, chimney crown repair, and chimney flashing repair. It’s important to consult with a professional chimney technician to determine the best course of action for your specific situation.

Advertisement

Inadequate Stove Maintenance

One of the main causes of smoke in your home can be the result of inadequate stove maintenance. A dirty stove and a clogged flue are two common culprits that can lead to smoke issues. When the stove isn’t properly cleaned, a buildup of soot and debris can occur on the burners, causing incomplete combustion and the production of smoke.

Additionally, a clogged flue prevents the proper ventilation of smoke, leading to its accumulation inside your home. Regular cleaning and maintenance of your stove, including cleaning the burners and ensuring the flue is clear, is crucial in preventing smoke issues.

It’s recommended to schedule annual professional maintenance to ensure your stove is in optimal condition and to avoid the inconvenience and potential health hazards associated with smoke in your home.

Incorrect Stove Installation

I regret not hiring a professional for my stove installation, as it has caused numerous issues and potential hazards. When it comes to installing a wood stove, proper positioning and sizing are crucial factors that shouldn’t be taken lightly.

Here are three key reasons why improper stove positioning and incorrect flue size can lead to problems:

Advertisement
  1. Inadequate clearance: Placing the stove too close to combustible materials can increase the risk of fire. It’s essential to follow the manufacturer’s guidelines for proper clearances to ensure the safe operation of the stove.

  2. Inefficient heating: Incorrect positioning can hinder the stove’s ability to distribute heat effectively throughout the room. This can result in uneven temperatures and wasted energy, leading to discomfort and higher heating costs.

  3. Insufficient draft: Using an incorrect flue size can impede the stove’s ability to expel smoke and gases properly. This can lead to backdrafting, where smoke enters the room instead of being directed outside. Aside from the health hazards, backdrafting can damage the stove and cause indoor air quality issues.

To avoid these problems, it’s essential to consult a professional for the proper installation of your wood stove. They’ll ensure that the stove is positioned correctly and the flue size is appropriate for efficient and safe operation.

Frequently Asked Questions

Can Smoking Occur if There Is Sufficient Airflow in the Wood Stove?

Yes, smoking can still occur in a wood stove even with sufficient airflow. Factors like improper wood placement, damp or unseasoned wood, or a clogged chimney can all contribute to smoking issues. Proper troubleshooting can resolve these problems and improve wood stove performance.

What Are Some Common Wood Types That Should Be Avoided to Prevent Smoking in a Wood Stove?

To prevent smoking in a wood stove, it is important to avoid using wood types like pine, as they contain high levels of resin. Additionally, properly seasoning firewood is crucial to reduce smoke production.

How Can I Identify if My Chimney Is Damaged or Leaking?

To identify chimney damage or leaks, conduct a thorough chimney inspection. Look for cracks, loose bricks, or crumbling mortar. Additionally, consider installing a smoke detector near the stove to quickly detect any smoke issues.

Besides Regular Cleaning, What Other Maintenance Practices Can Help Prevent Smoking in a Wood Stove?

Other maintenance practices, such as ensuring proper airflow and avoiding certain wood types, can help prevent smoking in a wood stove. Identifying chimney damage or leaks and checking for correct stove installation are also crucial.

Advertisement

What Are Some Signs of Incorrect Stove Installation That May Lead to Smoking?

Installing a wood stove improperly can lead to frustrating smoke issues. One key sign is if the chimney height is too short. Another is using unseasoned wood, which can cause excessive smoke.

What Are Some Wood Stove Brands That Have Smoke-Reducing Features?

Looking for the best wood stove brands with smoke-reducing features? Look no further. With increasing concerns about air pollution, several brands are innovating their wood stoves to minimize smoke emissions. Some notable options include Vermont Castings, Jøtul, and Blaze King. These brands prioritize efficiency and clean burning, ensuring you can enjoy the warmth of a wood stove while minimizing environmental impact.

Conclusion

In conclusion, when your wood stove smokes, it’s often due to factors such as:

  • Insufficient airflow
  • Improper wood selection
  • A damaged or leaky chimney
  • Inadequate stove maintenance
  • Incorrect installation

To prevent this, you should:

  • Ensure proper ventilation
  • Use seasoned and dry wood
  • Inspect and repair your chimney regularly
  • Maintain your stove diligently
  • Ensure professional installation

By addressing these issues, you can enjoy a smoke-free and efficient wood stove experience, creating a cozy and inviting atmosphere in your home.

Continue Reading

Wood Stove

How To Build A Wood Stove From A Jerry Can

Published

on

By

An image showcasing the step-by-step process of transforming a jerry can into a wood stove

I have always been fascinated by the concept of transforming ordinary objects into useful tools.

So when I came across an old jerry can in my garage, I knew I had the perfect opportunity to create my own wood stove.

In this article, I’ll guide you through the process of transforming a jerry can into a functional and efficient wood stove, complete with ventilation, legs, and a base.

Get ready to unleash your inner DIY enthusiast and start enjoying the warmth of your homemade wood stove.

Key Takeaways

  • Consider the capacity and dimensions of the jerry can
  • Compare different materials for jerry cans
  • Prepare and clean the jerry can properly
  • Take safety precautions and use the right tools when modifying the jerry can

Selecting the Right Jerry Can for Your Wood Stove

I’m trying to figure out which jerry can is the best option for my wood stove.

When it comes to choosing the right size jerry can for your wood stove, it’s important to consider the capacity and dimensions. A larger can will hold more fuel, but it may be too bulky for your space. On the other hand, a smaller can may require more frequent refills.

Advertisement

Additionally, it’s crucial to compare different materials for jerry cans to ensure optimal wood stove performance. Metal cans are durable and resistant to heat, but they can also be heavy. Plastic cans, on the other hand, are lightweight and easier to handle, but may not withstand high temperatures as well.

Ultimately, finding the perfect jerry can for your wood stove is about balancing capacity, dimensions, and material for efficient and safe operation.

Preparing and Cleaning the Jerry Can

Before starting to use the jerry can, it’s crucial to properly clean and prepare it by removing any dirt or residue, and then ensuring it’s completely dry. Here is the cleaning process and safety precautions to follow:

  1. Rinse the jerry can with warm water and a mild detergent to remove any dirt or debris. Use a sponge or brush to scrub the inside and outside of the can thoroughly.

  2. Rinse the can again with clean water to remove any soap residue. Make sure to rinse it multiple times to ensure all the soap is gone.

  3. After rinsing, allow the jerry can to air dry completely. This is important to prevent any moisture from causing rust or corrosion.

By following these cleaning steps, you can ensure that your jerry can is ready for modification.

Now, let’s discuss cutting open and modifying the jerry can for ventilation.

Advertisement

Cutting Open and Modifying the Jerry Can for Ventilation

I’ll explain how to use a few small holes in the jerry can to provide adequate ventilation for the wood stove. When modifying the jerry can for ventilation, it is important to take safety precautions and use the right tools. Here is a table outlining the necessary steps:

Step Safety Precautions Tools Needed
1 Wear protective gloves and goggles Drill
2 Work in a well-ventilated area Marker
3 Ensure the jerry can is empty and clean Metal file
4 Mark the desired ventilation holes on the can Safety glasses
5 Use the drill to create the holes Protective gloves
6 Smooth the edges of the holes with the metal file Goggles
7 Clean any metal shavings from the can Clean cloth

Adding Legs and a Base to the Wood Stove

I can attach some sturdy legs and a stable base to the wood stove to ensure it stands securely on any surface. Achieving stove stability is crucial to prevent accidents and maintain proper functioning.

When choosing materials for the legs and base, it’s important to consider their strength, durability, and heat resistance. Here are three essential elements to consider:

  1. Material Selection: Opt for materials that can withstand high temperatures, such as stainless steel or cast iron. These materials are known for their strength and ability to withstand the intense heat generated by the wood stove.

  2. Design and Construction: The design of the legs should provide sufficient support and stability. Consider a tripod or four-leg design for optimal balance. Additionally, ensure the legs are securely attached to the stove body to prevent any wobbling or instability.

  3. Base Size and Shape: The base of the wood stove should be wide and flat enough to distribute the weight evenly, ensuring stability on various surfaces. A larger base will provide better stability, especially when using the stove on uneven or soft ground.

Testing and Using Your DIY Wood Stove

I’ve successfully tested and now use my DIY wood stove to cook meals while camping. It’s a simple yet effective solution for outdoor cooking. However, before using it, I took several testing techniques and safety precautions to ensure its efficiency and my own well-being.

Firstly, I conducted a leak test to ensure there were no air or gas leaks that could potentially cause a fire hazard. This involved pressurizing the stove and checking for any signs of leakage. I also tested its heat distribution by placing a pot of water on the stove and monitoring how evenly the heat was dispersed.

Advertisement

To further ensure safety, I implemented safety precautions such as maintaining a safe distance between the stove and any flammable objects, using heat-resistant gloves when handling the stove, and having a fire extinguisher nearby.

Using my DIY wood stove has been a game-changer for my camping trips. Not only does it provide a reliable cooking source, but it also allows me to enjoy the natural surroundings without relying on traditional campfire cooking methods. By following proper testing techniques and safety precautions, I can confidently cook my meals and enjoy the great outdoors.

Frequently Asked Questions

How Long Does It Take to Build a Wood Stove From a Jerry Can?

It takes about 2 hours to build a wood stove from a jerry can. The benefits of using a wood stove include cost-effective heating and a sustainable fuel source. Regular cleaning and maintenance ensure optimal performance.

Can I Use Any Type of Wood for the Base of the Wood Stove?

I can use different types of wood for the base of the wood stove, but it’s important to consider safety precautions when using it indoors. Proper ventilation and non-flammable materials are crucial.

Is It Safe to Use the Wood Stove Indoors?

Oh, using a wood stove indoors, what a brilliant idea! Let me enlighten you on the potential health hazards and share some precise tips for safely using one. Shall we begin?

Advertisement

Can I Paint the Jerry Can After Modifying It?

Yes, you can paint the modified jerry can using various painting techniques. It is important to choose a paint that can withstand high temperatures and adhere well to metal surfaces. Make sure to consider alternative fuel sources when painting for safety.

What Tools Do I Need to Build a Wood Stove From a Jerry Can?

To build a wood stove from a jerry can, I need a few tools like a jigsaw, drill, and metal file. Safety precautions are crucial, and alternative materials can be used if necessary.

Can I Use a Wood Stove Insert in a DIY Jerry Can Wood Stove?

When considering building a wood stove fireplace, it’s crucial to factor in the cost of materials and construction. However, if you’re planning to use a wood stove insert in a DIY Jerry Can Wood Stove, the cost of building a wood stove fireplace may decrease significantly. This alternative method combines affordability and practicality, making it an excellent choice for those seeking an alternative heating solution.

Can Duraflame Logs Be Used in a Wood Stove Made from a Jerry Can?

Can Duraflame logs be used in a wood stove made from a jerry can? Many DIY enthusiasts wonder about using Duraflame logs in a wood stove. While Duraflame logs are commonly used in traditional fireplaces, their use in a jerry can wood stove may not be ideal. It’s important to consider the safety and compatibility aspects of using duraflame logs in wood stoves specifically designed for them.

Conclusion

After carefully selecting the right jerry can, preparing and modifying it for ventilation, and adding sturdy legs and a stable base, your DIY wood stove is ready for testing and use.

Advertisement

With its compact design and efficient functionality, this wood stove provides a practical and cost-effective heating solution for outdoor activities or emergency situations.

Embrace the warmth and convenience of this homemade creation, bringing comfort and coziness wherever you go.

Continue Reading

Trending