Connect with us

Pellets & Pellet Stoves

How Does a Wood Pellet Pizza Oven Work

Published

on

An image showcasing a wood pellet pizza oven in action

Ever wondered how a wood pellet pizza oven works? Well, let me break it down for you.

The beauty of these ovens lies in their simplicity and efficiency. With just a push of a button, the wood pellets ignite, creating a roaring fire that generates intense heat.

This heat is then evenly distributed across the cooking surface, thanks to the pizza stone, ensuring a perfectly crisp crust every time.

So, sit back, relax, and let me guide you through the fascinating inner workings of a wood pellet pizza oven.

Key Takeaways

  • Wood pellets are a fuel source made from compressed wood and are known for their fuel efficiency and clean burning properties.
  • The ignition process involves using a reliable ignition source, such as a propane torch, to light the wood pellets in the oven’s combustion chamber.
  • Proper temperature control is essential for successful pizza cooking, and it can be achieved by adjusting the airflow and fuel supply in the oven.
  • Efficient heat distribution techniques, such as using a rotating pizza stone and proper insulation, help evenly distribute heat and retain it for optimal cooking.
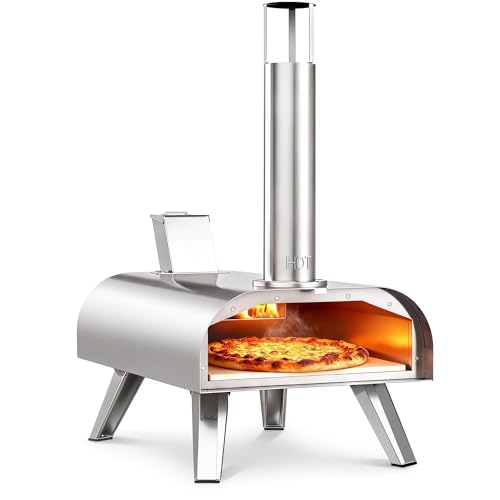
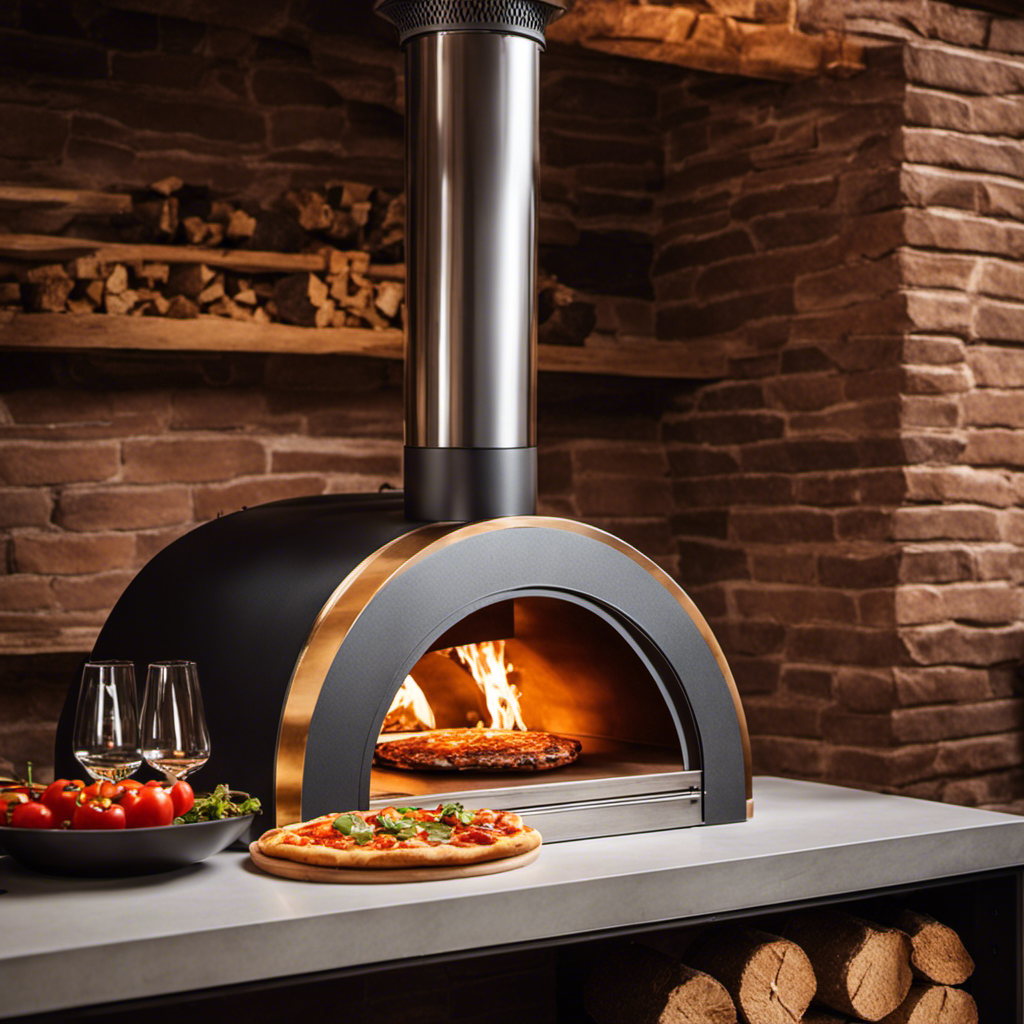
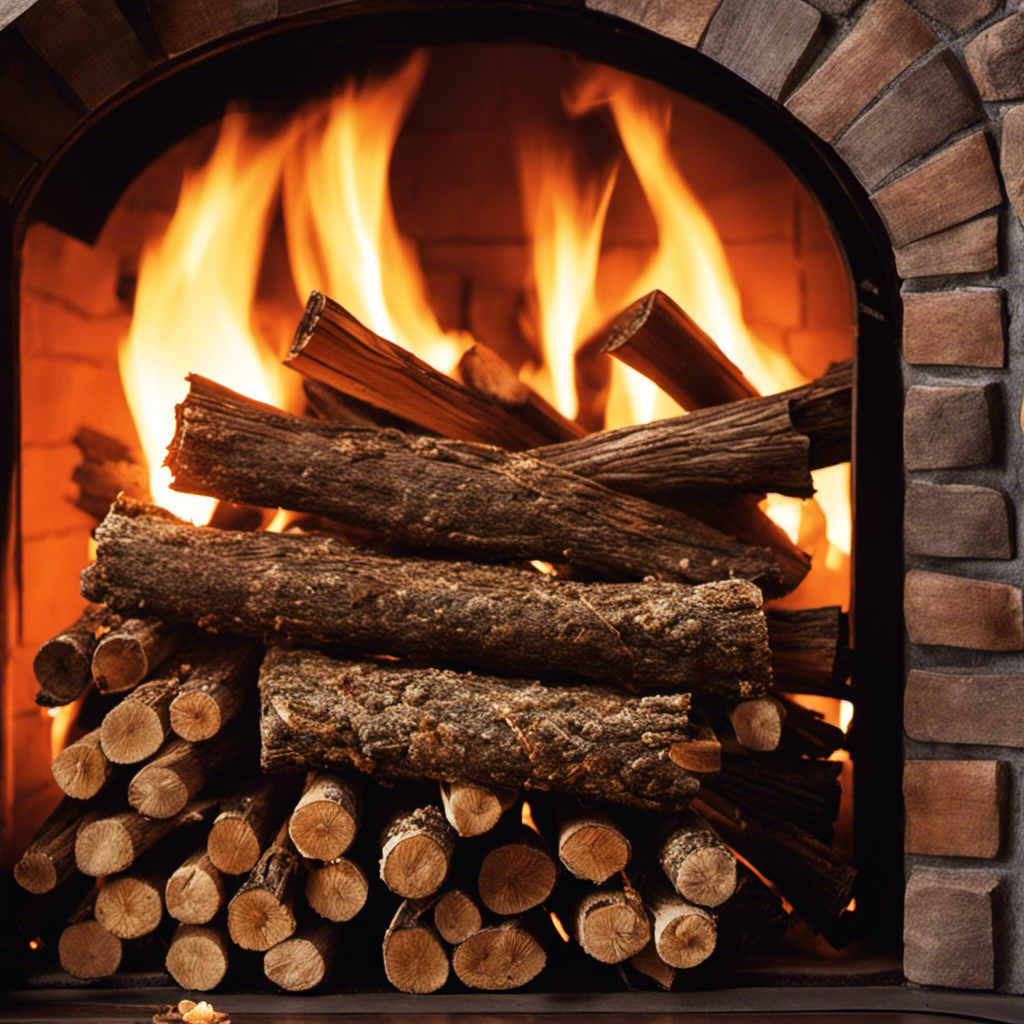
Fuel Source: Understanding the Wood Pellets

To understand how a wood pellet pizza oven works, you need to know that the fuel source for these ovens is wood pellets. Wood pellets are small, cylindrical pieces of compressed wood that are made from sawdust and other wood waste materials. These pellets are known for their fuel efficiency, as they burn cleanly and produce a high amount of heat.

The wood pellets are typically stored in a hopper located at the back of the oven. This hopper can hold a large quantity of pellets, allowing for continuous cooking without the need for frequent refills.

Now that we understand the fuel source, let’s move on to the ignition process: starting the fire.

Ignition Process: Starting the Fire

When it comes to lighting the kindling in a wood pellet pizza oven, it is crucial to follow the proper ignition process.

This involves using a reliable ignition source, such as a propane torch, to ignite the kindling and start the fire.

Once the fire is lit, controlling the temperature becomes essential to achieve the desired cooking results.

This can be done by adjusting the airflow and fuel supply to regulate the heat output.

Additionally, to ensure even heat distribution throughout the oven, it is important to properly position the wood pellets and maintain a consistent flame.

Lighting the Kindling

First, you’ll need to gather some kindling and place it in the wood pellet pizza oven to start the fire. Lighting the kindling is an essential part of the ignition process.

To ensure a successful fire, it is important to use proper lighting techniques and practice fire management. One effective technique is to use a long-reach lighter or matches to ignite the kindling. Start by placing the lighter or matches near the base of the kindling and apply a flame. Be cautious of any sparks or embers that may be produced.

Once the kindling is lit, you can gradually add larger pieces of wood pellets to build up the fire. This will help in controlling the temperature and maintaining a consistent heat for cooking delicious pizzas.

Controlling the Temperature

One way you can control the temperature is by adjusting the airflow in the oven. By controlling the amount of air circulating inside the oven, you can effectively increase or decrease the heat levels. This is achieved by manipulating the oven’s air vents, which allow air to enter and exit the cooking chamber. When you open the vents, more oxygen flows into the oven, fueling the flames and increasing the temperature. Conversely, closing the vents restricts the airflow, reducing the heat output. To give you a better understanding, here is a table showcasing the relationship between airflow and temperature control:

Airflow Level Heat Output
Fully Open High
Partially Open Medium
Closed Low

Achieving Even Heat

To achieve even heat distribution, you’ll want to ensure that the flames are evenly spread across the cooking chamber. This is crucial for cooking a perfect pizza in a wood pellet pizza oven.

Here are some key factors to consider for achieving even heat:

  • Proper airflow: Make sure there’s sufficient ventilation to allow the flames to circulate evenly throughout the oven.

  • Consistent fuel feed: A steady supply of wood pellets is essential for maintaining a constant flame, which helps in achieving even heat distribution.

  • Insulation: Good insulation is crucial for fuel efficiency and heat retention. It helps to keep the heat inside the oven, resulting in more consistent temperatures.

By focusing on these factors, you can ensure that your wood pellet pizza oven achieves optimal fuel efficiency and heat retention.

Now, let’s explore how the oven reaches high temperatures through heat generation.

Heat Generation: How the Oven Reaches High Temperatures

When it comes to understanding the heat generation in a wood pellet pizza oven, it is essential to delve into the combustion process.

The combustion process is the heart of the oven, where the pellets are burned to produce the heat needed for cooking.

Combustion Process Explained

The wood pellet pizza oven works by burning wood pellets to create heat for cooking. The combustion process is essential in generating the high temperatures needed to cook the perfect pizza. Here’s how the wood pellet combustion works:

  • Ignition: The fire is started by lighting the wood pellets with a flame or electric igniter.

  • Oxygen supply: Adequate airflow is crucial for the combustion process. The oven is designed with vents and a chimney to ensure a steady supply of oxygen.

  • Combustion chamber: The wood pellets are placed in a designated chamber where they burn and release heat.

The combustion process efficiently converts the energy stored in the wood pellets into heat, which is then used to cook the pizza. This efficient heat generation sets the stage for the subsequent section on efficient heat distribution techniques.

Efficient Heat Distribution Techniques

One efficient way to evenly distribute heat in a wood pellet pizza oven is by using a rotating pizza stone. The pizza stone acts as a heat sink, absorbing and retaining the heat generated by the burning wood pellets. This heat retention is crucial for maintaining a consistent and high cooking temperature throughout the oven.

To further enhance heat retention, insulation techniques are employed in the construction of the oven. Insulating materials, such as ceramic fibers or refractory bricks, are used to line the walls and ceiling of the oven, preventing heat from escaping and ensuring maximum efficiency. With the use of these insulation techniques, the heat generated by the wood pellets is effectively trapped and utilized for cooking the perfect pizza.

Now, let’s explore the cooking surface: the pizza stone.

Cooking Surface: Exploring the Pizza Stone

To get that perfect crispy crust, you’ll want to preheat the pizza stone in your wood pellet pizza oven. The cooking surface plays a crucial role in achieving delicious results, and the pizza stone is a popular choice for its ability to evenly distribute heat.

Here are some key points to consider when exploring different materials for your pizza stone:

  • Ceramic: Ceramic stones are known for their excellent heat retention, ensuring that your pizza cooks evenly and thoroughly.

  • Cordierite: This material is highly resistant to thermal shock, making it perfect for high-temperature cooking. It also provides a crispy crust while preventing the pizza from sticking to the surface.

  • Soapstone: Soapstone retains heat well and is ideal for slow cooking. It also adds a unique flavor to your pizza, enhancing the overall taste experience.

By choosing the right pizza stone, you can maximize heat retention and achieve that desired crispy crust.

Now, let’s move on to temperature control: managing the heat levels without compromising the cooking process.

Temperature Control: Managing the Heat Levels

Now let’s delve into temperature control and how to effectively manage the heat levels during the cooking process. When it comes to operating a wood pellet pizza oven, managing airflow and using insulation are key factors in maintaining the desired temperature. By controlling the airflow, you can regulate the intensity of the fire and ensure even heat distribution throughout the oven. Insulation plays a crucial role in heat retention, preventing any heat loss and maintaining a consistent temperature within the cooking chamber. To illustrate the importance of these elements, consider the following table:

Managing Airflow Using Insulation Consistent Heat Levels
Allows for precise control over temperature Prevents heat loss and ensures even cooking Ensures a consistently perfect pizza crust
Promotes efficient combustion of wood pellets Reduces fuel consumption Enhances overall cooking experience
Helps achieve desired cooking results Improves heat retention in the oven Provides consistent heat for consistent results

Cooking Techniques: Achieving the Perfect Crust

If you want to achieve the perfect crust, you should consider trying different cooking techniques in your wood pellet pizza oven. Achieving a crispy crust requires careful attention to the dough preparation techniques and the cooking process. Here are some techniques that can help you achieve that desired crispy crust:

  • Preheating the oven: Make sure to preheat your wood pellet pizza oven to the recommended temperature before placing the pizza inside. This allows for even cooking and helps create a crispy crust.

  • Using a pizza stone or baking steel: Placing your pizza on a preheated pizza stone or baking steel can help absorb moisture from the dough, resulting in a crispier crust.

  • Rotating the pizza: During the cooking process, rotating the pizza periodically helps ensure even heat distribution and prevents any areas from getting burnt.

By using these techniques, you can achieve a delicious pizza with a perfectly crispy crust.

Now, let’s move on to maintenance and cleaning, essential for keeping the oven in top shape.

Maintenance and Cleaning: Keeping the Oven in Top Shape

Make sure you regularly clean and maintain your wood pellet pizza oven to keep it in top shape. Proper cleaning techniques are essential to prevent the build-up of grease, ash, and food residue that can affect the performance and taste of your pizzas. To help you in maintaining your oven, here are some effective cleaning techniques and tips to prevent rust:

Cleaning Technique Description
Brushing Use a wire brush to remove ash and debris from the cooking surface and inside the oven.
Scrubbing For stubborn stains, use a mixture of warm water and mild dish soap to scrub the surfaces gently.
Seasoning Apply a thin layer of cooking oil to the interior surfaces to prevent rust and improve heat retention.

Preventing rust is crucial to prolonging the lifespan of your wood pellet pizza oven. After every cleaning session, make sure to wipe the oven’s exterior with a dry cloth to remove any moisture that could lead to rust formation. Additionally, consider investing in a weatherproof cover to protect your oven from the elements when not in use. By following these cleaning techniques and rust prevention tips, you can ensure that your wood pellet pizza oven remains in excellent condition for many delicious pizza-making sessions to come.

Frequently Asked Questions

Can a Wood Pellet Pizza Oven Be Used for Other Types of Cooking Besides Making Pizza?

Yes, a wood pellet pizza oven can be used for other types of cooking besides making pizza. It is versatile and can cook a variety of dishes such as bread, roasted vegetables, and even grilled meats. The benefits of using a wood pellet pizza oven for cooking include its ability to reach high temperatures quickly and evenly distribute heat, resulting in delicious and flavorful dishes.

How Long Does It Take for the Wood Pellets to Ignite and Reach the Desired Temperature?

When I fire up my wood pellet pizza oven, it feels like igniting a spark of excitement. Within 10 to 15 minutes, the pellets ignite and reach the desired temperature, allowing me to cook more than just pizza.

Are There Any Specific Types or Brands of Wood Pellets That Are Recommended for Use in a Wood Pellet Pizza Oven?

I recommend using hardwood pellets like oak or hickory for a wood pellet pizza oven. Some of the best brands include Traeger, Pit Boss, and Camp Chef. These pellets provide a rich, smoky flavor to your pizza.

Can the Temperature of a Wood Pellet Pizza Oven Be Adjusted During the Cooking Process?

Yes, the temperature of a wood pellet pizza oven can be adjusted during the cooking process. This allows for cooking versatility, ensuring that your pizza is cooked to perfection every time.

How Often Should a Wood Pellet Pizza Oven Be Cleaned and Maintained to Ensure Optimal Performance?

Cleaning frequency and maintenance tips for optimal performance of a wood pellet pizza oven will be discussed. Regular cleaning and maintenance are important to ensure the oven works efficiently and produces delicious pizzas.

Conclusion

In conclusion, a wood pellet pizza oven is a remarkable piece of equipment that combines the traditional taste of wood-fired pizza with modern convenience. With its fuel source of wood pellets, the oven provides a consistent heat source for cooking the perfect pizza. The ignition process ensures a quick and easy start, while the high temperatures reached by the oven guarantee a crispy crust. By using a pizza stone and managing the heat levels, you can achieve the desired texture and flavor.

Overall, a wood pellet pizza oven offers a unique and enjoyable cooking experience, allowing you to create delicious pizzas with ease.

For example, imagine hosting a backyard party with friends and family. As the sun sets, you fire up your wood pellet pizza oven, the smell of burning wood filling the air. Everyone eagerly gathers around as you slide the freshly made pizza onto the hot stone. The oven’s high temperatures quickly cook the pizza, creating a beautiful charred crust and melting cheese. The guests can’t help but marvel at the delicious results, savoring each bite and complimenting your culinary skills.

With a wood pellet pizza oven, you can create memorable moments and mouthwatering pizzas for all to enjoy.

Logan’s affair with adventure began in childhood. He hailed from a small town where vast forests bordered one side and endless shores stretched on the other. His days were spent exploring uncharted woods, climbing tall trees, or listening to the tales of old sailors. This early immersion in a world brimming with stories and mysteries became the foundation of his passion for writing.

Continue Reading

Pellets & Pellet Stoves

How to Remove the Inside Wall Brick Like of Wood Pellet Stove to Clean

Published

on

By

An image showing a close-up of a wood pellet stove with the inside wall brick being carefully removed

I’ve got a fascinating statistic for you: did you know that cleaning the inside wall brick of a wood pellet stove can increase its efficiency by up to 20%?

In this article, I’ll be sharing step-by-step instructions on how to remove the inside wall brick of your wood pellet stove for a thorough cleaning. With just a few tools and some elbow grease, you’ll be able to keep your stove running smoothly and effectively.

Let’s get started!

Key Takeaways

  • Turn off and cool down the stove before starting the cleaning process.
  • Use the appropriate tools and materials, and follow safety precautions throughout the cleaning.
  • Thoroughly clean the burn pot by disconnecting it from electrical connections and removing it from the combustion chamber.
  • When cleaning the inside wall brick, remove screws or clips holding the brick, choose the right cleaning method, and inspect for cracks or damage before sealing the bricks to prevent moisture penetration.

Tools and Materials Needed

To remove the inside wall brick, you’ll need a few tools and materials. The tools required include a flathead screwdriver, a hammer, a chisel, and a vacuum cleaner with a brush attachment.

As for the materials, you’ll need a drop cloth or tarp to protect the surrounding area from debris and dust. Cleaning techniques are also essential for this process.

Start by disconnecting the stove from the power source and removing any loose debris from the inside. Then, use the flathead screwdriver to gently pry the bricks loose. If they are stubborn, tap the screwdriver with the hammer to loosen them further.

Once the bricks are removed, vacuum the area to remove any remaining dust or debris. With the bricks removed, you can now proceed to prepare the stove for cleaning, ensuring optimal performance and longevity.

Preparing the Stove for Cleaning

Before starting, make sure you have all the necessary tools for preparing your stove for cleaning. Cleaning your wood pellet stove is an important maintenance task that ensures its optimal performance.

To begin, ensure that the stove is turned off and has completely cooled down. This will prevent any accidental burns or injuries.

Next, gather a vacuum cleaner with a brush attachment, a soft cloth or sponge, a stove cleaner specifically designed for wood pellet stoves, and a pair of gloves to protect your hands. It is essential to follow safety precautions during the cleaning process to avoid any mishaps.

The next section will guide you through the process of removing the burn pot, an important step in cleaning your wood pellet stove.

Removing the Burn Pot

When it comes to removing the burn pot from your wood pellet stove, there are a few techniques that can make the process easier.

One method is to simply lift the burn pot out of the stove, while another involves using a screwdriver or wrench to unscrew any bolts or fasteners holding the pot in place.

Once the pot is removed, it’s important to clean it thoroughly to ensure optimal performance and efficiency of your stove.

Burn Pot Removal Techniques

First, make sure you’ve turned off and unplugged the wood pellet stove before attempting to remove the burn pot. Burn pot maintenance is crucial for the proper functioning of your wood pellet stove.

Troubleshooting common issues often requires removing and inspecting the burn pot. To remove the burn pot, locate the access panel on the stove’s exterior. Open the panel and carefully disconnect the burn pot from its electrical connections.

Next, detach the burn pot from the stove’s combustion chamber by unscrewing the retaining bolts. Gently lift the burn pot out of the stove, being cautious not to spill any residual pellets.

With the burn pot removed, you can now proceed to clean it thoroughly, ensuring optimal performance and longevity of your wood pellet stove.

Cleaning the Burn Pot

Once you’ve disconnected the burn pot, it’s important to carefully inspect and remove any debris or ash. Burn pot maintenance is crucial for the proper functioning of your wood pellet stove. Troubleshooting burn pot issues often starts with a thorough cleaning.

Begin by using a small brush or vacuum to remove loose debris from the burn pot. Be sure to pay attention to the corners and crevices where ash can accumulate. Next, use a damp cloth to wipe down the inside walls of the burn pot, removing any stubborn residue. This will help prevent clogs and ensure optimal combustion.

Now, let’s move on to disassembling the inside wall brick, which is an essential step in maintaining your wood pellet stove’s efficiency.

Disassembling the Inside Wall Brick

To remove the inside wall brick, follow these steps:

  1. Turn off the wood pellet stove and allow it to cool down completely.
  2. Put on protective gloves and goggles before starting the disassembly process.
  3. Locate the screws or clips that hold the brick in place.
  4. Use a screwdriver or pliers to carefully remove the screws or clips, taking care not to damage the surrounding components.
  5. Once the screws or clips are removed, gently pry the brick away from the stove, starting at one corner and working your way around.
  6. Take your time during this process to avoid causing any further damage.
  7. Once the brick is detached, set it aside for cleaning.

Now, let’s move on to the cleaning process:

  1. Remove any debris or soot from the inside wall brick to ensure optimal performance and efficiency.

Cleaning the Inside Wall Brick

When it comes to cleaning techniques for bricks, there are a few key points to keep in mind.

First, it’s important to choose the right cleaning method based on the type of brick and the level of dirt or stains.

Second, using a mixture of water and a mild detergent can help remove surface dirt and grime.

Lastly, regular maintenance tips for bricks include inspecting for cracks or damage, sealing the bricks to prevent moisture penetration, and avoiding harsh chemicals that can cause discoloration or erosion.

Cleaning Techniques for Bricks

If you’re looking to clean the bricks inside your wood pellet stove, start by gathering the necessary supplies. You’ll need a stiff-bristle brush, a vacuum cleaner with a brush attachment, warm water, mild detergent, and a sponge or cloth.

Begin by using the brush to scrub off any loose soot and debris from the bricks. Then, use the vacuum cleaner to remove the loosened particles.

Next, mix some warm water with a small amount of mild detergent and dampen the sponge or cloth with the solution. Gently scrub the bricks using circular motions, focusing on areas with stubborn soot stains. Rinse the bricks with clean water and pat them dry with a towel.

Now that your bricks are clean, let’s move on to maintenance tips for keeping them in great condition.

Maintenance Tips for Bricks

After cleaning, it’s important to regularly inspect the bricks for any signs of damage or wear. Proper maintenance is crucial to ensure the longevity and structural integrity of your bricks.

One key aspect of brick maintenance is to choose the right cleaning methods. Different types of bricks may require specific cleaning solutions and techniques to prevent damage. For example, acidic cleaners should be avoided on certain types of bricks as they can cause discoloration or erosion. It is also essential to remove any dirt or debris from the surface before applying any cleaning products.

Regularly inspecting the bricks allows you to identify any cracks, chips, or loose mortar that may require repair. It is recommended to conduct these inspections at least once a year to catch any issues early on and prevent further damage.

By regularly maintaining and inspecting your bricks, you can ensure their longevity and keep them in optimal condition for years to come.

Moving on to inspecting for damage or wear…

Inspecting for Damage or Wear

First, check for any signs of damage or wear on the inside wall brick of your wood pellet stove. Inspecting for cracks is crucial as they can compromise the integrity of the brick and affect the stove’s performance. Carefully examine the surface, paying close attention to any hairline cracks or larger fractures.

Additionally, check for rust, especially around the edges or corners of the brick. Rust can indicate moisture damage and may require further investigation. If you notice any damage or rust, it is essential to address it promptly to prevent further deterioration.

Once you have thoroughly inspected the inside wall brick, you can proceed to reassembling it, ensuring a secure fit and proper alignment.

Reassembling the Inside Wall Brick

To ensure a secure fit and proper alignment, make sure you carefully position and connect the inside wall brick of your wood pellet stove. Reassembling the inside wall brick requires attention to detail and following specific techniques to ensure a successful installation.

Here are some helpful reassembling techniques and troubleshooting tips:

  • Clean the inside of the stove thoroughly before reassembling to remove any debris or build-up.
  • Check the condition of the gaskets and replace them if necessary to ensure a tight seal.
  • Use high-temperature adhesive or cement to secure the inside wall brick in place.

By following these reassembling techniques and troubleshooting tips, you can ensure that your wood pellet stove functions efficiently and safely.

Now, let’s move on to the next section, where we will discuss replacing the burn pot.

Replacing the Burn Pot

Replacing the burn pot is a simple task that can be done by carefully disconnecting the old pot and installing the new one in its place.

Before replacing the burn pot, it’s important to troubleshoot any issues with it. If the burn pot is not igniting properly or is producing excessive smoke, it may need to be cleaned. A regular cleaning schedule for the burn pot is recommended to maintain optimal performance.

To replace the burn pot, first, ensure that the stove is cool and disconnected from the power source. Then, remove the access panel and locate the burn pot. Carefully disconnect any wires or connections attached to the burn pot.

Next, remove the old burn pot and install the new one in its place. Finally, reconnect any wires or connections and replace the access panel.

With the burn pot replaced, we can now move on to finishing up and testing the stove.

Finishing Up and Testing the Stove

Now that the burn pot has been replaced, it’s time to finish up by reconnecting any wires or connections and testing the stove for proper functioning. Before moving forward, it’s important to ensure everything is properly connected and secured. Start by referring to the manufacturer’s manual for specific instructions on wiring and connections. Once everything is reconnected, it’s time to test the stove for efficiency and troubleshoot any common issues. Here is a table that provides a step-by-step guide for testing the stove:

Step Action
1 Power on the stove and set the desired temperature.
2 Observe the ignition process. The stove should ignite quickly and smoothly.
3 Monitor the flame pattern. It should be consistent and stable.
4 Check the exhaust for any smoke or unusual odors.
5 Verify that the stove is maintaining the desired temperature.

Frequently Asked Questions

Can I Clean the Inside Wall Brick of a Wood Pellet Stove Without Disassembling It?

I can’t clean the inside wall brick of a wood pellet stove without disassembling it. However, there may be alternative cleaning methods or professional cleaning services available to ensure a thorough and effective cleaning process.

How Often Should I Clean the Inside Wall Brick of My Wood Pellet Stove?

To properly clean the inside wall brick of a wood pellet stove, you’ll need a few tools. First, make sure the stove is cool. Then, use a vacuum or brush to remove any debris. Repeat this process as often as necessary for optimal performance.

Can I Use Regular Household Cleaners to Clean the Inside Wall Brick of My Wood Pellet Stove?

I wouldn’t recommend using regular household cleaners on wood pellet stove walls. Instead, opt for suitable alternatives like vinegar or mild soap mixed with water. Regular maintenance and avoiding excessive heat can prolong the lifespan of the bricks.

Are There Any Safety Precautions I Should Take When Cleaning the Inside Wall Brick of My Wood Pellet Stove?

When it comes to proper maintenance and cleaning of wood pellet stoves, it’s important to prioritize safety. Before removing the inside wall brick, ensure the stove is completely cooled down to avoid any potential accidents.

Is It Necessary to Replace the Burn Pot Every Time I Clean the Inside Wall Brick of My Wood Pellet Stove?

No, it is not necessary to replace the burn pot every time I clean the inside wall brick of my wood pellet stove. However, regular burn pot maintenance tips and alternative cleaning methods for wood pellet stoves are recommended.

Conclusion

In conclusion, cleaning the inside wall brick of a wood pellet stove is an important maintenance task that should be done regularly to ensure optimal performance.

By following the steps outlined in this article and using the necessary tools and materials, you can successfully remove, clean, and reassemble the inside wall brick.

One interesting statistic to note is that a clean inside wall brick can improve the efficiency of a wood pellet stove by up to 20%. This improvement results in significant cost savings and a more comfortable living environment.

Continue Reading

Pellets & Pellet Stoves

How to Replace a Pellet Stove With Wood Stove

Published

on

By

An image showcasing a cozy living room with a pellet stove being carefully removed and replaced with a beautiful wood stove

I know what you’re thinking – replacing a pellet stove with a wood stove sounds like a daunting task. But let me assure you, with the right tools and a bit of know-how, it can be a straightforward process.

In this article, I’ll walk you through each step, from assessing the requirements of both stoves to connecting the wood stove to the chimney or flue.

So, let’s dive in and learn how to make the switch and enjoy the warmth and charm of a wood-burning stove in your home.

Key Takeaways

  • Assess the requirements and gather the necessary tools and materials for the installation.
  • Prepare the space by measuring dimensions, clearing debris, ensuring proper ventilation, and addressing any obstructions or flammable materials.
  • Disconnect and remove the pellet stove safely, taking precautions to avoid damage or injury.
  • Prepare for the wood stove installation by clearing flammable materials, ensuring a sturdy floor, checking for combustible materials in walls or ceiling, and maintaining proper clearance.

Assessing the Pellet Stove and Wood Stove Requirements

To properly assess the requirements for both your pellet stove and wood stove, you’ll need to consider factors such as size, ventilation, and fuel availability. Evaluating costs and comparing heating efficiency are also crucial in making an informed decision.

First, measure the dimensions of your current pellet stove to determine the appropriate size for the wood stove. Take into account the clearance requirements and ensure that the space can accommodate the new stove.

Next, evaluate the ventilation system. Wood stoves require a chimney or flue to safely exhaust the smoke. Check if your existing setup meets the necessary specifications or if modifications are needed.

Lastly, consider fuel availability. Pellet stoves use wood pellets, while wood stoves require firewood. Determine which option is more readily accessible and cost-effective for you.

With these factors in mind, you can proceed to gather the necessary tools and materials for the installation process.

Gathering the Necessary Tools and Materials

Before starting the process of replacing a pellet stove with a wood stove, it’s crucial to gather all the necessary tools and materials.

The essential tools needed for this project include a screwdriver, pliers, tape measure, and a level.

Additionally, a required materials checklist should include items such as a wood stove, stove pipe, chimney cap, fireproof sealant, and stove cement.

Essential Tools Needed

The essential tools you’ll need for the job include a wrench, a screwdriver, and a level. These tools are crucial for the smooth and safe replacement of a pellet stove with a wood stove. Let’s compare these tools and their importance in the process.

Tool Purpose Safety Precautions
Wrench Used to tighten and loosen bolts and nuts Wear protective gloves to prevent injuries
Screwdriver Used to remove screws and fasteners Ensure the screwdriver is the correct size and in good condition
Level Ensures the stove is properly aligned and balanced Place the level on a flat surface for accurate readings

Required Materials Checklist

Now that we’ve covered the essential tools, let’s take a look at the materials checklist you’ll need for this task.

When assessing pellet stove requirements, it is important to consider the size and heating capacity of the wood stove you choose as a replacement. First, you will need to measure the square footage of the area you wish to heat to determine the appropriate stove size.

Additionally, consider the type of wood stove that best suits your needs, such as a freestanding stove or an insert. You will also require a chimney liner, stovepipe, and a hearth pad or floor protection.

Don’t forget to gather everything necessary, including firebricks, fireproof caulk, and high-temperature paint, to ensure a successful installation without compromising safety.

Gathering Everything Necessary

Make sure you’ve got all the required items like firebricks, fireproof caulk, and high-temperature paint to successfully install your new stove. Before starting the installation process, it is crucial to assess the space where the pellet stove currently sits. Measure the dimensions of the area to ensure that your new wood stove will fit properly. Additionally, inspect the surroundings for any potential hazards or obstructions that may need to be addressed before proceeding.

To prepare for the installation, it is important to remove any debris or objects that may hinder the process. Clear the area around the pellet stove, ensuring there are no loose items or flammable materials nearby. Thoroughly clean the space, removing dust, dirt, and any accumulated debris. This will help create a safe and clean environment for the installation of your new wood stove.

Proceeding to the next section, disconnecting and removing the pellet stove requires careful attention to detail and following proper procedures.

Disconnecting and Removing the Pellet Stove

First, I’ll discuss the process of disconnecting the electrical and ventilation systems when removing a pellet stove. This involves turning off the power supply and disconnecting any electrical connections. It’s also important to properly seal off the ventilation pipes.

Next, I’ll explain the importance of safely removing the pellet stove without causing any damage or injury. This includes carefully disconnecting the stove from the flue and removing any remaining pellets or debris from the stove and surrounding area.

Disconnecting Electrical and Ventilation

Before you begin, make sure to turn off the electricity and disconnect the ventilation system.

To safely disconnect the electrical connections, start by locating the circuit breaker for the pellet stove and switch it off. This will prevent any accidental electrical shocks during the removal process.

Next, carefully disconnect the power supply cord from the outlet. Ensure that the cord is not tangled or obstructed by any objects.

Moving on to the ventilation system, you will need to remove the ventilation ducts that are connected to the pellet stove. Use a screwdriver or a wrench to loosen the screws or bolts securing the ducts in place. Gently pull the ducts away from the stove while being cautious not to damage them.

Now that the electrical connections are disabled and the ventilation ducts are removed, you can proceed to the next section on removing the pellet stove safely.

Removing Pellet Stove Safely

Once the electrical connections and ventilation ducts are taken care of, you can safely proceed with the removal of the pellet stove. Before beginning the removal process, it is important to take certain precautions to ensure your safety. Here are some key steps to safely remove a pellet stove:

Precautions During Removal
Turn off the power supply to the stove
Wear protective gloves and goggles
Disconnect the stove from the venting system
Empty the pellet hopper and remove any remaining pellets
Remove the front panel and disconnect the electrical connections

Preparing for Wood Stove

To ensure a smooth installation, it’s important to assess the space and make sure there is proper ventilation for the new stove. When preparing the space for a wood stove installation, there are several safety precautions to keep in mind.

Firstly, clear the area surrounding the installation site of any flammable materials, such as curtains or furniture. Next, ensure that the floor is sturdy and can support the weight of the wood stove. Additionally, check for any combustible materials in the walls or ceiling that may need to be addressed prior to installation.

Lastly, make sure there is adequate clearance between the wood stove and any nearby walls or furniture to prevent overheating and potential fire hazards. By taking these necessary precautions, you can create a safe and functional environment for your wood stove installation.

In the next section, we will discuss the steps to physically prepare the space for the wood stove installation.

Preparing the Space for the Wood Stove Installation

You’ll need to clear out any furniture or other items from the area where the wood stove will be installed. This is important to ensure proper ventilation and clearance for the stove.

When choosing the right location for the wood stove, consider factors such as proximity to combustible materials, accessibility for maintenance, and the layout of your home. It is recommended to place the stove in a central location to maximize heat distribution.

Once the area is cleared, measure the dimensions of the stove and mark the location on the floor. Ensure that there is enough space around the stove for proper ventilation and clearance as per the manufacturer’s recommendations.

With the space prepared, it’s time to move on to the installation of the wood stove and venting system, ensuring a safe and efficient heating solution for your home.

Installing the Wood Stove and Venting System

After clearing the area and marking the dimensions for installation, it’s time to begin installing the wood stove and venting system. Here are some important steps to follow:

  • Ensure that the stove is positioned correctly, allowing for proper clearance from combustible materials.
  • Assemble the venting components, including the stovepipe, thimble, and chimney cap.
  • Connect the stovepipe to the flue collar on the wood stove, ensuring a secure fit.

When installing the wood stove, it’s important to troubleshoot common issues that may arise. These can include improper clearance, insufficient draft, or leaks in the venting system. By addressing these issues promptly, you can ensure the safe and efficient operation of your wood stove.

Now that the wood stove and venting system are in place, we can move on to connecting the wood stove to the chimney or flue.

Connecting the Wood Stove to the Chimney or Flue

Once the venting components are securely assembled, it’s time to connect the stovepipe to the chimney or flue for proper ventilation. When connecting the wood stove to the existing chimney, it is crucial to select the right size flue for the wood stove. This ensures efficient and safe operation. The size of the flue should match the size of the wood stove’s flue collar. If the flue is too small, it can lead to poor draft and increased risk of smoke backflow. On the other hand, if the flue is too large, it can result in decreased efficiency and potential overheating. To help you select the right size flue, refer to the table below:

Wood Stove Size (BTU) Flue Size (inches)
Up to 25,000 6
25,000 – 60,000 8
60,000 – 100,000 10
Over 100,000 12

Testing and Fine-tuning the Wood Stove for Optimal Performance

To ensure optimal performance, it’s important to test and fine-tune the wood stove. Testing methods play a crucial role in identifying any issues or inefficiencies that may affect the stove’s functionality.

One common testing method is the smoke test. This involves igniting a small fire in the stove and observing the smoke that is emitted. Ideally, the smoke should be minimal and clear. If there is excessive smoke or a strong odor, it may indicate a problem with the stove’s ventilation or combustion.

Another important aspect of testing is checking the stove’s temperature distribution. This can be done using a surface thermometer to measure the heat output in various areas of the stove.

Troubleshooting tips include adjusting the air vents, ensuring proper fuel supply, and cleaning the stove regularly to prevent buildup and improve overall efficiency.

Frequently Asked Questions

How Much Does It Cost to Replace a Pellet Stove With a Wood Stove?

Replacing a pellet stove with a wood stove can vary in cost depending on the specific installation requirements. Factors such as the type of wood stove, labor fees, and any necessary modifications to the existing setup can influence the overall cost.

Can I Use the Existing Chimney for the Wood Stove Installation?

Yes, you can use the existing chimney for the wood stove installation. It is important to properly install the wood stove with the existing chimney to ensure safety and efficiency.

Are There Any Specific Building Codes or Regulations I Need to Follow When Replacing a Pellet Stove With a Wood Stove?

When replacing a pellet stove with a wood stove, it is crucial to follow building codes and regulations. Familiarize yourself with local codes to ensure proper installation. Consider the pros and cons of switching fuels for optimal heat efficiency.

What Are the Advantages of Using a Wood Stove Over a Pellet Stove?

Using a wood stove instead of a pellet stove has advantages like increased heat output and the ability to burn different types of wood. It provides a more versatile and efficient heating option.

Do I Need to Hire a Professional to Replace a Pellet Stove With a Wood Stove, or Can I Do It Myself?

I can replace a pellet stove with a wood stove, but it is recommended to hire a professional. Steps to replace: disconnect power, remove pellet stove, install wood stove, connect power.

Conclusion

In conclusion, replacing a pellet stove with a wood stove requires careful assessment, proper tools and materials, and step-by-step installation.

While some may argue that the process is complicated and time-consuming, the benefits of a wood stove, such as increased heat output and a traditional ambiance, far outweigh any initial challenges.

By following the outlined steps and seeking professional assistance if needed, homeowners can successfully make the switch and enjoy the warmth and comfort of a wood stove in their homes.

Continue Reading

Pellets & Pellet Stoves

How to Put Out a Silo Wood Pellet Fire

Published

on

By

An image capturing a pair of sturdy, heat-resistant gloves gripping a silver fire extinguisher nozzle, poised to release a powerful stream of white foam onto a towering inferno engulfing a wooden silo filled with blazing wood pellets

As a fire safety expert, I’ve seen firsthand the devastation that a silo wood pellet fire can cause. It’s a situation that requires immediate action and a clear plan of attack.

In this article, I’ll guide you step-by-step on how to put out a silo wood pellet fire, ensuring the safety of yourself and those around you.

From assessing the fire to controlling the air supply, using fire extinguishers to calling for emergency assistance, we’ll cover it all.

Don’t panic – I’ve got you covered.

Key Takeaways

  • Regularly inspect the silo and surrounding areas for fire hazards and maintain equipment to prevent fires.
  • Install fire detection systems like smoke alarms and heat sensors to quickly assess and understand the fire situation.
  • Manage air vents and ventilation properly to control airflow and prevent fire risks.
  • Choose the right type and size of fire extinguisher, aim at the base of the flames, and sweep from side to side to effectively put out a silo wood pellet fire.

Safety Precautions

Before attempting to put out the silo wood pellet fire, it’s important to take necessary safety precautions.

Fire prevention is key to avoid accidents and ensure the safety of everyone involved. Regularly inspect the silo and surrounding areas for any potential fire hazards, such as flammable materials or electrical issues. Install fire detection systems, like smoke alarms and heat sensors, to quickly identify any signs of fire. Additionally, keep firefighting equipment accessible and regularly maintained. This includes fire extinguishers, fire blankets, and water hoses.

By having these safety measures in place, you can minimize the risk of a fire getting out of control.

Now, let’s move on to assessing the fire and determining the best course of action.

Assessing the Fire

When assessing a fire, it’s important to quickly determine the extent of the danger. Evaluating the damage and identifying the causes are crucial steps in understanding the situation and taking appropriate action. To help you assess the fire effectively, I have prepared a table below that outlines key factors to consider:

Factors to Consider Importance Examples
Size of the fire High Small flames vs. large inferno
Smoke production High Thick, black smoke vs. light, white smoke
Heat intensity High Intense heat vs. moderate heat
Structural integrity High Collapsed walls vs. intact structure

Controlling the Air Supply

When it comes to controlling the air supply in a silo wood pellet fire, two key points to consider are air vents and temperature regulation.

Proper airflow is essential for maintaining safety in these situations. In this discussion, we will explore the importance of managing air vents and temperature to ensure the right airflow and prevent any potential hazards.

Air Vents and Temperature

To control the temperature, you’ll need to adjust the air vents on the silo wood pellet fire. Proper air vent maintenance is essential for effective temperature regulation. By manipulating the air vents, you can increase or decrease the airflow, which directly impacts the fire’s intensity and heat output. Here is a table outlining the different air vent settings and their corresponding effects on temperature:

Air Vent Setting Temperature
Fully Open High
Partially Open Medium
Closed Low

Proper Airflow for Safety

Make sure you regularly clean and clear the air vents to maintain proper airflow for safety. Proper ventilation is crucial in ensuring that any potential fire is contained and suppressed effectively.

When air vents are clogged or obstructed, it can hinder the flow of air, which may lead to poor combustion and an increased risk of fire. By regularly cleaning and clearing the air vents, you ensure that there is adequate airflow, allowing for optimal combustion and reducing the chances of a fire occurring.

However, even with proper ventilation, accidents can still happen. In such cases, it is essential to know how to use fire extinguishers effectively to quickly and efficiently suppress the fire before it spreads and causes further damage.

Using Fire Extinguishers

When it comes to using fire extinguishers, proper selection is crucial. You need to choose the right type of extinguisher for the specific type of fire you are dealing with.

Additionally, it is important to know how to apply the extinguisher effectively to maximize its effectiveness in suppressing the fire.

Proper Extinguisher Selection

Using the wrong extinguisher can be dangerous, so it’s important to choose the proper one for a silo wood pellet fire. When it comes to fire prevention and suppression, selecting the right extinguisher is crucial. Here are three key factors to consider:

  • Class A: Look for an extinguisher specifically designed for Class A fires, which involve ordinary combustible materials like wood pellets.

  • Size: Ensure the extinguisher is large enough to handle the size of the fire. A small extinguisher may not be effective in fully extinguishing a silo fire.

  • Reach: Opt for an extinguisher with a long reach or an extended hose, as silos can be tall and difficult to access.

By carefully considering these factors, you can choose an extinguisher that is suitable for combating a silo wood pellet fire.

Now, let’s discuss how to apply the extinguisher effectively to extinguish the fire.

Applying Extinguisher Effectively

To effectively apply the extinguisher, remember to aim at the base of the flames and sweep from side to side. This technique ensures that the fire’s fuel source is targeted and extinguished. When dealing with a silo wood pellet fire, it is crucial to understand the importance of proper application. Here is a table outlining the steps for applying an extinguisher effectively:

Step Action
1 Aim at the base of the flames
2 Sweep from side to side
3 Maintain a safe distance
4 Monitor the fire for re-ignition
5 Ensure proper ventilation of exhaust systems

Calling for Emergency Assistance

If you can’t control the wood pellet fire in the silo, you should immediately call for emergency assistance. Don’t hesitate to contact your local fire department for their professional expertise in handling such situations. They are trained to respond to emergency calls and have the necessary equipment to extinguish fires effectively.

When contacting the fire department, provide them with detailed information about the fire, such as the location, size, and any potential hazards. Stay on the line until they advise you on what to do next. Remember, the safety of yourself and others is of utmost importance, so it’s crucial to rely on the expertise of emergency responders in these situations.

Now, let’s discuss some preventive measures to avoid future fires in the silo.

Preventing Future Fires

One way to prevent future fires in the silo is by regularly inspecting and maintaining the equipment. Fire prevention is crucial in ensuring the safety and efficiency of the silo.

Regular maintenance procedures should be followed to identify any potential hazards or issues that could lead to a fire. This includes checking for any signs of wear and tear on the equipment, such as frayed wires or malfunctioning sensors.

It is also important to clean the silo regularly to remove any dust or debris that could ignite and cause a fire.

Frequently Asked Questions

What Are the Common Causes of Silo Wood Pellet Fires?

Common causes of silo wood pellet fires include poor maintenance, improper storage, and electrical malfunctions. To prevent these fires, regular inspections, proper ventilation, and following manufacturer guidelines for installation and usage are essential.

Can the Fire Spread to Other Parts of the Property?

The fire can spread to other parts of the property if not properly contained. It is crucial to have an emergency response plan in place to quickly and effectively address the situation.

Is It Safe to Attempt to Put Out the Fire Without Professional Help?

It’s important to consider the dangers of DIY fire extinguishing. Attempting to put out a silo wood pellet fire alone can be risky. Seek professional help to ensure your safety and the safety of your property.

How Long Does It Typically Take to Extinguish a Silo Wood Pellet Fire?

To effectively extinguish a silo wood pellet fire, you’ll need the right tools and equipment. It’s important to act quickly and follow proper safety protocols. The time it takes to put out the fire can vary depending on the size and severity.

Are There Any Specific Maintenance Practices That Can Help Prevent Silo Wood Pellet Fires in the Future?

Maintenance practices are crucial for fire prevention in silo wood pellet storage. Regular inspections, cleaning, and ensuring proper ventilation are key. Additionally, implementing temperature monitoring systems and following safety guidelines can help prevent future fires.

Conclusion

In conclusion, putting out a silo wood pellet fire requires careful assessment and control of the air supply. It is important to use fire extinguishers and, if necessary, call for emergency assistance. By following these safety precautions and taking immediate action, you can prevent further damage and ensure the safety of yourself and others.

Remember, just like a firefighter rushing into a burning building, it is important to act swiftly and decisively when faced with a fire. Stay vigilant and be prepared to tackle any fire that may arise in the future.

Continue Reading

Trending