Connect with us

Pellet Stoves

How Close Can Tv Be to Wood Pellet Stove

Published

on

An image capturing the cozy scene of a wood pellet stove, radiating warmth and surrounded by a TV mounted on a wall nearby, their proximity effortlessly blending comfort and technology

Snuggled up by my wood pellet stove, it hits me: how far should my TV be from this cozy warmth?

In this article, we will explore the ins and outs of positioning your TV near a wood pellet stove.

From understanding heat output to evaluating the effects on TV performance, we’ll provide you with all the information you need to maintain an optimal viewing experience while enjoying the warmth of your stove.

Key Takeaways

  • The heat output of a wood pellet stove is measured in BTUs, which determines the heat distribution patterns and affects the safe distance between the TV and stove.
  • Placing the TV too close to the stove can expose it to excessive heat, which can damage TV components, distort or discolor the screen, and shorten the TV’s lifespan.
  • To prevent heat exposure risks, it is important to maintain a safe distance of at least three feet between the TV and stove, use heat-resistant materials for insulation, ensure proper ventilation, and have smoke detectors and fire extinguishers nearby.
  • Evaluating the effects of heat on TV performance and picture quality, considering the TV’s heat tolerance, and implementing innovative solutions for heat shielding and proper ventilation are crucial to ensure the longevity and performance of the TV.
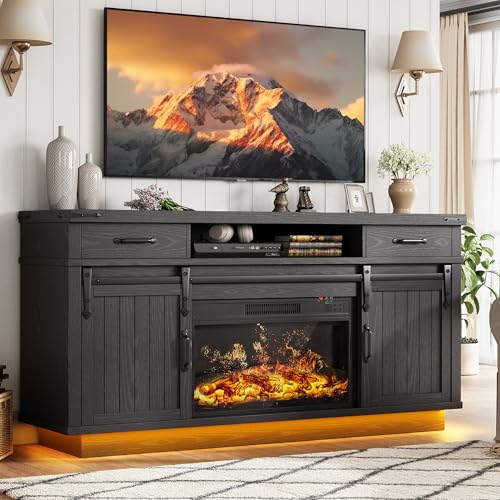
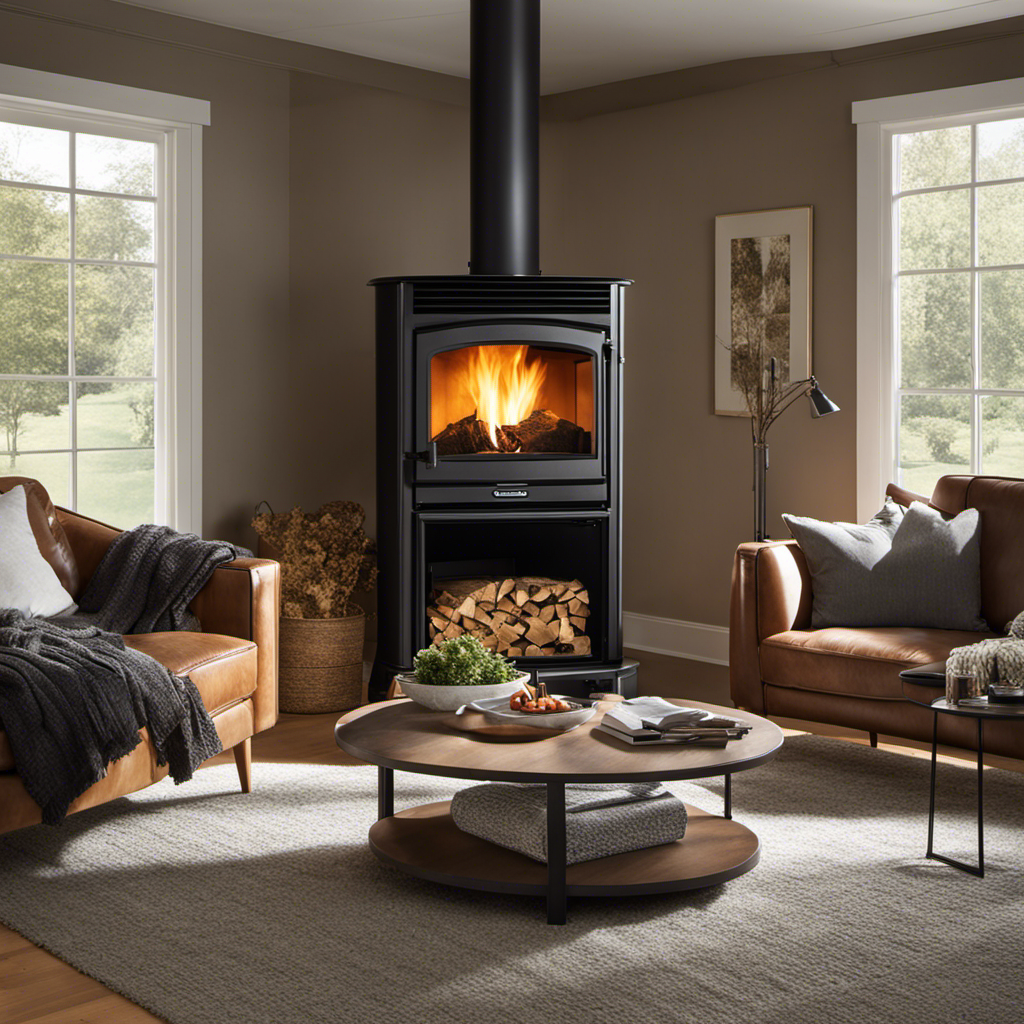
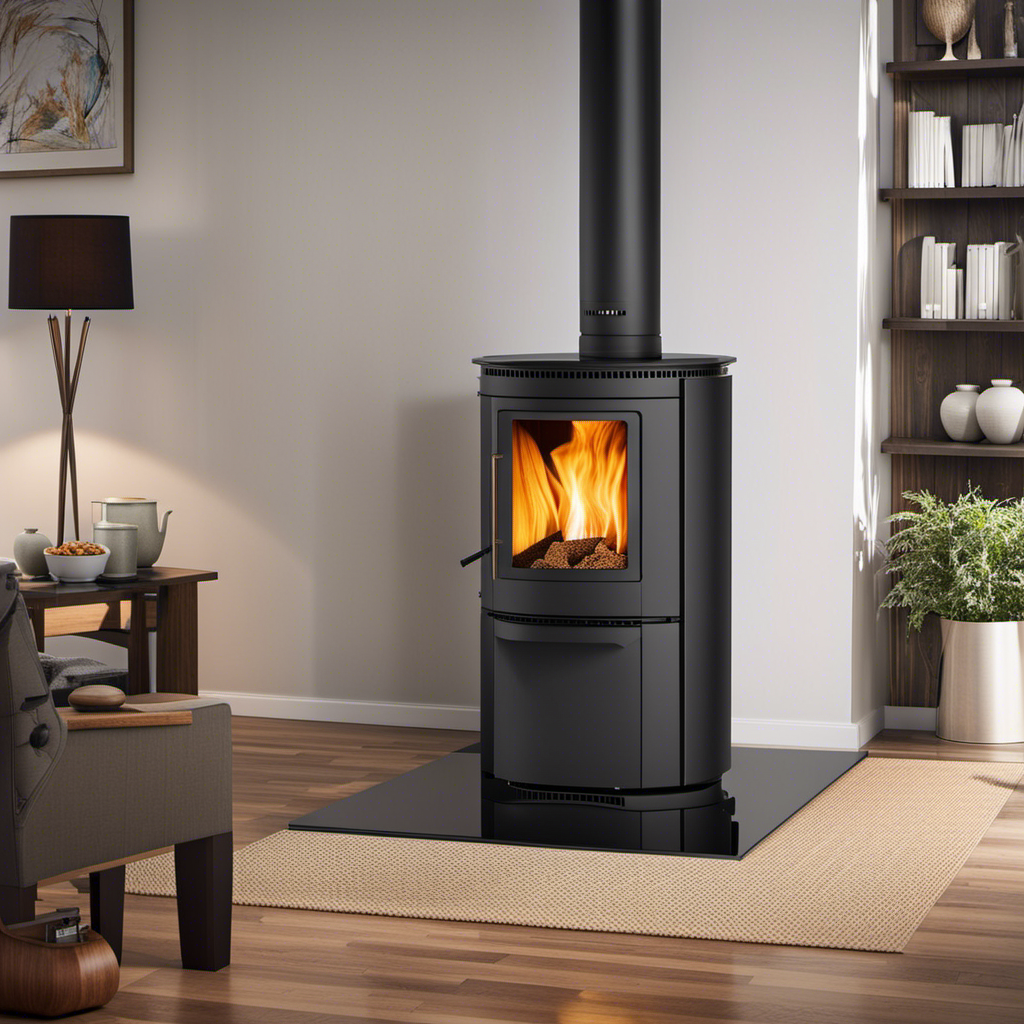
Understanding the Heat Output of a Wood Pellet Stove

Understanding the heat output of a wood pellet stove can help determine how close a TV can be placed to it. When evaluating efficiency, it is important to consider the amount of heat generated by the stove.

Advertisement

Wood pellet stoves typically have a heat output measured in British Thermal Units (BTUs). This measurement indicates the amount of heat produced per hour. By knowing the BTU rating of your stove, you can calculate its potential heat distribution patterns and understand how far-reaching its warmth will be.

This information is crucial when deciding on the placement of your TV in relation to the stove. It ensures that your TV remains at a safe distance from any excessive heat, preventing any potential damage or malfunction caused by overheating components.

Recommended Safe Distance Between TV and Wood Pellet Stove

After understanding the heat output of a wood pellet stove, it’s crucial to determine the recommended safe distance between a TV and the stove.

This discussion will focus on three key points: optimal distance for safety, heat exposure risks, and potential damage prevention.

Optimal Distance for Safety

The optimal distance for safety when it comes to placing a TV near a wood pellet stove is typically at least three feet. This ensures that the TV is not exposed to excessive heat, which can cause damage to its components. Heat exposure is a significant concern when positioning electronic devices near heating appliances, as it can lead to overheating and potential fire hazards. To better understand the safe distance required, let’s take a look at the table below:

Advertisement
Distance (in feet) Heat Exposure Level
1 High
2 Moderate
3 or more Low

As shown in the table, placing the TV at least three feet away from the wood pellet stove minimizes heat exposure risks. It is crucial to follow these guidelines to ensure the longevity and safety of your television equipment without compromising on entertainment enjoyment.

Heat Exposure Risks

Placing the television at a safe distance from the wood pellet stove minimizes the risk of heat exposure. Heat exposure can have detrimental effects on electronic devices, including televisions. The intense heat generated by the wood pellet stove can cause internal components of the TV to overheat, leading to malfunctions or even permanent damage. Safety precautions should be taken to avoid these issues.

When a television is too close to a wood pellet stove, it is subjected to higher temperatures than it is designed for. This can result in distortion or discoloration of the screen, reduced image quality, and shortened lifespan of the TV. Additionally, excessive heat can affect other sensitive parts such as circuit boards and connectors.

To prevent these heat exposure effects, it is recommended to keep a minimum distance between the television and wood pellet stove. This will allow for proper ventilation and airflow around the TV, dissipating any excess heat efficiently. By following these safety precautions, you can ensure that your television remains protected from potential damage caused by prolonged exposure to high temperatures.

Transitioning into the subsequent section about ‘potential damage prevention,’ it is important to take additional steps in safeguarding your valuable electronics from other potential hazards that may arise when they are placed near sources of heat or open flames.

Advertisement

Potential Damage Prevention

To prevent potential damage, it’s important to take extra precautions when keeping valuable electronics near sources of heat or open flames. When it comes to protecting your electronics from heat exposure, there are several measures you can take:

  1. Heat insulation: Use heat-resistant materials such as ceramic or metal plates to create a barrier between the electronics and the heat source. This will help minimize the transfer of heat and reduce the risk of damage.

  2. Adequate ventilation: Ensure that there is proper airflow around the electronic devices by providing sufficient space for them to breathe. This will prevent overheating and potential fire hazards.

  3. Fire safety measures: Install smoke detectors and fire extinguishers in close proximity to your electronic setup. Regularly check their functionality and ensure they are easily accessible in case of emergencies.

By implementing these precautions, you can safeguard your valuable electronics from potential damage due to heat exposure or open flames.

Now let’s explore the factors that affect the heat distribution of a wood pellet stove.

Factors Affecting the Heat Distribution of a Wood Pellet Stove

When considering the factors affecting the heat distribution of a wood pellet stove, there are several key points to be aware of.

Firstly, proximity and temperature play a significant role in determining how effectively the heat is distributed throughout a space. The closer an object or surface is to the stove, the higher its temperature will be due to radiant heat, so it is important to maintain appropriate distances for safety reasons.

Advertisement

Secondly, air circulation patterns within the room can greatly impact how efficiently the heat is dispersed. Proper airflow ensures that warm air is evenly distributed, preventing hot spots and cold zones from forming.

Lastly, using heat-resistant materials in close proximity to the stove is crucial for safety and efficient heat distribution as these materials can withstand high temperatures without warping or melting, allowing for optimal heat transfer.

Proximity and Temperature

Make sure you don’t put your TV too close to the wood pellet stove, as the high temperatures could damage it. When considering the proximity of your TV to a wood pellet stove, it is important to take into account airflow patterns and heat resistant materials. Here are some key points to keep in mind:

  • Airflow Patterns: Wood pellet stoves generate a significant amount of heat that can affect objects nearby. Placing your TV too close to the stove can disrupt the natural airflow patterns and lead to overheating.

  • Heat Resistant Materials: TVs are typically made with components that may not be able to withstand extreme temperatures. It is crucial to ensure that there is adequate distance between the stove and the TV, or use heat resistant materials such as fireproof insulation or a protective barrier.

  • Proper Ventilation: Good ventilation around both the stove and the TV is essential for maintaining optimal performance and preventing any potential damage caused by excessive heat buildup.

  • Safety Precautions: Always follow manufacturer’s guidelines for recommended distances between appliances. Additionally, regularly inspect both your wood pellet stove and TV for any signs of damage or wear that may impact their safety.

Considering these factors will help preserve both your TV and wood pellet stove while ensuring safe operation. Now let’s explore how air circulation patterns play a crucial role in maximizing efficiency.

Air Circulation Patterns

Air circulation patterns greatly impact the efficiency of both appliances. When it comes to wood pellet stoves and TVs, proper air circulation is crucial for heat distribution and preventing potential damage. In order to achieve optimal performance, it is important to understand how air moves around these appliances.

Advertisement

Wood pellet stoves rely on a system of fans and blowers to circulate warm air throughout the room. These fans help distribute heat evenly, ensuring that no hot spots or cold areas are left behind. On the other hand, TVs require adequate ventilation to prevent overheating. Blocking the airflow around a TV can lead to internal temperature buildup, potentially causing damage to sensitive electronic components.

To ensure both appliances work efficiently and safely, it is advisable to maintain sufficient space between them. This allows for proper air circulation around the TV while still benefiting from the warmth of the wood pellet stove. However, it is also essential to consider heat-resistant materials needed for positioning your TV near a source of heat like a wood pellet stove.

Heat-Resistant Materials Needed

In order to safely position a TV near a wood pellet stove, it is crucial to use heat-resistant materials and ensure proper ventilation.

Heat-resistant materials, such as fireproof insulation and ceramic or glass panels, can help protect the TV from the intense heat generated by the stove. These materials act as barriers that prevent direct contact between the TV and the hot air emitted by the stove.

Proper ventilation is also essential to dissipate any excess heat that may accumulate in the vicinity of the TV. Installing vents or fans near the stove can help circulate air and prevent overheating. It is important to ensure that there is enough airflow around both sides of the TV to avoid heat buildup.

Advertisement

By using heat-resistant materials and ensuring proper ventilation, you can minimize any potential risks when positioning your TV near a wood pellet stove.

Now let’s move on to some tips for properly positioning your TV near a wood pellet stove…

Tips for Properly Positioning Your TV Near a Wood Pellet Stove

When positioning your TV near a wood pellet stove, it’s important to consider the distance between them. Evaluating heat exposure and preventing damage are crucial factors to keep in mind. To ensure the safety and longevity of your TV, follow these tips:

Distance from Stove Recommended Distance
Less than 1 foot Not recommended
1-2 feet Minimum distance
2-4 feet Optimal distance

By maintaining a minimum distance of 1-2 feet between your TV and wood pellet stove, you can reduce the risk of heat-related damage. This allows for proper air circulation around the TV, preventing overheating. Additionally, using a heat-resistant barrier or shield can provide an extra layer of protection.

Transitioning into evaluating the effects of heat on TV performance, it is essential to understand how prolonged exposure to high temperatures can impact your television’s functionality without further ado.

Advertisement

Evaluating the Effects of Heat on TV Performance

When it comes to evaluating the effects of heat on TV performance, there are a few key points to consider.

Firstly, understanding your TV’s heat tolerance is crucial in preventing any potential damage.

Secondly, excessive heat can have a significant impact on picture quality, leading to distorted images or even screen burn-in.

Lastly, it’s important to be aware of the potential risks that come with exposing your TV to high temperatures, such as overheating components or electrical malfunctions.

TV Heat Tolerance

You’ll want to make sure your TV can handle the heat from a wood pellet stove. It’s important to consider the temperature tolerance and heat resistance capabilities of your television before placing it near a source of high heat. Here are four key factors to keep in mind:

Advertisement
  1. Temperature range: Check the manufacturer’s specifications for the recommended operating temperature range of your TV. Most TVs have a maximum temperature limit, beyond which they may not function properly or could even be permanently damaged.

  2. Ventilation: Ensure that there is proper ventilation around your TV, as excessive heat buildup can cause components to overheat and potentially fail.

  3. Distance: Maintain an adequate distance between your TV and the wood pellet stove, following any guidelines provided by the manufacturer. This will help prevent direct exposure to intense heat.

  4. Heat shielding: Consider using a heat shield or barrier between your TV and the wood pellet stove to further protect it from excessive temperatures.

Understanding how well your TV can handle heat is crucial for ensuring its longevity and performance.

Now let’s explore how this heat exposure might impact picture quality without skipping a beat into our next section.

Impact on Picture Quality

Now that we understand the heat tolerance of TVs, let’s evaluate how the proximity to a wood pellet stove can impact picture quality.

Heat from a nearby stove can cause several issues that affect the performance of the TV. Firstly, excessive heat can lead to thermal expansion and contraction of internal components, potentially causing circuitry damage or loosening connections.

Secondly, high temperatures may degrade the LCD panel, resulting in discoloration or image distortion. Additionally, heat can negatively impact the backlighting system, leading to uneven brightness or even complete failure.

Advertisement

It is crucial to consider these potential damage risks when placing your TV near a wood pellet stove. By understanding the effects of heat on TV performance, you can make an informed decision and prevent any adverse consequences that may compromise your viewing experience.

Moving on from evaluating how heat affects picture quality, let’s now explore the potential damage risks associated with placing a TV too close to a wood pellet stove.

Potential Damage Risks

Excessive heat from a nearby wood pellet stove can cause damage to the internal components of a TV. This can potentially lead to circuitry damage or loose connections. It is crucial to evaluate the effects of heat on TV performance to prevent potential damage.

The high temperatures emitted by the wood pellet stove can adversely affect the delicate electronic circuitry inside the TV. This can lead to malfunctions or even permanent damage. Over time, repeated exposure to excessive heat can weaken solder joints and cause them to become brittle. As a result, loose connections may disrupt signal transmission and overall performance.

To mitigate these issues, it is important to ensure proper ventilation around the TV and maintain a safe distance from any heat sources like wood pellet stoves. By taking these precautions, you can protect your valuable television equipment.

Advertisement

Exploring the potential risks of placing a TV close to a wood pellet stove highlights important considerations for protecting your valuable television equipment.

Exploring the Potential Risks of Placing a TV Close to a Wood Pellet Stove

Be cautious when placing your TV close to a wood pellet stove, as there are potential risks that need to be explored. Wood pellet stoves can generate intense heat, which can have detrimental effects on electronic devices like televisions.

Here are some key points to consider:

  1. Heat exposure: The proximity of the TV to the stove increases the chances of it being exposed to excessive heat.

  2. Overheating: High temperatures can cause internal components of the TV to overheat and malfunction.

  3. Damage to circuitry: Excessive heat can lead to damage in delicate circuitry, affecting the performance and lifespan of your television.

  4. Fire hazards: In extreme cases, prolonged exposure to heat may even pose a fire hazard.

To ensure optimal safety and functionality, it’s essential to follow best practices for maintaining an optimal TV viewing experience near a wood pellet stove without compromising on safety or performance.

Best Practices for Maintaining Optimal TV Viewing Experience Near a Wood Pellet Stove

To maintain an optimal TV viewing experience near a wood pellet stove, it’s important to follow these best practices. Evaluating TV performance and maintaining picture quality are key considerations when placing your television in close proximity to a wood pellet stove. Here are some guidelines to help you achieve the best possible results:

Advertisement
Best Practices
1 TV Placement Position your TV at a safe distance from the stove to avoid heat damage. A recommended minimum distance of 3 feet is advisable.
2 Heat Shielding Install a heat shield behind your TV to protect it from excessive heat radiation. This can be done using materials like sheet metal or tempered glass.
3 Proper Ventilation Ensure that your wood pellet stove has adequate ventilation to minimize smoke and soot build-up, which can affect picture quality over time.
4 Regular Cleaning Routinely clean both the front and back of your television screen, as well as any vents or filters, to prevent dust accumulation that may impact performance.

By following these best practices, you can enjoy uninterrupted TV viewing near your wood pellet stove while maintaining excellent picture quality and prolonging the lifespan of your television equipment.

Now let’s address common concerns about TV placement near wood pellet stoves without skipping a beat.

Addressing Common Concerns About TV Placement Near Wood Pellet Stoves

Installing a heat shield behind your television can help protect it from the heat emitted by a wood pellet stove. When considering the placement of your TV near a wood pellet stove, it is important to prioritize safety and choose materials that are heat resistant. Heat shields are designed to create a barrier between the stove and your electronic devices, preventing them from overheating or getting damaged. These shields are typically made from fire-resistant materials such as stainless steel or tempered glass, which can withstand high temperatures without warping or melting. By installing a heat shield, you can enjoy watching TV in close proximity to your wood pellet stove without compromising safety or risking damage to your electronics.

Transitioning into the subsequent section about understanding the impact of wood pellet stove emissions on TV performance, it is important to consider not only the physical distance between the stove and TV but also other factors that may affect viewing experience.

Understanding the Impact of Wood Pellet Stove Emissions on TV Performance

When using a wood pellet stove near your television, it’s important to consider how the emissions can affect your TV’s performance. Evaluating TV performance in relation to heat exposure risks is crucial for maintaining optimal functionality.

Advertisement

Here are some key points to keep in mind:

  • Heat Dissipation: Wood pellet stoves generate significant heat, which can impact the TV’s ability to dissipate its own heat.
  • Airflow: Proper airflow around the TV is essential for preventing overheating and ensuring efficient cooling.
  • Electromagnetic Interference: Wood pellet stoves emit electromagnetic fields that may interfere with the TV’s signal reception and picture quality.
  • Dust Accumulation: Stove emissions contain fine particles that can settle on the TV screen, affecting visibility over time.
  • Maintenance: Regular cleaning of both the stove and the TV is necessary to minimize any negative effects caused by emissions.

Understanding these factors will help you assess potential risks and take appropriate measures for protecting your television.

Now let’s explore innovative solutions for integrating your TV and wood pellet stove seamlessly into your home.

Innovative Solutions for Integrating TV and Wood Pellet Stove in Your Home

Consider the latest advancements in home technology that seamlessly combine your television and heating system to create a modern, efficient living space. Integrating technology has become increasingly important in today’s homes, as homeowners seek energy-efficient solutions for their everyday needs.

One such innovative solution is the integration of a TV and wood pellet stove. This combination not only provides entertainment but also maximizes the efficiency of both systems.

By strategically placing the TV near the wood pellet stove, you can take advantage of its heat output to warm up your living area effectively. However, it’s crucial to ensure that there is sufficient distance between them to prevent any damage or interference with the TV’s performance due to excessive heat exposure. Additionally, using a high-quality heat-resistant material as a barrier between the two can provide added protection while maintaining optimal functionality.

Advertisement

Integrating technology within your home allows you to optimize space utilization while embracing energy-efficient solutions. Combining a TV and wood pellet stove ensures both comfort and entertainment while minimizing energy consumption – truly an innovative approach for today’s modern homes.

Frequently Asked Questions

Can a Wood Pellet Stove Damage a TV if Placed Too Close?

Placing a TV too close to a wood pellet stove can potentially damage it due to the heat. To ensure wood pellet stove safety and protect electronics from heat damage, it is important to maintain a safe distance between them.

What Is the Recommended Distance Between a TV and a Wood Pellet Stove?

The recommended distance between a TV and a wood pellet stove is determined by the risk of heat damage. It’s important to keep the TV at a safe distance to prevent any potential harm caused by the stove’s high temperatures.

Will the Heat Distribution From a Wood Pellet Stove Affect the Picture Quality of a Tv?

To protect your TV from heat damage caused by a wood pellet stove, it is important to consider the impact of heat on TV screens and take preventive measures.

Are There Any Specific Tips for Positioning a TV Near a Wood Pellet Stove to Minimize Heat Damage?

To maintain optimal heat insulation for a TV near a wood pellet stove, position it at least 3 feet away. Use a heat-resistant barrier like tempered glass or ceramic tiles and ensure proper ventilation to prevent overheating.

Advertisement

Are There Any Potential Health Risks Associated With Having a TV in Close Proximity to a Wood Pellet Stove?

There are potential health risks associated with having a TV in close proximity to a wood pellet stove. The heat emitted from the stove can negatively affect the electronics of the TV, causing damage or malfunction.

Conclusion

In conclusion, it is crucial to consider the recommended safe distance between a TV and a wood pellet stove to ensure optimal performance and safety.

According to experts, the general guideline suggests placing the TV at least three feet away from the stove. This allows for proper heat distribution and decreases the risk of overheating or damage to both the TV and the stove.

By maintaining this distance, you can enjoy your favorite shows without compromising on comfort or worrying about potential hazards caused by excessive heat exposure.

Advertisement

Terra grew up with a soul deeply connected to nature. Her earliest memories are of sun-drenched meadows, whispering woods, and the rhythmic dance of waves on a moonlit night. Every gust of wind, rustling leaf, and distant horizon beckoned her with tales waiting to be told.

Advertisement

Pellet Stoves

How Do You Cook a Turkey in a Traeger Wood Pellet Grill

Published

on

By

An image showcasing a golden-brown turkey, perfectly roasted on a Traeger Wood Pellet Grill

I will walk you through the process of preparing a turkey using a Traeger wood pellet grill, expertly. This technique will help you create delicious outcomes that will impress your guests.

From choosing the right turkey size to preheating the grill and adding wood pellets for that delicious smoky flavor, I’ll cover all the steps.

Get ready to impress with a perfectly cooked turkey that’ll be the star of your next feast.

Key Takeaways

  • Consider the number of guests and desired leftovers when choosing the turkey size and plan for 1-1.5 pounds of turkey per person.
  • Brining enhances flavor and juiciness, while seasoning and marinating the turkey adds flavor and moisture.
  • Trussing the turkey ensures even cooking by keeping the legs and wings close to the body and tying them together.
  • Preheat the grill for a perfect sear, use high temperature for a crusty outside and juicy inside, and monitor the cooking temperature using a meat thermometer.

Choosing the Right Turkey Size

To choose the right turkey size, you’ll want to consider the number of guests you’ll be serving and the amount of leftovers you want. When it comes to choosing the right turkey size for your Traeger wood pellet grill, it’s important to keep in mind that the size of the grill will limit the size of the turkey you can cook.

A general rule of thumb is to plan for about 1 to 1.5 pounds of turkey per person. If you want leftovers, you might want to go for a larger turkey. Additionally, brining techniques can help enhance the flavor and juiciness of your turkey. Brining involves soaking the turkey in a saltwater solution for a period of time before cooking. This helps to season the turkey and keep it moist during the grilling process.

Now that you’ve chosen the right turkey size and considered brining techniques, let’s move on to preparing the turkey for grilling.

Advertisement

Preparing the Turkey for Grilling

When it comes to preparing a turkey for grilling, there are a few key points to keep in mind.

First, seasoning and marinating the bird is crucial for adding flavor and moisture. I like to use a combination of herbs, spices, and a marinade to infuse the meat with deliciousness.

Second, trussing the turkey ensures even cooking by keeping the legs and wings close to the body. This helps the meat cook more evenly and prevents any parts from drying out.

Lastly, preheating the grill is essential for achieving that perfect sear and ensuring the turkey cooks evenly. I recommend preheating the grill to a high temperature to create a nice crust on the outside while keeping the inside juicy and tender.

Seasoning and Marinating

First, make sure you have thoroughly seasoned and marinated your turkey before placing it in the Traeger wood pellet grill.

Advertisement

Seasoning and marinating are crucial steps in preparing a turkey for grilling, as they enhance the flavor and ensure a juicy and tender end result.

One popular technique is brining, which involves soaking the turkey in a saltwater solution infused with various herbs, spices, and aromatics. This process helps to lock in moisture and impart flavor deep into the meat.

Another method for flavor infusion is marinating, where you coat the turkey in a mixture of oil, herbs, spices, and acidic ingredients such as citrus juice or vinegar. This allows the flavors to penetrate the meat and adds a delicious kick.

Now that the turkey is seasoned and marinated, let’s move on to the next step of trussing for even cooking.

Trussing for Even Cooking

Now that the turkey is seasoned and marinated, it’s important to truss it for even cooking. Trussing is a technique used to secure the wings and legs of the turkey close to the body, ensuring that it cooks evenly.

Advertisement

To truss the turkey, start by tucking the wings underneath the bird. Then, cross the legs and tie them together with kitchen twine. Trussing not only helps the turkey cook more evenly, but it also gives it a neater appearance.

Preheating the Grill

To get your grill ready for cooking, make sure to preheat it to the desired temperature. Preheating is essential to ensure even cooking and to maximize the flavor of your turkey.

Here’s what you need to know about preheating your Traeger wood pellet grill:

  • Optimal preheating time:

  • Set your grill to the recommended temperature and allow it to preheat for 15-20 minutes.

  • This will ensure that the grill reaches the desired temperature and that the cooking surface is evenly heated.

  • Benefits of preheating:

  • Preheating helps to sear the turkey and lock in the juices, resulting in a moist and flavorful bird.

  • It also creates a consistent cooking environment, promoting even heat distribution and preventing hot spots.

Seasoning the Turkey

For a flavorful turkey, you’ll want to generously season the bird with a mixture of herbs and spices before placing it on the Traeger wood pellet grill. Seasoning is crucial to enhance the taste and juiciness of the turkey. One popular brining technique is to soak the bird in a saltwater solution overnight, allowing the flavors to penetrate the meat. If you prefer alternative seasoning methods, you can create a dry rub using a combination of herbs like rosemary, thyme, and sage, along with spices like garlic powder, paprika, and black pepper. This will create a beautiful crust on the turkey while infusing it with a delicious aroma. As you can see in the table below, there are several options for seasoning your turkey:

Brining Techniques Alternative Seasoning Methods
Saltwater solution Dry rub with herbs and spices
Buttermilk brine Citrus and herb marinade
Beer brine Honey and mustard glaze
Apple cider brine Soy sauce and ginger marinade

Once the turkey is seasoned to perfection, it’s time to preheat the Traeger grill to ensure even cooking and a beautifully charred exterior.

Advertisement

Preheating the Traeger Grill

When it comes to preheating the Traeger grill, there are a few key points to consider.

First, the optimal preheating temperature can vary depending on what you’re cooking, but generally, a temperature of 375°F to 450°F works well for most recipes.

Second, the time required for preheating will depend on the size of your grill and the outside temperature, but typically, it takes around 15 to 20 minutes to reach the desired temperature.

Optimal Preheating Temperature

The optimal preheating temperature for cooking a turkey in a Traeger wood pellet grill is 375 degrees Fahrenheit. This temperature ensures that the turkey cooks evenly and achieves a delicious, golden brown exterior while remaining juicy and tender on the inside. Here are three reasons why this temperature is ideal for cooking a turkey in a Traeger grill:

  1. Optimal Cooking Techniques: Cooking the turkey at 375 degrees Fahrenheit allows for the perfect balance between searing the skin and slow cooking the meat. This results in a crispy skin and moist, flavorful meat.

  2. Alternative Cooking Methods: While some may opt for higher temperatures to speed up the cooking process, this can lead to dry and overcooked meat. By cooking at 375 degrees Fahrenheit, you can achieve a turkey that is cooked to perfection without sacrificing tenderness.

  3. Enhanced Flavor: The Traeger wood pellet grill imparts a smoky flavor to the turkey, and cooking at 375 degrees Fahrenheit allows the flavors to develop gradually, resulting in a rich and delicious taste.

Now that we know the optimal preheating temperature, let’s move on to the next section and discuss the time required for preheating the Traeger grill.

Advertisement

Time Required for Preheating

To ensure that your turkey cooks evenly and achieves a delicious, golden brown exterior while remaining juicy and tender on the inside, it is important to preheat the Traeger grill for the recommended amount of time. The optimal preheating time for a Traeger grill is around 15-20 minutes. This allows the grill to reach the desired temperature and ensures that the heat is evenly distributed throughout the cooking chamber.

Here are some tips for efficient preheating:

  1. Clean the grill: Before preheating, make sure to clean any residue or debris from the grill grates. This will help prevent any unwanted flavors and ensure a clean cooking surface.

  2. Close the lid: Keeping the lid closed during preheating will help trap the heat inside the grill, allowing it to reach the desired temperature faster.

Tips for efficient preheating
Clean the grill
Close the lid

Benefits of Preheating

Using proper preheating techniques ensures that your food cooks evenly and retains its natural flavors.

Preheating your grill before cooking is essential for several reasons. Firstly, it helps to remove any residual dirt or debris from the grill grates, ensuring a clean cooking surface.

Secondly, preheating allows the grill to reach the desired temperature, which is crucial for proper cooking and avoiding undercooked or overcooked food. Temperature control is important when cooking a turkey on a Traeger wood pellet grill because it ensures that the meat is cooked to perfection, with a juicy and tender texture. Additionally, preheating helps to create those beautiful grill marks on the turkey, giving it that delicious smoky flavor.

Advertisement

Now that the grill is preheated, let’s move on to placing the turkey on the grill.

Placing the Turkey on the Grill

Start by carefully positioning your turkey on the grill grate of your Traeger wood pellet grill. Planning ahead is key to a successful turkey cook, so make sure you have enough room on the grill for your bird.

Preheat your Traeger to the desired temperature, usually around 325°F, and place the turkey on the grill, breast side up. Make sure the turkey is centered and not touching the sides of the grill for even cooking.

Temperature control is crucial during the cooking process, so keep an eye on the grill temperature and make adjustments as needed.

Now, let’s move on to monitoring the cooking temperature to ensure your turkey is cooked to perfection.

Advertisement

Monitoring the Cooking Temperature

Keep an eye on the temperature of the grill while the turkey is cooking to ensure it is cooked to perfection. Monitoring the cooking progress is crucial for a deliciously juicy turkey. To accurately monitor the temperature, I highly recommend using a meat thermometer.

Insert the thermometer into the thickest part of the turkey, avoiding contact with bones. This will give you an accurate reading of the internal temperature. The ideal temperature for a cooked turkey is 165°F (74°C).

As the turkey cooks, periodically check the temperature to ensure it is progressing as desired. This will help you avoid undercooking or overcooking the turkey.

Now that you have the cooking temperature under control, let’s talk about adding wood pellets for flavor.

Adding Wood Pellets for Flavor

Now that we have discussed monitoring the cooking temperature, let’s move on to the next step of cooking a turkey in a Traeger wood pellet grill: adding wood pellets for flavor.

Advertisement

One of the great benefits of using a Traeger grill is the ability to infuse your turkey with delicious smoky flavors. To achieve this, you will need to choose the right wood pellets that complement the taste of your turkey. Traeger offers a variety of wood flavors such as hickory, mesquite, apple, and cherry. Each wood imparts a unique aroma and taste to the meat.

Simply add the desired wood pellets to the pellet hopper, ensuring you have enough for the duration of the cook. The Traeger grill will automatically feed the pellets into the fire pot, creating a consistent smoke throughout the cooking process. This step is crucial in achieving that perfect smoky flavor in your turkey.

As we finish the smoking process, we can transition into the subsequent section about resting and carving the turkey.

Resting and Carving the Turkey

To ensure the juiciness of your turkey, let it rest for about 20 minutes before carving. This resting time allows the juices to redistribute throughout the meat, resulting in a more flavorful and tender bird. While it may be tempting to dig in right away, patience is key when it comes to carving your turkey.

Here are some carving techniques to ensure you get the most out of your bird:

Advertisement
  1. Start by removing the legs and wings: Use a sharp knife to separate the leg and thigh from the body, then remove the wings.

  2. Slice the breast meat: Make horizontal cuts along the breastbone to create thin slices of juicy white meat.

  3. Separate the thigh and drumstick: Cut through the joint to separate the thigh and drumstick.

Resting and carving your turkey properly is essential for a delicious and visually appealing meal. Take your time, follow these techniques, and enjoy the fruits of your labor.

Can I Cook a Turkey in a Wood Pellet Pizza Oven?

Yes, you can cook a turkey in a wood pellet pizza oven. The consistent heat and smoky flavor from the wood pellets will result in a delicious and juicy turkey. Just make sure to monitor the temperature and use a meat thermometer to ensure it’s fully cooked.

Can the Same Method Used for a Wood Pellet Pizza Oven be Applied to Cooking a Turkey in a Traeger Wood Pellet Grill?

Yes, the same method for starting wood pellet pizza oven can be applied to cooking a turkey in a Traeger wood pellet grill. Both the wood pellet pizza oven and Traeger grill utilize wood pellets as fuel, and the methods for starting the fire and controlling the temperature are similar.

Frequently Asked Questions

What Are the Advantages of Cooking a Turkey in a Traeger Wood Pellet Grill Compared to Other Grilling Methods?

The advantages of cooking a turkey in a Traeger Wood Pellet Grill are numerous. With precise temperature control, even heat distribution, and the ability to infuse smoky flavors, it’s a game-changer for turkey cooking. Here are some tips and techniques to help you achieve the perfect turkey on a Traeger.

Can I Use a Frozen Turkey for Grilling on a Traeger Wood Pellet Grill?

Using a frozen turkey on a Traeger wood pellet grill is not recommended. Thawing the turkey before grilling ensures even cooking and prevents foodborne illness. There are alternative grilling methods for turkey that can yield delicious results.

Advertisement

How Long Does It Take to Cook a Turkey on a Traeger Wood Pellet Grill?

Cooking a turkey on a Traeger Wood Pellet Grill requires careful temperature control. The cooking time will depend on the size of the turkey, but typically takes around 4-6 hours at a temperature of 325°F.

Are There Any Specific Cooking Techniques or Tips for Achieving a Crispy Skin on the Turkey When Grilling on a Traeger Wood Pellet Grill?

To achieve crispy skin on a turkey when grilling on a Traeger Wood Pellet Grill, there are specific cooking techniques you can use. Preheat the grill, apply oil or butter to the skin, and cook at a high temperature for a shorter time.

Can I Use Marinades or Brines on the Turkey Before Grilling It on a Traeger Wood Pellet Grill?

Yes, you can use marinades or brines on the turkey before grilling it on a Traeger wood pellet grill. Marinating techniques enhance flavor, while brining benefits include moisture retention and tenderizing the meat.

Conclusion

In conclusion, cooking a turkey in a Traeger wood pellet grill is a feast for the senses. The tantalizing aroma of the seasoned turkey sizzling on the grill and the mouthwatering flavor infused by the wood pellets are just the beginning. The tender, juicy meat that melts in your mouth is the ultimate reward. It’s a culinary experience like no other.

With the right techniques and a little patience, you can create a masterpiece that will leave your taste buds singing with joy. So fire up that Traeger and get ready to impress your family and friends with a truly unforgettable turkey.

Advertisement

Continue Reading

Pellet Stoves

How Do Wood Pellet Mills Work

Published

on

By

An image showcasing the intricate process of wood pellet mills in action

I have always been fascinated by the operation of wood pellet mills and the intricate process they entail.

One example that comes to mind is a case study I recently came across. In this study, a wood pellet mill was able to efficiently grind and dry the wood material, pelletize it, and then cool and screen the resulting wood pellets.

The entire process was seamless and resulted in high-quality wood pellets that were ready for packaging and storage.

In this article, I will delve into the technical details of how wood pellet mills work and explore the environmental benefits they provide.

Key Takeaways

  • Wood pellet mills grind wood into sawdust and compress it into small pellets.
  • Different types of pellet mills, such as flat die mills and ring die mills, determine the efficiency and quality of the pellets.
  • Wood pellets have high energy density, low moisture content, and reduced greenhouse gas emissions, making them an attractive option for renewable energy.
  • The raw materials for wood pellet mills, such as sawdust, wood chips, and wood shavings, are obtained from sustainable sources and contribute to the reduction of waste and reliance on fossil fuels.

The Process of Wood Pellet Production

The process of wood pellet production involves several steps. First, wood is ground into sawdust. Next, the sawdust is compressed into small pellets. After that, the pellets are cooled and packaged for distribution. The design of pellet mills is important in determining the efficiency and quality of the pellets. There are different types of pellet mills available, such as flat die and ring die designs. Flat die mills are commonly used for small-scale production, while ring die mills are preferred for large-scale operations due to their higher capacity and durability.

Wood pellets have many advantages as a biomass energy source. They have a high energy density, low moisture content, and reduced greenhouse gas emissions compared to traditional fossil fuels. These qualities make wood pellets an attractive option for renewable energy.

Advertisement

Now, let’s discuss the raw materials used in wood pellet mills. These raw materials are crucial for producing high-quality pellets.

Raw Materials for Wood Pellet Mills

When it comes to wood pellet production, understanding the common raw materials used is crucial. These materials typically include sawdust, wood chips, and wood shavings, which are obtained from various sources such as sawmills, woodworking factories, and furniture manufacturers.

The pellet production process then involves grinding and drying the raw materials before compressing them into pellets, resulting in a highly efficient and sustainable fuel source.

Additionally, the use of wood pellets offers numerous environmental sustainability benefits, including reduced greenhouse gas emissions and reliance on fossil fuels, making it an attractive alternative for both residential and industrial heating.

Common Raw Materials

You can use different types of biomass, such as sawdust, wood chips, or agricultural waste, as raw materials for wood pellet mills. These materials are commonly used in wood pellet production techniques due to their availability and suitability for the process.

Advertisement

Sawdust, which is a byproduct of woodworking, is a popular choice because of its high lignin content, which acts as a natural binder during pelletization. Wood chips, on the other hand, are larger pieces of wood that can be obtained from logging or sawmills. Agricultural waste, including straw, corn stalks, and sugarcane bagasse, can also be used as raw materials.

These alternative uses for raw materials not only reduce waste but also contribute to the sustainability of the pellet production process. This ensures that the wood pellet industry remains environmentally friendly and economically viable.

Transitioning into the subsequent section about the "pellet production process," it is important to understand the various steps involved in turning these raw materials into wood pellets.

Pellet Production Process

Using biomass materials, such as sawdust, wood chips, or agricultural waste, can be a sustainable and environmentally friendly way to produce wood pellets. One of the major benefits of using wood pellets as a renewable energy source is their high energy density. Wood pellets have a higher energy content per unit mass than other biomass fuels, making them more efficient and cost-effective.

Wood pellet mills play a crucial role in the production process. These mills use specialized machinery to compress the biomass materials into compact pellets. The process involves grinding, drying, and pelletizing the raw materials, which are then cooled and packaged for use. Wood pellet mills can produce large quantities of pellets in a short period, making them a reliable and efficient fuel source.

Advertisement

Transitioning to the subsequent section about environmental sustainability benefits, the production of wood pellets helps reduce greenhouse gas emissions and dependence on fossil fuels.

Environmental Sustainability Benefits

The high energy density of wood pellets makes them an efficient and cost-effective renewable energy source. Here are four reasons why wood pellets contribute to environmental sustainability and the reduction of carbon emissions:

  1. Renewable Energy Source: Wood pellets are made from sustainably sourced wood, such as sawdust and wood chips, which are byproducts of the timber industry. By utilizing this otherwise wasted material, we are reducing our reliance on non-renewable fossil fuels.

  2. Carbon Neutral: When wood pellets are burned, they release carbon dioxide, but the amount emitted is equal to the carbon absorbed by the trees during their growth. This creates a carbon-neutral cycle, minimizing the net increase of greenhouse gases in the atmosphere.

  3. Lower Emissions: Wood pellet combustion produces significantly fewer emissions compared to traditional fossil fuels like coal. This helps to improve air quality and reduce the overall carbon footprint.

  4. Waste Reduction: Wood pellets are manufactured from wood waste, diverting it from landfills and reducing the environmental impact of waste disposal.

Transition: To produce wood pellets, the first step involves grinding and drying the wood material.

Grinding and Drying the Wood Material

In the grinding process, wood material is broken down into smaller particles to facilitate the pelletizing process. This involves the use of a hammer mill, which uses rotating hammers to strike and grind the wood.

Wood drying is a crucial step in the pellet production process as it reduces the moisture content of the wood material, making it easier to grind and improving the overall quality of the pellets produced.

Advertisement

Grinding Process Explained

To understand how wood pellet mills work, you’ll want to know about the grinding process. This crucial step in the production of wood pellets involves reducing the raw material into a fine powder. Here are the grinding techniques used in pellet mills to ensure optimal pellet mill efficiency:

  1. Hammer mills: These machines use rotating hammers to pulverize the wood material, resulting in a consistent and uniform particle size.

  2. Knife mills: Equipped with sharp blades, knife mills cut the wood into small pieces, ensuring a homogeneous and efficient grinding process.

  3. Impact mills: By utilizing high-speed rotating blades or hammers, impact mills shatter the wood material into fine particles, enhancing the overall pellet mill efficiency.

The grinding process is vital in preparing the wood material for pellet production, but it is closely connected to the subsequent step – wood drying. Properly dried wood ensures optimal pellet quality and combustion efficiency.

Importance of Wood Drying

After the grinding process, it is crucial to ensure that the wood material has the right moisture content before it can be pelletized. Wood moisture refers to the amount of water present in the wood, and it plays a vital role in the pelletizing process. Wood with high moisture content is difficult to pelletize as it can lead to poor pellet quality and increased energy consumption during the pellet mill operation.

To reduce the wood moisture, various drying methods are employed. These methods include natural drying, kiln drying, and air drying. Natural drying involves exposing the wood to the sun and wind, while kiln drying utilizes heat and controlled humidity levels to remove moisture. Air drying involves stacking the wood and allowing air to circulate around it.

By reducing the wood moisture to the optimal level, the wood becomes more suitable for pellet production. It ensures that the pellets have the desired density and durability.

Advertisement

Now, let’s move on to the next section and explore the process of pelletizing the wood material.

Pelletizing the Wood Material

During the pelletizing process, the wood material is compressed and shaped into small pellets. Wood pellet density and the techniques used for pelletizing play a crucial role in determining the quality and efficiency of the final product.

Achieving the desired wood pellet density requires carefully selecting the raw materials, which should have a suitable moisture content and particle size distribution. Pelletizing techniques such as pressure and heat are employed to soften the lignin in the wood, allowing it to bind the particles together.

The compressed wood material is then forced through small holes in a die, creating uniform pellets of the desired size and shape. These pellets are then ready for the next stage of the process, which involves cooling and screening to ensure their quality and readiness for use.

Cooling and Screening the Wood Pellets

You can ensure the quality of the wood pellets by carefully cooling and screening them. Cooling efficiency is crucial in maintaining the integrity and durability of the pellets. Here are two methods to achieve optimal cooling:

Advertisement
  • Air Cooling:

  • The hot wood pellets are transferred to a cooling chamber.

  • Cold air is blown over the pellets, removing excess heat.

  • The cooled pellets are then ready for screening.

  • Water Cooling:

  • The wood pellets are submerged in a water bath.

  • The water absorbs the heat from the pellets, rapidly cooling them.

  • The pellets are then separated from the water and proceed to the screening stage.

Screening methods further enhance the quality of the wood pellets by removing any fines or oversized particles. This ensures uniform size and consistency, improving combustion efficiency.

Now, let’s delve into the next section, where we will explore the packaging and storage of wood pellets.

Packaging and Storage of Wood Pellets

The packaging and storage of wood pellets is crucial for maintaining their quality and preventing moisture damage.

One of the main concerns when it comes to packaging challenges is ensuring that the pellets are sealed properly to keep out any moisture. Moisture can lead to the degradation of the pellets, causing them to crumble or mold. To address this issue, storage solutions such as using waterproof bags or containers with airtight seals are commonly employed.

Additionally, it is important to store wood pellets in a dry and well-ventilated area to further prevent moisture build-up. Proper labeling and stacking techniques are also essential to ensure efficient storage and easy identification.

Advertisement

By implementing these packaging and storage solutions, the quality of wood pellets can be preserved, ultimately leading to better performance and customer satisfaction.

Transitioning into the subsequent section about the maintenance and troubleshooting of wood pellet mills, it is equally important to ensure the proper functioning and upkeep of the machinery to produce high-quality pellets.

Maintenance and Troubleshooting of Wood Pellet Mills

To keep your wood pellet mill running smoothly, regular maintenance is essential. Proper maintenance techniques can help prevent breakdowns and ensure optimal performance of your mill.

One important maintenance task is cleaning the mill regularly to remove any dust, debris, or foreign objects that may accumulate and cause clogging or damage.

Lubricating the moving parts, such as the rollers and bearings, is also crucial to reduce friction and extend the lifespan of these components.

Advertisement

Additionally, regularly inspecting the electrical connections and replacing worn-out or damaged parts can help prevent electrical issues and improve safety.

Troubleshooting tips can also be helpful in addressing common problems, such as uneven pellet size or low production rates.

By following these maintenance techniques and troubleshooting tips, you can maximize the efficiency and lifespan of your wood pellet mill.

Transition: In addition to the maintenance and troubleshooting aspects, wood pellet mills also offer significant environmental benefits.

Environmental Benefits of Wood Pellet Mills

In addition to their maintenance and troubleshooting aspects, wood pellet mills also have significant environmental benefits. Here are three reasons why wood pellet mills are considered an environmentally-friendly choice:

Advertisement
  1. Reducing Carbon Emissions: Wood pellets are made from renewable biomass sources such as sawdust, wood chips, or agricultural waste. When burned as fuel, they release significantly fewer greenhouse gas emissions compared to fossil fuels like coal or oil. This helps to reduce the overall carbon footprint and combat climate change.

  2. Renewable Energy Source: Wood pellets are derived from sustainable forestry practices, where trees are responsibly harvested and replanted. Unlike fossil fuels, which are finite resources, wood pellets offer a renewable energy source that can be continuously produced and utilized without depleting natural resources.

  3. Waste Reduction: Wood pellet mills help to repurpose and utilize wood waste that would otherwise end up in landfills. By converting this waste into valuable fuel, wood pellet mills contribute to waste reduction and promote a more circular economy.

Overall, wood pellet mills play a crucial role in reducing carbon emissions, providing a renewable energy source, and minimizing waste, making them an environmentally-friendly option for meeting energy needs.

What is the process of making wood pellets in a wood pellet mill?

At wood pellet mill processes, raw materials like sawdust or wood chips are first ground into small particles. Then, the particles are fed into the wood pellet mill where they are compressed and heated to form pellets. The pellets are then cooled and screened before being ready for use.

What Are the Key Components of a Wood Pellet Mill and How Do They Function?

A wood pellet mill operation consists of several key components including the hammer mill for grinding raw materials, the pellet machine for compressing the materials into pellets, and the cooler and dryer for reducing moisture content. The final step involves the packaging machine for storing and transporting the finished wood pellets.

Frequently Asked Questions

Are Wood Pellets Safe to Use for Heating and Cooking?

Yes, wood pellets are safe to use for heating and cooking. They have environmental benefits and are cost-effective compared to other options. They provide efficient heat and are a renewable energy source.

How Long Do Wood Pellet Mills Typically Last?

Wood pellet mills typically last for several years, with the longevity depending on various factors such as maintenance, usage, and quality of the machine. These factors can significantly affect the lifespan of wood pellet mills.

Advertisement

Can Wood Pellet Mills Use Different Types of Wood as Raw Materials?

Different types of wood suitable for wood pellet production include hardwoods, softwoods, and agricultural residues. Benefits of using different types of wood in wood pellet mills include increased energy efficiency and reduced emissions.

What Is the Average Production Capacity of a Wood Pellet Mill?

On average, a wood pellet mill can produce around [insert production capacity] of wood pellets per hour. This production capacity is determined by the size and efficiency of the mill.

Are There Any Regulations or Certifications for Wood Pellet Mills to Ensure Their Quality and Environmental Impact?

Yes, there are regulations and certifications for wood pellet mills to ensure their quality and minimize their environmental impact. These measures are in place to promote sustainable practices and protect the environment.

Conclusion

So there you have it, folks. Wood pellet mills, the magical machines that turn wood into little nuggets of fuel. It’s truly a fascinating process.

From grinding and drying the wood material to pelletizing it and finally cooling and screening the wood pellets. And let’s not forget about the packaging and storage, because who doesn’t love a neatly packed bag of wood pellets?

Advertisement

But the real star of the show is the maintenance and troubleshooting of these mills, because let’s face it, nothing is perfect. But fear not, because the environmental benefits of wood pellet mills make it all worth it.

So next time you cozy up by the fire, remember the humble wood pellet mill that made it all possible.

Continue Reading

Pellet Stoves

How Do You Adjust a Pellet Stove to Hard Wood

Published

on

By

An image showcasing a hand turning the pellet stove's air intake control knob to decrease the opening size, while another hand adjusts the fuel feed rate dial to increase the flow, all against a backdrop of stacked hardwood pellets

Having ample experience using pellet stoves, I frequently adjust mine to burn hardwood pellets efficiently. Although it may seem overwhelming to differentiate between hardwood and softwood pellets initially, with the appropriate expertise and strategies, this obstacle can be easily conquered.

In this article, I will guide you through the process of understanding the basics of pellet stove adjustments, identifying the differences between softwood and hardwood pellets, and fine-tuning the feed rate and air intake for optimal hardwood burning.

Plus, I’ll share tips on maintenance and cleaning to ensure longevity and performance.

Key Takeaways

  • Choose hardwood pellets with low moisture content for better combustion
  • Look for pellets made from dense hardwoods like oak or hickory for higher heat output
  • Increase feed rate slightly if stove is not producing enough heat
  • Decrease feed rate gradually if stove is producing too much heat

Understanding the Basics of Pellet Stove Adjustments

To understand the basics of pellet stove adjustments, you’ll need to familiarize yourself with the different settings and options available. Proper pellet stove troubleshooting begins with understanding how to control the temperature.

Most pellet stoves have a temperature control dial or digital display that allows you to adjust the heat output. By turning the dial or using the controls, you can increase or decrease the temperature as needed. It’s important to remember that each pellet stove may have slightly different controls or settings, so it’s best to consult the manufacturer’s manual for specific instructions.

Now that we understand the basics of pellet stove adjustments, let’s move on to identifying the differences between softwood and hardwood pellets.

Advertisement

Identifying the Differences Between Softwood and Hardwood Pellets

Identifying the differences between softwood and hardwood pellets can help improve the performance of your stove. When choosing the right pellet fuel for your stove, it is important to consider the heat output of the pellets.

Softwood pellets, made from coniferous trees like pine or spruce, tend to have a higher heat output compared to hardwood pellets. This is because softwood has a higher resin content, which results in a more efficient burn.

On the other hand, hardwood pellets, made from trees like oak or maple, may have a lower heat output but they burn longer and produce less ash. Understanding these differences can help you make an informed decision when selecting the pellets for your stove.

Now, let’s discuss adjusting the feed rate for optimal hardwood burning.

Adjusting the Feed Rate for Optimal Hardwood Burning

When adjusting the feed rate for optimal hardwood burning, it’s important to find the right balance for consistent heat output. Hardwood pellets can provide a longer burn time and higher heat output compared to softwood pellets.

Advertisement

To ensure efficient burning, consider the following:

  • Hardwood pellet selection:
  • Choose hardwood pellets with low moisture content for better combustion.
  • Look for pellets made from dense hardwoods like oak or hickory for higher heat output.

Troubleshooting common feed rate issues:

  • If the stove is not producing enough heat, increase the feed rate slightly.
  • If the stove is producing too much heat, decrease the feed rate gradually.

By adjusting the feed rate accordingly, you can optimize the burning process and achieve consistent heat output.

Now, let’s move on to fine-tuning the air intake for efficient wood combustion.

Fine-Tuning the Air Intake for Efficient Wood Combustion

For optimal wood combustion, make sure you find the right balance in adjusting the air intake. Proper ventilation is of utmost importance to ensure efficient wood combustion.

When the air intake is adjusted correctly, it allows for the right amount of oxygen to reach the fire, promoting complete and efficient combustion. This helps in maximizing heat output and minimizing the production of harmful pollutants.

Additionally, it is crucial to consider the moisture content of the wood pellets used for combustion. High moisture content can negatively impact combustion efficiency, leading to reduced heat output and increased smoke emissions. Therefore, it is essential to use dry and seasoned wood pellets for optimal performance.

Advertisement

By fine-tuning the air intake and using low moisture content wood pellets, you can achieve efficient wood combustion and a more environmentally friendly operation.

Ensuring proper maintenance and cleaning further enhances longevity and performance, keeping your pellet stove operating at its best.

Ensuring Proper Maintenance and Cleaning for Longevity and Performance

Proper maintenance and cleaning are essential for ensuring the longevity and optimal performance of your pellet stove. Regular inspections are of utmost importance to identify any issues or potential problems that may affect its functionality. By conducting these inspections, you can address any concerns promptly and prevent further damage or breakdowns.

Additionally, using high-quality pellets can greatly enhance the performance of your stove. High-quality pellets burn more efficiently, producing more heat and leaving behind less residue. This not only improves the overall performance of your stove but also reduces the frequency of cleanings and maintenance required.

Therefore, investing in good quality pellets is not only beneficial for your stove but also saves you time and money in the long run.

Advertisement

Is Adjusting a Pellet Stove to Burn Hard Wood Different from Installing a Wood Pellet Stove?

Adjusting a pellet stove to burn hard wood is different from installing a wood pellet stove. The adjustment involves changing the fuel type and may require modifying the stove settings. On the other hand, wood pellet stove installation steps include assembling the stove, positioning the vent, and connecting it to the flue.

Can I Use Hard Wood Instead of Pellets in a Wood Pellet Stove?

Yes, you can use hard wood instead of pellets in a wood pellet stove. However, it is important to follow the manufacturer’s recommendations for fuel type to ensure efficient and safe operation. For more information, consult a wood pellet stove installation guide.

Frequently Asked Questions

Can I Use Softwood Pellets in a Pellet Stove Designed for Hardwood Pellets?

I can burn softwood pellets in my pellet stove designed for hardwood pellets, but there are advantages to using hardwood pellets. They tend to have higher heat output and produce less ash. Adjusting the stove may be necessary for optimal performance.

How Often Should I Clean My Pellet Stove?

When troubleshooting a pellet stove not igniting, it’s important to check the fuel supply, igniter, and air intake. Signs that a pellet stove needs cleaning include reduced heat output and excessive ash buildup.

What Kind of Maintenance Is Required for a Pellet Stove?

To properly maintain a pellet stove, regular maintenance is required. This includes cleaning the burn pot, removing ash buildup, and checking the exhaust vent for blockages. Troubleshooting issues may involve adjusting air intake or checking the fuel supply.

Advertisement

Can I Adjust the Feed Rate on My Pellet Stove to Burn Different Types of Wood?

To optimize pellet stove efficiency, I adjust the feed rate according to the type of wood I’m burning. By tweaking this setting, I can control the burn rate and ensure efficient combustion.

Are There Any Safety Precautions I Should Take When Adjusting My Pellet Stove?

When adjusting a pellet stove, it is important to take safety precautions. Ensure the stove is turned off and cooled down before making any adjustments. Follow the manufacturer’s instructions and wear protective gear if necessary.

Conclusion

In conclusion, adjusting a pellet stove to burn hardwood requires a combination of knowledge and precision. By understanding the basics of pellet stove adjustments and the differences between softwood and hardwood pellets, one can optimize the feed rate and air intake for efficient wood combustion.

Regular maintenance and cleaning are also essential for the longevity and performance of the stove.

So, if you’re looking to harness the full potential of your pellet stove with hardwood, don’t forget to fine-tune and maintain it like a pro.

Advertisement

Continue Reading

Trending