As someone who’s passionate about pizza, my pursuit has always been to find the ideal method for mimicking the enticingly crisp and smoky taste in my homemade pizzas. It was through this search that I stumbled upon the amazing results that can be obtained by using a wood pellet pizza oven.
This ingenious contraption not only delivers mouthwatering results but also adds a touch of authenticity to your culinary creations. In this article, we’ll delve into the art of using a wood pellet pizza oven, from choosing the right pellets to mastering temperature control and everything in between.
Get ready to elevate your pizza game like never before!
Key Takeaways
- Choose high-quality wood pellets designed for pizza ovens and consider the type of wood and its flavor profile.
- Properly light the oven by arranging the pellets in the firebox, igniting them from multiple sides, and ensuring proper ventilation.
- Preheat the oven to around 500°F (260°C) for even cooking and a crispy crust, and monitor the temperature throughout the cooking process.
- Prepare and top the pizza with a variety of flavors and toppings, using flour sparingly to prevent sticking, and transferring it onto a preheated pizza stone using a well-floured pizza peel.
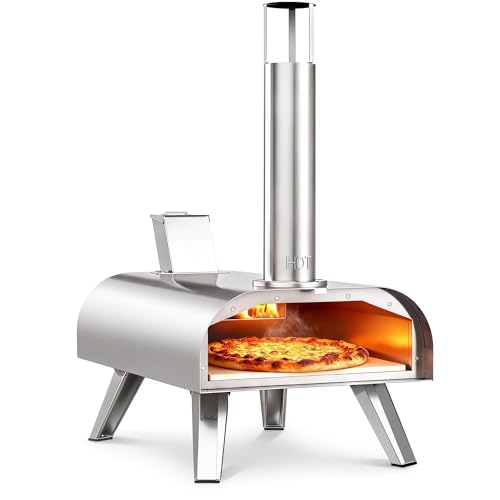
BIG HORN 12" Multi-Fuel Outdoor Pizza Oven Reach up to 1110℉– 3-in-1 Wood,Gas&Electric Compatible(Burners Sold Separately),Pellet Pizza Oven Portable Pizza Maker for Backyard,Camping&Tailgating,Silver
- Material: Premium stainless steel construction
- Fuel Compatibility: Wood, gas, electric options
- Cooking Temperature: Reaches up to 1110°F
As an affiliate, we earn on qualifying purchases.
As an affiliate, we earn on qualifying purchases.
Choosing the Right Wood Pellets
When choosing the right wood pellets, it’s important to consider the type of wood and its flavor profile. Different woods impart unique flavors to your pizzas, enhancing your overall cooking experience.
Some popular wood pellet pizza oven brands include Traeger, Camp Chef, and Green Mountain Grills. These brands offer a variety of wood pellet options such as oak, cherry, hickory, and applewood. Each wood type adds its own distinct taste to the final dish.
Using wood pellets in your pizza oven has several benefits. They provide consistent heat and maintain steady temperatures throughout the cooking process, resulting in evenly cooked pizzas with a delicious smoky flavor. Additionally, they are eco-friendly and produce less ash compared to traditional firewood.
Now that we have chosen our ideal wood pellets, let’s move on to preparing the wood pellet pizza oven for use…
Preparing the Wood Pellet Pizza Oven
When it comes to preparing the wood pellet pizza oven, there are three key points to consider: choosing the right pellets, lighting the oven, and maintaining optimal temperature.
The first step is selecting high-quality wood pellets that are specifically designed for use in pizza ovens.
Once you have the right pellets, you’ll need to properly light the oven using a fire starter or lighter.
Choosing the Right Pellets
To choose the right pellets for your wood pellet pizza oven, you’ll want to consider factors such as flavor, heat output, and ash production.
When it comes to wood pellet brands, there are several options available in the market. Each brand offers its unique blend of hardwoods that contribute to different flavor profiles. Some brands may have a stronger smoky taste, while others offer a milder flavor. It’s important to choose pellets that align with your personal preference and the kind of pizza you want to create.
Additionally, consider the heat output of the pellets as it will affect the cooking time and temperature control.
Lastly, keep in mind the level of ash production as this can impact maintenance and cleaning requirements.
Now that you’ve chosen your pellets, let’s move on to lighting the oven without wasting any time.
Lighting the Oven
Once you’ve selected the right pellets, it’s time to light up your oven and start cooking. Lighting a wood pellet pizza oven requires some techniques and troubleshooting tips to ensure a successful fire.
Here are some key steps to help you get started:
-
Ensure proper ventilation: Before lighting the oven, make sure there is enough airflow by opening the damper or chimney.
-
Arrange the pellets: Create a small mound of pellets in the center of the firebox, leaving space for air circulation.
-
Ignite the pellets: Use a torch or lighter to ignite the pellets from multiple sides for an even burn.
-
Monitor and adjust: Keep an eye on the flame and adjust as needed by adding more pellets or adjusting airflow.
Maintaining Optimal Temperature
Maintaining optimal temperature in your wood pellet pizza oven requires monitoring the flame and making adjustments as needed. To ensure a perfectly cooked pizza, it is crucial to maintain consistent heat throughout the cooking process.
One common issue that may arise is temperature fluctuations, which can lead to unevenly cooked pizzas. Troubleshooting these fluctuations involves checking for any obstructions or blockages in the air vents, as well as adjusting the airflow and fuel supply accordingly.
Additionally, regularly cleaning out ash buildup from previous uses can help maintain proper airflow and prevent temperature irregularities. By staying vigilant and making necessary adjustments, you can ensure that your wood pellet pizza oven maintains a steady temperature for consistently delicious pizzas.
Now, let’s move on to lighting the wood pellets…
Lighting the Wood Pellets
Before lighting the wood pellets, make sure you have enough ventilation and a clear area around the pizza oven. Lighting techniques can vary depending on the type of wood pellets you’re using.
To start, make sure the pellet hopper is filled with enough fuel to create a steady flame. Next, open the draft control and ignite a fire starter near the pellets. Once lit, close the door to retain heat and allow the flames to spread evenly.
If you encounter any issues during this process, here are some troubleshooting tips: check for blockages in the fuel delivery system, ensure proper air circulation by adjusting the draft control, and verify that there’s no debris hindering ignition.
Now that we’ve successfully lit our wood pellets, let’s move on to preheating the pizza oven.
Preheating the Pizza Oven
When it comes to preheating a pizza oven, two key factors play a crucial role in achieving the perfect cooking environment: the optimal preheating temperature and the recommended preheating time.
The optimal preheating temperature is the ideal heat level at which your pizza oven should reach before you start baking your pizzas. This temperature ensures that the pizza cooks evenly, with a crispy crust and perfectly melted toppings.
Additionally, following the recommended preheating time ensures that your oven reaches its desired temperature and allows for any residual moisture to evaporate, resulting in a more efficient and effective cooking process.
Optimal Preheating Temperature
To get the best results, you’ll want to make sure your wood pellet pizza oven is preheated to the optimal temperature. Preheating your pizza oven properly is essential for achieving that crispy, perfectly cooked crust and even heat distribution. Here are three reasons why preheating is important:
-
Even Cooking: Preheating allows the oven to reach a consistent temperature throughout, ensuring your pizza cooks evenly from edge to center.
-
Faster Cooking Time: By preheating your oven, you reduce the overall cooking time since it starts at an already hot temperature.
-
Crispier Crust: The initial burst of high heat from preheating helps create a crisp and golden-brown crust on your pizza.
Preheating Time Recommendation
For the best results, make sure you’re preheating your oven for the recommended amount of time. Preheating is a crucial step in achieving a perfectly cooked wood-fired pizza. The optimal preheating temperature for a wood pellet pizza oven is around 500°F (260°C). This allows the oven to reach an ideal cooking environment where the dough will crisp up nicely while the toppings cook evenly.
To ensure accuracy, it’s important to monitor the temperature closely using an oven thermometer. This will help you make any necessary adjustments and maintain a consistent heat throughout the cooking process. By following these guidelines, you can ensure that your pizza cooks to perfection with a crispy crust and melty toppings.
Now that our oven is preheated to perfection, let’s move on to stretching and shaping the pizza dough…
Stretching and Shaping the Pizza Dough
First, you’ll want to gently stretch and shape the pizza dough for a thin crust. This is an essential step in achieving the perfect pizza.
Here are some tips and techniques for working with pizza dough:
-
Be patient: Allow the dough to rest at room temperature for about 30 minutes before rolling it out. This will make it easier to work with and prevent it from springing back.
-
Use flour sparingly: Dust your work surface and hands lightly with flour to prevent sticking, but be careful not to add too much as it can toughen the dough.
-
Stretch, don’t press: Use your fingertips to gently stretch the dough from the center towards the edges, rotating it as you go. Avoid using a rolling pin as it can compress the air bubbles in the dough.
-
Troubleshooting: If your dough tears or becomes too elastic, let it rest for a few minutes before continuing. You can also try stretching smaller portions of dough at a time.
With your perfectly stretched and shaped pizza crust ready, let’s move on to topping the pizza without delay.
Topping the Pizza
Now that I have stretched and shaped the pizza dough, it’s time to move on to the fun part – topping the pizza! This is where you can get creative and experiment with different flavors. Here are some topping ideas that will help you create unique and delicious pizzas in your wood pellet pizza oven:
| Topping Ideas | Description |
|---|---|
| Margherita | Classic combination of tomato, mozzarella, and basil leaves |
| BBQ Chicken | Tangy barbecue sauce, grilled chicken, red onions, and cilantro |
| Mediterranean | Olive oil base, feta cheese, sun-dried tomatoes, spinach, and kalamata olives |
| Hawaiian | Ham, pineapple chunks, tomato sauce, and mozzarella cheese |
Feel free to mix and match toppings to suit your taste preferences. Once you’ve added your desired toppings onto the stretched dough, it’s time to slide the pizza onto the preheated pizza stone without disturbing its shape.
Now let’s move on to sliding the pizza onto the pizza stone…
Sliding the Pizza Onto the Pizza Stone
To slide the pizza onto the pizza stone, carefully place it on a well-floured pizza peel. This sliding technique is crucial to ensure that your pizza doesn’t lose its shape or toppings when transferring it into the wood pellet pizza oven.
When choosing a pizza peel, you have two options: wooden or metal. A wooden peel provides a traditional feel and allows for easy sliding due to its natural surface. On the other hand, a metal peel offers a smooth surface that prevents sticking and makes it easier to maneuver the pizza.
Whichever option you choose, make sure to dust it with flour before placing the dough on top. This will create a barrier between the dough and the peel, making it effortless to slide onto the hot stone without any mishaps.
Now that we have successfully transferred our pizza onto the stone, it’s time to move on to monitoring and adjusting the temperature…
Monitoring and Adjusting the Temperature
Once the pizza is on the stone, you’ll want to keep an eye on the temperature and make any necessary adjustments. Monitoring the temperature is crucial for achieving a perfectly cooked wood-fired pizza. With a wood pellet pizza oven, it’s important to maintain a consistent temperature throughout the cooking process.
I recommend using an oven thermometer to accurately monitor the internal temperature of the oven. This will ensure that your pizza cooks evenly and avoids any burnt or undercooked spots. If you notice that the temperature is too high or too low, you can adjust it by adding more or less wood pellets accordingly. It’s essential to maintain a steady heat for optimal results.
Now that we have discussed how to monitor and adjust the temperature, let’s move on to checking for doneness without interrupting our cooking process.
Checking for Doneness
Checking if the pizza is done can be easily done by using a pizza peel to lift the edge of the crust and checking if it is golden brown and crispy. This simple technique allows me to monitor the cooking time and ensure that my pizza comes out perfectly cooked every time.
Here are three things I look for when checking for doneness:
- Crust color: I want the crust to have a beautiful golden brown color all around, indicating that it has been cooked evenly.
- Texture: By lifting the edge of the crust with a pizza peel, I can feel if it is crispy on the outside and still tender on the inside.
- Cheese melt: I also check if the cheese has melted completely and has turned bubbly and slightly browned.
By following these guidelines, I can confidently determine if my pizza is ready to be taken out of the wood pellet pizza oven.
Now, let’s move on to cleaning and maintaining this wonderful appliance without any delay.
Cleaning and Maintaining the Wood Pellet Pizza Oven
When cleaning and maintaining your wood pellet pizza oven, it’s important to remove any leftover food debris and ash from the cooking surface.
To do this, start by allowing the oven to cool completely. Once cooled, use a brush or scraper to gently remove any remnants of food or ash from the cooking grates. Be sure to check the burn pot for any build-up as well.
Next, wipe down the exterior of the oven with a damp cloth and mild detergent if necessary. For deeper cleaning, you can use a specialized oven cleaner made specifically for wood pellet ovens.
It’s also essential to regularly inspect and clean the chimney and vents to ensure proper airflow.
Frequently Asked Questions
Can I Use Regular Wood in a Wood Pellet Pizza Oven?
Yes, you can use regular wood in a wood pellet pizza oven. However, there are pros and cons to consider. Regular wood may produce more smoke and require more maintenance, but it can also add a unique flavor to your pizzas.
How Long Does It Take for the Wood Pellets to Light and Reach the Desired Temperature?
Lighting time for wood pellets can vary, but it typically takes around 10-15 minutes to ignite and reach the desired temperature. It’s important to follow the manufacturer’s instructions for optimal temperature and ensure proper airflow for efficient combustion.
Do I Need to Preheat the Pizza Stone Before Sliding the Pizza Onto It?
Sure, I can answer that. Preheating the pizza stone is a personal preference. It helps to create a crispy crust and even cooking. However, if you’re short on time, you can also slide the pizza onto a cold stone and adjust cooking times accordingly.
Can I Use Store-Bought Pizza Dough Instead of Making My Own?
Yes, you can definitely use store-bought pizza dough as an alternative to making your own. It’s convenient and saves time. You can also explore other options like using frozen pizza dough or experimenting with different crusts.
How Often Should I Clean and Maintain the Wood Pellet Pizza Oven?
I clean and maintain my wood pellet pizza oven regularly to ensure it’s in top condition. Cleaning frequency depends on usage, but I recommend a thorough cleaning every few months. Some maintenance tips include checking for any damage or wear and tear, cleaning the burn pot and ash drawer, and lubricating moving parts if necessary.
Conclusion
In conclusion, using a wood pellet pizza oven is truly a game-changer for pizza lovers. The process may seem intricate at first, but with the right knowledge and attention to detail, you’ll be able to create mouthwatering pizzas that rival your favorite pizzeria.
So why settle for average when you can elevate your pizza-making experience? With every slice devoured, the wood-fired flavors will transport you to a place of culinary bliss. Embrace this newfound cooking technique and ignite your passion for perfect pizzas.