Pellet Stoves
Danger Lurks: Signs and Fixes for Leaking Pellet Stoves
![](https://bestsmallwoodstoves.com/wp-content/uploads/2023/09/31V1Zkjjf-L._SL500-1.jpg)
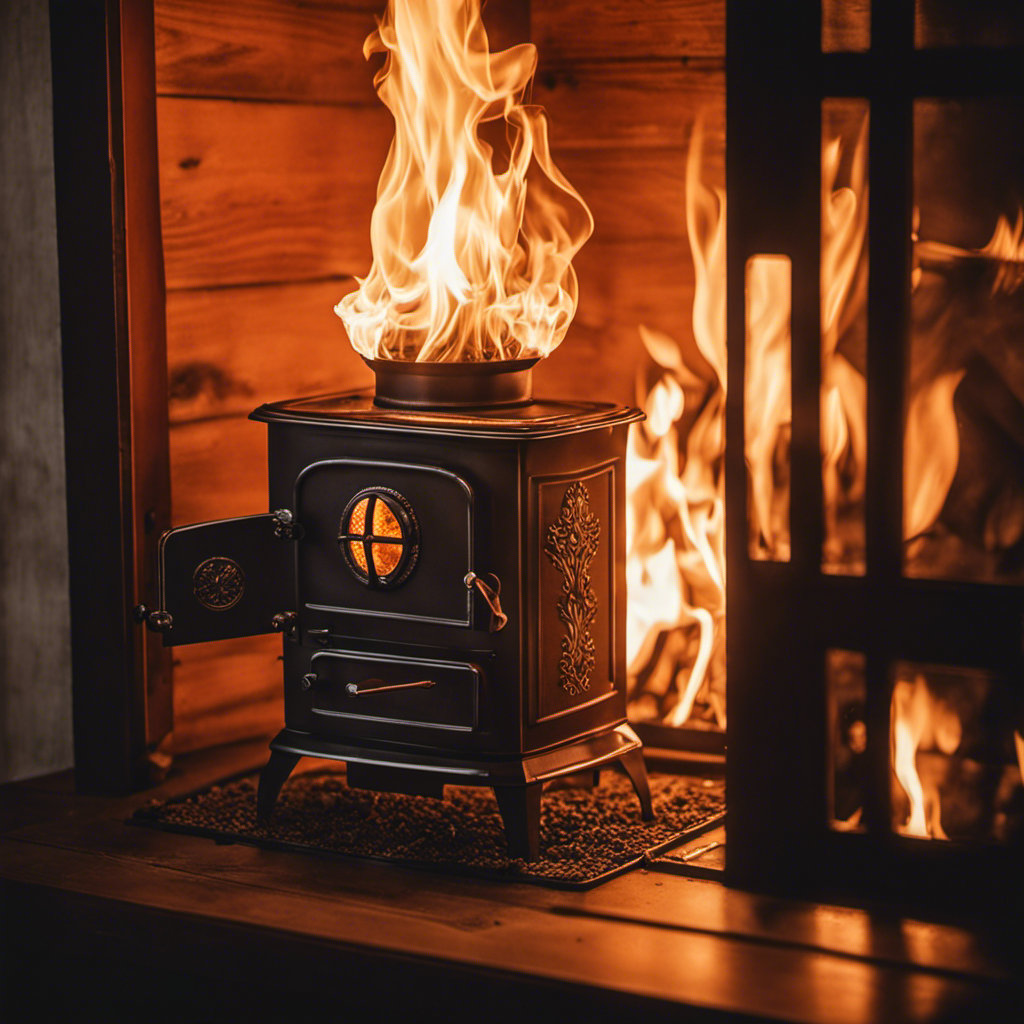
This article will delve into the indicators and hazards of leaking pellet stoves, along with strategies for detecting and repairing these leaks.
We understand the importance of maintaining a safe and efficient heating system in our homes. Leaking pellet stoves can pose serious risks, such as carbon monoxide poisoning, and compromise the stove’s longevity.
By identifying the signs and taking proactive measures, we can ensure the safety of our households. Join us as we delve into the world of leaking pellet stoves and find the fixes to keep our homes warm and secure.
Key Takeaways
- Signs of pellet stove leaks include soot leaking through holes, strong smell of smoke, trails of soot from vents, and light shining through the stove.
- Pellet stove leaks can lead to severe CO2 poisoning as CO2 gases are released along with soot.
- Regular maintenance is important to prevent leaks and ensure safety, including inspecting and maintaining seals, cleaning the stove, and checking for hidden holes.
- Pellet stoves offer benefits such as high energy efficiency, environmentally friendly fuel source, cost-effectiveness, and consistent heat distribution.
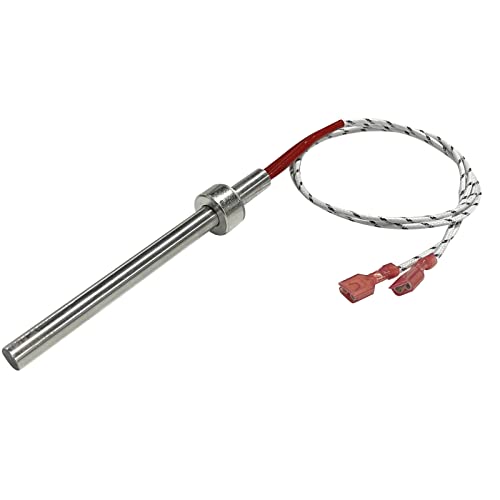
Signs of Soot Leakage
We noticed trails of soot from the vents, indicating possible leakage in the pellet stove. Soot leaking through holes in the stove is a sign of potential danger. It’s crucial to address this issue promptly to prevent CO2 poisoning and ensure the safety of everyone in the room.
CO2 gases are released along with the soot, and they’re odorless, colorless, and dangerous. To prevent CO2 poisoning, regular maintenance is essential. Thoroughly test the pellet stove system before use and inspect and maintain seals at connection points. Clean the stove to reveal any hidden holes and use properly rated duct tape to seal vents.
Regular cleaning and inspection of the stove will help identify and fix any leaks, ensuring the longevity of the stove and preventing potential CO2 poisoning.
Strong Smell of Smoke
When we smell a strong odor of smoke in the room, it’s a clear indication that something is wrong with the pellet stove. This smell can be quite unpleasant and can also be a sign of potential dangers.
To prevent smoke odor and address ventilation issues, here are four important steps to take:
-
Check the air intake: Ensure that the air intake isn’t blocked by any debris or obstructions. A blocked intake can lead to poor combustion and an increase in smoke production.
-
Clean the exhaust system: Regularly clean the exhaust system, including the chimney and vent pipes, to prevent the buildup of soot and other residues. A clean exhaust system allows for proper airflow and reduces the chances of smoke entering the room.
-
Inspect and maintain seals: Check the seals around the pellet stove and its components. Any gaps or leaks can contribute to smoke odor. Replace any deteriorated seals to ensure proper ventilation.
-
Install carbon monoxide detectors: Carbon monoxide (CO) is a silent and deadly gas that can be emitted from a malfunctioning pellet stove. Install CO detectors near the stove and regularly test them to ensure your safety.
Trails of Soot From Vents
Trails of soot from the vents indicate a potential issue with the ventilation system of our pellet stove. Soot accumulation can lead to decreased efficiency and potential safety hazards.
To prevent soot accumulation and ensure proper functioning, it’s crucial to regularly clean and maintain the venting system. Start by inspecting the vents for any blockages or obstructions. Clear any debris or build-up that may be hindering the airflow.
Check for any leaks or gaps in the venting system and seal them using high-quality duct tape. Additionally, consider scheduling professional maintenance to thoroughly clean and repair the venting system.
Light Test for Leaks
The light test will help identify any leaks in the venting system of our pellet stove. Here’s how you can conduct the test:
- Turn off the pellet stove and allow it to cool down completely.
- Close all doors and windows in the room to create a draft-free environment.
- Turn off any fans or ventilation systems that may interfere with the test.
- With the room pitch black, shine a bright flashlight along the entire length of the venting system, including the joints and connections.
Dangers of CO2 Poisoning
We need to be aware of the potential hazards of CO2 poisoning when using our pellet stove. CO2, also known as carbon dioxide, is a colorless and odorless gas that can be released along with soot from the stove. This gas can accumulate in closed spaces and pose a serious health risk.
To prevent CO2 poisoning, it’s essential to install CO2 detectors in our homes. These detectors will alert us if the CO2 levels reach dangerous levels, allowing us to take immediate action. Installing CO2 detectors is a crucial step in ensuring the safety of ourselves and our loved ones when using a pellet stove.
Importance of CO2 Detectors
CO2 detectors are crucial for our safety, as they alert us to the presence of this odorless and dangerous gas. Here are four reasons why CO2 detectors are important and why regular maintenance is essential:
-
Early detection: CO2 detectors provide an early warning system, allowing us to take immediate action and prevent potential harm. They can detect even low levels of CO2, ensuring our safety.
-
Peace of mind: Knowing that we have a CO2 detector installed and properly maintained gives us peace of mind. We can have confidence in our safety and the well-being of our loved ones.
-
Preventing CO2 poisoning: Regular maintenance of CO2 detectors ensures that they are functioning properly and accurately detecting CO2 levels. This helps prevent CO2 poisoning, which can lead to serious health issues and even death.
-
Longevity: Regular maintenance of CO2 detectors extends their lifespan and ensures their effectiveness. By replacing batteries, testing the alarms, and keeping them clean, we can ensure that they will continue to protect us for years to come.
CO2 Build-up in Small Rooms
Now let’s discuss the dangers of CO2 build-up in small rooms and how to prevent it.
In confined spaces, such as small rooms, CO2 build-up can pose serious risks to our health and safety. CO2, or carbon dioxide, is an odorless and colorless gas that can accumulate when there’s inadequate ventilation. Breathing in high levels of CO2 can cause dizziness, headaches, difficulty breathing, and in extreme cases, it can even be life-threatening.
To prevent CO2 build-up in small rooms, it’s crucial to ensure proper ventilation by opening windows or using fans to circulate fresh air. Additionally, installing CO2 detectors can provide an early warning system and allow us to take necessary actions to prevent harm.
It’s essential to prioritize safety and take proactive measures to avoid the dangers associated with CO2 build-up in confined spaces.
Methods to Find Leaks
When identifying leaks in our pellet stove system, it’s important to thoroughly test and inspect all connection points and seals. Regular maintenance and proper cleaning procedures are crucial to keep our pellet stoves in good working condition.
Here are four steps to find and fix pellet stove leaks:
-
Conduct a thorough test of the entire pellet stove system before use.
-
Check for any spots where the system is welded or taped sealed and ensure they’re intact.
-
Inspect and maintain the seals at all connection points to prevent any leaks.
-
Clean the stove regularly to reveal any hidden holes or leaks that may be present.
Checking Welded or Taped Seals
Inspecting the integrity of welded or taped seals is an important step in ensuring the safety and efficiency of our pellet stove system. Properly maintained seals are crucial for preventing leaks and potential dangers. To help you understand the significance of checking maintenance and safety precautions, we have provided a table outlining the key steps involved in inspecting and maintaining these seals.
Step | Description | Safety Precautions |
---|---|---|
1 | Visually inspect all welded or taped seals for any signs of damage or deterioration. | Wear protective gloves and eyewear to avoid injury. |
2 | Test the seals by running the pellet stove and checking for any visible leaks or irregularities in the seal’s appearance. | Ensure proper ventilation in the room to prevent the build-up of harmful gases. |
3 | If any leaks or issues are found, promptly repair or replace the damaged seals to maintain the stove’s efficiency and safety. | Follow the manufacturer’s guidelines for seal replacement and use appropriate tools and materials. |
Inspecting Connection Point Seals
By regularly checking the integrity of our connection point seals, we can ensure the safety and efficiency of our pellet stove system. Inspecting seal integrity is crucial as it helps us identify any potential issues and prevent leaks.
Common causes of seal deterioration include:
-
Age and wear: Over time, seals can deteriorate due to constant use and exposure to heat and other elements. Regular inspection allows us to identify any signs of wear and tear.
-
Improper installation: If the seals weren’t installed correctly initially, they may deteriorate faster or fail to provide a proper seal. Regular inspection helps us catch any installation errors and rectify them promptly.
-
Maintenance neglect: Lack of proper maintenance, such as cleaning and lubrication, can lead to seal deterioration. Regular inspection reminds us to perform the necessary maintenance tasks to prolong the life of the seals.
-
Environmental factors: Factors like extreme temperatures, humidity, and exposure to chemicals can degrade seals over time. Regular inspection helps us identify any environmental factors that may be impacting the seals and take appropriate measures to mitigate them.
Cleaning to Reveal Hidden Holes
Regularly cleaning our pellet stove system allows us to reveal any hidden holes and address potential issues to maintain the stove’s efficiency and safety.
Cleaning techniques are essential in preventing future leaks and ensuring optimal performance.
When cleaning the stove, it’s important to pay attention to the venting system and internal components. A thorough inspection using a bright flashlight can help identify any leaks or gaps in the seals.
Properly rated duct tape can be used to seal vents and prevent air leakage.
Additionally, cleaning the stove’s interior can help identify any internal leaks that may be causing issues.
Identifying Leaks With a Flashlight
When it comes to preventing pellet stove leaks, one effective technique is using a flashlight to identify any potential leaks in the venting system. Here are four key steps to successfully utilize the flashlight technique:
-
Prepare the flashlight: Ensure that you’ve a bright flashlight with fresh batteries. A high-intensity LED flashlight works best for this task.
-
Darken the room: Turn off any lights in the room where the pellet stove is located. This will create a darker environment, making it easier to spot any leaks.
-
Shine the flashlight: With the pellet stove running, shine the flashlight along the venting system, paying close attention to the joints and connection points. Look for any areas where light shines through, indicating a potential leak.
-
Seal any leaks: Once you’ve identified a leak, use properly rated duct tape to seal the area. This will prevent any further leakage and ensure the stove operates efficiently.
Properly Sealing Vents With Duct Tape
Sealing vents with duct tape ensures that the pellet stove operates efficiently and prevents any potential hazards. Proper vent sealing techniques are crucial for maintaining the performance and safety of a pellet stove.
In addition to duct tape, there are alternative methods for vent sealing that can be considered. One option is using high-temperature silicone caulk to seal the gaps and joints in the venting system. This provides a durable and long-lasting seal.
Another alternative method is using metal foil tape, which is specifically designed for HVAC applications. It adheres well to metal surfaces and provides a tight seal.
Whichever method is chosen, it’s important to ensure that the sealing is done properly, with attention to detail. This helps to prevent any leaks or drafts, ensuring that the pellet stove operates at its optimum efficiency while minimizing any potential safety risks.
Regularly Checking and Replacing Seals
We should prioritize checking and replacing seals on a regular basis to ensure the proper functioning and safety of our pellet stove. Here are four important reasons why checking and replacing worn seals should be a part of our maintenance schedule:
-
Preventing leaks: Worn seals can lead to leaks, allowing soot and smoke to escape into our living spaces. Regularly checking and replacing seals will help prevent these leaks, keeping our home clean and safe.
-
Ensuring efficiency: Properly sealed seals help maintain the efficiency of our pellet stove. By preventing air leakage, the stove can burn pellets more efficiently, providing effective heat without wasting energy.
-
Extending lifespan: Regular maintenance, including checking and replacing seals, can extend the lifespan of our pellet stove. By addressing any seal issues promptly, we can avoid further damage to the stove, ensuring its longevity.
-
Safety: Worn seals can pose safety hazards, such as the risk of carbon monoxide poisoning. By regularly checking and replacing seals, we can ensure that our pellet stove operates safely and protects our health and well-being.
Cleaning to Identify Internal Leaks
Now that we’ve discussed the importance of regularly checking and replacing seals in pellet stoves, let’s move on to the next step in pellet stove maintenance: cleaning to identify internal leaks.
Cleaning the stove not only helps to maintain its overall performance but also allows us to identify any hidden holes or leaks that may be present.
To begin the cleaning process, it’s important to turn off the stove and allow it to cool down completely. Once cooled, we can remove the ash and debris from the burn pot, ash pan, and any other accessible areas. This will help us get a clear view of the stove’s interior.
Next, we can use a bright flashlight to carefully inspect the venting system, including the flue pipe and any joints or connections. Any leaks or holes will be visible as light shining through. It’s important to seal any leaks we find using properly rated duct tape or other appropriate materials.
Are Leaking Pellet Stoves Often Caused by Auger Troubles?
Leaking pellet stoves can sometimes be caused by auger troubles. Proper troubleshooting pellet stove augers can identify issues with the feed mechanism that may result in leaks. Regular maintenance and timely repairs can prevent potential problems with pellet stove augers and keep the stove running efficiently.
How Can Pellet Stove Auger Issues Cause Leaks and What Are the Fixes?
Troubleshooting pellet stove augers is crucial in preventing leaks. If the auger jams, excess fuel accumulates, leading to overloading and potential leaks. To fix this issue, check for obstructions and clean the auger if necessary. Also, ensure proper alignment and tension adjustment for smooth operation. Regular maintenance and prompt attention to auger problems can significantly reduce the risk of leaks.
Frequently Asked Questions
How Often Should I Test My Pellet Stove System for Leaks Before Use?
We should regularly test our pellet stove system for leaks before use to ensure safety and optimal performance. The testing frequency may vary depending on factors such as the age and condition of the stove. However, it’s generally recommended to test the system at least once a year.
Regular testing allows us to identify any potential leaks early on and take necessary actions to fix them. By addressing leaks promptly, we can prevent the dangers associated with pellet stove leaks and ensure the longevity of our stove.
What Should I Do if I Notice Streaks of Soot on My Older Pellet Stove?
If we notice streaks of soot on our older pellet stove, there are a few steps we can take to address the issue.
Firstly, we should clean the stove thoroughly to remove any build-up and reveal hidden holes.
Secondly, we can inspect and replace any deteriorated seals that may be causing the leaks.
Regular maintenance is crucial in preventing leaks and ensuring the safety and longevity of the stove.
Can a Pellet Stove Leak Lead to CO2 Poisoning Even if There Is No Visible Soot?
Yes, a pellet stove leak can potentially lead to CO2 poisoning, even if there’s no visible soot. CO2 gases are released along with the soot, and CO2 is odorless, colorless, and dangerous.
This poses a serious health risk, especially in small rooms where CO2 build-up from breathing can occur. It’s essential to have CO2 detectors installed for safety.
Common causes of pellet stove leaks include deteriorated seals, holes in the stove, and improper maintenance. Regular maintenance is crucial to prevent leaks and ensure safety.
Is It Necessary to Use a Bright Flashlight to Identify Leaks in the Venting System?
Using a bright flashlight to identify leaks in the venting system isn’t necessary, but it’s highly recommended. There are alternative methods, such as using a strong light source, but a bright flashlight provides the best visibility. It helps to pinpoint even the tiniest leaks that may not be visible to the naked eye.
Common causes of pellet stove leaks include deteriorated seals, improper maintenance, and soot build-up. Identifying and fixing these leaks is crucial for the safe and efficient operation of the pellet stove.
How Frequently Should I Check and Replace Deteriorated Seals on My Pellet Stove?
When it comes to regular maintenance for pellet stoves, checking and replacing deteriorated seals is crucial. By inspecting the seals on a routine basis, we can ensure the stove’s safety and prevent potential leaks.
Regular maintenance not only extends the lifespan of the pellet stove but also maintains its overall quality. By staying on top of seal replacements, we can avoid the dangers of leaking pellet stoves and enjoy the benefits of a well-maintained and efficient heating option.
Conclusion
In conclusion, it’s crucial to be aware of the signs and dangers of leaking pellet stoves in order to maintain a safe and efficient heating system. By identifying and fixing these leaks, we can prevent the risks of carbon monoxide poisoning and ensure the longevity of our pellet stoves.
Regular maintenance and proper sealing of vents are key in addressing and preventing leaks. Remember, a small leak can lead to big consequences, so stay vigilant and keep your home warm and secure.
Embrace the warmth, but do so safely.
Pellet Stoves
How Do You Cook a Turkey in a Traeger Wood Pellet Grill
![An image showcasing a golden-brown turkey, perfectly roasted on a Traeger Wood Pellet Grill](https://bestsmallwoodstoves.com/wp-content/uploads/2023/09/how-do-you-cook-a-turkey-in-a-traeger-wood-pellet-grill_215.png)
I will walk you through the process of preparing a turkey using a Traeger wood pellet grill, expertly. This technique will help you create delicious outcomes that will impress your guests.
From choosing the right turkey size to preheating the grill and adding wood pellets for that delicious smoky flavor, I’ll cover all the steps.
Get ready to impress with a perfectly cooked turkey that’ll be the star of your next feast.
Key Takeaways
- Consider the number of guests and desired leftovers when choosing the turkey size and plan for 1-1.5 pounds of turkey per person.
- Brining enhances flavor and juiciness, while seasoning and marinating the turkey adds flavor and moisture.
- Trussing the turkey ensures even cooking by keeping the legs and wings close to the body and tying them together.
- Preheat the grill for a perfect sear, use high temperature for a crusty outside and juicy inside, and monitor the cooking temperature using a meat thermometer.
Choosing the Right Turkey Size
To choose the right turkey size, you’ll want to consider the number of guests you’ll be serving and the amount of leftovers you want. When it comes to choosing the right turkey size for your Traeger wood pellet grill, it’s important to keep in mind that the size of the grill will limit the size of the turkey you can cook.
A general rule of thumb is to plan for about 1 to 1.5 pounds of turkey per person. If you want leftovers, you might want to go for a larger turkey. Additionally, brining techniques can help enhance the flavor and juiciness of your turkey. Brining involves soaking the turkey in a saltwater solution for a period of time before cooking. This helps to season the turkey and keep it moist during the grilling process.
Now that you’ve chosen the right turkey size and considered brining techniques, let’s move on to preparing the turkey for grilling.
Preparing the Turkey for Grilling
When it comes to preparing a turkey for grilling, there are a few key points to keep in mind.
First, seasoning and marinating the bird is crucial for adding flavor and moisture. I like to use a combination of herbs, spices, and a marinade to infuse the meat with deliciousness.
Second, trussing the turkey ensures even cooking by keeping the legs and wings close to the body. This helps the meat cook more evenly and prevents any parts from drying out.
Lastly, preheating the grill is essential for achieving that perfect sear and ensuring the turkey cooks evenly. I recommend preheating the grill to a high temperature to create a nice crust on the outside while keeping the inside juicy and tender.
Seasoning and Marinating
First, make sure you have thoroughly seasoned and marinated your turkey before placing it in the Traeger wood pellet grill.
Seasoning and marinating are crucial steps in preparing a turkey for grilling, as they enhance the flavor and ensure a juicy and tender end result.
One popular technique is brining, which involves soaking the turkey in a saltwater solution infused with various herbs, spices, and aromatics. This process helps to lock in moisture and impart flavor deep into the meat.
Another method for flavor infusion is marinating, where you coat the turkey in a mixture of oil, herbs, spices, and acidic ingredients such as citrus juice or vinegar. This allows the flavors to penetrate the meat and adds a delicious kick.
Now that the turkey is seasoned and marinated, let’s move on to the next step of trussing for even cooking.
Trussing for Even Cooking
Now that the turkey is seasoned and marinated, it’s important to truss it for even cooking. Trussing is a technique used to secure the wings and legs of the turkey close to the body, ensuring that it cooks evenly.
To truss the turkey, start by tucking the wings underneath the bird. Then, cross the legs and tie them together with kitchen twine. Trussing not only helps the turkey cook more evenly, but it also gives it a neater appearance.
Preheating the Grill
To get your grill ready for cooking, make sure to preheat it to the desired temperature. Preheating is essential to ensure even cooking and to maximize the flavor of your turkey.
Here’s what you need to know about preheating your Traeger wood pellet grill:
-
Optimal preheating time:
-
Set your grill to the recommended temperature and allow it to preheat for 15-20 minutes.
-
This will ensure that the grill reaches the desired temperature and that the cooking surface is evenly heated.
-
Benefits of preheating:
-
Preheating helps to sear the turkey and lock in the juices, resulting in a moist and flavorful bird.
-
It also creates a consistent cooking environment, promoting even heat distribution and preventing hot spots.
Seasoning the Turkey
For a flavorful turkey, you’ll want to generously season the bird with a mixture of herbs and spices before placing it on the Traeger wood pellet grill. Seasoning is crucial to enhance the taste and juiciness of the turkey. One popular brining technique is to soak the bird in a saltwater solution overnight, allowing the flavors to penetrate the meat. If you prefer alternative seasoning methods, you can create a dry rub using a combination of herbs like rosemary, thyme, and sage, along with spices like garlic powder, paprika, and black pepper. This will create a beautiful crust on the turkey while infusing it with a delicious aroma. As you can see in the table below, there are several options for seasoning your turkey:
Brining Techniques | Alternative Seasoning Methods |
---|---|
Saltwater solution | Dry rub with herbs and spices |
Buttermilk brine | Citrus and herb marinade |
Beer brine | Honey and mustard glaze |
Apple cider brine | Soy sauce and ginger marinade |
Once the turkey is seasoned to perfection, it’s time to preheat the Traeger grill to ensure even cooking and a beautifully charred exterior.
Preheating the Traeger Grill
When it comes to preheating the Traeger grill, there are a few key points to consider.
First, the optimal preheating temperature can vary depending on what you’re cooking, but generally, a temperature of 375°F to 450°F works well for most recipes.
Second, the time required for preheating will depend on the size of your grill and the outside temperature, but typically, it takes around 15 to 20 minutes to reach the desired temperature.
Optimal Preheating Temperature
The optimal preheating temperature for cooking a turkey in a Traeger wood pellet grill is 375 degrees Fahrenheit. This temperature ensures that the turkey cooks evenly and achieves a delicious, golden brown exterior while remaining juicy and tender on the inside. Here are three reasons why this temperature is ideal for cooking a turkey in a Traeger grill:
-
Optimal Cooking Techniques: Cooking the turkey at 375 degrees Fahrenheit allows for the perfect balance between searing the skin and slow cooking the meat. This results in a crispy skin and moist, flavorful meat.
-
Alternative Cooking Methods: While some may opt for higher temperatures to speed up the cooking process, this can lead to dry and overcooked meat. By cooking at 375 degrees Fahrenheit, you can achieve a turkey that is cooked to perfection without sacrificing tenderness.
-
Enhanced Flavor: The Traeger wood pellet grill imparts a smoky flavor to the turkey, and cooking at 375 degrees Fahrenheit allows the flavors to develop gradually, resulting in a rich and delicious taste.
Now that we know the optimal preheating temperature, let’s move on to the next section and discuss the time required for preheating the Traeger grill.
Time Required for Preheating
To ensure that your turkey cooks evenly and achieves a delicious, golden brown exterior while remaining juicy and tender on the inside, it is important to preheat the Traeger grill for the recommended amount of time. The optimal preheating time for a Traeger grill is around 15-20 minutes. This allows the grill to reach the desired temperature and ensures that the heat is evenly distributed throughout the cooking chamber.
Here are some tips for efficient preheating:
-
Clean the grill: Before preheating, make sure to clean any residue or debris from the grill grates. This will help prevent any unwanted flavors and ensure a clean cooking surface.
-
Close the lid: Keeping the lid closed during preheating will help trap the heat inside the grill, allowing it to reach the desired temperature faster.
Tips for efficient preheating |
---|
Clean the grill |
Close the lid |
Benefits of Preheating
Using proper preheating techniques ensures that your food cooks evenly and retains its natural flavors.
Preheating your grill before cooking is essential for several reasons. Firstly, it helps to remove any residual dirt or debris from the grill grates, ensuring a clean cooking surface.
Secondly, preheating allows the grill to reach the desired temperature, which is crucial for proper cooking and avoiding undercooked or overcooked food. Temperature control is important when cooking a turkey on a Traeger wood pellet grill because it ensures that the meat is cooked to perfection, with a juicy and tender texture. Additionally, preheating helps to create those beautiful grill marks on the turkey, giving it that delicious smoky flavor.
Now that the grill is preheated, let’s move on to placing the turkey on the grill.
Placing the Turkey on the Grill
Start by carefully positioning your turkey on the grill grate of your Traeger wood pellet grill. Planning ahead is key to a successful turkey cook, so make sure you have enough room on the grill for your bird.
Preheat your Traeger to the desired temperature, usually around 325°F, and place the turkey on the grill, breast side up. Make sure the turkey is centered and not touching the sides of the grill for even cooking.
Temperature control is crucial during the cooking process, so keep an eye on the grill temperature and make adjustments as needed.
Now, let’s move on to monitoring the cooking temperature to ensure your turkey is cooked to perfection.
Monitoring the Cooking Temperature
Keep an eye on the temperature of the grill while the turkey is cooking to ensure it is cooked to perfection. Monitoring the cooking progress is crucial for a deliciously juicy turkey. To accurately monitor the temperature, I highly recommend using a meat thermometer.
Insert the thermometer into the thickest part of the turkey, avoiding contact with bones. This will give you an accurate reading of the internal temperature. The ideal temperature for a cooked turkey is 165°F (74°C).
As the turkey cooks, periodically check the temperature to ensure it is progressing as desired. This will help you avoid undercooking or overcooking the turkey.
Now that you have the cooking temperature under control, let’s talk about adding wood pellets for flavor.
Adding Wood Pellets for Flavor
Now that we have discussed monitoring the cooking temperature, let’s move on to the next step of cooking a turkey in a Traeger wood pellet grill: adding wood pellets for flavor.
One of the great benefits of using a Traeger grill is the ability to infuse your turkey with delicious smoky flavors. To achieve this, you will need to choose the right wood pellets that complement the taste of your turkey. Traeger offers a variety of wood flavors such as hickory, mesquite, apple, and cherry. Each wood imparts a unique aroma and taste to the meat.
Simply add the desired wood pellets to the pellet hopper, ensuring you have enough for the duration of the cook. The Traeger grill will automatically feed the pellets into the fire pot, creating a consistent smoke throughout the cooking process. This step is crucial in achieving that perfect smoky flavor in your turkey.
As we finish the smoking process, we can transition into the subsequent section about resting and carving the turkey.
Resting and Carving the Turkey
To ensure the juiciness of your turkey, let it rest for about 20 minutes before carving. This resting time allows the juices to redistribute throughout the meat, resulting in a more flavorful and tender bird. While it may be tempting to dig in right away, patience is key when it comes to carving your turkey.
Here are some carving techniques to ensure you get the most out of your bird:
-
Start by removing the legs and wings: Use a sharp knife to separate the leg and thigh from the body, then remove the wings.
-
Slice the breast meat: Make horizontal cuts along the breastbone to create thin slices of juicy white meat.
-
Separate the thigh and drumstick: Cut through the joint to separate the thigh and drumstick.
Resting and carving your turkey properly is essential for a delicious and visually appealing meal. Take your time, follow these techniques, and enjoy the fruits of your labor.
Can I Cook a Turkey in a Wood Pellet Pizza Oven?
Yes, you can cook a turkey in a wood pellet pizza oven. The consistent heat and smoky flavor from the wood pellets will result in a delicious and juicy turkey. Just make sure to monitor the temperature and use a meat thermometer to ensure it’s fully cooked.
Can the Same Method Used for a Wood Pellet Pizza Oven be Applied to Cooking a Turkey in a Traeger Wood Pellet Grill?
Yes, the same method for starting wood pellet pizza oven can be applied to cooking a turkey in a Traeger wood pellet grill. Both the wood pellet pizza oven and Traeger grill utilize wood pellets as fuel, and the methods for starting the fire and controlling the temperature are similar.
Frequently Asked Questions
What Are the Advantages of Cooking a Turkey in a Traeger Wood Pellet Grill Compared to Other Grilling Methods?
The advantages of cooking a turkey in a Traeger Wood Pellet Grill are numerous. With precise temperature control, even heat distribution, and the ability to infuse smoky flavors, it’s a game-changer for turkey cooking. Here are some tips and techniques to help you achieve the perfect turkey on a Traeger.
Can I Use a Frozen Turkey for Grilling on a Traeger Wood Pellet Grill?
Using a frozen turkey on a Traeger wood pellet grill is not recommended. Thawing the turkey before grilling ensures even cooking and prevents foodborne illness. There are alternative grilling methods for turkey that can yield delicious results.
How Long Does It Take to Cook a Turkey on a Traeger Wood Pellet Grill?
Cooking a turkey on a Traeger Wood Pellet Grill requires careful temperature control. The cooking time will depend on the size of the turkey, but typically takes around 4-6 hours at a temperature of 325°F.
Are There Any Specific Cooking Techniques or Tips for Achieving a Crispy Skin on the Turkey When Grilling on a Traeger Wood Pellet Grill?
To achieve crispy skin on a turkey when grilling on a Traeger Wood Pellet Grill, there are specific cooking techniques you can use. Preheat the grill, apply oil or butter to the skin, and cook at a high temperature for a shorter time.
Can I Use Marinades or Brines on the Turkey Before Grilling It on a Traeger Wood Pellet Grill?
Yes, you can use marinades or brines on the turkey before grilling it on a Traeger wood pellet grill. Marinating techniques enhance flavor, while brining benefits include moisture retention and tenderizing the meat.
Conclusion
In conclusion, cooking a turkey in a Traeger wood pellet grill is a feast for the senses. The tantalizing aroma of the seasoned turkey sizzling on the grill and the mouthwatering flavor infused by the wood pellets are just the beginning. The tender, juicy meat that melts in your mouth is the ultimate reward. It’s a culinary experience like no other.
With the right techniques and a little patience, you can create a masterpiece that will leave your taste buds singing with joy. So fire up that Traeger and get ready to impress your family and friends with a truly unforgettable turkey.
Logan’s affair with adventure began in childhood. He hailed from a small town where vast forests bordered one side and endless shores stretched on the other. His days were spent exploring uncharted woods, climbing tall trees, or listening to the tales of old sailors. This early immersion in a world brimming with stories and mysteries became the foundation of his passion for writing.
Pellet Stoves
How Do Wood Pellet Mills Work
![An image showcasing the intricate process of wood pellet mills in action](https://bestsmallwoodstoves.com/wp-content/uploads/2023/09/how-do-wood-pellet-mills-work_476.png)
I have always been fascinated by the operation of wood pellet mills and the intricate process they entail.
One example that comes to mind is a case study I recently came across. In this study, a wood pellet mill was able to efficiently grind and dry the wood material, pelletize it, and then cool and screen the resulting wood pellets.
The entire process was seamless and resulted in high-quality wood pellets that were ready for packaging and storage.
In this article, I will delve into the technical details of how wood pellet mills work and explore the environmental benefits they provide.
Key Takeaways
- Wood pellet mills grind wood into sawdust and compress it into small pellets.
- Different types of pellet mills, such as flat die mills and ring die mills, determine the efficiency and quality of the pellets.
- Wood pellets have high energy density, low moisture content, and reduced greenhouse gas emissions, making them an attractive option for renewable energy.
- The raw materials for wood pellet mills, such as sawdust, wood chips, and wood shavings, are obtained from sustainable sources and contribute to the reduction of waste and reliance on fossil fuels.
The Process of Wood Pellet Production
The process of wood pellet production involves several steps. First, wood is ground into sawdust. Next, the sawdust is compressed into small pellets. After that, the pellets are cooled and packaged for distribution. The design of pellet mills is important in determining the efficiency and quality of the pellets. There are different types of pellet mills available, such as flat die and ring die designs. Flat die mills are commonly used for small-scale production, while ring die mills are preferred for large-scale operations due to their higher capacity and durability.
Wood pellets have many advantages as a biomass energy source. They have a high energy density, low moisture content, and reduced greenhouse gas emissions compared to traditional fossil fuels. These qualities make wood pellets an attractive option for renewable energy.
Now, let’s discuss the raw materials used in wood pellet mills. These raw materials are crucial for producing high-quality pellets.
Raw Materials for Wood Pellet Mills
When it comes to wood pellet production, understanding the common raw materials used is crucial. These materials typically include sawdust, wood chips, and wood shavings, which are obtained from various sources such as sawmills, woodworking factories, and furniture manufacturers.
The pellet production process then involves grinding and drying the raw materials before compressing them into pellets, resulting in a highly efficient and sustainable fuel source.
Additionally, the use of wood pellets offers numerous environmental sustainability benefits, including reduced greenhouse gas emissions and reliance on fossil fuels, making it an attractive alternative for both residential and industrial heating.
Common Raw Materials
You can use different types of biomass, such as sawdust, wood chips, or agricultural waste, as raw materials for wood pellet mills. These materials are commonly used in wood pellet production techniques due to their availability and suitability for the process.
Sawdust, which is a byproduct of woodworking, is a popular choice because of its high lignin content, which acts as a natural binder during pelletization. Wood chips, on the other hand, are larger pieces of wood that can be obtained from logging or sawmills. Agricultural waste, including straw, corn stalks, and sugarcane bagasse, can also be used as raw materials.
These alternative uses for raw materials not only reduce waste but also contribute to the sustainability of the pellet production process. This ensures that the wood pellet industry remains environmentally friendly and economically viable.
Transitioning into the subsequent section about the "pellet production process," it is important to understand the various steps involved in turning these raw materials into wood pellets.
Pellet Production Process
Using biomass materials, such as sawdust, wood chips, or agricultural waste, can be a sustainable and environmentally friendly way to produce wood pellets. One of the major benefits of using wood pellets as a renewable energy source is their high energy density. Wood pellets have a higher energy content per unit mass than other biomass fuels, making them more efficient and cost-effective.
Wood pellet mills play a crucial role in the production process. These mills use specialized machinery to compress the biomass materials into compact pellets. The process involves grinding, drying, and pelletizing the raw materials, which are then cooled and packaged for use. Wood pellet mills can produce large quantities of pellets in a short period, making them a reliable and efficient fuel source.
Transitioning to the subsequent section about environmental sustainability benefits, the production of wood pellets helps reduce greenhouse gas emissions and dependence on fossil fuels.
Environmental Sustainability Benefits
The high energy density of wood pellets makes them an efficient and cost-effective renewable energy source. Here are four reasons why wood pellets contribute to environmental sustainability and the reduction of carbon emissions:
-
Renewable Energy Source: Wood pellets are made from sustainably sourced wood, such as sawdust and wood chips, which are byproducts of the timber industry. By utilizing this otherwise wasted material, we are reducing our reliance on non-renewable fossil fuels.
-
Carbon Neutral: When wood pellets are burned, they release carbon dioxide, but the amount emitted is equal to the carbon absorbed by the trees during their growth. This creates a carbon-neutral cycle, minimizing the net increase of greenhouse gases in the atmosphere.
-
Lower Emissions: Wood pellet combustion produces significantly fewer emissions compared to traditional fossil fuels like coal. This helps to improve air quality and reduce the overall carbon footprint.
-
Waste Reduction: Wood pellets are manufactured from wood waste, diverting it from landfills and reducing the environmental impact of waste disposal.
Transition: To produce wood pellets, the first step involves grinding and drying the wood material.
Grinding and Drying the Wood Material
In the grinding process, wood material is broken down into smaller particles to facilitate the pelletizing process. This involves the use of a hammer mill, which uses rotating hammers to strike and grind the wood.
Wood drying is a crucial step in the pellet production process as it reduces the moisture content of the wood material, making it easier to grind and improving the overall quality of the pellets produced.
Grinding Process Explained
To understand how wood pellet mills work, you’ll want to know about the grinding process. This crucial step in the production of wood pellets involves reducing the raw material into a fine powder. Here are the grinding techniques used in pellet mills to ensure optimal pellet mill efficiency:
-
Hammer mills: These machines use rotating hammers to pulverize the wood material, resulting in a consistent and uniform particle size.
-
Knife mills: Equipped with sharp blades, knife mills cut the wood into small pieces, ensuring a homogeneous and efficient grinding process.
-
Impact mills: By utilizing high-speed rotating blades or hammers, impact mills shatter the wood material into fine particles, enhancing the overall pellet mill efficiency.
The grinding process is vital in preparing the wood material for pellet production, but it is closely connected to the subsequent step – wood drying. Properly dried wood ensures optimal pellet quality and combustion efficiency.
Importance of Wood Drying
After the grinding process, it is crucial to ensure that the wood material has the right moisture content before it can be pelletized. Wood moisture refers to the amount of water present in the wood, and it plays a vital role in the pelletizing process. Wood with high moisture content is difficult to pelletize as it can lead to poor pellet quality and increased energy consumption during the pellet mill operation.
To reduce the wood moisture, various drying methods are employed. These methods include natural drying, kiln drying, and air drying. Natural drying involves exposing the wood to the sun and wind, while kiln drying utilizes heat and controlled humidity levels to remove moisture. Air drying involves stacking the wood and allowing air to circulate around it.
By reducing the wood moisture to the optimal level, the wood becomes more suitable for pellet production. It ensures that the pellets have the desired density and durability.
Now, let’s move on to the next section and explore the process of pelletizing the wood material.
Pelletizing the Wood Material
During the pelletizing process, the wood material is compressed and shaped into small pellets. Wood pellet density and the techniques used for pelletizing play a crucial role in determining the quality and efficiency of the final product.
Achieving the desired wood pellet density requires carefully selecting the raw materials, which should have a suitable moisture content and particle size distribution. Pelletizing techniques such as pressure and heat are employed to soften the lignin in the wood, allowing it to bind the particles together.
The compressed wood material is then forced through small holes in a die, creating uniform pellets of the desired size and shape. These pellets are then ready for the next stage of the process, which involves cooling and screening to ensure their quality and readiness for use.
Cooling and Screening the Wood Pellets
You can ensure the quality of the wood pellets by carefully cooling and screening them. Cooling efficiency is crucial in maintaining the integrity and durability of the pellets. Here are two methods to achieve optimal cooling:
-
Air Cooling:
-
The hot wood pellets are transferred to a cooling chamber.
-
Cold air is blown over the pellets, removing excess heat.
-
The cooled pellets are then ready for screening.
-
Water Cooling:
-
The wood pellets are submerged in a water bath.
-
The water absorbs the heat from the pellets, rapidly cooling them.
-
The pellets are then separated from the water and proceed to the screening stage.
Screening methods further enhance the quality of the wood pellets by removing any fines or oversized particles. This ensures uniform size and consistency, improving combustion efficiency.
Now, let’s delve into the next section, where we will explore the packaging and storage of wood pellets.
Packaging and Storage of Wood Pellets
The packaging and storage of wood pellets is crucial for maintaining their quality and preventing moisture damage.
One of the main concerns when it comes to packaging challenges is ensuring that the pellets are sealed properly to keep out any moisture. Moisture can lead to the degradation of the pellets, causing them to crumble or mold. To address this issue, storage solutions such as using waterproof bags or containers with airtight seals are commonly employed.
Additionally, it is important to store wood pellets in a dry and well-ventilated area to further prevent moisture build-up. Proper labeling and stacking techniques are also essential to ensure efficient storage and easy identification.
By implementing these packaging and storage solutions, the quality of wood pellets can be preserved, ultimately leading to better performance and customer satisfaction.
Transitioning into the subsequent section about the maintenance and troubleshooting of wood pellet mills, it is equally important to ensure the proper functioning and upkeep of the machinery to produce high-quality pellets.
Maintenance and Troubleshooting of Wood Pellet Mills
To keep your wood pellet mill running smoothly, regular maintenance is essential. Proper maintenance techniques can help prevent breakdowns and ensure optimal performance of your mill.
One important maintenance task is cleaning the mill regularly to remove any dust, debris, or foreign objects that may accumulate and cause clogging or damage.
Lubricating the moving parts, such as the rollers and bearings, is also crucial to reduce friction and extend the lifespan of these components.
Additionally, regularly inspecting the electrical connections and replacing worn-out or damaged parts can help prevent electrical issues and improve safety.
Troubleshooting tips can also be helpful in addressing common problems, such as uneven pellet size or low production rates.
By following these maintenance techniques and troubleshooting tips, you can maximize the efficiency and lifespan of your wood pellet mill.
Transition: In addition to the maintenance and troubleshooting aspects, wood pellet mills also offer significant environmental benefits.
Environmental Benefits of Wood Pellet Mills
In addition to their maintenance and troubleshooting aspects, wood pellet mills also have significant environmental benefits. Here are three reasons why wood pellet mills are considered an environmentally-friendly choice:
-
Reducing Carbon Emissions: Wood pellets are made from renewable biomass sources such as sawdust, wood chips, or agricultural waste. When burned as fuel, they release significantly fewer greenhouse gas emissions compared to fossil fuels like coal or oil. This helps to reduce the overall carbon footprint and combat climate change.
-
Renewable Energy Source: Wood pellets are derived from sustainable forestry practices, where trees are responsibly harvested and replanted. Unlike fossil fuels, which are finite resources, wood pellets offer a renewable energy source that can be continuously produced and utilized without depleting natural resources.
-
Waste Reduction: Wood pellet mills help to repurpose and utilize wood waste that would otherwise end up in landfills. By converting this waste into valuable fuel, wood pellet mills contribute to waste reduction and promote a more circular economy.
Overall, wood pellet mills play a crucial role in reducing carbon emissions, providing a renewable energy source, and minimizing waste, making them an environmentally-friendly option for meeting energy needs.
What is the process of making wood pellets in a wood pellet mill?
At wood pellet mill processes, raw materials like sawdust or wood chips are first ground into small particles. Then, the particles are fed into the wood pellet mill where they are compressed and heated to form pellets. The pellets are then cooled and screened before being ready for use.
What Are the Key Components of a Wood Pellet Mill and How Do They Function?
A wood pellet mill operation consists of several key components including the hammer mill for grinding raw materials, the pellet machine for compressing the materials into pellets, and the cooler and dryer for reducing moisture content. The final step involves the packaging machine for storing and transporting the finished wood pellets.
Frequently Asked Questions
Are Wood Pellets Safe to Use for Heating and Cooking?
Yes, wood pellets are safe to use for heating and cooking. They have environmental benefits and are cost-effective compared to other options. They provide efficient heat and are a renewable energy source.
How Long Do Wood Pellet Mills Typically Last?
Wood pellet mills typically last for several years, with the longevity depending on various factors such as maintenance, usage, and quality of the machine. These factors can significantly affect the lifespan of wood pellet mills.
Can Wood Pellet Mills Use Different Types of Wood as Raw Materials?
Different types of wood suitable for wood pellet production include hardwoods, softwoods, and agricultural residues. Benefits of using different types of wood in wood pellet mills include increased energy efficiency and reduced emissions.
What Is the Average Production Capacity of a Wood Pellet Mill?
On average, a wood pellet mill can produce around [insert production capacity] of wood pellets per hour. This production capacity is determined by the size and efficiency of the mill.
Are There Any Regulations or Certifications for Wood Pellet Mills to Ensure Their Quality and Environmental Impact?
Yes, there are regulations and certifications for wood pellet mills to ensure their quality and minimize their environmental impact. These measures are in place to promote sustainable practices and protect the environment.
Conclusion
So there you have it, folks. Wood pellet mills, the magical machines that turn wood into little nuggets of fuel. It’s truly a fascinating process.
From grinding and drying the wood material to pelletizing it and finally cooling and screening the wood pellets. And let’s not forget about the packaging and storage, because who doesn’t love a neatly packed bag of wood pellets?
But the real star of the show is the maintenance and troubleshooting of these mills, because let’s face it, nothing is perfect. But fear not, because the environmental benefits of wood pellet mills make it all worth it.
So next time you cozy up by the fire, remember the humble wood pellet mill that made it all possible.
Pellet Stoves
How Do You Adjust a Pellet Stove to Hard Wood
![An image showcasing a hand turning the pellet stove's air intake control knob to decrease the opening size, while another hand adjusts the fuel feed rate dial to increase the flow, all against a backdrop of stacked hardwood pellets](https://bestsmallwoodstoves.com/wp-content/uploads/2023/09/how-do-you-adjust-a-pellet-stove-to-hard-wood_500.png)
Having ample experience using pellet stoves, I frequently adjust mine to burn hardwood pellets efficiently. Although it may seem overwhelming to differentiate between hardwood and softwood pellets initially, with the appropriate expertise and strategies, this obstacle can be easily conquered.
In this article, I will guide you through the process of understanding the basics of pellet stove adjustments, identifying the differences between softwood and hardwood pellets, and fine-tuning the feed rate and air intake for optimal hardwood burning.
Plus, I’ll share tips on maintenance and cleaning to ensure longevity and performance.
Key Takeaways
- Choose hardwood pellets with low moisture content for better combustion
- Look for pellets made from dense hardwoods like oak or hickory for higher heat output
- Increase feed rate slightly if stove is not producing enough heat
- Decrease feed rate gradually if stove is producing too much heat
Understanding the Basics of Pellet Stove Adjustments
To understand the basics of pellet stove adjustments, you’ll need to familiarize yourself with the different settings and options available. Proper pellet stove troubleshooting begins with understanding how to control the temperature.
Most pellet stoves have a temperature control dial or digital display that allows you to adjust the heat output. By turning the dial or using the controls, you can increase or decrease the temperature as needed. It’s important to remember that each pellet stove may have slightly different controls or settings, so it’s best to consult the manufacturer’s manual for specific instructions.
Now that we understand the basics of pellet stove adjustments, let’s move on to identifying the differences between softwood and hardwood pellets.
Identifying the Differences Between Softwood and Hardwood Pellets
Identifying the differences between softwood and hardwood pellets can help improve the performance of your stove. When choosing the right pellet fuel for your stove, it is important to consider the heat output of the pellets.
Softwood pellets, made from coniferous trees like pine or spruce, tend to have a higher heat output compared to hardwood pellets. This is because softwood has a higher resin content, which results in a more efficient burn.
On the other hand, hardwood pellets, made from trees like oak or maple, may have a lower heat output but they burn longer and produce less ash. Understanding these differences can help you make an informed decision when selecting the pellets for your stove.
Now, let’s discuss adjusting the feed rate for optimal hardwood burning.
Adjusting the Feed Rate for Optimal Hardwood Burning
When adjusting the feed rate for optimal hardwood burning, it’s important to find the right balance for consistent heat output. Hardwood pellets can provide a longer burn time and higher heat output compared to softwood pellets.
To ensure efficient burning, consider the following:
- Hardwood pellet selection:
- Choose hardwood pellets with low moisture content for better combustion.
- Look for pellets made from dense hardwoods like oak or hickory for higher heat output.
Troubleshooting common feed rate issues:
- If the stove is not producing enough heat, increase the feed rate slightly.
- If the stove is producing too much heat, decrease the feed rate gradually.
By adjusting the feed rate accordingly, you can optimize the burning process and achieve consistent heat output.
Now, let’s move on to fine-tuning the air intake for efficient wood combustion.
Fine-Tuning the Air Intake for Efficient Wood Combustion
For optimal wood combustion, make sure you find the right balance in adjusting the air intake. Proper ventilation is of utmost importance to ensure efficient wood combustion.
When the air intake is adjusted correctly, it allows for the right amount of oxygen to reach the fire, promoting complete and efficient combustion. This helps in maximizing heat output and minimizing the production of harmful pollutants.
Additionally, it is crucial to consider the moisture content of the wood pellets used for combustion. High moisture content can negatively impact combustion efficiency, leading to reduced heat output and increased smoke emissions. Therefore, it is essential to use dry and seasoned wood pellets for optimal performance.
By fine-tuning the air intake and using low moisture content wood pellets, you can achieve efficient wood combustion and a more environmentally friendly operation.
Ensuring proper maintenance and cleaning further enhances longevity and performance, keeping your pellet stove operating at its best.
Ensuring Proper Maintenance and Cleaning for Longevity and Performance
Proper maintenance and cleaning are essential for ensuring the longevity and optimal performance of your pellet stove. Regular inspections are of utmost importance to identify any issues or potential problems that may affect its functionality. By conducting these inspections, you can address any concerns promptly and prevent further damage or breakdowns.
Additionally, using high-quality pellets can greatly enhance the performance of your stove. High-quality pellets burn more efficiently, producing more heat and leaving behind less residue. This not only improves the overall performance of your stove but also reduces the frequency of cleanings and maintenance required.
Therefore, investing in good quality pellets is not only beneficial for your stove but also saves you time and money in the long run.
Is Adjusting a Pellet Stove to Burn Hard Wood Different from Installing a Wood Pellet Stove?
Adjusting a pellet stove to burn hard wood is different from installing a wood pellet stove. The adjustment involves changing the fuel type and may require modifying the stove settings. On the other hand, wood pellet stove installation steps include assembling the stove, positioning the vent, and connecting it to the flue.
Can I Use Hard Wood Instead of Pellets in a Wood Pellet Stove?
Yes, you can use hard wood instead of pellets in a wood pellet stove. However, it is important to follow the manufacturer’s recommendations for fuel type to ensure efficient and safe operation. For more information, consult a wood pellet stove installation guide.
Frequently Asked Questions
Can I Use Softwood Pellets in a Pellet Stove Designed for Hardwood Pellets?
I can burn softwood pellets in my pellet stove designed for hardwood pellets, but there are advantages to using hardwood pellets. They tend to have higher heat output and produce less ash. Adjusting the stove may be necessary for optimal performance.
How Often Should I Clean My Pellet Stove?
When troubleshooting a pellet stove not igniting, it’s important to check the fuel supply, igniter, and air intake. Signs that a pellet stove needs cleaning include reduced heat output and excessive ash buildup.
What Kind of Maintenance Is Required for a Pellet Stove?
To properly maintain a pellet stove, regular maintenance is required. This includes cleaning the burn pot, removing ash buildup, and checking the exhaust vent for blockages. Troubleshooting issues may involve adjusting air intake or checking the fuel supply.
Can I Adjust the Feed Rate on My Pellet Stove to Burn Different Types of Wood?
To optimize pellet stove efficiency, I adjust the feed rate according to the type of wood I’m burning. By tweaking this setting, I can control the burn rate and ensure efficient combustion.
Are There Any Safety Precautions I Should Take When Adjusting My Pellet Stove?
When adjusting a pellet stove, it is important to take safety precautions. Ensure the stove is turned off and cooled down before making any adjustments. Follow the manufacturer’s instructions and wear protective gear if necessary.
Conclusion
In conclusion, adjusting a pellet stove to burn hardwood requires a combination of knowledge and precision. By understanding the basics of pellet stove adjustments and the differences between softwood and hardwood pellets, one can optimize the feed rate and air intake for efficient wood combustion.
Regular maintenance and cleaning are also essential for the longevity and performance of the stove.
So, if you’re looking to harness the full potential of your pellet stove with hardwood, don’t forget to fine-tune and maintain it like a pro.
-
Wood Stove9 months ago
How To Build A Thermoelectric Generator For A Wood Stove
-
Wood Stove6 months ago
What Can I Use As Insulation On Wood Stove Pipes
-
Wood Stove2 months ago
How To Use Damper And Draft On Wood Stove
-
Wood Stove2 weeks ago
How Far Does Wood Stove Have To Be From Wall
-
Wood Stove8 months ago
How To Make A Heat Shield For A Wood Stove
-
Wood Stove1 month ago
When To Open And Close Damper On Wood Stove
-
Wood Stove9 months ago
How To Use The Flue On A Wood Stove
-
Wood Stove6 months ago
How To Install A Wood Stove Pipe And Chimney