Connect with us

Pellets & Pellet Stoves

What Temp Do I Use Cooking Steaks on My Wood Pellet Grill

Published

on

An image capturing a sizzling wood pellet grill, with smoke billowing around a perfectly seared steak

I’ve always wondered what temperature to use when cooking steaks on my wood pellet grill. It’s a question that many grill enthusiasts like myself often ask.

Well, I’m here to tell you that today, we’re going to uncover the secrets to achieving perfectly cooked steaks on a wood pellet grill. From understanding the basics of wood pellet grilling to mastering the art of temperature control, we’ll explore everything you need to know to take your steak game to the next level.

So, let’s get started and unlock the key to mouthwatering, juicy steaks!

Key Takeaways

  • Wood pellet grills offer consistent heat distribution and precise cooking control.
  • Achieving the perfect doneness is crucial when cooking steak.
  • Monitoring the internal temperature with a meat thermometer is essential.
  • Recommended temperature ranges for different steak cuts ensure desired results.

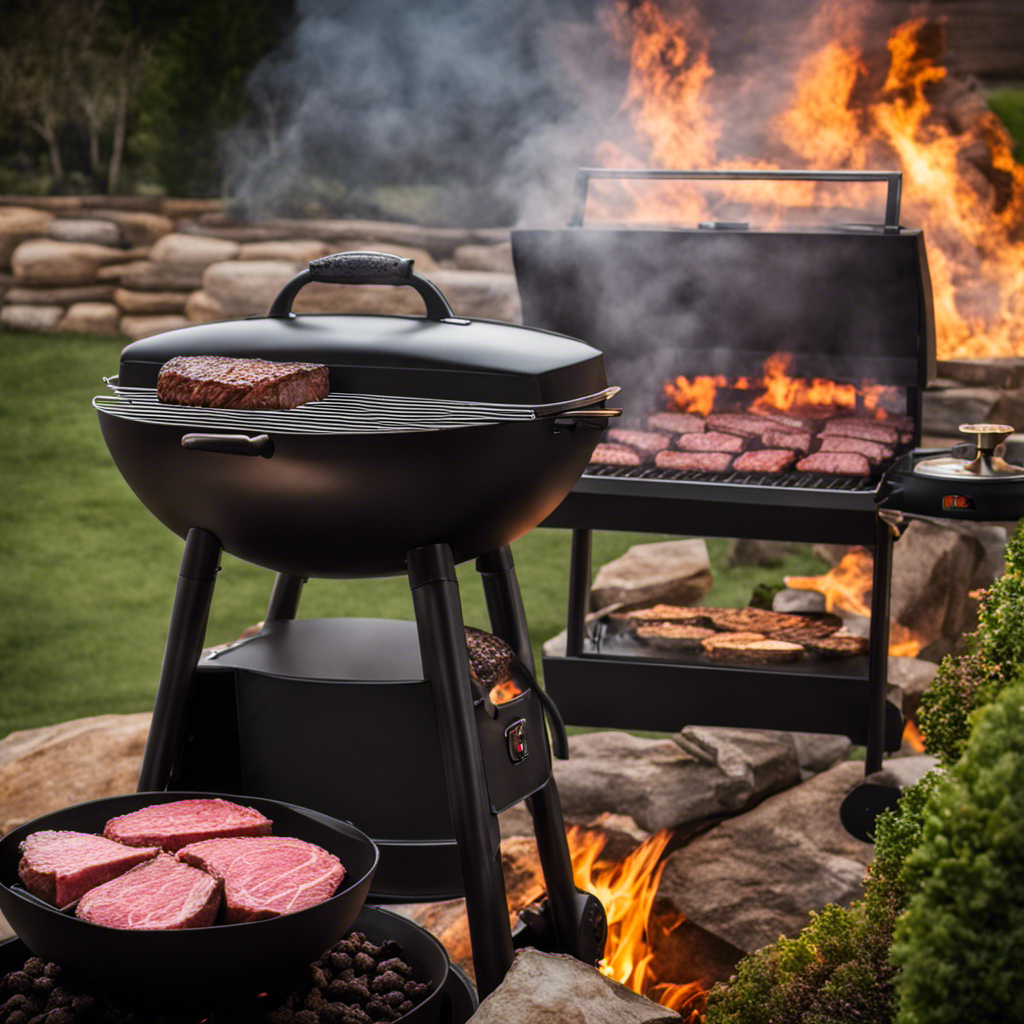
Understanding the Basics of Wood Pellet Grilling

One of the key elements to mastering wood pellet grilling is understanding the basics. Temperature control techniques play a vital role in achieving the perfect cook on your wood pellet grill.

The benefits of wood pellet grilling include consistent heat distribution, ease of use, and the ability to infuse smoky flavors into your food. With wood pellet grills, you can effortlessly adjust the temperature using a digital control panel or a dial, allowing precise cooking control. By maintaining a steady temperature, you can ensure that your food cooks evenly and retains its moisture, resulting in delicious and tender dishes.

Now let’s delve into the importance of temperature control for perfectly cooked steaks, where we’ll explore the art of achieving the ideal temperature for a juicy and flavorful steak.

Importance of Temperature Control for Perfectly Cooked Steaks

When it comes to cooking steak, achieving the perfect doneness is crucial. The optimal cooking temperature plays a significant role in ensuring consistent results.

In this discussion, I will explore the importance of temperature control and how it can help you achieve perfectly cooked steaks every time.

Optimal Steak Cooking Temperature

To achieve the best results, it’s crucial to know the optimal temperature for cooking steaks on a wood pellet grill. Here are a few key points to keep in mind:

  • Preheat the grill: Before placing the steaks on the grill, make sure it’s preheated to the desired temperature.

  • Optimal searing technique: For a perfect sear, set the grill to a high temperature, around 450-500°F (232-260°C). This will help create a flavorful crust on the steak.

  • Recommended cooking times: The cooking time will depend on the thickness of the steak and desired doneness. As a general guideline, for a 1-inch thick steak, cook it for about 4-6 minutes per side for medium-rare.

When it comes to achieving consistent doneness, it’s important to monitor the internal temperature of the steak using a meat thermometer. This will help you determine when the steak has reached your desired level of doneness without overcooking it.

Achieving Consistent Doneness

For consistent doneness, it’s essential to monitor the internal temperature of the steak using a meat thermometer. This ensures that your steak is cooked to the desired level of doneness every time.

When it comes to grilling steaks on a wood pellet grill, controlling the grill temperature is crucial for achieving consistent cooking times. The temperature of the grill affects how quickly the steak cooks and the level of char you want to achieve. By maintaining a steady temperature, you can ensure that your steaks cook evenly and to your liking.

However, it’s important to note that the right temperature for steaks depends on various factors such as the thickness of the steak, the cut, and personal preference. Considering these factors will help you choose the right temperature for your steaks without compromising on taste and texture.

Factors to Consider When Choosing the Right Temperature for Steaks

It’s important to consider factors like the thickness of the steak and your desired level of doneness when choosing the right temperature for cooking on a wood pellet grill. Here are a few things I keep in mind:

  • Thickness of the steak: Thicker steaks require lower temperatures to ensure they cook evenly without burning the exterior.

  • Desired level of doneness: Different people have different preferences when it comes to how well-done they like their steak. Adjusting the temperature can help you achieve that perfect level of doneness.

  • Resting time: Remember to factor in resting time after cooking. The residual heat will continue to cook the steak, so it’s best to remove it from the grill a few degrees before reaching the desired doneness.

Considering these factors will help you achieve consistent doneness every time you cook steak on your wood pellet grill.

Now, let’s talk about the recommended temperature ranges for different steak cuts.

Recommended Temperature Ranges for Different Steak Cuts

When it comes to cooking steaks, it’s important to know the recommended temperature ranges for different cuts.

For a ribeye, medium rare is the way to go, allowing for a juicy and tender result.

On the other hand, filet mignon is best cooked to a medium temperature, ensuring a balance between tenderness and flavor.

As for a T-bone steak, it is often preferred rare or medium, allowing for a more tender and flavorful experience.

Ribeye: Medium Rare

To achieve a juicy and tender medium rare ribeye on your wood pellet grill, you should preheat it to 450°F. Here are some tips to help you achieve the perfect ribeye temperature and cooking technique:

  • Start with a well-marbled ribeye steak.
  • Let the steak come to room temperature before grilling.
  • Season the steak with salt and pepper, or your favorite rub.
  • Sear the steak on high heat for about 2-3 minutes on each side.
  • Reduce the heat to medium and continue grilling for another 4-5 minutes per side.
  • Use a meat thermometer to check the internal temperature. For medium rare, it should be around 135°F.
  • Let the steak rest for a few minutes before slicing and serving.

Now, let’s move on to the next section about filet mignon cooked to medium perfection.

Filet Mignon: Medium

For a perfectly cooked medium filet mignon, you should follow these steps.

Factors to consider when cooking a filet mignon include the thickness of the steak, the desired level of doneness, and the cooking method.

To achieve medium doneness, start by preheating your grill to high heat. Season the steak with salt and pepper, and then sear it on each side for about 2-3 minutes.

Reduce the heat to medium and continue cooking for another 4-5 minutes per side. Use an instant-read thermometer to check the internal temperature, aiming for around 145°F.

Let the steak rest for a few minutes before serving.

Now, let’s move on to the next section about the t-bone steak: rare or medium?

T-Bone: Rare or Medium?

Let’s now decide whether we prefer our T-bone steak rare or medium. As for me, I tend to lean towards medium. Here are a few reasons why:

  • A medium T-bone steak allows for a perfect balance between tenderness and flavor.
  • The marbled fat in the steak gets a chance to render and melt, enhancing the overall taste.
  • Medium doneness ensures that the meat is cooked through while still retaining a slightly pink center.

When it comes to achieving the perfect sear, there are two popular techniques: high heat and low heat. High heat creates a beautiful crust on the outside while maintaining a juicy interior. On the other hand, low heat allows for a more gentle cooking process, resulting in a more evenly cooked steak.

Now, let’s explore these techniques further and discover which one suits our preferences best.

Achieving the Perfect Sear: High Heat Vs. Low Heat Techniques

Using high heat on your wood pellet grill will help you achieve the perfect sear on your steaks. High heat searing is a technique that involves cooking your steaks at a high temperature for a short amount of time. This allows for the Maillard reaction to occur, creating a flavorful crust on the outside of the steak while keeping the inside juicy and tender.

On the other hand, low heat slow cooking is a method that involves cooking your steaks at a lower temperature for a longer period of time. This is ideal for thicker cuts of steak, as it allows the meat to cook evenly and become more tender. Both techniques have their merits, but it ultimately depends on your personal preference and the type of steak you are cooking.

Transitioning to the role of resting time in steak cooking temperatures, it is important to give your steaks time to rest after cooking to allow the juices to redistribute and the steak to reach its desired internal temperature.

The Role of Resting Time in Steak Cooking Temperatures

Resting your cooked steaks is crucial to allow the juices to redistribute and the meat to reach its desired internal temperature. Here are some benefits of resting time and the impact it has on steak tenderness:

  • Retains Juices: Resting allows the juices to settle back into the meat instead of running out when you cut into it, resulting in a juicier steak.

  • Enhanced Tenderness: During resting, the proteins in the meat relax and become more tender, making the steak more enjoyable to eat.

  • Even Cooking: Resting time helps to even out the cooking process, ensuring that the steak is cooked evenly from edge to center.

Resting your steaks not only improves their taste and texture, but it also allows for easier temperature adjustment when cooking to different levels of doneness. By adjusting the temperature on your wood pellet grill, you can achieve the perfect doneness from rare to well-done without compromising on tenderness or flavor.

Adjusting Temperature for Different Levels of Doneness

To achieve the perfect levels of doneness, it’s important to adjust the temperature while cooking your steaks. The temperature you choose will depend on the desired level of doneness and the cooking method you’re using.

For rare steaks, a lower cooking temperature is recommended, while well-done steaks require a higher temperature. The thickness of the steak also plays a role in determining the cooking temperature.

Thicker steaks will need a lower temperature and longer cooking time to ensure they are cooked evenly. On the other hand, thinner steaks can be cooked at a higher temperature for a shorter period. Understanding the impact of thickness on cooking temperature is crucial for achieving the perfect steak.

With this knowledge, you can now move on to mastering steak cooking temperatures on a wood pellet grill, where I will share some tips and tricks.

Tips and Tricks for Mastering Steak Cooking Temperatures on a Wood Pellet Grill

For the best results on your wood pellet grill, you’ll want to take note of some helpful tips and tricks to master steak cooking temperatures. Here are three key things to keep in mind:

  • Preheat your grill: Before cooking your steak, make sure to preheat your wood pellet grill to the desired temperature. This ensures an even cooking process and helps achieve that perfect sear on the outside of the steak.

  • Use a meat thermometer: Testing steak doneness is crucial to achieving optimal results. Invest in a reliable meat thermometer to accurately measure the internal temperature of your steak. This way, you can cook your steak to your desired level of doneness, whether it’s rare, medium-rare, medium, or well-done.

  • Let the steak rest: After cooking, allow your steak to rest for a few minutes before cutting into it. This allows the juices to redistribute, resulting in a more flavorful and tender steak.

Frequently Asked Questions

What Type of Wood Pellets Should I Use for Grilling Steaks on a Wood Pellet Grill?

I use different types of wood pellets for grilling steaks on my wood pellet grill. To achieve the perfect sear, I recommend using hardwood pellets like hickory or mesquite for a smoky flavor.

How Long Does It Take to Preheat a Wood Pellet Grill Before Cooking Steaks?

To get the best results when cooking steaks on a wood pellet grill, it’s important to preheat the grill properly. The recommended preheating time and temperature can vary, so it’s best to consult the manufacturer’s instructions for your specific grill model.

Can I Use a Wood Pellet Grill to Cook Steaks to Different Levels of Doneness?

When cooking steaks on my wood pellet grill, I can achieve different levels of doneness by adjusting the cooking times. The advantages of using a wood pellet grill include precise temperature control and smoky flavor infusion.

Is It Necessary to Flip the Steaks While Cooking on a Wood Pellet Grill?

It’s not necessary to flip steaks while cooking on a wood pellet grill. However, flipping can help with even cooking. For a perfect sear, preheat the grill to high temperature and sear each side for a few minutes.

Are There Any Special Temperature Considerations for Cooking Thicker Cuts of Steak on a Wood Pellet Grill?

When cooking thicker cuts of steak on my wood pellet grill, it’s important to consider the cooking time and searing techniques. The temperature should be adjusted to ensure a perfect medium-rare or desired doneness.

Conclusion

In conclusion, mastering steak cooking temperatures on a wood pellet grill is a skill that takes time and practice. By understanding the basics of wood pellet grilling and the importance of temperature control, you can achieve perfectly cooked steaks every time.

Remember to consider factors like the cut of steak, searing techniques, and resting time. Adjusting the temperature based on desired doneness is crucial.

With these tips and tricks, you’ll soon be grilling steaks to perfection, turning your grill into a culinary masterpiece that sizzles with flavor.

Growing up surrounded by the vast beauty of nature, Sierra was always drawn to the call of the wild. While others sought the comfort of the familiar, she ventured out, embracing the unpredictable and finding stories in the heartbeat of nature.   At the epicenter of every remarkable venture lies a dynamic team—a fusion of diverse talents, visions, and passions. The essence of Best Small Wood Stoves is crafted and refined by such a trio: Sierra, Logan, and Terra. Their collective expertise has transformed the platform into a leading authority on small wood stoves, radiating warmth and knowledge in equal measure.

Continue Reading

Pellets & Pellet Stoves

How Does a Wood Pellet Pizza Oven Work

Published

on

By

An image showcasing a wood pellet pizza oven in action

Ever wondered how a wood pellet pizza oven works? Well, let me break it down for you.

The beauty of these ovens lies in their simplicity and efficiency. With just a push of a button, the wood pellets ignite, creating a roaring fire that generates intense heat.

This heat is then evenly distributed across the cooking surface, thanks to the pizza stone, ensuring a perfectly crisp crust every time.

So, sit back, relax, and let me guide you through the fascinating inner workings of a wood pellet pizza oven.

Key Takeaways

  • Wood pellets are a fuel source made from compressed wood and are known for their fuel efficiency and clean burning properties.
  • The ignition process involves using a reliable ignition source, such as a propane torch, to light the wood pellets in the oven’s combustion chamber.
  • Proper temperature control is essential for successful pizza cooking, and it can be achieved by adjusting the airflow and fuel supply in the oven.
  • Efficient heat distribution techniques, such as using a rotating pizza stone and proper insulation, help evenly distribute heat and retain it for optimal cooking.

Fuel Source: Understanding the Wood Pellets

To understand how a wood pellet pizza oven works, you need to know that the fuel source for these ovens is wood pellets. Wood pellets are small, cylindrical pieces of compressed wood that are made from sawdust and other wood waste materials. These pellets are known for their fuel efficiency, as they burn cleanly and produce a high amount of heat.

The wood pellets are typically stored in a hopper located at the back of the oven. This hopper can hold a large quantity of pellets, allowing for continuous cooking without the need for frequent refills.

Now that we understand the fuel source, let’s move on to the ignition process: starting the fire.

Ignition Process: Starting the Fire

When it comes to lighting the kindling in a wood pellet pizza oven, it is crucial to follow the proper ignition process.

This involves using a reliable ignition source, such as a propane torch, to ignite the kindling and start the fire.

Once the fire is lit, controlling the temperature becomes essential to achieve the desired cooking results.

This can be done by adjusting the airflow and fuel supply to regulate the heat output.

Additionally, to ensure even heat distribution throughout the oven, it is important to properly position the wood pellets and maintain a consistent flame.

Lighting the Kindling

First, you’ll need to gather some kindling and place it in the wood pellet pizza oven to start the fire. Lighting the kindling is an essential part of the ignition process.

To ensure a successful fire, it is important to use proper lighting techniques and practice fire management. One effective technique is to use a long-reach lighter or matches to ignite the kindling. Start by placing the lighter or matches near the base of the kindling and apply a flame. Be cautious of any sparks or embers that may be produced.

Once the kindling is lit, you can gradually add larger pieces of wood pellets to build up the fire. This will help in controlling the temperature and maintaining a consistent heat for cooking delicious pizzas.

Controlling the Temperature

One way you can control the temperature is by adjusting the airflow in the oven. By controlling the amount of air circulating inside the oven, you can effectively increase or decrease the heat levels. This is achieved by manipulating the oven’s air vents, which allow air to enter and exit the cooking chamber. When you open the vents, more oxygen flows into the oven, fueling the flames and increasing the temperature. Conversely, closing the vents restricts the airflow, reducing the heat output. To give you a better understanding, here is a table showcasing the relationship between airflow and temperature control:

Airflow Level Heat Output
Fully Open High
Partially Open Medium
Closed Low

Achieving Even Heat

To achieve even heat distribution, you’ll want to ensure that the flames are evenly spread across the cooking chamber. This is crucial for cooking a perfect pizza in a wood pellet pizza oven.

Here are some key factors to consider for achieving even heat:

  • Proper airflow: Make sure there’s sufficient ventilation to allow the flames to circulate evenly throughout the oven.

  • Consistent fuel feed: A steady supply of wood pellets is essential for maintaining a constant flame, which helps in achieving even heat distribution.

  • Insulation: Good insulation is crucial for fuel efficiency and heat retention. It helps to keep the heat inside the oven, resulting in more consistent temperatures.

By focusing on these factors, you can ensure that your wood pellet pizza oven achieves optimal fuel efficiency and heat retention.

Now, let’s explore how the oven reaches high temperatures through heat generation.

Heat Generation: How the Oven Reaches High Temperatures

When it comes to understanding the heat generation in a wood pellet pizza oven, it is essential to delve into the combustion process.

The combustion process is the heart of the oven, where the pellets are burned to produce the heat needed for cooking.

Combustion Process Explained

The wood pellet pizza oven works by burning wood pellets to create heat for cooking. The combustion process is essential in generating the high temperatures needed to cook the perfect pizza. Here’s how the wood pellet combustion works:

  • Ignition: The fire is started by lighting the wood pellets with a flame or electric igniter.

  • Oxygen supply: Adequate airflow is crucial for the combustion process. The oven is designed with vents and a chimney to ensure a steady supply of oxygen.

  • Combustion chamber: The wood pellets are placed in a designated chamber where they burn and release heat.

The combustion process efficiently converts the energy stored in the wood pellets into heat, which is then used to cook the pizza. This efficient heat generation sets the stage for the subsequent section on efficient heat distribution techniques.

Efficient Heat Distribution Techniques

One efficient way to evenly distribute heat in a wood pellet pizza oven is by using a rotating pizza stone. The pizza stone acts as a heat sink, absorbing and retaining the heat generated by the burning wood pellets. This heat retention is crucial for maintaining a consistent and high cooking temperature throughout the oven.

To further enhance heat retention, insulation techniques are employed in the construction of the oven. Insulating materials, such as ceramic fibers or refractory bricks, are used to line the walls and ceiling of the oven, preventing heat from escaping and ensuring maximum efficiency. With the use of these insulation techniques, the heat generated by the wood pellets is effectively trapped and utilized for cooking the perfect pizza.

Now, let’s explore the cooking surface: the pizza stone.

Cooking Surface: Exploring the Pizza Stone

To get that perfect crispy crust, you’ll want to preheat the pizza stone in your wood pellet pizza oven. The cooking surface plays a crucial role in achieving delicious results, and the pizza stone is a popular choice for its ability to evenly distribute heat.

Here are some key points to consider when exploring different materials for your pizza stone:

  • Ceramic: Ceramic stones are known for their excellent heat retention, ensuring that your pizza cooks evenly and thoroughly.

  • Cordierite: This material is highly resistant to thermal shock, making it perfect for high-temperature cooking. It also provides a crispy crust while preventing the pizza from sticking to the surface.

  • Soapstone: Soapstone retains heat well and is ideal for slow cooking. It also adds a unique flavor to your pizza, enhancing the overall taste experience.

By choosing the right pizza stone, you can maximize heat retention and achieve that desired crispy crust.

Now, let’s move on to temperature control: managing the heat levels without compromising the cooking process.

Temperature Control: Managing the Heat Levels

Now let’s delve into temperature control and how to effectively manage the heat levels during the cooking process. When it comes to operating a wood pellet pizza oven, managing airflow and using insulation are key factors in maintaining the desired temperature. By controlling the airflow, you can regulate the intensity of the fire and ensure even heat distribution throughout the oven. Insulation plays a crucial role in heat retention, preventing any heat loss and maintaining a consistent temperature within the cooking chamber. To illustrate the importance of these elements, consider the following table:

Managing Airflow Using Insulation Consistent Heat Levels
Allows for precise control over temperature Prevents heat loss and ensures even cooking Ensures a consistently perfect pizza crust
Promotes efficient combustion of wood pellets Reduces fuel consumption Enhances overall cooking experience
Helps achieve desired cooking results Improves heat retention in the oven Provides consistent heat for consistent results

Cooking Techniques: Achieving the Perfect Crust

If you want to achieve the perfect crust, you should consider trying different cooking techniques in your wood pellet pizza oven. Achieving a crispy crust requires careful attention to the dough preparation techniques and the cooking process. Here are some techniques that can help you achieve that desired crispy crust:

  • Preheating the oven: Make sure to preheat your wood pellet pizza oven to the recommended temperature before placing the pizza inside. This allows for even cooking and helps create a crispy crust.

  • Using a pizza stone or baking steel: Placing your pizza on a preheated pizza stone or baking steel can help absorb moisture from the dough, resulting in a crispier crust.

  • Rotating the pizza: During the cooking process, rotating the pizza periodically helps ensure even heat distribution and prevents any areas from getting burnt.

By using these techniques, you can achieve a delicious pizza with a perfectly crispy crust.

Now, let’s move on to maintenance and cleaning, essential for keeping the oven in top shape.

Maintenance and Cleaning: Keeping the Oven in Top Shape

Make sure you regularly clean and maintain your wood pellet pizza oven to keep it in top shape. Proper cleaning techniques are essential to prevent the build-up of grease, ash, and food residue that can affect the performance and taste of your pizzas. To help you in maintaining your oven, here are some effective cleaning techniques and tips to prevent rust:

Cleaning Technique Description
Brushing Use a wire brush to remove ash and debris from the cooking surface and inside the oven.
Scrubbing For stubborn stains, use a mixture of warm water and mild dish soap to scrub the surfaces gently.
Seasoning Apply a thin layer of cooking oil to the interior surfaces to prevent rust and improve heat retention.

Preventing rust is crucial to prolonging the lifespan of your wood pellet pizza oven. After every cleaning session, make sure to wipe the oven’s exterior with a dry cloth to remove any moisture that could lead to rust formation. Additionally, consider investing in a weatherproof cover to protect your oven from the elements when not in use. By following these cleaning techniques and rust prevention tips, you can ensure that your wood pellet pizza oven remains in excellent condition for many delicious pizza-making sessions to come.

Frequently Asked Questions

Can a Wood Pellet Pizza Oven Be Used for Other Types of Cooking Besides Making Pizza?

Yes, a wood pellet pizza oven can be used for other types of cooking besides making pizza. It is versatile and can cook a variety of dishes such as bread, roasted vegetables, and even grilled meats. The benefits of using a wood pellet pizza oven for cooking include its ability to reach high temperatures quickly and evenly distribute heat, resulting in delicious and flavorful dishes.

How Long Does It Take for the Wood Pellets to Ignite and Reach the Desired Temperature?

When I fire up my wood pellet pizza oven, it feels like igniting a spark of excitement. Within 10 to 15 minutes, the pellets ignite and reach the desired temperature, allowing me to cook more than just pizza.

Are There Any Specific Types or Brands of Wood Pellets That Are Recommended for Use in a Wood Pellet Pizza Oven?

I recommend using hardwood pellets like oak or hickory for a wood pellet pizza oven. Some of the best brands include Traeger, Pit Boss, and Camp Chef. These pellets provide a rich, smoky flavor to your pizza.

Can the Temperature of a Wood Pellet Pizza Oven Be Adjusted During the Cooking Process?

Yes, the temperature of a wood pellet pizza oven can be adjusted during the cooking process. This allows for cooking versatility, ensuring that your pizza is cooked to perfection every time.

How Often Should a Wood Pellet Pizza Oven Be Cleaned and Maintained to Ensure Optimal Performance?

Cleaning frequency and maintenance tips for optimal performance of a wood pellet pizza oven will be discussed. Regular cleaning and maintenance are important to ensure the oven works efficiently and produces delicious pizzas.

Conclusion

In conclusion, a wood pellet pizza oven is a remarkable piece of equipment that combines the traditional taste of wood-fired pizza with modern convenience. With its fuel source of wood pellets, the oven provides a consistent heat source for cooking the perfect pizza. The ignition process ensures a quick and easy start, while the high temperatures reached by the oven guarantee a crispy crust. By using a pizza stone and managing the heat levels, you can achieve the desired texture and flavor.

Overall, a wood pellet pizza oven offers a unique and enjoyable cooking experience, allowing you to create delicious pizzas with ease.

For example, imagine hosting a backyard party with friends and family. As the sun sets, you fire up your wood pellet pizza oven, the smell of burning wood filling the air. Everyone eagerly gathers around as you slide the freshly made pizza onto the hot stone. The oven’s high temperatures quickly cook the pizza, creating a beautiful charred crust and melting cheese. The guests can’t help but marvel at the delicious results, savoring each bite and complimenting your culinary skills.

With a wood pellet pizza oven, you can create memorable moments and mouthwatering pizzas for all to enjoy.

Continue Reading

Pellets & Pellet Stoves

How Does a Wood Pellet Grill Work?

Published

on

By

An image capturing the intricate mechanism of a wood pellet grill, depicting the process of wood pellets being fed into the auger, ignited by a hot rod, and smoke infusing the food through the convection fan

Did you know that wood pellet grills have become increasingly popular in recent years, with sales reaching over 1 million units in 2020 alone?

As an avid grilling enthusiast, I’m here to share with you the inner workings of these innovative cooking machines.

In this article, we’ll delve into the basics of how a wood pellet grill works, including the heating mechanism, the role of wood pellets, temperature and smoke control, and various cooking techniques.

So, let’s fire up the grill and explore the delicious possibilities together!

Key Takeaways

  • Wood pellet grills use wood pellets as fuel for cooking and offer precise temperature control for optimal grilling results.
  • The heating mechanism involves controlled burning of wood pellets for heat, with heat distribution achieved through fans or convection systems.
  • Temperature control knobs allow for precise adjustments of the cooking temperature, and different types of wood pellets create unique flavor profiles.
  • Wood pellet grills offer versatility in cooking methods, including direct grilling, indirect grilling, smoking, roasting, and baking, allowing for experimentation and creativity in the kitchen.

The Basics of Wood Pellet Grills

So, you’re probably wondering how a wood pellet grill actually works. Well, let me break it down for you.

Wood pellet grills are equipped with heating elements that are responsible for generating heat and cooking your food. These heating elements are usually located beneath the cooking surface, allowing for even heat distribution and precise temperature control.

Speaking of cooking surface options, wood pellet grills typically come with grates made of stainless steel or cast iron. These materials are known for their durability and heat retention properties, ensuring that your food cooks evenly and retains its natural flavors.

Now, let’s move on to understanding the heating mechanism of these grills, which plays a crucial role in achieving that perfect smoky flavor in your grilled dishes.

Understanding the Heating Mechanism

When it comes to understanding the heating mechanism of wood pellet grills, there are three key points to consider: the pellet combustion process, the heat distribution method, and the temperature control system.

The pellet combustion process involves the controlled burning of wood pellets to generate heat, creating a consistent and flavorful cooking environment.

The heat distribution method utilizes fans or convection systems to evenly distribute the heat throughout the grill, ensuring that your food is cooked to perfection.

Lastly, the temperature control system allows you to adjust and maintain the desired cooking temperature, giving you full control over the grilling process.

Pellet Combustion Process

First, you’ll load hardwood pellets into the hopper of the wood pellet grill. These pellets are made from compressed sawdust and other wood waste materials, making them an eco-friendly choice for fuel. Pellet fuel production involves grinding the raw materials into a fine powder, which is then compressed under high pressure to form the pellets. This process eliminates the need for chemicals or binders, further reducing the environmental impact.

Once the pellets are loaded, they are fed into a combustion chamber by an auger. The grill’s electronic control system regulates the amount of fuel and air flow, ensuring efficient and consistent combustion. As the pellets burn, they release heat and smoke, creating the signature wood-fired flavor. The heat is then circulated throughout the cooking chamber by a convection fan, ensuring even heat distribution and consistent cooking temperatures.

Now, let’s move on to the heat distribution method used in wood pellet grills.

Heat Distribution Method

The heat from the burning pellets is evenly distributed throughout the cooking chamber by a convection fan. This heat distribution method ensures that the food is cooked evenly and thoroughly. The convection fan creates a constant airflow within the grill, allowing for efficient heat transfer.

As the pellets burn, they produce heat, which is then circulated by the convection fan. The airflow dynamics play a crucial role in maintaining a consistent temperature inside the cooking chamber. The hot air is pushed around the food, ensuring that it is cooked from all sides. This method not only results in deliciously cooked meals but also eliminates the need for constant flipping or rotating of the food.

Now, let’s delve into the temperature control system, which allows for precise adjustments to achieve the desired cooking temperature.

Temperature Control System

The temperature control system on the grill allows for precise adjustments to achieve the desired cooking temperature. This system plays a crucial role in ensuring temperature accuracy and fuel consumption. With the ability to control the temperature with precision, you can cook your food to perfection. This means no more undercooked or overcooked meals.

The temperature control system uses advanced technology to regulate the flow of fuel and air into the grill, which directly affects the temperature inside. By adjusting the temperature control knobs, you can increase or decrease the heat, maintaining a consistent temperature throughout the cooking process. This not only ensures that your food cooks evenly but also helps in minimizing fuel consumption.

Now, let’s move on to the importance of wood pellets in the operation of a wood pellet grill.

The Importance of Wood Pellets

To make your wood pellet grill work, you’ll need to understand the importance of wood pellets.

Wood pellets are the fuel source for your grill, providing both heat and flavor to your food. They are made from compressed sawdust and contain no additives or binders, making them a clean and eco-friendly option.

The benefits of using wood pellets in your grill are numerous. Firstly, they offer consistent and reliable heat, allowing for precise temperature control. Secondly, they impart a delicious smoky flavor to your food, enhancing the taste and aroma. Lastly, there are different types of wood pellets available, each with its own unique flavor profile. From hickory and mesquite to apple and cherry, you can experiment with different woods to create a variety of flavors.

Now, let’s delve into the next section, where we will discuss how to control temperature and smoke on your wood pellet grill.

Controlling Temperature and Smoke

Now, let’s dive into how you can control the temperature and smoke on your wood pellet grill. Here are three key ways to achieve the perfect cooking environment:

  1. Controlling Airflow: Adjusting the airflow on your wood pellet grill is crucial for temperature control. By opening or closing the vents, you can increase or decrease the amount of oxygen that reaches the fire, ultimately affecting the heat produced.

  2. Smoke Flavor Profiles: The wood pellets you choose will greatly impact the flavor of your food. Different wood varieties, such as hickory, mesquite, or apple, create unique smoke flavor profiles. Experimenting with different combinations can elevate your dishes to new levels of deliciousness.

  3. Placement of Meat: The position of your meat on the grill grates can also influence the smoke flavor. Placing it closer to the fire will result in a stronger smoky taste, while positioning it further away will produce a milder flavor.

By mastering these techniques, you can create mouthwatering dishes with precise temperature control and delightful smoke flavors.

Now, let’s explore the various cooking techniques on a wood pellet grill.

Cooking Techniques on a Wood Pellet Grill

By experimenting with different cooking techniques, you can elevate your dishes to new levels of deliciousness on a wood pellet grill. Wood pellet grills offer versatility when it comes to cooking methods, allowing you to achieve various flavors and textures.

One popular technique is direct grilling, where you cook your food directly over the heat source. This method is perfect for steaks, burgers, and vegetables, giving them a beautiful sear and caramelization.

Another technique is indirect grilling, where you cook your food away from the heat source. This method is great for larger cuts of meat, such as roasts or whole chickens, as it ensures even cooking and tenderness.

You can also enhance the flavor of your dishes by using wood pellets that complement your ingredients. Hickory for a smoky taste, apple for a touch of sweetness, or mesquite for a bold and robust flavor.

By mastering these cooking methods and experimenting with different wood pellets, you can take your dishes to the next level of flavor enhancement.

As you explore the delicious possibilities of cooking on a wood pellet grill, it’s important to remember that regular maintenance and cleaning are essential to keep your grill in top condition.

Maintenance and Cleaning Tips for Wood Pellet Grills

Regular maintenance and cleaning are crucial for keeping your wood pellet grill in optimal condition. To ensure that your grill continues to perform at its best, here are some maintenance tips and cleaning techniques you can follow.

First, always clean the grill grates after each use to remove any residual food and grease. Use a grill brush to scrub away any stuck-on debris.

Next, regularly inspect the fire pot and clean out any ash or pellet buildup. This will help prevent clogs and ensure proper airflow.

Additionally, check the heat diffuser and drip tray for grease buildup and clean them as needed.

Finally, don’t forget to clean the exterior of the grill with warm soapy water and a soft sponge.

Frequently Asked Questions

Are Wood Pellet Grills Suitable for Both Indoor and Outdoor Use?

Yes, wood pellet grills are suitable for both indoor and outdoor use. However, there are pros and cons to consider. Indoor grilling offers convenience and safety, while outdoor grilling allows for a traditional BBQ experience. Safety considerations and the use of accessories are important in both settings.

Can Wood Pellet Grills Be Used for Grilling and Smoking at the Same Time?

Yes, wood pellet grills can be used for grilling and smoking at the same time. It’s a versatile cooking method that allows for precise temperature control, giving you the best of both worlds.

How Long Do Wood Pellets Typically Last Before Needing to Be Refilled?

On average, wood pellets typically last between 4 to 6 hours before needing to be refilled. However, the burn time can be affected by factors such as temperature, cooking duration, and pellet quality.

Can Wood Pellet Grills Reach High Temperatures for Searing?

Yes, wood pellet grills can reach high temperatures for searing. The combination of wood pellets and airflow allows for precise temperature control, making them versatile for both low and slow cooking and high-heat searing.

Are Wood Pellet Grills Compatible With Different Types of Wood Pellets?

Yes, wood pellet grills are compatible with different types of wood pellets. The pros of using different types of wood pellets include diverse flavors, while the cons include potential ash buildup and cost variations.

Conclusion

In conclusion, using a wood pellet grill is like having a master chef by your side, effortlessly creating mouthwatering dishes.

The heating mechanism, fueled by wood pellets, ensures consistent and precise temperature control, allowing for even cooking and perfect results every time.

Just like a conductor leading an orchestra, you have complete control over the temperature and smoke levels, giving you the ability to create a symphony of flavors.

With proper maintenance and cleaning, your wood pellet grill will continue to be your culinary companion, bringing joy and delicious meals for years to come.

Continue Reading

Pellets & Pellet Stoves

How Does a Outdoor Corn Wood or Pellet Burner Heat a House

Published

on

By

An image showcasing an outdoor corn, wood, or pellet burner integrated with a house

I’ve always been fascinated by the ingenuity of outdoor corn wood or pellet burners. These remarkable devices have the power to transform a chilly house into a cozy haven. But how exactly do they work?

In this article, we’ll delve into the mechanics of these burners, exploring the types available, the combustion process, and the heat transfer mechanisms. We’ll also discuss the advantages of using these burners, factors affecting heating efficiency, and provide installation and maintenance tips.

So, let’s dive in and uncover the secrets behind these incredible heating systems.

Key Takeaways

  • The fuel and air ratio is crucial for efficient heating, with the right balance maximizing heat output and minimizing fuel consumption.
  • Understanding heat transfer mechanisms such as conduction, convection, and radiation is important for effectively transferring heat to the desired space or medium.
  • Using corn, wood, or pellet burners offers advantages such as high efficiency, cost-effectiveness, and a lower carbon footprint compared to traditional heating methods.
  • Proper installation, maintenance, and safety precautions are essential for the optimal functioning and longevity of outdoor burners.

Types of Outdoor Corn Wood or Pellet Burners

There are three main types of outdoor burners: corn, wood, and pellet burners. These burners are an alternative to traditional heating methods and offer different fuel options.

The first type is the corn burner, which uses shelled corn as fuel. It is an economical option and provides a consistent heat output.

The second type is the wood burner, which uses logs or wood pellets for fuel. Wood burners offer a traditional and rustic heating experience and are often used in areas where wood is abundant.

The third type is the pellet burner, which uses compressed wood pellets. Pellet burners are efficient and easy to use, as the pellets can be automatically fed into the burner.

Understanding the combustion process is essential to operating these burners effectively.

Understanding the Combustion Process

In order to understand the combustion process, it’s important to examine the fuel and air ratio as well as the heat transfer mechanisms involved.

The fuel and air ratio refers to the proportion of fuel and air required for optimal combustion. This ratio can greatly impact the efficiency and performance of the burner. By ensuring the correct ratio, the combustion process can be more efficient and effective.

Additionally, heat transfer mechanisms such as conduction, convection, and radiation play a crucial role in transferring the heat generated during combustion. These mechanisms help to transfer the heat to the desired space or medium, ensuring that it is used effectively.

Understanding both the fuel and air ratio and the heat transfer mechanisms is essential for optimizing the combustion process and achieving desired results.

Fuel and Air Ratio

The fuel and air ratio in an outdoor corn wood or pellet burner is crucial for efficient heating of a house. Achieving optimal fuel efficiency requires careful control of this ratio during the combustion process.

When the correct amount of air is supplied to the burner, it ensures complete combustion of the fuel, resulting in maximum heat generation. Too little air can lead to incomplete combustion, producing less heat and wasting fuel. On the other hand, too much air can cause excessive cooling, reducing the overall efficiency of the system.

Therefore, it is essential to find the right balance between fuel and air to maximize the heat output and minimize fuel consumption. By understanding and managing this ratio, we can effectively harness the energy potential of corn, wood, or pellets in heating our homes.

Transitioning to the subsequent section, we will now explore the various heat transfer mechanisms involved in this process.

Heat Transfer Mechanisms

To effectively maximize the efficiency of your heating system, understanding and managing the heat transfer mechanisms is crucial. Here are four key aspects to consider:

  1. Radiation heat transfer: This occurs when heat is transferred through electromagnetic waves, such as infrared radiation. It is responsible for the warmth you feel when standing near a fireplace or a hot stove.

  2. Convection heat transfer: This involves the transfer of heat through the movement of fluids, such as air or water. In the case of an outdoor burner, convection helps distribute the heated air throughout the house, ensuring even heating.

  3. Insulation: Proper insulation is essential to minimize heat loss and maximize the effectiveness of the heat transfer mechanisms. Good insulation helps retain the heat generated by the burner, reducing the energy required to maintain a comfortable temperature.

  4. Air circulation: Efficient air circulation is vital for effective heat transfer. Ensuring that air can flow freely throughout the house helps distribute the heat evenly and prevents pockets of cold air.

Understanding and managing these heat transfer mechanisms is crucial for optimizing the performance of your outdoor burner. By considering factors such as radiation heat transfer, convection heat transfer, insulation, and air circulation, you can ensure that your heating system operates efficiently and effectively.

Now, let’s explore how these mechanisms work specifically in outdoor burners.

Heat Transfer Mechanisms in Outdoor Burners

Heat is transferred from an outdoor corn wood or pellet burner to a house through conduction, convection, and radiation. Radiation is the primary mechanism by which heat travels through space without the need for a medium.

In the case of an outdoor burner, the heat radiates from the burning corn, wood, or pellets and is absorbed by the surrounding air. This heated air then rises due to convection, creating a natural circulation of warm air. Convection plays a crucial role in distributing the heat throughout the house, as the warm air from the burner rises and displaces the cooler air, creating a continuous cycle.

These heat transfer mechanisms ensure that the warmth generated by the burner is effectively delivered to every corner of the house, providing efficient and comfortable heating.

Moving on to the advantages of using corn wood or pellet burners…

Advantages of Using Corn Wood or Pellet Burners

Using corn wood or pellet burners as a heating alternative offers several advantages.

Firstly, these burners are highly efficient in providing heat for homes.

Secondly, they utilize a renewable fuel source, such as corn or wood pellets, which reduces reliance on fossil fuels and helps to minimize the carbon footprint.

Lastly, these burners are cost-effective for home heating as they can provide significant savings on energy bills in the long run.

Efficient Heating Alternative

An outdoor corn wood or pellet burner can be an efficient alternative for heating a house. These burners use renewable fuels such as corn kernels, wood pellets, or biomass to generate heat. By using these renewable fuel sources, you can reduce your environmental impact and contribute to a cleaner and greener future.

Not only are these burners environmentally friendly, but they also offer long-term savings. The cost of corn, wood pellets, or biomass is generally lower compared to traditional heating fuels like oil or gas. Additionally, these burners are designed for optimal efficiency, ensuring that more heat is produced with less fuel consumption. This means lower heating bills and more money saved in the long run.

Transitioning to an outdoor corn wood or pellet burner is a smart choice for both your wallet and the environment.

Renewable Fuel Source

By switching to a renewable fuel source like corn, wood pellets, or biomass, you can reduce your environmental impact and save money on heating bills. Renewable energy sources such as these have a significantly lower carbon footprint compared to traditional fossil fuels. When burned, corn, wood pellets, or biomass release carbon dioxide, but the amount released is equal to the amount absorbed by the plants during their growth, making them carbon-neutral. This reduces greenhouse gas emissions, which contribute to climate change.

Additionally, these renewable fuels are often sourced locally, reducing the dependence on foreign oil and supporting local economies. By adopting renewable fuel sources for heating, we can make a positive impact on the environment while also benefiting financially.

Now, let’s explore the next section about cost-effective home heating solutions.

Cost-Effective Home Heating

Switching to a cost-effective home heating solution can help you save money on your energy bills. Here are a few cost saving tips to consider:

  • Install an outdoor corn, wood, or pellet burner: This type of heating system uses renewable fuel sources, such as corn, wood, or pellets, which are often more affordable than traditional fuels like oil or gas.

  • Invest in insulation: Proper insulation in your home can help retain heat and reduce the amount of energy needed for heating, leading to significant cost savings.

  • Use a programmable thermostat: By setting your thermostat to lower temperatures when you’re not at home or asleep, you can reduce energy consumption and save money.

Not only can these cost-effective measures save you money, but they also have a positive environmental impact by reducing carbon emissions. Considering these factors affecting the heating efficiency, it’s important to evaluate the size of your home, insulation, and maintenance of the heating system.

Factors Affecting the Heating Efficiency

Factors affecting the heating efficiency of an outdoor corn wood or pellet burner include the quality of fuel and the insulation of the house.

When it comes to heating distribution, the burner’s ability to evenly distribute heat throughout the house is crucial.

A well-insulated house ensures that the heat generated by the burner is retained and not lost to the outside environment. Insulation effectiveness plays a significant role in preventing heat loss through walls, floors, and ceilings. This means less energy is required to maintain a comfortable temperature indoors.

By using high-quality fuel and ensuring proper insulation, homeowners can optimize the heating efficiency of their outdoor burners, resulting in lower energy costs and a more comfortable living environment.

With these factors in mind, let’s now explore the installation and set-up for outdoor burners.

Installation and Set-Up for Outdoor Burners

When installing and setting up an outdoor burner, it’s important to consider factors such as proper ventilation and safety precautions. To meet installation requirements, ensure that the burner is placed in an open area away from flammable materials. Install a chimney or venting system to allow for the release of combustion byproducts. Make sure to follow the manufacturer’s instructions for proper fuel connection and electrical wiring.

Common issues that may arise during installation include fuel leaks, improper venting, and electrical malfunctions. Troubleshooting these issues requires a thorough inspection of the burner. Check for leaks, ensure proper venting, and test the electrical connections.

By addressing these installation requirements and troubleshooting common issues, you can ensure a safe and efficient operation of your outdoor burner.

Moving on to maintenance and safety tips for outdoor burners…

Maintenance and Safety Tips for Outdoor Burners

Now that we have discussed the installation and set-up of outdoor burners, it is important to understand the maintenance and safety tips associated with these heating systems.

Proper maintenance is crucial to ensure the longevity and efficiency of your outdoor burner. Regularly inspect the burner for any signs of wear and tear, and clean it as needed.

It is also important to follow safety precautions when operating the burner. Keep flammable materials away from the burner, and make sure it is placed on a stable and non-combustible surface. Additionally, always use caution when handling fuel and conducting any maintenance tasks.

By following these maintenance tips and safety precautions, you can enjoy the warmth and comfort of your outdoor burner while minimizing any potential risks.

When comparing outdoor burners with other heating options…

Comparing Outdoor Burners With Other Heating Options

One important aspect to consider is the cost of operating different heating options. When comparing efficiency levels and environmental impact, outdoor burners can be a viable alternative. Let’s take a look at a comparison table:

Heating Option Efficiency Level Environmental Impact
Outdoor Burners High Low
Natural Gas Medium Medium
Oil Low High
Electric Low High
Propane Medium Medium

As we can see, outdoor burners offer high efficiency levels and low environmental impact. Natural gas and propane provide a compromise between efficiency and environmental impact. However, oil and electric heating options have lower efficiency levels and higher environmental impact. It’s important to consider these factors when choosing a heating option for your home. Outdoor burners not only provide warmth but also contribute to a more sustainable and efficient heating solution.

Frequently Asked Questions

How Much Does an Outdoor Corn, Wood, or Pellet Burner Cost?

When comparing the cost of outdoor corn, wood, or pellet burners, it’s important to consider the benefits they offer. These burners can provide efficient heating for your house while reducing your reliance on traditional energy sources.

Can an Outdoor Burner Be Used to Heat Multiple Rooms or Is It Only Suitable for One Area?

An outdoor burner can efficiently heat multiple rooms, providing warmth like a cozy blanket on a chilly night. Its ability to distribute heat evenly throughout the house makes it a beneficial choice for those seeking warmth and comfort in every corner.

Are Outdoor Burners Environmentally Friendly and Do They Produce a Lot of Smoke?

Outdoor burners are generally considered environmentally friendly and produce minimal smoke when properly maintained. However, their energy efficiency and environmental impact can vary depending on the type of fuel used. Proper installation and following safety precautions are crucial.

Can an Outdoor Burner Be Used as the Primary Heat Source for a House, or Is It More of a Supplemental Heat Source?

As the primary heat source, an outdoor burner has pros and cons. Pros include cost savings and independence from traditional fuel sources. However, cons include maintenance and the need for backup heating during extreme temperatures.

What Kind of Maintenance Is Required for an Outdoor Burner and How Often Should It Be Performed?

Maintenance frequency for an outdoor burner depends on usage and manufacturer guidelines. Common issues include cleaning the burn pot, inspecting and replacing gaskets, and checking for any leaks or blockages. Regular maintenance ensures optimal performance and safety.

Conclusion

In conclusion, using an outdoor corn wood or pellet burner to heat your house is like having a cozy fireplace that never goes out. These burners provide efficient heat transfer mechanisms, utilizing the combustion process to generate warmth.

With various types available, installation and set-up can be tailored to your specific needs. Regular maintenance and following safety tips ensure optimal performance.

Compared to other heating options, outdoor burners offer advantages such as cost-effectiveness and environmental friendliness. Embrace the warmth and comfort these burners bring to your home.

Continue Reading

Trending