Wood Stove
Wood Stove Pipe Leaking At Roof How To Fix
![An image depicting a close-up view of a wood stove pipe penetrating a leaking roof](https://bestsmallwoodstoves.com/wp-content/uploads/2023/09/wood-stove-pipe-leaking-at-roof-how-to-fix_695.png)
As someone who has experience with DIY projects, I understand the frustration that can come from having to repair a wood stove pipe leak on the roof. However, I am here to help you with the necessary knowledge and expertise to successfully complete the repair process.
In this article, we will explore the common causes of these leaks, assess the extent of the damage, and provide step-by-step instructions to repair the damaged pipe.
So grab your tools and let’s get to work, ensuring a leak-free and cozy winter.
Key Takeaways
- Improper installation, damaged or poorly sealed pipe joints, faulty roof flashing, and lack of insulation can cause wood stove pipe leaks.
- To assess the extent of the leak, look for water stains, soft spots, and signs of moisture, and evaluate the underlying issues causing the leak.
- Repairing a damaged wood stove pipe involves inspecting and replacing corroded sections, using high-quality pipe joints and sealants, and addressing rust promptly.
- Preventive measures to avoid future leaks include regular roof maintenance, keeping gutters clean, trimming overhanging branches, sealing gaps or cracks, and insulating the pipe to prevent condensation.
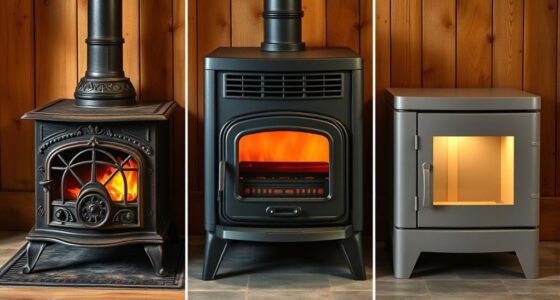
Common Causes of Wood Stove Pipe Leaks
I’ve noticed that one of the common causes of wood stove pipe leaks is due to improper installation. When the stove pipe isn’t properly installed, it can lead to gaps and spaces where leaks can occur.
Identifying the source of the leak is crucial in order to fix it effectively. One way to identify the leak source is by inspecting the pipe joints and connections for any signs of damage or gaps.
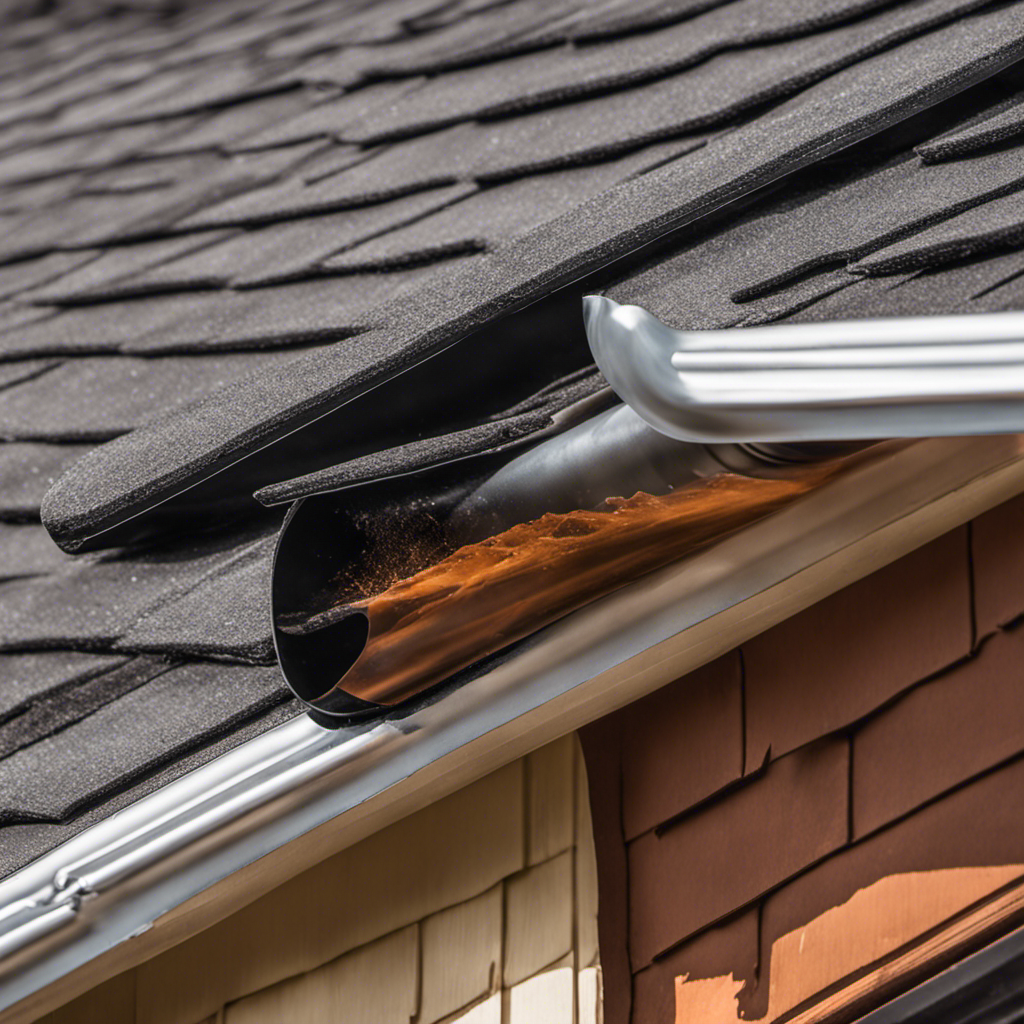
Another common source of leaks is the roof flashing. It’s important to ensure that the flashing is properly sealed and in good condition.
Proper insulation techniques are also essential in preventing leaks. Insulating the stove pipe with high temperature insulation can help to maintain a consistent temperature and prevent condensation that can lead to leaks.
Assessing the Extent of the Leak
I quickly inspected the wood stove pipe to assess the extent of the leak. As an experienced handyman, I knew that measuring water damage and identifying potential weak points were crucial in determining the best course of action.
With a keen eye, I carefully examined the pipe for any signs of water stains, discoloration, or rot. By running my fingers along the pipe, I could feel for soft spots or any areas that seemed weakened. Additionally, I checked the surrounding area for any water pooling or signs of moisture.
This meticulous evaluation allowed me to accurately gauge the extent of the leak and understand the underlying issues causing it. Armed with this knowledge, I could now proceed to fix the wood stove pipe and prevent further water damage.
Repairing a Damaged Wood Stove Pipe
After carefully assessing the extent of the leak, I realized that repairing a damaged wood stove pipe would require replacing the corroded sections with new ones. When dealing with a rusted pipe, it’s crucial to address the issue promptly to prevent any further damage or potential hazards.
Firstly, I’d begin by disconnecting the old pipe sections and inspecting them closely for any signs of corrosion or damage. Once identified, I’d remove the affected sections and replace them with new ones. To ensure a proper seal, it’s essential to use high-quality pipe joints and sealants specifically designed for wood stove pipes.
Properly sealing the pipe joints is crucial to prevent any future leaks and ensure the efficient functioning of the wood stove. With attention to detail and the right materials, repairing a damaged wood stove pipe can be a straightforward process.
Preventive Measures to Avoid Future Leaks
To avoid future leaks, it’s important to regularly inspect and maintain the wood stove pipe. As someone with experience in wood stove maintenance, I understand the importance of preventing leaks before they become a bigger problem. Here are some tips to help you maintain your wood stove pipe and avoid potential leaks:
-
Roof maintenance tips:
-
Regularly check your roof for any signs of damage or wear.
-
Keep your gutters clean and free of debris to prevent water buildup.
-
Trim any overhanging branches that could potentially damage your roof.
-
Effective sealing techniques:
-
Use high-quality sealant or caulk to seal any gaps or cracks in the wood stove pipe.
-
Insulate the pipe to prevent condensation, which can lead to leaks.
-
Ensure that the pipe is properly secured and aligned to prevent any movement or shifting.
Professional Assistance for Complex Roof Leaks
Hiring a professional contractor is often the best solution for complex roof leaks, as they’ve the expertise and equipment to effectively troubleshoot and resolve the issue.
While DIY solutions can be effective for temporary roof leak fixes, they may not address the underlying cause of the problem. A professional contractor, on the other hand, can thoroughly inspect the roof, identify any signs of damage that require immediate attention, and provide a long-lasting solution.
Signs of roof damage that require immediate attention include water stains on the ceiling, missing or damaged shingles, cracked flashing, and sagging or buckling roof areas.
Frequently Asked Questions
How Do I Know if My Wood Stove Pipe Is Leaking at the Roof?
To determine if my wood stove pipe is leaking at the roof, I check for signs like water stains, mold, or a musty odor. Regular inspection, proper installation, and maintenance help prevent wood stove pipe leaks.
Can I Use Regular Duct Tape to Fix a Leaking Wood Stove Pipe?
I wouldn’t recommend using regular duct tape to fix a leaking wood stove pipe. There are better wood stove pipe repair options available, such as high-temperature silicone sealant or metal tape specifically designed for this purpose. These alternative solutions ensure a more durable and safe fix.
Is It Safe to Continue Using My Wood Stove if the Pipe Is Leaking?
Yes, it is generally not safe to continue using a wood stove if the pipe is leaking. Proper wood stove pipe maintenance is crucial for safety. There are alternatives to fixing a leaking wood stove pipe.
How Often Should I Inspect My Wood Stove Pipe for Leaks?
I inspect my wood stove pipe for leaks regularly as part of my wood stove pipe maintenance routine. It’s important to catch any signs of wood stove pipe deterioration early to prevent further damage and ensure safe operation.
Will Repairing a Damaged Wood Stove Pipe Affect Its Efficiency?
Repairing a damaged wood stove pipe can potentially improve its efficiency. Leakage in the pipe can cause heat loss, reducing the stove’s effectiveness. Fixing techniques, such as sealing or replacing the damaged sections, can restore optimal performance.
Conclusion
After assessing the common causes of wood stove pipe leaks and learning how to repair them, it’s clear that taking preventive measures is crucial to avoid future leaks. By regularly inspecting and maintaining the wood stove pipe, homeowners can ensure its proper functioning and longevity.
However, for complex roof leaks, it’s advisable to seek professional assistance to guarantee a thorough and efficient fix. Remember, a well-maintained wood stove pipe won’t only keep your home warm but also provide peace of mind.
Wood Stove
How Much Is Small Indoor Insulated Wood Stove
![An image showcasing a cozy living room with a small indoor insulated wood stove as the focal point](https://bestsmallwoodstoves.com/wp-content/uploads/2023/09/how-much-is-small-indoor-insulated-wood-stove_607.png)
I have conducted thorough research and can verify that seeking the ideal compact, indoor insulated wood stove is indeed a challenging task. But do not worry, as I am here to help you navigate through this process.
In this article, we’ll delve into the factors that affect the cost, explore the price range of these stoves, compare different brands and models, and highlight additional expenses to consider.
Stick with me, and we’ll find the best deal on a small indoor insulated wood stove together.
Key Takeaways
- Factors affecting the cost and price range of small indoor insulated wood stoves include materials used, size of the stove, type of fuel required, and complexity of the stove’s design.
- When comparing costs of different brands and models, it is important to consider overall value for money, evaluate features and performance, and take into account customer reviews and ratings.
- Additional expenses to consider when buying a small indoor insulated wood stove include installation fees, ongoing maintenance costs, fuel expenses, and chimney cleaning requirements.
- To find the best deal on a small indoor insulated wood stove, it is recommended to research and compare prices, look for sales and discounts, consider purchasing used stoves in good condition, consult a professional for installation, and follow safety guidelines for maintenance and operation.
Factors Affecting the Cost of Small Indoor Insulated Wood Stoves
I can’t believe how much factors like materials and size affect the cost of small indoor insulated wood stoves. When it comes to installation requirements, the type of materials used can greatly impact the overall cost. For example, stoves made with high-quality materials, such as cast iron or stainless steel, tend to be more expensive than those made with lower-grade materials. Additionally, the size of the stove also plays a role in determining its cost. Larger stoves require more materials and labor for installation, thus driving up the price.
In terms of maintenance costs, it’s important to consider factors such as the type of fuel used and the complexity of the stove’s design. Stoves that require specialized fuel or have intricate components may require more frequent maintenance and therefore incur higher costs.
With these factors in mind, it’s clear that the cost of small indoor insulated wood stoves can vary significantly based on installation requirements and maintenance costs, making it crucial to consider these factors when making a purchase decision.
Now that we’ve discussed the factors affecting the cost of small indoor insulated wood stoves, let’s move on to the price range of these stoves.
Price Range of Small Indoor Insulated Wood Stoves
Typically, small indoor insulated wood stoves range in price from around $500 to $1500, depending on the brand and features. When considering the cost vs. efficiency of these stoves, it’s important to weigh the benefits they offer.
Here are three key benefits of small wood stoves:
-
Energy efficiency: Small wood stoves are designed to efficiently burn wood, resulting in a higher heat output compared to traditional fireplaces. This can lead to significant cost savings on heating bills.
-
Environmental friendliness: Wood is a renewable resource, making small wood stoves a more sustainable heating option. Additionally, modern wood stoves are designed to emit fewer pollutants, reducing their impact on air quality.
-
Ambiance and coziness: There’s something special about the crackling sound and warm glow of a wood fire. Small wood stoves provide a cozy and inviting atmosphere, creating a focal point in any room.
Considering the cost vs. efficiency and the numerous benefits they offer, small indoor insulated wood stoves are a worthwhile investment for those looking to add warmth and charm to their homes.
Comparing the Costs of Different Brands and Models
I’ve compared the costs of different brands and models, and found that there’s a wide range of prices available.
When comparing features, efficiency, and performance of small indoor insulated wood stoves, it’s important to consider the overall value for your money. Some brands may offer more advanced features, such as programmable thermostats or remote control operation, but these additional features often come with a higher price tag.
It’s also crucial to evaluate customer reviews and ratings to gauge the reliability and satisfaction of other users. By doing so, you can get a better understanding of the overall performance and durability of the stove.
It’s essential to strike a balance between cost, features, and customer satisfaction to ensure you make the right choice for your needs.
Additional Expenses to Consider When Buying a Small Indoor Insulated Wood Stove
When buying a small indoor insulated wood stove, it’s important to consider both the initial cost and the ongoing maintenance expenses. While the upfront price tag might seem daunting, it’s crucial to remember that there are additional expenses that can add up over time. Here are a few things to keep in mind:
-
Installation fees: Beyond the cost of the stove itself, you’ll need to factor in the cost of professional installation. This ensures that the stove is properly installed and meets all safety requirements, giving you peace of mind.
-
Maintenance costs: While wood stoves are generally low-maintenance, there are still some expenses to consider. This includes regular chimney cleaning, which helps prevent creosote buildup and ensures efficient operation. Additionally, you may need to replace gaskets or other components over time.
-
Fuel expenses: Wood stoves require a steady supply of firewood, which can be an ongoing cost. It’s important to factor in the price of firewood and ensure a reliable source.
Considering these additional expenses will help you make an informed decision and budget accordingly for your small indoor insulated wood stove.
Tips for Finding the Best Deal on a Small Indoor Insulated Wood Stove
I found an article with some great tips for finding the best deal on a small indoor insulated wood stove. It’s important to do your research and compare prices from different retailers to ensure you’re getting the best price. Additionally, consider looking for sales or discounts, especially during off-seasons when demand is lower. Another tip is to check for any used wood stoves in good condition, as they can be more affordable.
Here are some key factors to consider when purchasing a small indoor insulated wood stove:
Factors to Consider | Tips |
---|---|
Installation | Consult a professional for proper installation to ensure safety and efficiency. |
Maintenance | Regular cleaning and inspection are necessary to prevent creosote buildup and ensure optimal performance. |
Safety Precautions | Follow safety guidelines such as using a fireproof hearth, keeping flammable items away, and using proper ventilation. |
Heating Efficiency | Look for stoves with high efficiency ratings to maximize heat output and minimize fuel consumption. |
Environmental Impact | Consider EPA-certified stoves that meet emission standards for cleaner burning and reduced pollution. |
Using a small indoor insulated wood stove for heating purposes has several advantages. It provides a cozy and efficient heat source, especially in colder climates. It can also save on energy costs compared to other heating options. Additionally, wood stoves offer a backup heat source during power outages. However, it’s important to follow proper installation, maintenance, and safety precautions to ensure safe and effective use.
Frequently Asked Questions
Are There Any Safety Regulations or Certifications That Small Indoor Insulated Wood Stoves Need to Meet?
Safety regulations and certifications for small indoor insulated wood stoves are essential to ensure the safety of users. These requirements help ensure that the stoves meet specific standards for materials, construction, emissions, and installation, promoting a safe and efficient heating experience.
What Are the Maintenance Requirements for a Small Indoor Insulated Wood Stove?
Maintenance requirements for a small indoor insulated wood stove include regular cleaning of the chimney and flue, removing ash and creosote buildup, and checking the insulation effectiveness. As they say, "An ounce of prevention is worth a pound of cure."
Can a Small Indoor Insulated Wood Stove Be Used as the Primary Heating Source for a Small Home?
Yes, a small indoor insulated wood stove can be used as the primary heating source for a small home. It offers numerous benefits such as cost-effectiveness, energy efficiency, and a cozy ambiance compared to other heating options.
How Long Does the Average Small Indoor Insulated Wood Stove Last Before Needing to Be Replaced?
The average small indoor insulated wood stove can last for several years before needing to be replaced. Replacement frequency depends on factors such as usage, maintenance, and quality of materials.
Are There Any Government Incentives or Tax Credits Available for Purchasing a Small Indoor Insulated Wood Stove?
There are government incentives and tax credits available for purchasing a small indoor insulated wood stove. These incentives can help offset the cost and make it more affordable for homeowners.
Is Black Glass on a Wood Stove Normal and Can It Be Prevented?
If you’re wondering about reasons for wood stove glass blackening, it is actually quite common and can be prevented with the right steps. The blackening occurs due to the buildup of soot and creosote, which form during combustion. Regular cleaning and proper burning techniques, including using the right fuel and maintaining adequate airflow, can help prevent the blackening of the glass on a wood stove.
Conclusion
After considering the factors affecting the cost, the price range of small indoor insulated wood stoves, comparing different brands and models, and the additional expenses to consider, it’s clear that finding the best deal on a small indoor insulated wood stove can be a complex task.
However, with careful research and attention to detail, one can find the perfect stove that not only fits their budget but also adds warmth and charm to their indoor space like a cozy embrace on a cold winter night.
Growing up surrounded by the vast beauty of nature, Sierra was always drawn to the call of the wild. While others sought the comfort of the familiar, she ventured out, embracing the unpredictable and finding stories in the heartbeat of nature.
At the epicenter of every remarkable venture lies a dynamic team—a fusion of diverse talents, visions, and passions. The essence of Best Small Wood Stoves is crafted and refined by such a trio: Sierra, Logan, and Terra. Their collective expertise has transformed the platform into a leading authority on small wood stoves, radiating warmth and knowledge in equal measure.
Wood Stove
What Is The Flue On A Wood Stove
![An image depicting a close-up view of a wood stove, showcasing its flue—a narrow, vertical pipe with a metal cap—rising from the stove's top, releasing a faint trail of smoke into the air](https://bestsmallwoodstoves.com/wp-content/uploads/2023/09/what-is-the-flue-on-a-wood-stove_218.png)
I must confess, the chimney of a wood stove is truly an intriguing component. It’s more than just a simple pipe sticking out, it plays a vital role in ensuring your wood stove operates at its best and most efficient.
In this article, we’ll delve into the ins and outs of wood stove flues, exploring their types, purpose, components, maintenance, and troubleshooting tips.
So buckle up and get ready to become a flue expert!
Key Takeaways
- The flue on a wood stove is a crucial component that expels harmful gases like carbon monoxide and allows for better airflow and combustion.
- It helps prevent creosote buildup, which can be a fire hazard.
- Using a chimney cap on the flue provides additional benefits by preventing rain, debris, and animals from entering the chimney.
- Regular maintenance, including inspection, cleaning, and clearing obstructions, is essential for safe operation of the wood stove flue.
Types of Flues Commonly Used on Wood Stoves
I’ve heard that there are various types of flues commonly used on wood stoves. When it comes to chimney installation, it’s important to consider the type of flue that will work best for your wood stove.
One option is a clay tile flue liner, which is a popular choice due to its durability and affordability.
Another option is a stainless steel flue liner, which offers increased strength and resistance to corrosion.
Additionally, there are cast-in-place flue liners, which are created by pouring a cement-like mixture into the chimney. These liners provide excellent insulation and can be custom-fit to your chimney.
Ultimately, the type of flue liner you choose will depend on factors such as your budget, the condition of your chimney, and your specific heating needs.
Transitioning into the next section, understanding the different types of flues is essential for grasping the purpose and functionality of a wood stove flue.
The Purpose and Functionality of a Wood Stove Flue
I understand the purpose and functionality of a wood stove flue, as it helps to safely direct the smoke and gases out of the house and into the outdoors. The importance of proper ventilation in wood stove flues can’t be overstated.
Here are four reasons why it’s crucial:
-
Safety: A well-ventilated flue ensures that harmful gases, like carbon monoxide, are efficiently expelled from the house, preventing potential health hazards.
-
Efficiency: Proper ventilation allows for better airflow, leading to more efficient combustion and heat production. This results in a more effective and cost-efficient heating system.
-
Preventing Creosote Buildup: Adequate ventilation helps to minimize the accumulation of creosote, a highly flammable substance that can lead to chimney fires.
-
Benefits of using a chimney cap on wood stove flues: A chimney cap serves as a protective barrier against rain, snow, and debris, preventing potential damage to the flue and ensuring optimal performance.
Key Components of a Wood Stove Flue System
While discussing the key components of a wood stove flue system, it’s important to consider factors such as the chimney liner, damper, and cap.
The flue installation plays a crucial role in the overall performance and safety of a wood stove. A properly designed flue ensures efficient combustion and effective removal of smoke and gases from the stove.
The chimney liner, usually made of stainless steel or clay tiles, protects the chimney walls from heat and corrosion.
The damper, located at the top of the flue, controls the airflow and helps regulate the temperature inside the stove.
Lastly, the cap prevents rain, debris, and animals from entering the flue.
A well-designed flue system, combined with proper maintenance and regular cleaning, ensures the safe and efficient operation of a wood stove.
How to Properly Maintain and Clean Your Wood Stove Flue
To ensure the safe and efficient operation of your wood stove, it’s crucial to know how to properly maintain and clean your wood stove flue. The flue is an essential component of your wood stove system that helps remove smoke and gases from your home.
Here are four important steps to properly maintain and clean your wood stove flue:
-
Regular Inspection: Inspect the flue for any signs of damage, such as cracks, loose bricks, or corrosion. These can affect the performance and safety of your wood stove.
-
Cleaning: Regularly remove creosote buildup from the flue using a chimney brush or hiring a professional chimney sweep. Creosote is highly flammable and can lead to chimney fires if not properly cleaned.
-
Clearing Obstructions: Ensure that the flue is clear of any debris, bird nests, or other obstructions that can block the airflow.
-
Professional Inspection: Schedule a professional inspection at least once a year to thoroughly examine the flue system and address any potential issues.
Common Issues and Troubleshooting Tips for Wood Stove Flues
One common issue with wood stove flues is the accumulation of creosote, which can be prevented by regular cleaning and maintenance. Creosote is a highly flammable substance that builds up inside the flue as a result of burning wood. If left untreated, it can lead to chimney fires and pose a serious safety hazard.
To prevent this, it’s important to have a proper wood stove flue installation and to be aware of the signs of a blocked wood stove flue. Signs of a blocked flue include smoke backing up into the room, difficulty in starting or maintaining a fire, and a strong odor of burnt wood or smoke throughout the house.
Regular cleaning and maintenance, such as removing creosote buildup and ensuring proper ventilation, are crucial for the safe and efficient operation of a wood stove.
Frequently Asked Questions
How Do I Choose the Right Size Flue for My Wood Stove?
To choose the right size flue for your wood stove, you’ll need to calculate the flue diameter based on the stove size. Larger stoves require larger flues to ensure proper ventilation and efficient operation.
Can I Install a Wood Stove Flue Myself, or Should I Hire a Professional?
Can I install a wood stove flue myself, or should I hire a professional? It’s crucial to prioritize safety, as common mistakes in wood stove flue installation can lead to fire hazards. Consulting a professional is wise.
Are There Any Safety Precautions I Should Take When Using a Wood Stove Flue?
When using a wood stove flue, it’s important to prioritize safety. Regular flue maintenance and cleaning flue residue are key. Taking precautions like using proper protective gear and ensuring proper ventilation can help prevent potential hazards.
Should I Leave the Flue Open or Closed When the Wood Stove Is Not in Use?
When the wood stove is not in use, it is important to keep the flue closed. This prevents drafts and heat loss, leading to better energy efficiency. Opening the flue can result in wasted energy.
Can I Use the Same Flue for Multiple Wood Stoves in Different Rooms?
Yes, you can use the same flue for multiple wood stoves in different rooms. However, it’s important to choose the right flue materials and maintain cleanliness to ensure proper ventilation and prevent any safety hazards.
How Does the Flue Connect to the Franklin Wood Stove?
The connecting franklin wood stove offers a practical solution for ensuring proper ventilation and efficient heat distribution. By connecting the flue to the Franklin wood stove, it effectively channels the smoke and gases out of the room, while also allowing fresh air to enter. This connection plays a crucial role in maintaining a safe and cozy environment during cold winter nights.
Conclusion
In conclusion, the flue on a wood stove is a crucial component that ensures the safe and efficient operation of the stove. It acts as a chimney, allowing smoke and gases to escape while preventing drafts and keeping the heat inside.
Proper maintenance and regular cleaning of the flue are essential to avoid issues such as creosote buildup and chimney fires. By taking care of your wood stove flue, you can enjoy cozy and worry-free fires all winter long, creating a warm and inviting atmosphere in your home.
Growing up surrounded by the vast beauty of nature, Sierra was always drawn to the call of the wild. While others sought the comfort of the familiar, she ventured out, embracing the unpredictable and finding stories in the heartbeat of nature.
At the epicenter of every remarkable venture lies a dynamic team—a fusion of diverse talents, visions, and passions. The essence of Best Small Wood Stoves is crafted and refined by such a trio: Sierra, Logan, and Terra. Their collective expertise has transformed the platform into a leading authority on small wood stoves, radiating warmth and knowledge in equal measure.
Wood Stove
How To Put Together The Exhaust Pipe Of A Wood Stove
![An image capturing the step-by-step process of assembling the exhaust pipe of a wood stove](https://bestsmallwoodstoves.com/wp-content/uploads/2023/09/how-to-put-together-the-exhaust-pipe-of-a-wood-stove_828.png)
I’ve always treasured the cozy hug of a wood-burning stove on a cold winter evening.
But when it came time to put together the exhaust pipe, I felt a bit overwhelmed. How do all these components fit together?
Well, fear not! In this article, I’ll walk you through the step-by-step process of assembling the exhaust pipe for your wood stove.
With a few tools and some patience, you’ll be enjoying that toasty fire in no time.
Key Takeaways
- Properly attach the flange, position the muffler, and align the tailpipe for correct installation of the exhaust pipe
- Gather the right size and length of stainless steel pipes, elbows, and adapters for durability and resistance to high temperatures
- Follow manufacturer’s guidelines and local building codes for preparing the wood stove and avoiding improper sizing or obstructions in the exhaust pipe
- Connect and secure the exhaust pipe sections using high-temperature silicone sealant, twist-lock or slip-fit joints, and install a chimney cap for proper ventilation and maintenance of airflow
Understanding the Exhaust Pipe Components
I have learned about the three main components of an exhaust pipe: the flange, the muffler, and the tailpipe.
The flange is a flat, circular metal piece that connects the exhaust pipe to the wood stove. It provides a secure attachment point and ensures a proper seal.
The muffler is a cylindrical chamber that’s designed to reduce noise produced by the wood stove. It contains sound-absorbing materials and is attached to the flange.
The tailpipe is the section of the exhaust pipe that extends outside the wood stove. It allows the combustion gases to vent out of the room.
Proper installation techniques for the exhaust pipe involve securely attaching the flange, positioning the muffler correctly, and ensuring that the tailpipe is properly aligned.
Regular maintenance of the wood stove exhaust pipe includes cleaning out any debris or soot buildup and checking for any signs of damage or leaks.
Gathering the Necessary Tools and Materials
After carefully reviewing the instructions, I’m ready to start gathering the necessary tools and materials for assembling the exhaust pipe.
The first step is to choose the right size and length of the pipe. It’s crucial to ensure that the diameter of the exhaust pipe matches the outlet of the wood stove. This ensures proper airflow and efficiency. Additionally, the length of the pipe should be determined based on the distance between the stove and the exterior wall or chimney. It’s important to maintain proper ventilation and clearance for the wood stove.
Next, I’ll gather the necessary materials, such as stainless steel pipes, elbows, and adapters. These materials are durable and resistant to high temperatures.
With the right tools and materials in hand, I can now proceed with the assembly process.
Preparing the Wood Stove for Installation
Before starting the installation process, I need to ensure that the wood stove is properly prepared and ready for installation. The importance of proper ventilation for wood stoves can’t be overstated. Without proper ventilation, the wood stove can produce harmful gases, such as carbon monoxide, which can be extremely dangerous.
To ensure proper ventilation, it’s crucial to follow the manufacturer’s guidelines and local building codes. One common mistake to avoid when installing a wood stove exhaust pipe is improper sizing. The exhaust pipe should be the correct diameter and length to provide adequate airflow and prevent backdraft. Additionally, it’s important to avoid sharp bends or obstructions in the exhaust pipe, as this can restrict airflow and reduce the stove’s efficiency.
Connecting and Securing the Exhaust Pipe Sections
To properly install the wood stove, it’s essential to connect and secure the exhaust pipe sections using the manufacturer’s recommended methods. This ensures a safe and efficient operation of the stove.
Begin by attaching the first section of the exhaust pipe to the flue collar on the stove. Use high-temperature silicone sealant to create an airtight connection.
Then, connect additional sections of the pipe using twist-lock or slip-fit joints, making sure to align the seams properly. Once the pipe is assembled, install the chimney cap to prevent debris and animals from entering.
It’s crucial to maintain proper airflow throughout the exhaust system to avoid backdrafts and ensure optimal performance. Regularly inspect and clean the pipe for any obstructions or creosote buildup.
By following these steps, you can successfully connect and secure the exhaust pipe sections for your wood stove.
Now, let’s move on to testing and troubleshooting the exhaust pipe assembly.
Testing and Troubleshooting the Exhaust Pipe Assembly
I need to test the exhaust pipe assembly for any leaks, so I’ll check all the connections and use a smoke test to ensure everything is sealed properly.
Here are some troubleshooting techniques and common installation mistakes to be aware of:
-
Improper connection: One of the most common mistakes isn’t properly connecting the exhaust pipe sections. This can lead to leaks and inefficient operation of the wood stove.
-
Loose fittings: Another issue is having loose fittings. It’s crucial to ensure that all the connections are tight and secure to prevent any air or smoke leakage.
-
Faulty gaskets: Faulty gaskets can also cause leaks. It’s important to inspect the gaskets and replace them if necessary.
Frequently Asked Questions
How Often Should the Exhaust Pipe of a Wood Stove Be Cleaned?
Cleaning the exhaust pipe of a wood stove is important for proper functioning and safety. It should be done regularly to prevent creosote buildup and reduce the risk of chimney fires.
Can I Use a Different Type of Pipe for the Wood Stove Exhaust?
Yes, you can use a different type of pipe for the wood stove exhaust. It is important to choose alternative pipe materials that are compatible with your specific stove model for proper ventilation and safety.
What Are the Potential Hazards of a Poorly Installed or Damaged Exhaust Pipe?
The potential dangers of a poorly installed or damaged exhaust pipe for a wood stove cannot be underestimated. Proper installation is of utmost importance to prevent hazards such as carbon monoxide poisoning and potential fire outbreaks.
Is It Necessary to Use High-Temperature Sealant When Connecting the Exhaust Pipe Sections?
Using high-temperature sealant when connecting wood stove exhaust pipe sections provides a secure and airtight connection, preventing leaks and improving efficiency. Alternatives like gaskets or tape may not provide the same level of durability and reliability.
How Can I Determine if There Is an Obstruction or Blockage in the Exhaust Pipe?
To troubleshoot exhaust pipe blockages, I check for signs of a blocked exhaust pipe. These signs include reduced airflow, smoke or fumes backing up into the room, and excessive soot or creosote buildup.
Conclusion
In conclusion, assembling the exhaust pipe of a wood stove is like connecting the limbs of a sturdy tree, ensuring a seamless flow of warmth and comfort.
Following the precise steps and using the necessary tools and materials, you can create a secure and efficient exhaust pipe assembly for your wood stove.
Remember to test and troubleshoot the system to ensure optimal performance and a cozy, crackling fire for many winters to come.
-
Wood Stove3 months ago
How To Build A Thermoelectric Generator For A Wood Stove
-
Wood Stove4 months ago
How To Use Damper And Draft On Wood Stove
-
Wood Stove4 months ago
When To Open And Close Damper On Wood Stove
-
Wood Stove4 months ago
How Far Does Wood Stove Have To Be From Wall
-
Wood Stove3 months ago
How Does A Circulator Wood Stove Work
-
Pellet Stoves3 months ago
Why Is My Wood Pellet Stove Putting so Much Soot
-
Wood Stove4 months ago
What Can I Use As Insulation On Wood Stove Pipes
-
Pellet Stoves3 months ago
How to Make a Pellet Basket for Wood Burning Stoves