Connect with us

Wood Stove

How To Install Wood Stove In Garage

Published

on

I’ve always wanted to install a wood stove in my garage, but I had no idea where to start. That’s when I stumbled upon this comprehensive guide on how to set up a wood stove in a garage.

Trust me, it’s easier than you think. From assessing the space and safety requirements to connecting the stove to the chimney, this article has got you covered.

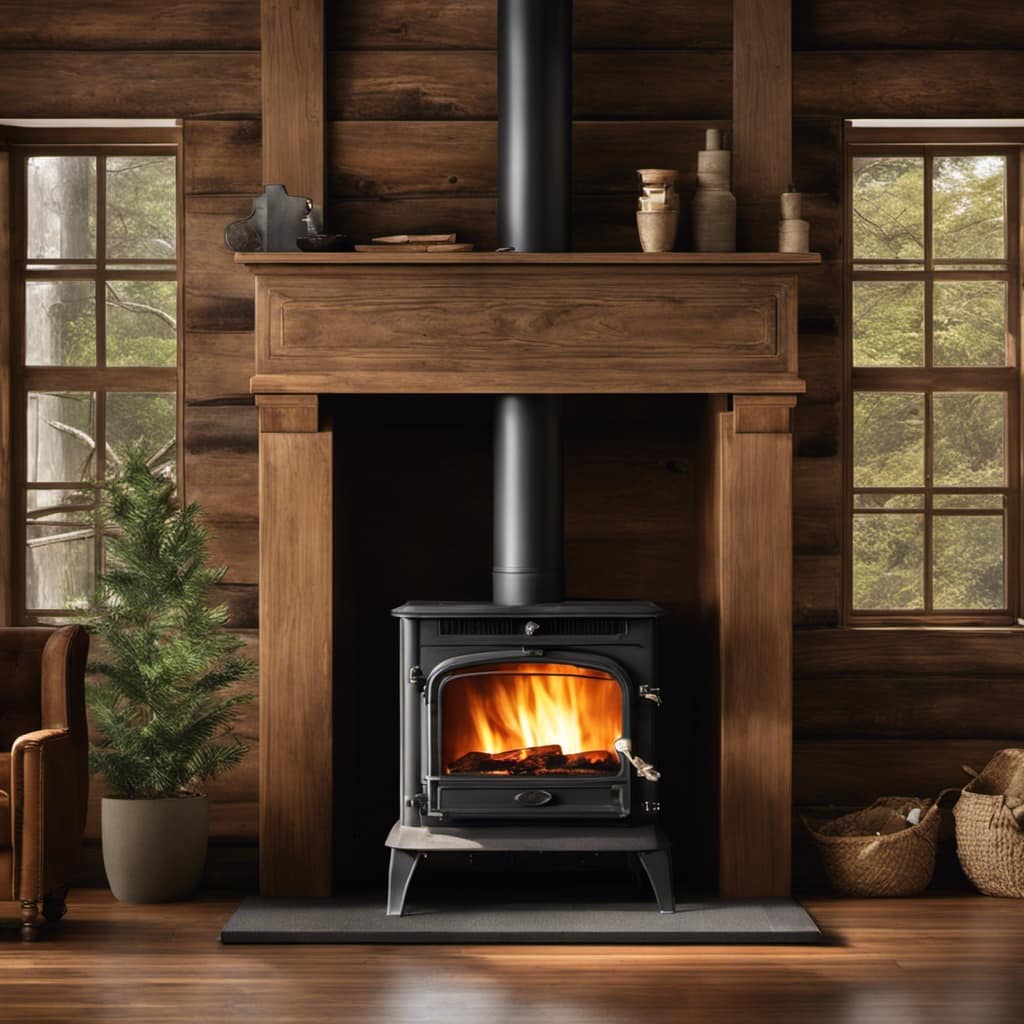
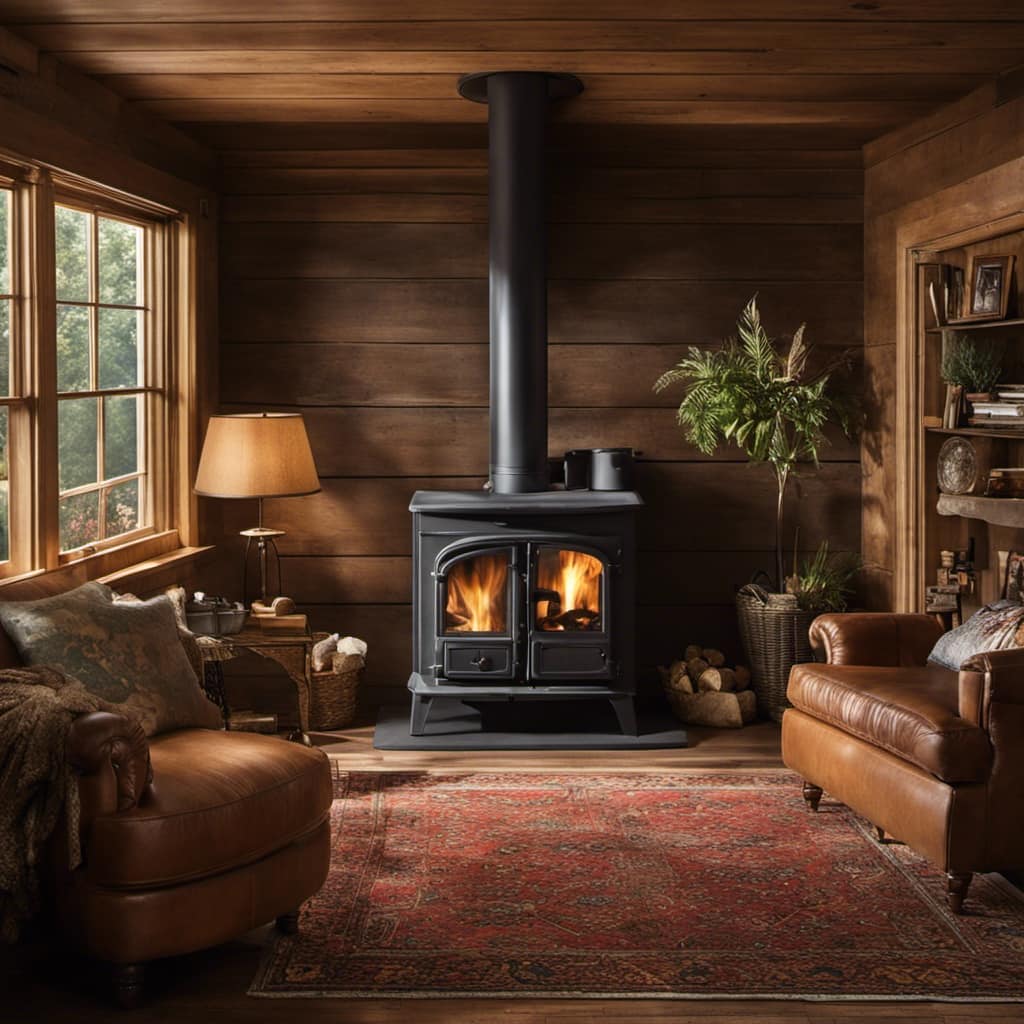
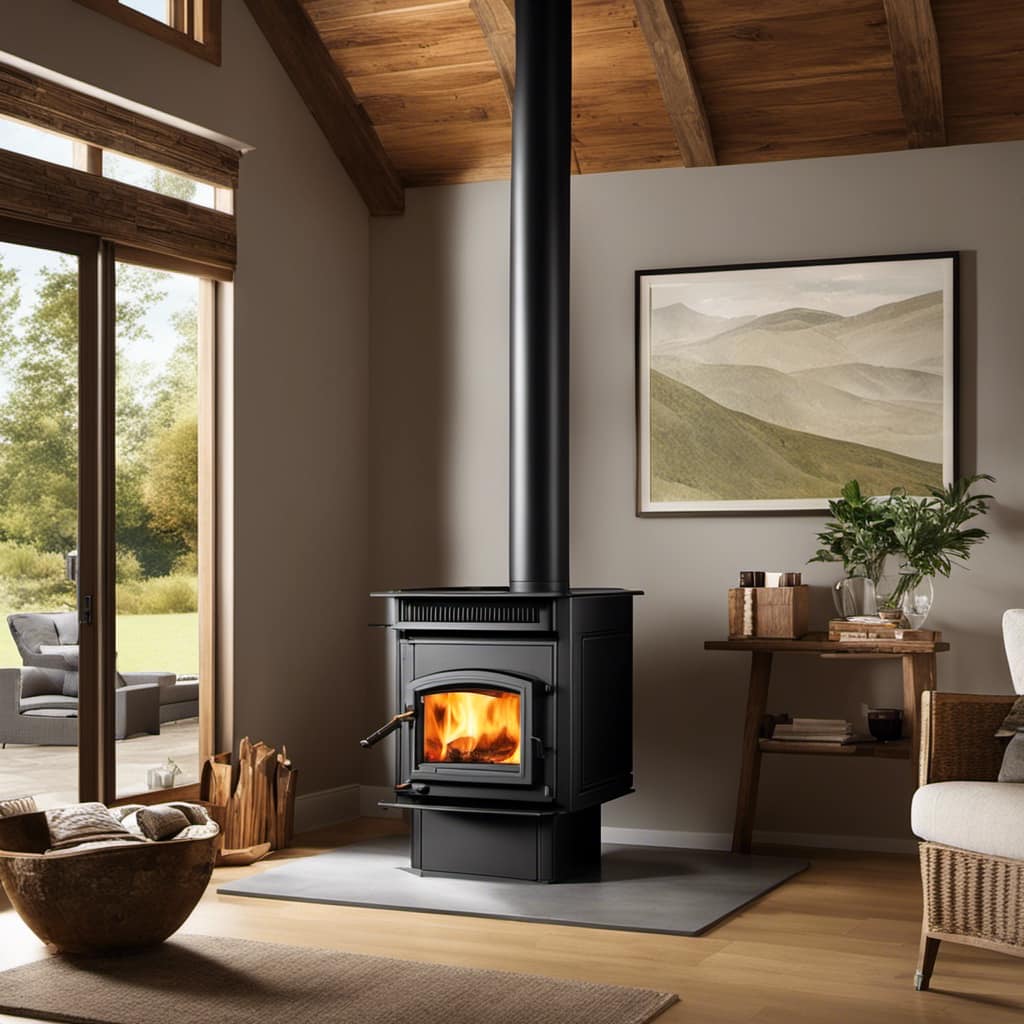
Get ready to turn your garage into a cozy oasis with the warmth of a wood stove.

Key Takeaways

  • Measure the available space and evaluate heating capacity to choose the right wood stove for the garage.
  • Check building codes and regulations, and ensure proper ventilation and safety equipment for installation.
  • Prepare the garage by assessing airflow, adding insulation, determining safety clearance distances, and installing smoke detectors and carbon monoxide alarms.
  • Install a chimney, use a fresh air intake, and ensure proper insulation to retain heat, while regularly testing and maintaining ventilation systems.
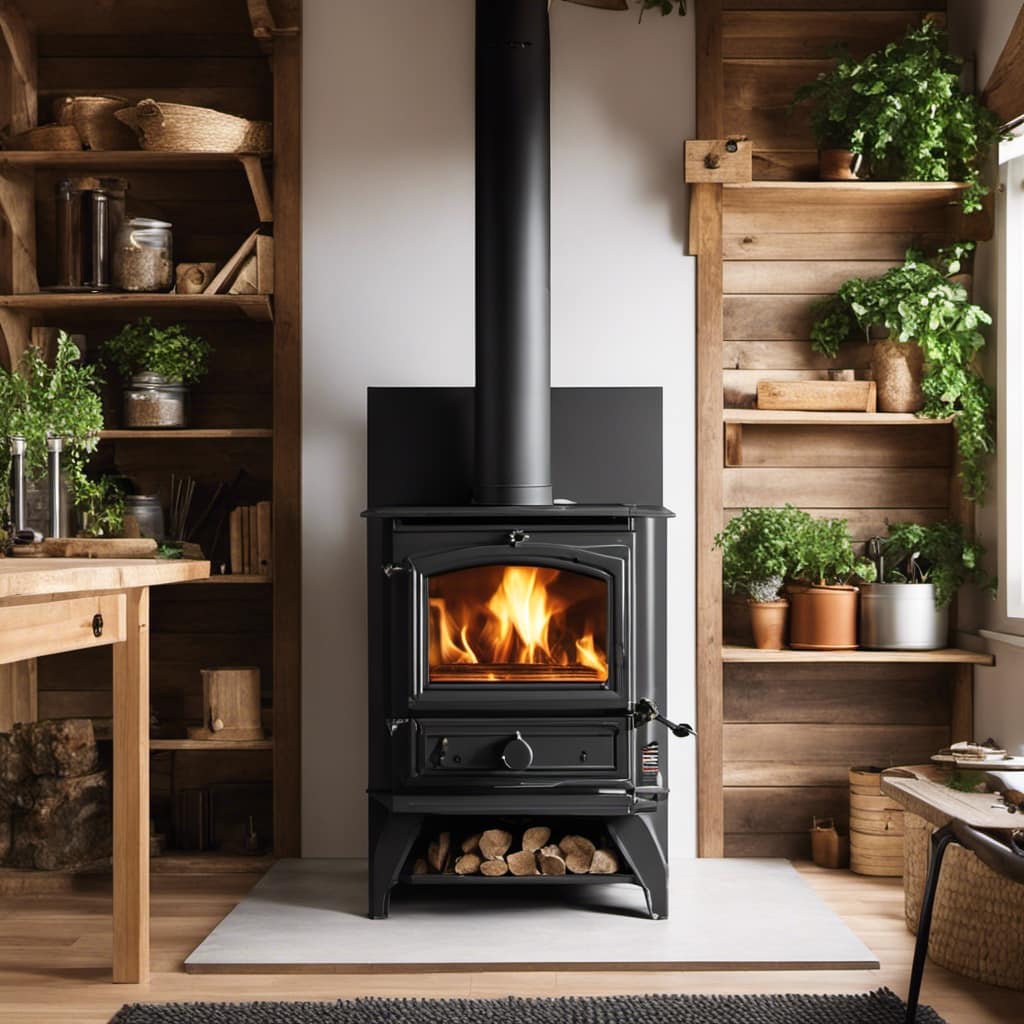
Assessing the Space and Safety Requirements

I’ll need to carefully measure the available space and ensure that all safety requirements are met before installing the wood stove in my garage. Assessing the space and safety requirements is crucial to ensure a successful installation and to prevent any potential hazards. Here are the steps to follow:

wood stove fireplace insert with blower

  1. Measure the available space: Start by measuring the dimensions of your garage to determine the suitable location for the wood stove. Consider factors such as clearances from walls, ceilings, and combustible materials.

  2. Check building codes and regulations: Research the local building codes and regulations regarding wood stove installations in garages. Ensure that you comply with all safety requirements and obtain any necessary permits.

  3. Evaluate ventilation options: Proper ventilation is essential for safe operation. Determine if your garage has existing ventilation systems or if you need to install additional vents or chimney systems to ensure proper airflow.

  4. Inspect the flooring: Check the condition of the garage floor. It should be made of non-combustible material, such as concrete, to prevent any fire hazards.

    wood cook stove

  5. Install fireproof barriers: If needed, install fireproof barriers around the wood stove to protect nearby combustible materials. This can include heat shields or non-combustible walls.

Choosing the Right Wood Stove for Your Garage

When selecting the best option, it’s important to consider the size and heating capacity of the stove that will suit my garage. Assessing the size and capacity of the wood stove is crucial to ensure efficient heating and avoid any safety issues.

Advertisement

Here are the steps to choosing the right wood stove for your garage:

  1. Measure the garage space: Determine the size of your garage to find a wood stove that fits comfortably without overcrowding the area.

    wood stove insert flex pipe

  2. Evaluate heating capacity: Consider the square footage of your garage and the insulation level to determine the BTU (British Thermal Unit) output required. This will ensure that the wood stove can adequately heat the space.

  3. Evaluate the fuel options: Wood stoves can burn a variety of fuels, including firewood, pellets, or coal. Evaluate the availability and cost of these fuel options in your area to choose the most practical and cost-effective option for your needs.

Gathering the Necessary Tools and Materials

To complete the project, I’ll need a measuring tape, screwdriver, and the appropriate fuel source for the wood stove.

Before starting the installation process, it’s important to assess the safety of the area where the wood stove will be placed. Make sure the garage has proper ventilation and is equipped with a smoke detector and carbon monoxide alarm.

wood stoves for sale at lowes

It’s also crucial to choose the right materials for the installation. Opt for a wood stove that’s specifically designed for garage use and meets all safety requirements. Additionally, select a chimney pipe that’s compatible with the stove and suitable for your garage’s layout. The pipe should be made of durable materials, such as stainless steel, to withstand high temperatures and provide proper ventilation.

Don’t forget to purchase the necessary insulation and fireproof materials to ensure the wood stove is installed safely.

Advertisement

Preparing the Garage for Wood Stove Installation

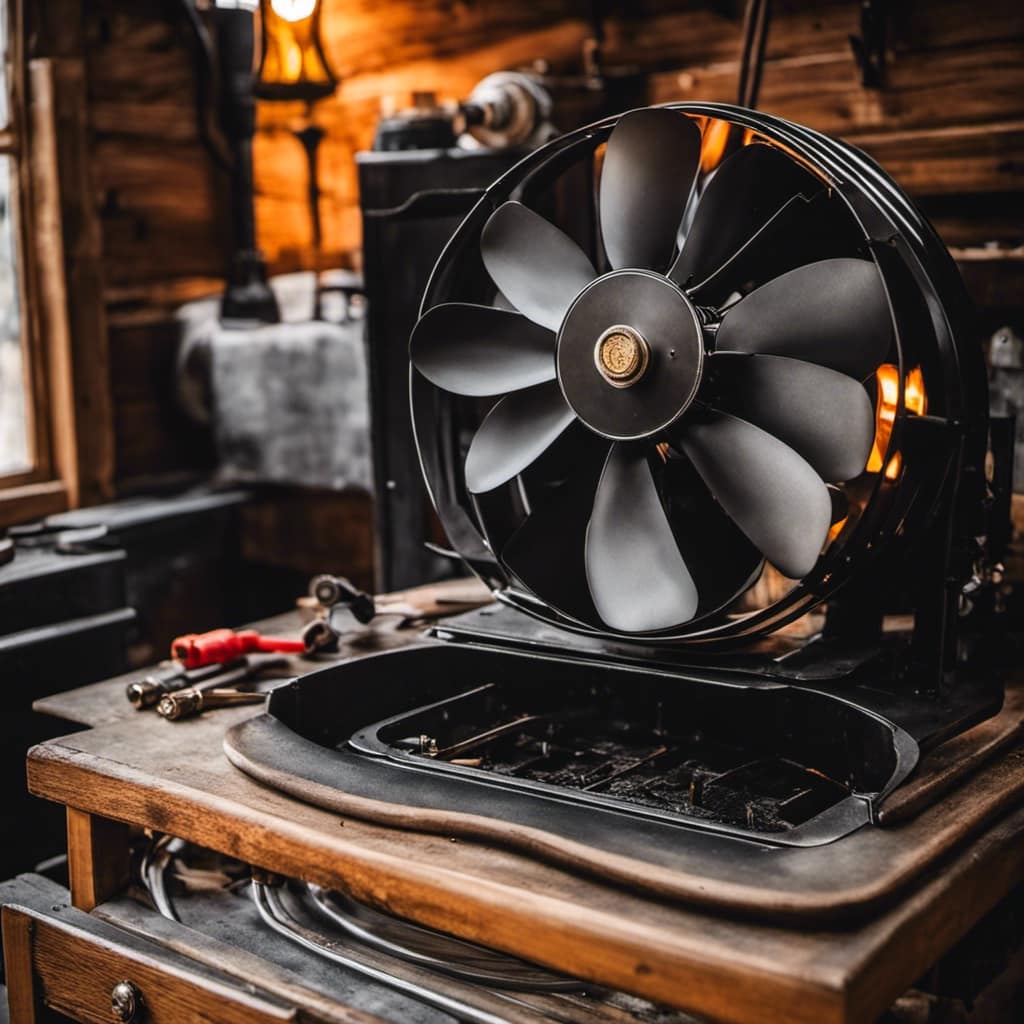
To prepare the garage for wood stove installation, I first need to ensure proper ventilation for safety. This involves assessing the existing airflow in the space and making any necessary modifications, such as installing vents or fans.

Next, I’ll focus on insulation to retain heat efficiently. This may include adding insulation to the walls and ceiling to create a more cozy and comfortable environment.

wood burning stove with blower

Lastly, I must consider clearance distances to maintain safety. This involves determining the required space between the stove and any combustible materials, as well as ensuring there’s enough room for easy access and maintenance.

Ventilation Requirements for Safety

I need to ensure that proper ventilation is in place to meet safety requirements for installing a wood stove in my garage. Ventilation is crucial for the safe operation of a wood stove, as it helps remove harmful gases and prevents the buildup of carbon monoxide.

Here are three ventilation techniques and safety precautions to consider:

Advertisement
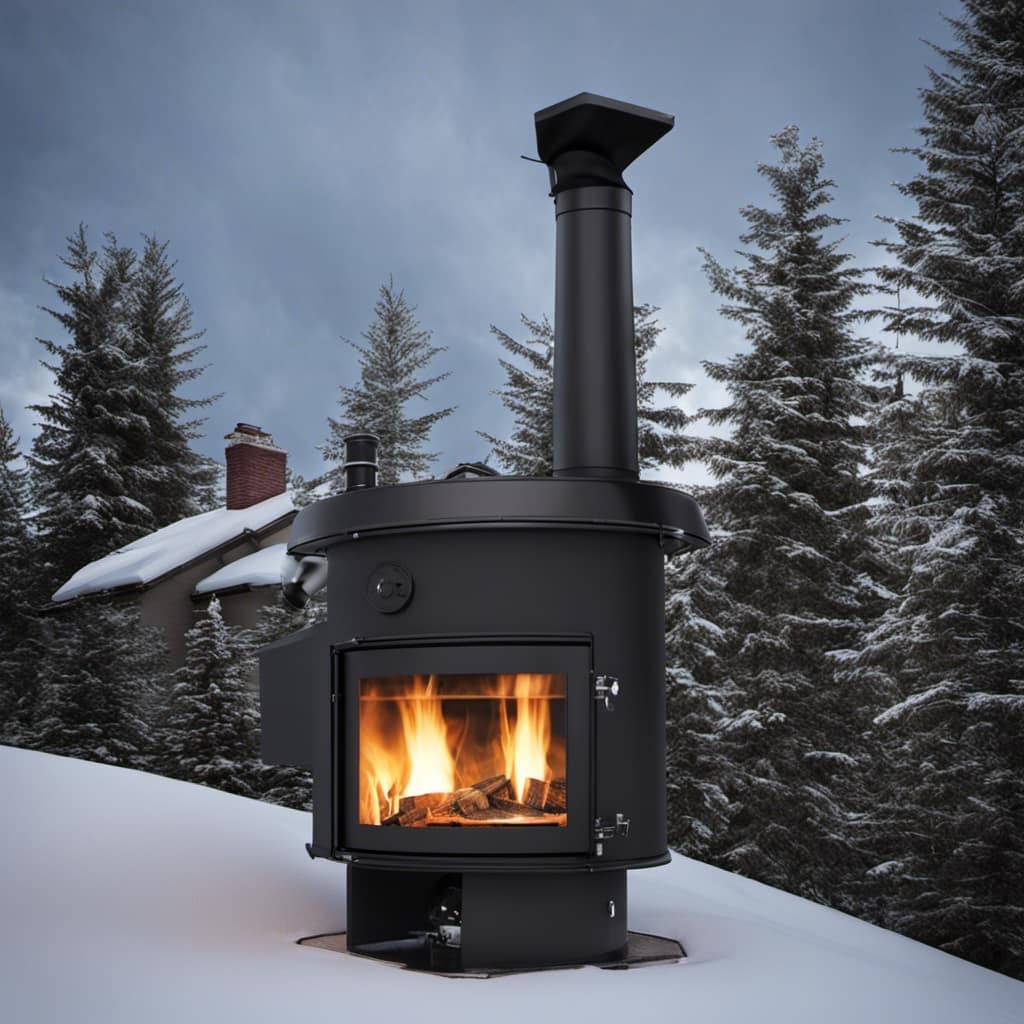
  1. Install a chimney: A chimney directs the smoke and gases produced by the wood stove out of the garage. It should be properly insulated and extend above the roofline to prevent backdraft and ensure effective ventilation.

    lowes summer heat wood stove

  2. Use a fresh air intake: A fresh air intake provides a steady supply of oxygen for combustion. It should be installed near the wood stove to prevent air starvation and maintain proper ventilation.

  3. Install carbon monoxide detectors: Carbon monoxide is a silent killer, so it’s important to have detectors in the garage. Place them near the wood stove and ensure they’re regularly tested and maintained.

Insulation for Heat Retention

Now that we have discussed the ventilation requirements for safety when installing a wood stove in a garage, let’s move on to the next important aspect: insulation for heat retention. Proper insulation is crucial to ensure that the heat generated by the wood stove stays inside the garage, providing warmth and comfort. Insulation offers several benefits, including increased energy efficiency and reduced heat loss. There are various insulation materials available in the market, such as fiberglass, cellulose, and foam board. Each material has its own advantages and considerations. To help you make an informed decision, I have created a table below comparing the key features of these insulation materials:

Insulation Material Benefits Considerations
Fiberglass – Good thermal resistance
  • Easy to install | – Can cause skin irritation
  • Prone to moisture damage |
    | Cellulose | – Excellent thermal performance
  • Environmentally friendly | – Requires professional installation
  • Can settle over time |
    | Foam Board | – High insulation value
  • Resistant to moisture and pests | – More expensive than other options
  • Difficult to install in existing walls |

Now that we understand the benefits and considerations of different insulation materials, we can move on to discussing the clearance distances for safety when installing a wood stove in a garage.

wood stove for sale

Clearance Distances for Safety

When considering safety, it’s important to be aware of the required clearance distances for a wood stove installation. Adhering to these clearance requirements is crucial to ensure the safety of your home and prevent any potential fire hazards. Here are the key safety precautions to keep in mind:

  1. Maintain a minimum clearance of 36 inches between the wood stove and any combustible materials such as walls, furniture, or curtains.

  2. Install a non-combustible floor protection with a minimum size of 18 inches in front of the wood stove.

  3. Provide proper clearance to the ceiling by ensuring a minimum distance of 36 inches between the top of the wood stove and any combustible materials.

    wood stove fireplace

By following these clearance requirements, you can significantly reduce the risk of fire and ensure the safe operation of your wood stove.

Now, let’s move on to the next step of installing the chimney or venting system.

Installing the Chimney or Venting System

To install the chimney or venting system, follow these steps:

  1. Determine the proper location for the chimney. Ensure that it is away from any combustible materials.

    wood stove insert cleaning

  2. Assemble the chimney components according to the manufacturer’s instructions. Make sure to securely connect each section.

  3. Attach the chimney to the wood stove. Ensure a tight seal to prevent any leaks.

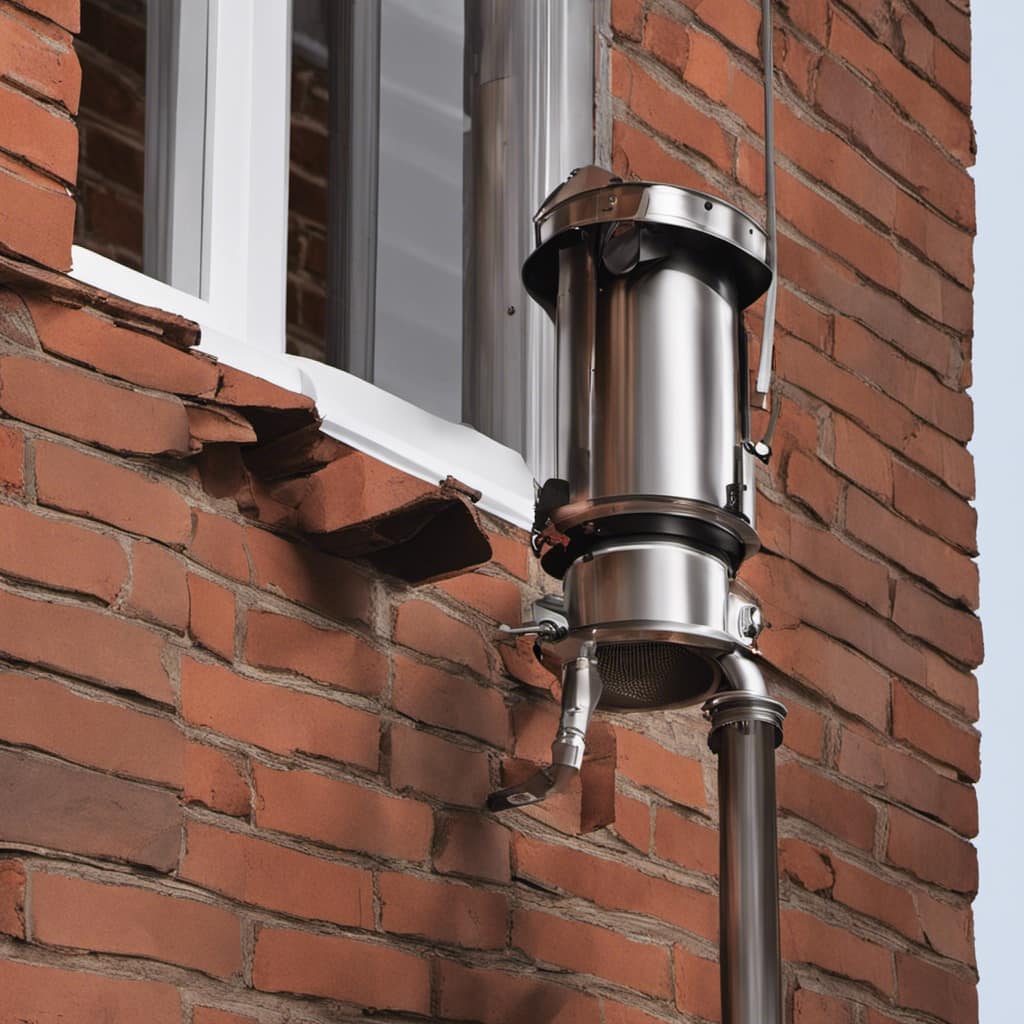
  4. Extend the chimney through the roof or sidewall. Follow the specific venting requirements for your wood stove model.

Remember to consult the manufacturer’s instructions for any specific guidelines or recommendations related to your particular wood stove model.

Advertisement

wood stove fans on top of stove

Proper Chimney Installation

I’ll make sure to properly install the chimney for my wood stove in the garage. Here are the steps to ensure a successful installation:

  1. Choose the right location: Select a spot in the garage where the chimney can be easily installed and will provide efficient heat distribution.

  2. Measure and plan: Determine the appropriate height for the chimney, ensuring it extends at least 3 feet above the highest point of the roof. Plan the route the chimney will take through the garage and roof.

  3. Install the chimney components: Assemble the chimney sections, starting from the wood stove and working upwards. Attach the necessary supports and secure the chimney in place.

    wood stove fireplace inserts wood burning

Proper chimney installation is crucial for the safe and efficient operation of your wood stove.

Once the chimney is installed, you can move on to the next step of the process, which involves meeting the venting system requirements.

Venting System Requirements

For efficient operation of my wood stove, it’s important to meet the venting system requirements.

The venting system design plays a crucial role in ensuring the proper functioning of the wood stove and maintaining indoor air quality.

slow combustion wood stoves

To start with, I need to determine the appropriate size and type of venting system based on the stove’s specifications and the layout of my garage.

Advertisement

Next, I must ensure that the venting system installation complies with local building codes and regulations.

This includes properly installing the chimney, stovepipe, and any necessary connectors or adapters.

It’s essential to follow the manufacturer’s instructions and guidelines for safe and efficient venting.

wood stove pipe home depot

Regular maintenance and inspections are also important to ensure the venting system remains in good working condition.

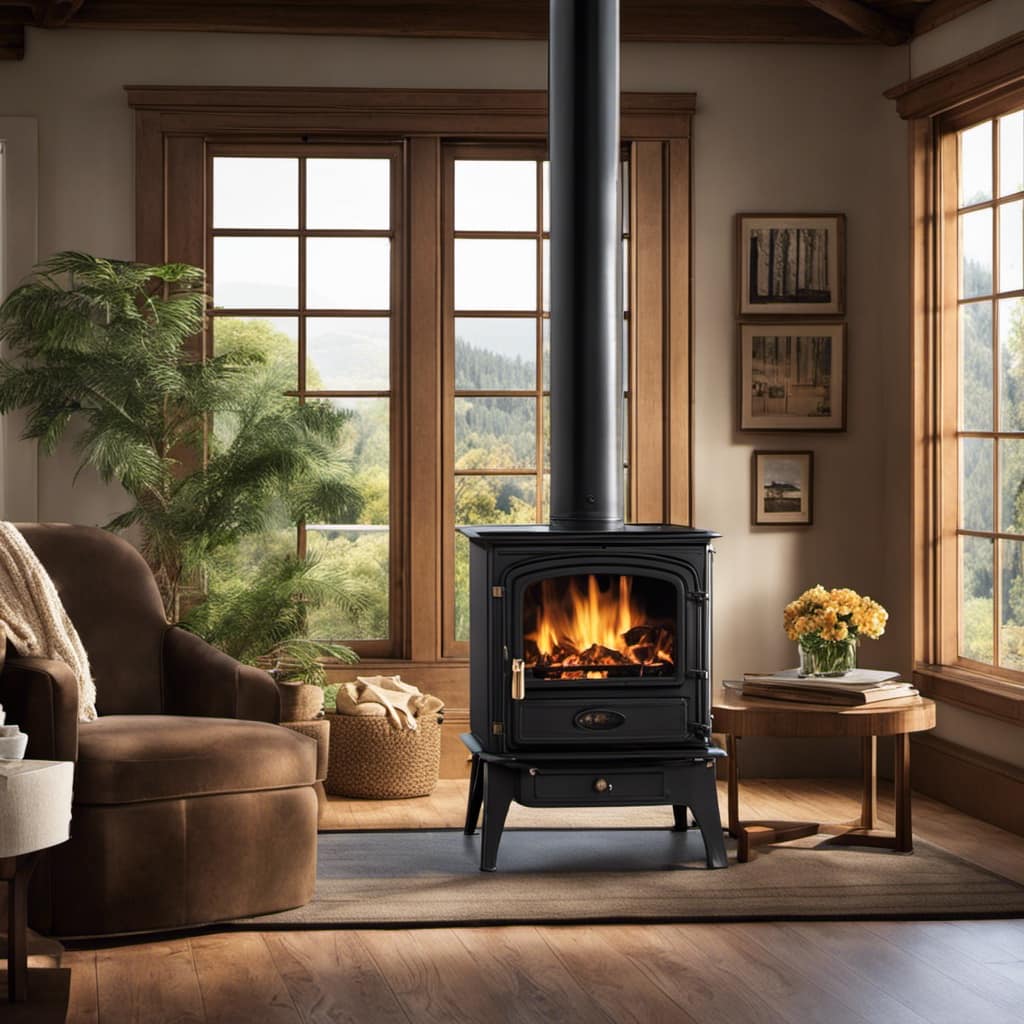
Positioning and Securing the Wood Stove in the Garage

I’m going to make sure the wood stove is positioned securely in the garage. Proper positioning is crucial for the safe and efficient operation of your wood stove. Here are some positioning tips and securing methods to follow:

Advertisement
  1. Location: Choose a spot in your garage that’s away from flammable materials, such as gasoline, paint, or cleaning supplies. Ensure that there’s enough clearance around the stove for proper ventilation and maintenance.

  2. Clearance: Maintain the required clearance distances specified by the manufacturer. This includes the distance from combustible walls, ceilings, and other objects. Refer to the stove’s installation manual for specific clearance requirements.

    regency wood stove

  3. Floor Protection: Install a non-combustible hearth pad or floor protection material beneath the stove to protect the floor from heat and sparks. This can be made of materials like tile, brick, or sheet metal.

Securing the stove:

  • Use stovepipe brackets or wall straps to secure the stovepipe to the wall or ceiling. This prevents accidental movement or dislodging of the stovepipe.

  • Install a heat shield on the wall behind the stove to protect the wall from excessive heat. The heat shield should be made of non-combustible material and provide sufficient clearance.

    slow combustion wood stoves

  • Consider using anchor bolts or brackets to secure the stove to the floor or wall. This adds an extra level of stability and prevents the stove from tipping over.

Connecting the Stove to the Chimney or Venting System

Connecting the stove to the chimney or venting system is an important step in ensuring proper ventilation and safe operation of the heating appliance. When installing a wood stove in a garage, it is crucial to connect it to the existing chimney or install a venting system specifically designed for wood stoves. Here is a step-by-step guide on how to connect your stove to the chimney or venting system:

  1. Determine the type and size of the chimney or venting system needed for your wood stove. Consult local building codes and regulations to ensure compliance.

  2. Measure the distance between the stove and the chimney or venting system. This will determine the length of the stovepipe or vent pipe needed.

    wood burning stove indoor

  3. Install the stovepipe or vent pipe from the stove to the chimney or venting system. Use the appropriate connectors and secure them tightly to prevent any leaks.

  4. Insulate the stovepipe or vent pipe to reduce heat loss and improve efficiency. Use high-temperature insulation materials specifically designed for wood stoves.

  5. Test the connection for any leaks or loose fittings. Light a small fire in the stove and check for any smoke escaping from the connections.

By following these steps, you can ensure that your wood stove is properly connected to the chimney or venting system, providing efficient heating and safe operation in your garage.

wood stove fireplace

Steps Description
1 Determine the type and size of the chimney or venting system needed
2 Measure the distance between the stove and the chimney or venting system
3 Install the stovepipe or vent pipe
4 Insulate the stovepipe or vent pipe
5 Test the connection for any leaks or loose fittings

Testing the Wood Stove and Ensuring Proper Ventilation

During the testing process, I check for any signs of smoke escaping from the connections to ensure proper ventilation. Proper ventilation is crucial when installing a wood stove in a garage to prevent the buildup of harmful gases and ensure optimal performance.

Here are some testing procedures and troubleshooting techniques to follow:

Advertisement
  1. Inspect the connections: Carefully examine the stovepipes and chimney connections for any gaps, leaks, or loose fittings. Use a flashlight to look for smoke escaping while the stove is in use.

  2. Conduct a smoke test: To perform a smoke test, light a small fire in the wood stove and observe the smoke behavior. It should flow up the chimney or venting system without any visible leaks or backdrafts.

    wood stove pipe installers near me

  3. Check for draft issues: If you notice smoke escaping from the connections or experiencing a weak draft, troubleshoot by adjusting the damper, cleaning the chimney, or ensuring proper air intake.

Maintaining and Cleaning Your Wood Stove for Longevity

To ensure the longevity of my wood stove, regular maintenance and cleaning are essential. By following these cleaning techniques and maintenance tips, I can keep my wood stove in great condition for years to come.

  1. Start by allowing the stove to cool down completely before beginning any cleaning or maintenance. This will prevent any accidents or injuries.

  2. Remove any ashes and debris from the firebox using a metal scoop or shovel. Dispose of the ashes in a metal container and store it outside, away from any flammable materials.

    wood stoves for heating and cooking

  3. Use a wire brush to clean the inside of the firebox and remove any built-up creosote. Creosote is a byproduct of burning wood and can lead to chimney fires if not removed regularly.

  4. Inspect the door gasket for any signs of wear and tear. Replace it if necessary to ensure a tight seal and prevent any air leaks.

  5. Clean the glass door using a non-abrasive glass cleaner. Be sure to follow the manufacturer’s instructions for cleaning to avoid damaging the glass.

  6. Finally, check the chimney and flue for any blockages or debris. Use a chimney brush to remove any creosote buildup and ensure proper ventilation.

    truck camping wood stove

Frequently Asked Questions

Can I Install a Wood Stove in My Garage if I Have Limited Space?

Yes, you can install a wood stove in your garage even if you’ve limited space. When considering the best location for installing a wood stove, it’s important to ensure proper clearances from combustible materials.

Additionally, you’ll need to provide adequate ventilation to prevent the buildup of harmful gases. It’s recommended to consult a professional to determine the specific requirements and guidelines for installing a wood stove in your garage.

Are There Any Specific Safety Requirements I Should Be Aware of When Installing a Wood Stove in a Garage?

When it comes to installing a wood stove in a garage, safety is paramount. There are specific safety requirements that you should be aware of to ensure a secure installation.

Precautions must be taken to protect against fire hazards and carbon monoxide poisoning. Proper ventilation, clearances, and insulation are essential.

pacific energy wood stove

It’s crucial to follow local building codes and manufacturer guidelines. By taking these necessary precautions, you can enjoy the warmth of a wood stove in your garage without compromising safety.

Advertisement

What Are the Key Factors to Consider When Choosing the Right Wood Stove for My Garage?

When choosing the right wood stove for my garage, wood stove efficiency and proper ventilation are key factors to consider. Efficiency is important for maximizing heat output and minimizing fuel consumption. Look for a stove with high efficiency ratings and features like secondary combustion.

Proper ventilation is crucial to ensure safe operation and prevent the buildup of harmful gases. Install a chimney or flue system that meets the necessary safety standards and provides adequate airflow.

Do I Need Any Specialized Tools or Materials for the Installation Process?

Installing a wood stove in your garage requires specialized tools and materials.

wood pellet stove

The first step is to gather the necessary tools, such as a drill, wrench, and level.

You’ll also need materials like chimney pipe, stove pipe, and fireproof insulation.

Advertisement

It’s important to carefully follow the manufacturer’s instructions for installation to ensure safety and efficiency.

With the right tools and materials, you can successfully install a wood stove in your garage and enjoy its warmth and functionality.

jotul wood stoves

How Often Should I Clean and Maintain My Wood Stove to Ensure Its Longevity?

Cleaning frequency and maintenance tips are crucial for ensuring the longevity of your wood stove. Regular cleaning is necessary to remove ash and creosote buildup, which can reduce efficiency and increase the risk of fire. I recommend cleaning the stove and chimney at least once a year, or more frequently if you use it heavily.

Additionally, inspect the gaskets, door seals, and other components regularly for any signs of wear or damage, and replace them as needed.

Conclusion

Well, congratulations! You’ve successfully installed a wood stove in your garage.

Advertisement

Now you can enjoy the warm and cozy atmosphere while working on your projects.

wood stove fans ecofan

Just make sure to follow the safety guidelines and maintain the stove regularly for optimal performance.

Who knew a garage could become the ultimate relaxation spot?

Keep those creative juices flowing and stay toasty!

Advertisement

Growing up surrounded by the vast beauty of nature, Sierra was always drawn to the call of the wild. While others sought the comfort of the familiar, she ventured out, embracing the unpredictable and finding stories in the heartbeat of nature.   At the epicenter of every remarkable venture lies a dynamic team—a fusion of diverse talents, visions, and passions. The essence of Best Small Wood Stoves is crafted and refined by such a trio: Sierra, Logan, and Terra. Their collective expertise has transformed the platform into a leading authority on small wood stoves, radiating warmth and knowledge in equal measure.

Continue Reading
Advertisement

Wood Stove

How Long Does It Take Wood To Ignite Aftee Being Put In A Wood Stove

Published

on

By

An image capturing the mesmerizing scene of a wood stove, with a bed of glowing embers beneath carefully stacked logs, as tendrils of thin smoke gracefully curl upwards, depicting the anticipation of wood slowly igniting

I must admit, the wait for wood to catch fire in a wood stove can seem never-ending. However, do not worry, as in this article, I will share some strategies and tips to speed up the process.

From understanding the temperature and moisture content of the wood to choosing the right type and preparing it efficiently, we’ll explore all the factors that affect wood ignition time.

So let’s dive in and get that fire blazing in no time!

Key Takeaways

  • Weather conditions and moisture content of the wood can affect the ignition time.
  • Properly seasoned wood with around 20% moisture content ignites more easily.
  • Smaller wood logs and softer woods tend to ignite faster than larger and harder woods.
  • Proper wood storage and preparation, such as keeping it off the ground, using fire starters, and maintaining airflow, can help ensure faster ignition in a wood stove.

Factors Affecting Wood Ignition Time

I’m curious about the factors that can affect the time it takes for wood to ignite in a wood stove.

One of the key factors is the weather conditions. Cold and damp weather can make it harder for the wood to catch fire, as moisture content in the wood can be high. It’s important to ensure that the wood is properly seasoned and has a moisture content of around 20% for optimal ignition.

Another factor to consider is the size of the wood logs. Smaller logs tend to ignite more quickly as they’ve a larger surface area exposed to the heat source.

Advertisement

Additionally, the type of wood being used can also affect ignition time, with softer woods igniting faster than harder woods.

Temperature and Moisture Content of Wood

The optimal moisture content for wood is around 20%, which ensures efficient ignition in a wood stove. The wood ignition process is influenced by various factors, and the moisture content plays a critical role in determining how quickly the wood will ignite.

When wood is too wet, it requires more energy to burn off the excess moisture before it can reach its ignition point. On the other hand, if the wood is too dry, it may ignite too quickly and burn too rapidly, leading to inefficient combustion and wasted energy.

Therefore, it’s essential to properly store wood to maintain its moisture content within the optimal range. Proper wood storage involves keeping the wood off the ground, covering it to protect it from rain or snow, and allowing for proper airflow to prevent excessive moisture buildup.

Type of Wood and Its Density

I prefer using hardwoods like oak or maple due to their density and their ability to burn longer and provide more heat. When it comes to wood species selection, it’s important to consider the impact of wood moisture content. Here are three key points to keep in mind:

Advertisement
  1. Moisture content affects combustion efficiency: Wet wood contains a higher moisture content, which leads to incomplete combustion and the production of more smoke and pollutants. Dry hardwoods, on the other hand, burn more efficiently and produce less smoke.

  2. Heat output is influenced by wood density: Hardwoods have a higher density compared to softwoods, resulting in a higher heat output. This means that hardwoods like oak and maple can provide more warmth and keep your space cozy for a longer period of time.

  3. Longer burn time with hardwoods: Due to their density, hardwoods burn at a slower rate, allowing for a longer burn time per log. This means less frequent refueling and a more consistent heat source.

Preparing Wood for Efficient Ignition

To ensure efficient ignition, I always make sure to properly split and dry my firewood. Proper wood storage is essential for achieving this. It’s important to store the firewood in a well-ventilated area, off the ground and protected from moisture. This allows the wood to dry properly and reduces the risk of it being damp or rotting.

When it comes to igniting the wood in a wood stove, using fire starters or kindling can greatly speed up the process. These small pieces of flammable material help create a hot and sustained flame, which in turn ignites the larger pieces of wood.

By incorporating these techniques, you can ensure a faster and more efficient ignition in your wood stove.

Now, let’s move on to some tips for faster wood ignition in a wood stove.

Tips for Faster Wood Ignition in a Wood Stove

Using kindling and ensuring proper airflow are key to achieving faster wood ignition in a wood stove. When it comes to stubborn wood that’s difficult to ignite, there are several ignition techniques that can be employed:

Advertisement
  1. Preparation: Properly seasoned wood with a moisture content below 20% is essential for efficient ignition. This ensures that the wood is dry enough to catch fire quickly.

  2. Kindling: Creating a bed of small, dry kindling underneath the larger logs helps to ignite the fire faster. Kindling acts as a fuel source that ignites easily and produces enough heat to catch the larger logs on fire.

  3. Airflow: Adequate airflow is crucial for wood ignition. By opening the damper or adjusting the air vents, you can ensure that enough oxygen is getting to the fire, promoting faster ignition.

While some may consider using accelerants to speed up wood ignition, it’s important to note that this can be dangerous and may result in uncontrollable fires or the release of harmful chemicals. It’s recommended to rely on proper ignition techniques and patience for a safe and efficient wood ignition process.

Frequently Asked Questions

Can I Use Treated Wood in My Wood Stove?

Using pressure treated wood in a wood stove is not recommended due to the chemicals it releases when burned. It is safer to use untreated wood or other alternatives for faster ignition.

What Is the Best Type of Wood to Use for Faster Ignition in a Wood Stove?

Fast burning woods like pine or fir can ignite in a wood stove within minutes. To ensure efficient wood stove usage, it’s important to choose dry, seasoned firewood and properly maintain the stove.

Are There Any Safety Precautions I Should Take When Igniting Wood in a Wood Stove?

When igniting wood in a wood stove, it is important to take safety precautions. Keep a fire extinguisher nearby and ensure proper ventilation. Additionally, the moisture content of the wood can affect its ignition time.

Can I Use Wood Chips or Sawdust for Ignition in a Wood Stove?

I can use wood chips or sawdust for ignition in a wood stove. They are effective fire starters for faster ignition. The small size and high surface area make them ignite quickly, reducing the time needed for the wood to catch fire.

Advertisement

How Does the Size of the Wood Affect Its Ignition Time in a Wood Stove?

Moisture content significantly affects wood ignition in a wood stove. Smaller pieces of wood ignite faster due to increased surface area. However, larger pieces provide longer burn times. Consider the advantages and disadvantages of each for efficient use in a wood stove.

Conclusion

After careful analysis of the factors affecting wood ignition time, it’s safe to say that wood doesn’t ignite instantly in a wood stove. Contrary to popular belief, wood requires time to reach its ignition point, which is influenced by factors such as temperature, moisture content, and wood density.

To expedite the process, it’s crucial to choose the right type of wood and ensure it’s properly prepared. So, if you were expecting an immediate burst of flames, you might’ve to wait a little longer.

Continue Reading

Wood Stove

Why Does Your Wood Stove Smoke

Published

on

By

An image capturing a rustic, cozy living room

Dealing with the smoke from your wood stove can be a real nuisance. But don’t worry, I’m here to provide some tips on how to manage it.

Understanding the root causes of this predicament is crucial. Insufficient airflow, improper wood selection, damaged chimney, inadequate maintenance, and incorrect installation are the major culprits.

Let’s delve into each of these factors to uncover the secrets behind why your wood stove may be producing that bothersome smoke.

Key Takeaways

  • Blocked vents disrupt combustion process and lead to incomplete burning and smoke generation.
  • Burning wet or high-moisture wood results in inefficient burning and increased creosote buildup.
  • Cracked or deteriorating chimney can cause leaks and smoke entry.
  • Inadequate stove maintenance, including dirty burners and clogged flue, can lead to smoke issues.

Insufficient Airflow

I’m having trouble with my wood stove smoking because there’s not enough airflow. A common cause of insufficient airflow is blocked vents. When the vents are blocked, the combustion process is disrupted, leading to incomplete burning of the wood and the generation of smoke.

To ensure efficient combustion and minimize smoke, it’s crucial to maintain clear and unobstructed vents. Blocked vents can result from a buildup of creosote or debris, so regular cleaning is essential.

Additionally, proper placement of the stove is crucial to ensure adequate airflow. Make sure that the stove is positioned away from any obstructions, such as furniture or curtains, that might impede the flow of air.

Advertisement

Improper Wood Selection

To prevent excessive smoke and poor combustion, it’s important to avoid burning wet wood or wood with high moisture content, as it can result in inefficient burning and increased creosote buildup. When burning seasoned firewood, which has a moisture content of around 20% or less, the wood burns more efficiently, producing less smoke and providing more heat output. Seasoned firewood has been properly dried for at least six months, allowing the moisture content to decrease significantly. This ensures that the wood burns cleanly and effectively in your wood stove. However, if you burn wood with high moisture content, it will create more smoke and reduce the overall efficiency of your stove. This can also lead to a higher risk of creosote buildup in your chimney, which can be dangerous and increase the chance of a chimney fire. Therefore, it’s crucial to always use dry, seasoned firewood to prevent excessive smoke and maintain proper combustion in your wood stove.

Now, let’s discuss another potential reason for excessive smoke: a damaged or leaky chimney.

Damaged or Leaky Chimney

A damaged or leaky chimney can cause smoke to enter your home, which can be hazardous to your health and safety. It’s important to address any issues with your chimney promptly to ensure the proper functioning of your wood stove.

Here are three signs of a damaged chimney that you should be aware of:

  1. Cracked or crumbling mortar: If you notice any cracks or crumbling in the mortar joints of your chimney, it could indicate water damage or structural issues. This can lead to leaks and smoke entering your home.

  2. Rusty or deteriorating chimney cap: The chimney cap plays a crucial role in keeping out rain, snow, debris, and animals. If it’s rusty or deteriorating, it may not be able to perform its function effectively, allowing smoke to escape into your living space.

  3. Smoke stains or odors: If you notice smoke stains on the walls or ceilings near your chimney or detect a persistent smoky odor in your home, it could be a sign of a leaky chimney. This should be addressed promptly to prevent further damage and potential health risks.

When faced with a damaged chimney, there are various repair options available, such as chimney relining, chimney crown repair, and chimney flashing repair. It’s important to consult with a professional chimney technician to determine the best course of action for your specific situation.

Advertisement

Inadequate Stove Maintenance

One of the main causes of smoke in your home can be the result of inadequate stove maintenance. A dirty stove and a clogged flue are two common culprits that can lead to smoke issues. When the stove isn’t properly cleaned, a buildup of soot and debris can occur on the burners, causing incomplete combustion and the production of smoke.

Additionally, a clogged flue prevents the proper ventilation of smoke, leading to its accumulation inside your home. Regular cleaning and maintenance of your stove, including cleaning the burners and ensuring the flue is clear, is crucial in preventing smoke issues.

It’s recommended to schedule annual professional maintenance to ensure your stove is in optimal condition and to avoid the inconvenience and potential health hazards associated with smoke in your home.

Incorrect Stove Installation

I regret not hiring a professional for my stove installation, as it has caused numerous issues and potential hazards. When it comes to installing a wood stove, proper positioning and sizing are crucial factors that shouldn’t be taken lightly.

Here are three key reasons why improper stove positioning and incorrect flue size can lead to problems:

Advertisement
  1. Inadequate clearance: Placing the stove too close to combustible materials can increase the risk of fire. It’s essential to follow the manufacturer’s guidelines for proper clearances to ensure the safe operation of the stove.

  2. Inefficient heating: Incorrect positioning can hinder the stove’s ability to distribute heat effectively throughout the room. This can result in uneven temperatures and wasted energy, leading to discomfort and higher heating costs.

  3. Insufficient draft: Using an incorrect flue size can impede the stove’s ability to expel smoke and gases properly. This can lead to backdrafting, where smoke enters the room instead of being directed outside. Aside from the health hazards, backdrafting can damage the stove and cause indoor air quality issues.

To avoid these problems, it’s essential to consult a professional for the proper installation of your wood stove. They’ll ensure that the stove is positioned correctly and the flue size is appropriate for efficient and safe operation.

Frequently Asked Questions

Can Smoking Occur if There Is Sufficient Airflow in the Wood Stove?

Yes, smoking can still occur in a wood stove even with sufficient airflow. Factors like improper wood placement, damp or unseasoned wood, or a clogged chimney can all contribute to smoking issues. Proper troubleshooting can resolve these problems and improve wood stove performance.

What Are Some Common Wood Types That Should Be Avoided to Prevent Smoking in a Wood Stove?

To prevent smoking in a wood stove, it is important to avoid using wood types like pine, as they contain high levels of resin. Additionally, properly seasoning firewood is crucial to reduce smoke production.

How Can I Identify if My Chimney Is Damaged or Leaking?

To identify chimney damage or leaks, conduct a thorough chimney inspection. Look for cracks, loose bricks, or crumbling mortar. Additionally, consider installing a smoke detector near the stove to quickly detect any smoke issues.

Besides Regular Cleaning, What Other Maintenance Practices Can Help Prevent Smoking in a Wood Stove?

Other maintenance practices, such as ensuring proper airflow and avoiding certain wood types, can help prevent smoking in a wood stove. Identifying chimney damage or leaks and checking for correct stove installation are also crucial.

Advertisement

What Are Some Signs of Incorrect Stove Installation That May Lead to Smoking?

Installing a wood stove improperly can lead to frustrating smoke issues. One key sign is if the chimney height is too short. Another is using unseasoned wood, which can cause excessive smoke.

What Are Some Wood Stove Brands That Have Smoke-Reducing Features?

Looking for the best wood stove brands with smoke-reducing features? Look no further. With increasing concerns about air pollution, several brands are innovating their wood stoves to minimize smoke emissions. Some notable options include Vermont Castings, Jøtul, and Blaze King. These brands prioritize efficiency and clean burning, ensuring you can enjoy the warmth of a wood stove while minimizing environmental impact.

Conclusion

In conclusion, when your wood stove smokes, it’s often due to factors such as:

  • Insufficient airflow
  • Improper wood selection
  • A damaged or leaky chimney
  • Inadequate stove maintenance
  • Incorrect installation

To prevent this, you should:

  • Ensure proper ventilation
  • Use seasoned and dry wood
  • Inspect and repair your chimney regularly
  • Maintain your stove diligently
  • Ensure professional installation

By addressing these issues, you can enjoy a smoke-free and efficient wood stove experience, creating a cozy and inviting atmosphere in your home.

Continue Reading

Wood Stove

How To Build A Wood Stove From A Jerry Can

Published

on

By

An image showcasing the step-by-step process of transforming a jerry can into a wood stove

I have always been fascinated by the concept of transforming ordinary objects into useful tools.

So when I came across an old jerry can in my garage, I knew I had the perfect opportunity to create my own wood stove.

In this article, I’ll guide you through the process of transforming a jerry can into a functional and efficient wood stove, complete with ventilation, legs, and a base.

Get ready to unleash your inner DIY enthusiast and start enjoying the warmth of your homemade wood stove.

Key Takeaways

  • Consider the capacity and dimensions of the jerry can
  • Compare different materials for jerry cans
  • Prepare and clean the jerry can properly
  • Take safety precautions and use the right tools when modifying the jerry can

Selecting the Right Jerry Can for Your Wood Stove

I’m trying to figure out which jerry can is the best option for my wood stove.

When it comes to choosing the right size jerry can for your wood stove, it’s important to consider the capacity and dimensions. A larger can will hold more fuel, but it may be too bulky for your space. On the other hand, a smaller can may require more frequent refills.

Advertisement

Additionally, it’s crucial to compare different materials for jerry cans to ensure optimal wood stove performance. Metal cans are durable and resistant to heat, but they can also be heavy. Plastic cans, on the other hand, are lightweight and easier to handle, but may not withstand high temperatures as well.

Ultimately, finding the perfect jerry can for your wood stove is about balancing capacity, dimensions, and material for efficient and safe operation.

Preparing and Cleaning the Jerry Can

Before starting to use the jerry can, it’s crucial to properly clean and prepare it by removing any dirt or residue, and then ensuring it’s completely dry. Here is the cleaning process and safety precautions to follow:

  1. Rinse the jerry can with warm water and a mild detergent to remove any dirt or debris. Use a sponge or brush to scrub the inside and outside of the can thoroughly.

  2. Rinse the can again with clean water to remove any soap residue. Make sure to rinse it multiple times to ensure all the soap is gone.

  3. After rinsing, allow the jerry can to air dry completely. This is important to prevent any moisture from causing rust or corrosion.

By following these cleaning steps, you can ensure that your jerry can is ready for modification.

Now, let’s discuss cutting open and modifying the jerry can for ventilation.

Advertisement

Cutting Open and Modifying the Jerry Can for Ventilation

I’ll explain how to use a few small holes in the jerry can to provide adequate ventilation for the wood stove. When modifying the jerry can for ventilation, it is important to take safety precautions and use the right tools. Here is a table outlining the necessary steps:

Step Safety Precautions Tools Needed
1 Wear protective gloves and goggles Drill
2 Work in a well-ventilated area Marker
3 Ensure the jerry can is empty and clean Metal file
4 Mark the desired ventilation holes on the can Safety glasses
5 Use the drill to create the holes Protective gloves
6 Smooth the edges of the holes with the metal file Goggles
7 Clean any metal shavings from the can Clean cloth

Adding Legs and a Base to the Wood Stove

I can attach some sturdy legs and a stable base to the wood stove to ensure it stands securely on any surface. Achieving stove stability is crucial to prevent accidents and maintain proper functioning.

When choosing materials for the legs and base, it’s important to consider their strength, durability, and heat resistance. Here are three essential elements to consider:

  1. Material Selection: Opt for materials that can withstand high temperatures, such as stainless steel or cast iron. These materials are known for their strength and ability to withstand the intense heat generated by the wood stove.

  2. Design and Construction: The design of the legs should provide sufficient support and stability. Consider a tripod or four-leg design for optimal balance. Additionally, ensure the legs are securely attached to the stove body to prevent any wobbling or instability.

  3. Base Size and Shape: The base of the wood stove should be wide and flat enough to distribute the weight evenly, ensuring stability on various surfaces. A larger base will provide better stability, especially when using the stove on uneven or soft ground.

Testing and Using Your DIY Wood Stove

I’ve successfully tested and now use my DIY wood stove to cook meals while camping. It’s a simple yet effective solution for outdoor cooking. However, before using it, I took several testing techniques and safety precautions to ensure its efficiency and my own well-being.

Firstly, I conducted a leak test to ensure there were no air or gas leaks that could potentially cause a fire hazard. This involved pressurizing the stove and checking for any signs of leakage. I also tested its heat distribution by placing a pot of water on the stove and monitoring how evenly the heat was dispersed.

Advertisement

To further ensure safety, I implemented safety precautions such as maintaining a safe distance between the stove and any flammable objects, using heat-resistant gloves when handling the stove, and having a fire extinguisher nearby.

Using my DIY wood stove has been a game-changer for my camping trips. Not only does it provide a reliable cooking source, but it also allows me to enjoy the natural surroundings without relying on traditional campfire cooking methods. By following proper testing techniques and safety precautions, I can confidently cook my meals and enjoy the great outdoors.

Frequently Asked Questions

How Long Does It Take to Build a Wood Stove From a Jerry Can?

It takes about 2 hours to build a wood stove from a jerry can. The benefits of using a wood stove include cost-effective heating and a sustainable fuel source. Regular cleaning and maintenance ensure optimal performance.

Can I Use Any Type of Wood for the Base of the Wood Stove?

I can use different types of wood for the base of the wood stove, but it’s important to consider safety precautions when using it indoors. Proper ventilation and non-flammable materials are crucial.

Is It Safe to Use the Wood Stove Indoors?

Oh, using a wood stove indoors, what a brilliant idea! Let me enlighten you on the potential health hazards and share some precise tips for safely using one. Shall we begin?

Advertisement

Can I Paint the Jerry Can After Modifying It?

Yes, you can paint the modified jerry can using various painting techniques. It is important to choose a paint that can withstand high temperatures and adhere well to metal surfaces. Make sure to consider alternative fuel sources when painting for safety.

What Tools Do I Need to Build a Wood Stove From a Jerry Can?

To build a wood stove from a jerry can, I need a few tools like a jigsaw, drill, and metal file. Safety precautions are crucial, and alternative materials can be used if necessary.

Can I Use a Wood Stove Insert in a DIY Jerry Can Wood Stove?

When considering building a wood stove fireplace, it’s crucial to factor in the cost of materials and construction. However, if you’re planning to use a wood stove insert in a DIY Jerry Can Wood Stove, the cost of building a wood stove fireplace may decrease significantly. This alternative method combines affordability and practicality, making it an excellent choice for those seeking an alternative heating solution.

Can Duraflame Logs Be Used in a Wood Stove Made from a Jerry Can?

Can Duraflame logs be used in a wood stove made from a jerry can? Many DIY enthusiasts wonder about using Duraflame logs in a wood stove. While Duraflame logs are commonly used in traditional fireplaces, their use in a jerry can wood stove may not be ideal. It’s important to consider the safety and compatibility aspects of using duraflame logs in wood stoves specifically designed for them.

Conclusion

After carefully selecting the right jerry can, preparing and modifying it for ventilation, and adding sturdy legs and a stable base, your DIY wood stove is ready for testing and use.

Advertisement

With its compact design and efficient functionality, this wood stove provides a practical and cost-effective heating solution for outdoor activities or emergency situations.

Embrace the warmth and convenience of this homemade creation, bringing comfort and coziness wherever you go.

Continue Reading

Trending