Connect with us

Wood Stove

How To Install A Wood Stove Chimney Through The Roof

Published

on

An image depicting a step-by-step guide to installing a wood stove chimney through a roof

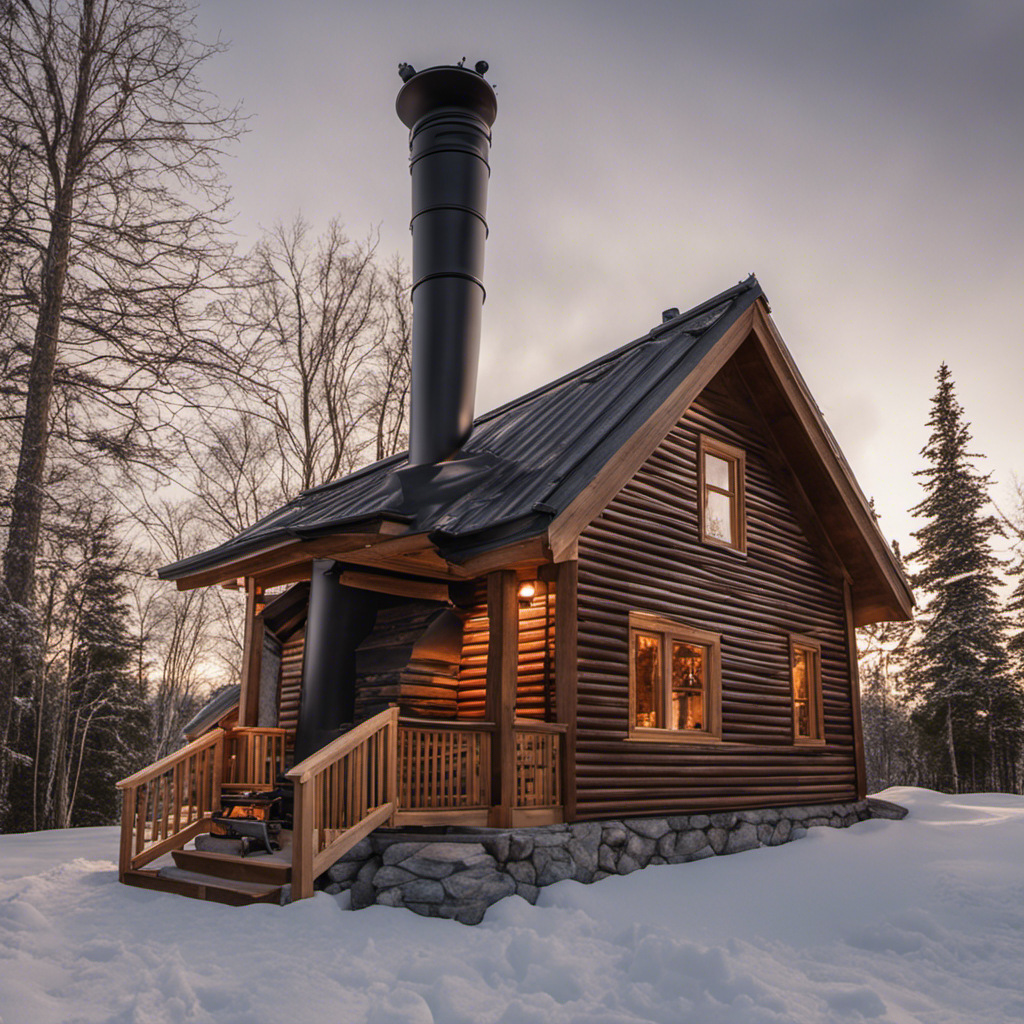
I have always been fond of the cozy warmth and soothing crackles from a wood stove during the cold winter nights. However, the idea of needing to set up a chimney through the roof appeared intimidating.

However, after a bit of research and some trial and error, I discovered a step-by-step process that made it surprisingly manageable.

In this article, I’ll share my experience and guide you through the process of installing a wood stove chimney through the roof, so you too can enjoy the beauty and functionality of a wood stove in your home.

Key Takeaways

  • Conduct a thorough roof inspection to ensure structural integrity, looking for signs of damage or decay in rafters or trusses, sagging, cracks, or water damage.
  • Maintain a minimum clearance of 3 feet from combustible materials and install a chimney cap and spark arrestor for added safety.
  • Gather necessary tools and materials such as a ladder, measuring tape, plumb bob, chalk line, and reciprocating saw, and wear protective gear.
  • Plan and mark the chimney route carefully, considering distance from wood stove to ceiling and nearby combustible materials, as well as compliance with local regulations for ventilation and safety.

Assessing Roof Structure and Clearance

I need to make sure the roof structure can support the weight of the wood stove chimney and that there’s enough clearance from any combustible materials. Before installing a wood stove chimney through the roof, it’s important to conduct a thorough roof inspection to ensure its structural integrity.

Start by examining the rafters or trusses to ensure they’re in good condition and free from any signs of damage or decay. Look for any sagging or cracks, as these could indicate a weakened structure. Additionally, check for any water damage, as this can compromise the stability of the roof.

Once you’ve determined that the roof structure is sound, you need to consider clearance from combustible materials. It’s essential to maintain a safe distance between the wood stove chimney and any nearby flammable objects such as insulation, roof decking, or wooden beams. The National Fire Protection Association (NFPA) recommends a minimum clearance of 3 feet from the chimney to any combustible materials. This clearance is necessary to prevent heat transfer and reduce the risk of fire.

Advertisement

To ensure safety, it’s also important to follow other safety precautions, such as installing a chimney cap to prevent debris or animals from entering the chimney. Additionally, consider using a spark arrestor to prevent sparks from igniting nearby combustible materials.

Gathering the Necessary Tools and Materials

To get started, I’ll need a ladder, measuring tape, plumb bob, chalk line, and a reciprocating saw. These tools are essential for installing a wood stove chimney through the roof.

Choosing the right chimney pipe is crucial for a successful installation. Make sure to select a pipe that’s compatible with your wood stove and meets the necessary safety standards. Look for a pipe that’s made of durable materials and has proper insulation to prevent heat transfer.

Safety precautions during installation are of utmost importance. Before you begin, ensure that you’ve protective gear, such as gloves and goggles, to protect yourself from any potential hazards. Additionally, make sure to follow all local building codes and regulations to ensure a safe and compliant installation.

Now that we’ve gathered the necessary tools and materials and understand the importance of safety, let’s move on to the next step: planning and marking the chimney route.

Advertisement

Planning and Marking the Chimney Route

As I map out the path for the chimney, it’s important to consider the most direct route that ensures proper ventilation and complies with local regulations. To do this, I need to measure the distances from the wood stove to the roof and determine the size of the chimney that will best suit my needs.

First, I measure the distance from the wood stove to the ceiling. This will determine the height of the chimney that needs to pass through the roof. I also measure the distance from the stove to any nearby combustible materials, such as walls or furniture, to ensure the proper clearance is maintained.

Next, I measure the distance from the ceiling to the roof. This will determine the length of the chimney pipe that needs to be installed. It’s important to choose the right chimney size to ensure optimal airflow and efficient ventilation. A chimney that is too small can cause poor draft and smoke backup, while a chimney that is too big can lead to excessive heat loss.

To help visualize this process, here is a table that outlines the measurements and chimney size options:

Measurement Distance (in feet) Chimney Size (in inches)
Stove to Ceiling 8 6
Ceiling to Roof 10 8

Based on these measurements, I would need a 6-inch chimney pipe for the distance between the stove and the ceiling, and an 8-inch chimney pipe for the distance between the ceiling and the roof.

Advertisement

Cutting and Framing the Roof Opening

Now that I’ve planned and marked the chimney route, it’s time to move on to the next step: cutting and framing the roof opening.

This is a crucial part of the installation process, as it determines the stability and structural support for the chimney.

To begin, I’ll carefully measure and mark the dimensions of the opening on the roof, ensuring that it aligns with the chimney route.

Then, using a reciprocating saw, I’ll cut through the roof, making sure to follow the marked lines precisely.

Roofing Material Compatibility

I’ve found that it’s crucial to ensure the roofing material is compatible with the wood stove chimney installation. The right choice of roofing material can make a significant difference in the long-term performance and weatherproofing of your chimney.

Advertisement

Here are some key factors to consider when selecting the roofing material:

  • Durability: Choose a material that can withstand the elements and has a long lifespan.
  • Heat resistance: Opt for a roofing material that can handle the high temperatures emitted by the wood stove chimney.
  • Compatibility: Ensure the roofing material is compatible with the chimney flashing and can be properly sealed to prevent leaks.
  • Easy installation: Select a roofing material that’s easy to work with and can be installed without compromising the integrity of the roof.
  • Aesthetic appeal: Consider the overall look and feel of the roofing material to ensure it complements the style of your home.

Structural Support Considerations

To ensure the safety and stability of the installation, it is important to consider the structural support requirements for the wood stove chimney. When installing a chimney through the roof, there are a few key factors to consider. First, you need to determine the structural load that the chimney will place on the roof. This can be calculated by considering the weight of the chimney itself and the additional weight of the flue liner and insulation. Additionally, the roof pitch is an important consideration as it affects the angle at which the chimney penetrates the roof. A steeper roof pitch may require additional support to ensure the chimney remains stable. It is crucial to consult with a professional to determine the specific structural support requirements for your wood stove chimney installation.

Structural Load Roof Pitch
Heavy Steep
Medium Moderate
Light Low
Heavy Steep
Medium Moderate

Proper Flashing Installation

When considering proper flashing installation for my wood stove chimney, it’s important to consult with a professional to ensure stability and safety. Flashing is crucial for protecting the area where the chimney meets the roof from water leaks. To maintain flashing, regular inspections are necessary to identify any signs of damage or deterioration.

Here are some common flashing issues and troubleshooting steps:

  • Leaks: Check for gaps or cracks in the flashing and apply caulk or roofing cement to seal them.
  • Rust: Remove any rust and apply a rust-resistant primer and paint to protect the flashing.
  • Loose flashing: Secure loose flashing by using roofing nails or screws.
  • Improper installation: If flashing wasn’t installed correctly, consult a professional to re-install it properly.
  • Debris buildup: Clear any debris, such as leaves or branches, that may accumulate around the flashing to prevent clogs and water damage.

Installing the Chimney Flashing and Roof Brackets

To install the chimney flashing and roof brackets, I start by positioning the flashing around the chimney pipe and securing it to the roof with roofing nails.

Next, I attach the roof brackets to the roof, making sure they’re properly aligned and securely fastened.

This step is crucial for providing stability and support to the chimney pipe, ensuring a safe and secure installation.

Advertisement

Flashing Types and Materials

I prefer using flexible flashing made of EPDM rubber for the wood stove chimney installation. This type of flashing is highly durable and can withstand extreme temperatures, ensuring a long-lasting and effective seal around the chimney.

When it comes to flashing installation techniques, there are a few key steps to follow:

  • Start by measuring and marking the area where the flashing will be installed.
  • Cut the EPDM rubber flashing to the appropriate size, ensuring it extends at least 6 inches up the chimney and 12 inches onto the roof.
  • Apply a layer of roofing cement to the area where the flashing will be placed.
  • Secure the flashing to the chimney and roof using roofing nails or screws.
  • Finally, seal any gaps or edges with additional roofing cement to prevent water leakage.

Proper Bracket Installation

Using a sturdy bracket made of durable metal is essential for properly supporting the weight of the chimney pipe. When installing the bracket, it’s crucial to consider its position and stability.

Here is a step-by-step guide on how to install the bracket correctly:

  1. Determine the ideal position for the bracket. It should be located just below the roofline, where the chimney pipe will pass through.

  2. Mark the position on the wall or roof using a pencil. Ensure that the bracket is level with the ground for proper support.

  3. Drill pilot holes at the marked position, making sure they’re deep enough to securely hold the bracket.

  4. Attach the bracket to the wall or roof using appropriate screws, ensuring a tight fit.

  5. Test the bracket’s stability by gently pushing and pulling it. If any movement is detected, reinforce the attachment points or choose a more secure location.

Assembling and Installing the Chimney Pipe Sections

I’m attaching the chimney pipe sections together before installing them through the roof. First, I gather all the necessary pipe sections and ensure they’re clean and free of any debris. Then, I connect the sections by inserting the male end of one section into the female end of the next section. I make sure to align the seams properly for a secure fit. Next, I tighten the locking bands or screws to hold the sections together firmly.

Now that the chimney pipe sections are assembled, I proceed to install them through the roof. Here are the steps I follow:

Advertisement
  • Measure and mark the location for the chimney pipe on the roof.
  • Cut a hole in the roof using a reciprocating saw or other appropriate tool. Make sure the hole is slightly larger than the diameter of the pipe.
  • Apply a layer of high-temperature silicone sealant around the opening to create a watertight seal.
  • Carefully insert the chimney pipe through the roof and align it with the hole.
  • Secure the chimney pipe to the roof using appropriate brackets or supports.

Once the chimney pipe is securely installed, I move on to the next step of installing the chimney cap.

Inspecting and Testing the Chimney Installation

To ensure the chimney installation is safe and functional, I carefully inspect and test the entire setup.

First, I conduct a smoke test to check for any leaks or obstructions in the chimney. I start by closing all doors and windows in the area to prevent any air drafts. Then, I light a small fire in the wood stove and let it burn for a few minutes.

Next, I climb up onto the roof to examine the chimney from the outside. I check for any signs of smoke escaping from the chimney, such as cracks or gaps. If I notice any issues, I make the necessary repairs before proceeding.

After completing the smoke test, I measure the height of the chimney to ensure it meets the necessary requirements. I use a measuring tape or a laser level to determine the exact height from the roofline to the top of the chimney. This measurement is important to ensure proper draft and airflow.

If the chimney height is too short, it may not draw the smoke out effectively, leading to poor combustion and potential smoke backdraft. On the other hand, if the chimney is too tall, it may create excessive draft, causing the wood stove to burn too hot and potentially damaging the stove or chimney.

Advertisement

Frequently Asked Questions

How Much Does It Cost to Install a Wood Stove Chimney Through the Roof?

When it comes to installing a wood stove chimney through the roof, the cost can vary depending on several factors. These include the materials needed, the size and complexity of the installation, and whether you choose to do it yourself or hire a professional.

DIY installation may save you money initially, but hiring a professional ensures proper installation and reduces the risk of mistakes.

It’s important to consider these cost factors and weigh the pros and cons before making a decision.

Can I Install a Wood Stove Chimney Through a Metal Roof?

Can I install a wood stove chimney through a metal roof?

Yes, you can. Metal roofs are suitable for installing wood stove chimneys.

Advertisement

The first step is to measure and mark the location where the chimney will go.

Then, you’ll need to cut a hole in the metal roof using a jigsaw or reciprocating saw.

Next, you’ll attach a chimney flashing to the roof around the hole to ensure a watertight seal.

What Are the Safety Precautions to Consider When Installing a Wood Stove Chimney Through the Roof?

When installing a wood stove chimney through the roof, safety measures are crucial. It’s important to follow the proper installation process to ensure a secure and efficient chimney system.

Begin by selecting the right location on the roof and measuring the clearance distances.

Advertisement

Use a roof flashing kit to create a watertight seal and protect against leaks.

Install a chimney support box to provide stability and prevent any structural damage.

Always consult a professional if you’re unsure about any step in the process.

Are There Any Building Codes or Permits Required for Installing a Wood Stove Chimney Through the Roof?

Installing a wood stove chimney through the roof requires careful consideration of building code requirements and the permitting process. It’s crucial to ensure compliance with local regulations to guarantee safety and avoid potential issues down the line.

Building codes dictate specific guidelines for chimney installation, including clearance distances, materials, and structural support. Additionally, obtaining the necessary permits is essential to ensure that the installation meets all legal requirements and is inspected for compliance.

Advertisement

Overall, following these steps will ensure a successful and compliant installation.

Can I Install a Wood Stove Chimney Through a Sloped Roof or Does It Have to Be a Flat Roof?

Installing a wood stove chimney on a slanted roof is possible, but it requires careful planning and consideration.

There are alternative options for wood stove chimney installation, such as using a chimney kit that’s specifically designed for sloped roofs. These kits provide the necessary components and instructions for a safe and efficient installation.

It’s important to consult with a professional to ensure that all building codes and regulations are met for the installation process.

Conclusion

In conclusion, installing a wood stove chimney through the roof requires careful planning, precise measurements, and the right tools and materials.

Advertisement

It’s essential to assess the roof structure and clearance beforehand to ensure a safe and efficient installation.

By following the step-by-step directions provided in this article, you can successfully cut and frame the roof opening, install the chimney flashing and roof brackets, and assemble and install the chimney pipe sections.

Remember, patience and attention to detail are key to a successful installation.

Growing up surrounded by the vast beauty of nature, Sierra was always drawn to the call of the wild. While others sought the comfort of the familiar, she ventured out, embracing the unpredictable and finding stories in the heartbeat of nature.   At the epicenter of every remarkable venture lies a dynamic team—a fusion of diverse talents, visions, and passions. The essence of Best Small Wood Stoves is crafted and refined by such a trio: Sierra, Logan, and Terra. Their collective expertise has transformed the platform into a leading authority on small wood stoves, radiating warmth and knowledge in equal measure.

Continue Reading
Advertisement

Wood Stove

How Long Does It Take Wood To Ignite Aftee Being Put In A Wood Stove

Published

on

By

An image capturing the mesmerizing scene of a wood stove, with a bed of glowing embers beneath carefully stacked logs, as tendrils of thin smoke gracefully curl upwards, depicting the anticipation of wood slowly igniting

I must admit, the wait for wood to catch fire in a wood stove can seem never-ending. However, do not worry, as in this article, I will share some strategies and tips to speed up the process.

From understanding the temperature and moisture content of the wood to choosing the right type and preparing it efficiently, we’ll explore all the factors that affect wood ignition time.

So let’s dive in and get that fire blazing in no time!

Key Takeaways

  • Weather conditions and moisture content of the wood can affect the ignition time.
  • Properly seasoned wood with around 20% moisture content ignites more easily.
  • Smaller wood logs and softer woods tend to ignite faster than larger and harder woods.
  • Proper wood storage and preparation, such as keeping it off the ground, using fire starters, and maintaining airflow, can help ensure faster ignition in a wood stove.

Factors Affecting Wood Ignition Time

I’m curious about the factors that can affect the time it takes for wood to ignite in a wood stove.

One of the key factors is the weather conditions. Cold and damp weather can make it harder for the wood to catch fire, as moisture content in the wood can be high. It’s important to ensure that the wood is properly seasoned and has a moisture content of around 20% for optimal ignition.

Another factor to consider is the size of the wood logs. Smaller logs tend to ignite more quickly as they’ve a larger surface area exposed to the heat source.

Advertisement

Additionally, the type of wood being used can also affect ignition time, with softer woods igniting faster than harder woods.

Temperature and Moisture Content of Wood

The optimal moisture content for wood is around 20%, which ensures efficient ignition in a wood stove. The wood ignition process is influenced by various factors, and the moisture content plays a critical role in determining how quickly the wood will ignite.

When wood is too wet, it requires more energy to burn off the excess moisture before it can reach its ignition point. On the other hand, if the wood is too dry, it may ignite too quickly and burn too rapidly, leading to inefficient combustion and wasted energy.

Therefore, it’s essential to properly store wood to maintain its moisture content within the optimal range. Proper wood storage involves keeping the wood off the ground, covering it to protect it from rain or snow, and allowing for proper airflow to prevent excessive moisture buildup.

Type of Wood and Its Density

I prefer using hardwoods like oak or maple due to their density and their ability to burn longer and provide more heat. When it comes to wood species selection, it’s important to consider the impact of wood moisture content. Here are three key points to keep in mind:

Advertisement
  1. Moisture content affects combustion efficiency: Wet wood contains a higher moisture content, which leads to incomplete combustion and the production of more smoke and pollutants. Dry hardwoods, on the other hand, burn more efficiently and produce less smoke.

  2. Heat output is influenced by wood density: Hardwoods have a higher density compared to softwoods, resulting in a higher heat output. This means that hardwoods like oak and maple can provide more warmth and keep your space cozy for a longer period of time.

  3. Longer burn time with hardwoods: Due to their density, hardwoods burn at a slower rate, allowing for a longer burn time per log. This means less frequent refueling and a more consistent heat source.

Preparing Wood for Efficient Ignition

To ensure efficient ignition, I always make sure to properly split and dry my firewood. Proper wood storage is essential for achieving this. It’s important to store the firewood in a well-ventilated area, off the ground and protected from moisture. This allows the wood to dry properly and reduces the risk of it being damp or rotting.

When it comes to igniting the wood in a wood stove, using fire starters or kindling can greatly speed up the process. These small pieces of flammable material help create a hot and sustained flame, which in turn ignites the larger pieces of wood.

By incorporating these techniques, you can ensure a faster and more efficient ignition in your wood stove.

Now, let’s move on to some tips for faster wood ignition in a wood stove.

Tips for Faster Wood Ignition in a Wood Stove

Using kindling and ensuring proper airflow are key to achieving faster wood ignition in a wood stove. When it comes to stubborn wood that’s difficult to ignite, there are several ignition techniques that can be employed:

Advertisement
  1. Preparation: Properly seasoned wood with a moisture content below 20% is essential for efficient ignition. This ensures that the wood is dry enough to catch fire quickly.

  2. Kindling: Creating a bed of small, dry kindling underneath the larger logs helps to ignite the fire faster. Kindling acts as a fuel source that ignites easily and produces enough heat to catch the larger logs on fire.

  3. Airflow: Adequate airflow is crucial for wood ignition. By opening the damper or adjusting the air vents, you can ensure that enough oxygen is getting to the fire, promoting faster ignition.

While some may consider using accelerants to speed up wood ignition, it’s important to note that this can be dangerous and may result in uncontrollable fires or the release of harmful chemicals. It’s recommended to rely on proper ignition techniques and patience for a safe and efficient wood ignition process.

Frequently Asked Questions

Can I Use Treated Wood in My Wood Stove?

Using pressure treated wood in a wood stove is not recommended due to the chemicals it releases when burned. It is safer to use untreated wood or other alternatives for faster ignition.

What Is the Best Type of Wood to Use for Faster Ignition in a Wood Stove?

Fast burning woods like pine or fir can ignite in a wood stove within minutes. To ensure efficient wood stove usage, it’s important to choose dry, seasoned firewood and properly maintain the stove.

Are There Any Safety Precautions I Should Take When Igniting Wood in a Wood Stove?

When igniting wood in a wood stove, it is important to take safety precautions. Keep a fire extinguisher nearby and ensure proper ventilation. Additionally, the moisture content of the wood can affect its ignition time.

Can I Use Wood Chips or Sawdust for Ignition in a Wood Stove?

I can use wood chips or sawdust for ignition in a wood stove. They are effective fire starters for faster ignition. The small size and high surface area make them ignite quickly, reducing the time needed for the wood to catch fire.

Advertisement

How Does the Size of the Wood Affect Its Ignition Time in a Wood Stove?

Moisture content significantly affects wood ignition in a wood stove. Smaller pieces of wood ignite faster due to increased surface area. However, larger pieces provide longer burn times. Consider the advantages and disadvantages of each for efficient use in a wood stove.

Conclusion

After careful analysis of the factors affecting wood ignition time, it’s safe to say that wood doesn’t ignite instantly in a wood stove. Contrary to popular belief, wood requires time to reach its ignition point, which is influenced by factors such as temperature, moisture content, and wood density.

To expedite the process, it’s crucial to choose the right type of wood and ensure it’s properly prepared. So, if you were expecting an immediate burst of flames, you might’ve to wait a little longer.

Continue Reading

Wood Stove

Why Does Your Wood Stove Smoke

Published

on

By

An image capturing a rustic, cozy living room

Dealing with the smoke from your wood stove can be a real nuisance. But don’t worry, I’m here to provide some tips on how to manage it.

Understanding the root causes of this predicament is crucial. Insufficient airflow, improper wood selection, damaged chimney, inadequate maintenance, and incorrect installation are the major culprits.

Let’s delve into each of these factors to uncover the secrets behind why your wood stove may be producing that bothersome smoke.

Key Takeaways

  • Blocked vents disrupt combustion process and lead to incomplete burning and smoke generation.
  • Burning wet or high-moisture wood results in inefficient burning and increased creosote buildup.
  • Cracked or deteriorating chimney can cause leaks and smoke entry.
  • Inadequate stove maintenance, including dirty burners and clogged flue, can lead to smoke issues.

Insufficient Airflow

I’m having trouble with my wood stove smoking because there’s not enough airflow. A common cause of insufficient airflow is blocked vents. When the vents are blocked, the combustion process is disrupted, leading to incomplete burning of the wood and the generation of smoke.

To ensure efficient combustion and minimize smoke, it’s crucial to maintain clear and unobstructed vents. Blocked vents can result from a buildup of creosote or debris, so regular cleaning is essential.

Additionally, proper placement of the stove is crucial to ensure adequate airflow. Make sure that the stove is positioned away from any obstructions, such as furniture or curtains, that might impede the flow of air.

Advertisement

Improper Wood Selection

To prevent excessive smoke and poor combustion, it’s important to avoid burning wet wood or wood with high moisture content, as it can result in inefficient burning and increased creosote buildup. When burning seasoned firewood, which has a moisture content of around 20% or less, the wood burns more efficiently, producing less smoke and providing more heat output. Seasoned firewood has been properly dried for at least six months, allowing the moisture content to decrease significantly. This ensures that the wood burns cleanly and effectively in your wood stove. However, if you burn wood with high moisture content, it will create more smoke and reduce the overall efficiency of your stove. This can also lead to a higher risk of creosote buildup in your chimney, which can be dangerous and increase the chance of a chimney fire. Therefore, it’s crucial to always use dry, seasoned firewood to prevent excessive smoke and maintain proper combustion in your wood stove.

Now, let’s discuss another potential reason for excessive smoke: a damaged or leaky chimney.

Damaged or Leaky Chimney

A damaged or leaky chimney can cause smoke to enter your home, which can be hazardous to your health and safety. It’s important to address any issues with your chimney promptly to ensure the proper functioning of your wood stove.

Here are three signs of a damaged chimney that you should be aware of:

  1. Cracked or crumbling mortar: If you notice any cracks or crumbling in the mortar joints of your chimney, it could indicate water damage or structural issues. This can lead to leaks and smoke entering your home.

  2. Rusty or deteriorating chimney cap: The chimney cap plays a crucial role in keeping out rain, snow, debris, and animals. If it’s rusty or deteriorating, it may not be able to perform its function effectively, allowing smoke to escape into your living space.

  3. Smoke stains or odors: If you notice smoke stains on the walls or ceilings near your chimney or detect a persistent smoky odor in your home, it could be a sign of a leaky chimney. This should be addressed promptly to prevent further damage and potential health risks.

When faced with a damaged chimney, there are various repair options available, such as chimney relining, chimney crown repair, and chimney flashing repair. It’s important to consult with a professional chimney technician to determine the best course of action for your specific situation.

Advertisement

Inadequate Stove Maintenance

One of the main causes of smoke in your home can be the result of inadequate stove maintenance. A dirty stove and a clogged flue are two common culprits that can lead to smoke issues. When the stove isn’t properly cleaned, a buildup of soot and debris can occur on the burners, causing incomplete combustion and the production of smoke.

Additionally, a clogged flue prevents the proper ventilation of smoke, leading to its accumulation inside your home. Regular cleaning and maintenance of your stove, including cleaning the burners and ensuring the flue is clear, is crucial in preventing smoke issues.

It’s recommended to schedule annual professional maintenance to ensure your stove is in optimal condition and to avoid the inconvenience and potential health hazards associated with smoke in your home.

Incorrect Stove Installation

I regret not hiring a professional for my stove installation, as it has caused numerous issues and potential hazards. When it comes to installing a wood stove, proper positioning and sizing are crucial factors that shouldn’t be taken lightly.

Here are three key reasons why improper stove positioning and incorrect flue size can lead to problems:

Advertisement
  1. Inadequate clearance: Placing the stove too close to combustible materials can increase the risk of fire. It’s essential to follow the manufacturer’s guidelines for proper clearances to ensure the safe operation of the stove.

  2. Inefficient heating: Incorrect positioning can hinder the stove’s ability to distribute heat effectively throughout the room. This can result in uneven temperatures and wasted energy, leading to discomfort and higher heating costs.

  3. Insufficient draft: Using an incorrect flue size can impede the stove’s ability to expel smoke and gases properly. This can lead to backdrafting, where smoke enters the room instead of being directed outside. Aside from the health hazards, backdrafting can damage the stove and cause indoor air quality issues.

To avoid these problems, it’s essential to consult a professional for the proper installation of your wood stove. They’ll ensure that the stove is positioned correctly and the flue size is appropriate for efficient and safe operation.

Frequently Asked Questions

Can Smoking Occur if There Is Sufficient Airflow in the Wood Stove?

Yes, smoking can still occur in a wood stove even with sufficient airflow. Factors like improper wood placement, damp or unseasoned wood, or a clogged chimney can all contribute to smoking issues. Proper troubleshooting can resolve these problems and improve wood stove performance.

What Are Some Common Wood Types That Should Be Avoided to Prevent Smoking in a Wood Stove?

To prevent smoking in a wood stove, it is important to avoid using wood types like pine, as they contain high levels of resin. Additionally, properly seasoning firewood is crucial to reduce smoke production.

How Can I Identify if My Chimney Is Damaged or Leaking?

To identify chimney damage or leaks, conduct a thorough chimney inspection. Look for cracks, loose bricks, or crumbling mortar. Additionally, consider installing a smoke detector near the stove to quickly detect any smoke issues.

Besides Regular Cleaning, What Other Maintenance Practices Can Help Prevent Smoking in a Wood Stove?

Other maintenance practices, such as ensuring proper airflow and avoiding certain wood types, can help prevent smoking in a wood stove. Identifying chimney damage or leaks and checking for correct stove installation are also crucial.

Advertisement

What Are Some Signs of Incorrect Stove Installation That May Lead to Smoking?

Installing a wood stove improperly can lead to frustrating smoke issues. One key sign is if the chimney height is too short. Another is using unseasoned wood, which can cause excessive smoke.

What Are Some Wood Stove Brands That Have Smoke-Reducing Features?

Looking for the best wood stove brands with smoke-reducing features? Look no further. With increasing concerns about air pollution, several brands are innovating their wood stoves to minimize smoke emissions. Some notable options include Vermont Castings, Jøtul, and Blaze King. These brands prioritize efficiency and clean burning, ensuring you can enjoy the warmth of a wood stove while minimizing environmental impact.

Conclusion

In conclusion, when your wood stove smokes, it’s often due to factors such as:

  • Insufficient airflow
  • Improper wood selection
  • A damaged or leaky chimney
  • Inadequate stove maintenance
  • Incorrect installation

To prevent this, you should:

  • Ensure proper ventilation
  • Use seasoned and dry wood
  • Inspect and repair your chimney regularly
  • Maintain your stove diligently
  • Ensure professional installation

By addressing these issues, you can enjoy a smoke-free and efficient wood stove experience, creating a cozy and inviting atmosphere in your home.

Continue Reading

Wood Stove

How To Build A Wood Stove From A Jerry Can

Published

on

By

An image showcasing the step-by-step process of transforming a jerry can into a wood stove

I have always been fascinated by the concept of transforming ordinary objects into useful tools.

So when I came across an old jerry can in my garage, I knew I had the perfect opportunity to create my own wood stove.

In this article, I’ll guide you through the process of transforming a jerry can into a functional and efficient wood stove, complete with ventilation, legs, and a base.

Get ready to unleash your inner DIY enthusiast and start enjoying the warmth of your homemade wood stove.

Key Takeaways

  • Consider the capacity and dimensions of the jerry can
  • Compare different materials for jerry cans
  • Prepare and clean the jerry can properly
  • Take safety precautions and use the right tools when modifying the jerry can

Selecting the Right Jerry Can for Your Wood Stove

I’m trying to figure out which jerry can is the best option for my wood stove.

When it comes to choosing the right size jerry can for your wood stove, it’s important to consider the capacity and dimensions. A larger can will hold more fuel, but it may be too bulky for your space. On the other hand, a smaller can may require more frequent refills.

Advertisement

Additionally, it’s crucial to compare different materials for jerry cans to ensure optimal wood stove performance. Metal cans are durable and resistant to heat, but they can also be heavy. Plastic cans, on the other hand, are lightweight and easier to handle, but may not withstand high temperatures as well.

Ultimately, finding the perfect jerry can for your wood stove is about balancing capacity, dimensions, and material for efficient and safe operation.

Preparing and Cleaning the Jerry Can

Before starting to use the jerry can, it’s crucial to properly clean and prepare it by removing any dirt or residue, and then ensuring it’s completely dry. Here is the cleaning process and safety precautions to follow:

  1. Rinse the jerry can with warm water and a mild detergent to remove any dirt or debris. Use a sponge or brush to scrub the inside and outside of the can thoroughly.

  2. Rinse the can again with clean water to remove any soap residue. Make sure to rinse it multiple times to ensure all the soap is gone.

  3. After rinsing, allow the jerry can to air dry completely. This is important to prevent any moisture from causing rust or corrosion.

By following these cleaning steps, you can ensure that your jerry can is ready for modification.

Now, let’s discuss cutting open and modifying the jerry can for ventilation.

Advertisement

Cutting Open and Modifying the Jerry Can for Ventilation

I’ll explain how to use a few small holes in the jerry can to provide adequate ventilation for the wood stove. When modifying the jerry can for ventilation, it is important to take safety precautions and use the right tools. Here is a table outlining the necessary steps:

Step Safety Precautions Tools Needed
1 Wear protective gloves and goggles Drill
2 Work in a well-ventilated area Marker
3 Ensure the jerry can is empty and clean Metal file
4 Mark the desired ventilation holes on the can Safety glasses
5 Use the drill to create the holes Protective gloves
6 Smooth the edges of the holes with the metal file Goggles
7 Clean any metal shavings from the can Clean cloth

Adding Legs and a Base to the Wood Stove

I can attach some sturdy legs and a stable base to the wood stove to ensure it stands securely on any surface. Achieving stove stability is crucial to prevent accidents and maintain proper functioning.

When choosing materials for the legs and base, it’s important to consider their strength, durability, and heat resistance. Here are three essential elements to consider:

  1. Material Selection: Opt for materials that can withstand high temperatures, such as stainless steel or cast iron. These materials are known for their strength and ability to withstand the intense heat generated by the wood stove.

  2. Design and Construction: The design of the legs should provide sufficient support and stability. Consider a tripod or four-leg design for optimal balance. Additionally, ensure the legs are securely attached to the stove body to prevent any wobbling or instability.

  3. Base Size and Shape: The base of the wood stove should be wide and flat enough to distribute the weight evenly, ensuring stability on various surfaces. A larger base will provide better stability, especially when using the stove on uneven or soft ground.

Testing and Using Your DIY Wood Stove

I’ve successfully tested and now use my DIY wood stove to cook meals while camping. It’s a simple yet effective solution for outdoor cooking. However, before using it, I took several testing techniques and safety precautions to ensure its efficiency and my own well-being.

Firstly, I conducted a leak test to ensure there were no air or gas leaks that could potentially cause a fire hazard. This involved pressurizing the stove and checking for any signs of leakage. I also tested its heat distribution by placing a pot of water on the stove and monitoring how evenly the heat was dispersed.

Advertisement

To further ensure safety, I implemented safety precautions such as maintaining a safe distance between the stove and any flammable objects, using heat-resistant gloves when handling the stove, and having a fire extinguisher nearby.

Using my DIY wood stove has been a game-changer for my camping trips. Not only does it provide a reliable cooking source, but it also allows me to enjoy the natural surroundings without relying on traditional campfire cooking methods. By following proper testing techniques and safety precautions, I can confidently cook my meals and enjoy the great outdoors.

Frequently Asked Questions

How Long Does It Take to Build a Wood Stove From a Jerry Can?

It takes about 2 hours to build a wood stove from a jerry can. The benefits of using a wood stove include cost-effective heating and a sustainable fuel source. Regular cleaning and maintenance ensure optimal performance.

Can I Use Any Type of Wood for the Base of the Wood Stove?

I can use different types of wood for the base of the wood stove, but it’s important to consider safety precautions when using it indoors. Proper ventilation and non-flammable materials are crucial.

Is It Safe to Use the Wood Stove Indoors?

Oh, using a wood stove indoors, what a brilliant idea! Let me enlighten you on the potential health hazards and share some precise tips for safely using one. Shall we begin?

Advertisement

Can I Paint the Jerry Can After Modifying It?

Yes, you can paint the modified jerry can using various painting techniques. It is important to choose a paint that can withstand high temperatures and adhere well to metal surfaces. Make sure to consider alternative fuel sources when painting for safety.

What Tools Do I Need to Build a Wood Stove From a Jerry Can?

To build a wood stove from a jerry can, I need a few tools like a jigsaw, drill, and metal file. Safety precautions are crucial, and alternative materials can be used if necessary.

Can I Use a Wood Stove Insert in a DIY Jerry Can Wood Stove?

When considering building a wood stove fireplace, it’s crucial to factor in the cost of materials and construction. However, if you’re planning to use a wood stove insert in a DIY Jerry Can Wood Stove, the cost of building a wood stove fireplace may decrease significantly. This alternative method combines affordability and practicality, making it an excellent choice for those seeking an alternative heating solution.

Can Duraflame Logs Be Used in a Wood Stove Made from a Jerry Can?

Can Duraflame logs be used in a wood stove made from a jerry can? Many DIY enthusiasts wonder about using Duraflame logs in a wood stove. While Duraflame logs are commonly used in traditional fireplaces, their use in a jerry can wood stove may not be ideal. It’s important to consider the safety and compatibility aspects of using duraflame logs in wood stoves specifically designed for them.

Conclusion

After carefully selecting the right jerry can, preparing and modifying it for ventilation, and adding sturdy legs and a stable base, your DIY wood stove is ready for testing and use.

Advertisement

With its compact design and efficient functionality, this wood stove provides a practical and cost-effective heating solution for outdoor activities or emergency situations.

Embrace the warmth and convenience of this homemade creation, bringing comfort and coziness wherever you go.

Continue Reading

Trending