Connect with us

Wood Stove

How Often Should I Clean My Wood Stove

Published

on

An image of a well-maintained wood stove, gleaming with a warm, golden glow

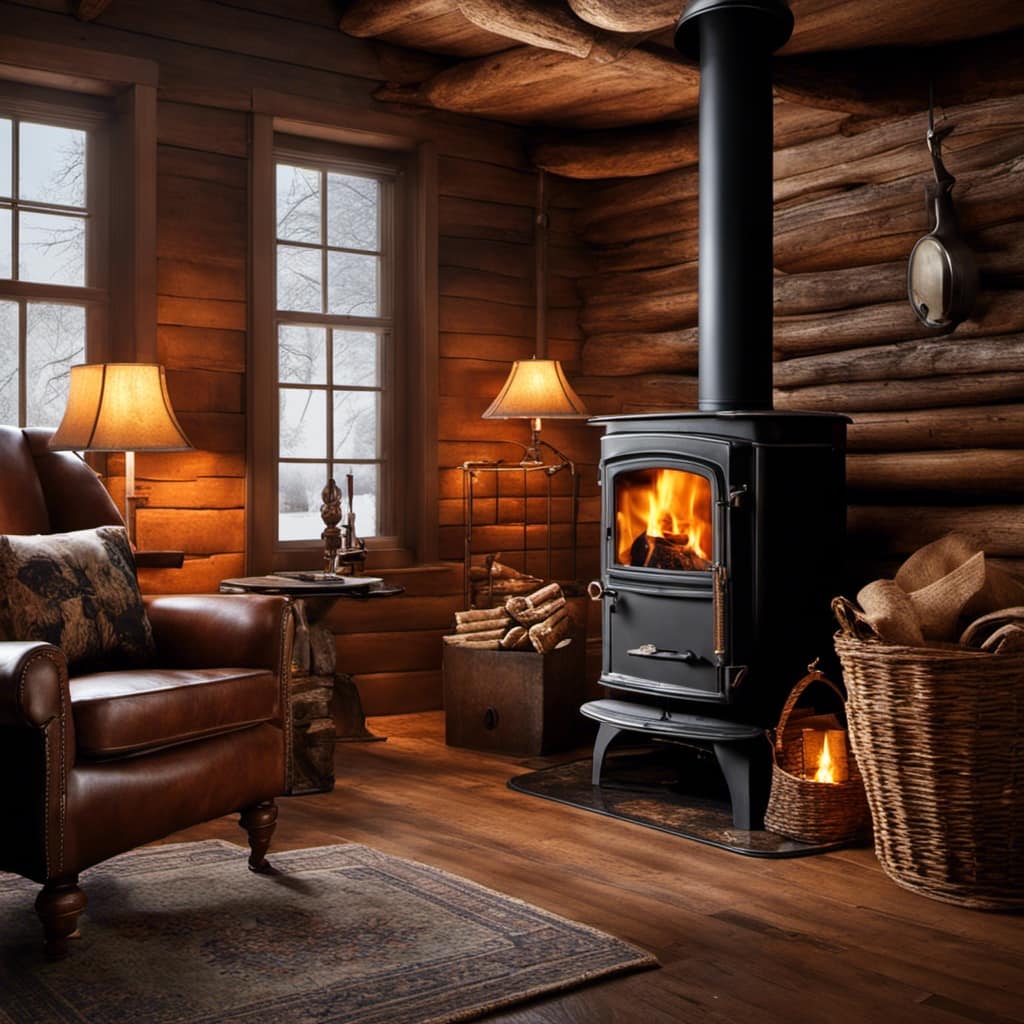
As an individual who truly values wood-burning stoves, I understand the importance of maintaining their cleanliness for safety and efficiency reasons.

Like a well-tuned instrument, regular cleaning ensures your wood stove performs at its best. But how often should I clean it?

In this article, I will guide you through the factors that determine cleaning frequency, provide a recommended cleaning schedule, and share signs that indicate your wood stove needs attention.

Get ready to learn how to properly care for your beloved wood stove.

Key Takeaways

  • Regular cleaning is important to ensure optimal performance and efficiency of a wood stove.
  • The frequency of cleaning depends on factors such as burning frequency and duration, as well as the type of wood used.
  • Hardwoods like oak, maple, and hickory produce less creosote buildup and require less frequent cleaning.
  • Signs that a wood stove needs cleaning include strong odors, excessive smoke, slow or inefficient burning, and visible soot buildup.

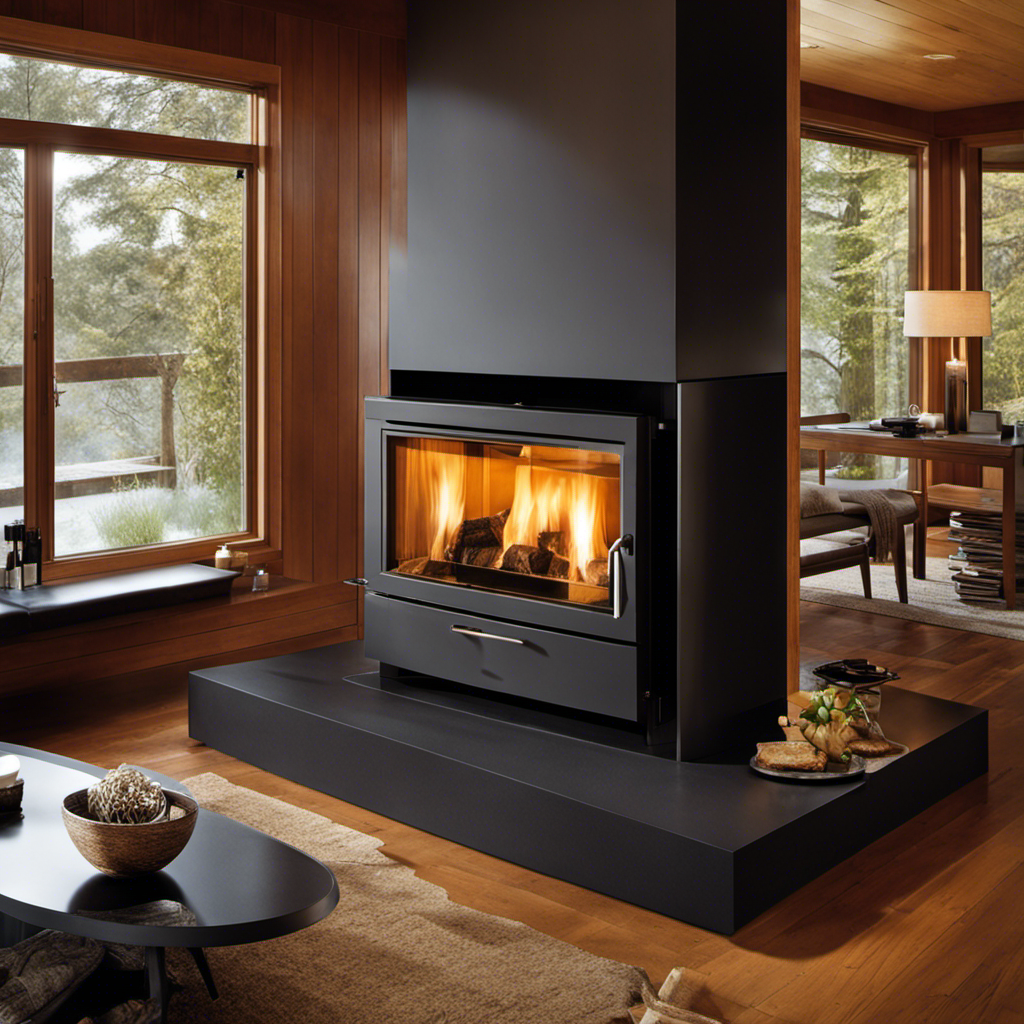
The Importance of Regular Wood Stove Cleaning

I understand the importance of regular wood stove cleaning to maintain its efficiency and prevent potential hazards. As someone who’s been using a wood stove for many years, I’ve come to appreciate the benefits of regular maintenance. While it may seem like a tedious task, professional cleaning is essential for ensuring the longevity and optimal performance of your wood stove.

One of the main reasons why professional cleaning is important is because it helps to remove any buildup of creosote. Creosote is a highly flammable substance that can accumulate in the chimney and stovepipe over time. If left unattended, it can lead to chimney fires, which can be extremely dangerous and damaging. By having your wood stove professionally cleaned on a regular basis, you can significantly reduce the risk of a chimney fire occurring.

Advertisement

Another benefit of regular maintenance is that it helps to improve the efficiency of your wood stove. Over time, soot and ash can build up inside the stove, affecting its ability to generate heat. By having your wood stove cleaned regularly, you can ensure that it operates at its full potential, providing you with a consistent and efficient source of heat.

Factors That Determine Cleaning Frequency

When it comes to determining the frequency of cleaning your wood stove, there are a few key factors to consider.

Firstly, the burning frequency and duration play a significant role. The more often and longer you use your wood stove, the more frequently it will need to be cleaned.

Secondly, the type of wood used also affects cleaning frequency, as certain woods produce more creosote and residue than others.

Taking these factors into account will help ensure that your wood stove is cleaned regularly and operating efficiently.

Advertisement

Burning Frequency and Duration

The frequency and duration of burning in my wood stove greatly affects its overall cleanliness. Burning efficiency plays a crucial role in determining how often I need to clean my wood stove. When the wood burns efficiently, it produces less smoke and soot, resulting in a cleaner stove.

On the other hand, if the burning efficiency is low, more smoke and soot will be generated, leading to a dirtier stove. This isn’t only an aesthetic concern but also has a significant impact on air quality. A dirty wood stove emits more pollutants into the air, contributing to poor indoor and outdoor air quality.

Therefore, it’s essential to ensure that the burning efficiency is maximized to maintain a clean wood stove and promote better air quality.

Type of Wood Used

Using hardwoods instead of softwoods in my wood stove results in a longer burn time and more efficient heat output.
Hardwoods, such as oak, maple, and hickory, are denser and have a higher energy content than softwoods like pine or fir. This means that they burn slower and produce more heat for a longer period of time.
When it comes to wood stove maintenance, using hardwoods can also help reduce the amount of creosote buildup in the chimney, as they produce less smoke and release fewer volatile compounds.
Additionally, hardwoods tend to produce less ash and require less frequent cleaning compared to softwoods.
Overall, choosing the right type of wood for your wood stove can greatly impact its performance and maintenance requirements.

Recommended Cleaning Schedule for Wood Stoves

To keep your wood stove in optimal condition and ensure its efficient performance, it’s important to follow a recommended cleaning schedule. Regular cleaning helps to prevent the build-up of creosote, ash, and other debris that can affect your stove’s functionality and pose potential safety hazards.

Advertisement

In the following points, I’ll discuss the frequency of cleaning and the methods and tools you can use to effectively maintain your wood stove.

Frequency of Cleaning

I should clean my wood stove every few months to ensure proper functionality. Regular cleaning not only helps to maintain the burning efficiency of the stove but also ensures the safety of your home.

Here are some important reasons why cleaning your wood stove is crucial:

  • Prevents creosote buildup: Creosote is a byproduct of burning wood that can accumulate on the interior walls of the stove and chimney. Regular cleaning helps to remove this flammable substance, reducing the risk of chimney fires.

  • Improves air quality: A clean wood stove burns more efficiently, producing less smoke and reducing the emission of harmful pollutants into the atmosphere.

  • Extends the lifespan of the stove: Regular cleaning and maintenance can prevent damage and prolong the life of your wood stove, saving you money in the long run.

Cleaning Methods and Tools

Regular maintenance and proper cleaning tools are essential for keeping my wood stove in good condition. When it comes to cleaning my wood stove, I’ve found that using the right techniques and supplies is crucial.

To start, I always make sure to remove any ashes and debris from the stove before proceeding with the cleaning process. For this, I use a metal scoop and a sturdy brush to carefully sweep away the ashes.

Advertisement

Next, I use a damp cloth or sponge to clean the exterior of the stove, making sure to remove any dirt or stains. When it comes to the interior, I use a specialized stove cleaner and a scrub brush to remove any built-up creosote or soot.

By following these cleaning techniques and using the appropriate supplies, I can ensure that my wood stove remains in optimal condition.

Now, let’s move on to the signs that indicate when my wood stove needs cleaning.

Signs That Your Wood Stove Needs Cleaning

When my wood stove starts emitting a strong and unpleasant odor, I know it’s time for a cleaning. Regular maintenance of your wood stove is crucial to ensure its efficiency and safety. Here are the signs that indicate your wood stove needs cleaning:

  • Excessive smoke: If you notice an increase in smoke production while using your wood stove, it may be a sign of creosote buildup inside the chimney or flue. This not only affects the stove’s performance but also poses a fire hazard.

  • Slow or inefficient burning: If your wood stove isn’t burning wood as efficiently as it used to, it could be due to a clogged airway or a dirty combustion chamber. This can lead to decreased heat output and wasted fuel.

  • Soot accumulation: A visible layer of black soot on the interior surfaces of your wood stove is a clear indication that it needs cleaning. Soot buildup can hinder proper airflow and cause poor combustion.

Regularly cleaning your wood stove is of utmost importance to ensure its optimal performance and prevent potential hazards. Now, let’s move on to the steps to properly clean your wood stove.

Advertisement

Steps to Properly Clean Your Wood Stove

To properly clean your wood stove, it’s important to follow these steps.

Cleaning frequency plays a crucial role in maintaining the efficiency and safety of your wood stove. I recommend cleaning your wood stove at least once a year, preferably before the start of the heating season. However, if you use your wood stove frequently, it may require more frequent cleaning.

Proper maintenance not only ensures optimal performance but also extends the lifespan of your wood stove.

Start by allowing the stove to cool completely before beginning the cleaning process. Remove any ashes and debris from the firebox using a shovel or brush.

Next, clean the stove’s glass door using a non-abrasive cleaner specifically designed for wood stoves. Wipe away any soot and grime, ensuring a clear view of the fire.

Advertisement

Inspect the stove’s gaskets and replace any that are worn or damaged. These gaskets help create an airtight seal, improving the stove’s efficiency.

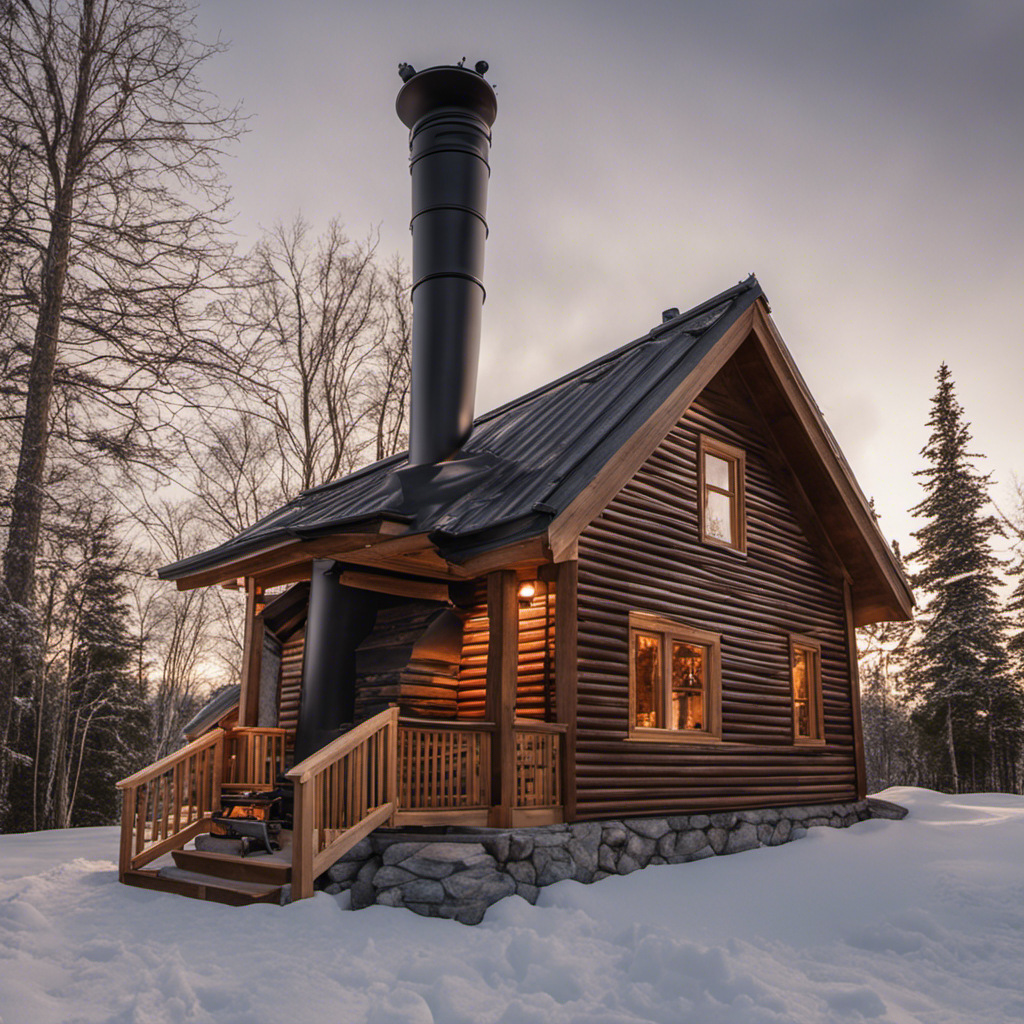
Check the chimney and flue for creosote buildup and remove it using a chimney brush or hire a professional chimney sweep for a thorough cleaning.

Finally, vacuum the exterior of the stove to remove any dust and dirt. Pay attention to the stove’s vents and air intake, ensuring they’re clear of obstructions.

Common Mistakes to Avoid During Wood Stove Cleaning

When it comes to cleaning your wood stove, there are some common mistakes that you should avoid to ensure a safe and effective cleaning process. Here are some cleaning tips to help you avoid these common mistakes:

  • Neglecting regular cleaning: One of the biggest mistakes isn’t cleaning your wood stove regularly. It’s important to clean it at least once a year to prevent the buildup of creosote and other debris. Regular cleaning will also improve the efficiency and safety of your wood stove.

  • Using the wrong cleaning products: Another common mistake is using the wrong cleaning products. Avoid using harsh chemicals or abrasive materials that can damage the surface of your wood stove. Instead, opt for mild soapy water and a soft cloth or brush to gently clean the stove.

  • Not properly disposing of ash: Many people make the mistake of not disposing of ash properly. Always wait for the ash to cool down completely before removing it from the stove. Use a metal container with a tight-fitting lid to store the ash, and dispose of it in a designated area away from flammable materials.

Maintenance Tips to Extend the Lifespan of Your Wood Stove

I find it helpful to regularly inspect and maintain my wood stove to ensure it lasts longer. Proper maintenance not only extends the lifespan of the stove but also ensures its safe and efficient operation. To help you keep your wood stove in top shape, here is a maintenance checklist to follow.

Advertisement

Firstly, make sure to clean the stove regularly. Remove any ashes and debris from the firebox, as well as the baffle and flue pipes. This helps to prevent blockages and improve airflow. Additionally, clean the glass door using a non-abrasive cleaner to maintain visibility.

Next, check the gaskets and seals for any signs of wear or damage. Replace them if necessary to maintain an airtight seal. Inspect the fire bricks and replace any that are cracked or broken to ensure proper insulation.

Additionally, it’s important to schedule a professional chimney sweep at least once a year to remove creosote buildup and ensure proper ventilation. This not only improves the stove’s efficiency but also reduces the risk of chimney fires.

Lastly, always follow cleaning safety precautions. Wear gloves and protective eyewear when handling ashes or cleaning the stove. Ensure the stove is completely cool before starting any maintenance tasks.

Frequently Asked Questions

Can I Use Regular Household Cleaning Products to Clean My Wood Stove?

Yes, you can use regular household cleaning products to clean your wood stove. However, it’s important to choose the right products that are safe and effective for cleaning wood stoves. Avoid using abrasive cleaners or anything that can scratch the surface. Instead, opt for gentle cleaners specifically designed for wood stoves.

Advertisement

It’s also recommended to follow the manufacturer’s instructions for cleaning methods and products to ensure the longevity and efficiency of your wood stove.

Is It Necessary to Clean the Chimney as Well When Cleaning the Wood Stove?

When it comes to cleaning my wood stove, I always make sure to give it a thorough cleaning.

But what about the chimney? Well, let me tell you, it’s absolutely necessary to clean the chimney when cleaning the wood stove.

Proper chimney maintenance is crucial for the safe and efficient operation of your stove.

There are various chimney cleaning tools and methods available to help you keep your chimney clean and free from any blockages or buildup.

Advertisement

How Often Should I Clean the Glass Door of My Wood Stove?

Cleaning frequency for the glass door of a wood stove depends on several factors such as usage and buildup of soot. It’s recommended to clean the glass door regularly to maintain its transparency and ensure efficient heat transfer.

The best cleaning method involves using a non-abrasive glass cleaner or a mixture of vinegar and water. Regularly inspect the glass door for any signs of dirt or residue and clean as needed to keep it looking clean and functioning properly.

Can I Burn Wet or Unseasoned Wood in My Wood Stove Without Affecting Its Cleanliness?

Burning wet or unseasoned wood in a wood stove can definitely impact its cleanliness. When wood has a high moisture content, it produces more smoke, which can lead to the buildup of creosote and soot on the interior surfaces of the stove.

This buildup can reduce the stove’s efficiency and increase the risk of a chimney fire. Therefore, it’s important to only burn properly seasoned wood in your wood stove to maintain its cleanliness and safety.

Is It Safe to Clean My Wood Stove While It Is Still Hot?

It’s important to prioritize safety when it comes to wood stove maintenance.

Advertisement

Cleaning your wood stove while it’s still hot can be dangerous and should be avoided. Wait for it to cool down before starting the cleaning process.

Regular cleaning is essential to keep your wood stove functioning efficiently and prevent the buildup of creosote, a flammable substance that can lead to chimney fires.

Follow proper cleaning tips and guidelines to ensure your wood stove stays in optimal condition.

Conclusion

In conclusion, regularly cleaning your wood stove is essential for its longevity and efficiency. By following a recommended cleaning schedule and being aware of signs that your stove needs cleaning, you can ensure that it operates at its best.

Taking the time to clean your stove properly and avoiding common mistakes will also contribute to its lifespan. So, don’t neglect your wood stove – give it the care it deserves and it will reward you with warmth and comfort for years to come.

Advertisement

Logan’s affair with adventure began in childhood. He hailed from a small town where vast forests bordered one side and endless shores stretched on the other. His days were spent exploring uncharted woods, climbing tall trees, or listening to the tales of old sailors. This early immersion in a world brimming with stories and mysteries became the foundation of his passion for writing.

Continue Reading
Advertisement

Wood Stove

How Long Does It Take Wood To Ignite Aftee Being Put In A Wood Stove

Published

on

By

An image capturing the mesmerizing scene of a wood stove, with a bed of glowing embers beneath carefully stacked logs, as tendrils of thin smoke gracefully curl upwards, depicting the anticipation of wood slowly igniting

I must admit, the wait for wood to catch fire in a wood stove can seem never-ending. However, do not worry, as in this article, I will share some strategies and tips to speed up the process.

From understanding the temperature and moisture content of the wood to choosing the right type and preparing it efficiently, we’ll explore all the factors that affect wood ignition time.

So let’s dive in and get that fire blazing in no time!

Key Takeaways

  • Weather conditions and moisture content of the wood can affect the ignition time.
  • Properly seasoned wood with around 20% moisture content ignites more easily.
  • Smaller wood logs and softer woods tend to ignite faster than larger and harder woods.
  • Proper wood storage and preparation, such as keeping it off the ground, using fire starters, and maintaining airflow, can help ensure faster ignition in a wood stove.

Factors Affecting Wood Ignition Time

I’m curious about the factors that can affect the time it takes for wood to ignite in a wood stove.

One of the key factors is the weather conditions. Cold and damp weather can make it harder for the wood to catch fire, as moisture content in the wood can be high. It’s important to ensure that the wood is properly seasoned and has a moisture content of around 20% for optimal ignition.

Another factor to consider is the size of the wood logs. Smaller logs tend to ignite more quickly as they’ve a larger surface area exposed to the heat source.

Advertisement

Additionally, the type of wood being used can also affect ignition time, with softer woods igniting faster than harder woods.

Temperature and Moisture Content of Wood

The optimal moisture content for wood is around 20%, which ensures efficient ignition in a wood stove. The wood ignition process is influenced by various factors, and the moisture content plays a critical role in determining how quickly the wood will ignite.

When wood is too wet, it requires more energy to burn off the excess moisture before it can reach its ignition point. On the other hand, if the wood is too dry, it may ignite too quickly and burn too rapidly, leading to inefficient combustion and wasted energy.

Therefore, it’s essential to properly store wood to maintain its moisture content within the optimal range. Proper wood storage involves keeping the wood off the ground, covering it to protect it from rain or snow, and allowing for proper airflow to prevent excessive moisture buildup.

Type of Wood and Its Density

I prefer using hardwoods like oak or maple due to their density and their ability to burn longer and provide more heat. When it comes to wood species selection, it’s important to consider the impact of wood moisture content. Here are three key points to keep in mind:

Advertisement
  1. Moisture content affects combustion efficiency: Wet wood contains a higher moisture content, which leads to incomplete combustion and the production of more smoke and pollutants. Dry hardwoods, on the other hand, burn more efficiently and produce less smoke.

  2. Heat output is influenced by wood density: Hardwoods have a higher density compared to softwoods, resulting in a higher heat output. This means that hardwoods like oak and maple can provide more warmth and keep your space cozy for a longer period of time.

  3. Longer burn time with hardwoods: Due to their density, hardwoods burn at a slower rate, allowing for a longer burn time per log. This means less frequent refueling and a more consistent heat source.

Preparing Wood for Efficient Ignition

To ensure efficient ignition, I always make sure to properly split and dry my firewood. Proper wood storage is essential for achieving this. It’s important to store the firewood in a well-ventilated area, off the ground and protected from moisture. This allows the wood to dry properly and reduces the risk of it being damp or rotting.

When it comes to igniting the wood in a wood stove, using fire starters or kindling can greatly speed up the process. These small pieces of flammable material help create a hot and sustained flame, which in turn ignites the larger pieces of wood.

By incorporating these techniques, you can ensure a faster and more efficient ignition in your wood stove.

Now, let’s move on to some tips for faster wood ignition in a wood stove.

Tips for Faster Wood Ignition in a Wood Stove

Using kindling and ensuring proper airflow are key to achieving faster wood ignition in a wood stove. When it comes to stubborn wood that’s difficult to ignite, there are several ignition techniques that can be employed:

Advertisement
  1. Preparation: Properly seasoned wood with a moisture content below 20% is essential for efficient ignition. This ensures that the wood is dry enough to catch fire quickly.

  2. Kindling: Creating a bed of small, dry kindling underneath the larger logs helps to ignite the fire faster. Kindling acts as a fuel source that ignites easily and produces enough heat to catch the larger logs on fire.

  3. Airflow: Adequate airflow is crucial for wood ignition. By opening the damper or adjusting the air vents, you can ensure that enough oxygen is getting to the fire, promoting faster ignition.

While some may consider using accelerants to speed up wood ignition, it’s important to note that this can be dangerous and may result in uncontrollable fires or the release of harmful chemicals. It’s recommended to rely on proper ignition techniques and patience for a safe and efficient wood ignition process.

Frequently Asked Questions

Can I Use Treated Wood in My Wood Stove?

Using pressure treated wood in a wood stove is not recommended due to the chemicals it releases when burned. It is safer to use untreated wood or other alternatives for faster ignition.

What Is the Best Type of Wood to Use for Faster Ignition in a Wood Stove?

Fast burning woods like pine or fir can ignite in a wood stove within minutes. To ensure efficient wood stove usage, it’s important to choose dry, seasoned firewood and properly maintain the stove.

Are There Any Safety Precautions I Should Take When Igniting Wood in a Wood Stove?

When igniting wood in a wood stove, it is important to take safety precautions. Keep a fire extinguisher nearby and ensure proper ventilation. Additionally, the moisture content of the wood can affect its ignition time.

Can I Use Wood Chips or Sawdust for Ignition in a Wood Stove?

I can use wood chips or sawdust for ignition in a wood stove. They are effective fire starters for faster ignition. The small size and high surface area make them ignite quickly, reducing the time needed for the wood to catch fire.

Advertisement

How Does the Size of the Wood Affect Its Ignition Time in a Wood Stove?

Moisture content significantly affects wood ignition in a wood stove. Smaller pieces of wood ignite faster due to increased surface area. However, larger pieces provide longer burn times. Consider the advantages and disadvantages of each for efficient use in a wood stove.

Conclusion

After careful analysis of the factors affecting wood ignition time, it’s safe to say that wood doesn’t ignite instantly in a wood stove. Contrary to popular belief, wood requires time to reach its ignition point, which is influenced by factors such as temperature, moisture content, and wood density.

To expedite the process, it’s crucial to choose the right type of wood and ensure it’s properly prepared. So, if you were expecting an immediate burst of flames, you might’ve to wait a little longer.

Continue Reading

Wood Stove

Why Does Your Wood Stove Smoke

Published

on

By

An image capturing a rustic, cozy living room

Dealing with the smoke from your wood stove can be a real nuisance. But don’t worry, I’m here to provide some tips on how to manage it.

Understanding the root causes of this predicament is crucial. Insufficient airflow, improper wood selection, damaged chimney, inadequate maintenance, and incorrect installation are the major culprits.

Let’s delve into each of these factors to uncover the secrets behind why your wood stove may be producing that bothersome smoke.

Key Takeaways

  • Blocked vents disrupt combustion process and lead to incomplete burning and smoke generation.
  • Burning wet or high-moisture wood results in inefficient burning and increased creosote buildup.
  • Cracked or deteriorating chimney can cause leaks and smoke entry.
  • Inadequate stove maintenance, including dirty burners and clogged flue, can lead to smoke issues.

Insufficient Airflow

I’m having trouble with my wood stove smoking because there’s not enough airflow. A common cause of insufficient airflow is blocked vents. When the vents are blocked, the combustion process is disrupted, leading to incomplete burning of the wood and the generation of smoke.

To ensure efficient combustion and minimize smoke, it’s crucial to maintain clear and unobstructed vents. Blocked vents can result from a buildup of creosote or debris, so regular cleaning is essential.

Additionally, proper placement of the stove is crucial to ensure adequate airflow. Make sure that the stove is positioned away from any obstructions, such as furniture or curtains, that might impede the flow of air.

Advertisement

Improper Wood Selection

To prevent excessive smoke and poor combustion, it’s important to avoid burning wet wood or wood with high moisture content, as it can result in inefficient burning and increased creosote buildup. When burning seasoned firewood, which has a moisture content of around 20% or less, the wood burns more efficiently, producing less smoke and providing more heat output. Seasoned firewood has been properly dried for at least six months, allowing the moisture content to decrease significantly. This ensures that the wood burns cleanly and effectively in your wood stove. However, if you burn wood with high moisture content, it will create more smoke and reduce the overall efficiency of your stove. This can also lead to a higher risk of creosote buildup in your chimney, which can be dangerous and increase the chance of a chimney fire. Therefore, it’s crucial to always use dry, seasoned firewood to prevent excessive smoke and maintain proper combustion in your wood stove.

Now, let’s discuss another potential reason for excessive smoke: a damaged or leaky chimney.

Damaged or Leaky Chimney

A damaged or leaky chimney can cause smoke to enter your home, which can be hazardous to your health and safety. It’s important to address any issues with your chimney promptly to ensure the proper functioning of your wood stove.

Here are three signs of a damaged chimney that you should be aware of:

  1. Cracked or crumbling mortar: If you notice any cracks or crumbling in the mortar joints of your chimney, it could indicate water damage or structural issues. This can lead to leaks and smoke entering your home.

  2. Rusty or deteriorating chimney cap: The chimney cap plays a crucial role in keeping out rain, snow, debris, and animals. If it’s rusty or deteriorating, it may not be able to perform its function effectively, allowing smoke to escape into your living space.

  3. Smoke stains or odors: If you notice smoke stains on the walls or ceilings near your chimney or detect a persistent smoky odor in your home, it could be a sign of a leaky chimney. This should be addressed promptly to prevent further damage and potential health risks.

When faced with a damaged chimney, there are various repair options available, such as chimney relining, chimney crown repair, and chimney flashing repair. It’s important to consult with a professional chimney technician to determine the best course of action for your specific situation.

Advertisement

Inadequate Stove Maintenance

One of the main causes of smoke in your home can be the result of inadequate stove maintenance. A dirty stove and a clogged flue are two common culprits that can lead to smoke issues. When the stove isn’t properly cleaned, a buildup of soot and debris can occur on the burners, causing incomplete combustion and the production of smoke.

Additionally, a clogged flue prevents the proper ventilation of smoke, leading to its accumulation inside your home. Regular cleaning and maintenance of your stove, including cleaning the burners and ensuring the flue is clear, is crucial in preventing smoke issues.

It’s recommended to schedule annual professional maintenance to ensure your stove is in optimal condition and to avoid the inconvenience and potential health hazards associated with smoke in your home.

Incorrect Stove Installation

I regret not hiring a professional for my stove installation, as it has caused numerous issues and potential hazards. When it comes to installing a wood stove, proper positioning and sizing are crucial factors that shouldn’t be taken lightly.

Here are three key reasons why improper stove positioning and incorrect flue size can lead to problems:

Advertisement
  1. Inadequate clearance: Placing the stove too close to combustible materials can increase the risk of fire. It’s essential to follow the manufacturer’s guidelines for proper clearances to ensure the safe operation of the stove.

  2. Inefficient heating: Incorrect positioning can hinder the stove’s ability to distribute heat effectively throughout the room. This can result in uneven temperatures and wasted energy, leading to discomfort and higher heating costs.

  3. Insufficient draft: Using an incorrect flue size can impede the stove’s ability to expel smoke and gases properly. This can lead to backdrafting, where smoke enters the room instead of being directed outside. Aside from the health hazards, backdrafting can damage the stove and cause indoor air quality issues.

To avoid these problems, it’s essential to consult a professional for the proper installation of your wood stove. They’ll ensure that the stove is positioned correctly and the flue size is appropriate for efficient and safe operation.

Frequently Asked Questions

Can Smoking Occur if There Is Sufficient Airflow in the Wood Stove?

Yes, smoking can still occur in a wood stove even with sufficient airflow. Factors like improper wood placement, damp or unseasoned wood, or a clogged chimney can all contribute to smoking issues. Proper troubleshooting can resolve these problems and improve wood stove performance.

What Are Some Common Wood Types That Should Be Avoided to Prevent Smoking in a Wood Stove?

To prevent smoking in a wood stove, it is important to avoid using wood types like pine, as they contain high levels of resin. Additionally, properly seasoning firewood is crucial to reduce smoke production.

How Can I Identify if My Chimney Is Damaged or Leaking?

To identify chimney damage or leaks, conduct a thorough chimney inspection. Look for cracks, loose bricks, or crumbling mortar. Additionally, consider installing a smoke detector near the stove to quickly detect any smoke issues.

Besides Regular Cleaning, What Other Maintenance Practices Can Help Prevent Smoking in a Wood Stove?

Other maintenance practices, such as ensuring proper airflow and avoiding certain wood types, can help prevent smoking in a wood stove. Identifying chimney damage or leaks and checking for correct stove installation are also crucial.

Advertisement

What Are Some Signs of Incorrect Stove Installation That May Lead to Smoking?

Installing a wood stove improperly can lead to frustrating smoke issues. One key sign is if the chimney height is too short. Another is using unseasoned wood, which can cause excessive smoke.

What Are Some Wood Stove Brands That Have Smoke-Reducing Features?

Looking for the best wood stove brands with smoke-reducing features? Look no further. With increasing concerns about air pollution, several brands are innovating their wood stoves to minimize smoke emissions. Some notable options include Vermont Castings, Jøtul, and Blaze King. These brands prioritize efficiency and clean burning, ensuring you can enjoy the warmth of a wood stove while minimizing environmental impact.

Conclusion

In conclusion, when your wood stove smokes, it’s often due to factors such as:

  • Insufficient airflow
  • Improper wood selection
  • A damaged or leaky chimney
  • Inadequate stove maintenance
  • Incorrect installation

To prevent this, you should:

  • Ensure proper ventilation
  • Use seasoned and dry wood
  • Inspect and repair your chimney regularly
  • Maintain your stove diligently
  • Ensure professional installation

By addressing these issues, you can enjoy a smoke-free and efficient wood stove experience, creating a cozy and inviting atmosphere in your home.

Continue Reading

Wood Stove

How To Build A Wood Stove From A Jerry Can

Published

on

By

An image showcasing the step-by-step process of transforming a jerry can into a wood stove

I have always been fascinated by the concept of transforming ordinary objects into useful tools.

So when I came across an old jerry can in my garage, I knew I had the perfect opportunity to create my own wood stove.

In this article, I’ll guide you through the process of transforming a jerry can into a functional and efficient wood stove, complete with ventilation, legs, and a base.

Get ready to unleash your inner DIY enthusiast and start enjoying the warmth of your homemade wood stove.

Key Takeaways

  • Consider the capacity and dimensions of the jerry can
  • Compare different materials for jerry cans
  • Prepare and clean the jerry can properly
  • Take safety precautions and use the right tools when modifying the jerry can

Selecting the Right Jerry Can for Your Wood Stove

I’m trying to figure out which jerry can is the best option for my wood stove.

When it comes to choosing the right size jerry can for your wood stove, it’s important to consider the capacity and dimensions. A larger can will hold more fuel, but it may be too bulky for your space. On the other hand, a smaller can may require more frequent refills.

Advertisement

Additionally, it’s crucial to compare different materials for jerry cans to ensure optimal wood stove performance. Metal cans are durable and resistant to heat, but they can also be heavy. Plastic cans, on the other hand, are lightweight and easier to handle, but may not withstand high temperatures as well.

Ultimately, finding the perfect jerry can for your wood stove is about balancing capacity, dimensions, and material for efficient and safe operation.

Preparing and Cleaning the Jerry Can

Before starting to use the jerry can, it’s crucial to properly clean and prepare it by removing any dirt or residue, and then ensuring it’s completely dry. Here is the cleaning process and safety precautions to follow:

  1. Rinse the jerry can with warm water and a mild detergent to remove any dirt or debris. Use a sponge or brush to scrub the inside and outside of the can thoroughly.

  2. Rinse the can again with clean water to remove any soap residue. Make sure to rinse it multiple times to ensure all the soap is gone.

  3. After rinsing, allow the jerry can to air dry completely. This is important to prevent any moisture from causing rust or corrosion.

By following these cleaning steps, you can ensure that your jerry can is ready for modification.

Now, let’s discuss cutting open and modifying the jerry can for ventilation.

Advertisement

Cutting Open and Modifying the Jerry Can for Ventilation

I’ll explain how to use a few small holes in the jerry can to provide adequate ventilation for the wood stove. When modifying the jerry can for ventilation, it is important to take safety precautions and use the right tools. Here is a table outlining the necessary steps:

Step Safety Precautions Tools Needed
1 Wear protective gloves and goggles Drill
2 Work in a well-ventilated area Marker
3 Ensure the jerry can is empty and clean Metal file
4 Mark the desired ventilation holes on the can Safety glasses
5 Use the drill to create the holes Protective gloves
6 Smooth the edges of the holes with the metal file Goggles
7 Clean any metal shavings from the can Clean cloth

Adding Legs and a Base to the Wood Stove

I can attach some sturdy legs and a stable base to the wood stove to ensure it stands securely on any surface. Achieving stove stability is crucial to prevent accidents and maintain proper functioning.

When choosing materials for the legs and base, it’s important to consider their strength, durability, and heat resistance. Here are three essential elements to consider:

  1. Material Selection: Opt for materials that can withstand high temperatures, such as stainless steel or cast iron. These materials are known for their strength and ability to withstand the intense heat generated by the wood stove.

  2. Design and Construction: The design of the legs should provide sufficient support and stability. Consider a tripod or four-leg design for optimal balance. Additionally, ensure the legs are securely attached to the stove body to prevent any wobbling or instability.

  3. Base Size and Shape: The base of the wood stove should be wide and flat enough to distribute the weight evenly, ensuring stability on various surfaces. A larger base will provide better stability, especially when using the stove on uneven or soft ground.

Testing and Using Your DIY Wood Stove

I’ve successfully tested and now use my DIY wood stove to cook meals while camping. It’s a simple yet effective solution for outdoor cooking. However, before using it, I took several testing techniques and safety precautions to ensure its efficiency and my own well-being.

Firstly, I conducted a leak test to ensure there were no air or gas leaks that could potentially cause a fire hazard. This involved pressurizing the stove and checking for any signs of leakage. I also tested its heat distribution by placing a pot of water on the stove and monitoring how evenly the heat was dispersed.

Advertisement

To further ensure safety, I implemented safety precautions such as maintaining a safe distance between the stove and any flammable objects, using heat-resistant gloves when handling the stove, and having a fire extinguisher nearby.

Using my DIY wood stove has been a game-changer for my camping trips. Not only does it provide a reliable cooking source, but it also allows me to enjoy the natural surroundings without relying on traditional campfire cooking methods. By following proper testing techniques and safety precautions, I can confidently cook my meals and enjoy the great outdoors.

Frequently Asked Questions

How Long Does It Take to Build a Wood Stove From a Jerry Can?

It takes about 2 hours to build a wood stove from a jerry can. The benefits of using a wood stove include cost-effective heating and a sustainable fuel source. Regular cleaning and maintenance ensure optimal performance.

Can I Use Any Type of Wood for the Base of the Wood Stove?

I can use different types of wood for the base of the wood stove, but it’s important to consider safety precautions when using it indoors. Proper ventilation and non-flammable materials are crucial.

Is It Safe to Use the Wood Stove Indoors?

Oh, using a wood stove indoors, what a brilliant idea! Let me enlighten you on the potential health hazards and share some precise tips for safely using one. Shall we begin?

Advertisement

Can I Paint the Jerry Can After Modifying It?

Yes, you can paint the modified jerry can using various painting techniques. It is important to choose a paint that can withstand high temperatures and adhere well to metal surfaces. Make sure to consider alternative fuel sources when painting for safety.

What Tools Do I Need to Build a Wood Stove From a Jerry Can?

To build a wood stove from a jerry can, I need a few tools like a jigsaw, drill, and metal file. Safety precautions are crucial, and alternative materials can be used if necessary.

Can I Use a Wood Stove Insert in a DIY Jerry Can Wood Stove?

When considering building a wood stove fireplace, it’s crucial to factor in the cost of materials and construction. However, if you’re planning to use a wood stove insert in a DIY Jerry Can Wood Stove, the cost of building a wood stove fireplace may decrease significantly. This alternative method combines affordability and practicality, making it an excellent choice for those seeking an alternative heating solution.

Can Duraflame Logs Be Used in a Wood Stove Made from a Jerry Can?

Can Duraflame logs be used in a wood stove made from a jerry can? Many DIY enthusiasts wonder about using Duraflame logs in a wood stove. While Duraflame logs are commonly used in traditional fireplaces, their use in a jerry can wood stove may not be ideal. It’s important to consider the safety and compatibility aspects of using duraflame logs in wood stoves specifically designed for them.

Conclusion

After carefully selecting the right jerry can, preparing and modifying it for ventilation, and adding sturdy legs and a stable base, your DIY wood stove is ready for testing and use.

Advertisement

With its compact design and efficient functionality, this wood stove provides a practical and cost-effective heating solution for outdoor activities or emergency situations.

Embrace the warmth and convenience of this homemade creation, bringing comfort and coziness wherever you go.

Continue Reading

Trending