Connect with us

Wood Stove

How To Clean Wood Stove

Published

on

An image capturing the meticulous process of cleaning a wood stove

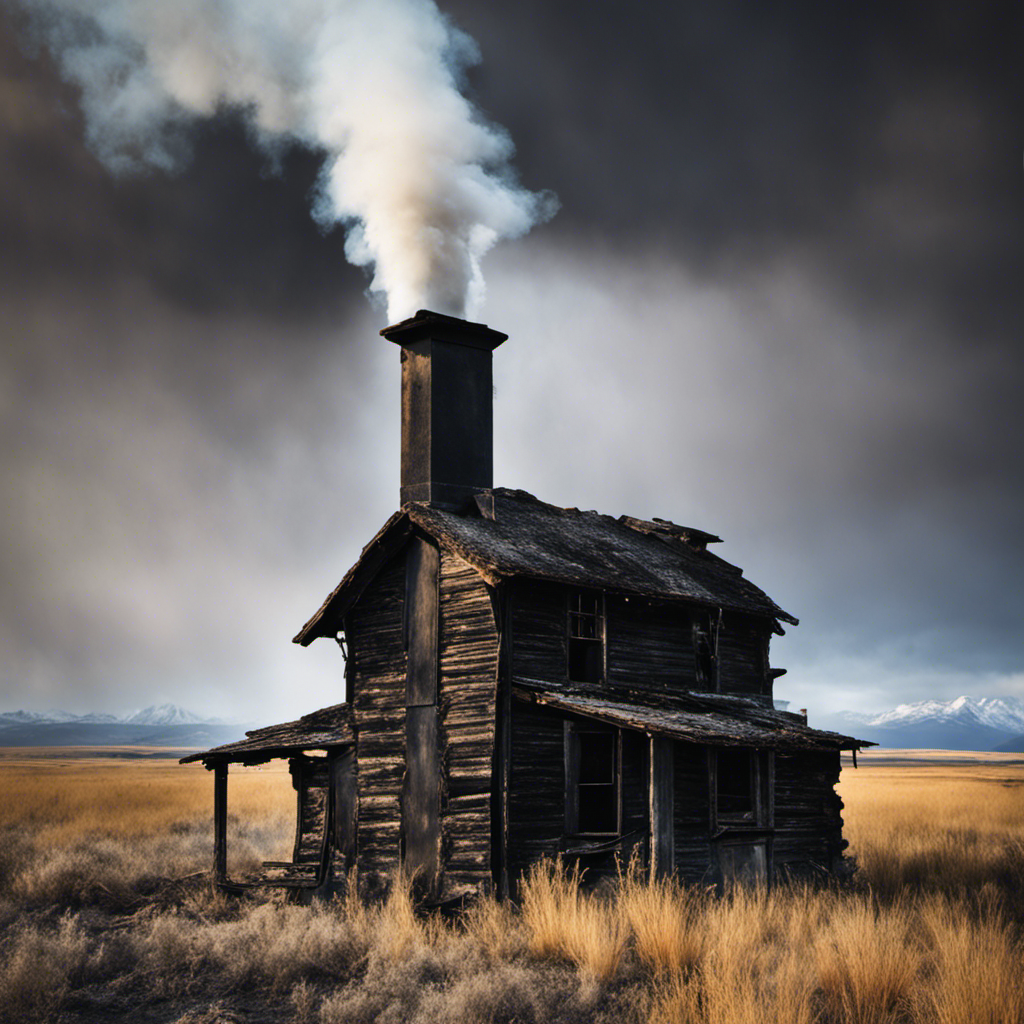
I’ve always held a fond appreciation for the cozy warmth that comes from a wood stove, yet maintaining it has proven to be somewhat difficult. Fortunately, I’ve come across a few simple methods that have simplified the cleaning process.

In this article, I’ll walk you through the techniques I use to keep my wood stove spotless and running efficiently. From removing ashes to scrubbing the glass door, I’ll share all the tips and tricks you need to maintain your wood stove like a pro.

Let’s get started!

Key Takeaways

  • Gather protective gear and essential tools before starting the cleaning process
  • Use a vacuum designed for ash removal with a HEPA filter to safely remove ashes from the stove
  • Clean the firebox thoroughly using warm water and mild soap, and rinse and dry it before lighting another fire
  • Scrub the glass door with a non-abrasive sponge and stove glass cleaner to remove soot stains and ensure clear visibility
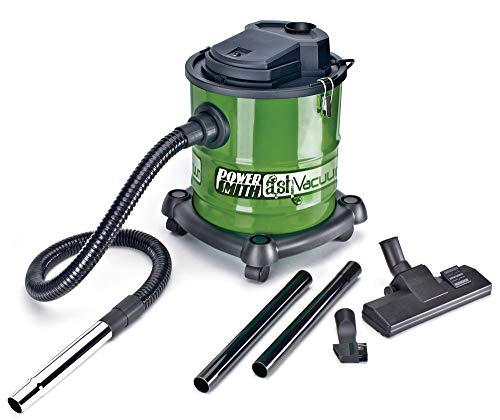
Preparing for Cleaning

Before starting the cleaning process, I should gather all the necessary materials. Proper preparation is key to effectively clean a wood stove. The pre-cleaning steps ensure that I’ve everything I need to tackle the task efficiently.

Firstly, I need to have protective gear such as gloves and safety glasses to keep myself safe from any potential hazards. Cleaning a wood stove can be messy and potentially dangerous, so it’s important to prioritize safety.

Next, I should gather a few essential tools. A wire brush is essential for scrubbing away any built-up soot and creosote. It’s important to choose a brush specifically designed for use on wood stoves to avoid damaging the surface. Additionally, a vacuum cleaner with a brush attachment is useful for removing ash and debris from inside the stove.

Advertisement

Other necessary materials include a metal bucket or container to collect the ash, newspaper or drop cloths to protect the surrounding area, and a cleaning solution specifically formulated for wood stoves. It’s important to choose a non-toxic cleaner to ensure the safety of the stove and its users.

Removing Ashes

I always make sure to wear gloves when removing the ashes from my wood stove. It’s an important safety measure to protect my hands from any hot embers that may still be lingering.

When it comes to cleaning a wood stove, removing the ashes is a crucial step. Not only does it help maintain the efficiency of the stove, but it also prevents any potential fire hazards. To remove the ashes, I use a vacuum specifically designed for ash removal. This device is equipped with a high-efficiency particulate air (HEPA) filter, which ensures that fine ash particles are contained and not released into the air.

I carefully vacuum the ashes, making sure to cover the entire surface area of the stove, including the firebox and any surrounding areas.

Once the ashes are vacuumed, it’s important to dispose of them properly. I allow the ashes to cool completely before transferring them to a metal container with a tight-fitting lid. This helps prevent any potential fire risk from smoldering ashes.

Advertisement

I then take the container to an outdoor area away from any flammable materials and dispose of the ashes in a designated ash disposal area.

Cleaning the Firebox

When removing the ashes, it’s important to pay close attention to the firebox and ensure that it’s thoroughly cleaned. The firebox is the heart of your wood stove, where the fuel is burned and the heat is generated. Neglecting its maintenance can lead to reduced efficiency and potential safety hazards.

To clean the firebox effectively, follow these steps:

  1. Allow the stove to cool down completely before starting the cleaning process.
  2. Use a small brush or vacuum cleaner to remove any loose soot or debris from the firebox.
  3. For a more thorough cleaning, mix a solution of warm water and mild soap.
  4. Dip a sponge or cloth into the solution and gently scrub the interior walls of the firebox, focusing on areas with heavy soot buildup.
  5. Rinse the sponge or cloth with clean water and wipe away any soap residue.
  6. Dry the firebox thoroughly before lighting another fire.

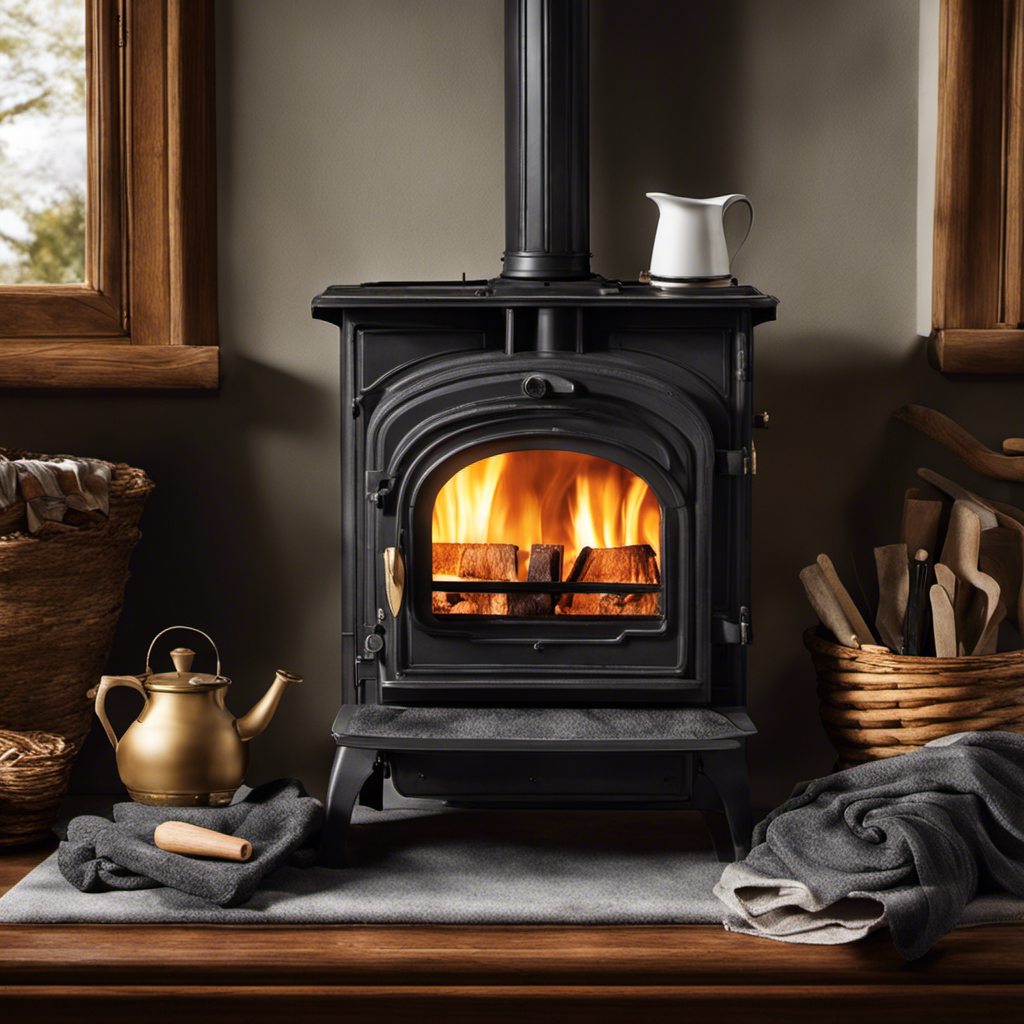
Scrubbing the Glass Door

The glass door of my stove needs a good scrubbing to remove any soot or debris. Glass door maintenance is an essential part of keeping a wood stove in good condition.

Over time, soot can build up on the glass, making it difficult to see the fire inside. To prevent this buildup, it’s important to clean the glass regularly.

To start, I gather a few supplies: a non-abrasive sponge, warm water, and a stove glass cleaner. I make sure the stove is completely cool before beginning the cleaning process.

Advertisement

Then, I dampen the sponge with warm water and apply a small amount of the stove glass cleaner. I gently scrub the glass door in a circular motion, paying close attention to any areas with stubborn soot stains.

Once I’ve thoroughly scrubbed the glass, I use a clean, damp cloth to wipe away any excess cleaner. It’s important to dry the glass completely to prevent streaks or water spots. I’m always careful not to use any abrasive materials or harsh chemicals that could damage the glass.

Cleaning the Chimney

Regularly maintaining the chimney ensures proper ventilation and reduces the risk of chimney fires. Chimney maintenance is an essential task that should be done at least once a year. As a homeowner, I understand the importance of keeping my chimney in top shape to ensure the safety and efficiency of my wood stove.

One of the key aspects of chimney maintenance is cleaning the chimney. This is where chimney sweep services come into play. Chimney sweep services are specialized professionals who have the knowledge and expertise to thoroughly clean and inspect chimneys. They use specialized tools and equipment to remove creosote buildup, debris, and blockages that can hinder proper ventilation and increase the risk of chimney fires. During the cleaning process, they also inspect the chimney for any signs of damage or deterioration, ensuring that any issues are addressed promptly.

Hiring a chimney sweep service is a wise investment for any homeowner with a wood stove. It not only ensures the safety of your home and family but also improves the efficiency and performance of your wood stove. So, if you haven’t had your chimney cleaned in a while, it’s time to contact a professional chimney sweep service and schedule a maintenance appointment. Trust me, you won’t regret it.

Advertisement

Maintaining the Exterior

As a homeowner, I take pride in keeping the exterior of my house well-maintained to enhance its curb appeal and protect it from the elements. This includes regular maintenance of my wood stove, which not only ensures its longevity but also promotes safe and efficient wood burning. One important aspect of wood stove maintenance is keeping the exterior clean and free from debris. To accomplish this, I use a variety of cleaning tools specifically designed for wood stoves.

Cleaning Tools Description
Ash Shovel Used to scoop out ashes and debris from the firebox.
Wire Brush Ideal for removing soot and buildup from the stove’s surface.
Vacuum Cleaner Equipped with a special attachment, it effectively sucks up ash and dust.
Microfiber Cloth Perfect for wiping down the exterior and leaving a streak-free finish.

Regularly cleaning the exterior of my wood stove not only keeps it looking its best, but it also helps to prevent the buildup of creosote, a highly flammable substance that can accumulate on the stove’s surface. By maintaining a clean stove, I can ensure that it operates efficiently and safely.

Now that we’ve covered the importance of maintaining the exterior of a wood stove, let’s move on to some essential tips for safe and efficient wood burning.

Tips for Safe and Efficient Wood Burning

To ensure safe and efficient wood burning, I always use dry and seasoned firewood. Using wet or unseasoned firewood can lead to inefficient burning, excessive smoke, and the build-up of creosote in the chimney, which can increase the risk of chimney fires. Dry and seasoned firewood, on the other hand, burns hotter and cleaner, providing better heat output and reducing the amount of smoke produced.

In addition to using dry and seasoned firewood, there are a few other wood stove safety tips to keep in mind. First, it’s important to have your chimney inspected and cleaned regularly by a professional to remove any creosote build-up and ensure proper ventilation. Second, make sure to keep flammable materials at least three feet away from the stove to prevent accidental fires. Finally, always use a screen or glass door to prevent sparks from escaping and causing a fire hazard.

Advertisement

Aside from the safety considerations, there are also several benefits to wood burning. Wood is a renewable energy source, and burning it releases less greenhouse gases compared to fossil fuels. It can also be a cost-effective heating option, especially if you’ve access to free or low-cost firewood. Additionally, the ambiance and warmth provided by a wood stove can create a cozy and inviting atmosphere in your home.

Frequently Asked Questions

How Often Should I Clean My Wood Stove?

I clean my wood stove regularly to ensure it operates efficiently and safely. Cleaning frequency depends on usage, but generally, it’s recommended to clean the stove at least once a month during the burning season.

Regular cleaning is important to remove ash, soot, and creosote buildup, which can reduce the stove’s efficiency and increase the risk of chimney fires.

Additionally, a clean wood stove will produce less smoke and emit fewer pollutants into the environment.

Can I Use Regular Household Cleaners to Clean My Wood Stove?

Regular household cleaners may not be the best option for cleaning a wood stove. They often contain chemicals that can leave behind residue or emit harmful fumes when exposed to high temperatures. Instead, consider using alternative options specifically designed for wood stove cleaning.

Advertisement

These cleaners are formulated to effectively remove soot, creosote, and other built-up debris without causing damage or posing health risks. It’s important to prioritize safety and choose the right products for maintaining your wood stove.

What Should I Do if There Is a Build-Up of Creosote in the Chimney?

If there’s a build-up of creosote in the chimney, it’s important to address it promptly for safety reasons. Removing creosote buildup in the chimney requires proper cleaning techniques for a wood stove.

One option is to hire a professional chimney sweep who’s the necessary tools and expertise. Another option is to use a creosote removal product specifically designed for wood stoves.

Regular maintenance and cleaning of the chimney will help prevent creosote buildup in the future.

Is It Safe to Clean the Glass Door While the Stove Is Still Hot?

When it comes to cleaning the glass door of a wood stove, safety should always be the priority. It isn’t safe to clean the glass door while the stove is still hot. The high temperatures can cause burns or injuries.

Advertisement

It’s important to wait for the stove to cool down before attempting to clean the glass. There are alternative cleaning methods that can be used, such as using a specialized glass cleaner or a mixture of vinegar and water.

How Can I Prevent Smoke From Escaping Into the Room When Cleaning the Firebox?

To prevent smoke from escaping into the room while cleaning the firebox, there are a few techniques you can try.

First, make sure the stove is completely cool before starting.

Next, open the damper to allow for proper ventilation.

Use a brush or vacuum to remove any ashes or debris from the firebox.

Advertisement

Conclusion

In conclusion, maintaining a clean wood stove is essential for its safe and efficient operation.

Did you know that according to the National Fire Protection Association, 27% of home heating fires are caused by heating equipment, including wood stoves?

By regularly cleaning your wood stove, you can significantly reduce the risk of fire and ensure its longevity.

Remember to follow the outlined steps and tips to keep your wood stove in excellent condition and enjoy its warmth for years to come.

Advertisement

Logan’s affair with adventure began in childhood. He hailed from a small town where vast forests bordered one side and endless shores stretched on the other. His days were spent exploring uncharted woods, climbing tall trees, or listening to the tales of old sailors. This early immersion in a world brimming with stories and mysteries became the foundation of his passion for writing.

Continue Reading
Advertisement

Wood Stove

How Long Does It Take Wood To Ignite Aftee Being Put In A Wood Stove

Published

on

By

An image capturing the mesmerizing scene of a wood stove, with a bed of glowing embers beneath carefully stacked logs, as tendrils of thin smoke gracefully curl upwards, depicting the anticipation of wood slowly igniting

I must admit, the wait for wood to catch fire in a wood stove can seem never-ending. However, do not worry, as in this article, I will share some strategies and tips to speed up the process.

From understanding the temperature and moisture content of the wood to choosing the right type and preparing it efficiently, we’ll explore all the factors that affect wood ignition time.

So let’s dive in and get that fire blazing in no time!

Key Takeaways

  • Weather conditions and moisture content of the wood can affect the ignition time.
  • Properly seasoned wood with around 20% moisture content ignites more easily.
  • Smaller wood logs and softer woods tend to ignite faster than larger and harder woods.
  • Proper wood storage and preparation, such as keeping it off the ground, using fire starters, and maintaining airflow, can help ensure faster ignition in a wood stove.

Factors Affecting Wood Ignition Time

I’m curious about the factors that can affect the time it takes for wood to ignite in a wood stove.

One of the key factors is the weather conditions. Cold and damp weather can make it harder for the wood to catch fire, as moisture content in the wood can be high. It’s important to ensure that the wood is properly seasoned and has a moisture content of around 20% for optimal ignition.

Another factor to consider is the size of the wood logs. Smaller logs tend to ignite more quickly as they’ve a larger surface area exposed to the heat source.

Advertisement

Additionally, the type of wood being used can also affect ignition time, with softer woods igniting faster than harder woods.

Temperature and Moisture Content of Wood

The optimal moisture content for wood is around 20%, which ensures efficient ignition in a wood stove. The wood ignition process is influenced by various factors, and the moisture content plays a critical role in determining how quickly the wood will ignite.

When wood is too wet, it requires more energy to burn off the excess moisture before it can reach its ignition point. On the other hand, if the wood is too dry, it may ignite too quickly and burn too rapidly, leading to inefficient combustion and wasted energy.

Therefore, it’s essential to properly store wood to maintain its moisture content within the optimal range. Proper wood storage involves keeping the wood off the ground, covering it to protect it from rain or snow, and allowing for proper airflow to prevent excessive moisture buildup.

Type of Wood and Its Density

I prefer using hardwoods like oak or maple due to their density and their ability to burn longer and provide more heat. When it comes to wood species selection, it’s important to consider the impact of wood moisture content. Here are three key points to keep in mind:

Advertisement
  1. Moisture content affects combustion efficiency: Wet wood contains a higher moisture content, which leads to incomplete combustion and the production of more smoke and pollutants. Dry hardwoods, on the other hand, burn more efficiently and produce less smoke.

  2. Heat output is influenced by wood density: Hardwoods have a higher density compared to softwoods, resulting in a higher heat output. This means that hardwoods like oak and maple can provide more warmth and keep your space cozy for a longer period of time.

  3. Longer burn time with hardwoods: Due to their density, hardwoods burn at a slower rate, allowing for a longer burn time per log. This means less frequent refueling and a more consistent heat source.

Preparing Wood for Efficient Ignition

To ensure efficient ignition, I always make sure to properly split and dry my firewood. Proper wood storage is essential for achieving this. It’s important to store the firewood in a well-ventilated area, off the ground and protected from moisture. This allows the wood to dry properly and reduces the risk of it being damp or rotting.

When it comes to igniting the wood in a wood stove, using fire starters or kindling can greatly speed up the process. These small pieces of flammable material help create a hot and sustained flame, which in turn ignites the larger pieces of wood.

By incorporating these techniques, you can ensure a faster and more efficient ignition in your wood stove.

Now, let’s move on to some tips for faster wood ignition in a wood stove.

Tips for Faster Wood Ignition in a Wood Stove

Using kindling and ensuring proper airflow are key to achieving faster wood ignition in a wood stove. When it comes to stubborn wood that’s difficult to ignite, there are several ignition techniques that can be employed:

Advertisement
  1. Preparation: Properly seasoned wood with a moisture content below 20% is essential for efficient ignition. This ensures that the wood is dry enough to catch fire quickly.

  2. Kindling: Creating a bed of small, dry kindling underneath the larger logs helps to ignite the fire faster. Kindling acts as a fuel source that ignites easily and produces enough heat to catch the larger logs on fire.

  3. Airflow: Adequate airflow is crucial for wood ignition. By opening the damper or adjusting the air vents, you can ensure that enough oxygen is getting to the fire, promoting faster ignition.

While some may consider using accelerants to speed up wood ignition, it’s important to note that this can be dangerous and may result in uncontrollable fires or the release of harmful chemicals. It’s recommended to rely on proper ignition techniques and patience for a safe and efficient wood ignition process.

Frequently Asked Questions

Can I Use Treated Wood in My Wood Stove?

Using pressure treated wood in a wood stove is not recommended due to the chemicals it releases when burned. It is safer to use untreated wood or other alternatives for faster ignition.

What Is the Best Type of Wood to Use for Faster Ignition in a Wood Stove?

Fast burning woods like pine or fir can ignite in a wood stove within minutes. To ensure efficient wood stove usage, it’s important to choose dry, seasoned firewood and properly maintain the stove.

Are There Any Safety Precautions I Should Take When Igniting Wood in a Wood Stove?

When igniting wood in a wood stove, it is important to take safety precautions. Keep a fire extinguisher nearby and ensure proper ventilation. Additionally, the moisture content of the wood can affect its ignition time.

Can I Use Wood Chips or Sawdust for Ignition in a Wood Stove?

I can use wood chips or sawdust for ignition in a wood stove. They are effective fire starters for faster ignition. The small size and high surface area make them ignite quickly, reducing the time needed for the wood to catch fire.

Advertisement

How Does the Size of the Wood Affect Its Ignition Time in a Wood Stove?

Moisture content significantly affects wood ignition in a wood stove. Smaller pieces of wood ignite faster due to increased surface area. However, larger pieces provide longer burn times. Consider the advantages and disadvantages of each for efficient use in a wood stove.

Conclusion

After careful analysis of the factors affecting wood ignition time, it’s safe to say that wood doesn’t ignite instantly in a wood stove. Contrary to popular belief, wood requires time to reach its ignition point, which is influenced by factors such as temperature, moisture content, and wood density.

To expedite the process, it’s crucial to choose the right type of wood and ensure it’s properly prepared. So, if you were expecting an immediate burst of flames, you might’ve to wait a little longer.

Continue Reading

Wood Stove

Why Does Your Wood Stove Smoke

Published

on

By

An image capturing a rustic, cozy living room

Dealing with the smoke from your wood stove can be a real nuisance. But don’t worry, I’m here to provide some tips on how to manage it.

Understanding the root causes of this predicament is crucial. Insufficient airflow, improper wood selection, damaged chimney, inadequate maintenance, and incorrect installation are the major culprits.

Let’s delve into each of these factors to uncover the secrets behind why your wood stove may be producing that bothersome smoke.

Key Takeaways

  • Blocked vents disrupt combustion process and lead to incomplete burning and smoke generation.
  • Burning wet or high-moisture wood results in inefficient burning and increased creosote buildup.
  • Cracked or deteriorating chimney can cause leaks and smoke entry.
  • Inadequate stove maintenance, including dirty burners and clogged flue, can lead to smoke issues.

Insufficient Airflow

I’m having trouble with my wood stove smoking because there’s not enough airflow. A common cause of insufficient airflow is blocked vents. When the vents are blocked, the combustion process is disrupted, leading to incomplete burning of the wood and the generation of smoke.

To ensure efficient combustion and minimize smoke, it’s crucial to maintain clear and unobstructed vents. Blocked vents can result from a buildup of creosote or debris, so regular cleaning is essential.

Additionally, proper placement of the stove is crucial to ensure adequate airflow. Make sure that the stove is positioned away from any obstructions, such as furniture or curtains, that might impede the flow of air.

Advertisement

Improper Wood Selection

To prevent excessive smoke and poor combustion, it’s important to avoid burning wet wood or wood with high moisture content, as it can result in inefficient burning and increased creosote buildup. When burning seasoned firewood, which has a moisture content of around 20% or less, the wood burns more efficiently, producing less smoke and providing more heat output. Seasoned firewood has been properly dried for at least six months, allowing the moisture content to decrease significantly. This ensures that the wood burns cleanly and effectively in your wood stove. However, if you burn wood with high moisture content, it will create more smoke and reduce the overall efficiency of your stove. This can also lead to a higher risk of creosote buildup in your chimney, which can be dangerous and increase the chance of a chimney fire. Therefore, it’s crucial to always use dry, seasoned firewood to prevent excessive smoke and maintain proper combustion in your wood stove.

Now, let’s discuss another potential reason for excessive smoke: a damaged or leaky chimney.

Damaged or Leaky Chimney

A damaged or leaky chimney can cause smoke to enter your home, which can be hazardous to your health and safety. It’s important to address any issues with your chimney promptly to ensure the proper functioning of your wood stove.

Here are three signs of a damaged chimney that you should be aware of:

  1. Cracked or crumbling mortar: If you notice any cracks or crumbling in the mortar joints of your chimney, it could indicate water damage or structural issues. This can lead to leaks and smoke entering your home.

  2. Rusty or deteriorating chimney cap: The chimney cap plays a crucial role in keeping out rain, snow, debris, and animals. If it’s rusty or deteriorating, it may not be able to perform its function effectively, allowing smoke to escape into your living space.

  3. Smoke stains or odors: If you notice smoke stains on the walls or ceilings near your chimney or detect a persistent smoky odor in your home, it could be a sign of a leaky chimney. This should be addressed promptly to prevent further damage and potential health risks.

When faced with a damaged chimney, there are various repair options available, such as chimney relining, chimney crown repair, and chimney flashing repair. It’s important to consult with a professional chimney technician to determine the best course of action for your specific situation.

Advertisement

Inadequate Stove Maintenance

One of the main causes of smoke in your home can be the result of inadequate stove maintenance. A dirty stove and a clogged flue are two common culprits that can lead to smoke issues. When the stove isn’t properly cleaned, a buildup of soot and debris can occur on the burners, causing incomplete combustion and the production of smoke.

Additionally, a clogged flue prevents the proper ventilation of smoke, leading to its accumulation inside your home. Regular cleaning and maintenance of your stove, including cleaning the burners and ensuring the flue is clear, is crucial in preventing smoke issues.

It’s recommended to schedule annual professional maintenance to ensure your stove is in optimal condition and to avoid the inconvenience and potential health hazards associated with smoke in your home.

Incorrect Stove Installation

I regret not hiring a professional for my stove installation, as it has caused numerous issues and potential hazards. When it comes to installing a wood stove, proper positioning and sizing are crucial factors that shouldn’t be taken lightly.

Here are three key reasons why improper stove positioning and incorrect flue size can lead to problems:

Advertisement
  1. Inadequate clearance: Placing the stove too close to combustible materials can increase the risk of fire. It’s essential to follow the manufacturer’s guidelines for proper clearances to ensure the safe operation of the stove.

  2. Inefficient heating: Incorrect positioning can hinder the stove’s ability to distribute heat effectively throughout the room. This can result in uneven temperatures and wasted energy, leading to discomfort and higher heating costs.

  3. Insufficient draft: Using an incorrect flue size can impede the stove’s ability to expel smoke and gases properly. This can lead to backdrafting, where smoke enters the room instead of being directed outside. Aside from the health hazards, backdrafting can damage the stove and cause indoor air quality issues.

To avoid these problems, it’s essential to consult a professional for the proper installation of your wood stove. They’ll ensure that the stove is positioned correctly and the flue size is appropriate for efficient and safe operation.

Frequently Asked Questions

Can Smoking Occur if There Is Sufficient Airflow in the Wood Stove?

Yes, smoking can still occur in a wood stove even with sufficient airflow. Factors like improper wood placement, damp or unseasoned wood, or a clogged chimney can all contribute to smoking issues. Proper troubleshooting can resolve these problems and improve wood stove performance.

What Are Some Common Wood Types That Should Be Avoided to Prevent Smoking in a Wood Stove?

To prevent smoking in a wood stove, it is important to avoid using wood types like pine, as they contain high levels of resin. Additionally, properly seasoning firewood is crucial to reduce smoke production.

How Can I Identify if My Chimney Is Damaged or Leaking?

To identify chimney damage or leaks, conduct a thorough chimney inspection. Look for cracks, loose bricks, or crumbling mortar. Additionally, consider installing a smoke detector near the stove to quickly detect any smoke issues.

Besides Regular Cleaning, What Other Maintenance Practices Can Help Prevent Smoking in a Wood Stove?

Other maintenance practices, such as ensuring proper airflow and avoiding certain wood types, can help prevent smoking in a wood stove. Identifying chimney damage or leaks and checking for correct stove installation are also crucial.

Advertisement

What Are Some Signs of Incorrect Stove Installation That May Lead to Smoking?

Installing a wood stove improperly can lead to frustrating smoke issues. One key sign is if the chimney height is too short. Another is using unseasoned wood, which can cause excessive smoke.

What Are Some Wood Stove Brands That Have Smoke-Reducing Features?

Looking for the best wood stove brands with smoke-reducing features? Look no further. With increasing concerns about air pollution, several brands are innovating their wood stoves to minimize smoke emissions. Some notable options include Vermont Castings, Jøtul, and Blaze King. These brands prioritize efficiency and clean burning, ensuring you can enjoy the warmth of a wood stove while minimizing environmental impact.

Conclusion

In conclusion, when your wood stove smokes, it’s often due to factors such as:

  • Insufficient airflow
  • Improper wood selection
  • A damaged or leaky chimney
  • Inadequate stove maintenance
  • Incorrect installation

To prevent this, you should:

  • Ensure proper ventilation
  • Use seasoned and dry wood
  • Inspect and repair your chimney regularly
  • Maintain your stove diligently
  • Ensure professional installation

By addressing these issues, you can enjoy a smoke-free and efficient wood stove experience, creating a cozy and inviting atmosphere in your home.

Continue Reading

Wood Stove

How To Build A Wood Stove From A Jerry Can

Published

on

By

An image showcasing the step-by-step process of transforming a jerry can into a wood stove

I have always been fascinated by the concept of transforming ordinary objects into useful tools.

So when I came across an old jerry can in my garage, I knew I had the perfect opportunity to create my own wood stove.

In this article, I’ll guide you through the process of transforming a jerry can into a functional and efficient wood stove, complete with ventilation, legs, and a base.

Get ready to unleash your inner DIY enthusiast and start enjoying the warmth of your homemade wood stove.

Key Takeaways

  • Consider the capacity and dimensions of the jerry can
  • Compare different materials for jerry cans
  • Prepare and clean the jerry can properly
  • Take safety precautions and use the right tools when modifying the jerry can

Selecting the Right Jerry Can for Your Wood Stove

I’m trying to figure out which jerry can is the best option for my wood stove.

When it comes to choosing the right size jerry can for your wood stove, it’s important to consider the capacity and dimensions. A larger can will hold more fuel, but it may be too bulky for your space. On the other hand, a smaller can may require more frequent refills.

Advertisement

Additionally, it’s crucial to compare different materials for jerry cans to ensure optimal wood stove performance. Metal cans are durable and resistant to heat, but they can also be heavy. Plastic cans, on the other hand, are lightweight and easier to handle, but may not withstand high temperatures as well.

Ultimately, finding the perfect jerry can for your wood stove is about balancing capacity, dimensions, and material for efficient and safe operation.

Preparing and Cleaning the Jerry Can

Before starting to use the jerry can, it’s crucial to properly clean and prepare it by removing any dirt or residue, and then ensuring it’s completely dry. Here is the cleaning process and safety precautions to follow:

  1. Rinse the jerry can with warm water and a mild detergent to remove any dirt or debris. Use a sponge or brush to scrub the inside and outside of the can thoroughly.

  2. Rinse the can again with clean water to remove any soap residue. Make sure to rinse it multiple times to ensure all the soap is gone.

  3. After rinsing, allow the jerry can to air dry completely. This is important to prevent any moisture from causing rust or corrosion.

By following these cleaning steps, you can ensure that your jerry can is ready for modification.

Now, let’s discuss cutting open and modifying the jerry can for ventilation.

Advertisement

Cutting Open and Modifying the Jerry Can for Ventilation

I’ll explain how to use a few small holes in the jerry can to provide adequate ventilation for the wood stove. When modifying the jerry can for ventilation, it is important to take safety precautions and use the right tools. Here is a table outlining the necessary steps:

Step Safety Precautions Tools Needed
1 Wear protective gloves and goggles Drill
2 Work in a well-ventilated area Marker
3 Ensure the jerry can is empty and clean Metal file
4 Mark the desired ventilation holes on the can Safety glasses
5 Use the drill to create the holes Protective gloves
6 Smooth the edges of the holes with the metal file Goggles
7 Clean any metal shavings from the can Clean cloth

Adding Legs and a Base to the Wood Stove

I can attach some sturdy legs and a stable base to the wood stove to ensure it stands securely on any surface. Achieving stove stability is crucial to prevent accidents and maintain proper functioning.

When choosing materials for the legs and base, it’s important to consider their strength, durability, and heat resistance. Here are three essential elements to consider:

  1. Material Selection: Opt for materials that can withstand high temperatures, such as stainless steel or cast iron. These materials are known for their strength and ability to withstand the intense heat generated by the wood stove.

  2. Design and Construction: The design of the legs should provide sufficient support and stability. Consider a tripod or four-leg design for optimal balance. Additionally, ensure the legs are securely attached to the stove body to prevent any wobbling or instability.

  3. Base Size and Shape: The base of the wood stove should be wide and flat enough to distribute the weight evenly, ensuring stability on various surfaces. A larger base will provide better stability, especially when using the stove on uneven or soft ground.

Testing and Using Your DIY Wood Stove

I’ve successfully tested and now use my DIY wood stove to cook meals while camping. It’s a simple yet effective solution for outdoor cooking. However, before using it, I took several testing techniques and safety precautions to ensure its efficiency and my own well-being.

Firstly, I conducted a leak test to ensure there were no air or gas leaks that could potentially cause a fire hazard. This involved pressurizing the stove and checking for any signs of leakage. I also tested its heat distribution by placing a pot of water on the stove and monitoring how evenly the heat was dispersed.

Advertisement

To further ensure safety, I implemented safety precautions such as maintaining a safe distance between the stove and any flammable objects, using heat-resistant gloves when handling the stove, and having a fire extinguisher nearby.

Using my DIY wood stove has been a game-changer for my camping trips. Not only does it provide a reliable cooking source, but it also allows me to enjoy the natural surroundings without relying on traditional campfire cooking methods. By following proper testing techniques and safety precautions, I can confidently cook my meals and enjoy the great outdoors.

Frequently Asked Questions

How Long Does It Take to Build a Wood Stove From a Jerry Can?

It takes about 2 hours to build a wood stove from a jerry can. The benefits of using a wood stove include cost-effective heating and a sustainable fuel source. Regular cleaning and maintenance ensure optimal performance.

Can I Use Any Type of Wood for the Base of the Wood Stove?

I can use different types of wood for the base of the wood stove, but it’s important to consider safety precautions when using it indoors. Proper ventilation and non-flammable materials are crucial.

Is It Safe to Use the Wood Stove Indoors?

Oh, using a wood stove indoors, what a brilliant idea! Let me enlighten you on the potential health hazards and share some precise tips for safely using one. Shall we begin?

Advertisement

Can I Paint the Jerry Can After Modifying It?

Yes, you can paint the modified jerry can using various painting techniques. It is important to choose a paint that can withstand high temperatures and adhere well to metal surfaces. Make sure to consider alternative fuel sources when painting for safety.

What Tools Do I Need to Build a Wood Stove From a Jerry Can?

To build a wood stove from a jerry can, I need a few tools like a jigsaw, drill, and metal file. Safety precautions are crucial, and alternative materials can be used if necessary.

Can I Use a Wood Stove Insert in a DIY Jerry Can Wood Stove?

When considering building a wood stove fireplace, it’s crucial to factor in the cost of materials and construction. However, if you’re planning to use a wood stove insert in a DIY Jerry Can Wood Stove, the cost of building a wood stove fireplace may decrease significantly. This alternative method combines affordability and practicality, making it an excellent choice for those seeking an alternative heating solution.

Can Duraflame Logs Be Used in a Wood Stove Made from a Jerry Can?

Can Duraflame logs be used in a wood stove made from a jerry can? Many DIY enthusiasts wonder about using Duraflame logs in a wood stove. While Duraflame logs are commonly used in traditional fireplaces, their use in a jerry can wood stove may not be ideal. It’s important to consider the safety and compatibility aspects of using duraflame logs in wood stoves specifically designed for them.

Conclusion

After carefully selecting the right jerry can, preparing and modifying it for ventilation, and adding sturdy legs and a stable base, your DIY wood stove is ready for testing and use.

Advertisement

With its compact design and efficient functionality, this wood stove provides a practical and cost-effective heating solution for outdoor activities or emergency situations.

Embrace the warmth and convenience of this homemade creation, bringing comfort and coziness wherever you go.

Continue Reading

Trending