To install a chimney through a metal roof, select the right roof flashing designed for metal roofs and match it to your chimney’s diameter. Mark and cut the roof carefully, making certain proper alignment and clearance for safety and performance. Fit the flashing snugly around the chimney pipe, secure it with screws, and seal all seams with weatherproof sealant. Properly supported and sealed installations prevent leaks and ensure long-lasting safety—continue to explore for detailed steps and tips.
Key Takeaways
- Choose roof flashing designed for metal roofs that matches chimney pipe diameter and material.
- Mark and cut the roof opening precisely, ensuring proper alignment and clearance.
- Install flashing snugly around the chimney pipe, sealing all seams with weatherproof sealant.
- Secure the flashing with self-tapping screws, ensuring proper overlap on roof panels.
- Verify the chimney pipe extends above the roofline and all clearances meet safety standards.
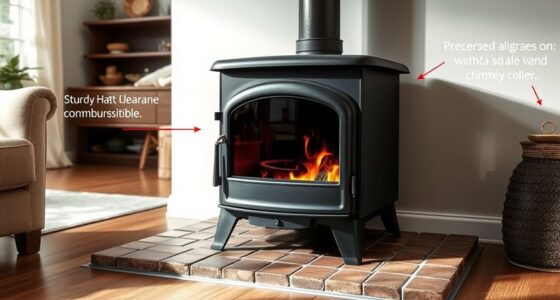
Installing a chimney through a metal roof can be straightforward if you follow the right steps and use the proper materials. The key to a successful installation lies in guaranteeing a proper seal and maintaining safe chimney clearances. First, you need to carefully select the right roof flashing designed specifically for metal roofs. Metal roof flashing is essential because it creates a watertight seal around the chimney pipe where it passes through the roof. Choose a flashing that matches the type of metal on your roof and is compatible with the chimney pipe diameter. Proper installation of roof flashing prevents leaks and protects your home from water intrusion.
Before you start, check the required chimney clearances based on local building codes and manufacturer recommendations. Adequate clearances are vital for safety and performance, especially to prevent heat transfer to the roof material and avoid fire hazards. Make sure there’s enough space between the chimney pipe and the roof decking, as well as any combustible materials. This clearance also helps with proper ventilation and reduces the risk of creosote buildup inside the chimney pipe. To ensure optimal performance, consider incorporating proper insulation around the chimney pipe to maintain temperature and prevent condensation. Additionally, understanding installation guidelines can help ensure your project meets safety standards and lasts for years.
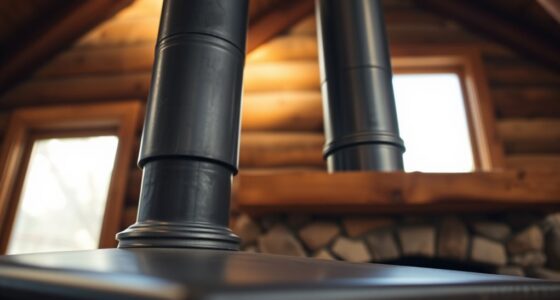
Next, mark the location on your roof where the chimney will penetrate. Use a level and measuring tape to ensure the opening aligns correctly with the interior flue system. Cut a hole in the metal roof using a jigsaw or metal-cutting tool, following your measurements precisely. Be cautious to avoid damaging the surrounding roofing panels or insulation. Once the hole is cut, slide the chimney pipe through the opening, ensuring it extends sufficiently above the roofline for proper draft and clearance from any nearby structures or trees. It’s also helpful to review industry standards to confirm your installation complies with safety and building codes.
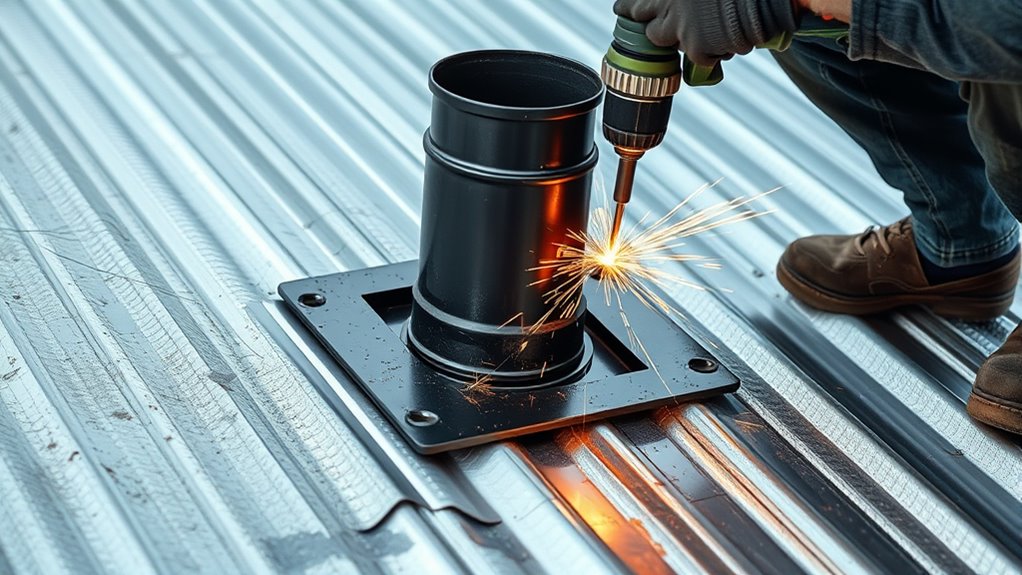
Position the roof flashing around the chimney pipe, fitting it snugly into the hole. Most flashing kits come with a base, a collar, and sometimes a storm collar. Secure the flashing base to the roof with self-tapping screws, making sure it overlaps the metal panels to channel water away from the penetration point. Seal all seams and edges with a high-quality, weatherproof sealant suitable for metal roofs. Pay close attention to the area where the flashing overlaps the roof panels, as this is where leaks are most likely to occur. Ensuring a properly aligned and sealed flashing is critical because waterproofing is vital to prevent leaks and water damage over time.
Finally, inspect the installation to confirm that the chimney is properly supported and that the flashing is sealed tightly. Check all clearances around the chimney pipe to guarantee they meet safety standards. Properly installed roof flashing and adherence to clearance guidelines will keep your chimney functioning efficiently and your home protected from water damage. With careful attention to these details, installing a chimney through a metal roof becomes a manageable project that offers long-lasting results.
Frequently Asked Questions
Can I Install a Chimney Without Professional Help?
You can try installing a chimney yourself, but be aware of DIY challenges that come with it. Without proper experience, you might struggle with sealing and flashing, risking leaks or fire hazards. Always prioritize safety precautions, like wearing protective gear and working carefully on the metal roof. If you’re unsure, it’s best to consult a professional to ensure the job’s done correctly and safely, avoiding costly mistakes.
How Long Does the Installation Process Typically Take?
Oh, you’ll be surprised how quickly this can all be done—usually within a day or two. The installation timeline depends on your roof’s complexity and scheduling considerations, so your project could stretch longer if you’re not careful. Expect to allocate time for prep, actual installation, and cleanup. If you’re organized and have the right tools, you can minimize delays and get your chimney installed efficiently, no fuss involved.
What Are the Cost Differences Compared to Other Roofing Types?
You’ll find that the cost comparison for installing a chimney through a metal roof tends to be higher than other roofing types like asphalt or tile. Metal roofs require specialized flashing and sealing, which add to installation costs. However, they offer durability and longevity. While initial expenses are greater, you might save on maintenance and replacement costs over time compared to other roofing types.
Are There Specific Chimney Materials Best Suited for Metal Roofs?
You might think any chimney material works with a metal roof, but that’s not true. The best suited materials are stainless steel or aluminum, which offer excellent metal roof compatibility and resist corrosion. When installing, make certain you use proper chimney flashing designed for metal roofs to prevent leaks. This combination guarantees durability, seamless integration, and long-lasting performance, making your chimney installation both safe and efficient.
How Do I Prevent Leaks Around the Chimney Installation?
To prevent leaks around your chimney, you should use proper flashing techniques and select a high-quality sealant. Guarantee the flashing is properly installed, overlapping the metal roof and chimney to direct water away. Apply a compatible sealant around the edges and joints for extra protection. Regularly inspect and maintain the flashing and sealant to catch any damage early, keeping your roof watertight and your home safe.
Conclusion
Now that you’ve got the basics down, imagine the warm glow filling your home, perfectly sealed against the elements. But wait—there’s one last step that could make or break your project. Will your flashing hold tight, or will an unnoticed leak cause trouble later? Stay alert and double-check your work. The satisfaction of a flawless installation is just a careful final inspection away. Are you ready to see your chimney stand tall through that metal roof?

Terra grew up with a soul deeply connected to nature. Her earliest memories are of sun-drenched meadows, whispering woods, and the rhythmic dance of waves on a moonlit night. Every gust of wind, rustling leaf, and distant horizon beckoned her with tales waiting to be told.