Wood Stove
How To Prevent Carbon Monoxide From Wood Stove
![An image of a well-ventilated room with a properly installed wood stove, showcasing a clear chimney, sealed joints, and a functional carbon monoxide detector, ensuring safety and prevention of carbon monoxide hazards](https://bestsmallwoodstoves.com/wp-content/uploads/2023/09/how-to-prevent-carbon-monoxide-from-wood-stove_126.png)
I’m here to provide essential advice on how to stop carbon monoxide from entering your home through your wood-burning stove.
Think of your wood stove as a cozy campfire in your living room. But just like you wouldn’t want smoke filling up your tent, you definitely don’t want carbon monoxide filling up your home.
So, let’s dive into some key steps you can take to ensure proper ventilation, maintenance, and safe operation of your wood stove.
Key Takeaways
- Proper ventilation and the installation of carbon monoxide detectors are crucial in preventing carbon monoxide poisoning from wood stoves.
- Regular maintenance and inspection of wood stoves help prevent chimney fires and ensure efficient operation.
- Choosing the right wood and fuel, such as properly seasoned firewood and low-emission options, reduces the risk of smoke and creosote buildup.
- Practicing safe wood stove operation, including proper wood storage and regular ash cleaning, prevents accidents and health hazards.
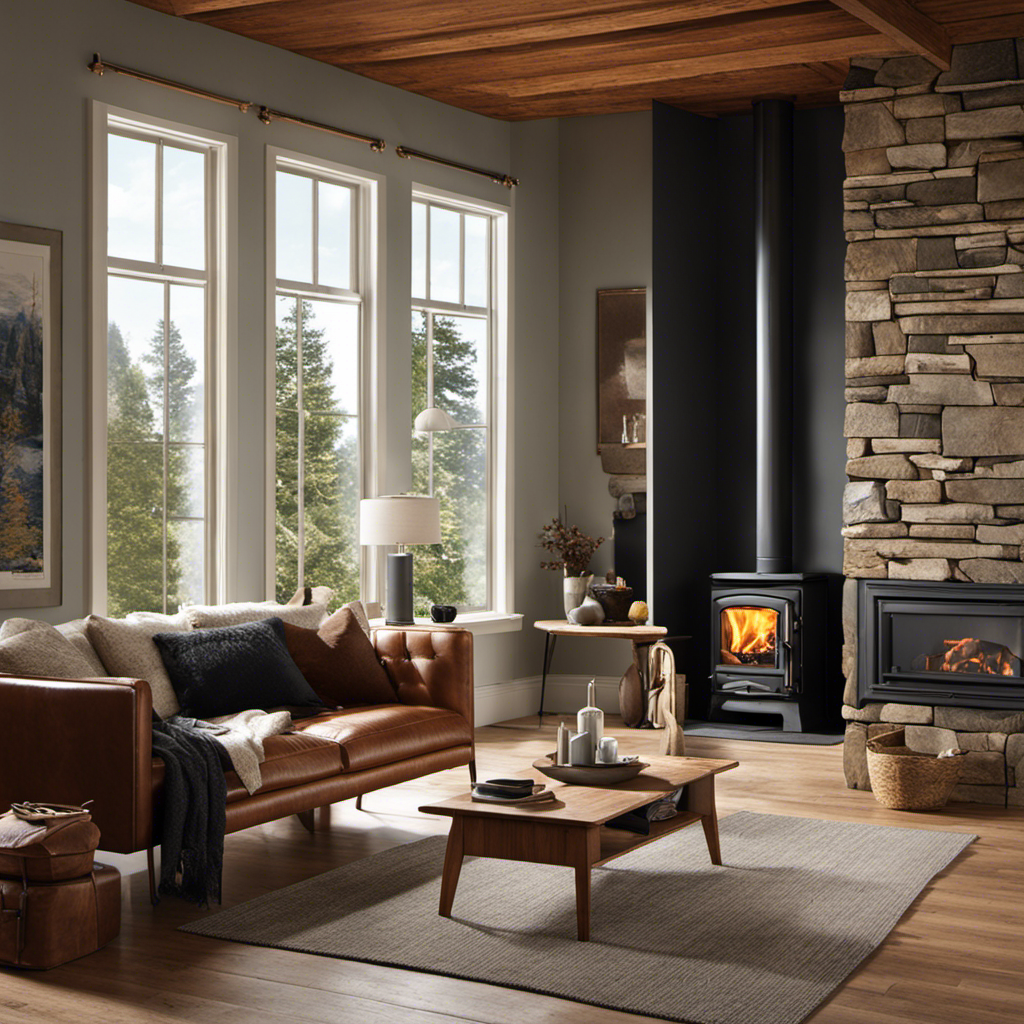
The Importance of Proper Ventilation
I understand the importance of proper ventilation when it comes to preventing carbon monoxide from a wood stove. Carbon monoxide is a silent killer, and exposure to high levels can be deadly. That’s why it’s crucial to have adequate ventilation in place to ensure the safe operation of a wood stove.
The dangers of carbon monoxide exposure can’t be underestimated. This odorless and colorless gas can quickly build up in enclosed spaces, such as a home, if not properly ventilated. The symptoms of carbon monoxide poisoning can be subtle, often mistaken for flu-like symptoms. Headaches, dizziness, nausea, and confusion are common signs to watch out for. In severe cases, it can lead to unconsciousness, brain damage, and even death.
Proper ventilation is essential to prevent carbon monoxide buildup. It allows for the safe removal of harmful gases and ensures a constant flow of fresh air. A chimney or flue system should be properly installed and regularly maintained to ensure efficient venting. Additionally, it’s important to keep air vents open and unobstructed to allow for proper airflow.
Regular Maintenance and Inspection
Regularly checking and cleaning my wood stove is essential to ensure it operates safely and efficiently. As a responsible wood stove owner, I follow a strict cleaning schedule to maintain its performance and prevent potential hazards.
Here are three key reasons why I prioritize regular maintenance and inspection:
-
Safety: Ensuring my wood stove is free from creosote buildup minimizes the risk of chimney fires. By regularly cleaning the flue and chimney, I reduce the chance of dangerous carbon monoxide leaks into my home.
-
Efficiency: A clean wood stove operates more efficiently, providing optimal heat output and reducing fuel consumption. Regularly removing ash and debris from the firebox and checking the gaskets ensures proper air circulation, maximizing the stove’s efficiency.
-
Longevity: Proper maintenance extends the lifespan of my wood stove. By inspecting and cleaning components such as the baffle plates and catalytic combustor, I prevent unnecessary wear and tear, saving money on repairs or replacements in the long run.
While I handle routine cleaning tasks, I understand that certain maintenance and inspection tasks require professional assistance. Seeking professional help for complex issues or annual inspections ensures that my wood stove operates safely and efficiently throughout the year.
With a well-maintained wood stove, the next step is to choose the right wood and fuel to maximize its performance and minimize emissions.
Choosing the Right Wood and Fuel
To ensure optimal performance and minimize emissions, it’s important to select the appropriate type of fuel and wood for my stove. Proper seasoning and efficient burning are essential factors to consider when choosing the right wood and fuel.
When it comes to wood, it’s crucial to use properly seasoned firewood. This means that the wood should have a moisture content of around 20% or less. Seasoned wood burns more efficiently and produces less smoke and creosote buildup, reducing the risk of chimney fires. Hardwoods such as oak, maple, and birch are excellent choices as they provide longer burn times and produce more heat compared to softwoods like pine and spruce.
Additionally, it’s important to use dry kindling and newspaper to start the fire, as damp or wet materials can hinder efficient burning.
When it comes to fuel, it’s recommended to use clean-burning and low-emission options such as pellets, which are made from compressed sawdust or other wood waste materials.
Installing Carbon Monoxide Detectors
Installing carbon monoxide detectors is essential for my safety and the well-being of my household. Carbon monoxide poisoning is a serious threat that can be deadly if not detected early. By taking the necessary safety precautions and installing these detectors, I can ensure the protection of myself and my loved ones.
Here are some reasons why I believe everyone should have carbon monoxide detectors in their homes:
-
Peace of mind: Having carbon monoxide detectors gives me peace of mind, knowing that I’m protected from this invisible and odorless gas. It allows me to sleep peacefully at night, knowing that I’ll be alerted if there’s a dangerous level of carbon monoxide in my home.
-
Early detection: Carbon monoxide detectors can detect even trace amounts of carbon monoxide in the air. This early detection is crucial in preventing carbon monoxide poisoning and allows me to take immediate action to mitigate any potential risks.
-
Life-saving potential: Carbon monoxide poisoning can be fatal, and having detectors in place significantly increases the chances of survival. By installing these devices, I’m taking a proactive step towards ensuring the safety and well-being of my household.
Overall, installing carbon monoxide detectors is a simple yet crucial step in ensuring the safety of myself and my loved ones. It provides me with the peace of mind and early detection necessary to prevent carbon monoxide poisoning and the potential risks it poses.
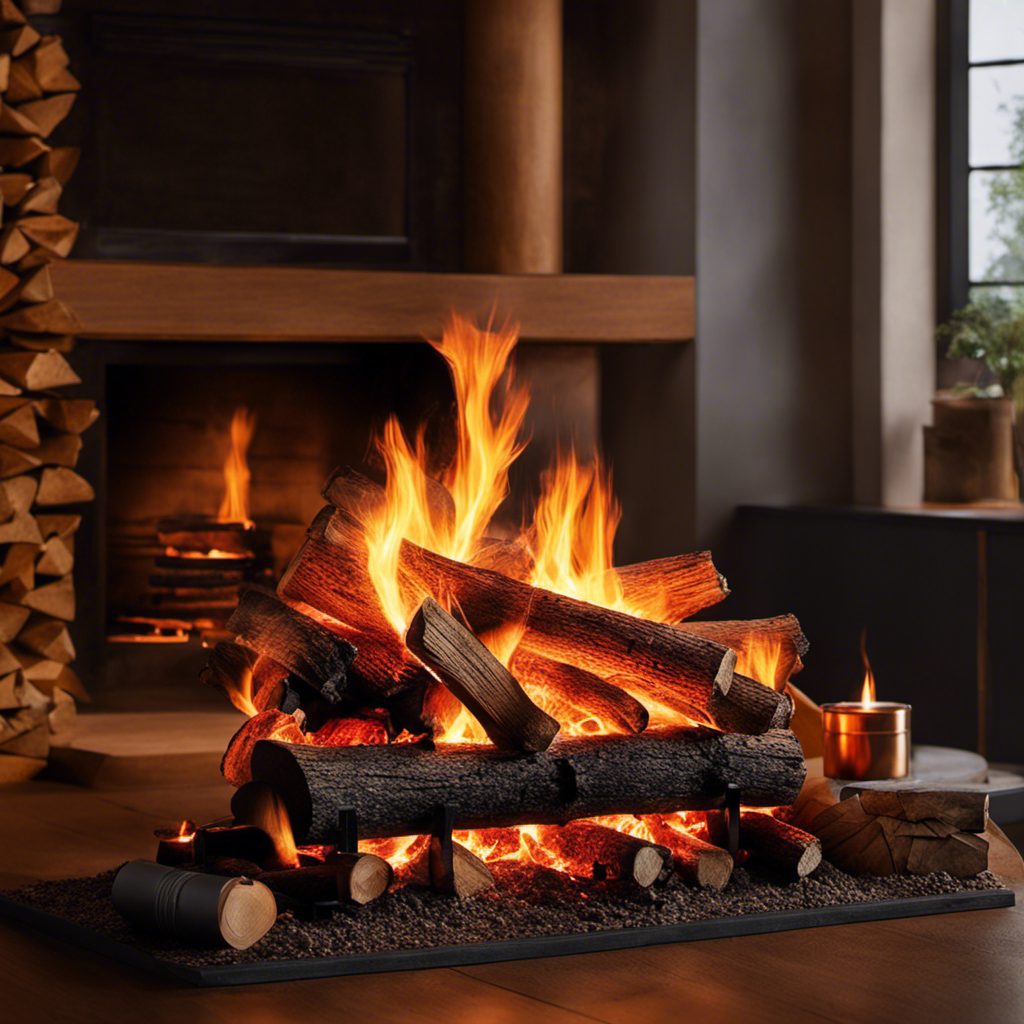
Practicing Safe Wood Stove Operation
Using my wood stove safely is essential for maintaining a warm and cozy home during the colder months. Not only does it provide a comforting heat source, but it also adds a rustic charm to my living space. However, it is crucial to follow proper wood stove operation guidelines to prevent any accidents or health hazards. Two important aspects of safe wood stove operation are proper wood storage and regular cleaning of ash.
Proper wood storage is essential for ensuring that the wood burns efficiently and produces less smoke. It is important to store firewood in a dry, well-ventilated area, away from the house. This helps prevent the growth of mold or fungi and reduces the risk of indoor air pollution. Additionally, wood should be stacked neatly, allowing for proper air circulation to aid in drying.
Regularly cleaning the ash from the wood stove is crucial for its efficient operation. The accumulation of ash can restrict airflow and reduce the stove’s ability to burn wood effectively. I make it a point to clean the ash at least once a week, or more frequently if needed. It is important to wait until the stove has completely cooled down before removing the ash. Using a shovel or an ash vacuum, I carefully scoop out the ash and dispose of it in a metal container.
By following these guidelines for proper wood storage and regular ash cleaning, I can enjoy the warmth and coziness of my wood stove without any safety concerns. Table 1 below provides a summary of these practices.
Wood Stove Safety Tips |
---|
Proper Wood Storage |
– Store in a dry, well-ventilated area |
– Stack wood neatly for air circulation |
Cleaning Ash Regularly |
– Wait for the stove to cool down |
– Use shovel or ash vacuum |
– Dispose of ash in a metal container |
Table 1: Wood Stove Safety Tips
Frequently Asked Questions
Are There Any Specific Safety Precautions to Take When Using a Wood Stove in a Small, Enclosed Space?
Ventilation tips and safety measures are crucial when using a wood stove in a small, enclosed space.
Proper ventilation ensures that harmful carbon monoxide gases are safely removed. Always ensure that the space has adequate air circulation to prevent the buildup of carbon monoxide.
Additionally, it’s essential to have a functioning carbon monoxide detector in the area, as it will alert you to any dangerous levels of the gas.
Regularly inspecting and cleaning the stove and chimney is also important to prevent carbon monoxide leaks.
Can a Wood Stove Produce Carbon Monoxide Even if It’s Properly Installed and Maintained?
A wood stove can indeed produce carbon monoxide if not properly installed and maintained. It’s crucial to prevent carbon monoxide leaks by ensuring the stove is correctly vented and that there are no obstructions in the chimney or flue. Regular inspections and cleanings are essential to maintain proper airflow and prevent the buildup of harmful gases.
Additionally, installing a carbon monoxide detector near the stove can provide an extra layer of safety.
How Often Should I Clean the Chimney and Flue of My Wood Stove to Prevent Carbon Monoxide Buildup?
To prevent carbon monoxide buildup from a wood stove, it’s crucial to maintain the chimney and flue. Chimney maintenance frequency depends on usage, but it’s generally recommended to clean them annually.
Safety precautions are essential, especially in small spaces. Regular inspections can identify any potential issues, like creosote buildup or blockages, ensuring proper ventilation.
Additionally, installing carbon monoxide detectors near the wood stove is advised for early detection of any harmful gas leaks.
Can I Use Any Type of Wood or Fuel in a Wood Stove, or Are There Specific Types That Are Safer and Produce Less Carbon Monoxide?
Using the right type of wood and ensuring proper ventilation in wood stove usage are key to preventing carbon monoxide buildup.
Certain types of wood, like dry hardwoods, burn more efficiently and produce less carbon monoxide compared to wet or softwoods. It’s important to avoid using materials like treated wood, which can release harmful chemicals when burned.
Additionally, regular chimney and flue cleaning is crucial to maintain proper airflow and prevent the accumulation of carbon monoxide.
What Are the Signs and Symptoms of Carbon Monoxide Poisoning, and How Can I Differentiate Them From Other Common Illnesses?
Differentiating carbon monoxide poisoning from common illnesses can be challenging, as the symptoms can be similar. However, there are specific signs to watch out for, such as headache, dizziness, nausea, and confusion. If these symptoms improve when you leave the area or are exposed to fresh air, it could be a sign of carbon monoxide poisoning.
Long-term exposure to carbon monoxide can lead to serious health effects, including brain damage and organ failure. It’s crucial to have carbon monoxide detectors installed in your home to prevent such risks.
Conclusion
In conclusion, preventing carbon monoxide from a wood stove is crucial for the safety of your home and loved ones. By ensuring proper ventilation, regular maintenance and inspection, using the right wood and fuel, installing carbon monoxide detectors, and practicing safe wood stove operation, you can greatly reduce the risk of carbon monoxide poisoning.
Remember, protecting yourself from this silent killer is a responsibility we should all take seriously. Stay informed and stay safe.
Wood Stove
How Long Does It Take Wood To Ignite Aftee Being Put In A Wood Stove
![An image capturing the mesmerizing scene of a wood stove, with a bed of glowing embers beneath carefully stacked logs, as tendrils of thin smoke gracefully curl upwards, depicting the anticipation of wood slowly igniting](https://bestsmallwoodstoves.com/wp-content/uploads/2023/09/how-long-does-it-take-wood-to-ignite-aftee-being-put-in-a-wood-stove_939.png)
I must admit, the wait for wood to catch fire in a wood stove can seem never-ending. However, do not worry, as in this article, I will share some strategies and tips to speed up the process.
From understanding the temperature and moisture content of the wood to choosing the right type and preparing it efficiently, we’ll explore all the factors that affect wood ignition time.
So let’s dive in and get that fire blazing in no time!
Key Takeaways
- Weather conditions and moisture content of the wood can affect the ignition time.
- Properly seasoned wood with around 20% moisture content ignites more easily.
- Smaller wood logs and softer woods tend to ignite faster than larger and harder woods.
- Proper wood storage and preparation, such as keeping it off the ground, using fire starters, and maintaining airflow, can help ensure faster ignition in a wood stove.
Factors Affecting Wood Ignition Time
I’m curious about the factors that can affect the time it takes for wood to ignite in a wood stove.
One of the key factors is the weather conditions. Cold and damp weather can make it harder for the wood to catch fire, as moisture content in the wood can be high. It’s important to ensure that the wood is properly seasoned and has a moisture content of around 20% for optimal ignition.
Another factor to consider is the size of the wood logs. Smaller logs tend to ignite more quickly as they’ve a larger surface area exposed to the heat source.
Additionally, the type of wood being used can also affect ignition time, with softer woods igniting faster than harder woods.
Temperature and Moisture Content of Wood
The optimal moisture content for wood is around 20%, which ensures efficient ignition in a wood stove. The wood ignition process is influenced by various factors, and the moisture content plays a critical role in determining how quickly the wood will ignite.
When wood is too wet, it requires more energy to burn off the excess moisture before it can reach its ignition point. On the other hand, if the wood is too dry, it may ignite too quickly and burn too rapidly, leading to inefficient combustion and wasted energy.
Therefore, it’s essential to properly store wood to maintain its moisture content within the optimal range. Proper wood storage involves keeping the wood off the ground, covering it to protect it from rain or snow, and allowing for proper airflow to prevent excessive moisture buildup.
Type of Wood and Its Density
I prefer using hardwoods like oak or maple due to their density and their ability to burn longer and provide more heat. When it comes to wood species selection, it’s important to consider the impact of wood moisture content. Here are three key points to keep in mind:
-
Moisture content affects combustion efficiency: Wet wood contains a higher moisture content, which leads to incomplete combustion and the production of more smoke and pollutants. Dry hardwoods, on the other hand, burn more efficiently and produce less smoke.
-
Heat output is influenced by wood density: Hardwoods have a higher density compared to softwoods, resulting in a higher heat output. This means that hardwoods like oak and maple can provide more warmth and keep your space cozy for a longer period of time.
-
Longer burn time with hardwoods: Due to their density, hardwoods burn at a slower rate, allowing for a longer burn time per log. This means less frequent refueling and a more consistent heat source.
Preparing Wood for Efficient Ignition
To ensure efficient ignition, I always make sure to properly split and dry my firewood. Proper wood storage is essential for achieving this. It’s important to store the firewood in a well-ventilated area, off the ground and protected from moisture. This allows the wood to dry properly and reduces the risk of it being damp or rotting.
When it comes to igniting the wood in a wood stove, using fire starters or kindling can greatly speed up the process. These small pieces of flammable material help create a hot and sustained flame, which in turn ignites the larger pieces of wood.
By incorporating these techniques, you can ensure a faster and more efficient ignition in your wood stove.
Now, let’s move on to some tips for faster wood ignition in a wood stove.
Tips for Faster Wood Ignition in a Wood Stove
Using kindling and ensuring proper airflow are key to achieving faster wood ignition in a wood stove. When it comes to stubborn wood that’s difficult to ignite, there are several ignition techniques that can be employed:
-
Preparation: Properly seasoned wood with a moisture content below 20% is essential for efficient ignition. This ensures that the wood is dry enough to catch fire quickly.
-
Kindling: Creating a bed of small, dry kindling underneath the larger logs helps to ignite the fire faster. Kindling acts as a fuel source that ignites easily and produces enough heat to catch the larger logs on fire.
-
Airflow: Adequate airflow is crucial for wood ignition. By opening the damper or adjusting the air vents, you can ensure that enough oxygen is getting to the fire, promoting faster ignition.
While some may consider using accelerants to speed up wood ignition, it’s important to note that this can be dangerous and may result in uncontrollable fires or the release of harmful chemicals. It’s recommended to rely on proper ignition techniques and patience for a safe and efficient wood ignition process.
Frequently Asked Questions
Can I Use Treated Wood in My Wood Stove?
Using pressure treated wood in a wood stove is not recommended due to the chemicals it releases when burned. It is safer to use untreated wood or other alternatives for faster ignition.
What Is the Best Type of Wood to Use for Faster Ignition in a Wood Stove?
Fast burning woods like pine or fir can ignite in a wood stove within minutes. To ensure efficient wood stove usage, it’s important to choose dry, seasoned firewood and properly maintain the stove.
Are There Any Safety Precautions I Should Take When Igniting Wood in a Wood Stove?
When igniting wood in a wood stove, it is important to take safety precautions. Keep a fire extinguisher nearby and ensure proper ventilation. Additionally, the moisture content of the wood can affect its ignition time.
Can I Use Wood Chips or Sawdust for Ignition in a Wood Stove?
I can use wood chips or sawdust for ignition in a wood stove. They are effective fire starters for faster ignition. The small size and high surface area make them ignite quickly, reducing the time needed for the wood to catch fire.
How Does the Size of the Wood Affect Its Ignition Time in a Wood Stove?
Moisture content significantly affects wood ignition in a wood stove. Smaller pieces of wood ignite faster due to increased surface area. However, larger pieces provide longer burn times. Consider the advantages and disadvantages of each for efficient use in a wood stove.
Conclusion
After careful analysis of the factors affecting wood ignition time, it’s safe to say that wood doesn’t ignite instantly in a wood stove. Contrary to popular belief, wood requires time to reach its ignition point, which is influenced by factors such as temperature, moisture content, and wood density.
To expedite the process, it’s crucial to choose the right type of wood and ensure it’s properly prepared. So, if you were expecting an immediate burst of flames, you might’ve to wait a little longer.
Logan’s affair with adventure began in childhood. He hailed from a small town where vast forests bordered one side and endless shores stretched on the other. His days were spent exploring uncharted woods, climbing tall trees, or listening to the tales of old sailors. This early immersion in a world brimming with stories and mysteries became the foundation of his passion for writing.
Wood Stove
Why Does Your Wood Stove Smoke
![An image capturing a rustic, cozy living room](https://bestsmallwoodstoves.com/wp-content/uploads/2023/09/why-does-your-wood-stove-smoke_270.png)
Dealing with the smoke from your wood stove can be a real nuisance. But don’t worry, I’m here to provide some tips on how to manage it.
Understanding the root causes of this predicament is crucial. Insufficient airflow, improper wood selection, damaged chimney, inadequate maintenance, and incorrect installation are the major culprits.
Let’s delve into each of these factors to uncover the secrets behind why your wood stove may be producing that bothersome smoke.
Key Takeaways
- Blocked vents disrupt combustion process and lead to incomplete burning and smoke generation.
- Burning wet or high-moisture wood results in inefficient burning and increased creosote buildup.
- Cracked or deteriorating chimney can cause leaks and smoke entry.
- Inadequate stove maintenance, including dirty burners and clogged flue, can lead to smoke issues.
Insufficient Airflow
I’m having trouble with my wood stove smoking because there’s not enough airflow. A common cause of insufficient airflow is blocked vents. When the vents are blocked, the combustion process is disrupted, leading to incomplete burning of the wood and the generation of smoke.
To ensure efficient combustion and minimize smoke, it’s crucial to maintain clear and unobstructed vents. Blocked vents can result from a buildup of creosote or debris, so regular cleaning is essential.
Additionally, proper placement of the stove is crucial to ensure adequate airflow. Make sure that the stove is positioned away from any obstructions, such as furniture or curtains, that might impede the flow of air.
Improper Wood Selection
To prevent excessive smoke and poor combustion, it’s important to avoid burning wet wood or wood with high moisture content, as it can result in inefficient burning and increased creosote buildup. When burning seasoned firewood, which has a moisture content of around 20% or less, the wood burns more efficiently, producing less smoke and providing more heat output. Seasoned firewood has been properly dried for at least six months, allowing the moisture content to decrease significantly. This ensures that the wood burns cleanly and effectively in your wood stove. However, if you burn wood with high moisture content, it will create more smoke and reduce the overall efficiency of your stove. This can also lead to a higher risk of creosote buildup in your chimney, which can be dangerous and increase the chance of a chimney fire. Therefore, it’s crucial to always use dry, seasoned firewood to prevent excessive smoke and maintain proper combustion in your wood stove.
Now, let’s discuss another potential reason for excessive smoke: a damaged or leaky chimney.
Damaged or Leaky Chimney
A damaged or leaky chimney can cause smoke to enter your home, which can be hazardous to your health and safety. It’s important to address any issues with your chimney promptly to ensure the proper functioning of your wood stove.
Here are three signs of a damaged chimney that you should be aware of:
-
Cracked or crumbling mortar: If you notice any cracks or crumbling in the mortar joints of your chimney, it could indicate water damage or structural issues. This can lead to leaks and smoke entering your home.
-
Rusty or deteriorating chimney cap: The chimney cap plays a crucial role in keeping out rain, snow, debris, and animals. If it’s rusty or deteriorating, it may not be able to perform its function effectively, allowing smoke to escape into your living space.
-
Smoke stains or odors: If you notice smoke stains on the walls or ceilings near your chimney or detect a persistent smoky odor in your home, it could be a sign of a leaky chimney. This should be addressed promptly to prevent further damage and potential health risks.
When faced with a damaged chimney, there are various repair options available, such as chimney relining, chimney crown repair, and chimney flashing repair. It’s important to consult with a professional chimney technician to determine the best course of action for your specific situation.
Inadequate Stove Maintenance
One of the main causes of smoke in your home can be the result of inadequate stove maintenance. A dirty stove and a clogged flue are two common culprits that can lead to smoke issues. When the stove isn’t properly cleaned, a buildup of soot and debris can occur on the burners, causing incomplete combustion and the production of smoke.
Additionally, a clogged flue prevents the proper ventilation of smoke, leading to its accumulation inside your home. Regular cleaning and maintenance of your stove, including cleaning the burners and ensuring the flue is clear, is crucial in preventing smoke issues.
It’s recommended to schedule annual professional maintenance to ensure your stove is in optimal condition and to avoid the inconvenience and potential health hazards associated with smoke in your home.
Incorrect Stove Installation
I regret not hiring a professional for my stove installation, as it has caused numerous issues and potential hazards. When it comes to installing a wood stove, proper positioning and sizing are crucial factors that shouldn’t be taken lightly.
Here are three key reasons why improper stove positioning and incorrect flue size can lead to problems:
-
Inadequate clearance: Placing the stove too close to combustible materials can increase the risk of fire. It’s essential to follow the manufacturer’s guidelines for proper clearances to ensure the safe operation of the stove.
-
Inefficient heating: Incorrect positioning can hinder the stove’s ability to distribute heat effectively throughout the room. This can result in uneven temperatures and wasted energy, leading to discomfort and higher heating costs.
-
Insufficient draft: Using an incorrect flue size can impede the stove’s ability to expel smoke and gases properly. This can lead to backdrafting, where smoke enters the room instead of being directed outside. Aside from the health hazards, backdrafting can damage the stove and cause indoor air quality issues.
To avoid these problems, it’s essential to consult a professional for the proper installation of your wood stove. They’ll ensure that the stove is positioned correctly and the flue size is appropriate for efficient and safe operation.
Frequently Asked Questions
Can Smoking Occur if There Is Sufficient Airflow in the Wood Stove?
Yes, smoking can still occur in a wood stove even with sufficient airflow. Factors like improper wood placement, damp or unseasoned wood, or a clogged chimney can all contribute to smoking issues. Proper troubleshooting can resolve these problems and improve wood stove performance.
What Are Some Common Wood Types That Should Be Avoided to Prevent Smoking in a Wood Stove?
To prevent smoking in a wood stove, it is important to avoid using wood types like pine, as they contain high levels of resin. Additionally, properly seasoning firewood is crucial to reduce smoke production.
How Can I Identify if My Chimney Is Damaged or Leaking?
To identify chimney damage or leaks, conduct a thorough chimney inspection. Look for cracks, loose bricks, or crumbling mortar. Additionally, consider installing a smoke detector near the stove to quickly detect any smoke issues.
Besides Regular Cleaning, What Other Maintenance Practices Can Help Prevent Smoking in a Wood Stove?
Other maintenance practices, such as ensuring proper airflow and avoiding certain wood types, can help prevent smoking in a wood stove. Identifying chimney damage or leaks and checking for correct stove installation are also crucial.
What Are Some Signs of Incorrect Stove Installation That May Lead to Smoking?
Installing a wood stove improperly can lead to frustrating smoke issues. One key sign is if the chimney height is too short. Another is using unseasoned wood, which can cause excessive smoke.
What Are Some Wood Stove Brands That Have Smoke-Reducing Features?
Looking for the best wood stove brands with smoke-reducing features? Look no further. With increasing concerns about air pollution, several brands are innovating their wood stoves to minimize smoke emissions. Some notable options include Vermont Castings, Jøtul, and Blaze King. These brands prioritize efficiency and clean burning, ensuring you can enjoy the warmth of a wood stove while minimizing environmental impact.
Conclusion
In conclusion, when your wood stove smokes, it’s often due to factors such as:
- Insufficient airflow
- Improper wood selection
- A damaged or leaky chimney
- Inadequate stove maintenance
- Incorrect installation
To prevent this, you should:
- Ensure proper ventilation
- Use seasoned and dry wood
- Inspect and repair your chimney regularly
- Maintain your stove diligently
- Ensure professional installation
By addressing these issues, you can enjoy a smoke-free and efficient wood stove experience, creating a cozy and inviting atmosphere in your home.
Logan’s affair with adventure began in childhood. He hailed from a small town where vast forests bordered one side and endless shores stretched on the other. His days were spent exploring uncharted woods, climbing tall trees, or listening to the tales of old sailors. This early immersion in a world brimming with stories and mysteries became the foundation of his passion for writing.
Wood Stove
How To Build A Wood Stove From A Jerry Can
![An image showcasing the step-by-step process of transforming a jerry can into a wood stove](https://bestsmallwoodstoves.com/wp-content/uploads/2023/09/how-to-build-a-wood-stove-from-a-jerry-can_398.png)
I have always been fascinated by the concept of transforming ordinary objects into useful tools.
So when I came across an old jerry can in my garage, I knew I had the perfect opportunity to create my own wood stove.
In this article, I’ll guide you through the process of transforming a jerry can into a functional and efficient wood stove, complete with ventilation, legs, and a base.
Get ready to unleash your inner DIY enthusiast and start enjoying the warmth of your homemade wood stove.
Key Takeaways
- Consider the capacity and dimensions of the jerry can
- Compare different materials for jerry cans
- Prepare and clean the jerry can properly
- Take safety precautions and use the right tools when modifying the jerry can
Selecting the Right Jerry Can for Your Wood Stove
I’m trying to figure out which jerry can is the best option for my wood stove.
When it comes to choosing the right size jerry can for your wood stove, it’s important to consider the capacity and dimensions. A larger can will hold more fuel, but it may be too bulky for your space. On the other hand, a smaller can may require more frequent refills.
Additionally, it’s crucial to compare different materials for jerry cans to ensure optimal wood stove performance. Metal cans are durable and resistant to heat, but they can also be heavy. Plastic cans, on the other hand, are lightweight and easier to handle, but may not withstand high temperatures as well.
Ultimately, finding the perfect jerry can for your wood stove is about balancing capacity, dimensions, and material for efficient and safe operation.
Preparing and Cleaning the Jerry Can
Before starting to use the jerry can, it’s crucial to properly clean and prepare it by removing any dirt or residue, and then ensuring it’s completely dry. Here is the cleaning process and safety precautions to follow:
-
Rinse the jerry can with warm water and a mild detergent to remove any dirt or debris. Use a sponge or brush to scrub the inside and outside of the can thoroughly.
-
Rinse the can again with clean water to remove any soap residue. Make sure to rinse it multiple times to ensure all the soap is gone.
-
After rinsing, allow the jerry can to air dry completely. This is important to prevent any moisture from causing rust or corrosion.
By following these cleaning steps, you can ensure that your jerry can is ready for modification.
Now, let’s discuss cutting open and modifying the jerry can for ventilation.
Cutting Open and Modifying the Jerry Can for Ventilation
I’ll explain how to use a few small holes in the jerry can to provide adequate ventilation for the wood stove. When modifying the jerry can for ventilation, it is important to take safety precautions and use the right tools. Here is a table outlining the necessary steps:
Step | Safety Precautions | Tools Needed |
---|---|---|
1 | Wear protective gloves and goggles | Drill |
2 | Work in a well-ventilated area | Marker |
3 | Ensure the jerry can is empty and clean | Metal file |
4 | Mark the desired ventilation holes on the can | Safety glasses |
5 | Use the drill to create the holes | Protective gloves |
6 | Smooth the edges of the holes with the metal file | Goggles |
7 | Clean any metal shavings from the can | Clean cloth |
Adding Legs and a Base to the Wood Stove
I can attach some sturdy legs and a stable base to the wood stove to ensure it stands securely on any surface. Achieving stove stability is crucial to prevent accidents and maintain proper functioning.
When choosing materials for the legs and base, it’s important to consider their strength, durability, and heat resistance. Here are three essential elements to consider:
-
Material Selection: Opt for materials that can withstand high temperatures, such as stainless steel or cast iron. These materials are known for their strength and ability to withstand the intense heat generated by the wood stove.
-
Design and Construction: The design of the legs should provide sufficient support and stability. Consider a tripod or four-leg design for optimal balance. Additionally, ensure the legs are securely attached to the stove body to prevent any wobbling or instability.
-
Base Size and Shape: The base of the wood stove should be wide and flat enough to distribute the weight evenly, ensuring stability on various surfaces. A larger base will provide better stability, especially when using the stove on uneven or soft ground.
Testing and Using Your DIY Wood Stove
I’ve successfully tested and now use my DIY wood stove to cook meals while camping. It’s a simple yet effective solution for outdoor cooking. However, before using it, I took several testing techniques and safety precautions to ensure its efficiency and my own well-being.
Firstly, I conducted a leak test to ensure there were no air or gas leaks that could potentially cause a fire hazard. This involved pressurizing the stove and checking for any signs of leakage. I also tested its heat distribution by placing a pot of water on the stove and monitoring how evenly the heat was dispersed.
To further ensure safety, I implemented safety precautions such as maintaining a safe distance between the stove and any flammable objects, using heat-resistant gloves when handling the stove, and having a fire extinguisher nearby.
Using my DIY wood stove has been a game-changer for my camping trips. Not only does it provide a reliable cooking source, but it also allows me to enjoy the natural surroundings without relying on traditional campfire cooking methods. By following proper testing techniques and safety precautions, I can confidently cook my meals and enjoy the great outdoors.
Frequently Asked Questions
How Long Does It Take to Build a Wood Stove From a Jerry Can?
It takes about 2 hours to build a wood stove from a jerry can. The benefits of using a wood stove include cost-effective heating and a sustainable fuel source. Regular cleaning and maintenance ensure optimal performance.
Can I Use Any Type of Wood for the Base of the Wood Stove?
I can use different types of wood for the base of the wood stove, but it’s important to consider safety precautions when using it indoors. Proper ventilation and non-flammable materials are crucial.
Is It Safe to Use the Wood Stove Indoors?
Oh, using a wood stove indoors, what a brilliant idea! Let me enlighten you on the potential health hazards and share some precise tips for safely using one. Shall we begin?
Can I Paint the Jerry Can After Modifying It?
Yes, you can paint the modified jerry can using various painting techniques. It is important to choose a paint that can withstand high temperatures and adhere well to metal surfaces. Make sure to consider alternative fuel sources when painting for safety.
What Tools Do I Need to Build a Wood Stove From a Jerry Can?
To build a wood stove from a jerry can, I need a few tools like a jigsaw, drill, and metal file. Safety precautions are crucial, and alternative materials can be used if necessary.
Can I Use a Wood Stove Insert in a DIY Jerry Can Wood Stove?
When considering building a wood stove fireplace, it’s crucial to factor in the cost of materials and construction. However, if you’re planning to use a wood stove insert in a DIY Jerry Can Wood Stove, the cost of building a wood stove fireplace may decrease significantly. This alternative method combines affordability and practicality, making it an excellent choice for those seeking an alternative heating solution.
Can Duraflame Logs Be Used in a Wood Stove Made from a Jerry Can?
Can Duraflame logs be used in a wood stove made from a jerry can? Many DIY enthusiasts wonder about using Duraflame logs in a wood stove. While Duraflame logs are commonly used in traditional fireplaces, their use in a jerry can wood stove may not be ideal. It’s important to consider the safety and compatibility aspects of using duraflame logs in wood stoves specifically designed for them.
Conclusion
After carefully selecting the right jerry can, preparing and modifying it for ventilation, and adding sturdy legs and a stable base, your DIY wood stove is ready for testing and use.
With its compact design and efficient functionality, this wood stove provides a practical and cost-effective heating solution for outdoor activities or emergency situations.
Embrace the warmth and convenience of this homemade creation, bringing comfort and coziness wherever you go.
Growing up surrounded by the vast beauty of nature, Sierra was always drawn to the call of the wild. While others sought the comfort of the familiar, she ventured out, embracing the unpredictable and finding stories in the heartbeat of nature.
At the epicenter of every remarkable venture lies a dynamic team—a fusion of diverse talents, visions, and passions. The essence of Best Small Wood Stoves is crafted and refined by such a trio: Sierra, Logan, and Terra. Their collective expertise has transformed the platform into a leading authority on small wood stoves, radiating warmth and knowledge in equal measure.
-
Wood Stove3 months ago
How To Build A Thermoelectric Generator For A Wood Stove
-
Wood Stove4 months ago
How To Use Damper And Draft On Wood Stove
-
Wood Stove4 months ago
When To Open And Close Damper On Wood Stove
-
Wood Stove4 months ago
How Far Does Wood Stove Have To Be From Wall
-
Wood Stove3 months ago
How Does A Circulator Wood Stove Work
-
Pellet Stoves3 months ago
Why Is My Wood Pellet Stove Putting so Much Soot
-
Wood Stove4 months ago
What Can I Use As Insulation On Wood Stove Pipes
-
Pellet Stoves3 months ago
How to Make a Pellet Basket for Wood Burning Stoves