Connect with us

Wood Stove

How Can You Effectively Maintain an Outdoor Wood Stove for Cooking?

Published

on

An image showcasing a well-maintained outdoor wood stove nestled in a serene natural setting

We recognize that maintaining an outdoor wood stove for cooking can be somewhat challenging. Nonetheless, with the right techniques, it becomes an easy job.

In this article, we will share practical tips and methods to keep your outdoor wood stove in top shape.

From cleaning methods and weather protection to regular inspections and rust prevention, we’ve got you covered.

So let’s dive in and learn how to effectively maintain your outdoor wood stove for a delightful cooking experience.

Key Takeaways

  • Regularly clean the stove’s interior and exterior surfaces to remove residue and prevent rust formation.
  • Inspect and maintain the weatherproof covers and insulation to protect the stove from damage and wear.
  • Apply a protective coating to prevent rust and corrosion during storage.
  • Use heat-resistant paints designed for outdoor use to prevent rust and extend the durability of the stove’s appearance.

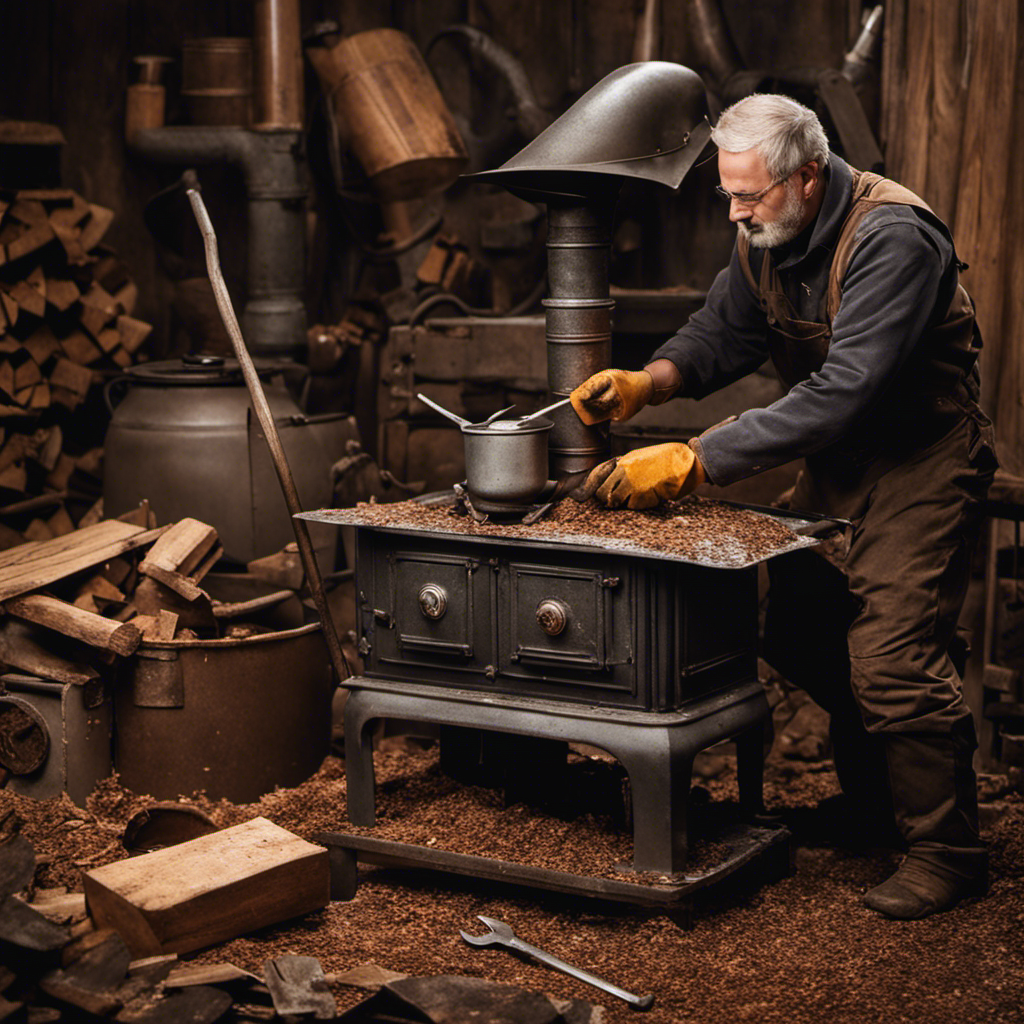
Cleaning Methods for Your Outdoor Wood Stove

We’ve found that using a wire brush and a mixture of vinegar and water is the most effective way to clean our outdoor wood stove. Regular maintenance is crucial to ensure its longevity and efficiency.

When cleaning, start by removing any ashes or debris from the stove. Then, using a wire brush, scrub the interior and exterior surfaces to remove any built-up residue. The vinegar and water mixture is an excellent natural cleaner that helps break down grease and grime. Simply spray the mixture onto the surfaces and scrub away. Rinse thoroughly with water and allow the stove to dry completely before using it again.

Advertisement

Cleaning your outdoor wood stove regularly not only improves its performance but also ensures the safety of your cooking environment.

Now, let’s discuss weather protection for your outdoor wood stove.

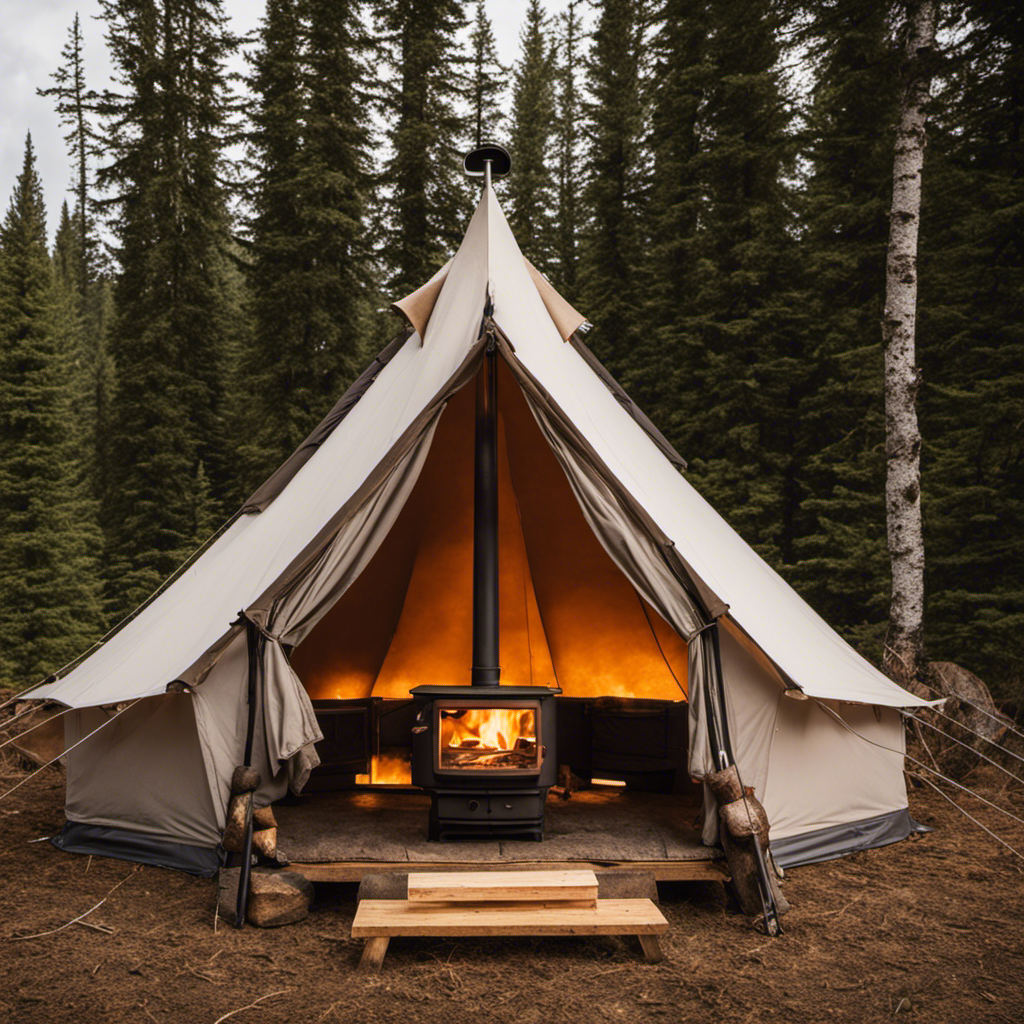
Weather Protection for Your Outdoor Wood Stove

One important aspect of maintaining our outdoor wood stove is ensuring proper weather protection to prevent any damage caused by rain or snow. Protecting our wood stove from the elements is crucial to its longevity and functionality. There are several options available to weatherproof our outdoor wood stove, such as weatherproof covers and insulation.

To give you a clearer picture, here is a table comparing different weatherproof covers and insulation options:

Weatherproof Covers Insulation Options
Heavy-duty tarp Fiberglass
Waterproof cover Ceramic
Insulated jacket Rockwool
Vinyl cover Foam board
Aluminum cover Reflective foil

These covers and insulation options provide varying levels of protection against rain, snow, and cold temperatures. When choosing the right weatherproof cover or insulation for our outdoor wood stove, it is important to consider factors such as durability, efficiency, and ease of installation.

Advertisement

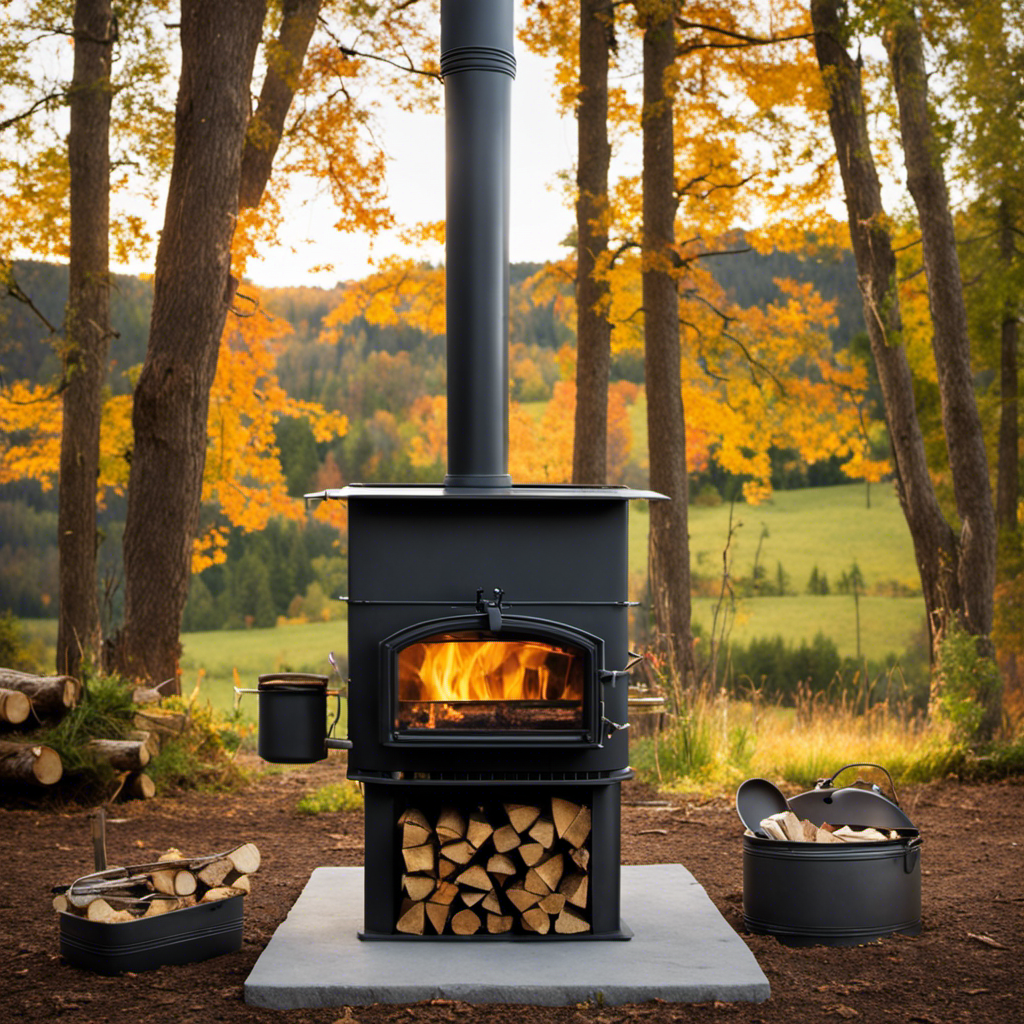
Proper Storage Techniques for Your Outdoor Wood Stove

Sometimes, we store our outdoor wood stove in a shed during the off-season to protect it from the elements, but other times we leave it outside with a weatherproof cover. Proper storage techniques are essential to ensure the longevity and efficiency of your outdoor wood stove.

Here are some tips to help you maintain your stove effectively:

  • Clean the stove thoroughly before storing it to prevent the buildup of dirt and debris.
  • Make sure to remove any ash and soot from the stove’s interior and exterior surfaces.
  • Apply a protective coating to the stove to prevent rust and corrosion during storage.
  • Create a maintenance schedule to remind you of regular cleaning and inspection tasks.

Regular Inspection of Your Outdoor Wood Stove

To ensure the safety and efficiency of our outdoor wood stove, we should regularly inspect it for any signs of damage or wear and tear. Regular maintenance is crucial in preventing damage and ensuring that the stove functions optimally. By performing routine inspections, we can identify any potential issues before they escalate into major problems.

Start by examining the exterior of the stove for any cracks, dents, or loose parts. Check the chimney and flue for obstructions and clean them if necessary. Inspect the firebox and grates for any signs of rust or corrosion. Clean out any ash or debris that may have accumulated inside.

Additionally, pay attention to the stove’s gaskets and seals. These components can deteriorate over time, leading to heat loss and decreased efficiency. Replace them if needed, ensuring a tight seal.

By regularly inspecting and maintaining our outdoor wood stove, we can prevent damage and ensure its longevity.

Advertisement

In the next section, we’ll discuss rust prevention techniques and the use of heat-resistant paints to further protect our stove.

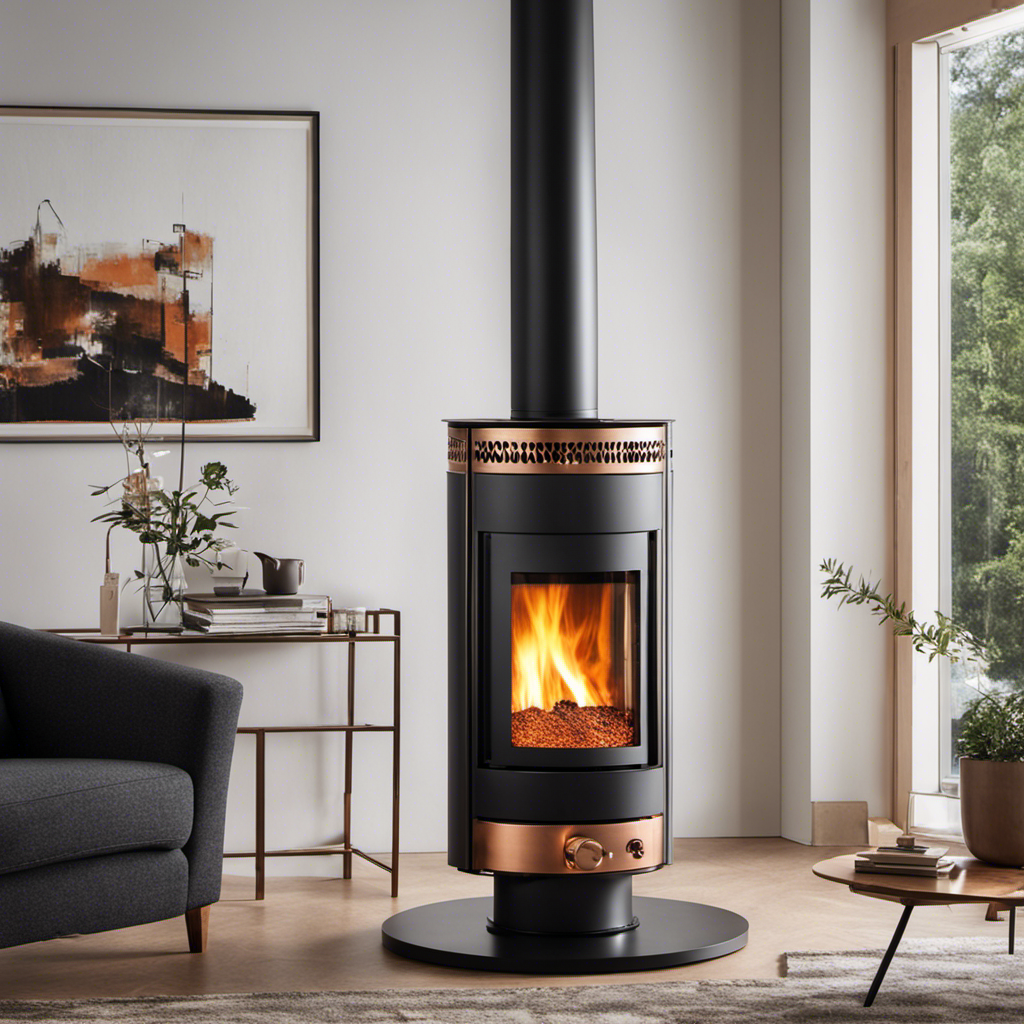
Rust Prevention and Heat-Resistant Paints for Your Outdoor Wood Stove

When it comes to maintaining an outdoor wood stove, rust prevention is crucial for ensuring its longevity.

One effective method is to apply heat-resistant paints that not only protect against rust but also withstand the high temperatures generated by the stove.

However, it’s important to choose the right paint that’s specifically designed for outdoor use and can withstand the elements.

Best Rust Prevention Methods

We’ve found that applying a high-quality rust-resistant paint to our outdoor wood stove has been the best method for preventing rust and ensuring its longevity. Not only does this paint form a protective barrier against moisture and corrosion, but it also withstands the high temperatures generated by the stove.

Advertisement

In addition to using rust-resistant paint, here are some other effective methods for preventing rust on your outdoor wood stove:

  • Regular cleaning and removal of ashes and debris
  • Applying a rust inhibitor or protective coating to exposed metal surfaces
  • Keeping the stove covered when not in use to protect it from the elements
  • Inspecting the stove regularly for any signs of rust or damage and addressing them promptly

Choosing the Right Paint

Our top priority is finding a paint that is both rust-resistant and heat-resistant for our outdoor wood stove. When it comes to painting our stove, we need a high-quality paint that can withstand the extreme temperatures it will be exposed to. Heat resistant paint options are a great choice for this purpose. These paints are designed to withstand high temperatures without blistering or peeling, ensuring the longevity of our stove. Additionally, using a high-quality paint provides several benefits. It not only protects the stove from rust, but also enhances its appearance, making it more visually appealing. Furthermore, a durable paint can withstand the wear and tear of outdoor use, allowing us to enjoy our cooking experience without worrying about constant maintenance. In the table below, we have listed some popular heat resistant paint options that we can consider for our outdoor wood stove.

Paint Brand Temperature Resistance
Brand A Up to 1200°F
Brand B Up to 1500°F
Brand C Up to 1800°F
Brand D Up to 2000°F
Brand E Up to 2200°F

Longevity of Heat-Resistant Paints

In order to ensure the longevity of our outdoor wood stove, we should regularly inspect and maintain the heat-resistant paints by applying a rust preventative coating and conducting touch-ups as needed. This will help to protect the stove from the harsh elements and extend the durability of the paint.

Here are some practical tips to maintain the paint on your outdoor wood stove:

  • Clean the surface thoroughly before applying any coatings.
  • Apply a rust preventative coating to prevent corrosion and extend the life of the paint.
  • Conduct regular inspections to identify any areas that may need touch-ups.
  • Use a heat-resistant paint specifically designed for outdoor wood stoves to ensure maximum durability.

Obtaining Replacement Parts for Your Outdoor Wood Stove

When it comes to obtaining replacement parts for your outdoor wood stove, it’s important to find reliable options that will ensure the stove’s continued functionality.

We understand the frustration that can come with searching for specific components, but rest assured that there are cost-effective options available.

Reliable Replacement Parts

Although it may be challenging, we can find reliable replacement parts for our outdoor wood stove if we search online or contact the manufacturer. It’s important to have access to reliable suppliers when it comes to replacing parts for our outdoor wood stove.

Advertisement

Here are some tips to help us find the right replacement parts:

  • Research online: Utilize online platforms and websites that specialize in outdoor wood stove replacement parts. Look for websites with positive customer reviews and a wide selection of parts.

  • Contact the manufacturer: Reach out to the manufacturer directly to inquire about replacement parts. They may have specific recommendations or be able to provide the parts themselves.

  • Join online forums or communities: Engage with other outdoor wood stove owners who may have experience finding reliable suppliers. They can provide valuable insights and recommendations.

  • Seek professional advice: Consult with a professional or expert in outdoor wood stoves who can guide you towards reliable suppliers and offer maintenance tips for your stove.

Finding Specific Components

We can easily locate the specific components we need for our outdoor wood stove by reaching out to reliable suppliers or searching online. Finding suppliers who specialize in wood stove parts can ensure that we get high-quality components that are compatible with our stove model. It’s important to choose suppliers who have a good reputation and offer warranty options for their products.

Additionally, troubleshooting common issues with our outdoor wood stove can help us identify the specific components that need replacement. By understanding the functioning of the stove and referring to the user manual, we can identify the faulty parts and find suitable replacements.

Regular maintenance and cleaning of the stove can also prevent common issues and prolong the lifespan of the components.

Cost-Effective Options Available

There are several cost-effective options available to obtain replacement parts for our outdoor wood stove, such as purchasing from second-hand sellers or exploring discounted options online. When considering cost-saving measures for maintaining our wood stove, it’s important to explore alternative fuel sources. Here are some suggestions to help you save money while keeping your stove running efficiently:

Advertisement
  • Consider using reclaimed or salvaged wood as a fuel source. This can be obtained from construction sites, tree removal services, or even old furniture.
  • Explore the option of using wood pellets instead of traditional firewood. Wood pellets are made from compressed sawdust and are a more efficient and cost-effective fuel source.
  • Look into biofuels, such as corn or soybeans, which can be converted into pellets or briquettes for use in your wood stove.
  • Take advantage of community programs or initiatives that offer discounted or free firewood to help reduce costs.

By implementing these cost-saving measures and exploring alternative fuel sources, you can effectively maintain your outdoor wood stove without breaking the bank.

Transitioning into the subsequent section about safe wood fuels and airflow control, let’s now discuss how to ensure optimal performance and safety for your wood stove.

Are the Maintenance Steps for an Outdoor Wood Stove Different from an Indoor Wood Stove?

Yes, the maintenance steps for an outdoor wood stove are slightly different from an indoor wood stove. It is essential to follow specific wood stove safety steps in both cases, but outdoor stoves may require extra protection from the elements and regular checks for debris or critters.

Safe Wood Fuels and Airflow Control for Your Outdoor Wood Stove

When using our outdoor wood stove, it’s important to understand how to safely control airflow and choose the right wood fuels. Proper wood stove maintenance and fuel selection are crucial for efficient and safe cooking.

To maintain your wood stove, regularly clean the stovepipe and chimney to prevent the buildup of creosote, which can lead to chimney fires. Additionally, inspect the gaskets and replace them if necessary to ensure a tight seal.

As for fuel selection, it’s best to use seasoned hardwoods like oak, maple, or birch. These woods burn longer and produce less smoke and creosote. Avoid using softwoods, as they burn quickly and can create excessive smoke.

Advertisement

Frequently Asked Questions

What Are the Best Cleaning Methods for Removing Stubborn Stains and Grease Buildup on an Outdoor Wood Stove?

To effectively maintain an outdoor wood stove for cooking, we use cleaning methods to remove stubborn stains and grease buildup. Additionally, preventing rust and using recommended heat resistant paints can help prolong the stove’s lifespan.

How Can I Protect My Outdoor Wood Stove From Extreme Weather Conditions Such as Heavy Rain and Snow?

To protect our outdoor wood stove from extreme weather conditions, we use protective covers and ensure proper positioning. This safeguards it against heavy rain and snow, preserving its functionality and longevity.

Are There Any Specific Techniques for Storing an Outdoor Wood Stove During the Offseason to Prevent Damage?

When it comes to storing techniques for an outdoor wood stove during the offseason to prevent damage, there are a few key steps to follow. Proper cleaning, covering, and storing in a dry location are essential.

How Often Should I Inspect My Outdoor Wood Stove for Any Potential Issues or Maintenance Needs?

We make sure to regularly inspect our outdoor wood stove for any potential issues or maintenance needs. It’s important to stay on top of things to ensure the stove is in good working condition.

What Are Some Effective Ways to Prevent Rust on an Outdoor Wood Stove, and What Types of Heat-Resistant Paints Are Recommended for This Purpose?

To prevent rust on an outdoor wood stove, we recommend regularly cleaning and drying it after use, applying a heat-resistant paint specifically designed for metal surfaces, and ensuring proper ventilation to prevent moisture buildup.

Advertisement

Conclusion

In conclusion, maintaining an outdoor wood stove for cooking is crucial for its longevity and efficiency. By regularly cleaning, protecting from weather, storing properly, inspecting, preventing rust, and using the right fuels and airflow control, you can ensure optimal performance.

Just like tending to a well-tuned instrument, caring for your outdoor wood stove will result in a harmonious cooking experience that will delight your taste buds and warm your soul. So, embrace the art of stove maintenance and let the culinary symphony begin!

Logan’s affair with adventure began in childhood. He hailed from a small town where vast forests bordered one side and endless shores stretched on the other. His days were spent exploring uncharted woods, climbing tall trees, or listening to the tales of old sailors. This early immersion in a world brimming with stories and mysteries became the foundation of his passion for writing.

Continue Reading
Advertisement

Wood Stove

How Long Does It Take Wood To Ignite Aftee Being Put In A Wood Stove

Published

on

By

An image capturing the mesmerizing scene of a wood stove, with a bed of glowing embers beneath carefully stacked logs, as tendrils of thin smoke gracefully curl upwards, depicting the anticipation of wood slowly igniting

I must admit, the wait for wood to catch fire in a wood stove can seem never-ending. However, do not worry, as in this article, I will share some strategies and tips to speed up the process.

From understanding the temperature and moisture content of the wood to choosing the right type and preparing it efficiently, we’ll explore all the factors that affect wood ignition time.

So let’s dive in and get that fire blazing in no time!

Key Takeaways

  • Weather conditions and moisture content of the wood can affect the ignition time.
  • Properly seasoned wood with around 20% moisture content ignites more easily.
  • Smaller wood logs and softer woods tend to ignite faster than larger and harder woods.
  • Proper wood storage and preparation, such as keeping it off the ground, using fire starters, and maintaining airflow, can help ensure faster ignition in a wood stove.

Factors Affecting Wood Ignition Time

I’m curious about the factors that can affect the time it takes for wood to ignite in a wood stove.

One of the key factors is the weather conditions. Cold and damp weather can make it harder for the wood to catch fire, as moisture content in the wood can be high. It’s important to ensure that the wood is properly seasoned and has a moisture content of around 20% for optimal ignition.

Another factor to consider is the size of the wood logs. Smaller logs tend to ignite more quickly as they’ve a larger surface area exposed to the heat source.

Advertisement

Additionally, the type of wood being used can also affect ignition time, with softer woods igniting faster than harder woods.

Temperature and Moisture Content of Wood

The optimal moisture content for wood is around 20%, which ensures efficient ignition in a wood stove. The wood ignition process is influenced by various factors, and the moisture content plays a critical role in determining how quickly the wood will ignite.

When wood is too wet, it requires more energy to burn off the excess moisture before it can reach its ignition point. On the other hand, if the wood is too dry, it may ignite too quickly and burn too rapidly, leading to inefficient combustion and wasted energy.

Therefore, it’s essential to properly store wood to maintain its moisture content within the optimal range. Proper wood storage involves keeping the wood off the ground, covering it to protect it from rain or snow, and allowing for proper airflow to prevent excessive moisture buildup.

Type of Wood and Its Density

I prefer using hardwoods like oak or maple due to their density and their ability to burn longer and provide more heat. When it comes to wood species selection, it’s important to consider the impact of wood moisture content. Here are three key points to keep in mind:

Advertisement

  1. Moisture content affects combustion efficiency: Wet wood contains a higher moisture content, which leads to incomplete combustion and the production of more smoke and pollutants. Dry hardwoods, on the other hand, burn more efficiently and produce less smoke.

  2. Heat output is influenced by wood density: Hardwoods have a higher density compared to softwoods, resulting in a higher heat output. This means that hardwoods like oak and maple can provide more warmth and keep your space cozy for a longer period of time.

  3. Longer burn time with hardwoods: Due to their density, hardwoods burn at a slower rate, allowing for a longer burn time per log. This means less frequent refueling and a more consistent heat source.

Preparing Wood for Efficient Ignition

To ensure efficient ignition, I always make sure to properly split and dry my firewood. Proper wood storage is essential for achieving this. It’s important to store the firewood in a well-ventilated area, off the ground and protected from moisture. This allows the wood to dry properly and reduces the risk of it being damp or rotting.

When it comes to igniting the wood in a wood stove, using fire starters or kindling can greatly speed up the process. These small pieces of flammable material help create a hot and sustained flame, which in turn ignites the larger pieces of wood.

By incorporating these techniques, you can ensure a faster and more efficient ignition in your wood stove.

Now, let’s move on to some tips for faster wood ignition in a wood stove.

Tips for Faster Wood Ignition in a Wood Stove

Using kindling and ensuring proper airflow are key to achieving faster wood ignition in a wood stove. When it comes to stubborn wood that’s difficult to ignite, there are several ignition techniques that can be employed:

Advertisement

  1. Preparation: Properly seasoned wood with a moisture content below 20% is essential for efficient ignition. This ensures that the wood is dry enough to catch fire quickly.

  2. Kindling: Creating a bed of small, dry kindling underneath the larger logs helps to ignite the fire faster. Kindling acts as a fuel source that ignites easily and produces enough heat to catch the larger logs on fire.

  3. Airflow: Adequate airflow is crucial for wood ignition. By opening the damper or adjusting the air vents, you can ensure that enough oxygen is getting to the fire, promoting faster ignition.

While some may consider using accelerants to speed up wood ignition, it’s important to note that this can be dangerous and may result in uncontrollable fires or the release of harmful chemicals. It’s recommended to rely on proper ignition techniques and patience for a safe and efficient wood ignition process.

Frequently Asked Questions

Can I Use Treated Wood in My Wood Stove?

Using pressure treated wood in a wood stove is not recommended due to the chemicals it releases when burned. It is safer to use untreated wood or other alternatives for faster ignition.

What Is the Best Type of Wood to Use for Faster Ignition in a Wood Stove?

Fast burning woods like pine or fir can ignite in a wood stove within minutes. To ensure efficient wood stove usage, it’s important to choose dry, seasoned firewood and properly maintain the stove.

Are There Any Safety Precautions I Should Take When Igniting Wood in a Wood Stove?

When igniting wood in a wood stove, it is important to take safety precautions. Keep a fire extinguisher nearby and ensure proper ventilation. Additionally, the moisture content of the wood can affect its ignition time.

Can I Use Wood Chips or Sawdust for Ignition in a Wood Stove?

I can use wood chips or sawdust for ignition in a wood stove. They are effective fire starters for faster ignition. The small size and high surface area make them ignite quickly, reducing the time needed for the wood to catch fire.

Advertisement

How Does the Size of the Wood Affect Its Ignition Time in a Wood Stove?

Moisture content significantly affects wood ignition in a wood stove. Smaller pieces of wood ignite faster due to increased surface area. However, larger pieces provide longer burn times. Consider the advantages and disadvantages of each for efficient use in a wood stove.

Conclusion

After careful analysis of the factors affecting wood ignition time, it’s safe to say that wood doesn’t ignite instantly in a wood stove. Contrary to popular belief, wood requires time to reach its ignition point, which is influenced by factors such as temperature, moisture content, and wood density.

To expedite the process, it’s crucial to choose the right type of wood and ensure it’s properly prepared. So, if you were expecting an immediate burst of flames, you might’ve to wait a little longer.

Continue Reading

Wood Stove

Why Does Your Wood Stove Smoke

Published

on

By

An image capturing a rustic, cozy living room

Dealing with the smoke from your wood stove can be a real nuisance. But don’t worry, I’m here to provide some tips on how to manage it.

Understanding the root causes of this predicament is crucial. Insufficient airflow, improper wood selection, damaged chimney, inadequate maintenance, and incorrect installation are the major culprits.

Let’s delve into each of these factors to uncover the secrets behind why your wood stove may be producing that bothersome smoke.

Key Takeaways

  • Blocked vents disrupt combustion process and lead to incomplete burning and smoke generation.
  • Burning wet or high-moisture wood results in inefficient burning and increased creosote buildup.
  • Cracked or deteriorating chimney can cause leaks and smoke entry.
  • Inadequate stove maintenance, including dirty burners and clogged flue, can lead to smoke issues.

Insufficient Airflow

I’m having trouble with my wood stove smoking because there’s not enough airflow. A common cause of insufficient airflow is blocked vents. When the vents are blocked, the combustion process is disrupted, leading to incomplete burning of the wood and the generation of smoke.

To ensure efficient combustion and minimize smoke, it’s crucial to maintain clear and unobstructed vents. Blocked vents can result from a buildup of creosote or debris, so regular cleaning is essential.

Additionally, proper placement of the stove is crucial to ensure adequate airflow. Make sure that the stove is positioned away from any obstructions, such as furniture or curtains, that might impede the flow of air.

Advertisement

Improper Wood Selection

To prevent excessive smoke and poor combustion, it’s important to avoid burning wet wood or wood with high moisture content, as it can result in inefficient burning and increased creosote buildup. When burning seasoned firewood, which has a moisture content of around 20% or less, the wood burns more efficiently, producing less smoke and providing more heat output. Seasoned firewood has been properly dried for at least six months, allowing the moisture content to decrease significantly. This ensures that the wood burns cleanly and effectively in your wood stove. However, if you burn wood with high moisture content, it will create more smoke and reduce the overall efficiency of your stove. This can also lead to a higher risk of creosote buildup in your chimney, which can be dangerous and increase the chance of a chimney fire. Therefore, it’s crucial to always use dry, seasoned firewood to prevent excessive smoke and maintain proper combustion in your wood stove.

Now, let’s discuss another potential reason for excessive smoke: a damaged or leaky chimney.

Damaged or Leaky Chimney

A damaged or leaky chimney can cause smoke to enter your home, which can be hazardous to your health and safety. It’s important to address any issues with your chimney promptly to ensure the proper functioning of your wood stove.

Here are three signs of a damaged chimney that you should be aware of:

  1. Cracked or crumbling mortar: If you notice any cracks or crumbling in the mortar joints of your chimney, it could indicate water damage or structural issues. This can lead to leaks and smoke entering your home.

  2. Rusty or deteriorating chimney cap: The chimney cap plays a crucial role in keeping out rain, snow, debris, and animals. If it’s rusty or deteriorating, it may not be able to perform its function effectively, allowing smoke to escape into your living space.

  3. Smoke stains or odors: If you notice smoke stains on the walls or ceilings near your chimney or detect a persistent smoky odor in your home, it could be a sign of a leaky chimney. This should be addressed promptly to prevent further damage and potential health risks.

When faced with a damaged chimney, there are various repair options available, such as chimney relining, chimney crown repair, and chimney flashing repair. It’s important to consult with a professional chimney technician to determine the best course of action for your specific situation.

Advertisement

Inadequate Stove Maintenance

One of the main causes of smoke in your home can be the result of inadequate stove maintenance. A dirty stove and a clogged flue are two common culprits that can lead to smoke issues. When the stove isn’t properly cleaned, a buildup of soot and debris can occur on the burners, causing incomplete combustion and the production of smoke.

Additionally, a clogged flue prevents the proper ventilation of smoke, leading to its accumulation inside your home. Regular cleaning and maintenance of your stove, including cleaning the burners and ensuring the flue is clear, is crucial in preventing smoke issues.

It’s recommended to schedule annual professional maintenance to ensure your stove is in optimal condition and to avoid the inconvenience and potential health hazards associated with smoke in your home.

Incorrect Stove Installation

I regret not hiring a professional for my stove installation, as it has caused numerous issues and potential hazards. When it comes to installing a wood stove, proper positioning and sizing are crucial factors that shouldn’t be taken lightly.

Here are three key reasons why improper stove positioning and incorrect flue size can lead to problems:

Advertisement
  1. Inadequate clearance: Placing the stove too close to combustible materials can increase the risk of fire. It’s essential to follow the manufacturer’s guidelines for proper clearances to ensure the safe operation of the stove.

  2. Inefficient heating: Incorrect positioning can hinder the stove’s ability to distribute heat effectively throughout the room. This can result in uneven temperatures and wasted energy, leading to discomfort and higher heating costs.

  3. Insufficient draft: Using an incorrect flue size can impede the stove’s ability to expel smoke and gases properly. This can lead to backdrafting, where smoke enters the room instead of being directed outside. Aside from the health hazards, backdrafting can damage the stove and cause indoor air quality issues.

To avoid these problems, it’s essential to consult a professional for the proper installation of your wood stove. They’ll ensure that the stove is positioned correctly and the flue size is appropriate for efficient and safe operation.

Frequently Asked Questions

Can Smoking Occur if There Is Sufficient Airflow in the Wood Stove?

Yes, smoking can still occur in a wood stove even with sufficient airflow. Factors like improper wood placement, damp or unseasoned wood, or a clogged chimney can all contribute to smoking issues. Proper troubleshooting can resolve these problems and improve wood stove performance.

What Are Some Common Wood Types That Should Be Avoided to Prevent Smoking in a Wood Stove?

To prevent smoking in a wood stove, it is important to avoid using wood types like pine, as they contain high levels of resin. Additionally, properly seasoning firewood is crucial to reduce smoke production.

How Can I Identify if My Chimney Is Damaged or Leaking?

To identify chimney damage or leaks, conduct a thorough chimney inspection. Look for cracks, loose bricks, or crumbling mortar. Additionally, consider installing a smoke detector near the stove to quickly detect any smoke issues.

Besides Regular Cleaning, What Other Maintenance Practices Can Help Prevent Smoking in a Wood Stove?

Other maintenance practices, such as ensuring proper airflow and avoiding certain wood types, can help prevent smoking in a wood stove. Identifying chimney damage or leaks and checking for correct stove installation are also crucial.

Advertisement

What Are Some Signs of Incorrect Stove Installation That May Lead to Smoking?

Installing a wood stove improperly can lead to frustrating smoke issues. One key sign is if the chimney height is too short. Another is using unseasoned wood, which can cause excessive smoke.

What Are Some Wood Stove Brands That Have Smoke-Reducing Features?

Looking for the best wood stove brands with smoke-reducing features? Look no further. With increasing concerns about air pollution, several brands are innovating their wood stoves to minimize smoke emissions. Some notable options include Vermont Castings, Jøtul, and Blaze King. These brands prioritize efficiency and clean burning, ensuring you can enjoy the warmth of a wood stove while minimizing environmental impact.

Conclusion

In conclusion, when your wood stove smokes, it’s often due to factors such as:

  • Insufficient airflow
  • Improper wood selection
  • A damaged or leaky chimney
  • Inadequate stove maintenance
  • Incorrect installation

To prevent this, you should:

  • Ensure proper ventilation
  • Use seasoned and dry wood
  • Inspect and repair your chimney regularly
  • Maintain your stove diligently
  • Ensure professional installation

By addressing these issues, you can enjoy a smoke-free and efficient wood stove experience, creating a cozy and inviting atmosphere in your home.

Continue Reading

Wood Stove

How To Build A Wood Stove From A Jerry Can

Published

on

By

An image showcasing the step-by-step process of transforming a jerry can into a wood stove

I have always been fascinated by the concept of transforming ordinary objects into useful tools.

So when I came across an old jerry can in my garage, I knew I had the perfect opportunity to create my own wood stove.

In this article, I’ll guide you through the process of transforming a jerry can into a functional and efficient wood stove, complete with ventilation, legs, and a base.

Get ready to unleash your inner DIY enthusiast and start enjoying the warmth of your homemade wood stove.

Key Takeaways

  • Consider the capacity and dimensions of the jerry can
  • Compare different materials for jerry cans
  • Prepare and clean the jerry can properly
  • Take safety precautions and use the right tools when modifying the jerry can

Selecting the Right Jerry Can for Your Wood Stove

I’m trying to figure out which jerry can is the best option for my wood stove.

When it comes to choosing the right size jerry can for your wood stove, it’s important to consider the capacity and dimensions. A larger can will hold more fuel, but it may be too bulky for your space. On the other hand, a smaller can may require more frequent refills.

Advertisement

Additionally, it’s crucial to compare different materials for jerry cans to ensure optimal wood stove performance. Metal cans are durable and resistant to heat, but they can also be heavy. Plastic cans, on the other hand, are lightweight and easier to handle, but may not withstand high temperatures as well.

Ultimately, finding the perfect jerry can for your wood stove is about balancing capacity, dimensions, and material for efficient and safe operation.

Preparing and Cleaning the Jerry Can

Before starting to use the jerry can, it’s crucial to properly clean and prepare it by removing any dirt or residue, and then ensuring it’s completely dry. Here is the cleaning process and safety precautions to follow:

  1. Rinse the jerry can with warm water and a mild detergent to remove any dirt or debris. Use a sponge or brush to scrub the inside and outside of the can thoroughly.

  2. Rinse the can again with clean water to remove any soap residue. Make sure to rinse it multiple times to ensure all the soap is gone.

  3. After rinsing, allow the jerry can to air dry completely. This is important to prevent any moisture from causing rust or corrosion.

By following these cleaning steps, you can ensure that your jerry can is ready for modification.

Now, let’s discuss cutting open and modifying the jerry can for ventilation.

Advertisement

Cutting Open and Modifying the Jerry Can for Ventilation

I’ll explain how to use a few small holes in the jerry can to provide adequate ventilation for the wood stove. When modifying the jerry can for ventilation, it is important to take safety precautions and use the right tools. Here is a table outlining the necessary steps:

Step Safety Precautions Tools Needed
1 Wear protective gloves and goggles Drill
2 Work in a well-ventilated area Marker
3 Ensure the jerry can is empty and clean Metal file
4 Mark the desired ventilation holes on the can Safety glasses
5 Use the drill to create the holes Protective gloves
6 Smooth the edges of the holes with the metal file Goggles
7 Clean any metal shavings from the can Clean cloth

Adding Legs and a Base to the Wood Stove

I can attach some sturdy legs and a stable base to the wood stove to ensure it stands securely on any surface. Achieving stove stability is crucial to prevent accidents and maintain proper functioning.

When choosing materials for the legs and base, it’s important to consider their strength, durability, and heat resistance. Here are three essential elements to consider:

  1. Material Selection: Opt for materials that can withstand high temperatures, such as stainless steel or cast iron. These materials are known for their strength and ability to withstand the intense heat generated by the wood stove.

  2. Design and Construction: The design of the legs should provide sufficient support and stability. Consider a tripod or four-leg design for optimal balance. Additionally, ensure the legs are securely attached to the stove body to prevent any wobbling or instability.

  3. Base Size and Shape: The base of the wood stove should be wide and flat enough to distribute the weight evenly, ensuring stability on various surfaces. A larger base will provide better stability, especially when using the stove on uneven or soft ground.

Testing and Using Your DIY Wood Stove

I’ve successfully tested and now use my DIY wood stove to cook meals while camping. It’s a simple yet effective solution for outdoor cooking. However, before using it, I took several testing techniques and safety precautions to ensure its efficiency and my own well-being.

Firstly, I conducted a leak test to ensure there were no air or gas leaks that could potentially cause a fire hazard. This involved pressurizing the stove and checking for any signs of leakage. I also tested its heat distribution by placing a pot of water on the stove and monitoring how evenly the heat was dispersed.

Advertisement

To further ensure safety, I implemented safety precautions such as maintaining a safe distance between the stove and any flammable objects, using heat-resistant gloves when handling the stove, and having a fire extinguisher nearby.

Using my DIY wood stove has been a game-changer for my camping trips. Not only does it provide a reliable cooking source, but it also allows me to enjoy the natural surroundings without relying on traditional campfire cooking methods. By following proper testing techniques and safety precautions, I can confidently cook my meals and enjoy the great outdoors.

Frequently Asked Questions

How Long Does It Take to Build a Wood Stove From a Jerry Can?

It takes about 2 hours to build a wood stove from a jerry can. The benefits of using a wood stove include cost-effective heating and a sustainable fuel source. Regular cleaning and maintenance ensure optimal performance.

Can I Use Any Type of Wood for the Base of the Wood Stove?

I can use different types of wood for the base of the wood stove, but it’s important to consider safety precautions when using it indoors. Proper ventilation and non-flammable materials are crucial.

Is It Safe to Use the Wood Stove Indoors?

Oh, using a wood stove indoors, what a brilliant idea! Let me enlighten you on the potential health hazards and share some precise tips for safely using one. Shall we begin?

Advertisement

Can I Paint the Jerry Can After Modifying It?

Yes, you can paint the modified jerry can using various painting techniques. It is important to choose a paint that can withstand high temperatures and adhere well to metal surfaces. Make sure to consider alternative fuel sources when painting for safety.

What Tools Do I Need to Build a Wood Stove From a Jerry Can?

To build a wood stove from a jerry can, I need a few tools like a jigsaw, drill, and metal file. Safety precautions are crucial, and alternative materials can be used if necessary.

Can I Use a Wood Stove Insert in a DIY Jerry Can Wood Stove?

When considering building a wood stove fireplace, it’s crucial to factor in the cost of materials and construction. However, if you’re planning to use a wood stove insert in a DIY Jerry Can Wood Stove, the cost of building a wood stove fireplace may decrease significantly. This alternative method combines affordability and practicality, making it an excellent choice for those seeking an alternative heating solution.

Can Duraflame Logs Be Used in a Wood Stove Made from a Jerry Can?

Can Duraflame logs be used in a wood stove made from a jerry can? Many DIY enthusiasts wonder about using Duraflame logs in a wood stove. While Duraflame logs are commonly used in traditional fireplaces, their use in a jerry can wood stove may not be ideal. It’s important to consider the safety and compatibility aspects of using duraflame logs in wood stoves specifically designed for them.

Conclusion

After carefully selecting the right jerry can, preparing and modifying it for ventilation, and adding sturdy legs and a stable base, your DIY wood stove is ready for testing and use.

Advertisement

With its compact design and efficient functionality, this wood stove provides a practical and cost-effective heating solution for outdoor activities or emergency situations.

Embrace the warmth and convenience of this homemade creation, bringing comfort and coziness wherever you go.

Continue Reading

Trending