I am an experienced DIY enthusiast ready to assist you in installing a wood stove pipe through your roof, guaranteeing a secure and effective setup.
Picture cozy evenings by the fire, with this step-by-step guide that covers all the necessary tools and materials, preparing the roof, installing the flashing, connecting and securing the stove pipe, and conducting thorough testing and inspection.
Let’s dive in and make your wood stove dreams a reality!
Key Takeaways
- Properly prepare the roof by inspecting and reinforcing it for stability.
- Choose the appropriate flashing material and ensure a tight seal for the roof flashing.
- Use high-quality stove pipe connectors and secure them tightly to prevent leaks.
- Regularly inspect and clean the stove pipe to ensure proper function and prevent buildup.

DuraVent DuraPlus Triple-Wall Chimney Stove Pipe, 6" x 36" – Galvanized Steel Vent and Exhaust Connector for Wood, Oil, Coal or Gas Stoves, Twist-Lock Installation, High-Temperature Venting System
Triple-wall pipe works to ensure that as you ignite your wood-burning stove, the comforting warmth it provides is…
As an affiliate, we earn on qualifying purchases.
As an affiliate, we earn on qualifying purchases.
Required Tools and Materials
I will need an article on the required tools and materials for installing a wood stove pipe through the roof.
When it comes to wood stove pipe maintenance and proper wood stove ventilation, it’s crucial to have the right tools and materials.
Firstly, you’ll need a chimney pipe, preferably made of stainless steel, as it’s durable and resistant to high temperatures.
Additionally, you’ll require a chimney cap to prevent debris and animals from entering the pipe.
Other necessary tools include a drill, a reciprocating saw, a screwdriver, and a level for accurate installation.

Furthermore, high-temperature silicone sealant is essential for sealing any gaps between the pipe and the roof.
Lastly, don’t forget about safety equipment such as gloves and goggles to protect yourself during the installation process.

Benfar 7 High Temp Roof Boot Kit Metal Roofing Flashing Boots with Screws Silicone Flexible for Wood Stove Pipe OD 6" to 11" 1 Pack BR04
Universal Fit- The #7 lexible roof pipe boot is designed to fit 6"-11" OD pipe. The rubber pipe…
As an affiliate, we earn on qualifying purchases.
As an affiliate, we earn on qualifying purchases.
Preparing the Roof for Installation
To ensure a secure and stable installation, it’s important to properly inspect and reinforce the roof before beginning the wood stove pipe installation. Start by examining the roof sealing to ensure there are no leaks or weak spots that could compromise the integrity of the installation. Repair any damaged areas and reinforce the roof structure if necessary.
Next, carefully determine the chimney positioning. It should be located at least 2 feet higher than any part of the roof within a 10-foot radius. This will help prevent any potential fire hazards.
Once the roof has been inspected and reinforced, we can move on to installing the roof flashing, which will provide a watertight seal around the wood stove pipe and protect the roof from potential leaks.
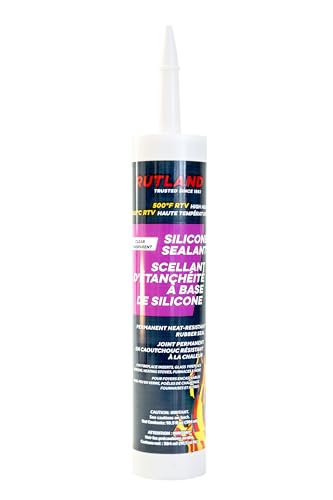
Rutland High Heat Silicone Sealant for BBQ Grills, USA-Made High Temp Gasket Maker Adhesive – UV Stable, Oil Resistant Waterproof & Non-Corrosive, 500F RTV Clear
Rutland High Temperature Silicone is a great solution to your sealant and adhesive needs
As an affiliate, we earn on qualifying purchases.
As an affiliate, we earn on qualifying purchases.
Installing the Roof Flashing
Before installing the roof flashing, it’s crucial to measure and cut the flashing material accurately, and then secure it tightly to ensure a proper seal. Common roof flashing mistakes can lead to leaks and damage, so it’s important to take the time to do it right.
There are different types of roof flashing materials available, including aluminum, copper, and rubber. Each material has its own advantages and disadvantages, so it’s essential to choose the one that best suits your needs.
Aluminum flashing is lightweight and easy to work with, while copper flashing is more durable and can withstand harsh weather conditions. Rubber flashing is flexible and provides a tight seal. By choosing the appropriate material and avoiding common mistakes, you can ensure a successful roof flashing installation.

Now, let’s move on to connecting and securing the stove pipe.

6 Inch Round Chimney Cap,Cone Top Chimney Cap with Screen,Roof Rain Wood Stove Pipe Cover Guard Outside Topper,Fireplace Exhaust Cover for 6" Stove Pipe-Galvanized Steel,Maximize Airflow Better Vent
Chimney Protector & Better Ventilation: 6 inch round chimney cap keep the leaves rain,snow and small animals from…
As an affiliate, we earn on qualifying purchases.
As an affiliate, we earn on qualifying purchases.
Connecting and Securing the Stove Pipe
After measuring and cutting the stove pipe, connecting it securely to the chimney is crucial for proper ventilation. To ensure a successful installation, here are some key steps to follow:
- Use high-quality stove pipe connectors to join sections of pipe together.
- Apply high-temperature stove pipe sealant to all connections to prevent leaks.
- Secure the stove pipe to the chimney using stainless steel screws or clamps.
Inspect the connections regularly to ensure they remain tight and intact. Clean the stove pipe regularly to prevent the buildup of creosote and other debris.
By connecting and maintaining the stove pipe properly, you can ensure efficient and safe operation of your wood stove.
However, it’s important to also test and inspect the installation to further ensure its effectiveness.
Testing and Inspecting the Installation
I will conduct a thorough inspection of the stove pipe installation to identify any potential issues.
When it comes to testing methods, there are a few key factors to consider.
First, I’ll check for proper clearance between the stove pipe and any combustible materials, such as insulation or structural components. This is crucial to ensure the safety of the installation.

Next, I’ll examine the joints and connections for any signs of leaks or gaps. Properly sealed connections are essential to prevent the escape of smoke and gases.
Additionally, I’ll assess the stability and support of the stove pipe to ensure it’s securely fastened and properly aligned.
Frequently Asked Questions
How Much Clearance Is Required Between the Wood Stove Pipe and Combustible Materials?
The clearance requirements between the wood stove pipe and combustible materials depend on the specific installation process. It is crucial to follow manufacturer’s instructions for safe installation and ensure proper distance to prevent fire hazards.
Can a Wood Stove Pipe Be Installed Through a Metal Roof?
Installing a wood stove pipe through a metal roof is possible. Make sure to use the appropriate materials and follow the proper installation guidelines to ensure a safe and efficient wood stove pipe installation.
What Is the Recommended Angle for the Wood Stove Pipe to Ensure Proper Draft?
The recommended angle for the wood stove pipe is crucial for ensuring proper draft. Troubleshooting wood stove pipe draft issues can be resolved by adjusting the angle to create optimal airflow and prevent smoke leakage.
How Often Should the Wood Stove Pipe Be Cleaned and Inspected for Creosote Buildup?
I clean and inspect my wood stove pipe for creosote buildup at least once a year to ensure proper function and safety. Regular maintenance and using dry, seasoned wood can prevent creosote buildup in wood stove pipes.
Are There Any Specific Building Codes or Regulations That Need to Be Followed When Installing a Wood Stove Pipe Through the Roof?
When it comes to installing a wood stove pipe through the roof, it’s important to follow building code requirements and safety regulations. These guidelines ensure a secure and efficient installation.
Conclusion
In conclusion, installing a wood stove pipe through the roof requires careful preparation and attention to detail.
One interesting statistic to note is that according to a study by the National Fire Protection Association, wood stoves were involved in 36% of home heating fires in the United States between 2013 and 2017.
Therefore, it’s crucial to ensure proper installation to minimize fire risks and ensure the safety of your home.