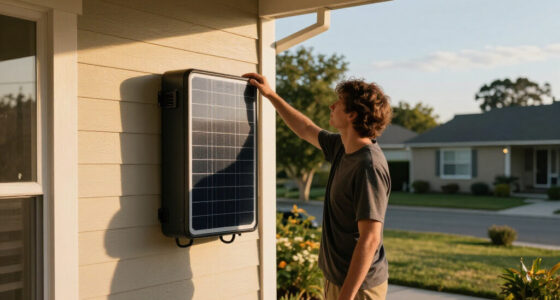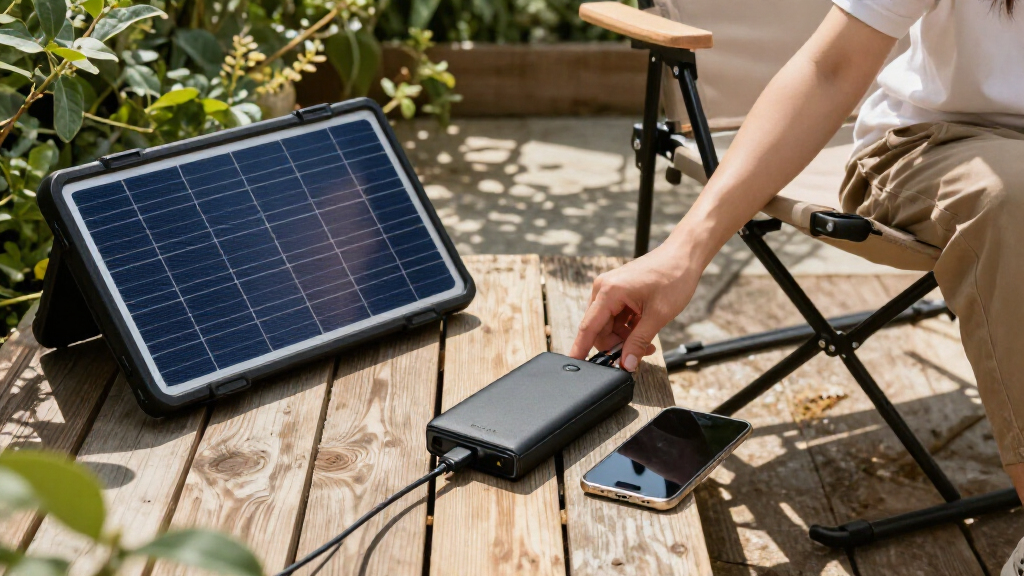
Choose and prepare a solar power bank so you can recharge a phone or other small device when wall power is unavailable. This guide is for beginners using a portable power bank with a built-in solar panel or a compatible external panel. Allow 30–60 minutes to check the specifications, test the connections, and prepare the unit; charging from sunlight may take several hours or longer.

Get backup power and energy gear delivered free with Prime
- Fast, free delivery on millions of items
- Prime Video, Amazon Music and more included
- Member-only deals all year

BLAVOR Solar Power Bank 20000mAh, Wireless Charger for Phones & Apple Watch
- ✔ Battery capacity: 20,000mAh
- ✔ USB-C output: Up to 20W stated
- ✔ Wired connections: Built-in USB-C, iOS, and USB-A cables; USB-C, USB-A, and iOS ports

Solar Power Bank 20000mAh with 4 Panels and Build-in 3 Cables
- ✔ Battery capacity: 20,000mAh
- ✔ Solar panels: 4 integrated panels
- ✔ Built-in cables: USB-C output, Lightning output, and USB-A input

BLAVOR Solar Power Bank 10,000mAh Portable Wireless Charger for Cell Phones
- ✔ Battery capacity: 10,000mAh
- ✔ USB-C output: Up to 20W stated
- ✔ Wireless charging: Qi-compatible
Difficulty: Beginner | Time: 30–60 minutes for setup; solar charging may take several hours or longer
What You’ll Need
Tools & Materials:
- Solar power bank with its charging cable
- Phone or other small device you plan to charge
- Device charging cable
- Optional: compatible external solar panel, if the power bank supports one
Knowledge:
- Basic ability to read product labels and connect USB cables
Read the power bank and device manuals before connecting them. Solar input, USB output, capacity, and charging limits vary by model. A built-in panel is often intended for emergency top-ups; its small surface area may charge the battery much more slowly than a wall adapter or larger compatible panel.
BLAVOR Solar Power Bank 20000mAh, Wireless Charger for Phones & Apple Watch
For a mixed-device kit, this BLAVOR is the most adaptable choice in the lineup. Its 20,000mAh stated capacity matches SolarTred’s, but the built-in USB-C, iOS, and USB-A cables plus separate ports make it easier to share power without packing as many cords. The wireless charging area adds another route for compatible phones and Apple Watch, a useful convenience when cable access is awkward. The 20W USB-C output is also the clearest fast-charge specification among these three.That flexibility comes with bulk: at roughly 7.28 inches long and 1.5 inches thick, it is a substantial pack rather than a pocket-first option like the 10,000mAh BLAVOR. Its accessory list—flashlight, camping light, compass, thermometer, carabiner, and rope—suits an outdoor emergency kit, though it adds functions that some buyers may not need. The IPX5 claim is useful for splash exposure, but SolarTred’s stated IP67 rating indicates a stronger protection target. As with the others, the small integrated solar panel is best viewed as a supplement to charging the bank by USB before a trip.
Pros:
- 20,000mAh stated capacity for a larger stored reserve
- Four built-in cables plus USB-C, USB-A, and iOS ports
- Wireless charging area supports compatible phones and Apple Watch
- 20W USB-C output and multiple lighting and outdoor accessories
Cons:
- Larger and thicker than the 10,000mAh BLAVOR
- IPX5 protection is less extensive on paper than SolarTred’s IP67
- No comparable solar input or recharge-time figures are provided
Best for: Campers and households carrying several kinds of phones or small devices who value built-in cables, wireless charging, and a larger stored reserve.
Not ideal for: Buyers who need a truly compact pack, or who prioritize the highest stated water and dust protection over connection flexibility.
Bottom line: We recommend this as the most versatile backup bank here when carrying and charging several device types matters more than minimizing pack size.
“We recommend this as the most versatile backup bank here when carrying and charging several device types matters more than minimizing pack size.”
Solar Power Bank 20000mAh with 4 Panels and Build-in 3 Cables
SolarTred is the pick for buyers who want the most explicitly solar-focused design in this group. Its four integrated panels provide more panel area than the single-panel-style BLAVOR options described here, and its IP67 rating is the strongest stated protection level in the comparison. Those details make it the more appealing candidate for dusty trails and wet-weather backup, though panel count alone does not establish how quickly it will recharge in actual sunlight.Like the BLAVOR 20,000mAh, it offers a large stated reserve, but its connection setup is more utilitarian: three built-in cables, two USB-A outputs, and a USB-C input/output are listed. There is no wireless charging, and its product information does not specify a charging wattage comparable to BLAVOR’s 20W claim. A dual flashlight and separate camping light add useful illumination, with the caveat that the two lighting systems cannot operate at the same time. Choose it over BLAVOR when panel layout and stated weather protection matter most; choose BLAVOR for broader convenience features and clearer fast-charge information.
Pros:
- 20,000mAh stated capacity
- Four integrated solar panels
- IP67 water and dust protection stated
- Three built-in cables and two lighting systems
Cons:
- No wireless charging feature is listed
- Charging wattage and comparable solar recharge time are not specified
- Flashlight and camping light cannot be used simultaneously
Best for: Outdoor users who want a 20,000mAh bank with multiple integrated panels, built-in cables, and a strong stated dust and water rating.
Not ideal for: Anyone who needs wireless charging, verified solar recharge performance, or a clearly specified fast-charge output.
Bottom line: We would choose SolarTred when outdoor protection and a multi-panel layout outrank wireless convenience and detailed output specifications.
“We would choose SolarTred when outdoor protection and a multi-panel layout outrank wireless convenience and detailed output specifications.”
BLAVOR Solar Power Bank 10,000mAh Portable Wireless Charger for Cell Phones
When size matters more than multi-day capacity, the smaller BLAVOR makes the most sense. Its 10,000mAh stated capacity is half that of the two larger options, so it is better matched to topping up a phone or supporting a lighter personal kit than sharing power across a group. The listing gives a 20W USB-C output and Qi wireless charging, preserving two of the bigger BLAVOR’s most convenient features in a more compact body.At 9.3 ounces and 0.87 inches thick, it is easier to fit into a day pack than the 20,000mAh model. It also includes two flashlights and a compass carabiner, while its IPX5 protection is similar to the larger BLAVOR and below SolarTred’s stated IP67 level. The smaller capacity means more frequent USB recharging if several devices depend on it. The listing describes solar charging but supplies no panel-output figure, so we would not rely on it as the sole means of restoring power during a short trip. Compared with the 20,000mAh alternatives, this is the sensible choice for one person who values carry comfort over endurance.
Pros:
- More compact and lighter than the 20,000mAh alternatives
- 20W USB-C output stated
- Qi wireless charging and support for three simultaneous devices stated
- Two flashlights and compass carabiner included
Cons:
- Half the stated capacity of the other two picks
- IPX5 protection is below SolarTred’s stated IP67
- Solar input performance is not quantified in the supplied details
Best for: Day hikers and commuters who want a lighter emergency reserve with wireless charging and USB-C fast-charge capability.
Not ideal for: Group trips, extended outages, or buyers who need the largest reserve and the strongest stated weather protection.
Bottom line: We recommend this for lighter personal backup where portability beats the longer reserve offered by either 20,000mAh model.
“We recommend this for lighter personal backup where portability beats the longer reserve offered by either 20,000mAh model.”
As an Amazon Associate we earn from qualifying purchases.
Before You Start
Check that the power bank is not swollen, cracked, unusually hot, or wet. Do not use a damaged unit. Keep it out of standing water and away from open flames, and do not leave it in a hot parked car. Use only panels and cables listed as compatible with the power bank. Never open the battery casing or attempt to repair its cells.
Step-by-Step Instructions
Step 1: Check the power bank’s specifications
Find the rated capacity, solar input limits, USB output ratings, and supported charging ports on the label or in the manual. Check that the output voltage and connector suit your device. If you plan to use an external panel, confirm that its connector and voltage range match the power bank’s solar input.
Tip:Capacity listed in milliamp-hours does not equal the amount your phone receives. Conversion losses and the phone’s charging needs reduce the usable amount.
Check: You can identify the correct input for recharging the bank and the correct output for your device.
Step 2: Inspect and prepare the unit
Place the power bank on a dry, stable surface and inspect its casing, ports, panel, and cable. Remove any protective film covering the solar cells. Charge the bank from a wall adapter before relying on it, following the manufacturer’s instructions; this gives you a dependable reserve while you learn how quickly solar charging works.
Tip:Do not use a cable with exposed wires, bent connectors, or a loose fit.
Check: The unit is undamaged, its ports are clear, and it has a usable charge level shown by its display or indicator lights.
Step 3: Test the USB output
Connect your phone to the power bank’s labeled output port with the device’s cable. Turn on the bank if its manual says to do so. Check the phone for a charging symbol, then disconnect it after a brief test.
Tip:Some banks switch off when they detect a very low-power device. Check the manual for a low-current mode if you are charging earbuds or a similar device.
Check: The phone indicates that it is charging, and the power bank’s indicator responds as described in its manual.
Step 4: Position the panel for sunlight
Place the built-in panel or compatible external panel in direct sunlight, facing the sun. Keep the panel uncovered and avoid shadows from hands, branches, windowsills, or nearby objects. Set the power bank on a stable, ventilated surface and follow the manual’s temperature limits.
Tip:Glass, clouds, shade, and changing sun angle reduce solar output. Do not leave the bank where its battery can overheat while the panel sits in direct sun.
Check: The panel receives unobstructed sunlight, and the charging indicator shows solar input if the model provides one.
Step 5: Connect an external panel if needed
If the built-in panel is too slow, connect only a panel the manufacturer lists as compatible. Check the panel’s voltage and connector against the manual before plugging it in. Seat the connector firmly, then confirm that the power bank indicates input.
Tip:Do not assume that a connector that fits is electrically compatible. An incompatible panel can prevent charging or damage the unit.
Check: The input indicator or display confirms charging, with no unusual heat, smell, or warning message.
Step 6: Monitor charging and protect the bank
Check the battery indicator periodically and move or angle the panel as the sun shifts. Keep the power bank dry and within its specified operating temperature. Stop charging and disconnect the panel if the unit becomes unusually hot, swells, smells odd, or displays an error.
Tip:Solar charging time depends on panel size, sunlight, angle, temperature, and battery level. A small built-in panel may take many hours to add a meaningful charge.
Check: The displayed charge level rises over time, or the bank’s manual describes another clear signal that solar input is active.
Step 7: Recharge your device and store the kit
When the power bank has enough charge, connect your device to the correct output port and check that it begins charging. Disconnect it when charged or when you need to conserve the reserve. Store the bank and cables dry, away from heat, and at the storage charge level recommended by the manufacturer.
Tip:For emergency readiness, check the charge level periodically and recharge the bank according to its manual.
Check: Your device charges from the bank, and the bank, cable, and any compatible panel are ready for the next use.
Common Mistakes to Avoid
- Expecting the built-in solar panel to recharge an empty bank quickly. — Charge the bank from a wall adapter before an outing or emergency. Treat its built-in panel as a backup source unless the manufacturer provides a realistic charging estimate for your conditions.
- Connecting a panel based only on connector shape. — Compare the panel’s voltage, connector, and input range with the bank’s manual before connecting it.
- Leaving the bank in intense sun until it overheats. — Keep the panel in sunlight while placing the battery in a shaded, ventilated spot if the design and cable allow it. Follow the stated temperature limits.
- Assuming the printed capacity will fully recharge a phone a matching number of times. — Allow for conversion losses and the phone’s battery size; use the power bank’s real-world output guidance when available.
Troubleshooting
Problem: The bank does not show solar input.
Solution: Move the panel into direct, unobstructed sunlight, adjust its angle, and check that the cable and connectors are seated. If using an external panel, verify compatibility and inspect the manual for the correct input port.
Problem: The battery level barely changes.
Solution: Check the panel for shade, dirt, or a poor angle. Solar input may be slow in cloudy or low-angle sunlight, especially with a built-in panel. Use a compatible larger panel or recharge from a wall adapter when available.
Problem: The phone does not charge from the bank.
Solution: Try the correct output port and a known-good cable. Confirm that the bank has charge and is switched on if required. Check the phone’s charging indicator and the manual for output limits or a low-current mode.
Problem: The power bank becomes unusually hot or appears damaged.
Solution: Stop charging, disconnect cables if safe, and move away from direct heat. Do not use or open a swollen, leaking, or damaged unit; follow the manufacturer’s support and disposal instructions.
What Success Looks Like
The power bank is undamaged, you have confirmed its compatible charging inputs and device outputs, and a test shows that it can charge your device. When placed in suitable sunlight, its indicator or display confirms solar input or its charge level rises. The bank and cables are stored dry and ready for use.
Next Steps
Before relying on the bank outdoors, test it with the exact device and cables you plan to carry. Record how long solar charging takes under your typical conditions, then plan a reserve based on that result. Check the battery level before trips, recharge it as the manual recommends, and replace damaged cables or equipment through the manufacturer’s guidance.
Frequently Asked Questions
Can a solar power bank charge a phone without sunlight?
Yes. If the bank has stored charge, connect the phone to its USB output. Sunlight is only needed when recharging the bank through its solar input.
How long does solar charging take?
It depends on panel size, sunlight, angle, shade, temperature, and the bank’s input limit. A small built-in panel can take many hours or longer to recharge the battery. Check the manual for model-specific estimates.
Can I charge my phone while the bank is charging from the sun?
Some models support simultaneous input and output, while others do not or charge less efficiently in that mode. Check the manual before connecting both, and monitor the bank’s temperature.
Can I use any solar panel with my power bank?
No. Use only a panel that matches the bank’s supported input voltage, current limits, and connector. Confirm compatibility in the product documentation before connecting it.