Pellet Stoves
How Can I Finance a Wood Pellet Stove?
I would like to confirm that while it may be difficult to secure the funding needed for a wood pellet stove, it is definitely worth it. With energy costs increasing and the demand for sustainable heating options growing, opting to purchase a wood pellet stove for your home is a wise choice.
In this article, I’ll break down all the different financing options available to you, from traditional methods to government assistance programs and even manufacturer financing plans. So, let’s dive in and explore how you can make your dream of owning a wood pellet stove a reality.
Key Takeaways
- Wood pellet stoves can be cost-effective and environmentally friendly compared to other fuel sources.
- Government grants and tax incentives can help offset the cost of purchasing and installing a wood pellet stove.
- Traditional financing methods such as loans from financial institutions are available, and interest rates vary based on credit score and loan length.
- Home equity loans and lines of credit can provide convenient access to funds for financing a wood pellet stove, but it’s important to carefully consider the terms and interest rates associated with these loans.
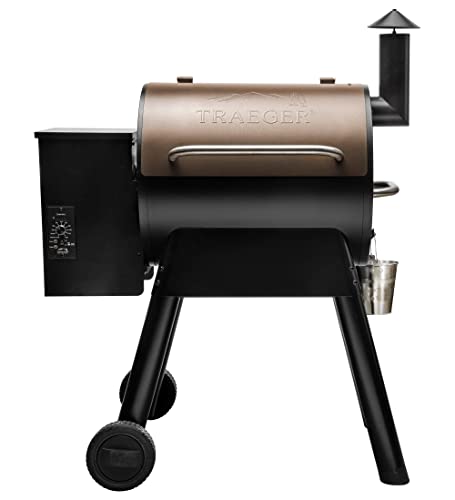
Understanding the Cost
You’ll need to understand the cost of a wood pellet stove before deciding how to finance it. When exploring installation costs, it’s important to consider factors such as the size of your space and the complexity of the installation process. The cost can vary depending on whether you choose a freestanding stove or a fireplace insert.
Additionally, comparing fuel types is crucial in determining the long-term expenses. Wood pellets are often more cost-effective compared to other fuel sources like propane or natural gas. They are also considered environmentally friendly due to their low emissions and renewable nature.
Understanding these costs and fuel options will help you make an informed decision when exploring financing options for your wood pellet stove. Now, let’s delve into the various financing options available to you.
Exploring Financing Options
There’s a variety of financing options available to help you purchase a wood pellet stove. If you’re looking for assistance from the government, you might be eligible for government grants specifically aimed at promoting energy efficiency and renewable energy sources. These grants can help offset the cost of purchasing and installing a wood pellet stove.
Another option to consider is crowdfunding. Crowdfunding platforms allow individuals to raise money for various projects, including home improvements. By creating a campaign and sharing it with friends, family, and the online community, you can gather funds to help finance your wood pellet stove.
These options provide alternative ways to finance your purchase and make the cost more manageable. However, if these options don’t suit your needs, there are also traditional financing methods available.
Traditional Financing Methods
If you’re not interested in government grants or crowdfunding, another option to consider is obtaining a loan from a financial institution. This can be a good choice for individuals who have a strong credit history and are comfortable with the idea of taking on debt.
When exploring traditional financing methods, it’s important to understand interest rates and their impact on your overall cost. Here are a few things to keep in mind:
- Interest rates can vary depending on factors such as your credit score and the length of the loan.
- A higher credit score can result in a lower interest rate, saving you money in the long run.
- It’s essential to compare loan offers from different financial institutions to ensure you’re getting the best rate possible.
Now, let’s move on to discussing government assistance programs that may be available to help finance your wood pellet stove purchase without relying on loans.
Government Assistance Programs
Government assistance programs can provide financial support for individuals looking to purchase a wood pellet stove. These programs, such as government grants and tax incentives, aim to promote energy efficiency and reduce reliance on traditional heating methods.
Government grants can offer a significant amount of money towards the purchase and installation of a wood pellet stove, helping to offset the initial cost. Additionally, tax incentives allow individuals to deduct a portion of the stove’s cost from their annual taxes, providing further financial relief. These programs not only make wood pellet stoves more affordable, but also encourage the use of clean and renewable energy sources.
Transitioning to the subsequent section about energy efficiency grants, another avenue of financial support for individuals seeking to improve their home’s energy efficiency is available.
Energy Efficiency Grants
You can apply for energy efficiency grants to receive financial assistance for improving your home’s energy efficiency. These grants are a great way to offset the costs of implementing energy-efficient upgrades, such as installing a wood pellet stove. By taking advantage of these incentives, you can not only reduce your carbon footprint but also save money on your energy bills in the long run.
Here is a table outlining some popular energy efficiency grants and renewable energy grants that you can explore:
Grant Name | Description |
---|---|
Energy Efficiency Incentives | Financial incentives for energy-efficient upgrades to homes and buildings. |
Renewable Energy Grants | Grants for the installation of renewable energy systems, such as solar panels or wind turbines. |
Weatherization Assistance Program | Assistance for low-income households to improve energy efficiency and reduce energy costs. |
Residential Energy Efficiency Rebates | Rebates for energy-efficient appliances and equipment in residential settings. |
Green Building Grants | Grants for the construction or renovation of energy-efficient and sustainable buildings. |
Now, let’s discuss how you can further finance your wood pellet stove installation through home equity loans and lines of credit.
Home Equity Loans and Lines of Credit
When it comes to financing the purchase of a stove, one option to consider is borrowing against your home equity.
Home equity loans and lines of credit can provide homeowners with a convenient and flexible way to access funds for home improvement projects, such as buying a stove.
These financing options allow you to tap into the value of your home and use that equity to secure a loan or line of credit, which can be used to finance the purchase and installation of a new stove.
Borrowing Against Home Equity
One option for financing a wood pellet stove is to borrow against your home equity. This can be done through a home equity loan or a home equity line of credit. These types of loans allow you to borrow against the value of your home, using it as collateral. This means that if you default on the loan, the lender can potentially foreclose on your property.
It’s important to carefully consider the terms and interest rates associated with these loans, as they can vary depending on your creditworthiness and the current market conditions. Additionally, it’s worth exploring other options such as borrowing against retirement savings or considering peer-to-peer lending platforms. These alternatives may offer different terms and rates that could better suit your financial situation.
Moving on to other financing options for stoves…
Financing Options for Stoves
There are various ways to finance the purchase of a stove, including borrowing against your home equity. When considering financing options for stoves, it is important to understand interest rates and compare loan terms.
Interest rates can significantly impact the total cost of financing, so it’s crucial to shop around and find the best rate available. Additionally, comparing loan terms allows you to evaluate the length of the loan, monthly payment amounts, and any additional fees or penalties.
By carefully considering these factors, you can make an informed decision about the financing option that best suits your needs and budget.
Now, let’s explore another financing option for purchasing a wood pellet stove: manufacturer financing plans.
Manufacturer Financing Plans
Manufacturer financing plans offer a convenient way to finance a wood pellet stove. These plans are designed to help homeowners afford the upfront cost of a stove by spreading payments over a set period. With manufacturer financing options, you can enjoy the benefits of a wood pellet stove without breaking the bank. In addition to these plans, there are alternative financing methods available that can also make owning a wood pellet stove more accessible. Here is a table comparing the different financing options:
Financing Options Pros Cons Manufacturer Financing Convenient repayment terms Higher interest rates Personal Loans Lower interest rates May require good credit Home Equity Loan Tax-deductible interest Tied to your home’s equity Credit Cards Instant access to funds High interest rates and fees Lease-to-Own Options Flexible payment options Higher overall cost in the long run
Now, let’s explore the lease-to-own options for financing a wood pellet stove.
Lease-to-Own Options
Leasing can offer several benefits when it comes to acquiring a product like a wood pellet stove.
One of the main advantages is the payment flexibility options that leasing provides. This allows me to choose a payment plan that best fits my budget and financial situation.
Additionally, at the end of the lease term, I have the option to own the wood pellet stove, providing me with a sense of ownership and the opportunity to continue enjoying its benefits for years to come.
Benefits of Leasing
One of the benefits of leasing a wood pellet stove is the flexibility it offers in terms of payment options. Leasing allows you to enjoy the advantages of owning a wood pellet stove without the large upfront cost. Instead of purchasing the stove outright, you can make monthly lease payments, which are typically more affordable and manageable for most people.
Leasing also allows you to upgrade your stove easily when newer models become available, ensuring that you always have access to the latest technology. Additionally, leasing provides the benefit of not having to worry about maintenance and repairs, as these are often included in the lease agreement.
Payment Flexibility Options
When it comes to payment flexibility options for a wood pellet stove lease, there are several choices available to suit different budget needs.
At [Company Name], we understand the importance of offering flexible payment terms to make it easier for our customers to finance their wood pellet stoves. We offer a range of financing options with different terms and conditions to accommodate various financial situations.
Whether you prefer shorter-term financing with higher monthly payments or longer-term financing with lower monthly payments, we have options to fit your needs. Our goal is to make it as convenient as possible for you to enjoy the benefits of a wood pellet stove without breaking the bank.
Speaking of financing terms and conditions, let’s now discuss what happens with ownership after the lease period ends.
Ownership After Lease
After the lease period ends, you’ll have the option to purchase the stove or return it.
When it comes to ownership transfer, it’s important to understand your post lease responsibilities. Here are a few key things to keep in mind:
- If you decide to purchase the stove, you will be responsible for any maintenance and repairs.
- Before transferring ownership, make sure to thoroughly inspect the stove for any damages.
- It’s also a good idea to check if there are any warranties or service agreements that can be transferred to you.
Considering the ownership transfer and post lease responsibilities, it’s important to plan ahead for financing options. One common way to finance a wood pellet stove is through personal loans and credit cards. These options allow you to spread out the cost over time, making it more manageable.
Personal Loans and Credit Cards
If you’re considering financing a wood pellet stove, personal loans and credit cards are two options to explore.
Personal loans are a popular choice for larger purchases, as they offer fixed interest rates and predictable monthly payments. Many lenders offer personal loans specifically for home improvement projects, making it easier to secure financing for a wood pellet stove.
On the other hand, credit card financing can be a convenient option for smaller purchases. It allows you to spread out the cost over time, but keep in mind that interest rates on credit cards can be high.
Whichever option you choose, it’s important to carefully consider your financial situation and compare interest rates and terms to ensure you are getting the best deal.
Planning for the future, there are additional financing options to consider.
Planning for the Future
When it comes to planning for the future, two key points to consider are saving for expenses and setting long-term financial goals.
Saving for expenses involves setting aside money for various needs such as emergencies, vacations, and major purchases.
On the other hand, long-term financial goals can include saving for retirement, buying a house, or funding a child’s education.
Saving for Expenses
Saving money can help you finance a wood pellet stove. It may seem daunting to come up with the funds for such a purchase, but with the right saving strategies and budgeting techniques, it is achievable.
Here are some tips to help you save effectively:
-
Create a budget: Track your expenses and prioritize your spending to identify areas where you can cut back.
-
Set savings goals: Determine how much you need to save and create a plan to reach your target within a specific timeframe.
-
Automate savings: Set up automatic transfers to a separate savings account to ensure you consistently put money aside.
-
Reduce unnecessary expenses: Cut back on dining out, entertainment, and other non-essential purchases to free up more funds.
-
Increase your income: Consider taking on a part-time job or freelancing to boost your earnings.
By implementing these saving strategies and budgeting techniques, you can make progress towards financing a wood pellet stove.
Planning for your long-term financial goals is essential for a secure future.
Long-Term Financial Goals
To achieve your long-term financial goals, it’s important to create a plan and stick to it.
Long-term financial planning is essential for securing a comfortable retirement. It involves setting goals, creating a budget, and regularly saving for the future.
One of the key aspects of long-term financial planning is retirement savings. It’s crucial to start saving early and consistently contribute to your retirement accounts. Whether it’s through employer-sponsored plans like a 401(k) or individual retirement accounts (IRAs), saving for retirement ensures financial security in your golden years.
By investing in a diversified portfolio and regularly reviewing and adjusting your savings strategy, you can maximize your retirement savings and achieve your long-term financial goals.
– Can I Use Financing Options to Purchase a Pellet Stove and Save on Heating Bills?
Yes, financing options can help you purchase a pellet stove and cut heating bills in half. By opting for a pellet stove, you can significantly reduce your heating costs and enjoy a more efficient and sustainable heating solution for your home.
What Financing Options Are Available for Purchasing a Wood Pellet Stove?
When considering purchasing a wood pellet stove, it’s important to explore your financing options. Many companies offer low-interest financing or payment plans to help make the investment more manageable. By exploring these options, you can cut heating bills in half with a pellet stove without breaking the bank.
Frequently Asked Questions
Can I Use a Personal Loan or Credit Card to Finance a Wood Pellet Stove?
Yes, you can use personal loan options or credit card financing to finance a wood pellet stove. These options allow you to spread out the cost over time and make it more manageable.
Are There Any Government Assistance Programs Specifically for Wood Pellet Stove Financing?
There are government assistance programs available for wood pellet stove financing. These programs can provide financial support and help make the cost more manageable. It’s worth exploring these options to see if you qualify.
What Are Some Alternative Financing Options for Those Who Do Not Qualify for Traditional Financing Methods?
Unconventional financing options for wood pellet stoves can be a lifesaver if traditional methods don’t work. Crowdfunding platforms are a great way to rally support and raise funds for your eco-friendly heating solution.
Can I Lease a Wood Pellet Stove and Eventually Own It?
Leasing options for wood pellet stoves allow you to enjoy the benefits of ownership without the upfront costs. Eventually, you can own the stove by fulfilling the lease agreement. It’s a convenient way to finance a wood pellet stove.
Are There Any Energy Efficiency Grants Available for Wood Pellet Stove Installations?
Energy efficiency grants and tax incentives are great options for financing wood pellet stove installations. These programs provide financial support to homeowners looking to improve energy efficiency in their homes and reduce their carbon footprint.
Conclusion
In conclusion, financing a wood pellet stove can be a wise investment in both financial and environmental terms.
By understanding the cost and exploring various financing options, such as government assistance programs and manufacturer financing plans, individuals can make their dream of owning a wood pellet stove a reality.
With the help of energy efficiency grants, lease-to-own options, personal loans, and credit cards, the path to a warm and cozy home becomes more attainable.
So, let’s embrace the warmth and sustainability symbolized by a wood pellet stove and plan for a greener future.
Growing up surrounded by the vast beauty of nature, Sierra was always drawn to the call of the wild. While others sought the comfort of the familiar, she ventured out, embracing the unpredictable and finding stories in the heartbeat of nature.
At the epicenter of every remarkable venture lies a dynamic team—a fusion of diverse talents, visions, and passions. The essence of Best Small Wood Stoves is crafted and refined by such a trio: Sierra, Logan, and Terra. Their collective expertise has transformed the platform into a leading authority on small wood stoves, radiating warmth and knowledge in equal measure.
Pellet Stoves
How Do You Cook a Turkey in a Traeger Wood Pellet Grill
I will walk you through the process of preparing a turkey using a Traeger wood pellet grill, expertly. This technique will help you create delicious outcomes that will impress your guests.
From choosing the right turkey size to preheating the grill and adding wood pellets for that delicious smoky flavor, I’ll cover all the steps.
Get ready to impress with a perfectly cooked turkey that’ll be the star of your next feast.
Key Takeaways
- Consider the number of guests and desired leftovers when choosing the turkey size and plan for 1-1.5 pounds of turkey per person.
- Brining enhances flavor and juiciness, while seasoning and marinating the turkey adds flavor and moisture.
- Trussing the turkey ensures even cooking by keeping the legs and wings close to the body and tying them together.
- Preheat the grill for a perfect sear, use high temperature for a crusty outside and juicy inside, and monitor the cooking temperature using a meat thermometer.
Choosing the Right Turkey Size
To choose the right turkey size, you’ll want to consider the number of guests you’ll be serving and the amount of leftovers you want. When it comes to choosing the right turkey size for your Traeger wood pellet grill, it’s important to keep in mind that the size of the grill will limit the size of the turkey you can cook.
A general rule of thumb is to plan for about 1 to 1.5 pounds of turkey per person. If you want leftovers, you might want to go for a larger turkey. Additionally, brining techniques can help enhance the flavor and juiciness of your turkey. Brining involves soaking the turkey in a saltwater solution for a period of time before cooking. This helps to season the turkey and keep it moist during the grilling process.
Now that you’ve chosen the right turkey size and considered brining techniques, let’s move on to preparing the turkey for grilling.
Preparing the Turkey for Grilling
When it comes to preparing a turkey for grilling, there are a few key points to keep in mind.
First, seasoning and marinating the bird is crucial for adding flavor and moisture. I like to use a combination of herbs, spices, and a marinade to infuse the meat with deliciousness.
Second, trussing the turkey ensures even cooking by keeping the legs and wings close to the body. This helps the meat cook more evenly and prevents any parts from drying out.
Lastly, preheating the grill is essential for achieving that perfect sear and ensuring the turkey cooks evenly. I recommend preheating the grill to a high temperature to create a nice crust on the outside while keeping the inside juicy and tender.
Seasoning and Marinating
First, make sure you have thoroughly seasoned and marinated your turkey before placing it in the Traeger wood pellet grill.
Seasoning and marinating are crucial steps in preparing a turkey for grilling, as they enhance the flavor and ensure a juicy and tender end result.
One popular technique is brining, which involves soaking the turkey in a saltwater solution infused with various herbs, spices, and aromatics. This process helps to lock in moisture and impart flavor deep into the meat.
Another method for flavor infusion is marinating, where you coat the turkey in a mixture of oil, herbs, spices, and acidic ingredients such as citrus juice or vinegar. This allows the flavors to penetrate the meat and adds a delicious kick.
Now that the turkey is seasoned and marinated, let’s move on to the next step of trussing for even cooking.
Trussing for Even Cooking
Now that the turkey is seasoned and marinated, it’s important to truss it for even cooking. Trussing is a technique used to secure the wings and legs of the turkey close to the body, ensuring that it cooks evenly.
To truss the turkey, start by tucking the wings underneath the bird. Then, cross the legs and tie them together with kitchen twine. Trussing not only helps the turkey cook more evenly, but it also gives it a neater appearance.
Preheating the Grill
To get your grill ready for cooking, make sure to preheat it to the desired temperature. Preheating is essential to ensure even cooking and to maximize the flavor of your turkey.
Here’s what you need to know about preheating your Traeger wood pellet grill:
-
Optimal preheating time:
-
Set your grill to the recommended temperature and allow it to preheat for 15-20 minutes.
-
This will ensure that the grill reaches the desired temperature and that the cooking surface is evenly heated.
-
Benefits of preheating:
-
Preheating helps to sear the turkey and lock in the juices, resulting in a moist and flavorful bird.
-
It also creates a consistent cooking environment, promoting even heat distribution and preventing hot spots.
Seasoning the Turkey
For a flavorful turkey, you’ll want to generously season the bird with a mixture of herbs and spices before placing it on the Traeger wood pellet grill. Seasoning is crucial to enhance the taste and juiciness of the turkey. One popular brining technique is to soak the bird in a saltwater solution overnight, allowing the flavors to penetrate the meat. If you prefer alternative seasoning methods, you can create a dry rub using a combination of herbs like rosemary, thyme, and sage, along with spices like garlic powder, paprika, and black pepper. This will create a beautiful crust on the turkey while infusing it with a delicious aroma. As you can see in the table below, there are several options for seasoning your turkey:
Brining Techniques | Alternative Seasoning Methods |
---|---|
Saltwater solution | Dry rub with herbs and spices |
Buttermilk brine | Citrus and herb marinade |
Beer brine | Honey and mustard glaze |
Apple cider brine | Soy sauce and ginger marinade |
Once the turkey is seasoned to perfection, it’s time to preheat the Traeger grill to ensure even cooking and a beautifully charred exterior.
Preheating the Traeger Grill
When it comes to preheating the Traeger grill, there are a few key points to consider.
First, the optimal preheating temperature can vary depending on what you’re cooking, but generally, a temperature of 375°F to 450°F works well for most recipes.
Second, the time required for preheating will depend on the size of your grill and the outside temperature, but typically, it takes around 15 to 20 minutes to reach the desired temperature.
Optimal Preheating Temperature
The optimal preheating temperature for cooking a turkey in a Traeger wood pellet grill is 375 degrees Fahrenheit. This temperature ensures that the turkey cooks evenly and achieves a delicious, golden brown exterior while remaining juicy and tender on the inside. Here are three reasons why this temperature is ideal for cooking a turkey in a Traeger grill:
-
Optimal Cooking Techniques: Cooking the turkey at 375 degrees Fahrenheit allows for the perfect balance between searing the skin and slow cooking the meat. This results in a crispy skin and moist, flavorful meat.
-
Alternative Cooking Methods: While some may opt for higher temperatures to speed up the cooking process, this can lead to dry and overcooked meat. By cooking at 375 degrees Fahrenheit, you can achieve a turkey that is cooked to perfection without sacrificing tenderness.
-
Enhanced Flavor: The Traeger wood pellet grill imparts a smoky flavor to the turkey, and cooking at 375 degrees Fahrenheit allows the flavors to develop gradually, resulting in a rich and delicious taste.
Now that we know the optimal preheating temperature, let’s move on to the next section and discuss the time required for preheating the Traeger grill.
Time Required for Preheating
To ensure that your turkey cooks evenly and achieves a delicious, golden brown exterior while remaining juicy and tender on the inside, it is important to preheat the Traeger grill for the recommended amount of time. The optimal preheating time for a Traeger grill is around 15-20 minutes. This allows the grill to reach the desired temperature and ensures that the heat is evenly distributed throughout the cooking chamber.
Here are some tips for efficient preheating:
-
Clean the grill: Before preheating, make sure to clean any residue or debris from the grill grates. This will help prevent any unwanted flavors and ensure a clean cooking surface.
-
Close the lid: Keeping the lid closed during preheating will help trap the heat inside the grill, allowing it to reach the desired temperature faster.
Tips for efficient preheating |
---|
Clean the grill |
Close the lid |
Benefits of Preheating
Using proper preheating techniques ensures that your food cooks evenly and retains its natural flavors.
Preheating your grill before cooking is essential for several reasons. Firstly, it helps to remove any residual dirt or debris from the grill grates, ensuring a clean cooking surface.
Secondly, preheating allows the grill to reach the desired temperature, which is crucial for proper cooking and avoiding undercooked or overcooked food. Temperature control is important when cooking a turkey on a Traeger wood pellet grill because it ensures that the meat is cooked to perfection, with a juicy and tender texture. Additionally, preheating helps to create those beautiful grill marks on the turkey, giving it that delicious smoky flavor.
Now that the grill is preheated, let’s move on to placing the turkey on the grill.
Placing the Turkey on the Grill
Start by carefully positioning your turkey on the grill grate of your Traeger wood pellet grill. Planning ahead is key to a successful turkey cook, so make sure you have enough room on the grill for your bird.
Preheat your Traeger to the desired temperature, usually around 325°F, and place the turkey on the grill, breast side up. Make sure the turkey is centered and not touching the sides of the grill for even cooking.
Temperature control is crucial during the cooking process, so keep an eye on the grill temperature and make adjustments as needed.
Now, let’s move on to monitoring the cooking temperature to ensure your turkey is cooked to perfection.
Monitoring the Cooking Temperature
Keep an eye on the temperature of the grill while the turkey is cooking to ensure it is cooked to perfection. Monitoring the cooking progress is crucial for a deliciously juicy turkey. To accurately monitor the temperature, I highly recommend using a meat thermometer.
Insert the thermometer into the thickest part of the turkey, avoiding contact with bones. This will give you an accurate reading of the internal temperature. The ideal temperature for a cooked turkey is 165°F (74°C).
As the turkey cooks, periodically check the temperature to ensure it is progressing as desired. This will help you avoid undercooking or overcooking the turkey.
Now that you have the cooking temperature under control, let’s talk about adding wood pellets for flavor.
Adding Wood Pellets for Flavor
Now that we have discussed monitoring the cooking temperature, let’s move on to the next step of cooking a turkey in a Traeger wood pellet grill: adding wood pellets for flavor.
One of the great benefits of using a Traeger grill is the ability to infuse your turkey with delicious smoky flavors. To achieve this, you will need to choose the right wood pellets that complement the taste of your turkey. Traeger offers a variety of wood flavors such as hickory, mesquite, apple, and cherry. Each wood imparts a unique aroma and taste to the meat.
Simply add the desired wood pellets to the pellet hopper, ensuring you have enough for the duration of the cook. The Traeger grill will automatically feed the pellets into the fire pot, creating a consistent smoke throughout the cooking process. This step is crucial in achieving that perfect smoky flavor in your turkey.
As we finish the smoking process, we can transition into the subsequent section about resting and carving the turkey.
Resting and Carving the Turkey
To ensure the juiciness of your turkey, let it rest for about 20 minutes before carving. This resting time allows the juices to redistribute throughout the meat, resulting in a more flavorful and tender bird. While it may be tempting to dig in right away, patience is key when it comes to carving your turkey.
Here are some carving techniques to ensure you get the most out of your bird:
-
Start by removing the legs and wings: Use a sharp knife to separate the leg and thigh from the body, then remove the wings.
-
Slice the breast meat: Make horizontal cuts along the breastbone to create thin slices of juicy white meat.
-
Separate the thigh and drumstick: Cut through the joint to separate the thigh and drumstick.
Resting and carving your turkey properly is essential for a delicious and visually appealing meal. Take your time, follow these techniques, and enjoy the fruits of your labor.
Can I Cook a Turkey in a Wood Pellet Pizza Oven?
Yes, you can cook a turkey in a wood pellet pizza oven. The consistent heat and smoky flavor from the wood pellets will result in a delicious and juicy turkey. Just make sure to monitor the temperature and use a meat thermometer to ensure it’s fully cooked.
Can the Same Method Used for a Wood Pellet Pizza Oven be Applied to Cooking a Turkey in a Traeger Wood Pellet Grill?
Yes, the same method for starting wood pellet pizza oven can be applied to cooking a turkey in a Traeger wood pellet grill. Both the wood pellet pizza oven and Traeger grill utilize wood pellets as fuel, and the methods for starting the fire and controlling the temperature are similar.
Frequently Asked Questions
What Are the Advantages of Cooking a Turkey in a Traeger Wood Pellet Grill Compared to Other Grilling Methods?
The advantages of cooking a turkey in a Traeger Wood Pellet Grill are numerous. With precise temperature control, even heat distribution, and the ability to infuse smoky flavors, it’s a game-changer for turkey cooking. Here are some tips and techniques to help you achieve the perfect turkey on a Traeger.
Can I Use a Frozen Turkey for Grilling on a Traeger Wood Pellet Grill?
Using a frozen turkey on a Traeger wood pellet grill is not recommended. Thawing the turkey before grilling ensures even cooking and prevents foodborne illness. There are alternative grilling methods for turkey that can yield delicious results.
How Long Does It Take to Cook a Turkey on a Traeger Wood Pellet Grill?
Cooking a turkey on a Traeger Wood Pellet Grill requires careful temperature control. The cooking time will depend on the size of the turkey, but typically takes around 4-6 hours at a temperature of 325°F.
Are There Any Specific Cooking Techniques or Tips for Achieving a Crispy Skin on the Turkey When Grilling on a Traeger Wood Pellet Grill?
To achieve crispy skin on a turkey when grilling on a Traeger Wood Pellet Grill, there are specific cooking techniques you can use. Preheat the grill, apply oil or butter to the skin, and cook at a high temperature for a shorter time.
Can I Use Marinades or Brines on the Turkey Before Grilling It on a Traeger Wood Pellet Grill?
Yes, you can use marinades or brines on the turkey before grilling it on a Traeger wood pellet grill. Marinating techniques enhance flavor, while brining benefits include moisture retention and tenderizing the meat.
Conclusion
In conclusion, cooking a turkey in a Traeger wood pellet grill is a feast for the senses. The tantalizing aroma of the seasoned turkey sizzling on the grill and the mouthwatering flavor infused by the wood pellets are just the beginning. The tender, juicy meat that melts in your mouth is the ultimate reward. It’s a culinary experience like no other.
With the right techniques and a little patience, you can create a masterpiece that will leave your taste buds singing with joy. So fire up that Traeger and get ready to impress your family and friends with a truly unforgettable turkey.
Logan’s affair with adventure began in childhood. He hailed from a small town where vast forests bordered one side and endless shores stretched on the other. His days were spent exploring uncharted woods, climbing tall trees, or listening to the tales of old sailors. This early immersion in a world brimming with stories and mysteries became the foundation of his passion for writing.
Pellet Stoves
How Do Wood Pellet Mills Work
I have always been fascinated by the operation of wood pellet mills and the intricate process they entail.
One example that comes to mind is a case study I recently came across. In this study, a wood pellet mill was able to efficiently grind and dry the wood material, pelletize it, and then cool and screen the resulting wood pellets.
The entire process was seamless and resulted in high-quality wood pellets that were ready for packaging and storage.
In this article, I will delve into the technical details of how wood pellet mills work and explore the environmental benefits they provide.
Key Takeaways
- Wood pellet mills grind wood into sawdust and compress it into small pellets.
- Different types of pellet mills, such as flat die mills and ring die mills, determine the efficiency and quality of the pellets.
- Wood pellets have high energy density, low moisture content, and reduced greenhouse gas emissions, making them an attractive option for renewable energy.
- The raw materials for wood pellet mills, such as sawdust, wood chips, and wood shavings, are obtained from sustainable sources and contribute to the reduction of waste and reliance on fossil fuels.
The Process of Wood Pellet Production
The process of wood pellet production involves several steps. First, wood is ground into sawdust. Next, the sawdust is compressed into small pellets. After that, the pellets are cooled and packaged for distribution. The design of pellet mills is important in determining the efficiency and quality of the pellets. There are different types of pellet mills available, such as flat die and ring die designs. Flat die mills are commonly used for small-scale production, while ring die mills are preferred for large-scale operations due to their higher capacity and durability.
Wood pellets have many advantages as a biomass energy source. They have a high energy density, low moisture content, and reduced greenhouse gas emissions compared to traditional fossil fuels. These qualities make wood pellets an attractive option for renewable energy.
Now, let’s discuss the raw materials used in wood pellet mills. These raw materials are crucial for producing high-quality pellets.
Raw Materials for Wood Pellet Mills
When it comes to wood pellet production, understanding the common raw materials used is crucial. These materials typically include sawdust, wood chips, and wood shavings, which are obtained from various sources such as sawmills, woodworking factories, and furniture manufacturers.
The pellet production process then involves grinding and drying the raw materials before compressing them into pellets, resulting in a highly efficient and sustainable fuel source.
Additionally, the use of wood pellets offers numerous environmental sustainability benefits, including reduced greenhouse gas emissions and reliance on fossil fuels, making it an attractive alternative for both residential and industrial heating.
Common Raw Materials
You can use different types of biomass, such as sawdust, wood chips, or agricultural waste, as raw materials for wood pellet mills. These materials are commonly used in wood pellet production techniques due to their availability and suitability for the process.
Sawdust, which is a byproduct of woodworking, is a popular choice because of its high lignin content, which acts as a natural binder during pelletization. Wood chips, on the other hand, are larger pieces of wood that can be obtained from logging or sawmills. Agricultural waste, including straw, corn stalks, and sugarcane bagasse, can also be used as raw materials.
These alternative uses for raw materials not only reduce waste but also contribute to the sustainability of the pellet production process. This ensures that the wood pellet industry remains environmentally friendly and economically viable.
Transitioning into the subsequent section about the "pellet production process," it is important to understand the various steps involved in turning these raw materials into wood pellets.
Pellet Production Process
Using biomass materials, such as sawdust, wood chips, or agricultural waste, can be a sustainable and environmentally friendly way to produce wood pellets. One of the major benefits of using wood pellets as a renewable energy source is their high energy density. Wood pellets have a higher energy content per unit mass than other biomass fuels, making them more efficient and cost-effective.
Wood pellet mills play a crucial role in the production process. These mills use specialized machinery to compress the biomass materials into compact pellets. The process involves grinding, drying, and pelletizing the raw materials, which are then cooled and packaged for use. Wood pellet mills can produce large quantities of pellets in a short period, making them a reliable and efficient fuel source.
Transitioning to the subsequent section about environmental sustainability benefits, the production of wood pellets helps reduce greenhouse gas emissions and dependence on fossil fuels.
Environmental Sustainability Benefits
The high energy density of wood pellets makes them an efficient and cost-effective renewable energy source. Here are four reasons why wood pellets contribute to environmental sustainability and the reduction of carbon emissions:
-
Renewable Energy Source: Wood pellets are made from sustainably sourced wood, such as sawdust and wood chips, which are byproducts of the timber industry. By utilizing this otherwise wasted material, we are reducing our reliance on non-renewable fossil fuels.
-
Carbon Neutral: When wood pellets are burned, they release carbon dioxide, but the amount emitted is equal to the carbon absorbed by the trees during their growth. This creates a carbon-neutral cycle, minimizing the net increase of greenhouse gases in the atmosphere.
-
Lower Emissions: Wood pellet combustion produces significantly fewer emissions compared to traditional fossil fuels like coal. This helps to improve air quality and reduce the overall carbon footprint.
-
Waste Reduction: Wood pellets are manufactured from wood waste, diverting it from landfills and reducing the environmental impact of waste disposal.
Transition: To produce wood pellets, the first step involves grinding and drying the wood material.
Grinding and Drying the Wood Material
In the grinding process, wood material is broken down into smaller particles to facilitate the pelletizing process. This involves the use of a hammer mill, which uses rotating hammers to strike and grind the wood.
Wood drying is a crucial step in the pellet production process as it reduces the moisture content of the wood material, making it easier to grind and improving the overall quality of the pellets produced.
Grinding Process Explained
To understand how wood pellet mills work, you’ll want to know about the grinding process. This crucial step in the production of wood pellets involves reducing the raw material into a fine powder. Here are the grinding techniques used in pellet mills to ensure optimal pellet mill efficiency:
-
Hammer mills: These machines use rotating hammers to pulverize the wood material, resulting in a consistent and uniform particle size.
-
Knife mills: Equipped with sharp blades, knife mills cut the wood into small pieces, ensuring a homogeneous and efficient grinding process.
-
Impact mills: By utilizing high-speed rotating blades or hammers, impact mills shatter the wood material into fine particles, enhancing the overall pellet mill efficiency.
The grinding process is vital in preparing the wood material for pellet production, but it is closely connected to the subsequent step – wood drying. Properly dried wood ensures optimal pellet quality and combustion efficiency.
Importance of Wood Drying
After the grinding process, it is crucial to ensure that the wood material has the right moisture content before it can be pelletized. Wood moisture refers to the amount of water present in the wood, and it plays a vital role in the pelletizing process. Wood with high moisture content is difficult to pelletize as it can lead to poor pellet quality and increased energy consumption during the pellet mill operation.
To reduce the wood moisture, various drying methods are employed. These methods include natural drying, kiln drying, and air drying. Natural drying involves exposing the wood to the sun and wind, while kiln drying utilizes heat and controlled humidity levels to remove moisture. Air drying involves stacking the wood and allowing air to circulate around it.
By reducing the wood moisture to the optimal level, the wood becomes more suitable for pellet production. It ensures that the pellets have the desired density and durability.
Now, let’s move on to the next section and explore the process of pelletizing the wood material.
Pelletizing the Wood Material
During the pelletizing process, the wood material is compressed and shaped into small pellets. Wood pellet density and the techniques used for pelletizing play a crucial role in determining the quality and efficiency of the final product.
Achieving the desired wood pellet density requires carefully selecting the raw materials, which should have a suitable moisture content and particle size distribution. Pelletizing techniques such as pressure and heat are employed to soften the lignin in the wood, allowing it to bind the particles together.
The compressed wood material is then forced through small holes in a die, creating uniform pellets of the desired size and shape. These pellets are then ready for the next stage of the process, which involves cooling and screening to ensure their quality and readiness for use.
Cooling and Screening the Wood Pellets
You can ensure the quality of the wood pellets by carefully cooling and screening them. Cooling efficiency is crucial in maintaining the integrity and durability of the pellets. Here are two methods to achieve optimal cooling:
-
Air Cooling:
-
The hot wood pellets are transferred to a cooling chamber.
-
Cold air is blown over the pellets, removing excess heat.
-
The cooled pellets are then ready for screening.
-
Water Cooling:
-
The wood pellets are submerged in a water bath.
-
The water absorbs the heat from the pellets, rapidly cooling them.
-
The pellets are then separated from the water and proceed to the screening stage.
Screening methods further enhance the quality of the wood pellets by removing any fines or oversized particles. This ensures uniform size and consistency, improving combustion efficiency.
Now, let’s delve into the next section, where we will explore the packaging and storage of wood pellets.
Packaging and Storage of Wood Pellets
The packaging and storage of wood pellets is crucial for maintaining their quality and preventing moisture damage.
One of the main concerns when it comes to packaging challenges is ensuring that the pellets are sealed properly to keep out any moisture. Moisture can lead to the degradation of the pellets, causing them to crumble or mold. To address this issue, storage solutions such as using waterproof bags or containers with airtight seals are commonly employed.
Additionally, it is important to store wood pellets in a dry and well-ventilated area to further prevent moisture build-up. Proper labeling and stacking techniques are also essential to ensure efficient storage and easy identification.
By implementing these packaging and storage solutions, the quality of wood pellets can be preserved, ultimately leading to better performance and customer satisfaction.
Transitioning into the subsequent section about the maintenance and troubleshooting of wood pellet mills, it is equally important to ensure the proper functioning and upkeep of the machinery to produce high-quality pellets.
Maintenance and Troubleshooting of Wood Pellet Mills
To keep your wood pellet mill running smoothly, regular maintenance is essential. Proper maintenance techniques can help prevent breakdowns and ensure optimal performance of your mill.
One important maintenance task is cleaning the mill regularly to remove any dust, debris, or foreign objects that may accumulate and cause clogging or damage.
Lubricating the moving parts, such as the rollers and bearings, is also crucial to reduce friction and extend the lifespan of these components.
Additionally, regularly inspecting the electrical connections and replacing worn-out or damaged parts can help prevent electrical issues and improve safety.
Troubleshooting tips can also be helpful in addressing common problems, such as uneven pellet size or low production rates.
By following these maintenance techniques and troubleshooting tips, you can maximize the efficiency and lifespan of your wood pellet mill.
Transition: In addition to the maintenance and troubleshooting aspects, wood pellet mills also offer significant environmental benefits.
Environmental Benefits of Wood Pellet Mills
In addition to their maintenance and troubleshooting aspects, wood pellet mills also have significant environmental benefits. Here are three reasons why wood pellet mills are considered an environmentally-friendly choice:
-
Reducing Carbon Emissions: Wood pellets are made from renewable biomass sources such as sawdust, wood chips, or agricultural waste. When burned as fuel, they release significantly fewer greenhouse gas emissions compared to fossil fuels like coal or oil. This helps to reduce the overall carbon footprint and combat climate change.
-
Renewable Energy Source: Wood pellets are derived from sustainable forestry practices, where trees are responsibly harvested and replanted. Unlike fossil fuels, which are finite resources, wood pellets offer a renewable energy source that can be continuously produced and utilized without depleting natural resources.
-
Waste Reduction: Wood pellet mills help to repurpose and utilize wood waste that would otherwise end up in landfills. By converting this waste into valuable fuel, wood pellet mills contribute to waste reduction and promote a more circular economy.
Overall, wood pellet mills play a crucial role in reducing carbon emissions, providing a renewable energy source, and minimizing waste, making them an environmentally-friendly option for meeting energy needs.
What is the process of making wood pellets in a wood pellet mill?
At wood pellet mill processes, raw materials like sawdust or wood chips are first ground into small particles. Then, the particles are fed into the wood pellet mill where they are compressed and heated to form pellets. The pellets are then cooled and screened before being ready for use.
What Are the Key Components of a Wood Pellet Mill and How Do They Function?
A wood pellet mill operation consists of several key components including the hammer mill for grinding raw materials, the pellet machine for compressing the materials into pellets, and the cooler and dryer for reducing moisture content. The final step involves the packaging machine for storing and transporting the finished wood pellets.
Frequently Asked Questions
Are Wood Pellets Safe to Use for Heating and Cooking?
Yes, wood pellets are safe to use for heating and cooking. They have environmental benefits and are cost-effective compared to other options. They provide efficient heat and are a renewable energy source.
How Long Do Wood Pellet Mills Typically Last?
Wood pellet mills typically last for several years, with the longevity depending on various factors such as maintenance, usage, and quality of the machine. These factors can significantly affect the lifespan of wood pellet mills.
Can Wood Pellet Mills Use Different Types of Wood as Raw Materials?
Different types of wood suitable for wood pellet production include hardwoods, softwoods, and agricultural residues. Benefits of using different types of wood in wood pellet mills include increased energy efficiency and reduced emissions.
What Is the Average Production Capacity of a Wood Pellet Mill?
On average, a wood pellet mill can produce around [insert production capacity] of wood pellets per hour. This production capacity is determined by the size and efficiency of the mill.
Are There Any Regulations or Certifications for Wood Pellet Mills to Ensure Their Quality and Environmental Impact?
Yes, there are regulations and certifications for wood pellet mills to ensure their quality and minimize their environmental impact. These measures are in place to promote sustainable practices and protect the environment.
Conclusion
So there you have it, folks. Wood pellet mills, the magical machines that turn wood into little nuggets of fuel. It’s truly a fascinating process.
From grinding and drying the wood material to pelletizing it and finally cooling and screening the wood pellets. And let’s not forget about the packaging and storage, because who doesn’t love a neatly packed bag of wood pellets?
But the real star of the show is the maintenance and troubleshooting of these mills, because let’s face it, nothing is perfect. But fear not, because the environmental benefits of wood pellet mills make it all worth it.
So next time you cozy up by the fire, remember the humble wood pellet mill that made it all possible.
Pellet Stoves
How Do You Adjust a Pellet Stove to Hard Wood
Having ample experience using pellet stoves, I frequently adjust mine to burn hardwood pellets efficiently. Although it may seem overwhelming to differentiate between hardwood and softwood pellets initially, with the appropriate expertise and strategies, this obstacle can be easily conquered.
In this article, I will guide you through the process of understanding the basics of pellet stove adjustments, identifying the differences between softwood and hardwood pellets, and fine-tuning the feed rate and air intake for optimal hardwood burning.
Plus, I’ll share tips on maintenance and cleaning to ensure longevity and performance.
Key Takeaways
- Choose hardwood pellets with low moisture content for better combustion
- Look for pellets made from dense hardwoods like oak or hickory for higher heat output
- Increase feed rate slightly if stove is not producing enough heat
- Decrease feed rate gradually if stove is producing too much heat
Understanding the Basics of Pellet Stove Adjustments
To understand the basics of pellet stove adjustments, you’ll need to familiarize yourself with the different settings and options available. Proper pellet stove troubleshooting begins with understanding how to control the temperature.
Most pellet stoves have a temperature control dial or digital display that allows you to adjust the heat output. By turning the dial or using the controls, you can increase or decrease the temperature as needed. It’s important to remember that each pellet stove may have slightly different controls or settings, so it’s best to consult the manufacturer’s manual for specific instructions.
Now that we understand the basics of pellet stove adjustments, let’s move on to identifying the differences between softwood and hardwood pellets.
Identifying the Differences Between Softwood and Hardwood Pellets
Identifying the differences between softwood and hardwood pellets can help improve the performance of your stove. When choosing the right pellet fuel for your stove, it is important to consider the heat output of the pellets.
Softwood pellets, made from coniferous trees like pine or spruce, tend to have a higher heat output compared to hardwood pellets. This is because softwood has a higher resin content, which results in a more efficient burn.
On the other hand, hardwood pellets, made from trees like oak or maple, may have a lower heat output but they burn longer and produce less ash. Understanding these differences can help you make an informed decision when selecting the pellets for your stove.
Now, let’s discuss adjusting the feed rate for optimal hardwood burning.
Adjusting the Feed Rate for Optimal Hardwood Burning
When adjusting the feed rate for optimal hardwood burning, it’s important to find the right balance for consistent heat output. Hardwood pellets can provide a longer burn time and higher heat output compared to softwood pellets.
To ensure efficient burning, consider the following:
- Hardwood pellet selection:
- Choose hardwood pellets with low moisture content for better combustion.
- Look for pellets made from dense hardwoods like oak or hickory for higher heat output.
Troubleshooting common feed rate issues:
- If the stove is not producing enough heat, increase the feed rate slightly.
- If the stove is producing too much heat, decrease the feed rate gradually.
By adjusting the feed rate accordingly, you can optimize the burning process and achieve consistent heat output.
Now, let’s move on to fine-tuning the air intake for efficient wood combustion.
Fine-Tuning the Air Intake for Efficient Wood Combustion
For optimal wood combustion, make sure you find the right balance in adjusting the air intake. Proper ventilation is of utmost importance to ensure efficient wood combustion.
When the air intake is adjusted correctly, it allows for the right amount of oxygen to reach the fire, promoting complete and efficient combustion. This helps in maximizing heat output and minimizing the production of harmful pollutants.
Additionally, it is crucial to consider the moisture content of the wood pellets used for combustion. High moisture content can negatively impact combustion efficiency, leading to reduced heat output and increased smoke emissions. Therefore, it is essential to use dry and seasoned wood pellets for optimal performance.
By fine-tuning the air intake and using low moisture content wood pellets, you can achieve efficient wood combustion and a more environmentally friendly operation.
Ensuring proper maintenance and cleaning further enhances longevity and performance, keeping your pellet stove operating at its best.
Ensuring Proper Maintenance and Cleaning for Longevity and Performance
Proper maintenance and cleaning are essential for ensuring the longevity and optimal performance of your pellet stove. Regular inspections are of utmost importance to identify any issues or potential problems that may affect its functionality. By conducting these inspections, you can address any concerns promptly and prevent further damage or breakdowns.
Additionally, using high-quality pellets can greatly enhance the performance of your stove. High-quality pellets burn more efficiently, producing more heat and leaving behind less residue. This not only improves the overall performance of your stove but also reduces the frequency of cleanings and maintenance required.
Therefore, investing in good quality pellets is not only beneficial for your stove but also saves you time and money in the long run.
Is Adjusting a Pellet Stove to Burn Hard Wood Different from Installing a Wood Pellet Stove?
Adjusting a pellet stove to burn hard wood is different from installing a wood pellet stove. The adjustment involves changing the fuel type and may require modifying the stove settings. On the other hand, wood pellet stove installation steps include assembling the stove, positioning the vent, and connecting it to the flue.
Can I Use Hard Wood Instead of Pellets in a Wood Pellet Stove?
Yes, you can use hard wood instead of pellets in a wood pellet stove. However, it is important to follow the manufacturer’s recommendations for fuel type to ensure efficient and safe operation. For more information, consult a wood pellet stove installation guide.
Frequently Asked Questions
Can I Use Softwood Pellets in a Pellet Stove Designed for Hardwood Pellets?
I can burn softwood pellets in my pellet stove designed for hardwood pellets, but there are advantages to using hardwood pellets. They tend to have higher heat output and produce less ash. Adjusting the stove may be necessary for optimal performance.
How Often Should I Clean My Pellet Stove?
When troubleshooting a pellet stove not igniting, it’s important to check the fuel supply, igniter, and air intake. Signs that a pellet stove needs cleaning include reduced heat output and excessive ash buildup.
What Kind of Maintenance Is Required for a Pellet Stove?
To properly maintain a pellet stove, regular maintenance is required. This includes cleaning the burn pot, removing ash buildup, and checking the exhaust vent for blockages. Troubleshooting issues may involve adjusting air intake or checking the fuel supply.
Can I Adjust the Feed Rate on My Pellet Stove to Burn Different Types of Wood?
To optimize pellet stove efficiency, I adjust the feed rate according to the type of wood I’m burning. By tweaking this setting, I can control the burn rate and ensure efficient combustion.
Are There Any Safety Precautions I Should Take When Adjusting My Pellet Stove?
When adjusting a pellet stove, it is important to take safety precautions. Ensure the stove is turned off and cooled down before making any adjustments. Follow the manufacturer’s instructions and wear protective gear if necessary.
Conclusion
In conclusion, adjusting a pellet stove to burn hardwood requires a combination of knowledge and precision. By understanding the basics of pellet stove adjustments and the differences between softwood and hardwood pellets, one can optimize the feed rate and air intake for efficient wood combustion.
Regular maintenance and cleaning are also essential for the longevity and performance of the stove.
So, if you’re looking to harness the full potential of your pellet stove with hardwood, don’t forget to fine-tune and maintain it like a pro.
-
Wood Stove9 months ago
How To Build A Thermoelectric Generator For A Wood Stove
-
Wood Stove6 months ago
What Can I Use As Insulation On Wood Stove Pipes
-
Wood Stove2 months ago
How To Use Damper And Draft On Wood Stove
-
Wood Stove2 weeks ago
How Far Does Wood Stove Have To Be From Wall
-
Wood Stove8 months ago
How To Make A Heat Shield For A Wood Stove
-
Wood Stove1 month ago
When To Open And Close Damper On Wood Stove
-
Wood Stove9 months ago
How To Use The Flue On A Wood Stove
-
Wood Stove6 months ago
How To Install A Wood Stove Pipe And Chimney