As a fan of wood stoves, I frequently consider the best way to effectively seal the area around the metal chimney. It is essential to have a secure seal to avoid any leaks or loss of heat. Fortunately, there are many trustworthy options available to help with this.
From silicone sealant to high-temperature caulk, chimney flashing tape to fireproof mortar, and insulation wrap, this article will guide you through the best techniques to keep your wood stove setup secure and efficient.
Let’s dive into the world of chimney sealing!
Key Takeaways
- Silicone sealant, high-temperature caulk, and chimney flashing tape are highly resistant to extreme temperatures and provide excellent adhesion to metal and wood surfaces.
- Proper cleaning of the area before applying the sealant/caulk/tape is essential for a durable and long-lasting seal.
- It is important to allow the sealant/caulk/tape to cure completely before using the wood stove again.
- Chimney flashing tape offers an alternative to high-temperature caulk for sealing around the metal chimney, but common mistakes to avoid include not cleaning the surface properly, uneven application, and insufficient pressure for proper adhesion.
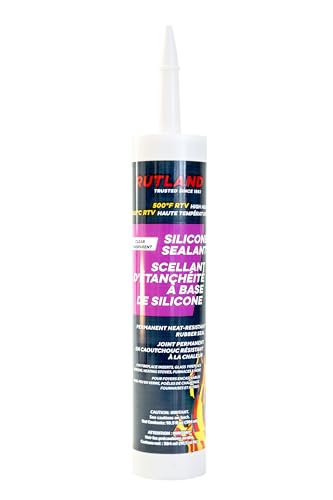
Rutland 500°F RTV High Heat Silicone Sealant Clear, USA-Made High Temperature Gasket Maker Adhesive – UV Stable, Oil Resistant & Non-Corrosive
Rutland High Temperature Silicone is a great solution to your sealant and adhesive needs
As an affiliate, we earn on qualifying purchases.
As an affiliate, we earn on qualifying purchases.
Silicone Sealant
I really need to buy some silicone sealant to fix the leak around the metal chimney of my wood stove.
Using silicone sealant offers numerous benefits when it comes to sealing around the metal chimney of a wood stove. First and foremost, silicone sealant is highly resistant to extreme temperatures, ensuring that it remains effective even when subjected to the intense heat of the stove. Additionally, silicone sealant provides excellent adhesion to both metal and wood surfaces, creating a durable and long-lasting seal.
To properly apply silicone sealant on wood stove chimneys, it’s crucial to clean the area thoroughly and remove any debris or old sealant. Apply the sealant using a caulking gun, ensuring an even and consistent bead. Smooth the sealant with a caulking tool or your finger, and allow it to cure completely before using the wood stove again.

FireHiking Fireproof Pipe Wrap (Basalt Fiber) Anti Scalding Chimney Ribbon Stove Flue Protector with 2 Clamps
【Level 3 Basalt Fiber Material】 The Industrial grade safe material has excellent high temperature resistance. But it may…
As an affiliate, we earn on qualifying purchases.
As an affiliate, we earn on qualifying purchases.
High-Temperature Caulk
Using high-temperature caulk is essential for maintaining a secure seal around the metal chimney of my wood stove. The advantages of using high-temperature caulk for sealing around a wood stove chimney are:
Heat resistance: High-temperature caulk is designed to withstand the extreme temperatures generated by a wood stove, ensuring that the seal remains intact even under intense heat.
Durability: This type of caulk is formulated to be long-lasting and resistant to cracking, shrinking, and crumbling, ensuring a reliable seal for years to come.
Easy application: High-temperature caulk is typically easy to apply, either by squeezing it directly from a tube or using a caulk gun.
However, there are a few disadvantages to consider:
Limited color options: High-temperature caulk is often available in limited color choices, which may not match the aesthetic of your wood stove or chimney.
Time-consuming application: Properly applying high-temperature caulk requires careful attention to detail, as it needs to be evenly and thoroughly spread along the chimney’s joints and gaps.
Difficult removal: If you need to remove or replace the caulk in the future, it can be a challenging and time-consuming process.
To apply high-temperature caulk to seal a metal chimney on a wood stove, follow these steps:
Clean the chimney: Remove any dirt, debris, or old caulk from the chimney surface to ensure proper adhesion.

Prepare the caulk: Cut the tip of the caulk tube at a 45-degree angle and load it into a caulk gun if necessary.
Apply the caulk: Squeeze a steady stream of caulk along the joints and gaps of the chimney, ensuring full coverage.
Smooth the caulk: Use a caulk smoothing tool or a gloved finger to smooth the caulk and remove any excess.
Allow the caulk to cure: Follow the manufacturer’s instructions for curing time before using the wood stove.


Tenon Refractory Mortar – High Temperature Mix for Fireplaces, Fire Pits, Chimneys, Parging, Brick, Clay, and More, White in Color, High Heat Resistance, Up to 2550°F (1, 10 Pounds)
READY TO USE: Preblended, just add water and go!
As an affiliate, we earn on qualifying purchases.
As an affiliate, we earn on qualifying purchases.
Chimney Flashing Tape
After researching different options, it seems that chimney flashing tape is a viable alternative to high-temperature caulk for sealing around the metal chimney of my wood stove.
Chimney flashing tape offers several benefits over other sealing methods. First and foremost, it provides a strong and durable seal that can withstand high temperatures. This is crucial when dealing with a wood stove, as it produces intense heat that can cause traditional caulk to crack and deteriorate over time.
Additionally, chimney flashing tape is easy to apply and requires minimal preparation. Unlike caulk, it doesn’t require any mixing or drying time.
However, there are some common mistakes to avoid when applying chimney flashing tape. These include not cleaning the surface properly before application, not applying the tape evenly, and not using enough pressure to ensure proper adhesion.

Akfix Heat Fighter Black Fireplace Sealant – 2700 °F (1×10.1 oz.) – Heat Resistant Fireplace Stove Caulk for Chimneys, Ovens, Grills, Wood Stoves | Non-Flammable, Quick-Drying & Paintable Cartridge
Withstands Extreme Heat Up to 2700°F: Built for direct flame contact. Ideal for sealing and insulating fireplaces, stoves,…
As an affiliate, we earn on qualifying purchases.
As an affiliate, we earn on qualifying purchases.
Fireproof Mortar
I’ve heard that fireproof mortar is the best option for sealing the gaps between the bricks in a wood stove chimney. When it comes to fireplace maintenance and chimney cleaning, it’s crucial to choose the right materials for the job.
Here are three reasons why fireproof mortar is a top choice:
Superior heat resistance: Fireproof mortar can withstand high temperatures, ensuring that it won’t crack or deteriorate over time.
Excellent adhesion: This mortar forms a strong bond with the bricks, creating a tight seal that prevents any smoke or gases from escaping.
Long-lasting durability: Fireproof mortar is designed to withstand the harsh conditions of a wood stove chimney, providing a reliable seal for many years.
Using fireproof mortar is essential for maintaining the efficiency and safety of your wood stove chimney. However, sealing the gaps is just one part of the equation.
To further improve insulation and reduce heat loss, let’s explore the benefits of using insulation wrap.
Insulation Wrap
The insulation wrap’s reflective surface helps to retain heat and improve energy efficiency in my wood stove chimney. This insulation wrap is specifically designed to provide insulation benefits by reducing heat loss and preventing cold air from entering the chimney.

The installation process for the insulation wrap is relatively straightforward. First, I clean the chimney thoroughly to remove any debris or soot. Then, I measure the length of the chimney and cut the insulation wrap accordingly.
Next, I wrap the insulation around the chimney, ensuring that the reflective surface faces inward. I secure the insulation wrap in place using metal fasteners or high-temperature adhesive. Finally, I seal any gaps or seams with heat-resistant tape to ensure maximum insulation effectiveness.
Overall, the insulation wrap is an excellent solution for improving energy efficiency and reducing heat loss in my wood stove chimney.
What Type of Sealant Should I Use for Installing a Wood Stove in an Existing Fireplace?
When looking to install a wood stove in an existing fireplace, it’s important to choose the right sealant. High-temperature silicone sealant is recommended for this task, as it can withstand the heat produced by the stove and create a secure, airtight seal for optimal safety and efficiency.
Frequently Asked Questions
Can I Use Regular Caulk or Sealant Instead of High-Temperature Caulk to Seal Around the Metal Chimney of My Wood Stove?
I wouldn’t recommend using regular caulk or sealant to seal around the metal chimney of a wood stove. High-temperature caulk is specifically designed to withstand the heat, preventing any potential fire hazards.
How Long Does It Take for Silicone Sealant to Cure and Become Fully Waterproof?
Silicone sealant typically takes 24-48 hours to cure completely and become fully waterproof. Its effectiveness in waterproofing depends on the quality of the sealant and proper application techniques.
Can Chimney Flashing Tape Be Used on a Brick Chimney or Is It Only Suitable for Metal Chimneys?
Chimney flashing tape is typically used on metal chimneys, but it can also be used on brick chimneys. However, there are alternatives to consider, such as high temperature caulk, which may be more suitable for sealing around a wood stove’s metal chimney.
Is Fireproof Mortar Suitable for Sealing Gaps and Cracks in the Chimney Pipe as Well, or Is It Only Meant for the Chimney’s Exterior?
Fireproof mortar is suitable for sealing gaps and cracks in both the chimney’s exterior and the chimney pipe. However, there are alternative sealing methods available, and it’s important to weigh the pros and cons of each option.
Can Insulation Wrap Be Used as a Standalone Solution for Sealing Around the Metal Chimney, or Does It Need to Be Combined With Other Sealants or Materials?
Insulation wrap alone may not provide sufficient sealing around the metal chimney. It is beneficial to combine it with other sealants or materials for better results. Using multiple sealants ensures a more effective and durable solution.
Conclusion
In conclusion, when it comes to sealing around the metal chimney of your wood stove, there are several effective options to choose from. Silicone sealant, high-temperature caulk, chimney flashing tape, fireproof mortar, and insulation wrap are all reliable choices.
Did you know that according to a study conducted by chimney professionals, using high-temperature caulk can increase the lifespan of your chimney by up to 10 years? So, make sure to choose the right sealing method to ensure the longevity and safety of your wood stove.