Connect with us

Pellet Stoves

How to Smoke a Boston Butt on a Wood Pellet Grill

Published

on

Are you interested in discovering the techniques to masterfully smoke a Boston Butt using a wood pellet grill? I assure you, it’s a culinary skill that will leave your palate craving for more.

With the right wood pellet flavor and the perfect temperature, you can achieve tender, juicy meat that is bursting with smoky goodness. Trust me, once you try this technique, there’s no going back.

Get ready to become the master of the grill and impress your friends and family with the best smoked Boston Butt they’ve ever tasted.

Key Takeaways

  • The choice of wood pellet flavor should be based on the type of meat being smoked.
  • Trim excess fat and apply a dry rub to prepare the Boston Butt for smoking.
  • Properly set up the wood pellet grill and maintain a consistent temperature for optimal smoking.
  • Avoid temperature fluctuations by ensuring proper sealing, minimizing lid opening, and adjusting fuel source or airflow vents if needed.

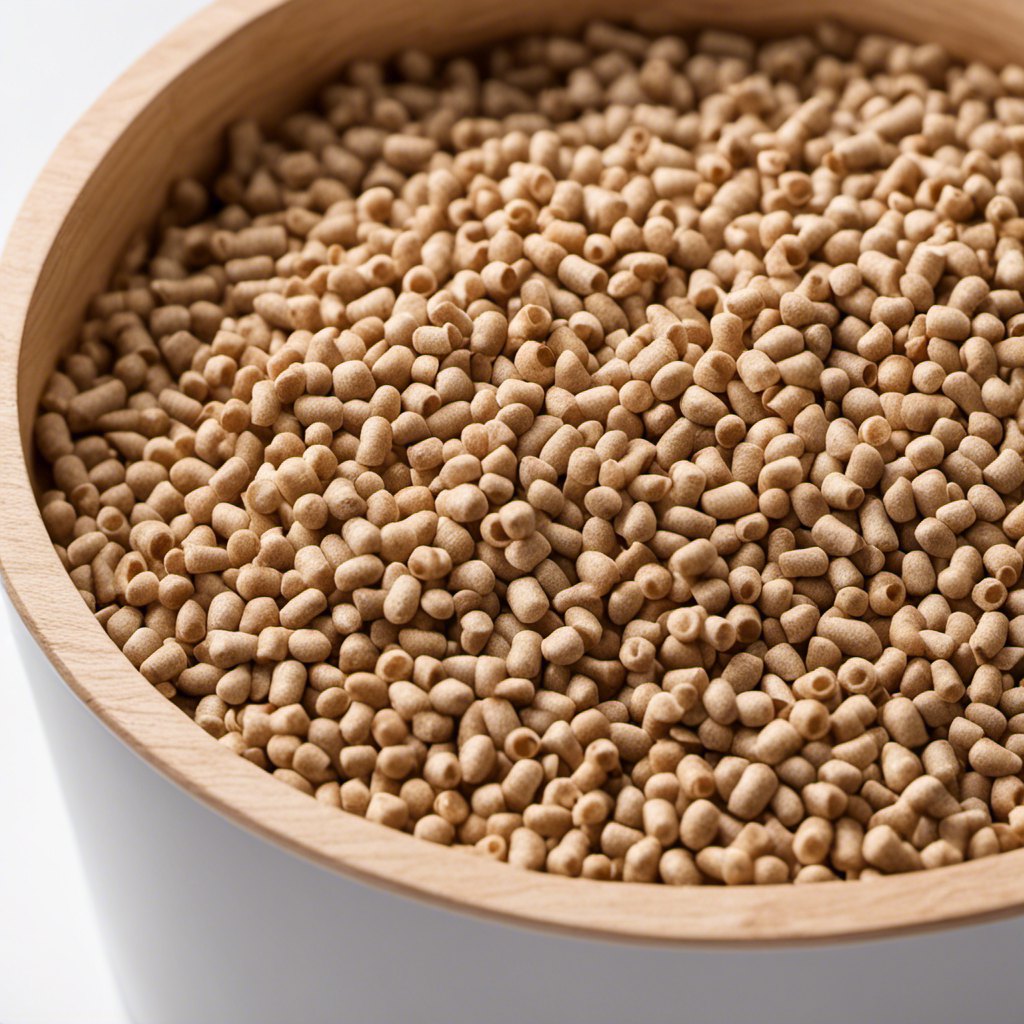
Selecting the Right Wood Pellet Flavor

When selecting the right wood pellet flavor, it’s important to consider the type of meat you’re smoking. Different types of wood pellets impart distinct flavors that can enhance the taste of your smoked dishes. Choosing the right wood pellet flavor is crucial in achieving a delicious and well-balanced outcome.

Advertisement

For a boston butt, I recommend using hickory or apple wood pellets. Hickory provides a strong, smoky flavor that complements the rich and fatty nature of the pork butt. On the other hand, apple wood pellets offer a milder and slightly sweet taste, which pairs well with pork’s natural sweetness. Both options will enhance the flavor of your boston butt and create an unforgettable smoky aroma.

Now that we’ve discussed choosing the right wood pellet flavor, let’s move on to preparing the boston butt for smoking by marinating it overnight to infuse it with even more flavor.

Preparing the Boston Butt for Smoking

When it comes to preparing a Boston Butt for smoking, there are a few key steps that can make all the difference in the final result.

First, trimming excess fat is important to ensure even cooking and prevent flare-ups.

Next, applying a dry rub adds flavor and helps create a delicious crust on the meat.

Advertisement

Lastly, letting the Boston Butt marinate allows the flavors to penetrate and tenderize the meat for an incredibly juicy and flavorful end product.

Trimming Excess Fat

To achieve a leaner cut of meat, you can start by trimming excess fat from the Boston butt before smoking it on the wood pellet grill. This step is crucial in reducing the fat content of the meat, resulting in a healthier and more flavorful final product.

By removing any visible fat, you not only improve the nutritional profile of the dish but also enhance its flavor profile. Fat tends to mask the natural flavors of the meat, so trimming it allows other seasonings and spices to shine through during the smoking process.

Once you have completed this important task, you can move on to applying a delicious dry rub that will further enhance the taste and aroma of your smoked Boston butt.

Applying Dry Rub

After trimming excess fat, you can easily enhance the flavor of your meat by applying a delicious dry rub. Dry rub techniques are a great way to add layers of flavor and create a crust on the outside of your meat.

Advertisement

To start, choose a combination of spices that complement the type of meat you’re cooking. Common ingredients include salt, pepper, paprika, garlic powder, and brown sugar. Mix these together in a bowl and generously apply it all over your meat, making sure to coat every inch. The dry rub will help seal in moisture while adding depth and complexity to the taste.

Once applied, let it marinate for at least an hour or overnight in the refrigerator before smoking for optimal flavor penetration without compromising texture.

Transitioning into the subsequent section about letting it marinate without using ‘step,’ now that we have our dry rub applied, it’s time to let those flavors meld together by allowing the meat to marinate.

Letting It Marinate

Now that you’ve applied the dry rub, it’s time to let your meat marinate and allow those flavors to come together. Marinating is a crucial step in the smoking process as it helps tenderize the meat and infuse it with delicious flavors.

There are various marinating techniques you can use, such as using a marinade or simply letting the meat sit in the dry rub for several hours or overnight. The marinating time depends on personal preference and the cut of meat you’re using. Generally, allowing your meat to marinate for at least 4-6 hours will enhance its taste and tenderness.

Advertisement

As the flavors meld together during this time, get ready to set up your wood pellet grill for smoking by following these simple steps…

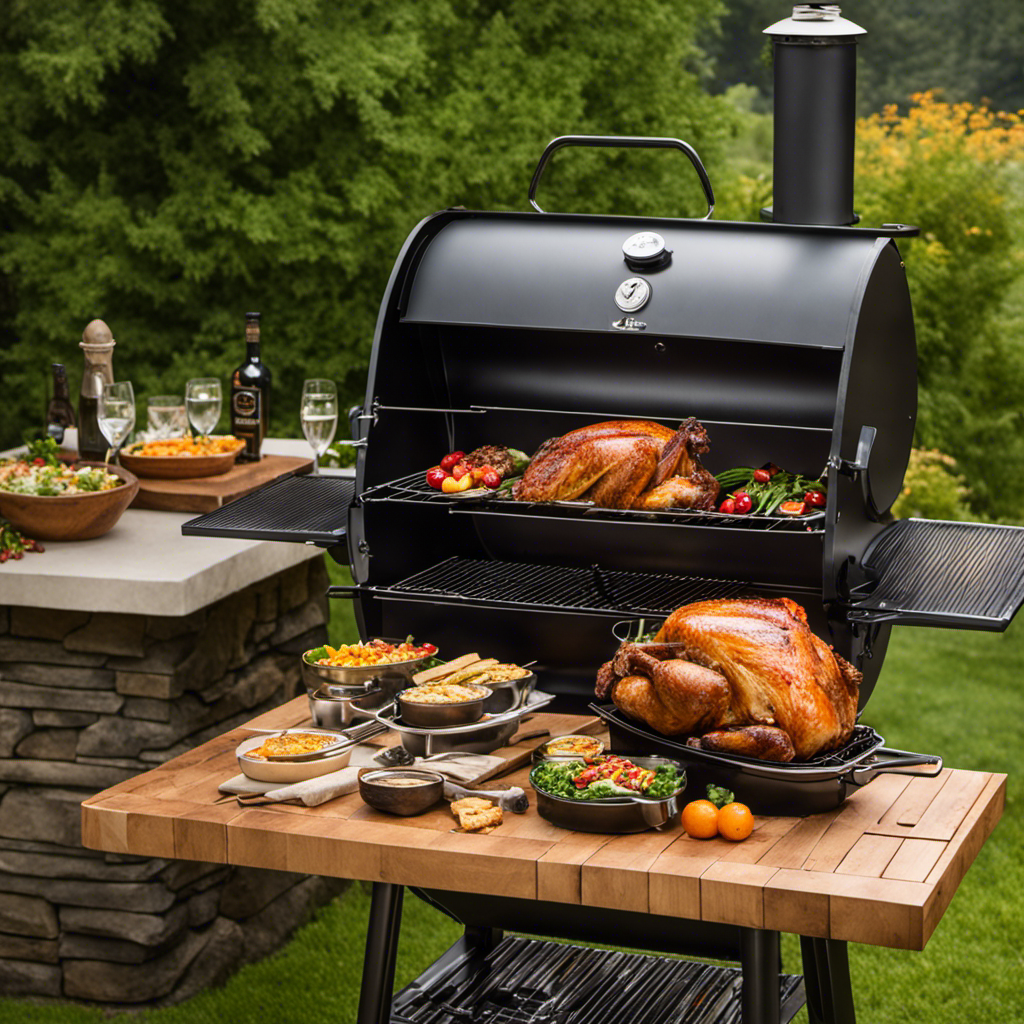
Setting Up the Wood Pellet Grill for Smoking

First, make sure you’ve filled the hopper with wood pellets and turned on the grill. Setting up a wood pellet grill for smoking is crucial to achieving that perfect smoky flavor in your Boston butt.

Start by preheating the grill to your desired temperature, typically around 225°F to 250°F. This low and slow cooking method ensures tender and juicy meat.

Place a drip pan under the grates to catch any drippings and prevent flare-ups. It’s important to avoid common mistakes like overfilling the hopper or not properly cleaning the grill before use.

Additionally, ensure proper ventilation by keeping all vents open during smoking.

Advertisement

Now that we have our grill set up, let’s move on to smoking the Boston butt at the right temperature.

Smoking the Boston Butt at the Right Temperature

When it comes to smoking a Boston Butt, achieving the optimal smoking temperature is crucial for a delicious and tender result. Maintaining a consistent temperature throughout the smoking process can be challenging but with the right tips, it can be achieved.

In this discussion, I will share insights on finding the optimal smoking temperatures, providing temperature control tips, and avoiding fluctuations to ensure that your Boston Butt turns out perfect every time.

Optimal Smoking Temperatures

To achieve the best results, you’ll want to monitor your wood pellet grill’s temperature throughout the smoking process. Maintaining even heat is crucial for ensuring that your Boston butt turns out tender and flavorful.

One of the benefits of low and slow cooking is that it allows the collagen in the meat to break down slowly, resulting in a juicy and succulent final product. The ideal temperature range for smoking a Boston butt is between 225°F and 250°F. This ensures that the meat cooks slowly and evenly, allowing ample time for smoke flavor to infuse into every bite.

Advertisement

Temperature Control Tips

For optimal temperature control, you’ll want to regularly check and adjust the settings on your grill. Temperature control techniques are crucial for achieving that perfect smoke on your Boston butt. One important technique is to preheat your grill before adding the meat. This ensures a stable starting temperature. Additionally, using a reliable thermometer will help you accurately monitor the internal temperature of the meat throughout the smoking process.

Troubleshooting temperature fluctuations can be frustrating but there are steps you can take to minimize them. First, make sure your grill is properly sealed to prevent heat from escaping. Next, avoid constantly opening the lid as this can cause significant drops in temperature. If you notice consistent fluctuations, consider adjusting the fuel source or airflow vents.

Avoiding Temperature Fluctuations

Minimizing temperature fluctuations is key to achieving consistent and delicious results while smoking your meat. Here are four essential tips to help you prevent drying out your meat and maintain a consistent smoke flavor:

  1. Use quality insulation: Invest in a well-insulated smoker or grill that can retain heat efficiently. This will help minimize temperature swings caused by external factors like wind.

  2. Preheat your smoker: Before adding your meat, preheat the smoker to the desired temperature. This ensures that the cooking environment is stable from the start, reducing the chances of sudden fluctuations.

  3. Avoid excessive lid opening: Every time you open the lid, heat escapes, causing temperature fluctuations. Limit unnecessary peeking and only open when necessary for basting or checking doneness.

  4. Monitor airflow: Proper airflow is crucial for maintaining consistent temperatures and smoke levels. Adjust air vents as needed to regulate oxygen flow and control the fire’s intensity.

By following these tips, you’ll be able to minimize temperature fluctuations, preventing drying out of your meat while maintaining a mouthwatering smoke flavor throughout the smoking process.

Now let’s move on to monitoring and maintaining the smoke levels without missing a beat.

Advertisement

Monitoring and Maintaining the Smoke Levels

Keep an eye on the smoke levels to ensure you’re getting that perfect smoky flavor in your Boston butt. Maintaining consistent smoke flavor is crucial for a delicious result.

To achieve this, start by ensuring that your wood pellets are producing enough smoke. If you notice the smoke starting to thin out or disappear, it might be due to insufficient airflow or a clogged heat diffuser plate. Troubleshooting these issues can help maintain the desired smoke levels throughout the cooking process.

Additionally, adjusting the temperature settings on your wood pellet grill can also impact the amount of smoke produced. By finding the right balance between temperature and smoke production, you can create a mouthwatering smoky flavor that will enhance your Boston butt’s taste and tenderness.

Now that you’ve mastered monitoring and maintaining the smoke levels, let’s move on to wrapping and resting the smoked Boston butt without compromising its juiciness and flavor.

Wrapping and Resting the Smoked Boston Butt

Once you’ve achieved that perfect smoky flavor, it’s time to wrap and let the smoked Boston butt rest for optimal juiciness and flavor.

Advertisement

Wrapping the boston butt during the smoking process offers several benefits. First, it helps retain moisture by trapping in the natural juices, preventing them from evaporating. Second, it allows the meat to continue cooking slowly and evenly while tenderizing further. And third, wrapping creates a barrier that prevents excessive smoke from overpowering the meat.

To achieve the perfect resting time for your smoked boston butt, follow these tips:

1) Let it rest for at least 30 minutes to allow the juices to redistribute throughout the meat.

2) Keep it wrapped tightly in foil or butcher paper to retain heat and moisture.

3) Aim for a resting temperature of around 160°F (71°C). This will ensure that your boston butt is tender and juicy when served.

Advertisement

After giving your smoked boston butt ample time to rest, you are now ready to serve and enjoy its perfectly smoky goodness.

Serving and Enjoying the Perfectly Smoked Boston Butt

After giving your smoked Boston butt ample time to rest, you’re now ready to slice it and savor the delicious smoky flavor.

Serving suggestions for this mouthwatering dish are endless, but here are a few ideas to get you started.

For a classic Southern-style meal, serve the sliced Boston butt on a buttered bun with coleslaw and pickles on the side. The combination of tender meat, crunchy slaw, and tangy pickles is simply irresistible.

If you’re looking for something lighter, try serving it with a fresh salad or roasted vegetables. The smoky flavors of the meat will pair beautifully with the freshness of the greens or the natural sweetness of roasted veggies.

Advertisement

And don’t forget about the sauces! Barbecue sauce, hot sauce, or even a homemade aioli can take your Boston butt to new heights of deliciousness.

So go ahead and enjoy every bite of your perfectly smoked creation!

Frequently Asked Questions

How Long Does It Take to Smoke a Boston Butt on a Wood Pellet Grill?

It takes several hours to smoke a Boston Butt on a wood pellet grill. Achieving a perfectly smoky flavor requires patience and attention to temperature and seasoning.

Can I Use Any Type of Wood Pellets for Smoking a Boston Butt?

Can I use any type of wood pellets for smoking a Boston Butt? Different types of wood pellets can add unique flavors to the meat. However, the best wood pellets for smoking a Boston Butt are typically hardwood varieties like hickory or oak.

Do I Need to Marinate or Season the Boston Butt Before Smoking It?

I prefer to season my Boston butt before smoking it rather than marinating. Seasoning allows the flavors to penetrate the meat better and creates a delicious bark. I recommend using a rub with salt, pepper, paprika, garlic powder, and brown sugar.

Advertisement

Can I Smoke a Frozen Boston Butt on a Wood Pellet Grill?

Smoking a frozen Boston butt on a wood pellet grill offers several benefits. The low and slow cooking process allows for tender and flavorful meat, while the frozen state helps retain moisture.

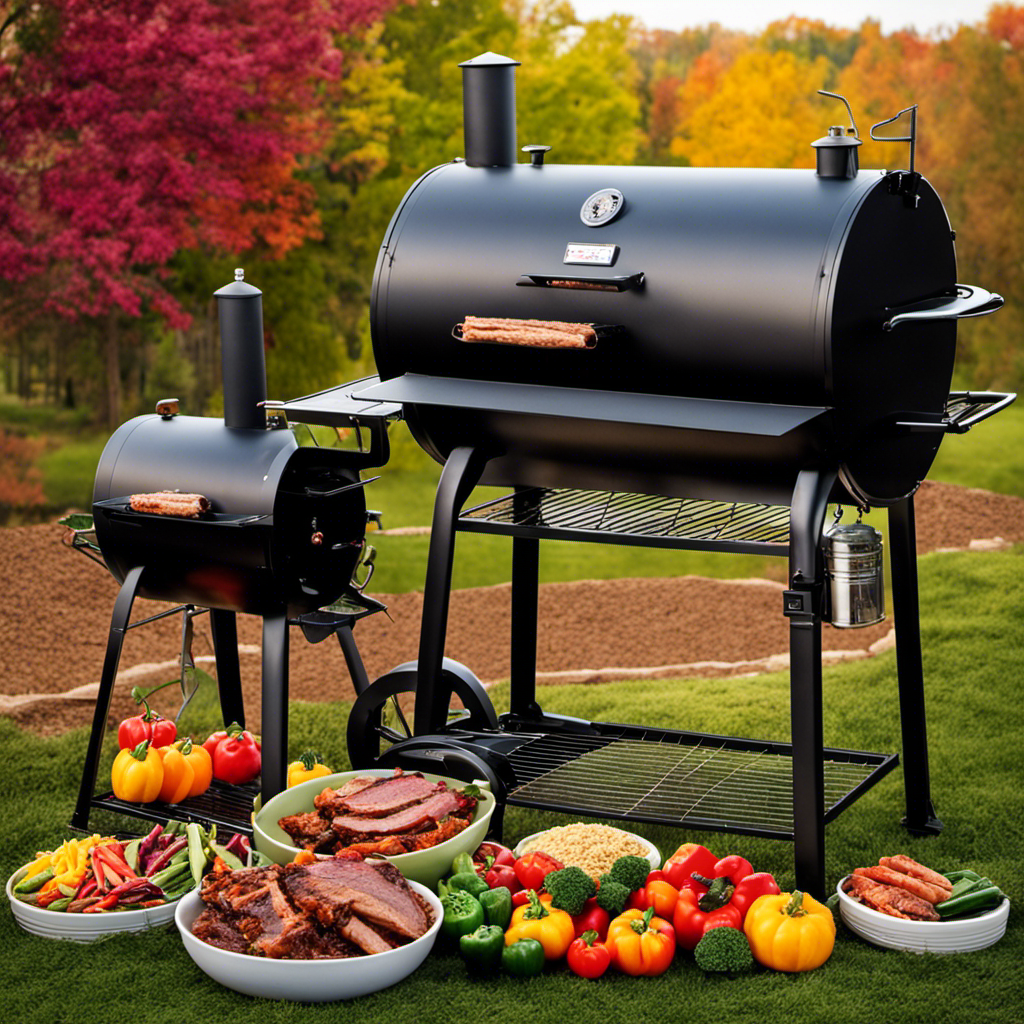
Can I Smoke Other Meats Alongside the Boston Butt on the Wood Pellet Grill?

Yes, you can smoke multiple meats alongside the Boston Butt on a wood pellet grill. Here are some tips for smoking on a wood pellet grill: maintain a consistent temperature, use appropriate seasoning, and allow enough time for the meat to cook thoroughly.

Conclusion

So there you have it, the step-by-step guide on how to smoke a Boston Butt on a wood pellet grill.

I have shared my knowledge and experience with you in order to help you achieve the perfect smoked Boston Butt.

By following these instructions and using the right wood pellet flavor, preparing the meat properly, and maintaining the right temperature and smoke levels, you can create a mouthwatering masterpiece that will impress your friends and family.

Advertisement

So go ahead, fire up that wood pellet grill and get ready for some amazing flavors!

Hicks Hickory Smoked Boneless Whole Boston Butt No Sauce, 6.5 Pound - 3 per case.

Growing up surrounded by the vast beauty of nature, Sierra was always drawn to the call of the wild. While others sought the comfort of the familiar, she ventured out, embracing the unpredictable and finding stories in the heartbeat of nature.   At the epicenter of every remarkable venture lies a dynamic team—a fusion of diverse talents, visions, and passions. The essence of Best Small Wood Stoves is crafted and refined by such a trio: Sierra, Logan, and Terra. Their collective expertise has transformed the platform into a leading authority on small wood stoves, radiating warmth and knowledge in equal measure.

Continue Reading
Advertisement

Pellet Stoves

Can I Hook My New Pellet Stove up Where My Wood Stove Was

Published

on

By

An image showcasing a cozy living room, with a beautiful new pellet stove seamlessly integrated into the space where the old wood stove used to stand

As a seasoned homeowner, I frequently toy with the idea of replacing my reliable wood stove with a pellet stove, which is renowned for its higher efficiency and ease of use. However, I wonder, can the new pellet stove be installed in the precise location of my former wood stove?

In this article, we’ll explore the benefits of making the switch, assess the compatibility of your existing chimney, and delve into the necessary modifications for installation. Plus, we’ll discuss the crucial factors to consider when choosing the right location and whether to hire a professional or tackle the installation yourself.

Let’s dive in!

Key Takeaways

  • Switching from a wood stove to a pellet stove offers benefits such as increased efficiency and environmental friendliness.
  • Assess the compatibility of your existing chimney for a pellet stove using a checklist to ensure it meets necessary requirements.
  • Necessary chimney modifications may be required for proper venting and safety when installing a pellet stove.
  • Safety precautions should be taken during the removal and disposal of the old wood stove, including proper ventilation and contacting local waste management or recycling facilities.

Benefits of Switching From a Wood Stove to a Pellet Stove

There are several benefits of switching from a wood stove to a pellet stove.

Pellet stoves offer a more efficient and environmentally friendly heating option compared to wood stoves.

One of the main advantages is the convenience they provide. With a pellet stove, you don’t have to constantly feed it with firewood. Instead, you can simply load the hopper with pellets, and the stove will automatically feed them into the combustion chamber as needed. This eliminates the need for constant monitoring and refueling.

Advertisement

Additionally, pellet stoves produce less smoke and ash compared to wood stoves, resulting in cleaner indoor air quality. They also have a higher heating efficiency, as they can burn pellets more completely. This means you get more heat output per unit of fuel.

In the next section, we will discuss how to assess the compatibility of your existing chimney for a pellet stove.

Assessing the Compatibility of Your Existing Chimney for a Pellet Stove

When considering switching from a wood stove to a pellet stove, it’s crucial to assess the compatibility of your existing chimney. To do this, you can use a chimney compatibility checklist to ensure that your chimney meets the necessary requirements for a pellet stove installation.

In some cases, necessary chimney modifications may be required to ensure proper venting and safety for your pellet stove.

Chimney Compatibility Checklist

You’ll need to check the chimney compatibility checklist to ensure your new pellet stove can be hooked up where your wood stove was.

Advertisement

Chimney installation is a crucial aspect when it comes to pellet stove maintenance. Before making any modifications, it’s important to assess if your existing chimney is suitable for a pellet stove.

The checklist will guide you through the key points to consider. First, check the size and condition of the chimney. Pellet stoves require specific venting systems, so make sure your chimney meets the necessary standards.

Next, inspect the clearance requirements. Pellet stoves need proper clearance from combustible materials to ensure safe operation. Additionally, assess the condition of the chimney liner and ensure it is in good shape.

Necessary Chimney Modifications

To determine if necessary modifications are needed for your chimney, assess the condition of the chimney liner and ensure it meets the required standards for a pellet stove.

Chimney maintenance is crucial to ensure safe and efficient operation of your pellet stove. A damaged or deteriorated chimney liner can pose serious risks, such as carbon monoxide leakage or chimney fires. Regular inspections and cleanings are essential to identify any issues early on.

Advertisement

When considering the cost of chimney maintenance, it is important to factor in the potential savings from improved efficiency and reduced fuel consumption.

Understanding the necessary modifications for installing a pellet stove involves assessing the chimney’s size, draft, and clearance requirements. By making these necessary modifications, you can ensure a seamless and safe installation of your pellet stove.

Understanding the Necessary Modifications for Installing a Pellet Stove

Sure, it’s important to understand the necessary modifications for installing a pellet stove where your wood stove used to be. Here are three key modifications required for a successful installation process:

  1. Chimney liner: A pellet stove requires a specific type of chimney liner to ensure proper venting. This liner is typically made of stainless steel and is designed to accommodate the higher temperatures produced by the pellet stove.

  2. Electrical wiring: Unlike a traditional wood stove, a pellet stove requires electricity to operate. You will need to have an electrical outlet installed near the stove to power the ignition system, fans, and controls.

  3. Air intake and exhaust: Pellet stoves require both an air intake and an exhaust vent. These vents need to be properly positioned to ensure efficient combustion and proper ventilation.

Understanding these modifications will help you prepare for the installation of your new pellet stove. Once you have made the necessary adjustments, you can proceed with safely removing and disposing of your old wood stove.

Steps to Safely Remove and Dispose of Your Old Wood Stove

When it comes to removing an old wood stove, it’s crucial to prioritize safety precautions. Before starting the removal process, make sure to turn off the power supply and disconnect any gas lines or pipes.

Advertisement

Proper disposal methods should also be followed, such as contacting a professional to handle the removal and disposal of any hazardous materials.

Additionally, when considering the installation of a pellet stove, it’s important to take into account factors such as the size and location of the stove, ventilation requirements, and any necessary modifications to the existing chimney or flue system.

Safety Precautions for Removal

Before removing your wood stove and hooking up the pellet stove, it’s important to take safety precautions. Here are three key safety measures to consider during the removal process:

  1. Ensure proper ventilation: Before starting any work, make sure the area is well-ventilated to prevent the buildup of harmful gases. Open windows and doors to allow fresh air to circulate.

  2. Disconnect the power supply: Before removing the wood stove, turn off the power supply to avoid any electrical accidents. This will also prevent any sparks or electrical hazards during the removal process.

  3. Use protective gear: It’s crucial to wear appropriate safety gear, including gloves, goggles, and a dust mask, to protect yourself from potential injuries and harmful particles.

By following these removal precautions and safety measures, you can minimize the risk of accidents and ensure a safe transition to your new pellet stove.

Now, let’s explore the proper disposal methods for your old wood stove.

Advertisement

Proper Disposal Methods

To properly dispose of your old wood stove, you can contact your local waste management facility for guidance and instructions. They will be able to provide you with proper disposal methods that are both environmentally friendly and compliant with local regulations.

One option for disposing of your old wood stove is to recycle it. Many waste management facilities have recycling programs in place for metal appliances like wood stoves. Recycling not only helps to reduce waste in landfills, but it also allows for the extraction and reuse of valuable materials.

Another option is to donate your old wood stove if it is still in working condition. There may be individuals or organizations in need of a wood stove who would greatly appreciate your donation.

When considering installation of a pellet stove to replace your old wood stove, there are several important considerations to keep in mind.

Installation Considerations for Pellet Stove

One important consideration when installing a pellet stove is the availability of a proper ventilation system. Without proper ventilation, the stove may not function efficiently and can pose serious health risks.

Advertisement

Here are three key installation considerations for a pellet stove:

  1. Venting Requirements: Pellet stoves require a venting system to remove combustion gases. This can be achieved through a direct vent system, which uses an exterior wall for venting, or a chimney vent system, which utilizes an existing chimney. It is important to follow manufacturer guidelines and local building codes when choosing the appropriate venting option.

  2. Clearances: Pellet stoves require specific clearances from combustible materials such as walls, furniture, and curtains. Proper clearances ensure safe operation and prevent fire hazards. Be sure to carefully measure and adhere to the recommended clearances during installation.

  3. Maintenance Requirements: Regular maintenance is crucial for the safe and efficient operation of a pellet stove. This includes cleaning the stove and venting system, inspecting and replacing gaskets and seals, and checking for any signs of wear or damage. Following the manufacturer’s maintenance guidelines will help extend the lifespan of the stove and prevent costly repairs.

Considering these installation considerations and maintenance requirements will ensure a safe and efficient pellet stove.

Now, let’s move on to choosing the right location for your new pellet stove.

Choosing the Right Location for Your New Pellet Stove

Sure, you can hook up your new pellet stove in the same location where your wood stove used to be. Pellet stoves offer numerous benefits, such as their efficiency, low emissions, and convenience. However, before installing your pellet stove, there are some important factors to consider.

First, ensure that your chosen location has adequate space and clearance requirements for the stove. This is crucial for proper ventilation and safety. Additionally, consider the proximity to an exterior wall for venting purposes.

Advertisement

It is also important to have access to a power source, as pellet stoves require electricity to operate. Lastly, be mindful of any combustible materials nearby that could pose a fire hazard.

With these considerations in mind, you can confidently proceed with installing your new pellet stove and enjoy its many advantages. Now, let’s discuss the proper ventilation and clearance requirements for pellet stoves.

Proper Ventilation and Clearance Requirements for Pellet Stoves

Before installing your new pellet stove, it’s important to consider the proper ventilation and clearance requirements. This ensures that your stove operates efficiently and safely. Here are three key factors to keep in mind:

  1. Ventilation: Pellet stoves require proper ventilation to remove combustion gases. Make sure your stove is vented to the outside, using a dedicated vent pipe that meets local codes and regulations.

  2. Clearance: Pellet stoves need adequate clearance from combustible materials. Check the manufacturer’s guidelines for the specific clearance distances required for your stove model. This includes walls, furniture, and other objects that could potentially catch fire.

  3. Proper maintenance: Regular maintenance is essential for the optimal performance of your pellet stove. This includes cleaning the stove, inspecting components, and ensuring proper airflow. Following the manufacturer’s maintenance instructions will help prolong the lifespan of your stove.

By understanding these ventilation and clearance requirements, as well as practicing proper maintenance and troubleshooting techniques, you can enjoy the warmth and efficiency of your pellet stove.

Now, let’s explore the factors to consider when deciding between hiring a professional or undertaking a DIY installation.

Advertisement

Hiring a Professional Versus DIY Installation: Factors to Consider

Hiring a professional or doing it yourself: there are several factors to consider when deciding how to install your new pellet stove.

While DIY installation may seem like a cost-effective option, it’s important to weigh the risks and benefits.

Hiring professionals ensures that the installation is done correctly and safely, minimizing the chances of any potential hazards. They have the expertise and experience to handle the technical aspects of the installation process, such as connecting the stove to the chimney and ensuring proper ventilation.

Additionally, professionals can provide valuable advice on selecting the right location for your pellet stove and help you comply with any local building codes.

Investing in professional installation can give you peace of mind and ensure the longevity and efficiency of your new pellet stove.

Advertisement

Is it Safe to Replace a Wood Stove with a Pellet Stove in the Same Location?

Yes, placing a pellet stove after a wood stove in the same location is generally safe. However, it is important to ensure that the proper venting and clearance requirements are met for the new pellet stove. Consulting with a professional installer is recommended to guarantee a safe and effective transition.

Is it Safe to Replace a Wood Stove with a Pellet Stove in the Same Location?

Yes, it is safe to put a pellet stove where the wood stove is located. Both types of stoves require proper ventilation and safety precautions, but as long as the installation is done correctly and the necessary adjustments are made, it is a viable option.

Frequently Asked Questions

What Are the Cost Savings of Switching From a Wood Stove to a Pellet Stove?

When considering the cost comparison between a wood stove and a pellet stove, it’s important to note the fuel efficiency of each. Pellet stoves are generally more efficient, resulting in potential long-term cost savings.

How Do I Properly Clean and Maintain a Pellet Stove?

Proper pellet stove maintenance is crucial for optimal performance. Avoid common cleaning mistakes by regularly removing ash and cleaning the exhaust vent. Like a well-tuned instrument, a well-maintained pellet stove will provide warmth and efficiency.

Can I Use My Existing Wood Stove Hearth or Do I Need to Make Modifications?

Yes, you can use your existing wood stove hearth for your new pellet stove, but modifications may be needed. It’s important to consult the manufacturer’s guidelines and a professional to ensure proper installation and safety.

Advertisement

Are There Any Specific Building Codes or Permits Required for Installing a Pellet Stove?

Building codes and permits are necessary when installing a pellet stove. It is important to consult local regulations to ensure compliance. Proper installation and adherence to codes will ensure safety and efficiency.

Are Pellet Stoves Environmentally Friendly Compared to Wood Stoves?

Compared to wood stoves, pellet stoves are more efficient and environmentally friendly. They burn cleaner, produce less pollution, and have higher heating efficiency. However, proper installation is crucial for optimal performance.

Conclusion

In conclusion, transitioning from a wood stove to a pellet stove offers a multitude of benefits.

By assessing the compatibility of your existing chimney and understanding the necessary modifications, you can safely install your new pellet stove.

Proper location selection, ventilation, and clearance requirements must be considered for optimal performance.

Advertisement

While hiring a professional ensures expertise, DIY installation can be a cost-effective option for the technically inclined.

Embrace this efficient and eco-friendly heating solution, and experience the warmth and convenience it brings to your home.

Continue Reading

Pellet Stoves

Can a Pellet Stove Be Vented Thru the Chimney Where a Regular Wood Stove Was

Published

on

By

An image showcasing a modern pellet stove seamlessly vented through a chimney previously used by a traditional wood stove

I often ponder whether a chimney, initially intended for a wood stove, can also serve to vent a pellet stove. It appears to be a feasible option, yet I had my doubts regarding its effectiveness.

After doing some research, I’m excited to share that it is indeed possible! In this article, we’ll explore the benefits, steps, challenges, and safety considerations of venting a pellet stove through an existing wood stove chimney.

So, let’s dive in and find out if this retrofitting option is right for you.

Key Takeaways

  • Venting a pellet stove through an existing wood stove chimney can reduce installation costs and minimize heat loss.
  • Pellet stoves have higher efficiency ratings and lower environmental impact compared to wood stoves.
  • Pellet stoves require a specific type of chimney called a pellet vent, while wood stoves can use a masonry or prefabricated chimney.
  • Venting a pellet stove through an existing chimney may require resizing or modification, proper insulation, and regular cleaning and maintenance to ensure safe operation.

Benefits of Venting a Pellet Stove Through an Existing Wood Stove Chimney

You’ll be happy to know that venting your pellet stove through an existing wood stove chimney has several benefits.

First and foremost, it helps in improving insulation. By utilizing the existing chimney, you can avoid the need for additional venting materials, which reduces installation costs significantly.

This method also eliminates the need for creating a new hole in your home’s exterior, minimizing any potential heat loss.

Advertisement

Furthermore, venting through an existing wood stove chimney ensures that the exhaust gases are efficiently expelled from your home, maintaining indoor air quality.

Understanding the differences between pellet stoves and wood stoves is crucial in making an informed decision about which option suits your heating needs better.

Understanding the Differences Between Pellet Stoves and Wood Stoves

When comparing the efficiency of pellet stoves versus wood stoves, it is important to consider factors such as fuel consumption and heat output.

Pellet stoves are known for their high efficiency, with some models boasting an efficiency rating of over 90%. Wood stoves, on the other hand, tend to have lower efficiency ratings, typically ranging from 60% to 80%.

In terms of installation requirements, chimney compatibility is a key consideration for both pellet stoves and wood stoves. Pellet stoves require a specific type of chimney, known as a pellet vent, which is designed to handle the exhaust gases produced by the stove.

Advertisement

Wood stoves, on the other hand, can be vented through a traditional masonry chimney or a prefabricated chimney system.

Efficiency Comparison: Pellet Vs. Wood

To compare the efficiency of pellet stoves versus wood stoves, you should consider factors such as fuel consumption and heat output. Pellet stoves offer several benefits over traditional wood stoves. They are highly efficient and have a higher heat output, which means they can warm up a room faster and maintain a consistent temperature. Additionally, pellet stoves produce less smoke and particulate matter, resulting in a reduced environmental impact compared to wood stoves. To illustrate this comparison, consider the following table:

Factor Pellet Stoves Wood Stoves
Fuel Consumption Low High
Heat Output High Moderate
Environmental Impact Low High

As you can see, pellet stoves outperform wood stoves in terms of fuel consumption and environmental impact. Now, let’s move on to the installation requirements, specifically chimney compatibility.

Installation Requirements: Chimney Compatibility

If you’re considering installing a pellet stove, it’s important to ensure that your chimney is compatible with the venting requirements.

Chimney installation for a pellet stove differs from that of a regular wood stove, as there are specific venting regulations that must be adhered to.

Advertisement

The first thing to check is the size of your chimney flue. A pellet stove requires a chimney with a minimum diameter of 3 inches, while a wood stove usually requires a larger diameter.

Additionally, the chimney must be in good condition, free from any blockages or damage.

It’s also important to check if your chimney has a liner, as this may need to be replaced or modified to meet the venting regulations for a pellet stove.

Ensuring proper venting for a pellet stove in a wood stove chimney involves a few steps to guarantee safe and efficient operation.

Steps to Ensure Proper Venting for a Pellet Stove in a Wood Stove Chimney

Before installing a pellet stove in a wood stove chimney, make sure to follow these steps to ensure proper venting.

Advertisement

First, consider the venting options available for your pellet stove. There are two main types: direct venting and venting through an existing chimney.

If you choose to vent through an existing chimney, the installation process is slightly different. Start by inspecting the chimney thoroughly to ensure it is in good condition and meets the necessary requirements for pellet stove venting.

Next, clean the chimney thoroughly to remove any debris or creosote buildup. Install a stainless steel liner inside the chimney to create a proper venting system for the pellet stove.

Finally, connect the pellet stove to the liner using the appropriate adapter. By following these steps, you can ensure that your pellet stove is properly vented through the wood stove chimney.

When venting a pellet stove through an existing chimney, there are common challenges that may arise.

Advertisement

Common Challenges When Venting a Pellet Stove Through an Existing Chimney

When venting a pellet stove through an existing wood stove chimney, there are some common challenges that may arise. These challenges can be related to chimney compatibility and may require additional steps to ensure proper venting. Here are some of the venting challenges you may encounter:

  1. Size Compatibility: The size of the wood stove chimney may not be suitable for a pellet stove. It may be necessary to resize or modify the chimney to accommodate the different venting requirements of a pellet stove.

  2. Insulation: Pellet stoves require proper insulation to maintain optimal efficiency. The existing chimney may lack the necessary insulation, which can result in heat loss and reduced performance.

  3. Drafting Issues: Pellet stoves rely on a consistent draft for proper combustion. If the existing chimney does not provide sufficient draft, it may need to be modified or equipped with a draft inducer to ensure proper venting.

  4. Cleaning and Maintenance: Wood stove chimneys are designed to handle the byproducts of burning wood, which can be different from those produced by pellet stoves. Regular cleaning and maintenance may be necessary to prevent buildup and ensure safe and efficient operation.

Transitioning into the subsequent section about safety considerations when using a wood stove chimney for a pellet stove, it is important to be aware of potential risks and take necessary precautions.

Safety Considerations When Using a Wood Stove Chimney for a Pellet Stove

To ensure your safety when using a wood stove chimney for venting a pellet stove, it is crucial to be aware of potential risks and take necessary precautions. Improper installation can pose serious dangers and result in potential chimney damage. One of the main risks is the inadequate clearance between the pellet stove flue and the existing chimney walls. This can lead to heat transfer and potential overheating, causing damage to the chimney structure.

Another risk is the accumulation of creosote in the chimney, which can ignite and cause a chimney fire. To avoid these risks, it is important to consult with a professional and ensure proper installation and inspection of the chimney system.

By taking these precautions, you can safely and efficiently vent your pellet stove through a wood stove chimney.

Advertisement

When it comes to venting a pellet stove through a wood stove chimney, there are several tips for improving efficiency.

Tips for Improving Efficiency When Venting a Pellet Stove Through a Wood Stove Chimney

When considering venting a pellet stove through a wood stove chimney, there are several chimney compatibility considerations to keep in mind.

These include checking the size and condition of the chimney, ensuring proper clearance from combustible materials, and verifying that the chimney is designed to handle the exhaust temperature of a pellet stove.

Additionally, it is crucial to follow safety precautions when venting, such as installing a proper chimney cap, ensuring a secure connection between the stove and chimney, and regularly inspecting and cleaning the chimney to prevent any blockages or buildup that could lead to a potential fire hazard.

Chimney Compatibility Considerations

Although a pellet stove can be vented through a chimney where a regular wood stove was, it is important to consider chimney compatibility. When it comes to chimney installation for a pellet stove, there are a few key factors to keep in mind.

Advertisement

First, you need to ensure that the chimney is in good condition and meets the necessary safety requirements. Additionally, the size and type of the chimney should be compatible with the pellet stove’s venting options. This includes considering the diameter of the flue liner and the type of chimney cap or termination kit that is needed.

By ensuring that the chimney is compatible with the pellet stove, you can avoid potential issues and maximize the efficiency of your heating system.

Moving on to safety precautions when venting…

Safety Precautions When Venting

Make sure you check for any obstructions or blockages in the venting system before starting the pellet stove.

Venting alternatives for pellet stoves in urban areas are important to consider due to the environmental impact of pellet stove venting options. When it comes to venting a pellet stove in an urban area, there are several alternatives to consider. These alternatives include direct venting, power venting, and vent-free options.

Advertisement

Each option has its own advantages and disadvantages, which can impact the overall performance and efficiency of the pellet stove. It is crucial to choose the right venting option that not only meets your needs but also minimizes the impact on the environment.

Transitioning into the subsequent section about important factors to consider before retrofitting a wood stove chimney for a pellet stove, it is essential to assess the compatibility and condition of the existing chimney.

Important Factors to Consider Before Retrofitting a Wood Stove Chimney for a Pellet Stove

Before retrofitting your wood stove chimney for a pellet stove, there are important factors to consider. Venting challenges and maintenance requirements play a crucial role in the decision-making process.

One major challenge is ensuring that the wood stove chimney is compatible with the pellet stove’s venting system. Pellet stoves require a specific type of venting, such as a pellet vent or a flexible stainless-steel liner. It is essential to assess whether your existing chimney can accommodate these requirements.

Additionally, maintenance requirements for a pellet stove vented through a wood stove chimney differ from those of a traditional wood stove. Regular cleaning of the chimney and venting system is necessary to prevent the build-up of creosote and ensure proper airflow. Proper maintenance and cleaning are vital for the safe and efficient operation of your pellet stove.

Advertisement

Maintenance and Cleaning Requirements for a Pellet Stove Vented Through a Wood Stove Chimney

To ensure the safe and efficient operation of your pellet stove, you’ll need to regularly clean and maintain the venting system in your wood stove chimney. Proper maintenance and cleaning procedures are crucial to prevent any blockages or buildup that could lead to poor performance or even dangerous situations. Here are some key maintenance requirements and cleaning procedures to keep in mind:

Maintenance Requirements Cleaning Procedures
Inspect the chimney annually Remove any debris or soot buildup
Check for any cracks or damage Use a chimney brush to clean the flue
Ensure proper airflow and ventilation Clear any obstructions or nests
Replace any worn-out components Clean the chimney cap and spark arrestor
Regularly clean the ashtray and combustion chamber Vacuum or sweep the surrounding area

Following these maintenance requirements and cleaning procedures will help prolong the lifespan of your pellet stove and ensure its optimal performance. Remember to always consult your manufacturer’s guidelines for specific instructions.

Frequently Asked Questions

What Are the Benefits of Venting a Pellet Stove Through an Existing Wood Stove Chimney?

The benefits of venting a pellet stove through an existing wood stove chimney include cost savings, as no new venting system needs to be installed, and convenience, as the existing chimney can be utilized. Additionally, pellet stoves are more efficient and environmentally friendly compared to wood stoves.

What Are the Differences Between Pellet Stoves and Wood Stoves?

Pellet stoves and wood stoves have distinct differences. Pellet stoves offer convenience with automated fuel feeding, while wood stoves provide a traditional, cozy ambiance. Both have pros and cons, so it depends on personal preferences.

What Are Some Common Challenges When Venting a Pellet Stove Through an Existing Chimney?

Common challenges when venting a pellet stove through an existing chimney include proper sizing, air flow issues, and potential blockages. Installation tips include inspecting the chimney, using the correct venting materials, and ensuring proper clearances for safety.

Advertisement

What Safety Considerations Should Be Taken Into Account When Using a Wood Stove Chimney for a Pellet Stove?

Safety precautions must always be taken when using a wood stove chimney for a pellet stove. Regular maintenance is necessary to ensure proper ventilation and prevent potential hazards.

How Can Efficiency Be Improved When Venting a Pellet Stove Through a Wood Stove Chimney?

Improving efficiency when venting a pellet stove through a wood stove chimney can be challenging. Proper insulation, installation of an adapter, and regular maintenance are crucial to maximize efficiency and prevent any safety hazards.

Conclusion

In conclusion, venting a pellet stove through an existing wood stove chimney is a game-changer! The benefits are immense, from saving time and money to improving efficiency.

However, it’s crucial to understand the differences between pellet stoves and wood stoves and take the necessary steps to ensure proper venting. While there may be some challenges and safety considerations, the rewards are well worth it.

So, go ahead and retrofit that chimney for your pellet stove and experience a whole new level of warmth and comfort! Don’t miss out on this incredible opportunity!

Advertisement

Continue Reading

Pellet Stoves

Efficient Heat Distribution: Maximize Your Pellet Stove

Published

on

By

An image depicting a pellet stove venting system, showcasing a close-up of a stainless steel chimney pipe connected to the stove's exhaust outlet, surrounded by a well-insulated wall, with a clear view of outdoor air intake and termination cap

Fed up with the inconsistent temperatures in your home? We’re on hand to help!

In this article, we’ll explore effective strategies to maximize the efficiency of your pellet stove and achieve optimal heat distribution.

From increasing blower speed to keeping doors open, using fans, and even installing floor vents or a ducted pellet stove, we’ll provide data-driven tips to ensure balanced heat throughout your living space.

Let’s dive in and make your home cozy and comfortable!

Key Takeaways

  • Ensure proper ventilation and avoid setting the blower speed too high to prevent overheating.
  • Keep doors open between rooms and avoid blocking airflow to facilitate heat distribution.
  • Use floor and ceiling fans strategically to push and circulate hot air throughout the house.
  • Rearrange furniture to create clear paths for heat to travel and remove obstructions.

Increasing Blower Speed

Increasing the blower speed helps us distribute heat more evenly throughout our home. By increasing the blower speed, we can ensure that the warm air is pushed out more forcefully, allowing it to reach all areas of the house. This leads to more consistent temperatures and eliminates any cold spots.

The benefits of higher blower speeds include improved comfort and increased efficiency of the pellet stove. However, it’s important to be cautious not to run the blower too high, as this can lead to potential risks such as overheating. It’s essential to find the right balance and monitor the temperature to avoid any hazards.

Advertisement

Keeping Doors Open

By opening doors between rooms, we allow heat to freely travel and distribute throughout the house. This simple action can have a significant impact on energy consumption and the overall efficiency of our pellet stove.

Here are some potential drawbacks and limitations to consider:

  1. Uneven heating: While opening doors facilitates the movement of heat from the room with the stove to other areas of the house, it may not guarantee uniform heat distribution. Some rooms may still be cooler than others, especially if they’re further away from the stove.

  2. Drafts and air leakage: Open doors can create drafts and allow warm air to escape, leading to heat loss and increased energy consumption. Additionally, if there are gaps or poor insulation around the doors, cold air can infiltrate the rooms, requiring additional heating.

  3. Privacy and noise concerns: Keeping doors open between rooms may compromise privacy and increase noise transmission, especially in areas where quiet or seclusion is desired.

While keeping doors open can be a useful strategy for heat distribution, it’s essential to consider these potential drawbacks and limitations to make informed decisions about maximizing the efficiency of our pellet stove.

Using Floor and Ceiling Fans

Using floor and ceiling fans can help circulate warm air generated by a pellet stove throughout the home, ensuring more even temperatures in every room. Floor fans placed beneath the pellet stove push hot air into the room. Ceiling fans, when set on low and rotating clockwise, help circulate heat throughout the entire house by pulling warm air up from below. It is important to properly clean and maintain ceiling fans for optimal performance. Regularly dusting the fan blades and cleaning the fan motor can prevent dust buildup and ensure smooth operation. Additionally, lubricating the fan motor bearings can help reduce noise and increase longevity. During the winter months, using floor fans can provide additional benefits in terms of air circulation and temperature regulation.

Moving Furniture Around

When rearranging furniture, it’s important to create a clear path for heat to travel and ensure that no large pieces obstruct the flow of air in the room. To maximize airflow and achieve efficient heat distribution from the pellet stove, we must take certain furniture placement precautions:

Advertisement

  1. Rearrange furniture to create a clear path for heat flow.
  2. Remove large pieces of furniture obstructing the heat’s path.
  3. Ensure furniture isn’t blocking the flow of heat in the room.

By following these steps, we can optimize the circulation of warm air and prevent any hot or cold spots in the room.

This data-driven approach ensures that the pellet stove’s heating capacity is fully utilized, providing comfortable warmth throughout the space. So, when moving furniture around, remember to consider the importance of creating clear paths for heat flow and avoiding any obstructions that may hinder the efficiency of the heating system.

Installing Floor Vents or Ducted Pellet Stove

To ensure even heat distribution throughout the entire house, we can consider installing floor vents or a ducted pellet stove. Floor vents, located near the pellet stove, circulate heat up through the floors above, making them ideal for multi-story homes. They evenly distribute heat throughout the house and maintain a consistent temperature across different levels. On the other hand, a ducted pellet stove uses a series of ducts to circulate air evenly throughout the house. It is beneficial for rooms located further away from the pellet stove and ensures effective heat delivery to all areas of the home. However, the installation of floor vents or a ducted pellet stove may involve additional costs and require professional assistance. It is important to weigh the advantages and disadvantages before making a decision.

Advantages Disadvantages
Floor Vents Additional costs
– Even heat distribution Professional installation may be required
– Suitable for multi-story homes
– Consistent temperature across levels
Ducted Pellet Stove
– Effective heat delivery to all areas
– Beneficial for rooms further away
– Ensures even heat distribution

Option 1: Install Floor Vents

Installing floor vents near the pellet stove allows for even heat circulation throughout the house, making them a suitable option for multi-story homes. Here are the benefits of installing floor vents:

  1. Enhanced Heat Distribution: Floor vents located near the pellet stove circulate heat up through the floors above, ensuring that upper floors stay warm without overheating lower floors. This results in consistent temperature across different levels of the home.

  2. Cost-Effective Solution: Compared to other heating methods, the installation cost of floor vents is relatively low. They provide an efficient way to distribute heat throughout the house, reducing the need for additional heating sources.

  3. Improved Energy Efficiency: By evenly distributing heat, floor vents help maximize the efficiency of the pellet stove. This not only ensures that the entire house is comfortably heated, but also helps to reduce energy consumption and lower heating costs.

Overall, installing floor vents near the pellet stove is a practical and cost-effective solution to achieve efficient heat distribution in multi-story homes.

Option 2: Install a Ducted Pellet Stove

Now let’s explore Option 2: Install a Ducted Pellet Stove.

Advertisement

Ducted pellet stoves offer several advantages over floor vents. With a ducted pellet stove, a series of ducts is used to circulate air evenly throughout the house. This is particularly beneficial for rooms located further away from the pellet stove, ensuring effective heat delivery to all areas of the home.

Unlike floor vents that only circulate heat through the floors above, ducted pellet stoves bring heat to areas that aren’t in close proximity to the pellet stove. This means that every room in the house can enjoy the warmth and comfort provided by the pellet stove.

Additionally, ducted pellet stoves help maintain consistent temperature across different levels of the home, ensuring that there are no excessively hot or uncomfortably cold rooms.

Frequently Asked Questions

How Can I Determine the Appropriate Blower Speed for My Pellet Stove?

To determine the appropriate blower speed for your pellet stove, we recommend following these steps:

1) Ensure proper ventilation for adequate air circulation.

Advertisement

2) Avoid setting the blower speed too high to prevent overheating.

3) Be cautious of running the pellet stove for extended periods to maintain even heating.

4) Increasing the blower speed helps distribute heat more evenly throughout the home.

Can I Use Floor and Ceiling Fans Simultaneously to Maximize Heat Distribution?

Yes, using floor and ceiling fans simultaneously can maximize heat distribution effectiveness.

Floor fans placed beneath the pellet stove push hot air into the room, while ceiling fans, set on low and rotating clockwise, circulate heat throughout the entire house.

Advertisement

This combination helps distribute heat evenly, ensuring that all areas of the home receive adequate warmth.

However, caution should be exercised to avoid placing fans too close to the stove to prevent fire hazards.

Are There Any Specific Safety Precautions I Should Take When Using Floor and Ceiling Fans With My Pellet Stove?

When using floor and ceiling fans with a pellet stove, it’s important to take specific safety precautions.

Fan safety is paramount, so make sure to place fans at a safe distance from the stove to prevent fire hazards.

Avoid placing furniture or any other objects that could obstruct the airflow of the fans.

Advertisement

What Are the Potential Drawbacks of Installing Floor Vents Near the Pellet Stove?

When installing floor vents near the pellet stove, there are potential drawbacks to consider.

One drawback is that the heat distribution may not be as efficient as desired. This is because the heat may rise too quickly and not have enough time to circulate throughout the room before being dispersed through the floor vents.

Additionally, depending on the layout of the house, the heat may not reach all areas equally, resulting in uneven heating.

These drawbacks should be considered when deciding on the best heat distribution method for your pellet stove.

How Can I Assess Whether a Ducted Pellet Stove Is the Right Option for My Home?

Assessing whether a ducted pellet stove is the right option for our home involves considering its efficiency and energy consumption.

Advertisement

We can analyze its efficiency by examining how effectively it distributes heat throughout the house and how well it delivers heat to areas that aren’t in close proximity to the stove.

We can assess its energy consumption by comparing its energy usage to other heating options.

Conclusion

In conclusion, by implementing the strategies discussed in this article, you can effectively maximize the heat distribution of your pellet stove and create a comfortable living space.

For example, John, a homeowner in a two-story house, installed floor vents in key areas to evenly distribute heat throughout both levels. As a result, he no longer experienced hot and cold spots, creating a cozy environment for his family.

Remember, optimizing heat distribution is essential for maximizing the efficiency of your pellet stove.

Advertisement

Continue Reading

Trending