Connect with us

Wood Stove

How To Run A Flue For Wood Stove

Published

on

Hello there! It seems you’re fully prepared to embark on the adventure of setting up a chimney for your wood-burning stove, correct? If that’s the case, you’ve certainly arrived at the ideal place.

In this article, I’ll be your guide through the ins and outs of this important system. From understanding its significance to troubleshooting common issues, I’ve got you covered.

So buckle up and get ready to master the art of running a flue like a pro!

Key Takeaways

  • Regular maintenance and cleaning of the flue are essential for safety.
  • Select proper flue materials that can withstand high temperatures and corrosive byproducts.
  • Carefully measure and assess the installation area to determine the appropriate size and length of the flue pipe.
  • Clean the flue at least once a year and remove debris and creosote buildup using a chimney brush.
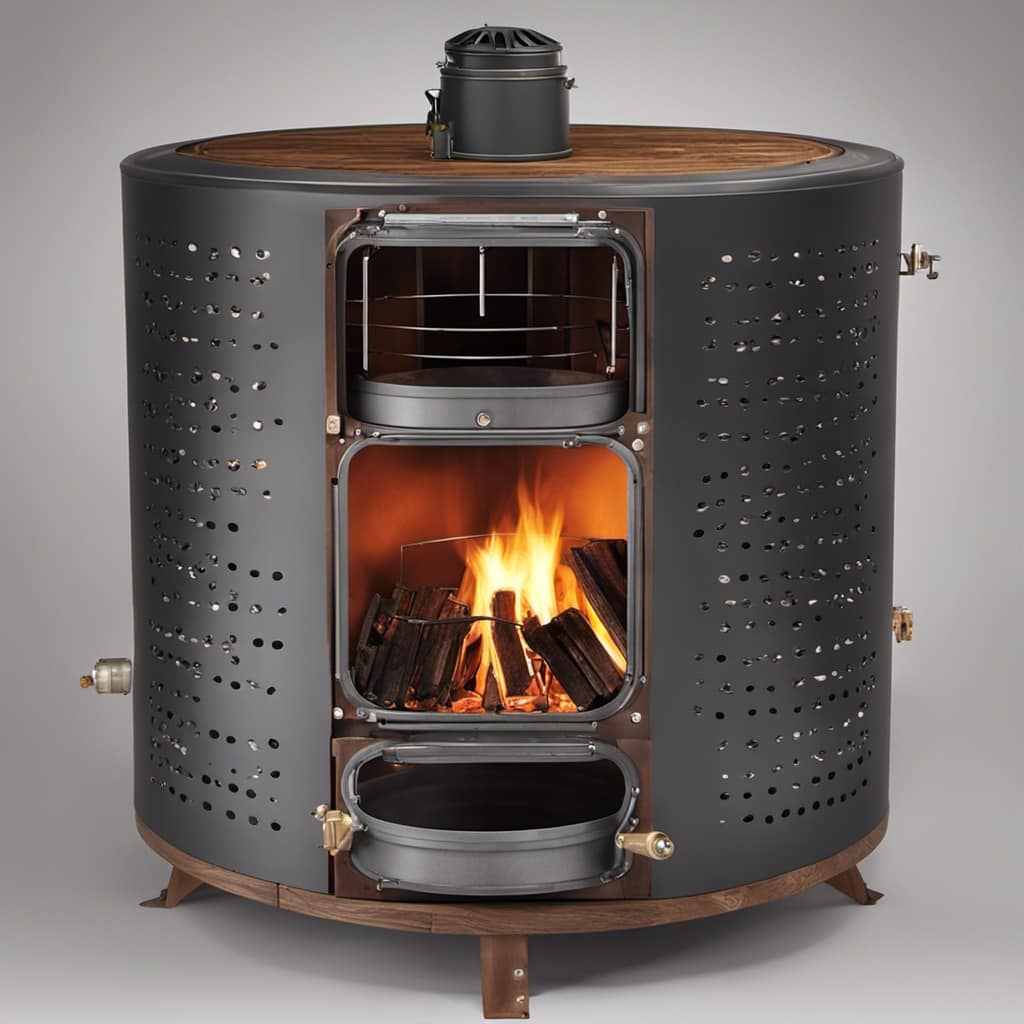
Understanding the Importance of a Properly Functioning Flue

I really need to figure out why my flue isn’t working properly because it’s crucial for the safety of my wood stove.

stove for food truck

The importance of chimney sweeps can’t be overstated when it comes to maintaining a properly functioning flue. Chimney sweeps are trained professionals who can inspect and clean your flue, ensuring that it’s free from any blockages or obstructions.

Advertisement

A blocked flue can lead to a variety of issues, including poor ventilation, smoke buildup, and even the risk of carbon monoxide poisoning. Signs of a blocked flue can include difficulty starting a fire, excessive smoke, and a strong odor coming from the fireplace.

Assessing and Preparing Your Wood Stove and Flue System

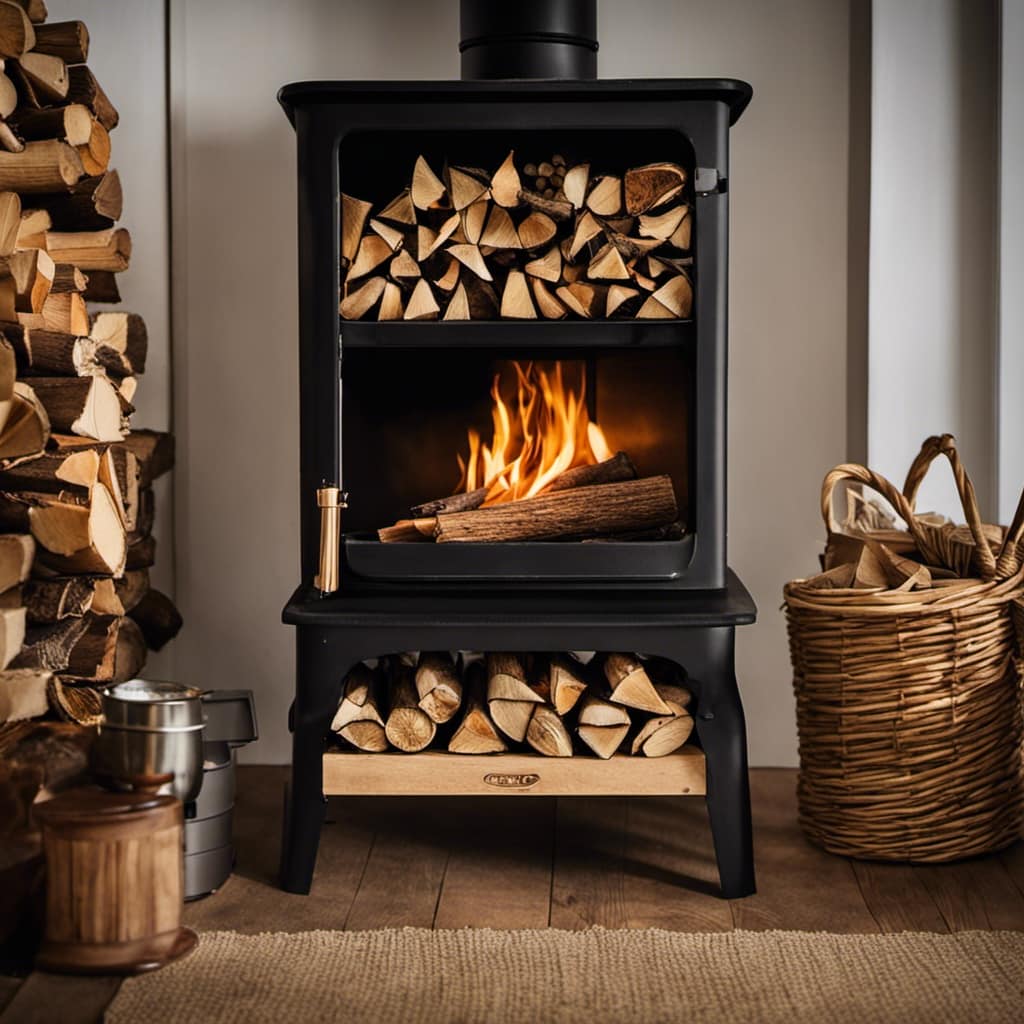
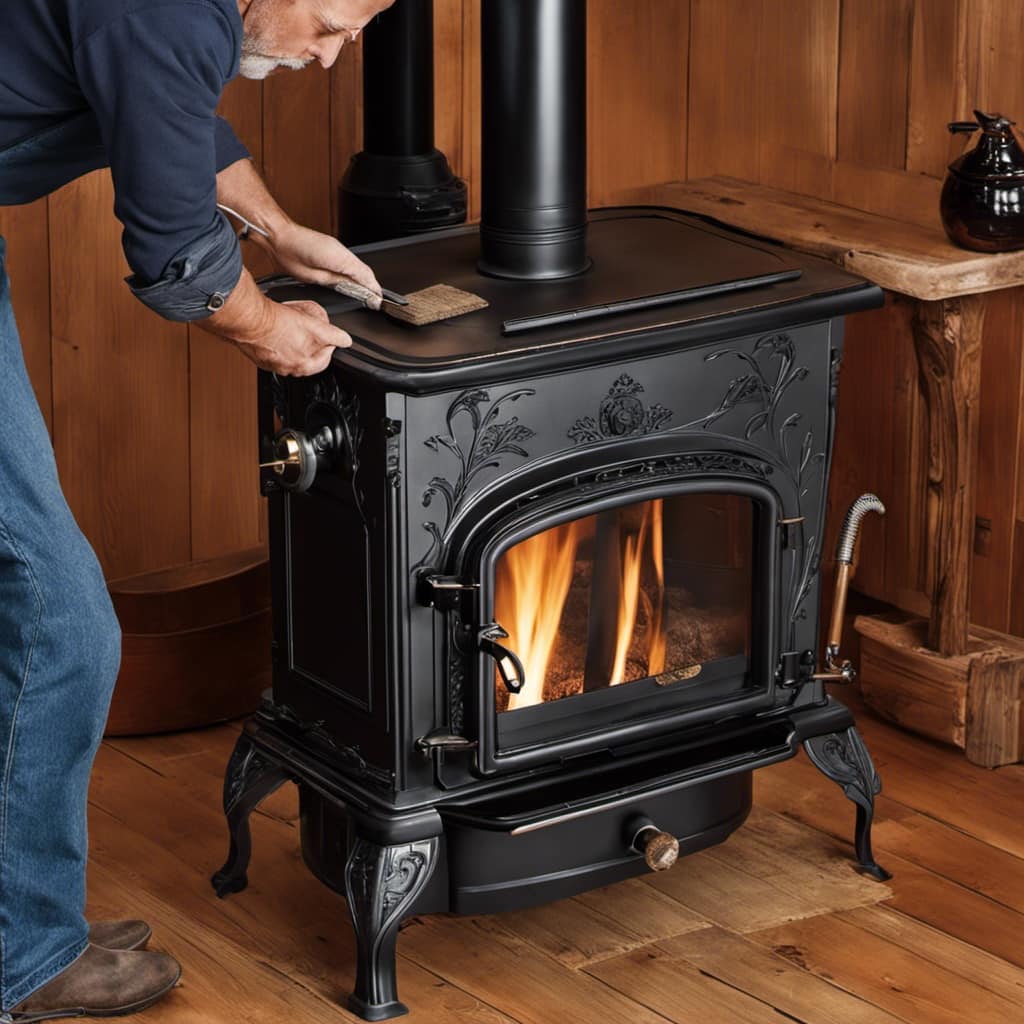
Regularly inspecting and cleaning your wood stove and flue system is crucial for ensuring its optimal performance and preventing potential issues. When it comes to assessing flue safety, one of the most important factors is selecting proper flue materials. The materials used for your flue should be able to withstand high temperatures and corrosive byproducts of combustion.

Stainless steel and double-wall insulated pipes are commonly recommended for their durability and efficiency. It’s important to carefully measure and assess your installation area to determine the appropriate size and length of the flue pipe. Additionally, ensuring proper clearances from combustible materials is essential for safety.

wood stove fan

By following these guidelines and taking the necessary precautions, you can ensure a safe and efficient wood stove operation in your home.

Now, let’s move on to the step-by-step guide to installing and connecting the flue pipe.

Advertisement

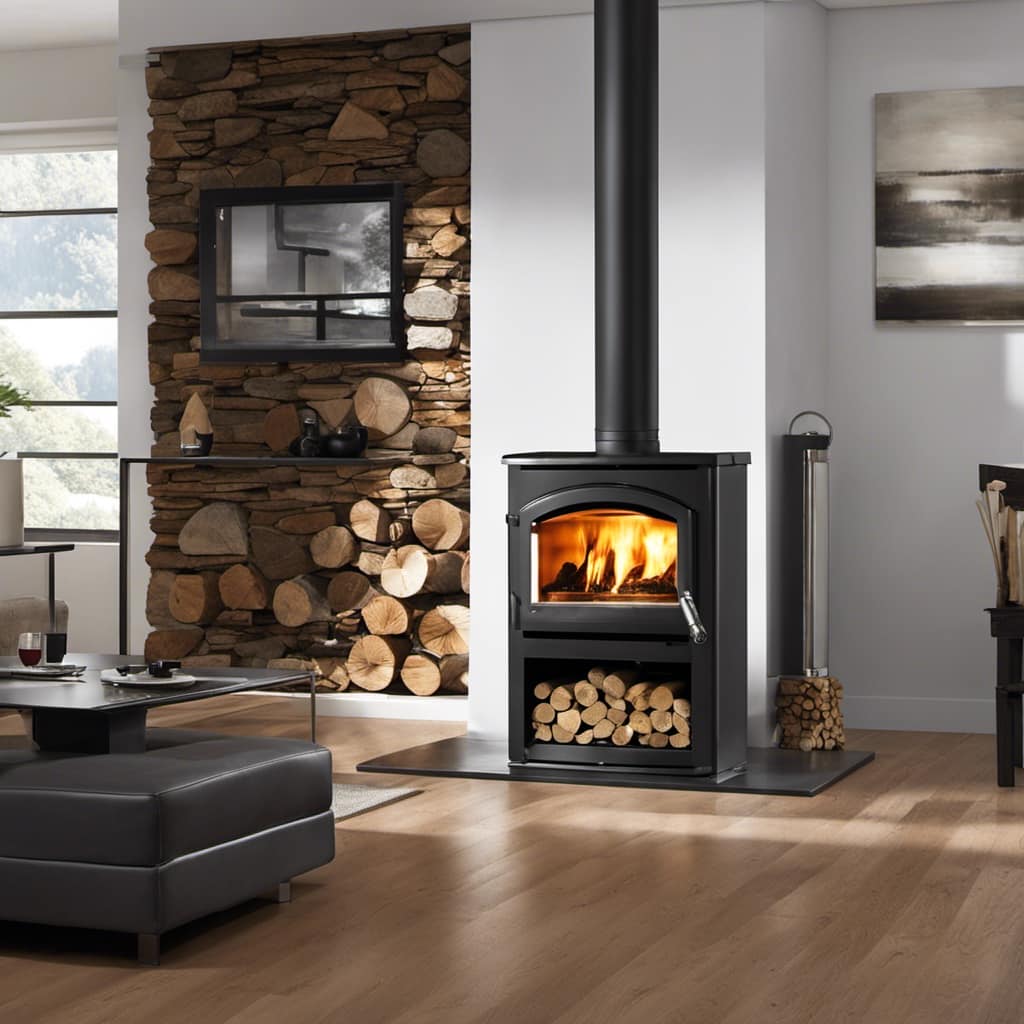
Step-by-Step Guide to Installing and Connecting the Flue Pipe

Before beginning the installation process, carefully measure the length of the flue pipe and ensure all connections are secure.

Installing a flue pipe for a wood stove is a crucial step in ensuring the safe and efficient operation of your heating system.

wood stoves for heating

Start by assembling the flue pipe sections, making sure they fit tightly together. Use high-temperature silicone sealant on the joints to prevent any leaks.

Connect the flue pipe to the stove’s outlet collar, securing it with screws or clamps.

Extend the flue pipe vertically through the ceiling and roof, using a support bracket to keep it stable.

Advertisement

Ensure that the flue pipe maintains the proper clearance from combustible materials, as specified in the manufacturer’s instructions.

wood stove with blower

Once the flue pipe is installed, you can transition into the subsequent section about maintaining and cleaning your flue for optimal performance.

Maintaining and Cleaning Your Flue for Optimal Performance

How often should I clean and maintain my flue to ensure optimal performance, and what are the best methods for doing so?

Cleaning and maintaining your flue is crucial for the safe and efficient operation of your wood stove. Ideally, you should clean your flue at least once a year, preferably before the start of the heating season. However, if you use your wood stove frequently, it may be necessary to clean it more often.

To clean your flue, start by removing any debris or creosote buildup using a chimney brush. Make sure to wear protective gear and follow safety guidelines.

Advertisement

wood stoves for sale facebook marketplace

Additionally, it’s important to inspect your flue for signs of damage such as cracks, corrosion, or loose bricks. If you notice any of these issues, it’s recommended to seek professional assistance to repair or replace the flue.

Regular cleaning and maintenance, along with proper burning practices, will ensure optimal performance and extend the lifespan of your flue.

Troubleshooting Common Issues With Flue Operation and How to Fix Them

I’m having trouble with the flue not fully opening, and I’m not sure how to fix it. This is a common problem that many people face with their flues.

Here are some troubleshooting techniques that can help you resolve this issue:

lopi wood stove

  1. Check for obstructions: Sometimes, debris or creosote buildup can block the flue, preventing it from fully opening. Use a flashlight to inspect the flue and remove any blockages.

  2. Adjust the damper: The damper controls the amount of airflow in the flue. If it’s not fully opening, it might be due to a malfunction or improper adjustment. Consult your stove’s manual to learn how to adjust the damper correctly.

  3. Clean the flue: Over time, creosote can accumulate on the flue walls, restricting its movement. Regular cleaning can prevent this buildup and ensure smooth operation.

Frequently Asked Questions

Can I Use the Same Flue for Multiple Wood Stoves?

Yes, you can reuse a flue for multiple wood stoves. However, there are benefits to having a separate flue for each stove, such as improved efficiency and reduced risk of chimney fires.

Advertisement

wood stoves for sale

How Often Should I Clean My Flue for Optimal Performance?

I clean my flue for optimal performance at least once a year. It’s important to remove any creosote buildup and debris to prevent chimney fires and ensure proper ventilation. Here are some flue cleaning tips.

Can I Install a Wood Stove Without a Flue?

Yes, it is possible to install a wood stove without a flue, but it is not recommended. A flue is essential for safely venting the smoke and gases produced by the stove. There are alternative heating options available if a flue is not feasible.

What Type of Wood Should I Use in My Wood Stove?

To run a flue for a wood stove, it’s crucial to choose the right type of firewood. Hardwoods like oak and maple burn longer and produce more heat. Remember to store your firewood properly to ensure it’s dry and ready to burn.

How Do I Know if My Flue Is Functioning Properly?

When it comes to a malfunctioning flue, signs to look for include smoke backdrafting, soot buildup, and a lack of draft. Troubleshooting common flue problems is crucial to ensure proper ventilation and prevent potential hazards.

wood stove hand truck

Conclusion

In conclusion, a properly functioning flue is crucial for the efficient operation of a wood stove.

Advertisement

Just like a clear path guides a hiker through a dense forest, a well-maintained flue ensures the smooth flow of smoke and gases out of your home.

By following the steps outlined in this article, you can install, connect, and maintain your flue system to enjoy optimal performance and a cozy, warm atmosphere in your living space.

Remember, a well-functioning flue is the key to a safe and efficient wood stove experience.

wood stove for sale craigslist

Growing up surrounded by the vast beauty of nature, Sierra was always drawn to the call of the wild. While others sought the comfort of the familiar, she ventured out, embracing the unpredictable and finding stories in the heartbeat of nature.   At the epicenter of every remarkable venture lies a dynamic team—a fusion of diverse talents, visions, and passions. The essence of Best Small Wood Stoves is crafted and refined by such a trio: Sierra, Logan, and Terra. Their collective expertise has transformed the platform into a leading authority on small wood stoves, radiating warmth and knowledge in equal measure.

Continue Reading
Advertisement

Wood Stove

How Long Is Part Number Dr46-Dgkit For A Summit Wood Stove

Published

on

By

An image showcasing a close-up view of the DR46-DGKIT part, specifically designed for the Summit Wood Stove

Hello!

Ever wondered about the length of part number DR46-DGKIT for a Summit wood stove? Well, you’re in luck!

In this article, I’m going to dive into the details and unveil the exact measurements of this part.

So, if you’re looking to find the perfect fit for your Summit wood stove, stick around and let’s get measuring!

Key Takeaways

  • Part numbers are essential for identifying and ordering specific parts for products like the Summit Wood Stove.
  • The DR46-DGKIT part number likely contains important information about the specific part it represents.
  • Determining the correct length of DR46-DGKIT is crucial for successful installation.
  • Factors such as clearances, space, and measuring techniques should be considered for accurate measurements.

Understanding the DR46-DGKIT Part Number

I can’t seem to understand the purpose of the DR46-DGKIT part number.

As a consumer, it can be confusing to decode product codes and understand what they mean. However, part numbers are essential for identifying and ordering specific parts for products like the Summit Wood Stove.

Advertisement

The DR46-DGKIT part number likely contains important information about the specific part it represents. For example, the ‘DR46’ may indicate the model or series of the part, while the ‘DGKIT’ could refer to a kit or set of components.

Understanding part numbers can help ensure you purchase the correct replacement parts and maintain the functionality of your Summit Wood Stove. If you’re unsure about the meaning of a part number, it’s always best to consult the manufacturer or a knowledgeable professional for clarification.

Exploring the Summit Wood Stove Compatibility

The Summit Wood Stove compatibility with different types of fuel is a crucial factor to consider when determining the best option for heating my home. Exploring compatibility is essential to ensure that the stove can efficiently burn the fuel of my choice. Choosing the right size is also important, as it determines the heating capacity and efficiency of the stove. To help you visualize the options, here is a table showcasing the compatibility of the Summit Wood Stove with different fuels:

Fuel Type Compatibility
Wood Highly compatible
Pellets Compatible
Coal Not recommended
Gas Not compatible

As you can see, the Summit Wood Stove is highly compatible with wood and pellets, making them excellent options for fueling the stove. However, it is important to note that coal and gas are not recommended or compatible with the Summit Wood Stove.

Now, let’s transition to the next section, where we will unveil the length of the DR46-DGKIT for the Summit Wood Stove.

Advertisement

Unveiling the Length of DR46-DGKIT for Summit Wood Stove

While exploring the compatibility of the Summit Wood Stove, it’s important to unveil the length of the DR46-DGKIT. Determining the correct length of DR46 DGKIT for a Summit Wood Stove is crucial for a successful installation.

When considering the sizing of the DR46-DGKIT, there are several important factors to take into account:

  • Clearances: Ensure that the DR46-DGKIT is sized to maintain proper clearances as specified by the manufacturer.

  • Chimney height: Consider the height of the chimney and select a DR46-DGKIT that will provide adequate venting for the Summit Wood Stove.

  • Roof penetration: Determine the correct length of the DR46-DGKIT to properly penetrate the roof and ensure safe and efficient operation.

  • Pipe connections: Take into consideration the necessary pipe connections and fittings when sizing the DR46-DGKIT for the Summit Wood Stove.

Factors to Consider for DR46-DGKIT Measurement

One important factor to consider for the DR46-DGKIT measurement is the proper clearances required for safe installation. When measuring the dimensions of the DR46-DGKIT, it’s crucial to ensure that there’s enough space around the stove to comply with safety regulations. This includes clearances from combustible materials such as walls, furniture, and curtains.

Measuring techniques such as using a tape measure or ruler can be employed to accurately determine the required clearances. Additionally, it’s important to note that alternative parts may not always be compatible with the DR46-DGKIT. When considering alternative parts, it’s essential to carefully review the specifications and consult with a professional to ensure proper fit and functionality.

Taking these factors into account will help ensure a safe and successful installation of the DR46-DGKIT.

Advertisement

Finding the Perfect Fit: Sizing the DR46-DGKIT for Your Summit Wood Stove

To properly size the DR46-DGKIT for my Summit Wood Stove, I can use measuring techniques and consult with a professional for the perfect fit. When considering the sizing of the DR46-DGKIT, there are a few important factors to keep in mind:

  • Measure the dimensions of your Summit Wood Stove accurately to ensure the DR46-DGKIT will fit properly.
  • Consider the clearance requirements for installation to ensure safety and compliance with regulations.
  • Take into account any additional accessories or attachments that may affect the sizing of the DR46-DGKIT.
  • Consult with a professional or refer to the manufacturer’s guidelines for specific installation tips and recommendations.

Frequently Asked Questions

What Other Parts Are Included in the DR46-DGKIT for a Summit Wood Stove?

The dr46-dgkit for a Summit wood stove includes various parts that enhance its performance. These parts provide benefits such as improved efficiency, better heat distribution, and reduced emissions, making it a valuable addition to your wood stove.

Can the DR46-DGKIT Be Used With Other Brands of Wood Stoves?

Yes, the DR46-DGKIT can be used with other brands of wood stoves. I recently installed it on my non-Summit stove and it fit perfectly. The compatibility and easy installation are definite advantages of using the DR46-DGKIT.

Is the DR46-DGKIT Compatible With Both Old and New Models of Summit Wood Stoves?

The dr46-dgkit is compatible with both old and new models of Summit wood stoves. It offers several advantages, such as improved efficiency and increased heat output.

Are There Any Additional Tools or Equipment Required for Installing the Dr46-Dgkit?

There are no additional tools or equipment required for installing the dr46-dgkit. The installation instructions for the dr46-dgkit are straightforward and easy to follow.

Can the DR46-DGKIT Be Adjusted or Modified to Fit Different Sizes of Summit Wood Stoves?

Yes, the dr46-dgkit can be adjusted or modified to fit different sizes of summit wood stoves. It is compatible with various summit wood stove models and can be customized to ensure a proper fit.

Advertisement

Conclusion

In conclusion, the length of the DR46-DGKIT part number for a Summit wood stove is an important factor to consider when finding the perfect fit.

By exploring the compatibility and measuring the DR46-DGKIT, you can ensure a seamless installation.

So, don’t let the size puzzle you, take the time to find the right measurement and enjoy the warmth and comfort of your Summit wood stove.

Continue Reading

Wood Stove

How To Heat A Pool With A Wood Stove

Published

on

By

An image showcasing a serene backyard oasis with a rustic wood stove adjacent to a sparkling pool

I’m going to share the method I use to warm up my swimming pool with a wood stove. It might seem a bit traditional, but trust me, it’s incredibly effective.

In this article, I’ll guide you through selecting the right wood stove, preparing your pool, installing the stove, and operating it to heat your pool.

I’ll also give you tips on maintaining and troubleshooting your wood stove pool heating system.

Get ready to enjoy a warm and cozy pool all year round!

Key Takeaways

  • Consider solar heating, electric heaters, or gas heaters as options for heating your pool
  • Properly insulate the pool and use a solar pool cover to maximize heat retention and energy savings
  • Choose a properly sized and efficient wood stove for optimal heat distribution and fuel consumption
  • Operate the wood stove safely, regularly monitor temperature, and use dry, seasoned hardwood for better combustion

Selecting the Right Wood Stove for Your Pool

I always make sure to choose the right wood stove for my pool to ensure optimal heating.

When it comes to heating a pool, there are several options to consider.

Advertisement

The benefits of solar heating for pools are well-known. Solar heaters utilize the sun’s energy to heat the water in an eco-friendly and cost-effective manner.

However, if solar heating isn’t feasible for your pool, you can also consider electric or gas pool heaters. Electric heaters are efficient and can quickly heat the pool, but they can be expensive to operate.

On the other hand, gas heaters are a popular choice due to their ability to heat the pool quickly and maintain the desired temperature. However, they can be costly to install and operate.

When selecting a wood stove for pool heating, it’s important to consider factors such as heating capacity, efficiency, and safety features.

Preparing Your Pool for Wood Stove Heating

Before starting the wood stove heating process, it is crucial to properly prepare your pool. This involves ensuring that your pool is properly insulated and covered with a solar pool cover to maximize heat retention and efficiency. Pool insulation helps to prevent heat loss and maintain the desired temperature, while solar pool covers can help trap heat from the sun and reduce evaporation. To illustrate the importance of these steps, consider the following table:

Advertisement
Step Pool Insulation Solar Pool Covers
Heat retention High High
Energy savings Significant Significant
Evaporation Reduced Reduced
Maintenance Less frequent Less frequent

Properly preparing your pool with insulation and solar pool covers will ensure that the wood stove heating process is efficient and effective. Now, let’s move on to installing the wood stove for pool heating.

Installing the Wood Stove for Pool Heating

After preparing the pool with insulation and solar pool covers, installing the wood stove for pool heating is the next step to maximize heat retention and efficiency.

When it comes to installing a wood stove for pool heating, there are a few key factors to consider.

Firstly, you need to ensure that the stove is properly sized for your pool. This will depend on the size and volume of your pool, as well as the desired temperature increase.

Secondly, it’s crucial to position the stove in a location that allows for optimal heat distribution. This may involve installing additional pipes or ductwork to distribute the heat evenly throughout the pool.

Advertisement

Lastly, it’s important to consider the efficiency of the wood stove itself. Look for models that are EPA-certified and have a high efficiency rating. These stoves will burn wood more efficiently, resulting in greater heat output and lower fuel consumption.

Operating the Wood Stove to Heat Your Pool

To effectively heat your pool, simply adjust the damper and control the air intake on the wood stove. By properly operating the wood stove, you can efficiently warm your pool water and enjoy a comfortable swimming experience. Here are some operating tips and safety precautions to follow:

Operating Tips Safety Precautions
1. Start by opening the damper to allow proper airflow. 1. Always ensure proper ventilation to prevent carbon monoxide buildup.
2. Adjust the air intake to regulate the heat output. 2. Install a carbon monoxide detector near the wood stove for added safety.
3. Monitor the temperature regularly to maintain the desired pool water warmth. 3. Keep flammable objects away from the wood stove to prevent fire hazards.
4. Use dry, seasoned hardwood for better combustion and less smoke production. 4. Never leave the wood stove unattended and always extinguish the fire before leaving.

Following these operating tips and safety precautions will ensure a safe and effective way to heat your pool using a wood stove. Enjoy the warmth and relaxation of your pool all year round!

Maintaining and Troubleshooting Your Wood Stove Pool Heating System

I have successfully maintained and troubleshooted my wood stove pool heating system by regularly cleaning the chimney and checking for any leaks. This ensures that my system operates efficiently and safely.

Here are some common problems you may encounter with your wood stove pool heating system and the safety precautions you should take:

Advertisement
  • Creosote buildup in the chimney: Regularly clean the chimney to prevent the accumulation of creosote, a highly flammable substance that can lead to chimney fires.

  • Leaks in the system: Check for any leaks in the pipes, valves, or connections. Leaking water can damage the wood stove and pose a safety hazard.

  • Insufficient heat transfer: Ensure that the heat exchanger is clean and functioning properly. Poor heat transfer can result in lower pool temperatures and increased energy consumption.

  • Carbon monoxide (CO) buildup: Install a carbon monoxide detector near the wood stove to monitor CO levels. Proper ventilation is crucial to prevent CO poisoning.

Frequently Asked Questions

Can I Use a Regular Wood Stove to Heat My Pool?

Yes, I can use a regular wood stove to heat my pool. The benefits of using a wood stove for pool heating include cost savings and ecological sustainability compared to a gas heater.

How Long Does It Take for the Wood Stove to Heat up the Pool?

It typically takes a few hours for the wood stove to heat up the pool. To maintain the temperature, ensure proper insulation and use a pool cover. Optimizing efficiency involves regular maintenance and using dry, seasoned wood.

What Is the Ideal Temperature for Heating a Pool With a Wood Stove?

The ideal pool temperature for heating with a wood stove is typically around 78-82 degrees Fahrenheit. Heating a pool with a wood stove offers benefits like cost savings, eco-friendliness, and the ability to enjoy a warm swimming experience.

Can I Use Any Type of Wood in the Wood Stove for Pool Heating?

I can use different types of wood in the wood stove for pool heating. However, each type has its advantages and disadvantages. It’s important to consider factors like burn time, heat output, and air pollution when choosing the right wood.

Is It Safe to Leave the Wood Stove Unattended While It Heats the Pool?

Yes, it is safe to leave the wood stove unattended while heating the pool. However, it is important to take precautions such as installing a safety barrier, ensuring proper ventilation, and using a reliable temperature control system.

Advertisement

Conclusion

In conclusion, heating your pool with a wood stove can provide an eco-friendly and cost-effective solution.

By carefully selecting the right wood stove, preparing your pool, and installing and operating the system correctly, you can enjoy the warmth and comfort of a heated pool.

With proper maintenance and troubleshooting, this wood stove pool heating system can be a reliable and efficient way to extend your swimming season.

So, why not take the plunge and experience the ultimate relaxation in a cozy, wood stove-heated pool?

Advertisement
Continue Reading

Wood Stove

How To Heat An Rv With Hydronic And Wood Stove

Published

on

By

An image showcasing an RV interior with a cozy hydronic heating system installed, featuring intricate piping arrangements, radiators, and a charming wood stove emitting a warm glow, all surrounded by a welcoming winter ambiance

Tired of being chilly in your RV during the winter season? Worry no more! I’ve found the perfect solution to maintain your warmth and comfort.

With a hydronic heating system and a trusty wood stove, you’ll never have to shiver again.

In this article, I’ll guide you through the process of heating your RV like a pro. From understanding hydronic heating systems to choosing the perfect wood stove, we’ll cover it all.

Get ready to transform your RV into a toasty paradise!

Key Takeaways

  • Hydronic heating systems provide consistent and even heating throughout an RV.
  • Wood stoves are a cost-effective heating option for RVs.
  • Installing a hydronic heating system can complement a wood stove for additional heating options.
  • Regular maintenance and inspection are necessary for both hydronic heating systems and wood stoves to ensure safe and efficient operation.

Understanding Hydronic Heating Systems

I really appreciate how informative this discussion is on understanding hydronic heating systems.

Hydronic heating systems offer numerous advantages over other heating methods. One major advantage is their ability to provide consistent and even heating throughout a space. This is achieved through the use of a network of pipes that circulate hot water or steam throughout the system, delivering heat to radiators or underfloor heating systems.

Advertisement

Another advantage is their energy efficiency, as hydronic systems can be easily zoned, allowing for individual control of heating in different areas of a building.

However, like any heating system, hydronic systems can face common issues that require troubleshooting. These issues may include leaks, airlocks, or a malfunctioning boiler. It’s important to regularly maintain and inspect the system to ensure its proper functioning and address any potential problems promptly.

Choosing the Right Wood Stove for Your RV

Choosing the right wood stove for my RV can be a challenging decision, but it’s crucial to ensure optimal heating and safety while on the road. When considering RV wood stove options, it’s important to weigh the pros and cons of wood stove heating in an RV.

Here are a few key factors to consider:

  • Efficiency: Wood stoves can provide excellent heat output, keeping you warm during cold nights on the road.

  • Cost: Wood stoves can be a cost-effective heating option, as wood is often cheaper than other fuel sources.

  • Space: Wood stoves can take up valuable space in your RV, so it’s essential to choose a model that fits your available area.

  • Maintenance: Wood stoves require regular cleaning and maintenance to ensure safe and efficient operation.

Once you’ve chosen the right wood stove for your RV, you may also want to consider installing a hydronic heating system for additional heating options and efficiency.

Advertisement

Installing a Hydronic Heating System in Your RV

Installing a hydronic heating system in my RV can significantly improve the efficiency and comfort of my travels, allowing me to enjoy cozy warmth on a more frequent basis. Hydronic heating systems use heated water to distribute warmth throughout the RV, providing a consistent and comfortable temperature. This type of heating system has several benefits for RV owners.

Firstly, hydronic heating systems are highly efficient, using less energy compared to traditional forced-air systems. This can result in cost savings and extended battery life while boondocking. Additionally, hydronic heating systems provide even heat distribution, eliminating hot and cold spots commonly found with other heating methods.

Table: Benefits of Hydronic Heating in RVs

Benefits Description
Energy Efficiency Hydronic heating systems use less energy compared to forced-air systems, resulting in cost savings and extended battery life.
Even Heat Distribution Hydronic heating provides consistent warmth without hot and cold spots, ensuring a comfortable environment throughout the RV.
Silent Operation These systems operate quietly, minimizing noise disturbance while sleeping or relaxing.
Versatility Hydronic heating systems can be integrated with other components, such as water heaters, to maximize functionality and convenience.

Maintaining Your Hydronic Heating System

Maintaining my hydronic heating system is crucial for ensuring its optimal performance and longevity. To prevent hydronic system leaks and troubleshoot common hydronic heating issues, here are a few key points to consider:

  • Regularly inspect and clean the system components, such as the boiler, pipes, and radiators, to remove any debris or sediment buildup.
  • Check for any leaks in the system by examining the connections and valves, and promptly repair any identified issues.
  • Maintain the proper water pressure and temperature levels within the system to prevent overheating or pressure-related problems.
  • Bleed the air from the system periodically to ensure efficient heat distribution and prevent airlocks.

By following these maintenance practices, you can enhance the performance and lifespan of your hydronic heating system.

Now, let’s move on to the next section for tips on efficiently heating your RV with a hydronic and wood stove combination.

Advertisement

Tips for Efficiently Heating Your RV With Hydronic and Wood Stove

During my recent RV trip, I discovered some helpful tips for efficiently heating my RV with a hydronic and wood stove.

To save energy and maximize heating, I found it beneficial to insulate the RV properly. This includes sealing any gaps or leaks in windows, doors, and vents, as well as using thermal curtains or shades.

Another energy-saving technique is to use a programmable thermostat to regulate the temperature and avoid unnecessary heat loss.

When troubleshooting common issues with hydronic and wood stove heating, it’s important to check for proper fuel and airflow. Make sure the wood stove is cleaned regularly to prevent clogs and ensure efficient burning.

Additionally, monitoring the water levels and pressure in the hydronic system is crucial for optimal heating performance.

Advertisement

Frequently Asked Questions

How Much Does It Cost to Install a Hydronic Heating System in an Rv?

Installing a hydronic heating system in an RV can cost around $2,000 to $6,000, depending on the size of the RV and the complexity of the installation. However, the benefits of hydronic heating, such as efficient and consistent heat distribution, make it a worthwhile investment.

Can I Use a Hydronic Heating System in My RV During Freezing Temperatures?

Using a hydronic heating system in my RV during freezing temperatures has pros and cons. It provides efficient and even heat distribution, but requires maintenance and proper insulation. Additionally, incorporating a wood stove can offer a secondary heat source.

Is It Safe to Leave a Wood Stove Unattended in an Rv?

Leaving a wood stove unattended in an RV can be dangerous. The pros of using a wood stove for heating include cost effectiveness and independence from electricity. However, safety measures must be taken to prevent fire hazards and carbon monoxide poisoning.

Can I Use the Hydronic Heating System to Also Heat the Water in My Rv?

Yes, the hydronic heating system can be used to heat the water in an RV. This alternative heating method is efficient and effective, providing a constant supply of hot water for showers and washing dishes.

How Often Do I Need to Clean and Maintain the Wood Stove in My Rv?

I clean and maintain my RV’s wood stove regularly. It’s important to clean the chimney and flue at least once a year. I also make sure to check for any buildup or blockages to ensure efficient heat output.

Advertisement

Conclusion

In conclusion, by combining the power of a hydronic heating system and a wood stove, you can efficiently heat your RV while enjoying the cozy ambiance of a traditional fireplace.

The hydronic system provides consistent, even heat throughout the vehicle, ensuring that every corner is warm and comfortable. This type of heating system uses hot water to distribute heat, which is more efficient than using forced air.

On the other hand, the wood stove adds a touch of rustic charm to your RV. It not only provides heat but also creates a cozy atmosphere with the crackling sound and flickering flames. It’s a great way to create a warm and inviting space in your RV.

With proper installation and maintenance, you can enjoy a warm and comfortable RV experience, no matter the weather outside. It’s important to have professionals install the hydronic system and ensure that it is properly connected to your RV’s heating system.

Regular maintenance of both the hydronic system and the wood stove is crucial to ensure their optimal performance. This includes cleaning the wood stove regularly and checking for any leaks or issues with the hydronic system.

Advertisement

So, whether you’re camping in the cold winter months or enjoying a chilly evening in the mountains, combining a hydronic heating system with a wood stove is a great way to stay warm and cozy on your next adventure.

Continue Reading

Trending