Just like a fortress stands protectively against the forces of nature, the door seal on a wood-burning pellet stove plays a crucial role in its optimal performance.
In this guide, I will walk you through the step-by-step process of replacing the door seal, ensuring a tight and effective seal that keeps your stove operating efficiently.
With the right tools and materials, along with careful installation and maintenance, you can enjoy long-lasting performance and maximum energy efficiency from your wood burning pellet stove.
Let’s get started!
Key Takeaways
- A proper door seal is crucial for fuel efficiency and preventing heat loss.
- Faulty door seals can lead to higher heating costs and the escape of smoke and harmful gases into the living space.
- Professional installation is recommended for optimal performance and safety.
- The choice of materials and proper tools are essential for successful replacement and functionality.

Komokeru Wood Stove Door Gasket, 1" x 86" Wood Stove Gasket Rope Seal for Wood Burning Stoves, Heat Resistant Fiberglass Gasket Replacement for Wood Stoves and Fireplaces, Grey
High Temperature Resistance Fireplace Replacement Parts – Upgrade your wood stove with our high-quality gasket rope made from…
As an affiliate, we earn on qualifying purchases.
As an affiliate, we earn on qualifying purchases.
Understanding the Importance of a Proper Door Seal
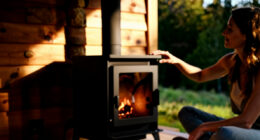
You need to understand why having a proper door seal is important for your wood burning pellet stove. The impact of a faulty door seal can be significant. A poorly sealed door allows excess air to enter the combustion chamber, resulting in poor fuel efficiency and an inefficient burn. This means that you’ll be burning more pellets than necessary, leading to higher heating costs and wasted energy.
Additionally, a faulty seal can cause smoke and harmful gases to escape into your living space, posing health risks. To ensure a tight seal, professional installation is recommended. Professionals have the knowledge and expertise to properly align and install the door seal, ensuring optimal performance and safety of your wood burning pellet stove.
Now let’s move on to discussing the tools and materials needed for replacing the door seal without compromising its integrity or functionality.

Protalwell Wood Stove Gasket, 7/8" Wood Stove Door Gasket Kit, Gasket Rope Replacement for Stove or Fireplace Doors, Grey Color Fiberglass Gasket
High Temperature Resistance Gasket Rope – Made by Graphite Impregnated Fiberglass, will not burn and withstand to temperatures…
As an affiliate, we earn on qualifying purchases.
As an affiliate, we earn on qualifying purchases.
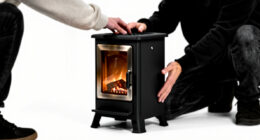
Tools and Materials Needed for Replacing the Door Seal
To replace the door seal on a wood burning pellet stove, gather the necessary tools and materials. You will need a screwdriver, pliers, a putty knife, a vacuum cleaner, and a new door seal.
When it comes to the door seal material, there are alternatives to consider. While fiberglass rope seals are commonly used for their durability and heat resistance, other options include graphite impregnated seals or adhesive-backed foam tape. These alternative materials may provide better insulation or easier installation depending on your specific needs.
Now that you have all the tools and materials ready, it’s time to proceed with removing the old door seal. This step is important to ensure a proper replacement is done without any issues arising during the process of installing the new one.
Komokeru Wood Stove Door Gasket, 1" x 86" Wood Stove Gasket Rope Seal for Wood Burning Stoves, Heat Resistant Fiberglass Gasket Replacement for Wood Stoves and Fireplaces, Grey
High Temperature Resistance Fireplace Replacement Parts – Upgrade your wood stove with our high-quality gasket rope made from…
As an affiliate, we earn on qualifying purchases.
As an affiliate, we earn on qualifying purchases.
Step-By-Step Guide to Removing the Old Door Seal
When it comes to removing the old door seal on a wood burning pellet stove, there are several techniques that can be employed.
One method involves using a putty knife to carefully pry off the seal from its adhesive backing, being cautious not to damage the surrounding areas.
Another approach is to heat up the seal with a hairdryer or heat gun, which softens the adhesive and makes it easier to peel off.
As for recommended replacement materials, silicone-based seals are often preferred due to their high temperature resistance and durability.
It is important to choose a seal that is specifically designed for use with wood burning pellet stoves in order to ensure proper fit and functionality.
Seal Removal Techniques
After removing the screws, I carefully pry off the old door seal using a flathead screwdriver.
Here are some seal removal techniques to consider:
- Heat gun: Apply heat to soften the adhesive and then gently peel off the seal.
- Razor blade: Slide a razor blade under the seal to cut through any remaining adhesive.
- Solvent: Use a solvent like acetone or rubbing alcohol to dissolve the adhesive and make it easier to remove.
- Wire brush: Scrub away any stubborn residue with a wire brush.
- Sandpaper: Smooth out any rough areas on the door surface before installing a new seal.
During the seal removal process, you may discover that your existing door seal is beyond repair. In such cases, there are alternative options available for replacement.
Now let’s move on to recommended replacement materials without skipping a beat.
Recommended Replacement Materials
One option for replacing a worn-out door seal is using a silicone gasket. Silicone gaskets are recommended materials due to their durability and heat resistance. They provide an excellent air-tight seal, preventing any leakage of smoke or gases from the stove.
When installing a silicone gasket, it is important to ensure that the surface is clean and free from any debris or old seal remnants. Measure the length required for the gasket and cut it accordingly, making sure to leave a slight overlap for a snug fit.
Apply high-temperature adhesive to the stove door and carefully press the gasket into place, ensuring even contact along the entire perimeter. Once installed correctly, the silicone gasket will effectively seal your stove door, improving its efficiency and performance.
To prepare the stove door for the new seal, start by removing any remaining traces of the old sealant and thoroughly clean the surface before proceeding with installation.

Wood Stove Door Gasket Cement, High Temperature Resistance Adhesive, Silicone Material, Black 3.5 Fl Oz
High Temperature Resistant Adhesive – Rated to withstand up to 500° F (260° C).
As an affiliate, we earn on qualifying purchases.
As an affiliate, we earn on qualifying purchases.
Preparing the Stove Door for the New Seal
To prepare the stove door for the new seal, you’ll need to remove any remaining adhesive or debris. This step is crucial in ensuring a proper and effective seal.
Here are some troubleshooting tips and sealing techniques to help you with this process:
-
Begin by using a scraper or putty knife to gently scrape off any old adhesive residue from the door surface.
-
Next, use a mild detergent mixed with warm water and a soft cloth to clean the door thoroughly, removing any dirt or debris.
-
Once the door is clean, inspect it for any dents or damage that may hinder the seal’s effectiveness. Repair or replace as necessary.
-
Finally, ensure that the surface is completely dry before proceeding with installing the new door seal.
Installing the New Door Seal Correctly
When it comes to properly installing a new door seal on a wood burning pellet stove, there are two key points that we must consider:
-
Proper seal placement: The first step in achieving a successful installation is ensuring that the seal is placed in the correct position, allowing for a tight and secure fit. This will effectively prevent any air leakage and maintain optimal heating efficiency.
-
Preventing heat loss: Additionally, by taking measures to prevent heat loss through the door seal, we can maximize the stove’s performance and minimize energy waste.
Proper Seal Placement
Make sure the door seal is evenly aligned along the edge of the stove. To ensure proper seal installation and troubleshoot any potential seal problems, follow these steps:
-
Start by inspecting the old door seal for signs of wear or damage. Remove any remnants of the old seal from the stove.
-
Apply a thin layer of heat-resistant adhesive to both sides of the door opening on the stove.
-
Carefully press the new door seal onto the adhesive, making sure it is centered and evenly aligned along the edge of the stove.
By following these instructions, you will achieve a proper seal placement that will effectively prevent heat loss and keep your wood burning pellet stove operating efficiently.
Now, let’s move on to discussing how to prevent heat loss in other areas of your stove without losing valuable energy.
Preventing Heat Loss
To prevent heat loss in other areas of your stove without wasting energy, check for any gaps or cracks in the surrounding walls and floor. These openings can allow warm air to escape and cold air to enter, reducing the efficiency of your wood burning pellet stove. By maximizing energy savings, you can ensure that your stove is operating at its full potential.
When replacing the door seal on your stove, it’s crucial to choose the right seal material. Look for a high-quality material that is resistant to heat and provides a tight seal when compressed. Silicone seals are often recommended due to their durability and flexibility.
Testing the Seal for Proper Fit and Effectiveness
Check if the door seal is fitting properly and working effectively by running your hand along the edges to feel for any gaps or leaks. This step is crucial in ensuring that your wood burning pellet stove operates efficiently and prevents heat loss.
To test the seal, you can also use a flashlight to inspect for any visible light leakage around the door frame. If you notice any gaps or leaks, it may be necessary to replace the door seal.
Troubleshooting tips include cleaning the seal with a mild detergent and water solution to remove any dirt or debris that may be affecting its performance.
Regularly testing and maintaining the door seal will help ensure long-lasting performance for your wood burning pellet stove.
Maintaining the Door Seal for Long-Lasting Performance
Regularly cleaning the seal with a mild detergent and water solution is essential for ensuring that it functions properly and maintains its effectiveness over time. Door seal maintenance is crucial to prevent air leakage, which can result in reduced heating efficiency and increased energy consumption.
A properly sealed door provides numerous benefits, including improved heat retention, increased stove performance, and enhanced safety by preventing smoke or carbon monoxide from entering the room. To maintain the door seal, start by wiping it down with a damp cloth to remove any dust or debris. Then, mix a mild detergent with water and use a soft brush to gently scrub the seal. Rinse thoroughly and dry completely before closing the door.
By regularly maintaining your door seal, you can ensure optimal performance of your wood-burning pellet stove.
Transitioning into troubleshooting common issues with door seals: However, despite regular maintenance, there may be times when you encounter problems with your door seal…
Troubleshooting Common Issues With Door Seals
If you’re experiencing problems with your door seal, a possible solution could be adjusting the hinges to ensure a proper fit. Here are some troubleshooting tips for common seal problems:
-
Inspect the seal for any signs of wear or damage, such as cracks or gaps.
-
If you notice any issues, replace the seal with a new one to ensure a tight and secure fit.
-
Make sure the door is properly aligned with the stove body to prevent air leaks.
-
Check if there is any debris or dirt on the seal that may be preventing it from forming a tight seal.
-
Clean the seal using mild soap and water, then dry it thoroughly before closing the door.
By addressing these common issues with your door seals, you can ensure optimal performance and energy efficiency.
Now let’s move on to tips for maximizing energy efficiency with a well-sealed door.
Tips for Maximizing Energy Efficiency With a Well-Sealed Door
To ensure your home stays warm and energy efficient, make sure to keep the area around your well-sealed door free from any obstructions.
Maximizing insulation effectiveness is crucial for reducing energy consumption and keeping your home comfortable.
One way to achieve this is by regularly inspecting the door seal for any signs of wear or damage. If you notice gaps or leaks, it’s important to replace the seal promptly.
Start by removing the old seal carefully, making sure not to damage the surrounding areas. Measure the dimensions of your door and purchase a high-quality replacement seal that matches these measurements precisely.
Install the new seal using adhesive or screws, ensuring a tight fit all around.
Regularly cleaning and maintaining your well-sealed door will help maximize its insulation effectiveness and minimize heat loss, ultimately reducing energy consumption in your home.
Does Replacing the Door Seal on a Wood Burning Pellet Stove Help with Heating Costs for the House?
Yes, replacing the door seal on a wood burning pellet stove can definitely help with reducing the wood burning stove cost to heat your house. A proper seal ensures better heat retention, resulting in increased efficiency and lower heating costs. It’s a simple and cost-effective way to improve the performance of your stove.
Frequently Asked Questions
How Often Should the Door Seal on a Wood Burning Pellet Stove Be Replaced?
When it’s time to replace the door seal on a wood burning pellet stove depends on wear and tear. Signs of a worn out seal include air leakage, decreased efficiency, and difficulty in maintaining consistent temperatures.
Can I Use Any Type of Sealant to Replace the Door Seal?
I can’t use just any sealant to replace the door seal on a wood burning pellet stove. Different types have pros and cons. It’s important to choose one that is suitable for high temperatures and won’t release harmful fumes.
What Should I Do if the New Door Seal Does Not Fit Properly?
If the new door seal does not fit properly, troubleshooting the installation is necessary. I can try adjusting or repositioning the seal to ensure a proper fit. Alternatively, I might need to explore alternative solutions for an ill-fitting door seal.
Can I Still Use My Wood Burning Pellet Stove if the Door Seal Is Damaged or Missing?
If the door seal on my wood burning pellet stove is damaged or missing, it is not recommended to use alternative materials. To properly measure and install a new door seal, follow these steps.
How Can I Tell if the Door Seal Is Causing a Decrease in Energy Efficiency?
If my wood burning pellet stove’s door seal is causing a decrease in energy efficiency, I can tell by checking for drafts and reduced heat output. Properly cleaning the stove and using it over a traditional fireplace offer benefits like improved air quality and efficiency.
Conclusion
In conclusion, replacing the door seal on a wood burning pellet stove is essential for maintaining efficiency and preventing heat loss. By carefully following the step-by-step guide provided, homeowners can ensure a proper fit and effective performance of the new seal.
While some may argue that it is a time-consuming task, investing time in maintaining the door seal will result in long-lasting performance and maximized energy efficiency. Don’t overlook this important aspect of stove maintenance; it’s worth the effort for optimal heating capabilities.