Connect with us

Wood Stove

How To Restore Rust On Cast Iron Wood Stove

Published

on


Can I use vinegar or other natural cleaning agents to remove rust from my cast iron wood stove?

As an avid cast iron wood stove enthusiast, I know the frustration of dealing with rust.

But fear not, because I’m here to guide you through the process of restoring your beloved stove to its former glory.

In this article, I’ll share my expert tips and techniques for removing rust, restoring the appearance, and preventing future corrosion.wood stove wiki

Get ready to say goodbye to that pesky rust and hello to a beautifully rejuvenated cast iron wood stove!

Key Takeaways

  • Rust occurs when moisture comes into contact with the iron surface.
  • Keeping the stove dry and clean helps prevent rust.
  • Removing rust can be done using natural remedies like vinegar or commercially available rust removal products.
  • Restoring the appearance of the stove can be achieved by applying high-temperature stove paint.

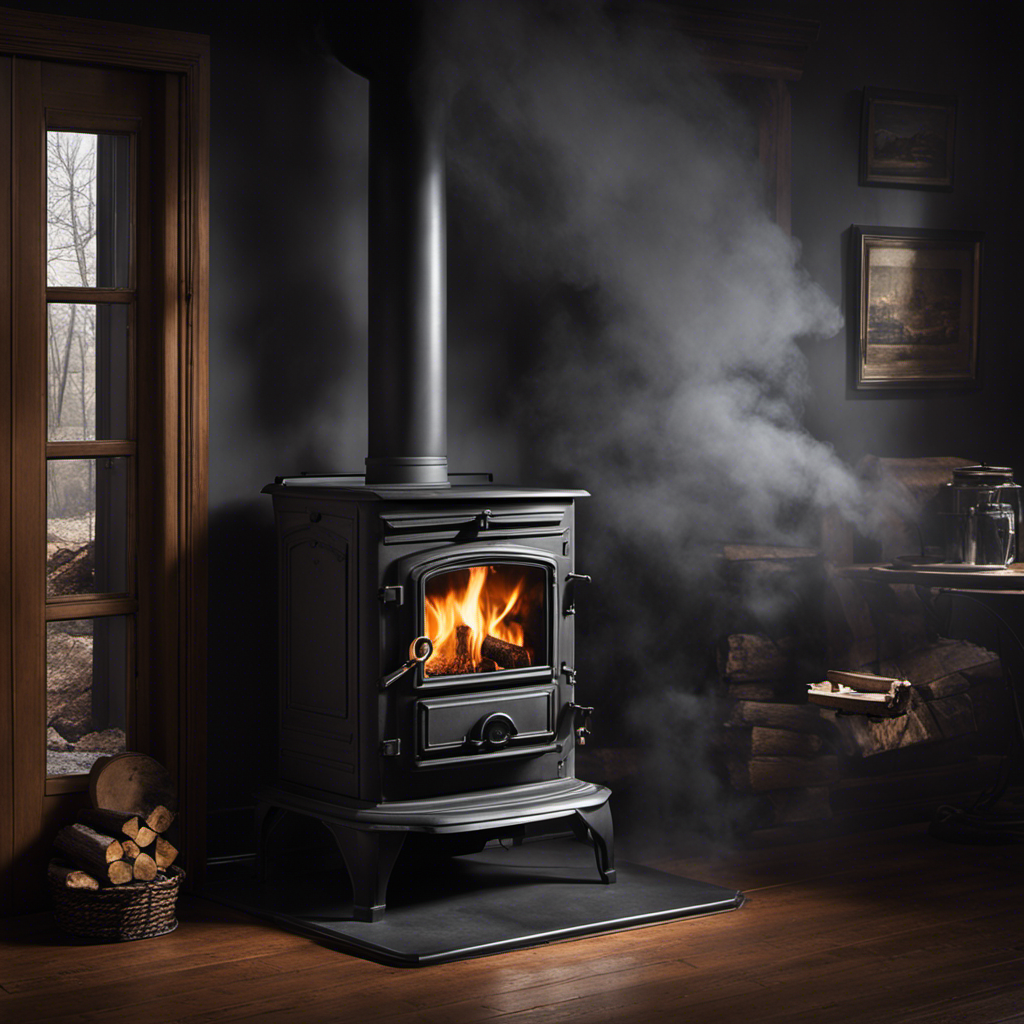
Understanding the Causes of Rust on Cast Iron Wood Stove

I need to understand the causes of rust on my cast iron wood stove so that I can effectively restore it.

Rust on cast iron is a common problem that occurs when moisture comes into contact with the iron surface. One of the most common misconceptions is that rust only forms on the outside of the stove. However, rust can also develop on the inside if the stove isn’t properly maintained.

Advertisement

Prevention methods include keeping the stove dry and clean, as moisture and debris can accelerate the rusting process. Regularly inspecting the stove for any signs of rust or damage is also important.vogelzang wood stove

To effectively restore the stove, it’s crucial to remove all rust using a wire brush or sandpaper and then applying a high-temperature paint or stove polish to protect the iron surface from further corrosion.

Preparing Your Cast Iron Wood Stove for Rust Restoration

Before starting the rust restoration process, it’s important to properly prepare your cast iron wood stove by removing any ashes or debris. Cleaning techniques vary depending on the level of dirt and grime present on the surface.

I recommend using a wire brush or steel wool to scrub away loose debris and rust particles. Be sure to wear gloves and protective eyewear to avoid any injuries.

Once the stove is clean, it’s crucial to apply a protective coating to prevent future rust formation. There are various options available, including high-temperature paint or specialized stove polish. These coatings not only provide a barrier against rust but also enhance the appearance of your wood stove.jotul wood stove for sale craigslist

With the stove properly prepared, we can now move on to the next step: removing rust from your cast iron wood stove.

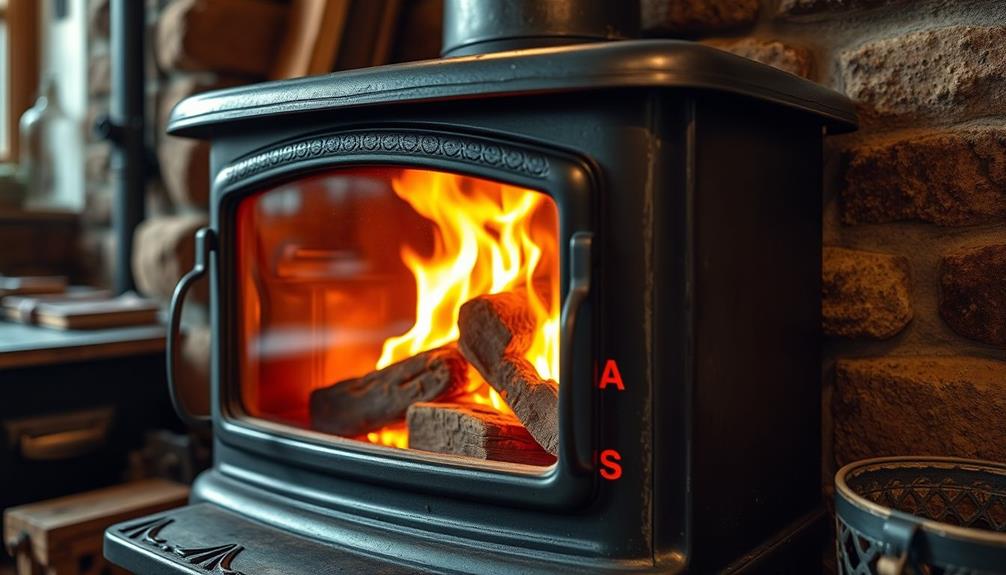
Removing Rust From Your Cast Iron Wood Stove

To effectively remove rust from your cast iron wood stove, start by mixing one part vinegar with three parts water in a spray bottle. This solution will act as a natural rust remover and is safe to use on cast iron surfaces. Spray the solution onto the rusted areas, making sure to cover all affected parts. Let it sit for about 10-15 minutes, allowing the vinegar to penetrate and loosen the rust.

Advertisement

Then, using a scrub brush or steel wool, gently scrub the rusted areas in a circular motion. Rinse the stove with clean water and dry it thoroughly.

Alternatively, there are also commercially available rust removal products specifically designed for cast iron restoration. These products often contain chemicals that can effectively dissolve rust and restore the appearance of your cast iron wood stove.quadra fire wood stove

Transitioning into the next section about ‘restoring the appearance of your cast iron wood stove’, it’s important to note that after removing the rust, you may need to perform additional steps to bring back the stove’s original shine and luster.

Restoring the Appearance of Your Cast Iron Wood Stove

After removing the rust, I like to apply a thin layer of high-temperature stove paint onto the cast iron surface to restore the appearance of my wood stove. This restoration technique not only enhances the aesthetic appeal of the stove but also helps protect it from further corrosion.

Before applying the paint, it’s crucial to clean the surface thoroughly and ensure it’s completely dry. I prefer using DIY rust removal methods such as vinegar or a mixture of baking soda and water to get rid of the rust. These natural remedies are effective and environmentally friendly.

Once the rust is removed, I gently sand the surface to create a smooth base for the paint. The high-temperature stove paint provides a durable finish that can withstand the heat produced by the wood stove, ensuring long-lasting restoration results.

Advertisement
pellet burning stove

Maintaining and Preventing Future Rust on Your Cast Iron Wood Stove

Since I regularly inspect and clean my cast iron wood stove, I’ve been able to prevent future rust and ensure its longevity. Preventing corrosion is crucial in maintaining the efficiency and safety of the stove.

To achieve this, I use the right cleaning products specifically designed for cast iron. Firstly, I remove any loose debris or ash using a soft brush or cloth. Then, I apply a cast iron cleaner that’s non-abrasive and specifically formulated to remove rust and stains.

After cleaning, I thoroughly dry the stove to prevent any moisture from causing rust. Additionally, I regularly inspect the stove for any signs of rust or corrosion and address them promptly.

Frequently Asked Questions

Can I Use Regular Household Cleaning Products to Remove Rust From My Cast Iron Wood Stove?

Yes, regular household cleaning products can be used to remove rust from a cast iron wood stove. However, there are also natural rust removal methods available, such as using vinegar or a paste made from baking soda and water.wood stove amazon

Is It Necessary to Remove All the Rust From My Cast Iron Wood Stove Before Restoring Its Appearance?

I should remove all rust from my cast iron wood stove before restoring it, but leaving some rust for a rustic look is also an option. Vinegar and other natural cleaning products can be used to remove rust.

Can I Use a Wire Brush to Remove Rust From My Cast Iron Wood Stove?

Yes, a wire brush can be used to remove rust from a cast iron wood stove. However, there are alternative methods such as using vinegar or a rust-removing solution that may be more effective.

How Often Should I Maintain My Cast Iron Wood Stove to Prevent Future Rust?

Inspecting my cast iron wood stove for rust regularly ensures its longevity. To prevent rust, I clean and dry it thoroughly after each use, apply a protective coating, and store it in a dry place.

Advertisement

There are various types of protective coatings that are recommended for preventing rust on cast iron wood stoves. These coatings form a barrier against moisture and oxidation, ensuring the longevity and appearance of the stove.wood stove wiki

Are the Restoration Methods for a Majestic Wood Stove Similar to a Cast Iron Wood Stove?

Yes, the restoration methods for a majestic wood stove are similar to a cast iron wood stove. Both require thorough cleaning, sanding, and repainting to restore them to their original glory. It’s essential to pay attention to detail to ensure a successful restore majestic wood stove project.

Conclusion

In conclusion, restoring rust on a cast iron wood stove is a technical process that requires careful preparation, removal, and restoration.

By understanding the causes of rust and following the steps outlined in this article, you can bring back the appearance of your stove and prevent future rusting.

Did you know that by properly maintaining your cast iron wood stove, you can enjoy its warmth and beauty for many years to come, creating a cozy and inviting atmosphere in your home?

Advertisement

Growing up surrounded by the vast beauty of nature, Sierra was always drawn to the call of the wild. While others sought the comfort of the familiar, she ventured out, embracing the unpredictable and finding stories in the heartbeat of nature.   At the epicenter of every remarkable venture lies a dynamic team—a fusion of diverse talents, visions, and passions. The essence of Best Small Wood Stoves is crafted and refined by such a trio: Sierra, Logan, and Terra. Their collective expertise has transformed the platform into a leading authority on small wood stoves, radiating warmth and knowledge in equal measure.

Continue Reading
Advertisement

Wood Stove

How To Pipe A Wood Stove Out The Window

Published

on

By

An image capturing a step-by-step guide on piping a wood stove out the window

The inviting charm of a wood stove has constantly attracted me, yet my compact apartment lacks a chimney. As a result, I was compelled to figure out a method for venting it through a window.

In this article, I’ll guide you through the steps of safely and efficiently installing a wood stove ventilation system. From assessing the window location to securing the pipe, you’ll have all the technical know-how to enjoy the benefits of a wood stove in any space.

Key Takeaways

  • Evaluate window size and dimensions, inspect surrounding area for obstructions, and consider fire hazard prevention during the assessment of the window location.
  • Gather necessary tools and materials such as measuring tape, drill, screws, and stove pipe kit, and choose the appropriate pipe diameter and support brackets.
  • Ensure the wood stove is ready for installation and select the appropriate wood type for efficient burning.
  • Position and secure the pipe using metal brackets and screws, insulate the pipe, seal joints with high-temperature silicone sealant, and attach metal brackets to the wall for stability.

Assessing the Window Location

I’m checking the window location to see if it’s suitable for piping the wood stove out.

When evaluating the window size, it’s important to ensure that it’s large enough to accommodate the stove pipe without any restrictions. I measure the window’s dimensions, taking note of its width and height. This information will help me determine if the pipe can be properly installed without compromising the window’s functionality.

Additionally, I closely inspect the area surrounding the window to check for any potential obstructions. It’s crucial to ensure that there are no obstacles such as trees, bushes, or structures that could obstruct the pipe or pose a fire hazard.

This thorough assessment ensures a safe and effective installation of the wood stove.

Advertisement

Gathering the Necessary Tools and Materials

I gather all the tools and materials needed for the wood stove installation, including a measuring tape, drill, screws, and a stove pipe kit.

The first step in piping a wood stove out the window is choosing the right size pipe. It’s crucial to ensure that the pipe diameter matches the stove’s flue outlet size to facilitate proper ventilation.

Additionally, selecting the appropriate support brackets is essential to secure the pipe and prevent any potential hazards. These brackets will provide structural stability and support for the pipe, ensuring a safe and secure installation.

Once I’ve gathered all the necessary tools and materials, including the pipe and support brackets, I’m ready to move on to preparing the wood stove for installation.

Preparing the Wood Stove for Installation

Once everything is gathered, it’s time to start preparing the wood stove for installation. One crucial step in this process is ensuring that the stove is ready for use and that the wood burned in it is of the right type. Choosing the right kind of wood is essential for efficient and safe burning. Hardwoods like oak, maple, and birch are ideal choices as they burn longer and produce more heat. Softwoods like pine and spruce are less dense and burn faster, making them suitable for quick heat. To help you make an informed decision, here is a table outlining the characteristics of different types of wood:

Advertisement

Wood Type Density Heat Output
Oak High High
Maple High High
Birch High High
Pine Medium Medium
Spruce Low Low

Installing and Securing the Pipe

To ensure proper ventilation, I’ll carefully position and securely fasten the pipe in place using metal brackets and screws. The pipe should be installed at a slight upward angle towards the outside to allow for proper airflow. Here are the key steps to installing and securing the pipe:

  • Proper insulation for the pipe: I’ll wrap the pipe with insulation material to prevent heat loss and protect surrounding walls from potential damage.

  • Ensuring the pipe is properly sealed: I’ll use high-temperature silicone sealant to seal the joints between the pipe sections and any openings in the wall or window.

  • Use metal brackets and screws: By attaching metal brackets to the wall and securing the pipe with screws, I’ll ensure its stability and minimize the risk of shifting or falling.

  • Double-checking alignment: Before finalizing the installation, I’ll verify that the pipe is aligned correctly and not obstructed by any nearby objects.

By following these steps, I can confidently install and secure the pipe, creating a safe and efficient wood stove ventilation system.

Once the installation is complete, it’s essential to test and maintain the system regularly to ensure continued functionality and safety.

Testing and Maintaining the Wood Stove Ventilation System

After installing and securing the wood stove ventilation system, I regularly check for any signs of wear or damage to ensure its proper functioning.

It’s crucial to inspect the chimney condition periodically to prevent potential hazards. When inspecting the chimney, I carefully examine the interior and exterior surfaces for any cracks, loose bricks, or signs of deterioration. Any issues found should be promptly addressed to maintain the system’s efficiency and safety.

Advertisement

Additionally, troubleshooting ventilation issues is an essential part of maintaining the wood stove’s performance. If there are any problems with the airflow, I check for blockages or obstructions in the chimney or stovepipe.

Regular maintenance and thorough inspections play a vital role in preventing accidents and ensuring optimal performance of the wood stove ventilation system.

Conclusion

In conclusion, by following these steps, you can successfully pipe a wood stove out the window.

Remember the adage, ‘Measure twice, cut once,’ to ensure accurate installation.

With the right tools and materials, proper preparation, and secure installation, you can enjoy a well-ventilated wood stove in your home.

Advertisement

Regular testing and maintenance will also help maintain its efficiency and safety.

Stay warm and cozy with your newly installed wood stove!

Continue Reading

Wood Stove

How Long Does A Catalytic Converter Last In A Wood Stove

Published

on

By

An image showcasing a pristine wood stove with a durable, high-quality catalytic converter installed

As someone with a keen interest in wood-burning stoves, I frequently find myself wondering about the lifespan of a catalytic converter in these crucial devices.

Well, let me tell you, the lifespan of a catalytic converter in a wood stove can be downright impressive! From the moment you light that first fire, this crucial component starts working tirelessly to reduce emissions and improve efficiency.

But like all good things, it won’t last forever. In this article, I’ll delve into the factors affecting its lifespan, signs of failure, and maintenance tips to keep it going strong.

Key Takeaways

  • Regular cleaning and maintenance can extend the lifespan of a catalytic converter in a wood stove.
  • Proper airflow and burning dry, seasoned wood can minimize creosote formation and prolong the lifespan of the converter.
  • Signs of a failing catalytic converter include decreased heat output, increased smoke emissions, visible damage or wear, clogging with creosote and debris, and obstructions in the air intake or exhaust system.
  • To extend the life of a catalytic converter, regularly clean and inspect it, use a soft brush or vacuum cleaner to remove soot or debris, repair or replace any visible damage or wear, monitor airflow to prevent overheating, and follow proper maintenance techniques and cleaning methods.

Factors Affecting the Lifespan of a Catalytic Converter in a Wood Stove

I’ve been researching the factors that affect the lifespan of a catalytic converter in a wood stove, and I’ve discovered that regular cleaning and maintenance can significantly extend its longevity.

One of the most common causes of catalytic converter failure is a buildup of creosote and soot. These deposits can clog the converter, reducing its efficiency and leading to premature failure.

To prevent this, it’s important to clean the converter regularly, using a specialized brush or scraper to remove any built-up material. Additionally, ensuring proper airflow and burning dry, seasoned wood can help minimize the formation of creosote.

Advertisement

If you notice a decrease in heat output or an increase in smoke emissions, it may be a sign of a failing catalytic converter. In the next section, we’ll discuss the specific signs to look out for.

Signs of a Failing Catalytic Converter in a Wood Stove

If you notice a decrease in heat output or an increase in smoke emissions, it may be a sign that your catalytic converter in the wood stove is failing. As an expert in wood stove maintenance, I want to share some troubleshooting tips to help you address common issues with your catalytic converter:

  1. Inspect the converter: Check for any visible damage or signs of wear, such as cracks or holes. These can affect the converter’s efficiency and lead to performance issues.

  2. Clean or replace the converter: Over time, the converter can become clogged with creosote and other debris. Regular cleaning or replacement is necessary to maintain optimal functioning.

  3. Check the catalyst: The catalyst is a crucial component of the converter. If it becomes contaminated or deteriorates, it can impact the converter’s effectiveness. Ensure the catalyst is in good condition.

  4. Monitor airflow: Adequate airflow is essential for proper combustion and efficient operation of the catalytic converter. Make sure there are no obstructions in the air intake or exhaust system.

Maintenance Tips to Extend the Life of a Catalytic Converter in a Wood Stove

Regularly cleaning and inspecting the catalytic converter, as well as monitoring airflow, can greatly extend its life in a wood stove.

The catalytic converter is a crucial component in a wood stove as it helps to reduce harmful emissions. To ensure its longevity, it’s important to follow proper maintenance techniques and cleaning methods.

One important step is to clean the catalytic converter regularly to remove any built-up soot or debris. This can be done using a soft brush or a vacuum cleaner.

Advertisement

Additionally, inspecting the catalytic converter for any signs of damage or wear is essential. Any cracks or holes should be repaired or replaced immediately to prevent further damage.

Lastly, monitoring the airflow in the wood stove is crucial in maintaining the efficiency of the catalytic converter. A restricted airflow can cause the converter to overheat, leading to potential damage.

Average Lifespan of a Catalytic Converter in a Wood Stove

Based on my experience, the average lifespan of a catalytic converter in a wood stove is approximately 5 to 10 years. Here are some key factors to consider when using a catalytic converter in a wood stove:

  1. Pros of using a catalytic converter:

    • Reduces emissions: Catalytic converters help to minimize harmful pollutants released into the air.
    • Increases efficiency: By promoting more complete combustion, a catalytic converter can improve the stove’s overall efficiency.
    • Enhances safety: These devices can reduce the risk of chimney fires by reducing creosote buildup.
    • Environmentally friendly: Using a catalytic converter aligns with eco-friendly practices, making it a sustainable choice.
  2. Cons of using a catalytic converter:

    • Higher cost: Catalytic converters can be more expensive to install compared to traditional wood stoves.
    • Maintenance requirements: Regular cleaning and maintenance are necessary to ensure optimal performance.
    • Limited lifespan: As mentioned earlier, catalytic converters have a finite lifespan and will eventually need replacement.
    • Potential heat loss: Some heat may be lost as it passes through the catalytic converter, reducing the overall heat output of the stove.

When choosing the right catalytic converter for a wood stove, it’s essential to consider factors such as the stove’s size, heat output, and specific emission requirements. Consulting with a professional can help ensure you select the right one for your needs.

When to Replace a Catalytic Converter in a Wood Stove

I’ve noticed that a catalytic converter in a wood stove typically needs to be replaced every 5 to 10 years. However, it’s important to note that this can vary depending on several factors such as the frequency of use, the quality of wood being burned, and maintenance practices.

It’s recommended to clean the catalytic converter in a wood stove at least once a year to ensure optimal performance and prevent any build-up of creosote or other debris. When cleaning, it’s essential to follow the manufacturer’s instructions and use appropriate cleaning agents.

Advertisement

If you’re experiencing any issues with your catalytic converter, such as decreased heat output or excessive smoke, troubleshooting may be required. This can involve inspecting for any visible damage, checking for proper air flow, and ensuring that the catalytic converter is properly aligned.

If problems persist, it may be time to consider replacing the catalytic converter in your wood stove.

Frequently Asked Questions

Can a Catalytic Converter in a Wood Stove Be Repaired or Must It Always Be Replaced?

Repairing a catalytic converter in a wood stove is not always possible; in many cases, it must be replaced. While repair costs may be lower initially, the long-term benefits of a new converter may outweigh the cost difference.

Are There Any Specific Environmental Factors That Can Impact the Lifespan of a Catalytic Converter in a Wood Stove?

Factors affecting the lifespan of catalytic converters in wood stoves include environmental conditions. Extreme temperatures, high humidity, and exposure to corrosive substances can impact the longevity of the converter.

Is It Possible to Clean a Catalytic Converter in a Wood Stove to Extend Its Lifespan?

Yes, it is possible to clean a catalytic converter in a wood stove to extend its lifespan. There are various cleaning methods available that can help remove built-up deposits and improve its efficiency. However, considering alternative heating options may be more cost-effective in the long run.

Advertisement

Can a Catalytic Converter in a Wood Stove Be Recycled?

Recycling options for a catalytic converter in a wood stove depend on local regulations and facilities. Implementing sustainability measures, such as proper disposal and recycling, can help minimize environmental impact and promote responsible waste management.

Are There Any Regulations or Guidelines Regarding the Disposal of a Catalytic Converter From a Wood Stove?

Regulations on disposal and guidelines for disposing of a catalytic converter from a wood stove vary by location. It’s important to check with local authorities to ensure proper and legal disposal methods are followed.

Conclusion

In conclusion, the lifespan of a catalytic converter in a wood stove can vary depending on various factors such as usage, maintenance, and the quality of the converter itself.

On average, a well-maintained catalytic converter can last anywhere from 5 to 10 years. However, a real-life example of a wood stove owner who regularly cleans and inspects their catalytic converter may find it lasting even longer, up to 15 years.

This highlights the importance of proper care and maintenance to prolong the life of this essential component.

Advertisement

Continue Reading

Installation & Maintenance

How To Installation A Lowes Wood Stove Chimney

Published

on

By

An image capturing the step-by-step process of installing a Lowes wood stove chimney

During my quest to grasp the complexities of wood stove installation, I’ve learned that success hinges on ensuring the chimney is correctly set up.

In this guide, I’ll walk you through the step-by-step process of installing a Lowes wood stove chimney.

From understanding the components to choosing the right location, I’ll provide all the detailed instructions you need.

So, let’s roll up our sleeves and get ready to bring warmth and coziness to your home.

Key Takeaways

  • Components work together for proper ventilation
  • Regular cleaning and inspection are essential
  • Choose the right location and materials for safety and efficiency
  • Thoroughly prepare your home and follow local building codes and regulations

Understanding the Components of a Lowes Wood Stove Chimney

I understand the components of a Lowes wood stove chimney and how they work together to ensure proper ventilation. One common problem with chimneys is the buildup of creosote, a flammable substance that can cause chimney fires. To prevent this, regular cleaning and inspection are essential.

Another issue is blockage caused by debris, such as leaves or animal nests. This can restrict airflow and lead to poor ventilation. It’s important to install a chimney cap to prevent these blockages.

Advertisement

Additionally, safety precautions should be taken when using a wood stove chimney. This includes using a spark arrester to prevent sparks from igniting nearby combustible materials.

Regular maintenance and following safety guidelines will help ensure the efficient and safe operation of your Lowes wood stove chimney.

Choosing the Right Location for Your Wood Stove Chimney

There are two main factors to consider when choosing the right location for your wood stove chimney: safety and efficiency. It is important to select a location that minimizes the risk of fire and carbon monoxide buildup, while also maximizing the stove’s heating capabilities. Here are some essential safety precautions for wood stove chimney installation:

  1. Keep the chimney at least 2 feet above the highest point where it passes through the roof.
  2. Install a chimney cap to prevent birds, animals, and debris from entering.
  3. Use only approved materials for the chimney, such as stainless steel or insulated double-wall pipe.
  4. Ensure proper clearance from combustible materials, following manufacturer guidelines.
  5. Regularly inspect and clean the chimney to prevent creosote buildup.

By following these precautions and choosing the best materials for your wood stove chimney, you can enjoy a safe and efficient heating system for your home.

Safety Precautions Materials
Keep chimney above roof Stainless steel or insulated double-wall pipe
Install chimney cap Follow manufacturer guidelines for clearance
Regularly inspect and clean chimney

Preparing Your Home for Wood Stove Chimney Installation

To ensure a smooth and successful wood stove chimney installation, it’s essential to thoroughly prepare your home and gather all the necessary materials.

When it comes to choosing the right materials for your wood stove chimney, there are a few key factors to consider. First and foremost, you’ll want to make sure that the materials are rated for high temperatures to prevent any potential fire hazards. Additionally, it’s important to choose materials that are durable and long-lasting, as a chimney is a substantial investment.

Advertisement

Common mistakes to avoid during wood stove chimney installation include failing to properly measure and plan for the chimney’s height and clearance requirements. It’s also crucial to follow all local building codes and regulations to ensure that your installation is safe and compliant.

Step-by-Step Guide to Installing a Lowes Wood Stove Chimney

I carefully followed the step-by-step guide and successfully installed a Lowes wood stove chimney with ease and confidence. It was a rewarding experience, knowing that I was taking the necessary steps to ensure the safety and functionality of my wood stove.

However, installing the chimney is just the beginning. Proper maintenance is crucial for the chimney to work efficiently and prevent any potential problems. Here are some important maintenance tips to keep in mind:

  • Regularly inspect and clean the chimney to remove any creosote buildup.
  • Check for any cracks or damage that may occur over time and repair them promptly.
  • Ensure that the chimney cap is in good condition to prevent water and debris from entering.
  • Keep an eye out for signs of chimney fires, such as excessive smoke or a strong, pungent odor.

Is a Permit Required for Installing a Lowes Wood Stove Chimney?

Yes, a permit for wood stove installation is required when installing a Lowes wood stove chimney. This is to ensure safety and compliance with local building codes. It’s important to check with your local building department to understand the specific requirements for obtaining a permit for wood stove installation in your area.

Tips for Maintaining and Troubleshooting Your Wood Stove Chimney

Regularly inspecting and cleaning the chimney, as well as promptly repairing any cracks or damage, are essential for maintaining and troubleshooting your wood stove chimney.

One of the most common chimney problems is the buildup of creosote, a flammable substance that can lead to chimney fires. To prevent this, it’s recommended to have your chimney professionally cleaned at least once a year.

Advertisement

Additionally, make sure to check for any obstructions such as bird nests or debris that could block the airflow.

Another common issue is the development of cracks or leaks in the chimney, which can cause smoke to seep into your home. If you notice any cracks, it’s crucial to repair them immediately using a high-temperature sealant.

Frequently Asked Questions

Can I Install a Lowes Wood Stove Chimney Myself, or Do I Need to Hire a Professional?

I can install a Lowes wood stove chimney myself, but it’s important to consider the pros and cons. DIY installation saves money, but hiring a professional ensures proper installation and compliance with local regulations.

How Often Should I Clean My Lowes Wood Stove Chimney?

I clean my Lowes wood stove chimney as often as I clean my teeth, which is to say, regularly. Signs that it needs cleaning include excessive smoke, a strong odor, or a decrease in stove efficiency.

What Type of Wood Should I Use in My Wood Stove to Maximize Efficiency?

To maximize efficiency in my wood stove, I use hardwoods like oak or maple. They burn longer and release more heat. It’s important to properly season the wood and ensure it’s dry for optimal performance.

Advertisement

Are There Any Specific Building Codes or Regulations I Need to Adhere to When Installing a Wood Stove Chimney?

Building code requirements and safety regulations must be followed when installing a wood stove chimney. It is important to ensure the chimney is properly installed and meets all necessary standards to ensure safety and compliance.

What Should I Do if I Notice a Leak or Smoke Coming From My Wood Stove Chimney?

If I notice a leak or smoke coming from my wood stove chimney, I would first inspect the chimney for any visible damage or cracks. Then, I would proceed with repairing chimney leaks and troubleshooting chimney smoke as needed.

Conclusion

To wrap things up, installing a Lowes wood stove chimney can be a rewarding project for any homeowner. By understanding the components, choosing the right location, and following a step-by-step guide, you can enjoy the warmth and comfort of a wood stove in your home.

Remember to regularly maintain and troubleshoot your chimney to ensure its efficiency and safety. So go ahead, embrace the cozy atmosphere and start enjoying the benefits of a wood stove chimney!

Advertisement
Continue Reading

Trending