Connect with us

Wood Stove

How To Replace Door Gasket On Wood Stove

Published

on


  1. Gasket replacement tips and tricks
  2. Common mistakes to avoid when replacing door gasket
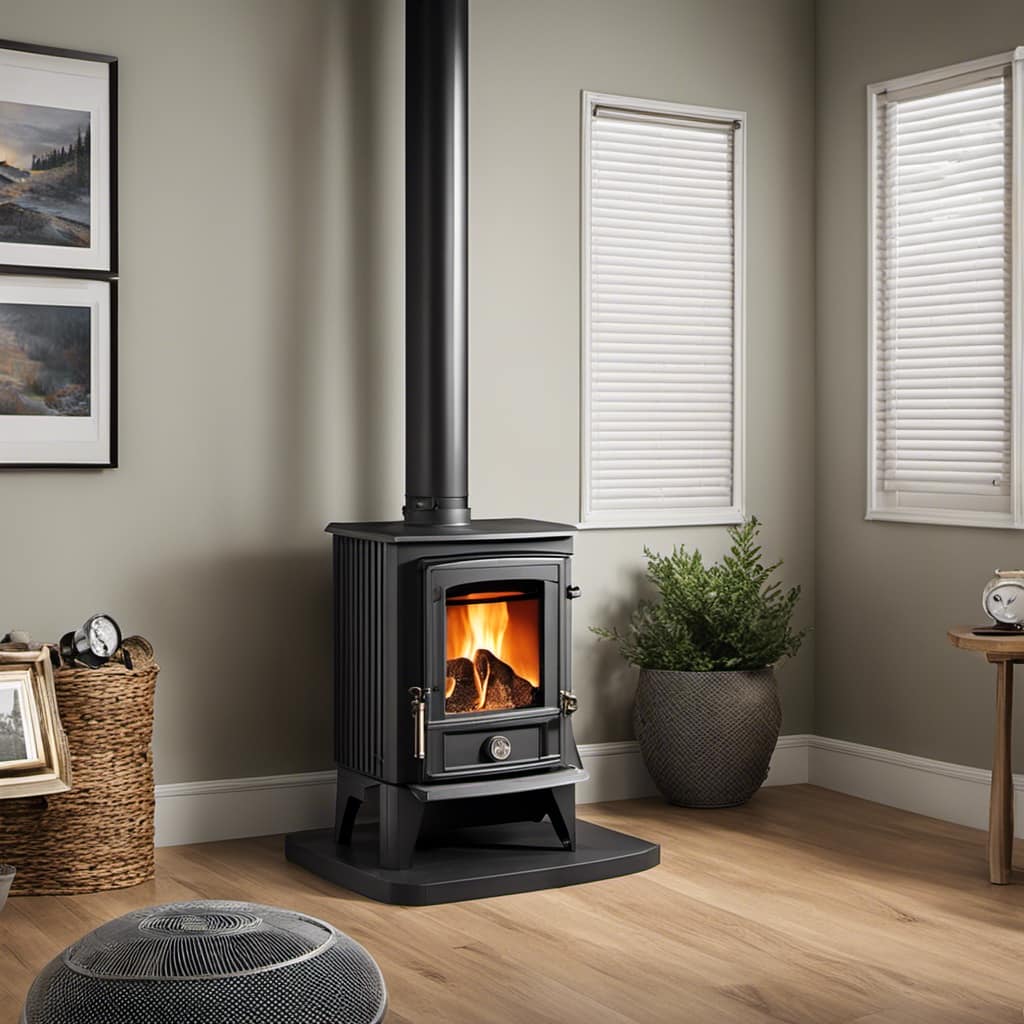
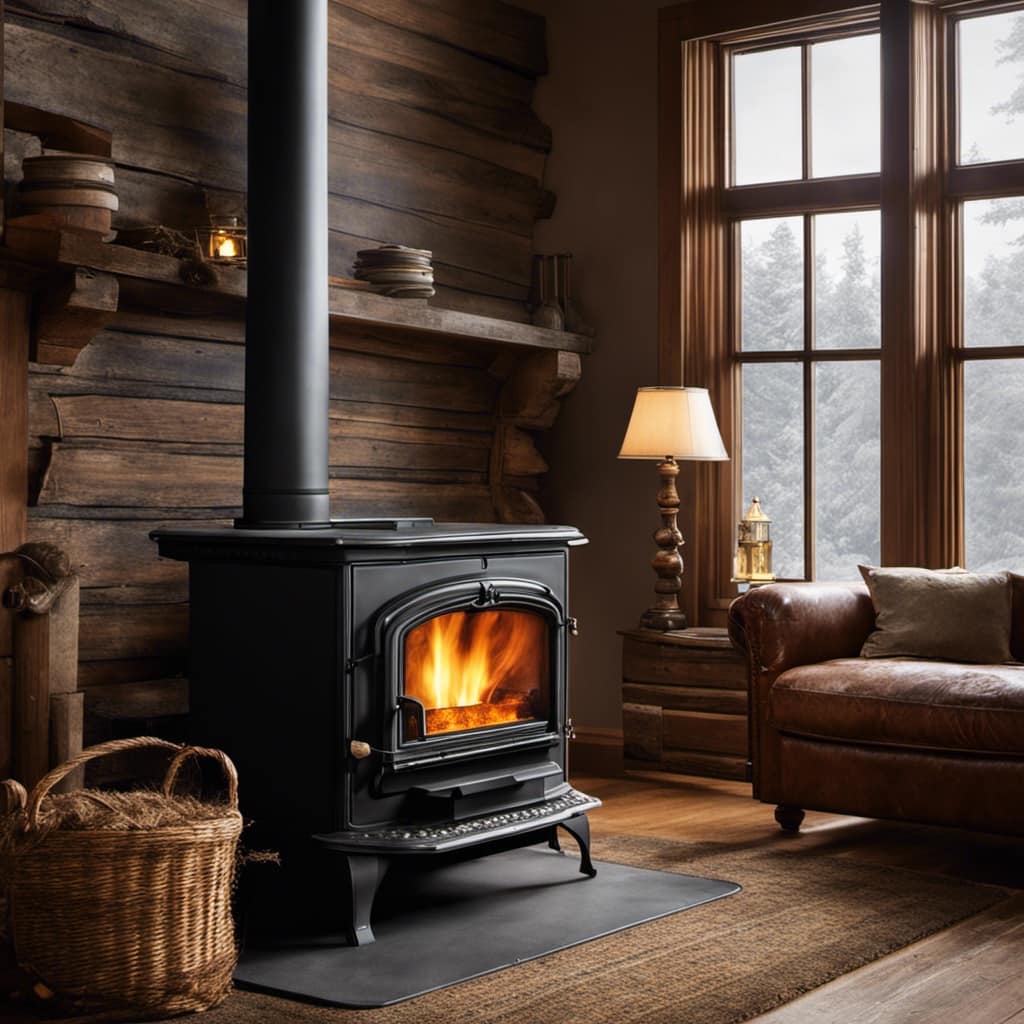
As someone who appreciates the cozy warmth my wood stove offers, I understand the frustration a faulty door gasket can cause. Though it may seem like merely a minor rubber component, it plays a crucial role in ensuring your stove operates both efficiently and safely.

In this article, I’ll guide you through the steps to replace your door gasket, ensuring that your wood stove continues to provide you with the comfort and heat you desire.

Let’s get started!

Key Takeaways

  • Assess the condition of the gasket and choose materials based on heat resistance and durability.
  • Remove the old gasket and prepare the surface by removing any adhesive or residue.
  • Install the new gasket by positioning it evenly around the edge of the stove door and ensuring a snug fit in the gasket channel.
  • Regularly inspect and maintain the gasket to ensure proper sealing, prevent air leakage, and maximize stove efficiency.

Assessing the Condition of the Door Gasket

I can feel the door gasket to check for any worn or damaged areas. Evaluating the lifespan of the gasket is crucial in determining if it needs replacement. A well-maintained gasket can last for several years, but over time, it can deteriorate due to exposure to high temperatures and constant use. Signs of gasket wear and tear include fraying, flattening, or brittleness. By running my fingers along the gasket, I can detect any inconsistencies in its texture, such as gaps or missing sections. I also inspect the gasket for discoloration, which may indicate heat damage.wood stoves for heating house

During this evaluation process, it’s essential to pay attention to any gaps between the gasket and the stove door. A properly functioning gasket should create a tight seal, preventing air leakage and ensuring efficient combustion. If I notice any significant gaps or signs of deterioration, it’s a clear indication that the gasket needs replacement.

Transitioning into the next section, gathering the necessary tools and materials, is crucial to begin the door gasket replacement process.

Gathering the Necessary Tools and Materials

Before starting the process of replacing the door gasket on a wood stove, it’s crucial to gather all the necessary tools and materials.

The essential tools for this task include a screwdriver, pliers, and a utility knife.

Advertisement
wood stove fireplace ideas

In addition, it’s important to choose the right materials, such as a high-quality replacement gasket and adhesive specifically designed for wood stoves.

Essential Tools for Gasket Replacement

To replace the door gasket on a wood stove, there are a few essential tools that you will need. These tools are necessary for a successful gasket replacement.

  1. Screwdriver: A screwdriver is needed to remove the screws that hold the old gasket in place.

  2. Wire brush: Before installing the new gasket, it’s important to clean the stove’s door thoroughly. A wire brush will help remove any debris or old adhesive.pomoly wood stove

  3. Adhesive: A high-temperature adhesive is necessary to secure the new gasket in place.

  4. Gasket material: Choosing the right gasket material is crucial for a proper seal. It should be heat-resistant and durable.

When replacing the door gasket, it’s important to keep a few tips and tricks in mind to avoid common mistakes.

  1. Not cleaning the surface properly before installing the new gasket.wood stove fans non electric

  2. Using the wrong adhesive or gasket material.

  3. Stretching the gasket too much, as it may not create a tight seal.

  4. Failing to follow the manufacturer’s instructions for installation.

Now that we’ve discussed the essential tools and common mistakes to avoid, let’s move on to choosing the right materials.wood stove for sale

Choosing the Right Materials

When choosing the right materials for the gasket replacement, it’s important to consider factors such as heat resistance and durability. The gasket serves as a seal between the door and the stove, preventing heat from escaping and improving the efficiency of the wood stove. To ensure a successful replacement, I recommend using a high-quality adhesive that is specifically designed for gasket installation. This will ensure a strong bond and prevent the gasket from coming loose over time. Additionally, regularly maintaining the door gasket is crucial for its longevity. Keep the gasket clean by wiping it down regularly with a damp cloth and avoiding harsh cleaning agents that could damage the material. Inspect the gasket for any signs of wear or damage, and replace it promptly if needed. By choosing the right adhesive and following these maintenance tips, you can ensure that your wood stove’s door gasket remains reliable and efficient.

Material Heat Resistance Durability
Fiberglass High High
Rope Medium High
Silicone High Medium

Removing the Old Door Gasket

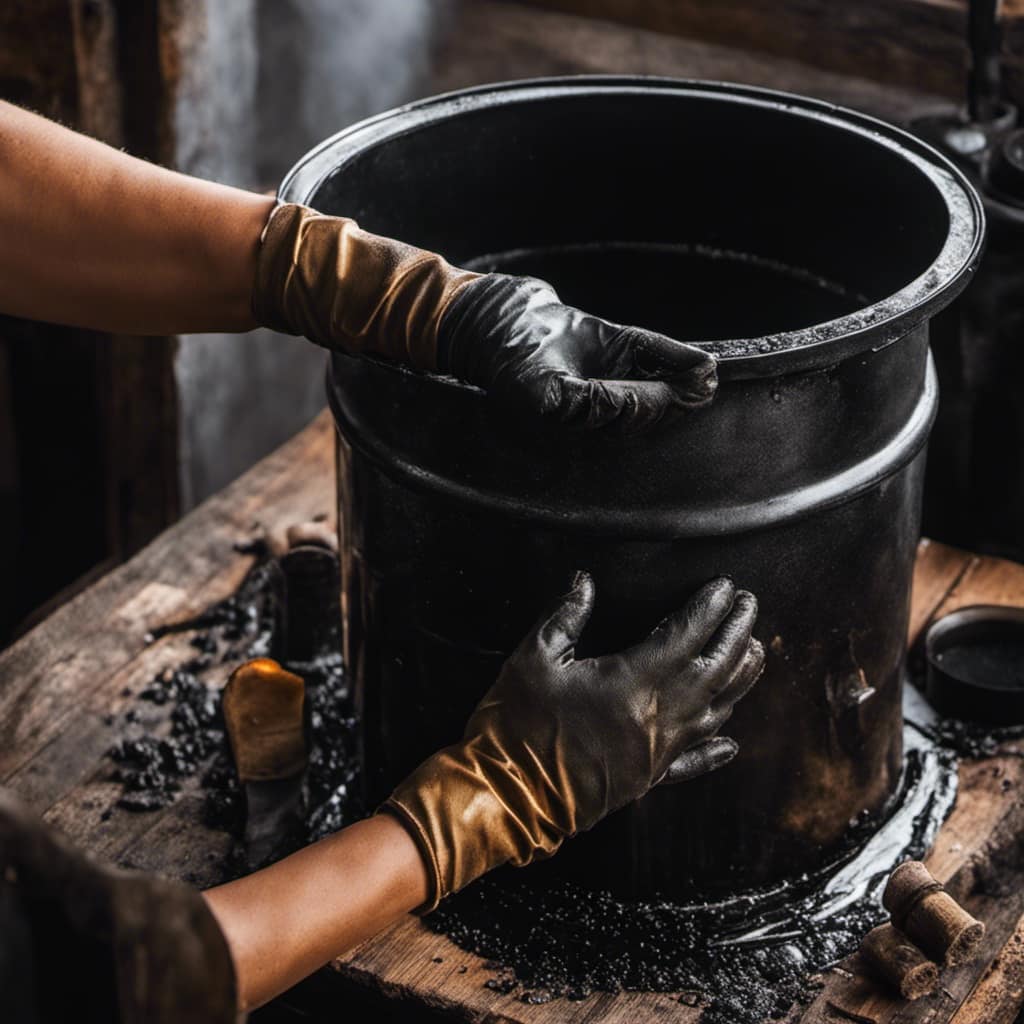
I can feel the old door gasket starting to loosen as I carefully pull it away from the wood stove. Removing the door gasket is an essential part of door gasket maintenance, and it requires precision and attention to detail.

Here’s how I go about removing the old door gasket:

Advertisement
  1. Inspect the gasket: Before removing it, I examine the condition of the gasket. I look for signs of wear and tear, such as fraying or cracking.wood burning stove small

  2. Loosen the adhesive: Using a heat gun or a hairdryer on a low setting, I gently warm up the adhesive that holds the gasket in place. This helps to soften the adhesive and make it easier to remove.

  3. Start at one corner: I carefully insert a flathead screwdriver or a putty knife between the gasket and the stove door. With a gentle prying motion, I gradually work my way around the door, loosening the gasket from the surface.

  4. Remove any residue: Once the gasket is completely removed, I inspect the surface for any remaining adhesive or residue. I use a scraper or sandpaper to remove any stubborn residue, ensuring a clean surface for the new gasket.

Preparing the Surface for the New Gasket

After removing the old gasket, I inspect the surface for any remaining residue or adhesive. It’s crucial to prepare the surface properly before installing the new gasket to ensure a tight seal and optimal performance of the wood stove.vermont castings wood stove

To begin, I use a scraper to gently scrape off any stubborn residue or adhesive that may be present. I take care not to scratch or damage the surface while doing this.

Next, I use a cleaning solvent specifically designed for removing adhesive residues on metal surfaces. I apply the solvent to a clean cloth and carefully wipe the surface, making sure to remove any traces of adhesive or residue. If there are any stubborn spots, I may need to repeat this step.

Once the surface is clean and free of any residue, I dry it thoroughly using a clean, lint-free cloth. This step is essential to ensure proper adhesion of the new gasket.

Installing the New Door Gasket

Now that the surface is properly prepared, it’s time to install the new door gasket.vermont castings defiant

First, determine the appropriate gasket material for your wood stove, ensuring it’s heat-resistant and the correct size.

Next, carefully position the gasket around the edge of the stove door, making sure it’s evenly aligned and snugly fits into the gasket channel.

Advertisement

Gasket Material Options

When choosing gasket material for my wood stove, I prefer using high temperature fiberglass because it’s durable and long-lasting.

Here are four reasons why high temperature fiberglass is the ideal choice for gasket installation:wood stove pipe home depot

  1. Heat Resistance: High temperature fiberglass can withstand extreme temperatures, making it perfect for wood stoves that generate high levels of heat. It won’t melt or degrade even with constant exposure to intense heat.

  2. Sealing Properties: This material provides an excellent seal, preventing any air leakage around the stove door. It ensures that the stove operates efficiently and minimizes heat loss.

  3. Longevity: High temperature fiberglass gaskets have a long lifespan, saving you the hassle and cost of frequent replacements. They’re resistant to wear and tear, maintaining their sealing performance over time.

  4. Easy Installation: Installing high temperature fiberglass gaskets is straightforward. With the right adhesive, you can secure the gasket in place quickly and effectively.wood stoves for heating near me

Overall, high temperature fiberglass gaskets offer superior performance and longevity, making them the top choice for gasket materials in wood stoves.

Proper Gasket Installation

I found that using high temperature fiberglass gasket material ensures a proper seal around the stove, preventing any air leakage. This type of gasket material is specifically designed to withstand the extreme temperatures produced by wood stoves.

When it comes to gasket installation, there are a few key steps to follow. First, remove any remnants of the old gasket using a scraper or wire brush. Make sure to clean the surface thoroughly to ensure proper adhesion.

Next, measure the length of the gasket needed and cut it to size. Apply a thin layer of high-temperature adhesive to the door or stove, then carefully press the gasket into place. Allow the adhesive to dry completely before closing the door.

Advertisement
wood stove hand truck

With proper gasket maintenance and regular inspections, the lifespan of the gasket can be extended, ensuring optimal performance of your wood stove.

Testing and Troubleshooting the New Gasket

After installing the new door gasket, I carefully inspect it for any gaps or leaks. This step is crucial to ensure the proper functioning of the wood stove and to prevent any heat or smoke from escaping. Here are some testing methods and troubleshooting tips to help you determine if your new gasket is installed correctly:

  1. Visual Inspection: Take a close look at the entire gasket, paying attention to any visible gaps or areas where the gasket isn’t properly sealed against the door or stove. If you notice any issues, you may need to readjust or replace the gasket.

  2. Smoke Test: Light a small piece of paper and hold it close to the gasket while the stove is burning. Observe if any smoke is leaking out. If you see smoke or feel any drafts, it indicates that the gasket isn’t properly sealed.no smoke wood stove

  3. Press Test: Gently press your hand against the gasket to check for any give or movement. The gasket should feel firm and secure. If it feels loose or has too much give, it may need to be tightened or replaced.

  4. Heat Resistance Test: During operation, carefully touch the gasket to check for excessive heat transfer. If it feels too hot to touch, it could indicate a problem with the gasket’s insulation properties.

Are there different methods for replacing a wood stove door gasket, and if so, what are they?

Yes, there are different methods for wood stove gasket replacement technique. One method involves removing the old gasket, cleaning the channel, applying adhesive, and carefully pressing the new gasket into place. Another method uses a self-adhesive gasket, eliminating the need for adhesive application. Both methods can effectively replace a wood stove door gasket.

Frequently Asked Questions

How Often Should the Door Gasket on a Wood Stove Be Replaced?

Replacing the door gasket on a wood stove is an important maintenance task. The frequency of replacement depends on several factors, such as the quality of the gasket and how often the stove is used. However, a general guideline is to replace the gasket every year or two.

Signs of a worn out door gasket include fraying, cracking, or a loose fit. To choose the right door gasket, consider the stove’s make and model, and consult the manufacturer’s recommendations.lowes summer heat wood stove

Can I Use Any Type of Adhesive to Install the New Door Gasket?

Can I use any type of adhesive to install the new door gasket?

When it comes to replacing the door gasket on a wood stove, it’s important to choose the right adhesive for a secure attachment.

Advertisement

Not all adhesives are suitable for this purpose.

To ensure a proper installation, it’s recommended to use a high-temperature adhesive specifically designed for wood stove door gaskets.wood stove fans on top of stove

This type of adhesive will withstand the heat and provide a long-lasting bond.

How Long Does It Take for the Adhesive to Dry Before I Can Use the Wood Stove Again?

Before using the wood stove again, it’s essential to allow the adhesive to dry completely. The drying time can vary depending on the type of adhesive used. To ensure proper drying, it’s recommended to follow the manufacturer’s instructions.

In the meantime, you can focus on properly preparing the surface before installing a new door gasket. This includes thoroughly cleaning the area and removing any old adhesive or debris.

Choosing the right adhesive for wood stove door gaskets is crucial for a secure and long-lasting seal.

Advertisement
wood stoves for sale craigslist

Is It Necessary to Clean the Surface Before Installing the New Door Gasket?

Yes, it’s necessary to clean the surface before installing the new door gasket on a wood stove.

Cleaning the surface ensures that there’s no dirt, debris, or old adhesive residue that could interfere with the proper adhesion of the new gasket.

It’s important to use a suitable cleaning agent that won’t damage the surface of the stove.

Additionally, choosing the right adhesive type for the gasket replacement is crucial for a secure and long-lasting seal.cast iron wood stove

What Are Some Common Signs That Indicate the Door Gasket Needs Replacement?

Common signs that indicate the door gasket needs replacement include:

  • Visible wear and tear, such as fraying or cracking, which compromises its effectiveness.
  • Air leakage or smoke escaping from the stove when the door is closed.

The replacement frequency of door gaskets depends on various factors, such as the quality of the gasket and how frequently the wood stove is used.

Regular inspection and maintenance can help identify when replacement is necessary.

Conclusion

In conclusion, replacing the door gasket on a wood stove is a necessary task to ensure optimal performance and energy efficiency. By assessing the condition of the gasket, gathering the right tools and materials, removing the old gasket, preparing the surface, and installing the new gasket, the wood stove can function effectively.

Advertisement
wood stove wiki

Testing and troubleshooting the new gasket is crucial to ensure a proper seal. Like a well-oiled machine, a properly installed door gasket will keep the stove running smoothly and efficiently.

Growing up surrounded by the vast beauty of nature, Sierra was always drawn to the call of the wild. While others sought the comfort of the familiar, she ventured out, embracing the unpredictable and finding stories in the heartbeat of nature.   At the epicenter of every remarkable venture lies a dynamic team—a fusion of diverse talents, visions, and passions. The essence of Best Small Wood Stoves is crafted and refined by such a trio: Sierra, Logan, and Terra. Their collective expertise has transformed the platform into a leading authority on small wood stoves, radiating warmth and knowledge in equal measure.

Continue Reading
Advertisement

Wood Stove

What Happens When Aluminum Is Put A Wood Stove

Published

on

By

An image showcasing the mesmerizing transformation of aluminum inside a wood stove

When I throw a thin aluminum strip into the powerful flames of my wood-burning stove, a captivating chemical reaction takes place right before my eyes. In this article, I will explore the scientific principles that can help us understand this mesmerizing phenomenon.

By exploring the thermal properties of aluminum, the combustion and oxidation processes, and the impact on the stove’s efficiency, we can uncover the intricate mechanisms at play.

However, we must also consider safety precautions when experimenting with this fiery interaction.

Let’s delve into the captivating world of aluminum and wood stove combustion.

Key Takeaways

  • Aluminum undergoes oxidation when exposed to oxygen in the air, and the intense heat in a wood stove accelerates this process.
  • The chemical reaction between aluminum and oxygen produces aluminum oxide, and the high temperature in the wood stove provides the energy for the reaction.
  • Aluminum has high thermal conductivity and is commonly used in industries like automotive, aerospace, and electronics for efficient heat transfer.
  • Using aluminum foil in a wood stove reflects heat back into the firebox, improves combustion, reduces energy consumption, helps distribute heat evenly, and can lower fuel consumption.

The Science Behind the Reaction

I can explain the science behind the reaction between aluminum and a wood stove.

When aluminum is put in a wood stove, a chemical reaction occurs due to the intense heat. Aluminum is a highly reactive metal, and when it comes into contact with oxygen in the air, it undergoes oxidation. The heat from the wood stove accelerates this process, causing the aluminum to react even more rapidly.

Advertisement

This chemical reaction produces aluminum oxide, which is a compound of aluminum and oxygen. The heat transfer in this reaction is significant, as the high temperature of the wood stove provides the energy needed for the reaction to take place.

Overall, the combination of the chemical reaction and heat transfer results in the aluminum undergoing a transformation in the wood stove.

Thermal Properties of Aluminum

Although aluminum is a metal, it has impressive thermal conductivity properties that make it an excellent choice for various heat transfer applications. The conductivity of aluminum is one of the highest among all metals, allowing it to efficiently transfer heat from one area to another. This is due to its crystal structure, which allows for the easy movement of heat-carrying electrons. Additionally, aluminum has a relatively low melting point of 660 degrees Celsius, making it suitable for applications where high temperatures are involved.

The high thermal conductivity of aluminum makes it particularly useful in industries such as automotive, aerospace, and electronics, where efficient heat transfer is crucial for optimal performance. In heat exchangers, for example, aluminum is commonly used as it can quickly absorb and distribute heat, ensuring efficient cooling. Similarly, in electronic devices, aluminum is often used as a heat sink material to dissipate excess heat generated by components.

Combustion and Oxidation Processes

The combustion of wood in a stove releases heat and carbon dioxide as byproducts. This process is driven by chemical reactions between the wood and oxygen in the air.

Advertisement

The heat generated during combustion is transferred to the surrounding environment through conduction, convection, and radiation. Chemical reactions occur when the wood is exposed to high temperatures, causing it to decompose into various volatile gases, such as methane, carbon monoxide, and hydrogen. These gases then react with oxygen to produce carbon dioxide and water vapor.

The heat transfer in a wood stove is primarily through convection, where hot gases rise and escape through the chimney, while cooler air is drawn in to replace it. This continuous cycle ensures efficient heat transfer and a steady supply of oxygen for the combustion process.

Impact on the Wood Stove’s Efficiency

Using aluminum foil in a wood stove can improve its efficiency, as it reflects heat back into the firebox. This simple technique can have a significant impact on heat distribution and energy consumption. Here are five reasons why using aluminum foil in a wood stove is beneficial:

Safety Considerations and Precautions

I take adequate safety precautions and carefully follow guidelines to ensure my well-being when using aluminum foil in my wood stove. Ventilation requirements are crucial when using aluminum foil as it can release toxic fumes if heated to high temperatures without proper airflow. It’s essential to ensure that the wood stove is properly vented to prevent the accumulation of harmful gases.

Additionally, handling and disposal of aluminum residue should be done with caution. Aluminum foil remnants should be cool before handling to avoid burns. Proper disposal methods should be followed, such as recycling the foil or disposing of it in designated waste bins.

Advertisement

Frequently Asked Questions

How Long Does It Take for Aluminum to Completely Burn in a Wood Stove?

The burn time for aluminum in a wood stove depends on various factors such as temperature and airflow. It can take anywhere from a few minutes to several hours for aluminum to completely burn. However, this process can release harmful emissions and negatively impact air quality.

Will Putting Aluminum in a Wood Stove Release Any Harmful Gases?

When aluminum is burned in a wood stove, it can release toxic fumes. The environmental impacts of this process include the emission of harmful gases and the potential for air pollution.

Can the Combustion of Aluminum in a Wood Stove Damage the Stove’s Interior?

The combustion of aluminum in a wood stove can potentially damage the stove’s interior and affect its performance. This is because the high heat generated during the combustion process can cause the aluminum to melt or warp, posing a fire hazard.

Is It Possible to Recycle the Aluminum Ash Left Behind After Burning It in a Wood Stove?

Recycling aluminum ash is possible, but the environmental impact of aluminum combustion must be considered. As an active participant in the process, I can tell you that proper recycling methods should be followed to reduce waste and promote sustainability.

What Are the Potential Risks of Using Aluminum in a Wood Stove, Both to the Stove Itself and to the Surrounding Environment?

Potential health hazards and environmental impact should be considered when using aluminum in a wood stove. The stove’s integrity may be compromised, leading to safety issues, and aluminum ash can release harmful toxins into the air, soil, and water.

Advertisement

Conclusion

In conclusion, when aluminum is put in a wood stove, it undergoes a combustion and oxidation process due to the high temperature. This reaction releases heat and produces aluminum oxide, which can impact the efficiency of the wood stove.

It’s important to consider safety precautions when introducing aluminum into a wood stove. Interestingly, the combustion of aluminum releases approximately 31,000 BTUs per pound, providing a visual representation of its potential energy output.

Continue Reading

Wood Stove

What Is The Twistable Knob On A Wood Stove For

Published

on

By

An image capturing the intricate details of a wood stove's twistable knob, showcasing its position on the stove, its textured grip, and the engraved temperature scale, enticing readers to learn about its purpose in our blog post

If you are the owner of a wood stove, have you ever questioned the function of the twistable knob?

Well, prepare to have your curiosity stoked. The twistable knob on a wood stove is like the conductor of an orchestra, controlling the airflow and ultimately the temperature inside your stove.

It’s a crucial instrument for achieving optimal heating efficiency. In this article, I will guide you through the purpose, function, and troubleshooting of this mysterious knob, ensuring you can make the most of your wood stove experience.

Key Takeaways

  • The twistable knob on a wood stove controls airflow and heat output by adjusting the amount of oxygen entering the combustion chamber.
  • It is connected to a damper that regulates air intake, opening the damper increases airflow and fire intensity, while closing it reduces airflow and fire intensity.
  • Turning the twistable knob counterclockwise increases the temperature, while turning it clockwise decreases the temperature.
  • Regular maintenance, including cleaning and lubrication, is necessary for proper functionality and optimizing the stove’s performance.

Understanding the Purpose of the Twistable Knob

I’m still not sure about the purpose of the twistable knob on a wood stove, but understanding its function seems crucial.

The twistable knob on a wood stove serves a vital role in controlling the airflow and heat output of the stove. It’s usually located on the front or side of the stove and can be easily adjusted to regulate the amount of oxygen that enters the combustion chamber. By turning the knob, you can increase or decrease the intensity of the fire, thus controlling the temperature inside the stove.

This feature is particularly useful for achieving optimal efficiency and preventing overheating. Different types of wood stove twistable knobs may include air intake knobs, damper knobs, and secondary air control knobs, each with their specific functions.

Advertisement

Proper maintenance and cleaning of wood stoves, including regular inspection and lubrication of the twistable knob, are essential to ensure its smooth operation and longevity.

How the Twistable Knob Controls Airflow

The twistable knob on a wood stove controls the airflow, allowing me to adjust the intensity of the fire. Understanding the mechanics of this twistable knob is essential to effectively control the combustion process in a wood stove.

The knob is connected to a damper, which regulates the amount of air that enters the stove. By twisting the knob, I can open or close the damper, thereby controlling the amount of oxygen that reaches the fire. Increasing the airflow by opening the damper will result in a more intense fire, while reducing the airflow by closing the damper will decrease the intensity.

This adjustment is crucial as it directly affects the combustion process. By managing the airflow, I can ensure efficient and clean burning, optimizing the stove’s performance.

Adjusting the Twistable Knob for Temperature Control

I can adjust the twistable knob by turning it counterclockwise to increase the temperature, or by turning it clockwise to decrease the temperature. The twistable knob is a crucial component of a wood stove as it allows me to control the amount of air reaching the fire, thus regulating the temperature. To ensure proper functionality and longevity of the twistable knob, regular maintenance is necessary. This includes checking for any debris or obstructions that may hinder its movement and cleaning it with a soft cloth. It’s also important to be aware of the different types of twistable knobs available. Some may have a simple design with arrows indicating the direction for temperature adjustment, while others may have numerical values for precise temperature control. Understanding the specific type of twistable knob on my wood stove will help me effectively adjust the temperature and maintain optimal performance.

Advertisement
Types of Twistable Knobs
Simple Design
Numerical Adjustment
Color-Coded
Digital Display
Multi-Function

The Importance of Properly Using the Twistable Knob

To effectively control the temperature of the wood stove, it’s crucial to properly turn and adjust the twistable knob.

The twistable knob on a wood stove is designed to regulate the airflow and therefore the heat output of the stove. It’s important to understand the mechanics of the knob and how it affects the stove’s performance.

Proper maintenance of the twistable knob is essential to ensure its smooth operation and prevent any malfunctions. Regular cleaning and lubrication are recommended to keep it functioning optimally.

Safety precautions must also be taken when handling the twistable knob. Always make sure to turn off the stove before adjusting the knob to avoid any accidents or burns.

Additionally, it’s important to be aware of the temperature range indicated on the knob and not exceed the recommended limits to prevent overheating or damage to the stove.

Advertisement

Troubleshooting Common Issues With the Twistable Knob

I’ve encountered several common issues with the twistable knob, such as it getting stuck or not turning smoothly. When faced with these problems, it’s essential to utilize troubleshooting techniques to address the issue effectively.

One common cause of a stuck twistable knob is the accumulation of debris or ash around the knob’s base. To resolve this, I recommend performing regular maintenance by cleaning the area around the knob using a soft brush or cloth.

Additionally, lubricating the knob’s mechanism with a high-quality graphite lubricant can improve its smooth operation. If the knob still refuses to turn smoothly, there might be a problem with the internal mechanism. In such cases, it’s advisable to seek professional assistance to avoid further damage.

Frequently Asked Questions

How Often Should I Adjust the Twistable Knob on My Wood Stove?

I adjust the twistable knob on my wood stove periodically to optimize heating efficiency. Cleaning the knob regularly ensures it functions properly. The twistable knob controls the airflow, allowing me to regulate the heat output of the stove.

Can I Use the Twistable Knob to Control the Intensity of the Fire?

Yes, the twistable knob on a wood stove can be used to control the intensity of the fire. By adjusting the knob, you can increase or decrease the amount of airflow to regulate the heat output.

Advertisement

What Happens if I Accidentally Break the Twistable Knob?

If the twistable knob on a wood stove is accidentally broken, it can be replaced. However, it is important to troubleshoot common issues with the knob first, such as checking for any debris or obstructions.

Is It Necessary to Have the Twistable Knob on a Wood Stove?

I wouldn’t dream of having a wood stove without the twistable knob. It’s absolutely necessary for controlling the airflow and regulating the temperature. Let me explain how this genius invention works.

Can the Twistable Knob Be Used to Control the Amount of Smoke Emitted From the Wood Stove?

Yes, the twistable knob on a wood stove can be used to control the amount of smoke emitted. By adjusting the knob, you can regulate the fire intensity, which directly affects the smoke production.

Does the Twistable Knob on a Wood Stove Affect the Amount of Ash Produced?

The twistable knob on a wood stove can indeed influence the amount of ash produced. By adjusting the knob, users can regulate the airflow and control the combustion process. Proper adjustment helps optimize burning efficiency and minimize excessive ash buildup in wood stoves, ensuring cleaner and more efficient heating.

Is a Catalytic or Non-Catalytic Wood Stove Better for Controlling Heat Output?

When it comes to controlling heat output, the choice between catalytic and non-catalytic wood stoves is a key factor. Catalytic vs non-catalytic wood stoves differ in their combustion process. Catalytic stoves use a catalyst to burn off smoke at lower temperatures, providing efficient and consistent heat. Non-catalytic stoves, on the other hand, provide a quicker and easier start-up but may have less precise heat control. Ultimately, the decision between the two depends on personal preferences and specific heating needs.

Advertisement

Conclusion

In conclusion, the twistable knob on a wood stove plays a crucial role in controlling the airflow and temperature within the stove. It acts as a metaphorical compass, guiding the user towards achieving the desired warmth and efficiency.

Just like a captain navigating through rough seas, understanding how to properly adjust and utilize the twistable knob is essential for a smooth and enjoyable wood stove experience.

So, remember to pay attention to this small but powerful tool to make the most out of your wood stove.

Continue Reading

Wood Stove

How To Remove Hearthstone Tribute Wood Stove Secondary Air Manifold

Published

on

By

An image that showcases the step-by-step process of detaching and removing the secondary air manifold from a Hearthstone Tribute Wood Stove

I’ve always enjoyed basking in the warm glow of my Hearthstone Tribute wood stove.

But recently, I noticed a decrease in its efficiency.

After some investigation, I discovered that the secondary air manifold might be clogged.

In this article, I’ll guide you through the process of removing the manifold, cleaning it, and inspecting for any issues.

By the end, your wood stove will be back to its optimal performance, keeping you cozy all winter long.

Advertisement

Key Takeaways

  • Prepare the stove by cleaning it thoroughly and disconnecting power sources
  • Use penetrating oil to loosen stuck or corroded bolts before removing the secondary air manifold
  • Regularly clean and inspect the manifold for debris, soot buildup, cracks, and leaks
  • When reinstalling the manifold, ensure the mating surfaces are clean, use a new gasket, and tighten the bolts evenly for a tight seal

Checking the Tools and Materials Needed

I need to make sure I’ve all the tools and materials required before starting the project. Safety precautions are essential when working with any heating appliance, so I’ll need safety goggles, gloves, and a dust mask to protect myself from any potential hazards.

Troubleshooting common issues may also require additional tools such as a flashlight, a screwdriver set, and pliers. It’s crucial to have these tools readily available to address any unexpected problems that may arise during the removal process.

Additionally, I’ll need to gather the necessary materials, including a new secondary air manifold, high-temperature silicone sealant, and a wire brush for cleaning.

Preparing the Stove for Manifold Removal

Before starting the removal process, it’s important to carefully clean the stove and disconnect the necessary components. This will ensure a smooth and efficient removal of the Hearthstone Tribute Wood Stove Secondary Air Manifold.

Here are a few key steps to follow when preparing the stove for removal:

  • Clean the stove thoroughly, removing any ash or debris that may have accumulated. This will prevent any dirt from entering the components during removal.

  • Disconnect the stove from any power sources and shut off the gas supply if applicable. Safety should always be the top priority when working with any appliance.

  • Troubleshoot common issues that may arise during removal, such as stuck or corroded bolts. Using penetrating oil and carefully applying pressure can help loosen stubborn parts.

Removing the Secondary Air Manifold

To successfully remove the secondary air manifold, carefully unscrew the bolts from the stove and gently slide it out from underneath the stove’s top plate.

Advertisement

The Hearthstone Tribute Wood Stove is a reliable and efficient heating source, but like any appliance, it may encounter common issues over time. Troubleshooting these issues is essential to ensure proper functioning.

Some common problems with the wood stove’s secondary air manifold include clogging and restricted airflow. Regular maintenance is key to maintaining the efficiency of the secondary air manifold.

It’s recommended to clean the manifold regularly by removing any buildup or debris. Additionally, checking for any leaks or cracks in the manifold and replacing damaged parts will help optimize its performance.

Cleaning and Inspecting the Manifold

The best way to ensure proper functioning of the secondary air manifold is to regularly clean and inspect it for any clogging or damage. The manifold plays a crucial role in the efficient operation of the wood stove, so it’s important to keep it in good condition.

Here are some key points to consider when inspecting the manifold:

Advertisement
  • Look for any signs of clogging, such as debris or soot buildup. A clogged manifold can restrict airflow and hinder the stove’s performance.

  • Check for any damage, such as cracks or leaks. These can lead to air leakage and affect the stove’s ability to generate heat.

  • Troubleshoot common issues, such as a misaligned or loose manifold. These problems can be easily fixed by adjusting or tightening the manifold.

Reinstalling the Secondary Air Manifold

After inspecting the secondary air manifold, I’ll reinstall it using a gasket and then secure it with bolts. When reinstalling the secondary air manifold, it’s important to ensure a proper seal to prevent any air leaks.

Start by cleaning the mating surfaces of the manifold and the stove body to remove any debris or old gasket material. Then, place a new gasket onto the manifold and align it with the bolt holes on the stove body. Carefully lower the manifold into position, making sure the gasket remains in place.

Once aligned, secure the manifold with the bolts, tightening them evenly to ensure a tight seal. Finally, check for any signs of air leaks and troubleshoot common issues such as loose bolts or a damaged gasket.

Frequently Asked Questions

How Long Does It Typically Take to Remove the Secondary Air Manifold From a Hearthstone Tribute Wood Stove?

Typically, it takes me about 15 minutes to remove the secondary air manifold from my Hearthstone Tribute wood stove. It’s a simple process that involves a few screws and careful maneuvering.

Can the Secondary Air Manifold Be Cleaned Without Removing It From the Stove?

Yes, the secondary air manifold can be cleaned without removing it from the stove. Regular maintenance and cleaning techniques for other parts of the wood stove are essential for optimal stove performance.

Advertisement

Is It Necessary to Inspect the Manifold for Any Specific Issues During the Cleaning Process?

Inspecting the manifold for specific issues during the cleaning process is necessary. Regularly inspecting the manifold is important to ensure its proper functioning and to identify any potential problems that may arise.

Are There Any Recommended Cleaning Agents or Solutions That Should Be Used When Cleaning the Secondary Air Manifold?

When cleaning the secondary air manifold of a Hearthstone Tribute Wood Stove, it is important to use recommended cleaning agents and follow the best cleaning techniques. This ensures a thorough and effective cleaning process.

Are There Any Common Mistakes to Avoid When Reinstalling the Secondary Air Manifold?

When reinstalling the secondary air manifold, it’s important to avoid common mistakes. One tip is to ensure a secure fit by tightening the screws evenly. Another is to double-check all connections for any leaks or gaps.

What is the Best Method to Remove Gunk from Wood Stove Windows?

When it comes to removing gunk from wood stove windows, there are several effective methods. One of the best approaches is to use a combination of vinegar and water. Simply mix equal parts of vinegar and water, apply the solution to the gunk, and let it sit for a few minutes. Then, scrub the residue off with a soft cloth or sponge. This method is not only affordable but also environmentally friendly.

Conclusion

After carefully removing and cleaning the secondary air manifold from your Hearthstone Tribute wood stove, you can reinstall it to ensure optimal performance.

Advertisement

Just like a conductor guiding an orchestra, the manifold plays a crucial role in directing the flow of air and fuel, enhancing the stove’s efficiency and heat output.

By maintaining and inspecting this component regularly, you can ensure that your wood stove continues to provide warmth and comfort for years to come.

Continue Reading

Trending