Connect with us

Wood Stove

U-Tube How To Replace Door Gasket On Lopi Wood Stove

Published

on

An image showcasing a step-by-step visual guide on replacing the door gasket of a Lopi Wood Stove

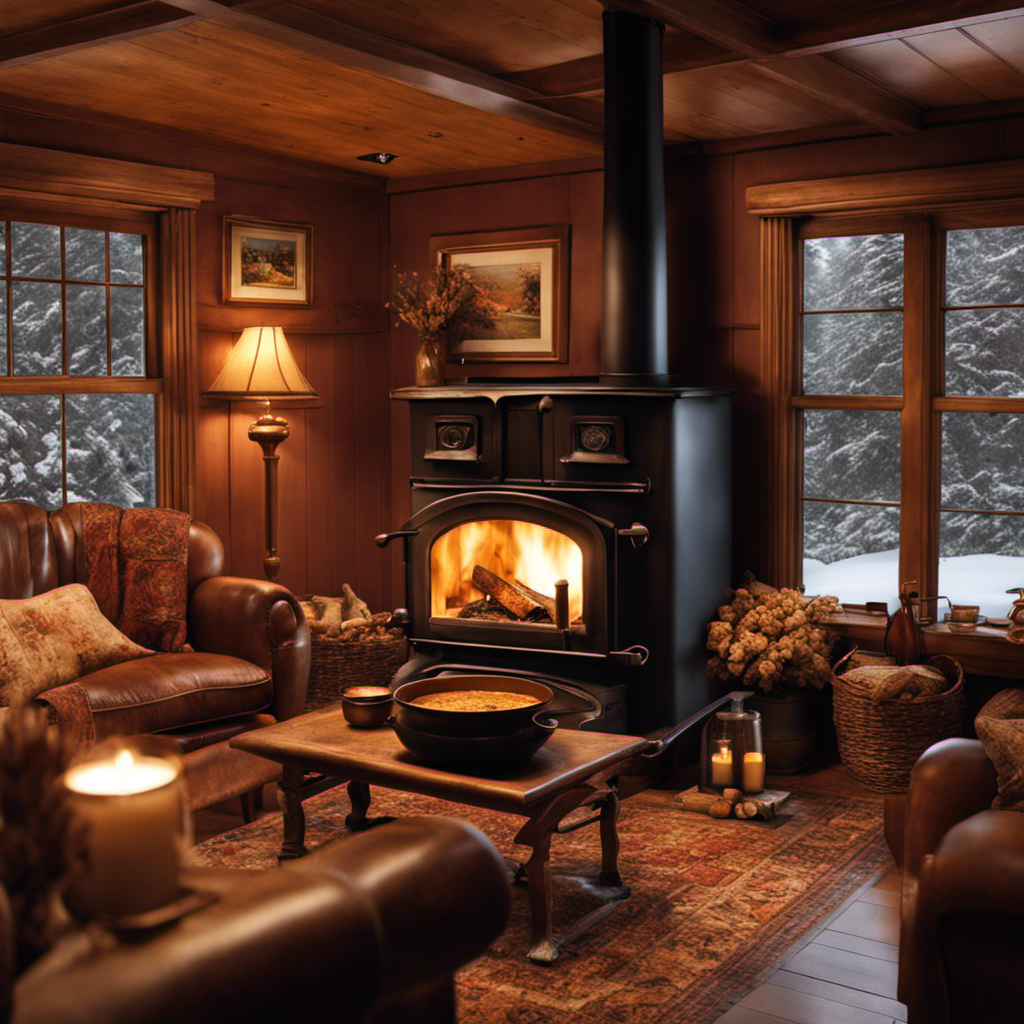
I have replaced the door seal on my Lopi wood stove multiple times, greatly enhancing the efficiency of the stove.

Did you know that a worn-out gasket can cause up to 20% heat loss?

In this article, I’ll guide you through the step-by-step process of replacing the door gasket on your Lopi wood stove.

With a few tools and materials, you’ll have a tight seal in no time, ensuring optimal performance and saving on energy costs.

Let’s get started!

Advertisement

Key Takeaways

  • A worn-out door gasket can cause up to 20% heat loss in a wood stove.
  • Choosing a high-quality and well-fitted door gasket made of durable materials like fiberglass or ceramic is important for an effective seal and preventing air leakage.
  • The old door gasket can be removed by gently prying it off with a screwdriver and pliers, cleaning the surface, and ensuring it is dry before installing the new gasket.
  • Installing the new door gasket involves positioning it, measuring and cutting it to the appropriate length, cleaning the surface, applying adhesive, and pressing the gasket evenly along the entire perimeter.

Understanding the Importance of a Door Gasket

I’ve learned that understanding the importance of a door gasket is crucial for maintaining the efficiency of my Lopi wood stove. The door gasket plays a vital role in keeping the heat inside the stove and preventing any air leakage. This ensures that the stove burns the wood efficiently, minimizing energy waste.

When choosing the right type of door gasket for your wood stove, it’s important to consider factors such as heat resistance, durability, and compatibility with your stove model. A high-quality door gasket made from materials like fiberglass or ceramic can provide an effective seal and withstand the high temperatures generated by the wood stove.

Gathering the Necessary Tools and Materials

To replace the door gasket on my Lopi wood stove, I need both a screwdriver and a pair of pliers.

Choosing the right door gasket is crucial for ensuring the efficiency of wood stove heating. When selecting a gasket, it’s important to consider its material, thickness, and size.

A high-quality gasket made of durable material, such as fiberglass or graphite, will provide a better seal and prevent heat loss. Additionally, the thickness of the gasket should match the specifications provided by the manufacturer to ensure a proper fit.

A well-fitted gasket will effectively prevent air leakage, allowing the stove to reach and maintain optimum temperatures.

Advertisement

Removing the Old Door Gasket

I’ll use a screwdriver and pliers to carefully remove the old door gasket, and then I’ll clean the surface before installing the new one. Door gasket maintenance is crucial for the proper functioning of a wood stove. When troubleshooting door gasket issues, it is important to assess the condition of the gasket and determine if it needs to be replaced. Here is a table that outlines the steps to remove the old door gasket:

Step Procedure
1 Open the stove door and locate the gasket
2 Using a screwdriver and pliers, gently pry off the old gasket
3 Clean the surface with a brush or cloth to remove any debris
4 Ensure the surface is dry and free from any residue before installing the new door gasket

Installing the New Door Gasket

First, I’ll position the new door gasket and secure it in place using adhesive. When installing a door gasket, it’s important to ensure a proper fit to maintain the stove’s efficiency and prevent any heat leakage.

To begin, I’ll measure and cut the gasket to the appropriate length, making sure to leave a slight overlap. Next, I’ll clean the surface of the door thoroughly, removing any debris or old adhesive.

Applying a thin layer of adhesive to the door’s surface, I’ll carefully press the gasket into place, ensuring it adheres evenly along the entire perimeter. Troubleshooting common door gasket issues may include adjusting the gasket’s position or replacing it if it becomes worn or damaged. Proper installation is crucial for optimal stove performance.

Transitioning to the next section, it’s important to test and maintain the door gasket regularly to ensure its effectiveness.

Advertisement

Testing and Maintaining the Door Gasket

I regularly inspect and lubricate the door gasket to ensure its proper functioning. Troubleshooting common door gasket issues is essential for maintaining the efficiency of a stove.

One common problem is a worn or damaged gasket, which can lead to air leaks and decreased heat retention. To troubleshoot this issue, I carefully examine the gasket for any signs of wear or tear, such as fraying or gaps. If necessary, I replace the gasket with a new one to restore a tight seal.

Additionally, I make sure to clean the gasket regularly to prevent the accumulation of dirt and debris that can affect its performance.

Frequently Asked Questions

How Often Should the Door Gasket on a Lopi Wood Stove Be Replaced?

I replace the door gasket on my Lopi wood stove as needed. To maintain a Lopi wood stove, regular inspection of the gasket is recommended. Troubleshoot common issues by following step-by-step guides.

Can I Use Any Type of Adhesive to Install the New Door Gasket?

Yes, you can use any type of adhesive to install the new door gasket on a Lopi wood stove, but it’s important to avoid certain types that may not withstand high temperatures. When removing the old gasket, be sure to follow these tips for a successful replacement.

Advertisement

Is It Necessary to Clean the Door Gasket Area Before Installing the New Gasket?

Yes, it is necessary to clean the door gasket area before installing the new gasket. This ensures proper adhesion and prevents any debris or old adhesive from interfering with the installation. Cleaning is an important step in troubleshooting door gasket issues.

How Long Does It Take for the Adhesive to Fully Cure After Installing the New Door Gasket?

After installing the new door gasket, the adhesive usually takes around 24 hours to fully cure. It’s important to allow enough time for the adhesive to set properly. Door gasket replacement frequency depends on usage and wear.

What Should I Do if the New Door Gasket Doesn’t Create a Tight Seal?

If the new door gasket on my Lopi wood stove doesn’t create a tight seal, I would troubleshoot the issue. I might try adjusting the latch or using alternative methods, like high-temperature silicone, to ensure a proper seal.

Conclusion

In conclusion, replacing the door gasket on your Lopi wood stove is a crucial maintenance task that ensures optimal performance and efficiency.

By following the steps outlined in this article, you can easily remove the old gasket and install a new one.

Advertisement

Just like a well-sealed door keeps the cold air out, a properly functioning door gasket will keep the heat in, ensuring a warm and cozy atmosphere in your home.

So don’t delay, replace your door gasket today and keep the warmth inside where it belongs.

Growing up surrounded by the vast beauty of nature, Sierra was always drawn to the call of the wild. While others sought the comfort of the familiar, she ventured out, embracing the unpredictable and finding stories in the heartbeat of nature.   At the epicenter of every remarkable venture lies a dynamic team—a fusion of diverse talents, visions, and passions. The essence of Best Small Wood Stoves is crafted and refined by such a trio: Sierra, Logan, and Terra. Their collective expertise has transformed the platform into a leading authority on small wood stoves, radiating warmth and knowledge in equal measure.

Continue Reading
Advertisement

Wood Stove

What Is A Wood Stove Plate Lifter Called

Published

on

By

An image featuring a sturdy, heat-resistant metal tool with a long handle and a pair of curved, gripping jaws

Should you ever encounter difficulties lifting the heavy plates of your wood stove, worry no more! I’m here to disclose the name of this handy tool to you.

So, what is a wood stove plate lifter called? Well, my friend, it’s commonly known as a ‘plate lifter.’ Simple, yet effective. This handy gadget will save your fingers from scorching while effortlessly moving those hot plates.

Stick around, and I’ll reveal some alternative names for this lifesaver too!

Key Takeaways

  • There are different types of wood stove plate lifters, including adjustable plate lifters, magnetic plate lifters, plate grippers, stove lifters, and those with non-slip rubber grips.
  • Using a wood stove plate lifter offers benefits such as safe handling of hot plates, precise placement for food presentation, minimized transfer time, convenience in handling hot plates, and reduced risk of dropping and breaking plates.
  • Common terminology for wood stove plate lifters includes plate gripper, stove lifter, adjustable plate lifter, long handle for added leverage, and compact and easy to store.
  • Safety guidelines for using a wood stove plate lifter include ensuring the lifter is in good condition and properly maintained, using proper lifting techniques, avoiding sudden movements and jerks, wearing protective gloves, and following safety guidelines to avoid accidents.

The Name of a Wood Stove Plate Lifter

I can’t believe how useful a wood stove plate lifter can be in my daily life. There are several different types of wood stove plate lifters available, each designed to meet specific needs.

One common type is the adjustable plate lifter, which allows you to easily lift plates of different sizes without the risk of burning yourself.

Another type is the magnetic plate lifter, which uses powerful magnets to securely hold onto plates, ensuring a firm grip and preventing any accidents.

Advertisement

The benefits of using a wood stove plate lifter in cooking are numerous. Firstly, it provides a safe and convenient way to handle hot plates, reducing the risk of burns or dropping and breaking them.

Secondly, it allows for easy and precise placement of plates, ensuring that your food is presented beautifully.

Finally, using a plate lifter can help to maintain the temperature of your food by minimizing the time it takes to transfer plates from the stove to the table.

Overall, a wood stove plate lifter is a must-have tool for anyone who loves cooking and wants to make their life in the kitchen easier and safer.

Common Terminology for a Wood Stove Plate Lifter

During my research, I discovered various names for a wood stove plate lifter, such as ‘plate gripper‘ and ‘stove lifter.’ These tools are essential for safely and effectively handling hot plates on a wood stove. There are different types of wood stove plate lifters available, each designed to accommodate various plate sizes and weights.

Advertisement

Here are three sub-lists to help you visualize the different types:

  • Plate Gripper:

  • Made of heat-resistant material

  • Features a spring-loaded mechanism for a secure grip

  • Long handle for added leverage

  • Stove Lifter:

  • Sturdy construction with heavy-duty handles

  • Designed to lift and move the entire stove top

  • Provides stability while handling hot plates

  • Adjustable Plate Lifter:

  • Adjustable jaws to accommodate plates of different sizes

  • Non-slip rubber grips for a secure hold

  • Compact and easy to store

Remember, when using a wood stove plate lifter, always follow these safety guidelines to avoid accidents:

  1. Ensure the lifter is in good condition and properly maintained.
  2. Use proper lifting techniques, keeping your back straight and using your legs to lift.
  3. Avoid sudden movements and jerks while handling hot plates.
  4. Always wear protective gloves to prevent burns.

What to Call a Wood Stove Plate Lifter

There are three common names for a wood stove plate lifter that people often use. These names are lifter, gripper, and handle. Each of these names accurately describes the function and purpose of this tool. A wood stove plate lifter is used to safely lift and move hot plates or grates on a wood stove.

When choosing a wood stove plate lifter, there are several factors to consider. Firstly, the type of lifter should match the specific needs and requirements of your wood stove. Different types of lifters include tongs, pokers, and hooks.

Secondly, the material of the lifter is important. It should be made of heat-resistant materials such as cast iron or stainless steel to ensure durability and safety.

Lastly, the design and ergonomics of the lifter should be considered for ease of use and comfort.

Advertisement

The Official Title for a Wood Stove Plate Lifter

The official title for a wood stove plate lifter is either lifter, gripper, or handle, depending on the specific function and usage. When it comes to different types of wood stove plate lifters, there are a few options to choose from:

  • Lifter: This type of wood stove plate lifter is designed to lift heavy plates and move them safely without any risk of burning yourself. It usually has a long handle for easy grip and a sturdy construction to handle the weight of the plates.

  • Gripper: A gripper is a type of wood stove plate lifter that has gripping teeth or prongs to securely hold the plates. This allows for a strong grip and prevents any slipping or dropping of the plates.

  • Handle: The handle type of wood stove plate lifter is a simple tool with a handle attached to a plate-shaped end. It’s used to lift and move plates without the need for any additional grips or teeth.

Using a wood stove plate lifter in your home has several benefits:

  • Safety: By using a wood stove plate lifter, you can avoid direct contact with hot plates and prevent burns or injuries.

  • Convenience: With a wood stove plate lifter, you can easily move plates around the stove without any hassle or risk of dropping them.

  • Durability: Wood stove plate lifters are typically made of strong materials that can withstand high temperatures and heavy plates, ensuring their long-lasting use in your home.

Alternative Names for a Wood Stove Plate Lifter

I’ve come up with a few alternative names for a wood stove plate lifter, such as a grabber or tongs. A wood stove plate lifter is an essential accessory for anyone who owns a wood stove. It is used to safely and easily lift hot plates or grates inside the stove without burning yourself. To give you a better understanding of wood stove accessories, here is a table showcasing different types and their uses:

Accessory Use
Ash Shovel Removing ash
Log Rack Storing logs
Fire Poker Adjusting fire

Now, let’s talk about how to properly maintain and clean a wood stove plate lifter. After each use, wipe off any soot or ash with a damp cloth. Avoid using harsh chemicals, as they can damage the lifter. If the lifter becomes rusty, you can use a wire brush to remove the rust and then apply a thin coat of stove polish or high-temperature paint. Regular maintenance and cleaning will ensure the longevity and effectiveness of your wood stove plate lifter.

Frequently Asked Questions

How Much Weight Can a Wood Stove Plate Lifter Typically Handle?

Wood stove plate lifters typically handle up to 50 pounds of weight. To choose the right one, consider its weight capacity and durability. Tips for safe use include ensuring a secure grip and avoiding overexertion to prevent accidents and injuries.

Advertisement

Are Wood Stove Plate Lifters Universal or Do They Come in Different Sizes?

Wood stove plate lifters can come in different sizes. Some are adjustable, allowing for a secure grip on various plate sizes. While primarily designed for wood stove plates, they can also be used for lifting other heavy objects.

Can a Wood Stove Plate Lifter Be Used for Other Purposes Besides Lifting Plates in a Wood Stove?

A wood stove plate lifter can be used for various purposes besides lifting plates in a wood stove. It can also be used to move logs, adjust firewood, and rearrange burning materials. Its advantages include its sturdy construction and heat-resistant design.

Are There Any Safety Precautions to Keep in Mind When Using a Wood Stove Plate Lifter?

When using a wood stove plate lifter, it’s important to keep safety in mind. Avoid burns by placing your hands properly and always wear heat resistant gloves. Safety first!

Are There Any Alternative Tools or Methods for Lifting Plates in a Wood Stove, Besides Using a Wood Stove Plate Lifter?

There are alternative tools for lifting plates in a wood stove, such as fireplace tongs or heat-resistant gloves. Using these tools can improve safety when handling hot plates without needing a wood stove plate lifter.

Conclusion

In conclusion, a wood stove plate lifter is commonly known as a ‘trivet.’ This versatile tool allows for the safe and easy handling of hot plates and pots on a wood stove.

Advertisement

Just like a guiding light that leads the way through a dark forest, the trivet provides a steady and secure grip, ensuring that you can move your cookware with confidence and ease.

So, next time you’re cooking up a storm on your wood stove, remember to reach for your trusty trivet!

Continue Reading

Wood Stove

How Long Should You Season Kindling For Wood Stove

Published

on

By

An image showcasing a bundle of freshly cut kindling arranged neatly next to a wood stove, with a timer placed nearby

I’ve always held the belief that the secret to a warm and inviting fire rests on the quality of the fire starters used. However, what is the optimal duration for drying out kindling for your wood-burning stove?

In this article, I’ll break down the importance of proper seasoning, the factors that affect the time it takes, and how to know when your kindling is ready.

Get ready to learn the secrets of perfectly seasoned kindling and enjoy a roaring fire all winter long.

Key Takeaways

  • Seasoned kindling is important for easier ignition and a hotter flame.
  • Properly dried kindling reduces smoke and creosote buildup in the chimney.
  • The recommended seasoning period for kindling is typically 6-12 months.
  • Proper storage in a dry and well-ventilated area is crucial to prevent reabsorption of moisture.

Understanding the Importance of Seasoning Kindling

I really understand the importance of seasoning kindling before using it in my wood stove. Seasoned kindling has several benefits that make it essential for efficient and safe fires.

Firstly, seasoned kindling is drier and contains less moisture, which allows it to ignite more easily and produce a hotter flame. This results in faster and more efficient fire-starting, ensuring that my wood stove reaches its desired temperature quickly.

Secondly, properly dried kindling reduces the amount of smoke and creosote buildup in the chimney, minimizing the risk of chimney fires.

Advertisement

To properly dry kindling, I gather small branches and split them into smaller pieces. I then stack them in a well-ventilated area, ensuring they’re off the ground and protected from rain. It usually takes about six months for the kindling to fully dry, but the wait is worth it for the benefits it provides.

Factors Affecting the Seasoning Time for Kindling

The humidity levels and temperature fluctuations are factors that can significantly impact the seasoning time for kindling. Properly seasoned kindling is essential for efficient and safe wood stove operation. Here are some key points to consider:

  • Drying methods: The choice of drying method can affect the overall seasoning time. Air drying is the most common method, but using a kiln or a dehumidifier can expedite the process.

  • Impact of moisture content: Moisture content is a crucial factor in determining the seasoning time. Higher moisture content will require more time for the kindling to dry properly.

  • Optimal moisture level: The ideal moisture content for seasoned kindling is around 15%-20%. This ensures efficient combustion and minimizes the risk of creosote buildup in the chimney.

  • Wood species: Different wood species have different moisture levels and densities, which can affect the seasoning time. Softer woods like pine may dry faster compared to hardwoods like oak.

  • Storage conditions: Proper storage is important to maintain the seasoned state of the kindling. Storing it in a dry and well-ventilated area will prevent reabsorption of moisture.

Understanding these factors and taking appropriate steps will ensure that your kindling is properly seasoned and ready for use in your wood stove.

Recommended Seasoning Period for Kindling

The recommended seasoning period for kindling is typically 6-12 months, but it can vary depending on factors such as wood species and storage conditions. During this period, the goal is to reduce the moisture content of the wood to optimal levels for efficient burning.

Kindling with moisture levels between 15-20% is considered ideal for achieving a clean and hot fire. However, speeding up the seasoning process is often desirable, especially when you need dry kindling sooner.

Advertisement

There are several methods you can try to accelerate the drying time. One option is to split the kindling into smaller pieces, which increases the surface area exposed to air and speeds up evaporation. Another approach is to stack the wood in a well-ventilated area, allowing air circulation to remove moisture more efficiently.

Additionally, using a moisture meter can help you monitor the progress and ensure that the kindling is properly seasoned before use.

Signs That Your Kindling Is Properly Seasoned

Often, properly seasoned kindling will have a distinct dryness and a light weight. This is because the moisture content has been reduced, making it easier to ignite and burn efficiently. Using seasoned kindling offers several benefits, such as:

  • Improved fire-starting: Seasoned kindling ignites quickly, allowing the fire to establish faster.
  • More heat output: Dry kindling burns hotter, creating a more intense and efficient fire.
  • Reduced smoke and emissions: Properly seasoned kindling produces less smoke and harmful emissions.
  • Longer burning time: Dry kindling burns longer, providing sustained heat for a longer period.
  • Cleaner stove and chimney: Seasoned kindling produces less soot and creosote buildup, reducing the risk of chimney fires.

However, there are common mistakes to avoid when seasoning kindling, such as insufficient drying time, storing it in a damp or humid area, or using green wood. These errors can result in damp or unburnable kindling.

Transition: Now that we understand the benefits of using properly seasoned kindling and the mistakes to avoid, let’s move on to discussing tips for properly storing seasoned kindling.

Tips for Properly Storing Seasoned Kindling

How can I effectively store seasoned kindling to ensure it remains dry and ready to use?

Advertisement

Storing kindling efficiently is essential for maintaining its quality and usability. The first step is to choose the right kindling for your wood stove. Look for dry, lightweight materials such as small twigs, dried leaves, or bark. It’s important to avoid using green or damp wood, as it can be challenging to ignite and will produce more smoke.

Once you have selected the ideal kindling, you can store it in a dry and well-ventilated area. Use a designated container or a firewood rack to keep it off the ground and protected from moisture. Additionally, consider covering the kindling with a tarp or plastic sheet to shield it from rain or snow.

Frequently Asked Questions

Can I Season Kindling in a Plastic Bag or Container?

You can season kindling in a plastic bag or container, but it may take longer to reach the ideal moisture content. It’s best to use a well-ventilated area or a dedicated kindling rack for faster and more effective seasoning.

What Happens if I Use Unseasoned Kindling in My Wood Stove?

Using unseasoned kindling in a wood stove can lead to several potential risks such as excessive smoke, increased creosote buildup, and reduced efficiency. To avoid these issues, it is important to properly season your kindling for optimal wood stove performance.

How Do I Know if My Kindling Is Over-Seasoned?

When it comes to knowing if your kindling is over-seasoned, look for signs like excessive dryness, brittleness, and crumbling. Properly storing seasoned kindling in a cool, dry place will help maintain its quality and prevent over-seasoning.

Advertisement

Can I Speed up the Seasoning Process for My Kindling?

I can speed up the seasoning process for kindling by using alternative methods. It’s important to know that the length of time for seasoning depends on various factors.

Is It Necessary to Season Kindling if I Am Using a Wood Stove With a Built-In Igniter?

Seasoning kindling is necessary for wood stoves with built-in igniters. It ensures a more efficient burn and reduces the risk of creosote buildup. Aim to season kindling for at least 6-12 months for optimal results.

Conclusion

In the dance of firewood, kindling is the vibrant partner that ignites the flame. Just as a well-seasoned dancer captivates the stage, seasoned kindling holds the power to transform a wood stove into a fiery spectacle.

Understanding the importance of proper seasoning and the factors that affect it’s key to achieving optimal performance. With patience and care, seasoned kindling will reward you with a warm and inviting fire, ensuring cozy nights and enchanting moments.

Advertisement
Continue Reading

Types of Wood Stoves

Which Type Of Stove Pipe To Use For Wood Stove

Published

on

By

An image showcasing a wood stove with three distinct stove pipe options: a single-wall black stove pipe, a double-wall insulated stainless steel pipe, and a triple-wall air-cooled chimney pipe

As someone who is passionate about wood stoves, I have come to understand how crucial it is to select the appropriate stove pipe to guarantee peak efficiency and safety. It’s akin to looking for the ideal puzzle piece; every kind has its own advantages.

From single wall to triple wall, insulated to stainless steel, the options can be overwhelming. In this article, I’ll guide you through the maze of stove pipes, providing knowledgeable and detailed information to help you make an informed decision for your wood stove.

Key Takeaways

  • Single wall stove pipes are lighter and less expensive, but have lower fire resistance and require more frequent cleaning.
  • Double wall stove pipes provide better insulation, reduced heat transfer, and lower risk of fire starting in your home.
  • Triple wall stove pipes offer superior insulation, excellent heat retention, and enhanced safety with a cool outer surface.
  • Insulated stove pipes have better heat retention, increased safety, and prevent condensation and potential corrosion. However, they are costlier and bulkier for installation in tight spaces.

Single Wall Stove Pipe

I prefer using a single wall stove pipe for my wood stove because it allows for efficient heat transfer. Single wall stove pipes are made from a single layer of metal, making them lighter and less expensive compared to double wall stove pipes.

One of the main advantages of using a single wall stove pipe is its ability to quickly heat up and radiate heat into the room. The thin metal construction also allows for faster heat transfer, ensuring that the room gets warm faster.

However, there are a few drawbacks to consider. Single wall stove pipes have a lower fire resistance compared to double wall pipes, so it’s important to maintain proper clearance from combustible materials. Additionally, single wall stove pipes may require more frequent cleaning due to the buildup of creosote.

Overall, single wall stove pipes are a cost-effective option for efficient heat transfer, but proper safety precautions should always be followed.

Advertisement

Double Wall Stove Pipe

Using double wall stove pipe provides better insulation and reduces the risk of heat transfer to combustible materials. This type of stove pipe has several advantages over single wall stove pipe.

  • Better Insulation: The double wall construction of this stove pipe allows for better insulation, meaning that less heat is lost during the combustion process. This results in increased efficiency and reduced energy costs.

  • Reduced Risk of Heat Transfer: Double wall stove pipe creates a barrier between the hot flue gases and the surrounding combustible materials. This greatly reduces the risk of heat transfer and minimizes the chance of a fire starting in your home.

  • Easy Installation: Installing double wall stove pipe is relatively straightforward. It typically comes with clear instructions and can be easily connected to your wood stove and chimney. However, it’s important to ensure proper clearance to combustible materials and follow all local building codes.

Triple Wall Stove Pipe

The triple wall stove pipe offers even better insulation and increased safety, making it a great option for wood stoves.

One of the major advantages of triple wall stove pipe is its superior insulation properties. With three layers of metal, it provides excellent heat retention and minimizes heat loss, ensuring optimal efficiency of your wood stove.

Additionally, the triple wall design enhances safety by reducing the risk of overheating and preventing the outer layer from becoming too hot to touch.

When it comes to installation, there are a few tips to keep in mind. Firstly, it’s crucial to follow the manufacturer’s guidelines and local building codes to ensure proper installation and compliance.

Advertisement

Secondly, make sure to use high-quality materials, including appropriate connectors and fasteners, to ensure a secure and leak-free installation.

Lastly, regular maintenance and inspection of the triple wall stove pipe is essential to ensure its continued efficiency and safety.

Insulated Stove Pipe

My preferred choice for the stove pipe is an insulated one, as it provides better heat retention and safety. Insulated stove pipes have several advantages over regular stove pipes. Here are the pros and cons of using insulated stove pipe for a wood stove:

Pros:

  • Better heat retention: Insulated stove pipes are designed to keep the heat inside the pipe, allowing it to radiate into the room more efficiently.
  • Increased safety: The insulation layer helps to reduce the risk of accidental burns or fires by keeping the outer surface of the pipe cooler.
  • Reduced condensation: Insulated stove pipes prevent condensation from forming inside the pipe, which can lead to corrosion and damage.

Cons:

  • Higher cost: Insulated stove pipes tend to be more expensive than regular stove pipes.
  • Bulkier design: Due to the added insulation layer, insulated stove pipes may have a larger diameter, which can be challenging for installation in tight spaces.
  • Limited aesthetic options: Insulated stove pipes are often only available in a limited range of finishes and designs.

Overall, the advantages of using an insulated stove pipe, such as better heat retention and increased safety, outweigh the drawbacks. It’s an excellent choice for anyone looking to maximize the efficiency and safety of their wood stove.

What Type of Stove Pipe is Best for Connecting to a Wood Stove?

When it comes to connecting stove pipe wood stove, the best option is a double-wall stovepipe. This type of stove pipe provides better insulation and reduces the risk of chimney fires. It is crucial to consult with a professional to ensure the proper installation for safety.

Advertisement

Stainless Steel Stove Pipe

I prefer stainless steel stove pipe because it is durable and resistant to corrosion. Stainless steel is an excellent choice for wood stove installations due to its numerous advantages. Firstly, it offers exceptional durability, ensuring that it will last for years without deteriorating. Additionally, stainless steel is highly resistant to corrosion, which is crucial when dealing with high temperatures and harsh conditions. Moreover, stainless steel stove pipe is easy to install, making it a convenient option for homeowners. Here are some installation tips for stainless steel stove pipe:

Installation Tips
1. Ensure proper clearance from combustible materials.
2. Use high-quality stainless steel clamps for secure connections.
3. Follow manufacturer guidelines for proper pipe length and positioning.
4. Insulate the pipe when running through walls or ceilings for added safety.

Frequently Asked Questions

What Is the Maximum Length of Single Wall Stove Pipe That Can Be Used?

The maximum length of single wall stove pipe that can be used depends on various factors such as the type of wood stove, clearance requirements, and local building codes. It is important to consult the manufacturer’s guidelines and local regulations for specific recommendations.

Can Double Wall Stove Pipe Be Used With a Wood Stove That Has a High Heat Output?

Yes, double wall stove pipe can be used with a wood stove that has a high heat output. It provides added insulation and reduces the risk of heat damage. However, it’s essential to follow manufacturer guidelines for safe installation and clearance requirements.

Is Triple Wall Stove Pipe Necessary for All Wood Stove Installations?

Triple wall stove pipe is not necessary for all wood stove installations. Single wall stove pipe can be safe for wood stove installation, but triple wall stove pipe offers the advantage of increased insulation and reduced clearance requirements.

Can Insulated Stove Pipe Be Used in a Mobile Home?

Yes, insulated stove pipe can be used in a mobile home. However, it is important to ensure that the installation follows wood stove venting regulations to maintain safety and efficiency.

Advertisement

Are Stainless Steel Stove Pipes More Durable and Long-Lasting Compared to Other Types of Stove Pipes?

Stainless steel stove pipes are more durable and long-lasting compared to galvanized stove pipes. They have a higher resistance to rust and corrosion, making them ideal for use with wood stoves.

Conclusion

After considering all the options, it’s clear that the best type of stove pipe to use for a wood stove is the triple wall stove pipe.

Its superior insulation and durability make it the ideal choice for efficient and safe wood burning.

With its three layers of protection, it’s like a fortress guarding against heat and potential hazards, ensuring a reliable and enjoyable heating experience.

Advertisement
Continue Reading

Trending