Connect with us

Wood Stove

How To Install Wood Stove Pipe

Published

on

An image showcasing the step-by-step process of installing a wood stove pipe: a person measuring and cutting the pipe, fitting it into the stove, securing it with screws, and sealing the joints with high-temperature silicone

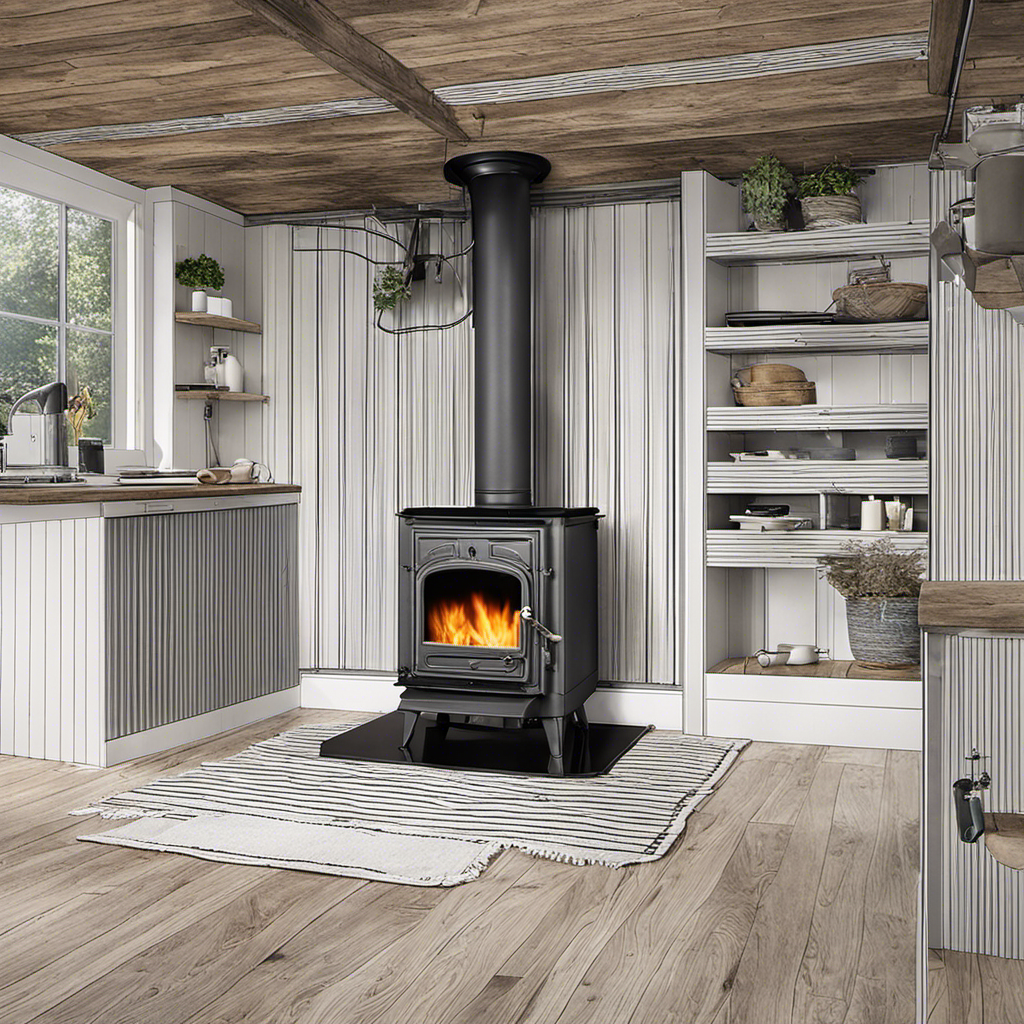
As an enthusiast of do-it-yourself projects, I’ve discovered that fitting a wood stove pipe can significantly improve the efficiency and coziness of your living space. Therefore, if you’re prepared to take on this project, let’s begin.

In this guide, I’ll walk you through the necessary steps to select the right pipe size, gather the tools and materials, prepare the installation area, and connect the pipe to your stove.

By the end, you’ll have a well-installed wood stove pipe that will keep you cozy all winter long.

Key Takeaways

  • Consider the size specified by the manufacturer and determine the size compatible with your wood stove.
  • Use insulation materials like fiberglass or ceramic insulation for proper insulation.
  • Gather the necessary tools and materials such as a tape measure, chimney brush, pipe sections, elbows, connectors, and high-temperature sealant.
  • Prepare the installation area by measuring the space, cleaning the area, checking for structural issues, and removing dust and loose materials.

Selecting the Right Wood Stove Pipe Size

I think the right wood stove pipe size is crucial for proper installation. When it comes to choosing the correct wood stove pipe material, there are a few factors to consider. First and foremost, you need to determine the size of the stove pipe that’s compatible with your wood stove. This is usually specified by the manufacturer and can vary depending on the model and size of your stove. It’s important to follow these guidelines to ensure efficient and safe operation.

In addition to selecting the right size, understanding the importance of proper insulation during installation is essential. Insulation helps to keep the heat inside the pipe and prevents it from escaping into the surrounding walls or ceiling. This not only increases the efficiency of your wood stove but also reduces the risk of fire hazards. Insulation materials such as fiberglass or ceramic insulation can be used to line the pipe and provide a barrier between the hot flue gases and the surrounding structure.

Gathering the Necessary Tools and Materials

To get started, I’ll need a few essential tools and materials for the wood stove pipe installation. Here’s a handy checklist to ensure I’ve everything I need before beginning the installation:

Advertisement
  1. Tape measure: This will help me accurately measure the length of the pipe and determine the correct dimensions for the installation.

  2. Chimney brush: A chimney brush is necessary to clean any debris or soot from the chimney flue before installing the pipe.

  3. Pipe sections: I’ll need the appropriate number and length of pipe sections to reach from the wood stove to the chimney flue.

  4. Elbows and connectors: These fittings will allow me to navigate around obstacles and create a secure connection between the pipe sections.

  5. High-temperature sealant: A heat-resistant sealant is crucial for ensuring a tight seal between the pipe sections and connectors.

  6. Screwdriver or wrench: This will be needed to tighten the connectors and secure the pipe sections in place.

  7. Safety goggles and gloves: Safety is paramount during installation, so I’ll need these protective gear to shield my eyes and hands from potential hazards.

Preparing the Installation Area

The area around the chimney needs to be cleared of any debris or obstructions before beginning the installation. It is important to have a clean and safe space to work in. To prepare the installation area, start by measuring the space where the wood stove pipe will be installed. This will help determine the length of pipe needed and ensure a proper fit. Next, thoroughly clean the area around the chimney. Remove any dust, dirt, or loose materials that may interfere with the installation process. It is also important to check for any structural issues, such as cracks or damage, that may need to be addressed before proceeding. Once the area is measured and cleaned, it is ready for the installation to begin.

Measure the Installation Area Clean the Installation Area
Measure the space Thoroughly clean the area
Determine length of pipe Remove dust and dirt
Ensure proper fit Check for structural issues

Installing the Wood Stove Pipe Through the Ceiling

As I position the pipe through the ceiling, I ensure it fits securely and aligns properly with the chimney. Installing wood stove pipe vertically is a crucial step in the process of setting up a wood stove. It allows for efficient ventilation and proper removal of smoke and gases from the stove.

Before installing the pipe, it’s important to measure the distance between the stove and the ceiling to determine the length of the pipe needed. Once the measurements are taken, I carefully attach the pipe to the stove collar using screws or clamps. I make sure the connection is tight to prevent any leaks.

Next, I insert the pipe through the ceiling hole, ensuring it’s straight and aligned with the chimney above. To secure the pipe, I use brackets or straps to hold it in place. This prevents any movement or sagging, which could cause blockages or damage to the pipe.

Insulating the wood stove pipe is another important step. It helps to prevent heat loss and protects the surrounding materials from excessive heat. I wrap the pipe with insulation material, such as fiberglass or mineral wool, making sure to cover all exposed areas. This insulation helps to maintain the temperature of the flue gases and improves the overall efficiency of the wood stove.

Advertisement

Connecting the Wood Stove Pipe to the Stove

When connecting the pipe to the stove, I ensure a tight and secure connection to prevent any leaks. This step is crucial in maintaining the safety of the wood stove installation.

Here are the steps I follow to ensure a proper connection:

  1. Inspect the pipe: Before connecting the pipe, I thoroughly inspect it for any damages or defects. I check for any signs of rust, cracks, or holes that could compromise the integrity of the pipe.

  2. Clean the pipe and stove: It’s important to clean both the pipe and the stove before making the connection. I remove any dirt, debris, or soot that may have accumulated, ensuring a clean surface for the connection.

  3. Apply high-temperature sealant: To ensure a tight and secure connection, I apply high-temperature sealant to the end of the pipe that will be inserted into the stove. This sealant helps to prevent any air or smoke leaks.

  4. Secure the connection: After applying the sealant, I firmly insert the pipe into the stove’s flue collar. I make sure the connection is tight and secure by using screws or clamps, depending on the specific stove’s requirements.

Inspecting and Testing the Wood Stove Pipe Installation

To ensure the safety of my installation, I inspect and test the wood stove pipe connection for any leaks or damages. Testing the wood stove pipe is crucial to prevent any potential hazards and ensure efficient operation.

One common mistake during installation is failing to properly secure the pipe sections together. This can result in gaps or loose connections, which can lead to leaks and the release of harmful gases into the living space.

To begin the inspection, I first visually examine the entire length of the pipe for any signs of damage, such as cracks, dents, or rust. I also check for proper clearances from combustible materials, as specified by the manufacturer’s guidelines. Next, I ensure that the pipe is securely fastened at all joints using appropriate connectors, such as screws or clamps.

Advertisement

After the visual inspection, I move on to testing the wood stove pipe for leaks. I use a smoke tester or a smoke pencil to detect any air leaks along the pipe joints. By directing the smoke towards the joints, I can easily identify any areas where smoke escapes. If any leaks are detected, I promptly address them by tightening the connections or replacing damaged sections.

Frequently Asked Questions

How Do I Determine the Appropriate Height for My Wood Stove Pipe Above the Roofline?

To determine the appropriate height for my wood stove pipe above the roofline, I need to consider roofline safety. It’s important to ensure that the smoke and gases from the stove are properly vented and don’t pose a risk to the roof or nearby structures.

The specific height requirement may vary depending on local building codes and regulations. I recommend consulting with a professional or referring to the manufacturer’s guidelines for the specific wood stove you’re installing.

Can I Use a Different Type of Pipe Material, Such as Stainless Steel, Instead of the Recommended Black Steel Pipe?

I can understand the temptation to use a different type of pipe material, like stainless steel, for your wood stove installation. While stainless steel may seem like a more durable option, it’s important to consider the pros and cons.

Black steel pipe is specifically designed for wood stove use, offering better heat resistance and durability. Stainless steel may not perform as well under high temperatures and could potentially warp or crack.

Advertisement

It’s always best to stick with the recommended black steel pipe for optimal safety and performance.

Are There Any Local Building Codes or Regulations That I Should Be Aware of Before Installing a Wood Stove Pipe?

Before starting my wood stove pipe installation, I made sure to research the local building codes and regulations. It’s crucial to comply with these guidelines to ensure safety and avoid any legal issues.

I contacted my local building department and they provided me with the specific requirements for wood stove pipe installation in my area. By following these regulations, I can confidently proceed with my project and enjoy the warmth of my wood stove without any concerns.

Can I Install a Wood Stove Pipe Through a Wall Instead of the Ceiling?

I’ve always been curious about alternative ways to install a wood stove pipe.

Recently, I discovered that it’s possible to install it through a wall instead of the ceiling.

Advertisement

This method has its advantages, such as easier access for maintenance and cleaning.

Additionally, it can be a more aesthetically pleasing option, as the pipe can be concealed within the wall.

Overall, installing a wood stove pipe through a wall can be a practical and visually appealing choice.

How Often Should I Clean and Maintain My Wood Stove Pipe to Ensure Its Safe and Efficient Operation?

To ensure the safe and efficient operation of my wood stove pipe, I need to clean and maintain it regularly. The cleaning frequency depends on how often I use the stove, but a general guideline is to clean it at least once a year.

Some maintenance tips include checking for creosote buildup, inspecting for any leaks or damage, and making sure the pipe is properly secured.

Advertisement

Regular cleaning and maintenance will help prevent potential hazards and keep the stove running smoothly.

Conclusion

In conclusion, installing a wood stove pipe requires careful consideration of the right size, gathering the necessary tools and materials, and preparing the installation area.

By following the correct steps, such as installing the pipe through the ceiling and connecting it to the stove, you can ensure a safe and efficient wood stove system.

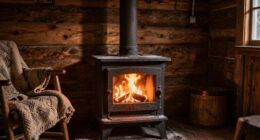
For example, John successfully installed a wood stove pipe in his cabin, and now enjoys cozy and cost-effective heating throughout the winter months.

Advertisement

Growing up surrounded by the vast beauty of nature, Sierra was always drawn to the call of the wild. While others sought the comfort of the familiar, she ventured out, embracing the unpredictable and finding stories in the heartbeat of nature.   At the epicenter of every remarkable venture lies a dynamic team—a fusion of diverse talents, visions, and passions. The essence of Best Small Wood Stoves is crafted and refined by such a trio: Sierra, Logan, and Terra. Their collective expertise has transformed the platform into a leading authority on small wood stoves, radiating warmth and knowledge in equal measure.

Continue Reading
Advertisement

Wood Stove

How Long Does It Take Wood To Ignite Aftee Being Put In A Wood Stove

Published

on

By

An image capturing the mesmerizing scene of a wood stove, with a bed of glowing embers beneath carefully stacked logs, as tendrils of thin smoke gracefully curl upwards, depicting the anticipation of wood slowly igniting

I must admit, the wait for wood to catch fire in a wood stove can seem never-ending. However, do not worry, as in this article, I will share some strategies and tips to speed up the process.

From understanding the temperature and moisture content of the wood to choosing the right type and preparing it efficiently, we’ll explore all the factors that affect wood ignition time.

So let’s dive in and get that fire blazing in no time!

Key Takeaways

  • Weather conditions and moisture content of the wood can affect the ignition time.
  • Properly seasoned wood with around 20% moisture content ignites more easily.
  • Smaller wood logs and softer woods tend to ignite faster than larger and harder woods.
  • Proper wood storage and preparation, such as keeping it off the ground, using fire starters, and maintaining airflow, can help ensure faster ignition in a wood stove.

Factors Affecting Wood Ignition Time

I’m curious about the factors that can affect the time it takes for wood to ignite in a wood stove.

One of the key factors is the weather conditions. Cold and damp weather can make it harder for the wood to catch fire, as moisture content in the wood can be high. It’s important to ensure that the wood is properly seasoned and has a moisture content of around 20% for optimal ignition.

Another factor to consider is the size of the wood logs. Smaller logs tend to ignite more quickly as they’ve a larger surface area exposed to the heat source.

Advertisement

Additionally, the type of wood being used can also affect ignition time, with softer woods igniting faster than harder woods.

Temperature and Moisture Content of Wood

The optimal moisture content for wood is around 20%, which ensures efficient ignition in a wood stove. The wood ignition process is influenced by various factors, and the moisture content plays a critical role in determining how quickly the wood will ignite.

When wood is too wet, it requires more energy to burn off the excess moisture before it can reach its ignition point. On the other hand, if the wood is too dry, it may ignite too quickly and burn too rapidly, leading to inefficient combustion and wasted energy.

Therefore, it’s essential to properly store wood to maintain its moisture content within the optimal range. Proper wood storage involves keeping the wood off the ground, covering it to protect it from rain or snow, and allowing for proper airflow to prevent excessive moisture buildup.

Type of Wood and Its Density

I prefer using hardwoods like oak or maple due to their density and their ability to burn longer and provide more heat. When it comes to wood species selection, it’s important to consider the impact of wood moisture content. Here are three key points to keep in mind:

Advertisement
  1. Moisture content affects combustion efficiency: Wet wood contains a higher moisture content, which leads to incomplete combustion and the production of more smoke and pollutants. Dry hardwoods, on the other hand, burn more efficiently and produce less smoke.

  2. Heat output is influenced by wood density: Hardwoods have a higher density compared to softwoods, resulting in a higher heat output. This means that hardwoods like oak and maple can provide more warmth and keep your space cozy for a longer period of time.

  3. Longer burn time with hardwoods: Due to their density, hardwoods burn at a slower rate, allowing for a longer burn time per log. This means less frequent refueling and a more consistent heat source.

Preparing Wood for Efficient Ignition

To ensure efficient ignition, I always make sure to properly split and dry my firewood. Proper wood storage is essential for achieving this. It’s important to store the firewood in a well-ventilated area, off the ground and protected from moisture. This allows the wood to dry properly and reduces the risk of it being damp or rotting.

When it comes to igniting the wood in a wood stove, using fire starters or kindling can greatly speed up the process. These small pieces of flammable material help create a hot and sustained flame, which in turn ignites the larger pieces of wood.

By incorporating these techniques, you can ensure a faster and more efficient ignition in your wood stove.

Now, let’s move on to some tips for faster wood ignition in a wood stove.

Tips for Faster Wood Ignition in a Wood Stove

Using kindling and ensuring proper airflow are key to achieving faster wood ignition in a wood stove. When it comes to stubborn wood that’s difficult to ignite, there are several ignition techniques that can be employed:

Advertisement
  1. Preparation: Properly seasoned wood with a moisture content below 20% is essential for efficient ignition. This ensures that the wood is dry enough to catch fire quickly.

  2. Kindling: Creating a bed of small, dry kindling underneath the larger logs helps to ignite the fire faster. Kindling acts as a fuel source that ignites easily and produces enough heat to catch the larger logs on fire.

  3. Airflow: Adequate airflow is crucial for wood ignition. By opening the damper or adjusting the air vents, you can ensure that enough oxygen is getting to the fire, promoting faster ignition.

While some may consider using accelerants to speed up wood ignition, it’s important to note that this can be dangerous and may result in uncontrollable fires or the release of harmful chemicals. It’s recommended to rely on proper ignition techniques and patience for a safe and efficient wood ignition process.

Frequently Asked Questions

Can I Use Treated Wood in My Wood Stove?

Using pressure treated wood in a wood stove is not recommended due to the chemicals it releases when burned. It is safer to use untreated wood or other alternatives for faster ignition.

What Is the Best Type of Wood to Use for Faster Ignition in a Wood Stove?

Fast burning woods like pine or fir can ignite in a wood stove within minutes. To ensure efficient wood stove usage, it’s important to choose dry, seasoned firewood and properly maintain the stove.

Are There Any Safety Precautions I Should Take When Igniting Wood in a Wood Stove?

When igniting wood in a wood stove, it is important to take safety precautions. Keep a fire extinguisher nearby and ensure proper ventilation. Additionally, the moisture content of the wood can affect its ignition time.

Can I Use Wood Chips or Sawdust for Ignition in a Wood Stove?

I can use wood chips or sawdust for ignition in a wood stove. They are effective fire starters for faster ignition. The small size and high surface area make them ignite quickly, reducing the time needed for the wood to catch fire.

Advertisement

How Does the Size of the Wood Affect Its Ignition Time in a Wood Stove?

Moisture content significantly affects wood ignition in a wood stove. Smaller pieces of wood ignite faster due to increased surface area. However, larger pieces provide longer burn times. Consider the advantages and disadvantages of each for efficient use in a wood stove.

Conclusion

After careful analysis of the factors affecting wood ignition time, it’s safe to say that wood doesn’t ignite instantly in a wood stove. Contrary to popular belief, wood requires time to reach its ignition point, which is influenced by factors such as temperature, moisture content, and wood density.

To expedite the process, it’s crucial to choose the right type of wood and ensure it’s properly prepared. So, if you were expecting an immediate burst of flames, you might’ve to wait a little longer.

Continue Reading

Wood Stove

Why Does Your Wood Stove Smoke

Published

on

By

An image capturing a rustic, cozy living room

Dealing with the smoke from your wood stove can be a real nuisance. But don’t worry, I’m here to provide some tips on how to manage it.

Understanding the root causes of this predicament is crucial. Insufficient airflow, improper wood selection, damaged chimney, inadequate maintenance, and incorrect installation are the major culprits.

Let’s delve into each of these factors to uncover the secrets behind why your wood stove may be producing that bothersome smoke.

Key Takeaways

  • Blocked vents disrupt combustion process and lead to incomplete burning and smoke generation.
  • Burning wet or high-moisture wood results in inefficient burning and increased creosote buildup.
  • Cracked or deteriorating chimney can cause leaks and smoke entry.
  • Inadequate stove maintenance, including dirty burners and clogged flue, can lead to smoke issues.

Insufficient Airflow

I’m having trouble with my wood stove smoking because there’s not enough airflow. A common cause of insufficient airflow is blocked vents. When the vents are blocked, the combustion process is disrupted, leading to incomplete burning of the wood and the generation of smoke.

To ensure efficient combustion and minimize smoke, it’s crucial to maintain clear and unobstructed vents. Blocked vents can result from a buildup of creosote or debris, so regular cleaning is essential.

Additionally, proper placement of the stove is crucial to ensure adequate airflow. Make sure that the stove is positioned away from any obstructions, such as furniture or curtains, that might impede the flow of air.

Advertisement

Improper Wood Selection

To prevent excessive smoke and poor combustion, it’s important to avoid burning wet wood or wood with high moisture content, as it can result in inefficient burning and increased creosote buildup. When burning seasoned firewood, which has a moisture content of around 20% or less, the wood burns more efficiently, producing less smoke and providing more heat output. Seasoned firewood has been properly dried for at least six months, allowing the moisture content to decrease significantly. This ensures that the wood burns cleanly and effectively in your wood stove. However, if you burn wood with high moisture content, it will create more smoke and reduce the overall efficiency of your stove. This can also lead to a higher risk of creosote buildup in your chimney, which can be dangerous and increase the chance of a chimney fire. Therefore, it’s crucial to always use dry, seasoned firewood to prevent excessive smoke and maintain proper combustion in your wood stove.

Now, let’s discuss another potential reason for excessive smoke: a damaged or leaky chimney.

Damaged or Leaky Chimney

A damaged or leaky chimney can cause smoke to enter your home, which can be hazardous to your health and safety. It’s important to address any issues with your chimney promptly to ensure the proper functioning of your wood stove.

Here are three signs of a damaged chimney that you should be aware of:

  1. Cracked or crumbling mortar: If you notice any cracks or crumbling in the mortar joints of your chimney, it could indicate water damage or structural issues. This can lead to leaks and smoke entering your home.

  2. Rusty or deteriorating chimney cap: The chimney cap plays a crucial role in keeping out rain, snow, debris, and animals. If it’s rusty or deteriorating, it may not be able to perform its function effectively, allowing smoke to escape into your living space.

  3. Smoke stains or odors: If you notice smoke stains on the walls or ceilings near your chimney or detect a persistent smoky odor in your home, it could be a sign of a leaky chimney. This should be addressed promptly to prevent further damage and potential health risks.

When faced with a damaged chimney, there are various repair options available, such as chimney relining, chimney crown repair, and chimney flashing repair. It’s important to consult with a professional chimney technician to determine the best course of action for your specific situation.

Advertisement

Inadequate Stove Maintenance

One of the main causes of smoke in your home can be the result of inadequate stove maintenance. A dirty stove and a clogged flue are two common culprits that can lead to smoke issues. When the stove isn’t properly cleaned, a buildup of soot and debris can occur on the burners, causing incomplete combustion and the production of smoke.

Additionally, a clogged flue prevents the proper ventilation of smoke, leading to its accumulation inside your home. Regular cleaning and maintenance of your stove, including cleaning the burners and ensuring the flue is clear, is crucial in preventing smoke issues.

It’s recommended to schedule annual professional maintenance to ensure your stove is in optimal condition and to avoid the inconvenience and potential health hazards associated with smoke in your home.

Incorrect Stove Installation

I regret not hiring a professional for my stove installation, as it has caused numerous issues and potential hazards. When it comes to installing a wood stove, proper positioning and sizing are crucial factors that shouldn’t be taken lightly.

Here are three key reasons why improper stove positioning and incorrect flue size can lead to problems:

Advertisement
  1. Inadequate clearance: Placing the stove too close to combustible materials can increase the risk of fire. It’s essential to follow the manufacturer’s guidelines for proper clearances to ensure the safe operation of the stove.

  2. Inefficient heating: Incorrect positioning can hinder the stove’s ability to distribute heat effectively throughout the room. This can result in uneven temperatures and wasted energy, leading to discomfort and higher heating costs.

  3. Insufficient draft: Using an incorrect flue size can impede the stove’s ability to expel smoke and gases properly. This can lead to backdrafting, where smoke enters the room instead of being directed outside. Aside from the health hazards, backdrafting can damage the stove and cause indoor air quality issues.

To avoid these problems, it’s essential to consult a professional for the proper installation of your wood stove. They’ll ensure that the stove is positioned correctly and the flue size is appropriate for efficient and safe operation.

Frequently Asked Questions

Can Smoking Occur if There Is Sufficient Airflow in the Wood Stove?

Yes, smoking can still occur in a wood stove even with sufficient airflow. Factors like improper wood placement, damp or unseasoned wood, or a clogged chimney can all contribute to smoking issues. Proper troubleshooting can resolve these problems and improve wood stove performance.

What Are Some Common Wood Types That Should Be Avoided to Prevent Smoking in a Wood Stove?

To prevent smoking in a wood stove, it is important to avoid using wood types like pine, as they contain high levels of resin. Additionally, properly seasoning firewood is crucial to reduce smoke production.

How Can I Identify if My Chimney Is Damaged or Leaking?

To identify chimney damage or leaks, conduct a thorough chimney inspection. Look for cracks, loose bricks, or crumbling mortar. Additionally, consider installing a smoke detector near the stove to quickly detect any smoke issues.

Besides Regular Cleaning, What Other Maintenance Practices Can Help Prevent Smoking in a Wood Stove?

Other maintenance practices, such as ensuring proper airflow and avoiding certain wood types, can help prevent smoking in a wood stove. Identifying chimney damage or leaks and checking for correct stove installation are also crucial.

Advertisement

What Are Some Signs of Incorrect Stove Installation That May Lead to Smoking?

Installing a wood stove improperly can lead to frustrating smoke issues. One key sign is if the chimney height is too short. Another is using unseasoned wood, which can cause excessive smoke.

What Are Some Wood Stove Brands That Have Smoke-Reducing Features?

Looking for the best wood stove brands with smoke-reducing features? Look no further. With increasing concerns about air pollution, several brands are innovating their wood stoves to minimize smoke emissions. Some notable options include Vermont Castings, Jøtul, and Blaze King. These brands prioritize efficiency and clean burning, ensuring you can enjoy the warmth of a wood stove while minimizing environmental impact.

Conclusion

In conclusion, when your wood stove smokes, it’s often due to factors such as:

  • Insufficient airflow
  • Improper wood selection
  • A damaged or leaky chimney
  • Inadequate stove maintenance
  • Incorrect installation

To prevent this, you should:

  • Ensure proper ventilation
  • Use seasoned and dry wood
  • Inspect and repair your chimney regularly
  • Maintain your stove diligently
  • Ensure professional installation

By addressing these issues, you can enjoy a smoke-free and efficient wood stove experience, creating a cozy and inviting atmosphere in your home.

Continue Reading

Wood Stove

How To Build A Wood Stove From A Jerry Can

Published

on

By

An image showcasing the step-by-step process of transforming a jerry can into a wood stove

I have always been fascinated by the concept of transforming ordinary objects into useful tools.

So when I came across an old jerry can in my garage, I knew I had the perfect opportunity to create my own wood stove.

In this article, I’ll guide you through the process of transforming a jerry can into a functional and efficient wood stove, complete with ventilation, legs, and a base.

Get ready to unleash your inner DIY enthusiast and start enjoying the warmth of your homemade wood stove.

Key Takeaways

  • Consider the capacity and dimensions of the jerry can
  • Compare different materials for jerry cans
  • Prepare and clean the jerry can properly
  • Take safety precautions and use the right tools when modifying the jerry can

Selecting the Right Jerry Can for Your Wood Stove

I’m trying to figure out which jerry can is the best option for my wood stove.

When it comes to choosing the right size jerry can for your wood stove, it’s important to consider the capacity and dimensions. A larger can will hold more fuel, but it may be too bulky for your space. On the other hand, a smaller can may require more frequent refills.

Advertisement

Additionally, it’s crucial to compare different materials for jerry cans to ensure optimal wood stove performance. Metal cans are durable and resistant to heat, but they can also be heavy. Plastic cans, on the other hand, are lightweight and easier to handle, but may not withstand high temperatures as well.

Ultimately, finding the perfect jerry can for your wood stove is about balancing capacity, dimensions, and material for efficient and safe operation.

Preparing and Cleaning the Jerry Can

Before starting to use the jerry can, it’s crucial to properly clean and prepare it by removing any dirt or residue, and then ensuring it’s completely dry. Here is the cleaning process and safety precautions to follow:

  1. Rinse the jerry can with warm water and a mild detergent to remove any dirt or debris. Use a sponge or brush to scrub the inside and outside of the can thoroughly.

  2. Rinse the can again with clean water to remove any soap residue. Make sure to rinse it multiple times to ensure all the soap is gone.

  3. After rinsing, allow the jerry can to air dry completely. This is important to prevent any moisture from causing rust or corrosion.

By following these cleaning steps, you can ensure that your jerry can is ready for modification.

Now, let’s discuss cutting open and modifying the jerry can for ventilation.

Advertisement

Cutting Open and Modifying the Jerry Can for Ventilation

I’ll explain how to use a few small holes in the jerry can to provide adequate ventilation for the wood stove. When modifying the jerry can for ventilation, it is important to take safety precautions and use the right tools. Here is a table outlining the necessary steps:

Step Safety Precautions Tools Needed
1 Wear protective gloves and goggles Drill
2 Work in a well-ventilated area Marker
3 Ensure the jerry can is empty and clean Metal file
4 Mark the desired ventilation holes on the can Safety glasses
5 Use the drill to create the holes Protective gloves
6 Smooth the edges of the holes with the metal file Goggles
7 Clean any metal shavings from the can Clean cloth

Adding Legs and a Base to the Wood Stove

I can attach some sturdy legs and a stable base to the wood stove to ensure it stands securely on any surface. Achieving stove stability is crucial to prevent accidents and maintain proper functioning.

When choosing materials for the legs and base, it’s important to consider their strength, durability, and heat resistance. Here are three essential elements to consider:

  1. Material Selection: Opt for materials that can withstand high temperatures, such as stainless steel or cast iron. These materials are known for their strength and ability to withstand the intense heat generated by the wood stove.

  2. Design and Construction: The design of the legs should provide sufficient support and stability. Consider a tripod or four-leg design for optimal balance. Additionally, ensure the legs are securely attached to the stove body to prevent any wobbling or instability.

  3. Base Size and Shape: The base of the wood stove should be wide and flat enough to distribute the weight evenly, ensuring stability on various surfaces. A larger base will provide better stability, especially when using the stove on uneven or soft ground.

Testing and Using Your DIY Wood Stove

I’ve successfully tested and now use my DIY wood stove to cook meals while camping. It’s a simple yet effective solution for outdoor cooking. However, before using it, I took several testing techniques and safety precautions to ensure its efficiency and my own well-being.

Firstly, I conducted a leak test to ensure there were no air or gas leaks that could potentially cause a fire hazard. This involved pressurizing the stove and checking for any signs of leakage. I also tested its heat distribution by placing a pot of water on the stove and monitoring how evenly the heat was dispersed.

Advertisement

To further ensure safety, I implemented safety precautions such as maintaining a safe distance between the stove and any flammable objects, using heat-resistant gloves when handling the stove, and having a fire extinguisher nearby.

Using my DIY wood stove has been a game-changer for my camping trips. Not only does it provide a reliable cooking source, but it also allows me to enjoy the natural surroundings without relying on traditional campfire cooking methods. By following proper testing techniques and safety precautions, I can confidently cook my meals and enjoy the great outdoors.

Frequently Asked Questions

How Long Does It Take to Build a Wood Stove From a Jerry Can?

It takes about 2 hours to build a wood stove from a jerry can. The benefits of using a wood stove include cost-effective heating and a sustainable fuel source. Regular cleaning and maintenance ensure optimal performance.

Can I Use Any Type of Wood for the Base of the Wood Stove?

I can use different types of wood for the base of the wood stove, but it’s important to consider safety precautions when using it indoors. Proper ventilation and non-flammable materials are crucial.

Is It Safe to Use the Wood Stove Indoors?

Oh, using a wood stove indoors, what a brilliant idea! Let me enlighten you on the potential health hazards and share some precise tips for safely using one. Shall we begin?

Advertisement

Can I Paint the Jerry Can After Modifying It?

Yes, you can paint the modified jerry can using various painting techniques. It is important to choose a paint that can withstand high temperatures and adhere well to metal surfaces. Make sure to consider alternative fuel sources when painting for safety.

What Tools Do I Need to Build a Wood Stove From a Jerry Can?

To build a wood stove from a jerry can, I need a few tools like a jigsaw, drill, and metal file. Safety precautions are crucial, and alternative materials can be used if necessary.

Can I Use a Wood Stove Insert in a DIY Jerry Can Wood Stove?

When considering building a wood stove fireplace, it’s crucial to factor in the cost of materials and construction. However, if you’re planning to use a wood stove insert in a DIY Jerry Can Wood Stove, the cost of building a wood stove fireplace may decrease significantly. This alternative method combines affordability and practicality, making it an excellent choice for those seeking an alternative heating solution.

Can Duraflame Logs Be Used in a Wood Stove Made from a Jerry Can?

Can Duraflame logs be used in a wood stove made from a jerry can? Many DIY enthusiasts wonder about using Duraflame logs in a wood stove. While Duraflame logs are commonly used in traditional fireplaces, their use in a jerry can wood stove may not be ideal. It’s important to consider the safety and compatibility aspects of using duraflame logs in wood stoves specifically designed for them.

Conclusion

After carefully selecting the right jerry can, preparing and modifying it for ventilation, and adding sturdy legs and a stable base, your DIY wood stove is ready for testing and use.

Advertisement

With its compact design and efficient functionality, this wood stove provides a practical and cost-effective heating solution for outdoor activities or emergency situations.

Embrace the warmth and convenience of this homemade creation, bringing comfort and coziness wherever you go.

Continue Reading

Trending