Connect with us

Pellet Stoves

How to Install Pit Boss Austin Xl Wood Pellet Grill&Smoker

Published

on

An image showcasing the step-by-step installation process of the Pit Boss Austin XL Wood Pellet Grill & Smoker

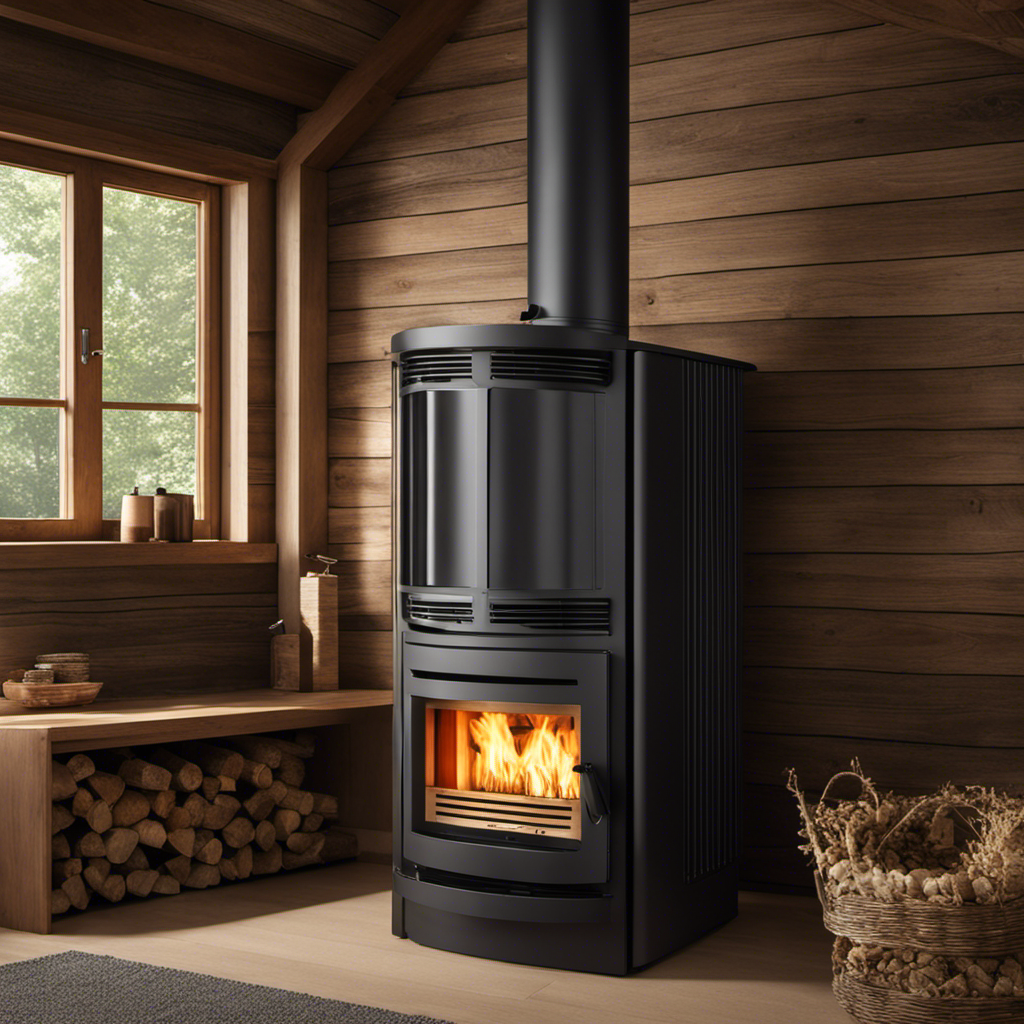
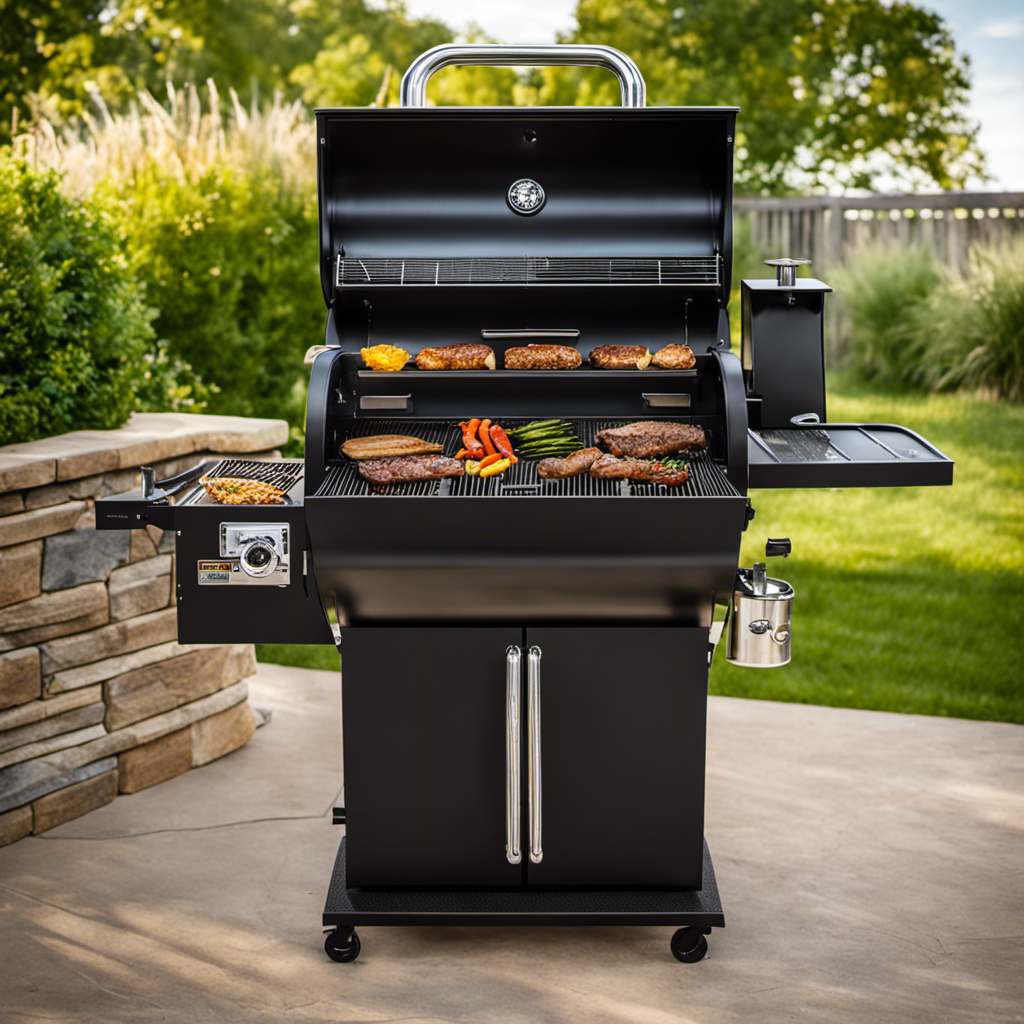
As an experienced aficionado of barbecue grilling, my passion for the Pit Boss Austin XL Wood Pellet Grill&Smoker is unparalleled. This amazing cooking device is designed to take your outdoor grilling adventures to unprecedented heights.

In this article, I will guide you through the step-by-step process of installing this impressive grill and smoker. This includes ensuring that you have all the necessary tools and equipment, assembling the components, and even troubleshooting common issues.

So, let’s get started and unlock the full potential of this game-changing grill!

Key Takeaways

  • The Pit Boss Austin XL Wood Pellet Grill&Smoker comes neatly packed with clear instructions for an impressive unboxing experience.
  • The grill is constructed with high-quality materials and has ample cooking space, enhancing its overall functionality.
  • Additional accessories included with the grill are a grease bucket, meat probe, and side shelf.
  • Proper preparation of the installation area, including clearing debris, ensuring proper ventilation, and choosing the right wood pellets, is essential for successful installation.

Unboxing the Pit Boss Austin Xl Wood Pellet Grill&Smoker

Now it’s time to unbox your Pit Boss Austin XL Wood Pellet Grill&Smoker and start assembling it.

The unboxing experience of the Pit Boss Austin XL Wood Pellet Grill&Smoker is nothing short of impressive. As I opened the box, I was greeted with neatly packed components and clear instructions. The initial impressions were excellent, with a sturdy construction and high-quality materials.

The grill itself is spacious, offering ample cooking space for all your grilling needs. The packaging also included additional accessories, such as a grease bucket, a meat probe, and a side shelf. These thoughtful additions enhance the overall functionality of the grill.

Advertisement

Now that we have unboxed this amazing grill, it’s time to gather the necessary tools and equipment for the next step.

Gathering the Necessary Tools and Equipment

Make sure you have all the tools and equipment you need before starting the installation process. Here are the essential items you’ll need:

  1. Screwdriver – to tighten screws and bolts during assembly.
  2. Wrench – for adjusting and securing parts.
  3. Level – to ensure the grill is set up on a flat surface.
  4. Rubber mallet – for gently tapping pieces into place without damaging them.

Setting up the grill area is crucial for a successful installation. Choose a location that is well-ventilated and away from any flammable materials. Make sure there is enough space around the grill for easy access and movement.

Choosing the right wood pellets is also important for achieving the desired flavor in your food. Consider the type of wood, such as hickory or mesquite, and the intensity of smoke you prefer. Different types of wood pellets offer distinct flavors, so experiment to find your favorite.

Now that you have gathered the necessary tools and equipment, let’s move on to preparing the installation area without further delay.

Preparing the Installation Area

Before you begin setting up the installation area, make sure to choose a location that is safe and well-ventilated.

Advertisement

Preparing the installation area is crucial to ensure a smooth and efficient setup of your Pit Boss Austin XL wood pellet grill and smoker.

Start by clearing any debris or obstacles from the designated spot.

Next, check for proper ventilation setup. The grill and smoker produce smoke and heat, so it’s important to have enough airflow to prevent any potential safety hazards.

Make sure there is enough space around the unit for airflow and that it is not placed near any flammable materials.

Additionally, consider placing it on a sturdy and level surface to avoid any accidents.

Advertisement

Now that you have prepared the installation area, let’s move on to assembling the grill and smoker components smoothly.

Assembling the Grill and Smoker Components

When it comes to assembling the grill and smoker components, there are a few key points to keep in mind.

First, make sure you have all the required tools and parts on hand before you begin. This will ensure a smooth and efficient assembly process.

Secondly, follow the step-by-step assembly process carefully, paying close attention to the instructions and diagrams provided. This will help you avoid any mistakes or confusion during the assembly.

Lastly, be prepared for any troubleshooting that may be necessary. Common issues such as loose screws or misaligned parts can easily be resolved with a little patience and problem-solving skills.

Advertisement

Required Tools and Parts

To install the Pit Boss Austin XL wood pellet grill&smoker, you’ll need a few tools and parts. Here’s a list of what you’ll need:

  • Tools needed:

  • Phillips head screwdriver

  • Adjustable wrench

  • Pliers

  • Rubber mallet

  • Drill with a 1/8-inch drill bit

  • Parts required:

  • Grill body

  • Hopper assembly

  • Grease bucket

  • Drip tray

  • Cooking grates

  • Pellet hopper

  • Control panel

  • Temperature probe

Having the right tools and parts is crucial for a smooth installation process. The Phillips head screwdriver will come in handy for tightening screws, while the adjustable wrench and pliers are necessary for securing nuts and bolts. The rubber mallet is useful for gently tapping parts into place, and the drill with a 1/8-inch drill bit is needed for drilling any necessary holes.

With these tools and parts ready, we can now move on to the step-by-step assembly process.

Step-By-Step Assembly Process

Now, let’s start assembling the grill by attaching the grill body and hopper assembly.

First, make sure you have all the necessary parts and tools ready.

Advertisement

Lay out the grill body and align the hopper assembly with the designated slots.

Use the provided screws and a screwdriver to secure the assembly tightly.

Next, attach the legs to the bottom of the grill body, ensuring they are securely fastened.

Once the legs are in place, connect the side shelf by sliding it into the designated slots on the grill body.

Double-check all the connections to ensure they are tight.

Advertisement

Following these assembling techniques will help you build your Pit Boss Austin XL wood pellet grill and smoker successfully.

Now, let’s move on to troubleshooting common issues that may arise during the assembly process.

Troubleshooting Common Issues

If you’re experiencing any issues during assembly, check the provided troubleshooting guide for solutions.

Here are some common problems you may encounter while setting up your Pit Boss Austin XL wood pellet grill & smoker:

  1. Igniter not working: Make sure the igniter wire is securely connected and not damaged. Check if the igniter is positioned correctly and clean any debris or grease that may be affecting its functionality.

  2. Poor temperature control: Ensure the grill is clean and free from any pellet ash buildup. Check the air vents and make sure they are not blocked. Adjust the temperature settings and give the grill time to stabilize.

  3. Pellet feed issues: Clean the hopper and remove any pellet fragments or blockages. Check the auger for any damage or obstructions. Make sure the hopper lid is closed properly to prevent moisture from entering.

  4. Uneven cooking: Clean the cooking grates and check for any obstructions in the fire pot. Ensure the heat diffuser is positioned correctly. Adjust the temperature settings and monitor the grill to achieve even heat distribution.

After troubleshooting any issues, you can proceed to connect the fuel source and power supply for your grill.

Advertisement

Connecting the Fuel Source and Power Supply

First, ensure the fuel source and power supply are properly connected for the Pit Boss Austin XL wood pellet grill & smoker.

This is an essential step to ensure that your grill functions correctly and that you can enjoy a hassle-free cooking experience.

To connect the fuel source, make sure the hopper is filled with high-quality wood pellets. These pellets will provide the fuel needed to generate heat and create delicious smoke flavors.

For the power supply connection, plug the grill into a grounded electrical outlet using the included power cord. This will ensure that the grill has the necessary power to operate its various functions and controls.

Once these connections are made, you can move on to adjusting the temperature and settings, allowing you to achieve the perfect cooking conditions for your food.

Advertisement

Adjusting the Temperature and Settings

When it comes to smoking meat, achieving the optimal temperature is crucial for the best results. In order to set up the desired heat, it is important to understand how to properly control and adjust the temperature on your smoker.

Optimal Temperature for Smoking

The optimal temperature for smoking on the Pit Boss Austin XL wood pellet grill & smoker is 225-250 degrees Fahrenheit. Temperature control is crucial when it comes to smoking techniques, as it directly affects the flavor and tenderness of the meat.

Maintaining a consistent temperature within this range ensures that your food cooks evenly and develops that signature smoky flavor. To achieve this, I recommend using the digital control panel on the grill to set the desired temperature.

The Pit Boss Austin XL also comes with a meat probe thermometer, allowing you to monitor the internal temperature of your food without opening the lid and losing heat. This precise temperature control is essential for achieving perfect results every time.

Now, let’s move on to setting up the desired heat for your smoking experience.

Advertisement

Setting up Desired Heat

To set up your desired heat on the Pit Boss Austin XL wood pellet grill & smoker, start by pressing the power button to turn on the control panel. Once the control panel is on, follow these steps for adjusting airflow and monitoring temperature:

  1. Adjusting Airflow: Open the chimney cap to allow for proper ventilation. This will help regulate the amount of oxygen flowing into the grill, which in turn affects the temperature.

  2. Monitoring Temperature: Use the digital control panel to set your desired temperature. The built-in temperature probe will monitor the internal temperature of the grill and adjust the pellet feed accordingly to maintain a consistent heat.

  3. Check the pellet hopper: Ensure that it is filled with enough wood pellets to sustain the desired heat level throughout the cooking process.

  4. Keep an eye on the grill: Regularly monitor the temperature gauge on the control panel to ensure that it stays within your desired range.

With the heat set and the grill ready, it’s time to move on to seasoning the grill grates for optimal cooking.

Seasoning the Grill Grates

First, make sure you’ve cleaned the grill grates thoroughly before seasoning them. Proper grill maintenance is essential for optimal performance and longevity.

To season the grill grates, start by preheating the grill to a high temperature. Then, apply a thin layer of cooking oil to the grates using a brush or cloth. This helps create a non-stick surface and prevents food from sticking.

Allow the oil to heat and burn off for about 15 minutes. The heat will help the oil penetrate the grates, forming a protective barrier against rust and corrosion.

Advertisement

After seasoning, the grates will be ready for use.

Now, let’s move on to testing the functionality and performance of your Pit Boss Austin XL wood pellet grill and smoker, ensuring that everything is in proper working order.

Testing the Functionality and Performance

When it comes to testing the functionality and performance of a grill, there are three key points that I always pay attention to.

First, heat distribution efficiency is crucial because it ensures that your food cooks evenly and thoroughly, preventing any hot or cold spots.

Second, temperature accuracy control is important for achieving precise cooking results. It allows you to maintain the perfect temperature for different types of food, ensuring that they are cooked to perfection.

Advertisement

Lastly, cooking versatility options give you the flexibility to try out various cooking methods and recipes. This enhances your overall grilling experience and allows you to explore new flavors and techniques.

Heat Distribution Efficiency

The Austin XL wood pellet grill & smoker has impressive heat distribution efficiency. The design of the grill ensures that the heat is evenly distributed across the entire cooking surface, resulting in perfectly cooked food every time. This is achieved through a combination of factors, including the placement of the heat diffuser plates and the use of convection fans to circulate the heat.

The result is that no matter where you place your food on the grill, it will receive consistent heat for even cooking. In addition to the excellent heat distribution, the Austin XL also offers precise temperature control. With the digital control panel, I can easily set and adjust the temperature to achieve the desired level of heat for my cooking needs. This ensures that my food is cooked to perfection, every time.

Transitioning into the subsequent section, another important aspect of temperature control is accuracy.

Temperature Accuracy Control

Achieving precise temperature control is made effortless with the digital control panel on the Austin XL, allowing me to easily set and adjust the desired level of heat. The temperature calibration on this grill is incredibly accurate, ensuring that my food is cooked to perfection every time. I no longer have to worry about temperature fluctuations ruining my meals. The digital control panel displays the current temperature inside the grill, as well as the set temperature, making it easy for me to monitor and make adjustments if needed. The table below showcases the temperature ranges for various cooking methods, providing an overview of the versatility this grill offers. With such precise temperature control, the Austin XL opens up a world of cooking options and allows me to explore different flavors and techniques without any hassle.

Advertisement
Cooking Method Temperature Range
Smoking 180°F – 225°F
Slow Roasting 225°F – 275°F
High Heat Grilling 400°F – 500°F

Now, let’s dive into the cooking versatility options that the Austin XL provides.

Cooking Versatility Options

With precise temperature control, you can easily explore different cooking methods and techniques on the Austin XL. This versatile grill and smoker allows you to try out a wide range of cooking techniques, from low and slow smoking to high heat searing. Whether you’re craving juicy smoked ribs, tender brisket, or perfectly grilled vegetables, the Austin XL has got you covered.

For smoking, you can use the indirect heat method, where you cook the meat slowly at a low temperature for a long period of time. This results in succulent, fall-off-the-bone goodness. If you prefer a crispy exterior and a juicy interior, you can try the reverse sear method. This involves slow cooking the meat first and then finishing it off with a quick sear on high heat.

When it comes to recipe suggestions, the possibilities are endless. You can smoke a whole chicken with a delicious dry rub, or create mouthwatering pulled pork sandwiches. Try grilling some marinated vegetables for a flavorful side dish, or even bake a homemade pizza with a smoky twist.

Now that you know all the exciting cooking techniques and recipe suggestions, it’s important to keep your Austin XL clean and well-maintained. Let’s dive into some cleaning and maintenance tips to ensure your grill and smoker stays in top shape for many delicious meals to come.

Advertisement

Cleaning and Maintenance Tips

To keep your Pit Boss Austin XL wood pellet grill & smoker clean and well-maintained, you should regularly remove and clean the grates, drip tray, and grease bucket. Here are some cleaning techniques and a maintenance schedule to ensure your grill stays in top shape:

  • Use a wire brush to scrub the grates after each use, removing any food residue.
  • Remove the drip tray and grease bucket, emptying and washing them with warm soapy water.
  • Wipe down the exterior of the grill with a damp cloth to remove any grease or dirt.
  • Inspect all seals and gaskets for wear and tear, replacing them if necessary.
  • Follow a maintenance schedule, which includes deep cleaning the grill at least once a month.

By properly cleaning and maintaining your Pit Boss Austin XL, you’ll ensure it performs at its best and lasts for years to come.

Now, let’s move on to troubleshooting common installation issues.

Troubleshooting Common Installation Issues

Having trouble with your grill? Let’s troubleshoot common installation issues.

One of the most common problems that people encounter with their grills is a grill malfunction. This can occur due to a variety of reasons, such as improper installation or a faulty component.

One area that often causes issues is the pellet feeder. If you’re experiencing problems with your pellet feeder, there are a few things you can check. First, make sure that the pellets are properly loaded into the feeder and that there are no blockages. Additionally, ensure that the auger is functioning correctly and that it is not damaged or jammed.

Advertisement

Frequently Asked Questions

Can the Pit Boss Austin Xl Wood Pellet Grill&Smoker Be Used Indoors?

No, the Pit Boss Austin XL Wood Pellet Grill&Smoker is not meant for indoor use. It is designed for outdoor cooking and should be used in a well-ventilated area. Here are some maintenance tips to keep it in good condition.

How Long Does It Take to Assemble the Grill and Smoker Components?

Assembling the Pit Boss Austin XL Wood Pellet Grill&Smoker is a straightforward process. The time it takes to complete the assembly will depend on your experience and familiarity with the components, but it generally takes around 1-2 hours.

Can the Grill and Smoker Components Be Disassembled for Easier Storage?

Yes, the grill and smoker components of the Pit Boss Austin XL can be easily disassembled for convenient storage. The disassembling process is straightforward and allows for various storage options to fit your needs.

Are There Any Specific Cleaning Products That Should Be Used for the Grill Grates?

When it comes to cleaning the grill grates, I recommend using a specialized grill cleaner or a mixture of vinegar and water. These options effectively remove grease and residue, providing a thorough cleaning without damaging the grates.

What Is the Warranty Period for the Pit Boss Austin Xl Wood Pellet Grill&Smoker?

The warranty period for the Pit Boss Austin XL Wood Pellet Grill&Smoker is [insert number of years]. It is important to note that this grill is designed for outdoor use only and should not be used indoors.

Advertisement

Can I Use the Same Installation Process for Building a Wood Pellet Grill?

Yes, you can use the same installation process for building wood pellet grills. Just follow the manufacturer’s instructions carefully and ensure all components are securely attached. It’s crucial to have a stable and reliable grill for safety and optimal performance.

Conclusion

As the smoke billows from my newly installed Pit Boss Austin XL Wood Pellet Grill&Smoker, I can’t help but feel a sense of satisfaction.

This grilling journey has taught me more than just how to cook mouthwatering meals; it has shown me the importance of patience and perseverance.

Just like tending to a fire, we must nurture our dreams and goals, allowing them to slowly come to fruition.

So, my friends, let this grill be a reminder to never give up on what truly ignites your passion.

Advertisement

Growing up surrounded by the vast beauty of nature, Sierra was always drawn to the call of the wild. While others sought the comfort of the familiar, she ventured out, embracing the unpredictable and finding stories in the heartbeat of nature.   At the epicenter of every remarkable venture lies a dynamic team—a fusion of diverse talents, visions, and passions. The essence of Best Small Wood Stoves is crafted and refined by such a trio: Sierra, Logan, and Terra. Their collective expertise has transformed the platform into a leading authority on small wood stoves, radiating warmth and knowledge in equal measure.

Continue Reading
Advertisement

Pellet Stoves

How Do Wood Pellet Fireplace Inserts Work

Published

on

By

An image showcasing the intricate mechanics of a wood pellet fireplace insert

I have always been intrigued by the workings of wood pellet fireplace inserts. It’s as if you have a mini power plant right in your own living space!

These incredible devices not only provide warmth and ambiance, but they also offer numerous benefits such as increased efficiency and reduced environmental impact.

In this article, we’ll delve into the intricate components of wood pellet fireplace inserts, explore their ignition and combustion process, discuss their heat output and safety features, and help you choose the perfect insert for your home.

Let’s dive in!

Key Takeaways

  • Wood pellet fireplace inserts use advanced combustion technology for efficient burning.
  • They minimize smoke and particulate matter released into the air.
  • Wood pellet fireplace inserts utilize wood pellets as a sustainable energy source.
  • They promote cleaner energy and healthier living environments.

Benefits of Wood Pellet Fireplace Inserts

One of the benefits of wood pellet fireplace inserts is that they are more energy-efficient than traditional fireplaces. This means that they can effectively heat your home while using less fuel, resulting in cost savings on your energy bills.

Wood pellet fireplace inserts are designed to burn wood pellets, which are made from compressed sawdust and other biomass materials. These pellets have a high energy density and produce minimal emissions, making them an environmentally-friendly choice.

Advertisement

The inserts are equipped with advanced combustion technology and efficient heat exchange systems to maximize energy efficiency. They also come with programmable thermostats and automatic ignition systems for convenient operation.

With their superior energy efficiency, wood pellet fireplace inserts provide not only warmth but also significant cost savings compared to traditional fireplaces.

Components of Wood Pellet Fireplace Inserts

To understand how they function, you’ll need to know about the different components of these fireplace inserts.

Wood pellet fireplace inserts are designed to maximize fuel efficiency and heating capacity. Here are the key components:

  • Hopper: This is where the wood pellets are stored. It holds a large quantity of pellets, allowing for longer burn times.

  • Auger System: The hopper is connected to an auger system that transports the pellets from the hopper to the combustion chamber.

  • Combustion Chamber: This is where the wood pellets are burned and heat is generated. The combustion process is carefully controlled for optimal fuel efficiency.

The fuel source for wood pellet fireplace inserts plays a crucial role in their operation.

Advertisement

Fuel Source for Wood Pellet Fireplace Inserts

You’ll need to consider the type of fuel source that best suits your needs for maximizing the efficiency and performance of your wood pellet fireplace insert. Wood pellets are a popular choice due to their high energy content and low moisture content. These pellets are typically made from compacted sawdust or other biomass materials, which are compressed into small cylindrical shapes. Pellets can be conveniently stored in bags or larger containers, making them easy to handle and replenish when needed.

When it comes to the combustion process, wood pellet fireplace inserts utilize advanced technology to ensure efficient burning. The pellets are fed into the combustion chamber through an auger system, where they interact with a controlled air supply. This regulated air flow allows for optimal combustion, resulting in minimal emissions and maximum heat output.

Transitioning into the subsequent section about the ignition and combustion process, it is important to understand how these factors play a crucial role in ensuring proper functioning of your wood pellet fireplace insert.

Ignition and Combustion Process

The ignition and combustion process in wood pellet fireplace inserts relies on a controlled air supply for efficient burning.

When it comes to the quality of pellets, there are a few factors that can impact their performance:

Advertisement
  • Moisture content: Pellets with higher moisture content may not burn as efficiently and can lead to more emissions.
  • Ash content: Higher ash content in pellets can result in increased maintenance requirements for the fireplace insert.
  • Size and shape: Uniformity in size and shape ensures consistent combustion and heat output.
  • Storage conditions: Proper storage is crucial to maintain pellet quality. Exposure to moisture or extreme temperatures can degrade the pellets.

Ensuring high-quality pellets and proper storage conditions will optimize the performance of your wood pellet fireplace insert, allowing for efficient burning and maximum heat output.

Heat Output and Efficiency of Wood Pellet Fireplace Inserts

When it comes to wood pellet fireplace inserts, there are two key points that I want to discuss: energy-saving benefits and heat distribution methods.

Firstly, these inserts are known for their energy-saving capabilities as they burn wood pellets efficiently, resulting in less waste and higher overall efficiency.

Secondly, the heat distribution methods used by these inserts ensure that the warmth is evenly distributed throughout the room, providing maximum comfort and eliminating cold spots.

Overall, understanding the energy-saving benefits and heat distribution methods of wood pellet fireplace inserts can help homeowners make informed decisions when it comes to heating their homes.

Energy-Saving Benefits

Wood pellet fireplace inserts can significantly reduce heating costs while also being environmentally-friendly. These inserts are designed to efficiently burn wood pellets, which are compressed sawdust or other biomass materials. The energy efficiency of wood pellet fireplace inserts is due to their advanced combustion technology and automated control systems.

Advertisement

One key benefit of these inserts is their high energy efficiency, which means that they convert a large percentage of the fuel’s energy into heat for your home. This results in significant cost savings on your heating bills compared to traditional fireplaces or inefficient heating systems.

To illustrate the potential cost savings, consider the following table:

Heating System Annual Heating Cost
Wood Pellet Fireplace Insert $800
Traditional Fireplace $1,500
Electric Heater $2,000
Oil Furnace $2,500
Natural Gas Furnace $1,200

As you can see from the table above, using a wood pellet fireplace insert can save you hundreds or even thousands of dollars per year compared to other heating options.

With its exceptional energy efficiency and cost savings potential, transitioning to a wood pellet fireplace insert is an excellent choice for homeowners looking to reduce their energy consumption and expenses.

When it comes to heat distribution methods…

Advertisement

Heat Distribution Methods

If you’re considering heat distribution methods, one option to explore is using a blower or fan to help circulate the warm air throughout your home. This technique is widely used in wood pellet fireplace inserts to ensure efficient and effective heat transfer mechanisms.

The blower or fan, typically located at the back of the insert, pulls in cool air from the room and pushes it over the hot surfaces of the firebox. As the air passes over these surfaces, it absorbs the heat and becomes warm. By continuously circulating this warm air through strategically placed vents or ducts, it evenly distributes heat throughout your living space.

This method not only maximizes comfort but also reduces energy waste by eliminating cold spots and ensuring that every corner of your home receives adequate warmth.

Now let’s dive into another important aspect of maintaining wood pellet fireplace inserts: maintenance and cleaning.

Maintenance and Cleaning of Wood Pellet Fireplace Inserts

When it comes to maintaining and cleaning wood pellet fireplace inserts, there are several key points to consider.

Advertisement

First, understanding the appropriate cleaning frequency and methods is crucial in order to keep the insert functioning efficiently.

Regular maintenance is also of utmost importance as it ensures the longevity and optimal performance of the insert.

Lastly, troubleshooting common issues that may arise during operation can save time and money by preventing further damage.

Cleaning Frequency and Methods

Regular cleaning is important to maintain the efficiency and safety of wood pellet fireplace inserts. To ensure proper maintenance, it is crucial to clean them regularly using the right tools and following safety precautions. Here are some essential cleaning tools and safety measures that should be considered:

Cleaning Tools Safety Precautions
Soft brush Use gloves when handling ashes
Ash vacuum Turn off the unit before cleaning
Glass cleaner Keep children and pets away during cleaning
Damp cloth Wear a dust mask to avoid inhaling particles

Importance of Regular Maintenance

To ensure the longevity and safety of your wood pellet fireplace, it’s vital that you prioritize regular maintenance. Regular maintenance is of utmost importance when it comes to keeping your wood pellet fireplace working efficiently and preventing any potential issues.

Advertisement

One key aspect of maintenance is cleaning. Cleaning frequency will depend on how often you use your fireplace, but generally, it’s recommended to clean it at least once a month during the heating season. This involves removing ash from the burn pot, cleaning the glass window, and checking and cleaning the exhaust vents. Additionally, it’s important to inspect and clean the hopper periodically to prevent any blockages or malfunctions.

By properly maintaining and cleaning your wood pellet fireplace regularly, you can ensure optimal performance and prolong its lifespan.

Now let’s delve into troubleshooting common issues that may arise with your wood pellet fireplace insert…

Troubleshooting Common Issues

If your wood pellet fireplace isn’t working properly, it’s important to troubleshoot common issues to identify and resolve the problem. Here are some maintenance tips to help you troubleshoot common issues with your wood pellet fireplace:

  • Check the power supply: Ensure that the fireplace is plugged in and receiving electricity.

  • Clean the hopper: A clogged hopper can prevent pellets from feeding properly into the fire. Regularly clean out any debris or dust in the hopper.

  • Inspect the auger: The auger is responsible for transferring pellets from the hopper to the burn pot. Make sure it’s not jammed or worn out.

  • Clean the burn pot and exhaust vent: A dirty burn pot or exhaust vent can cause poor combustion and inefficient burning. Regularly clean these areas to ensure proper functioning.

By following these troubleshooting steps, you can address common issues with your wood pellet fireplace and enjoy a warm and cozy atmosphere in your home.

Advertisement

Now let’s explore the safety features of wood pellet fireplace inserts without compromising on style or comfort.

Safety Features in Wood Pellet Fireplace Inserts

One of the safety features in wood pellet fireplace inserts is an automatic shut-off system. This system is designed to prevent fire hazards and the buildup of carbon monoxide. If there is a sudden increase in temperature or a malfunction within the insert, the shut-off system will automatically turn off the unit, ensuring that no further damage occurs. This feature provides peace of mind for homeowners, as it eliminates the risk of potential fires and dangerous gas leaks.

In addition to the automatic shut-off system, wood pellet fireplace inserts also come equipped with other safety features such as heat sensors and glass doors that remain cool to the touch. These features work together to create a safe and efficient heating experience for users.

When it comes to installation and placement of wood pellet fireplace inserts, careful consideration must be taken into account.

Installation and Placement of Wood Pellet Fireplace Inserts

When it comes to the installation and placement of wood pellet fireplace inserts, there are several key points to consider.

Advertisement

First, proper venting requirements must be met in order to ensure the safe and efficient operation of the insert. This includes ensuring that there is adequate ventilation for the exhaust gases and that any flue pipes or chimneys are properly sized and installed according to manufacturer guidelines.

Secondly, ideal positioning and location play a crucial role in maximizing the heat output and overall performance of the insert. It is important to choose a location that allows for easy access to fuel storage, as well as one that provides optimal heat distribution throughout the desired area.

Lastly, an overview of the installation process will provide valuable insights into what steps need to be taken in order to successfully install a wood pellet fireplace insert. This includes preparing the existing fireplace opening, connecting venting components, and properly sealing any gaps or joints to prevent air leakage.

Proper Venting Requirements

To ensure proper venting requirements for your wood pellet fireplace insert, it is important to follow the manufacturer’s guidelines and use an approved venting system. Proper venting is crucial for the safe and efficient operation of your fireplace insert.

Here are some important tips to keep in mind when it comes to venting installation and maintenance:

Advertisement
  1. Choose the right type of venting system: There are different options available, such as direct vent or power vent systems. Consult with the manufacturer or a professional installer to determine which type is suitable for your specific fireplace insert.

  2. Follow proper installation procedures: It is essential to install the venting system according to the manufacturer’s instructions. This includes ensuring proper clearances, sealing any connections properly, and using appropriate materials.

  3. Regular maintenance: Keep your venting system clean and free from any obstructions that could hinder airflow. Inspect it regularly for signs of damage or wear, such as cracks or loose fittings.

By following these venting installation and maintenance tips, you can ensure optimal performance and safety for your wood pellet fireplace insert.

When positioning and locating your wood pellet fireplace insert…

Ideal Positioning and Location

For optimal performance and safety, it’s important to position and locate your wood pellet fireplace insert in a suitable area of your home. The ideal positioning for a wood pellet fireplace insert is against an exterior wall with access to venting options. This allows for efficient heat distribution throughout the room and easy installation of the required venting system.

When choosing the right location, consider factors such as proximity to combustible materials, clearance requirements, and ease of access for maintenance and refueling. Additionally, ensure that the chosen location meets the necessary venting requirements for proper airflow and exhaust extraction.

Once you have determined the ideal positioning and location, you can move on to the installation process overview without any further delay.

Advertisement

Installation Process Overview: Now that you have identified the ideal positioning and location for your wood pellet fireplace insert, let’s delve into the installation process itself.

Installation Process Overview

Now that you’ve determined the ideal positioning and location, let’s take a look at how the installation process works. Installing a wood pellet fireplace insert may seem daunting, but with the right steps and tools, it can be done smoothly.

Here are the installation steps to guide you through:

  1. Prepare the existing fireplace: Clean out any debris and inspect for structural issues.

  2. Measure and cut the flue liner: Ensure proper fit for ventilation.

  3. Install the hearth pad: Provide a non-combustible base for the insert.

  4. Place and secure the wood pellet fireplace insert: Align it properly and fasten securely.

To complete these installation steps, you will need some essential tools like measuring tape, masonry drill bits, wrenches, and screws.

With your wood pellet fireplace insert properly installed, let’s now shift our focus to understanding its environmental impact without further delay.

Advertisement

Environmental Impact of Wood Pellet Fireplace Inserts

If you’re concerned about the environmental impact, wood pellet fireplace inserts emit fewer emissions compared to traditional fireplaces. This is because wood pellets are a renewable source of energy and produce significantly less carbon footprint. When burned, they release fewer greenhouse gases into the atmosphere, helping to reduce air pollution and improve air quality both indoors and outdoors.

Wood pellet fireplace inserts use advanced combustion technology to ensure efficient burning of the pellets, resulting in minimal smoke and particulate matter being released into the air. These inserts also come with built-in emission control systems that further reduce harmful pollutants.

With their lower emissions and improved efficiency, wood pellet fireplace inserts are a sustainable heating option that promotes cleaner energy and healthier living environments.

When it comes to choosing the right wood pellet fireplace insert for your home…

Choosing the Right Wood Pellet Fireplace Insert for Your Home

When selecting the right wood pellet fireplace insert for your home, it’s important to consider factors such as size, heating capacity, and installation requirements.

Advertisement

Here are three key considerations to keep in mind when choosing the right wood pellet fireplace insert:

  1. Size: Measure the dimensions of your existing fireplace opening to ensure a proper fit. The insert should seamlessly integrate into your space without any gaps or overlaps.

  2. Heating Capacity: Determine the square footage that needs to be heated and select an insert with the appropriate heating capacity. This will ensure optimal warmth and comfort in your home.

  3. Installation Requirements: Consider if you want a freestanding or built-in insert, as well as any venting or electrical requirements. Consulting with a professional installer can help determine what type of installation is best for your specific needs.

By carefully considering these factors, you can choose the right wood pellet fireplace insert that not only enhances the aesthetic appeal of your home but also provides efficient and eco-friendly heating.

The benefits of using a wood pellet fireplace insert include reduced carbon emissions, cost savings on heating bills, and convenient operation with easy-to-use controls.

Can Wood Pellet Fireplace Inserts be Used in Conjunction with Traditional Wood Burning Fireplace Inserts?

Yes, using pellet fuel fireplace inserts can be used in conjunction with traditional wood-burning fireplace inserts. The pellet fuel fireplace insert can provide additional heat and efficiency to the traditional fireplace setup, making it a versatile option for homeowners looking to enhance their heating options.

Can I Use Wood Pellet Fireplace Inserts in a Traditional Wood Burning Fireplace?

Yes, you can absolutely use wood pellet fireplace inserts in a traditional wood burning fireplace. This allows you to enjoy the ambiance of a real fire while using pellet fuel in the fireplace, which is a more convenient and efficient option for heating your home.

Advertisement

Frequently Asked Questions

How Much Do Wood Pellet Fireplace Inserts Cost?

When it comes to wood pellet fireplace inserts, the cost can vary depending on factors such as brand, size, and features. However, it is important to consider a cost comparison along with the benefits and drawbacks before making a purchase decision.

Can Wood Pellet Fireplace Inserts Be Used as the Primary Heat Source for a Home?

Yes, wood pellet fireplace inserts can be used as the primary heat source for a home. They are highly efficient and offer many benefits, such as reduced heating costs and lower environmental impact.

Are Wood Pellet Fireplace Inserts Noisy?

No, wood pellet fireplace inserts are not noisy. They provide a cozy and peaceful ambiance with the crackling sound of burning pellets. Maintenance is simple, and the benefits include energy efficiency and cost savings.

Can Wood Pellet Fireplace Inserts Be Used in Homes Without a Chimney?

Yes, wood pellet fireplace inserts can be used in homes without a chimney. They are an effective alternative heating option that requires regular maintenance to ensure proper operation and safety.

Do Wood Pellet Fireplace Inserts Require a Professional Installation?

Professional installation is recommended for wood pellet fireplace inserts. While it may increase the installation cost, it ensures proper setup and safety. I learned this after researching about wood pellet fireplace inserts and their requirements.

Advertisement

Conclusion

In conclusion, wood pellet fireplace inserts are a game-changer when it comes to heating your home efficiently and sustainably.

With their advanced combustion technology and automatic ignition systems, these inserts provide both warmth and convenience.

Not only do they offer impressive heat output and efficiency, but they also come with safety features that give homeowners peace of mind.

Installing a wood pellet fireplace insert is not only beneficial for your comfort but also for the environment, as they produce lower emissions compared to traditional fireplaces.

So why settle for anything less when you can have the best? Choose a wood pellet fireplace insert today and experience the cozy warmth like never before.

Advertisement

Continue Reading

Pellet Stoves

How Do I Use a Stainless Steel Wood Pellet Tube Smoker in a Charcoal Grill

Published

on

By

An image showcasing a step-by-step visual guide on using a stainless steel wood pellet tube smoker in a charcoal grill

As someone who loves grilling, I’ve constantly searched for ways to enhance my barbecue skills. This quest led me to the incredible discovery of incorporating a stainless steel wood pellet tube smoker into my charcoal grill. It’s like finding a hidden gem that opens up a whole new world of delicious smoky flavors.

In this article, I’ll guide you through the step-by-step process of using this ingenious tool, from preparing your grill to achieving that perfect balance of heat and flavor.

Get ready to take your grilling skills to the next level.

Key Takeaways

  • Using a stainless steel wood pellet tube smoker enhances the smoky flavor of grilled food.
  • Preparing the charcoal grill by cleaning the grates, removing ash, and checking the vents ensures proper airflow for smoking.
  • Choosing the right wood pellets for flavor is important, as different types of wood bring unique taste profiles to the food.
  • Enhancing grilled flavors can be done through experimenting with marinades, rubs, and a variety of ingredients to infuse flavors into the meat.

Benefits of Using a Stainless Steel Wood Pellet Tube Smoker

Using a stainless steel wood pellet tube smoker in your charcoal grill offers you the benefits of enhanced smoky flavor and convenient, long-lasting smoke.

The stainless steel construction of the smoker provides numerous advantages. First, it ensures durability and resistance to rust, allowing for long-term use. Additionally, stainless steel is a non-reactive material, meaning it won’t affect the taste of your food.

As for the wood pellet smoking method, it brings its own set of benefits. Wood pellets are made from compressed sawdust and offer consistent and controlled smoke, resulting in a more balanced flavor profile. Furthermore, the pellets ignite quickly and produce clean smoke, minimizing the chances of bitter or acrid flavors.

Advertisement

Now, let’s move on to preparing the charcoal grill for smoking.

Preparing the Charcoal Grill for Smoking

To prepare your charcoal grill for smoking with the stainless steel wood pellet tube smoker, start by ensuring the grill is clean and free from any leftover ashes or debris. This will help achieve smoky perfection in your food. Here’s a simple checklist to follow:

Steps
1. Clean the grill grates
2. Remove any ash or debris from the grill’s bottom
3. Check and clean the vents to ensure proper airflow
4. Place a drip pan under the grill grates to catch any drippings
5. Fill the charcoal chimney with the desired amount of charcoal

Choosing the Right Wood Pellets for Flavor

When it comes to choosing the best wood pellet flavors for grilling, there are a few key points to consider.

First, it’s important to understand how different wood flavors can enhance the taste of your grilled food. From the rich and smoky flavor of hickory to the sweet and fruity notes of applewood, each wood pellet brings its own unique taste profile to the table.

Additionally, pairing the right wood pellet with your food can take your grilling experience to the next level, creating a harmonious balance of flavors that will leave your taste buds satisfied.

Advertisement

Best Wood Pellet Flavors

I’ve heard that hickory and mesquite are the best wood pellet flavors for adding smoky richness to grilled food. When it comes to smoking techniques, experimenting with flavors is key.

These two wood pellet flavors provide a strong and distinct smoky flavor that can enhance a variety of grilled dishes. Hickory is known for its bold and robust flavor, making it ideal for red meats like beef and pork. Mesquite, on the other hand, offers a sweeter and more intense smoky taste, making it perfect for chicken and fish.

By using hickory and mesquite wood pellets, you can elevate the flavors of your grilled food to new heights.

Now, let’s explore how to further enhance those grilled flavors without any additional steps.

Enhancing Grilled Flavors

If you’re looking to enhance the flavors of your grilled food, consider experimenting with different marinades and rubs. These grilling techniques can take your meals to a whole new level of deliciousness.

Advertisement

Marinades are great for infusing flavors into your meat, while rubs add a tasty crust and depth of flavor. When it comes to marinades, you can use a variety of ingredients like citrus juices, soy sauce, herbs, and spices to create the perfect blend for your taste buds. For rubs, a mixture of salt, pepper, garlic powder, paprika, and other spices can work wonders.

The key is to let your meat marinate or rub sit for a sufficient amount of time to allow the flavors to penetrate. By mastering these flavor-infused cooking techniques, you’ll be able to create mouthwatering dishes that will leave your guests coming back for seconds.

Now, let’s move on to the next section where we’ll explore the art of pairing pellets with food in order to further elevate your grilling experience.

Pairing Pellets With Food

To enhance the flavor of your grilled food, consider experimenting with different pellet flavors for a unique and delicious taste. When it comes to grilling techniques, using wood pellets can take your culinary creations to the next level.

The type of pellet you choose can greatly impact the flavor profile of your food. For example, if you’re grilling seafood, try using mesquite pellets to impart a smoky and robust flavor. For poultry, a combination of apple and cherry pellets can create a sweet and tangy taste. And if you’re grilling beef, hickory pellets can add a rich and slightly sweet flavor.

Advertisement

Don’t be afraid to mix and match pellet flavors to create your own unique flavor combinations.

Now, let’s move on to how to fill and light the wood pellet tube smoker.

How to Fill and Light the Wood Pellet Tube Smoker

When it comes to using a wood pellet tube smoker, proper pellet placement and lighting techniques are crucial for achieving the desired results.

First and foremost, it’s important to ensure that the pellets are evenly distributed throughout the tube to promote consistent smoke production.

Additionally, using the right lighting technique can help kickstart the combustion process and ensure that the pellets ignite properly.

Advertisement

Proper Pellet Placement

Make sure you’ve properly positioned the stainless steel wood pellet tube smoker in your charcoal grill for optimal results.

Proper pellet placement is crucial for achieving optimal smoke output. Here are a few key considerations to keep in mind:

  • Position the pellet tube smoker on one side of the charcoal grill, away from the direct heat source. This will allow the pellets to smolder and produce smoke without catching fire.

  • Place the pellets in the tube smoker, filling it up to the desired level. Make sure the pellets are tightly packed to ensure a consistent burn.

  • Once the pellets are in place, close the lid of the grill to contain the smoke and heat.

By following these proper pellet placement techniques, you can enhance the smoke output and infuse your food with delicious smoky flavors.

Now, let’s move on to the next section where we’ll discuss lighting techniques for pellets.

Lighting Techniques for Pellets

Now that we know how to properly place the wood pellets in the tube smoker, let’s move on to lighting techniques. Igniting the pellets correctly is crucial for producing smoke that will enhance the flavor of your food.

Advertisement

There are a few different methods you can use to get the pellets burning. One popular technique is to use a torch to ignite the pellets directly. Simply hold the flame to the open end of the tube smoker until the pellets catch fire.

Another method is to use a chimney starter. Fill the starter with charcoal and place the tube smoker on top. Light the charcoal in the chimney starter, and as it burns, the heat will transfer to the pellets, causing them to ignite and produce smoke.

Now that we have covered lighting techniques for the wood pellet tube smoker, let’s move on to placing it in the charcoal grill.

Placing the Wood Pellet Tube Smoker in the Charcoal Grill

To properly use a stainless steel wood pellet tube smoker in your charcoal grill, you’ll want to carefully place it in the desired location.

Here are three pellet placement techniques that can help you achieve optimal smoke:

Advertisement
  • Position the wood pellet tube smoker near the charcoal bed, ensuring it is not directly touching the hot coals. This allows the pellets to smolder and release smoke gradually.

  • Place the smoker on the grill grates, away from direct heat sources. This ensures even distribution of smoke throughout the cooking chamber.

  • Consider elevating the smoker by using a wire rack or a heat-resistant stand. This elevates the smoker and allows for better air circulation, resulting in consistent smoke production.

By following these pellet placement techniques, you can achieve a steady flow of flavorful smoke throughout your cooking process.

Now, let’s move on to monitoring and maintaining the temperature without compromising the smoke production.

Monitoring and Maintaining the Temperature

One important step in achieving consistent smoke production is monitoring and maintaining the temperature throughout the cooking process. Temperature control is crucial for creating that perfect smoky flavor in your food. It ensures that the wood pellets burn evenly and produce the desired amount of smoke. To help you understand the different temperature ranges and troubleshooting techniques, I have prepared a table below:

Temperature Range Description Troubleshooting Techniques
Low (225°F – 250°F) Ideal for slow cooking and smoking Check for airflow restrictions, adjust vents as needed
Medium (275°F – 300°F) Suitable for grilling and smoking Add more wood pellets if smoke production is low
High (350°F – 400°F) Perfect for searing and quick cooking Open vents fully and monitor closely to avoid burning

Now that you know how to control the temperature, let’s move on to some tips and tricks for achieving smoky perfection in your charcoal grill.

Tips and Tricks for Achieving Smoky Perfection

Ready to take your grilling to the next level? Here are some tips and tricks for achieving that perfect smoky flavor in your food.

Advertisement
  • Choose the right wood pellets: Experiment with different flavors like hickory, mesquite, or applewood to find the one that suits your taste buds. Each wood imparts a unique smoky aroma to your food.

  • Control the smoke: To prevent overpowering your food with smoke, soak the wood pellets in water for about 30 minutes before using them. This will help slow down the burn rate and produce a more subtle smoky flavor.

  • Clean and maintain your smoker: Regularly clean the stainless steel wood pellet tube smoker to remove any residue or buildup that can affect the quality of the smoke. Make sure to follow the manufacturer’s instructions for cleaning and maintenance to keep your smoker in top condition.

With these tips, you’ll be able to achieve that perfect smoky flavor in your grilled dishes while ensuring smoke control and proper cleaning and maintenance of your smoker.

Happy grilling!

Can I Use the Stainless Steel Wood Pellet Tube Smoker to Infuse Bourbon Flavor into my Food?

Yes, you can use the stainless steel wood pellet tube smoker for adding bourbon flavor to smoker pellets to infuse your food with a rich, smoky bourbon taste. Simply fill the smoker tube with bourbon-infused wood pellets and let it work its magic while you cook. Enjoy the delicious results!

Can I Use Bourbon-Infused Wood Pellets in a Stainless Steel Wood Pellet Tube Smoker for Grilling?

Yes, you can definitely use bourbon-infused wood pellets in a stainless steel wood pellet tube smoker for grilling. Adding bourbon flavor to smoker pellets can impart a unique and delicious taste to your grilled food, creating a rich and smoky flavor profile that enhances your cooking experience.

Frequently Asked Questions

Are Wood Pellet Tube Smokers Only Used in Charcoal Grills?

The pros of using a wood pellet tube smoker in a charcoal grill include enhanced flavor and versatility. However, it’s not limited to just charcoal grills; you can also use it in gas or electric grills for similar results.

Advertisement

Can I Use Any Type of Wood Pellets in a Stainless Steel Wood Pellet Tube Smoker?

Certainly! You can use any type of wood pellets in a stainless steel wood pellet tube smoker. The different types of wood pellets offer unique flavors and aromas, enhancing the taste of your smoked food.

How Long Does It Take for the Wood Pellets to Fully Burn in the Smoker?

It usually takes about 2-4 hours for the wood pellets to fully burn in the smoker. The exact time may vary depending on factors like the type of pellets used and the temperature.

Can I Use the Wood Pellet Tube Smoker for Other Types of Cooking, Not Just Smoking?

Yes, you can use a wood pellet tube smoker for grilling. It adds a delicious smoky flavor to your food and provides consistent heat. The benefits of using a wood pellet tube smoker are amazing!

Is It Necessary to Soak the Wood Pellets Before Using Them in the Smoker?

Soaking wood pellets before using them in a smoker is not necessary. While some people believe it adds moisture and enhances flavor, it can also lead to longer smoking times and the risk of creating too much smoke.

Conclusion

In conclusion, using a stainless steel wood pellet tube smoker in a charcoal grill is a game-changer for all barbecue enthusiasts.

Advertisement

The smoky aroma that fills the air, the sizzle of the meat as it cooks to perfection, and the mouthwatering taste that leaves you craving for more – it’s an experience like no other.

With the right preparation, wood pellets, and temperature control, you can transform your charcoal grill into a smoky wonderland.

So, fire up your grill, load up the wood pellet tube smoker, and get ready for a flavor-packed adventure.

Continue Reading

Pellet Stoves

Englander 10-Cpm Corn Wood Pellet Stove Is How Many Btu?

Published

on

By

An image featuring a close-up of the Englander 10-Cpm Corn Wood Pellet Stove, showcasing its sleek design and visible temperature controls, evoking a cozy ambiance with its warm glow and flickering flames

If you are curious about the BTU output of the Englander 10-CPM Corn Wood Pellet Stove, fret not, as I am ready to give you all the technical details and solutions you are looking for.

In this article, we’ll delve into the BTU capacity of the Englander 10-Cpm Stove, understand its heat output, and compare it to other models. We’ll also discuss factors that affect its BTU rating and provide tips for optimizing its efficiency.

So let’s dive in and uncover everything you need to know about this powerful heating appliance.

Key Takeaways

  • The Englander 10-Cpm Corn Wood Pellet Stove has a BTU capacity of 40,000, indicating a high heat output.
  • The stove is designed for efficient and effective heating, utilizing fans and vents for optimal heat circulation.
  • The quality of fuel used, such as wood pellets or corn, can impact the BTU rating of the stove.
  • Regular cleaning and maintenance, along with using high-quality fuel, can improve the efficiency of the Englander stove.

The BTU Capacity of the Englander 10-Cpm Corn Wood Pellet Stove

You’ll be pleased to know that the Englander 10-Cpm Corn Wood Pellet Stove has a BTU capacity of 40,000.

This means that the stove is capable of producing 40,000 British Thermal Units of heat per hour.

The BTU capacity is an important factor to consider when choosing a stove, as it determines the heat output and efficiency of the unit.

Advertisement

The heat output refers to the amount of heat that the stove can generate, and a higher BTU capacity generally indicates a greater heat output.

The efficiency rating, on the other hand, measures how effectively the stove converts fuel into heat.

Understanding the heat output of the Englander 10-Cpm stove is crucial in determining its suitability for your heating needs and ensuring optimal performance.

Understanding the Heat Output of the Englander 10-Cpm Stove

To understand the heat output of this stove model, it’s important to consider the BTU rating. The Englander 10-Cpm Stove is designed to provide efficient and effective heating for your home. Here are three key factors to understand about its heat distribution:

  1. BTU Rating: The Englander 10-Cpm Stove has a BTU rating of XX,XXX, indicating the amount of heat it can produce per hour. This rating is an important factor in determining the stove’s heating capacity.

  2. Proper Stove Maintenance: Regular maintenance is crucial to ensure optimal heat distribution. Cleaning the stove regularly, checking for air leaks, and inspecting the fuel feed system are essential steps to maintain efficient heat output.

  3. Heat Distribution Design: The Englander 10-Cpm Stove is engineered with a heat distribution system that maximizes the spread of warmth throughout your space. It utilizes fans and vents to circulate heat effectively, ensuring even distribution and comfort.

Understanding heat distribution and proper stove maintenance are essential for getting the most out of your Englander 10-Cpm Stove. Now let’s explore the factors that can affect the BTU rating of this stove model.

Advertisement

Factors Affecting the BTU Rating of the Englander 10-Cpm Stove

One factor that can affect the BTU rating of the Englander 10-Cpm Stove is the quality of the fuel used. The BTU rating of a stove refers to the amount of heat it produces in British Thermal Units per hour. The BTU rating can vary depending on the type of fuel used, as different fuels have different energy content.

For example, wood pellets typically have a BTU rating of around 8,000 to 10,000 BTU per pound, while corn pellets can range from 7,000 to 9,000 BTU per pound. The moisture content of the fuel can also impact the BTU rating, as wetter fuel will produce less heat. Therefore, it is important to use high-quality fuel with the Englander 10-Cpm Stove to ensure optimal heat output.

Now, let’s compare the BTU output of the Englander 10-Cpm Stove to other models.

Comparing the BTU Output of the Englander 10-Cpm Stove to Other Models

When comparing the BTU output of the Englander 10-Cpm stove to its competitors, it’s crucial to consider the efficiency of the Englander stove. The BTU rating alone doesn’t provide a complete picture of the stove’s performance.

The efficiency of the Englander stove plays a significant role in determining its overall heat output and fuel consumption.

Advertisement

BTU Comparison: Englander Vs Competitors

The Englander 10-cpm corn wood pellet stove has a higher BTU rating compared to its competitors. This means that it can produce more heat, making it more efficient and effective in heating large spaces. To further illustrate this, let’s compare the BTU ratings of the Englander stove with some of its competitors:

Stove Model BTU Rating Efficiency
Englander 10-cpm 50,000 BTU 85%
Competitor A 40,000 BTU 80%
Competitor B 45,000 BTU 82%
Competitor C 38,000 BTU 78%
Competitor D 42,000 BTU 81%

As you can see from the table, the Englander stove outperforms its competitors in terms of BTU rating, providing a higher heat output. This means that the Englander stove can heat a larger area more efficiently, resulting in greater comfort and potentially lower heating costs. Now, let’s delve into the efficiency of the Englander stove and how it contributes to its overall performance.

Efficiency of Englander Stove

To maximize the efficiency of your Englander stove, make sure to regularly clean and maintain it. Here are some tips to improve the efficiency of your Englander stove:

  • Clean the stove regularly to remove any build-up of ash or debris that can hinder airflow and reduce efficiency.
  • Check the gaskets and seals around the stove doors and windows to ensure a tight seal, preventing heat loss.
  • Use high-quality pellets or corn that burn more efficiently and produce less ash.
  • Adjust the air intake to find the optimal balance between combustion and heat output.
  • Insulate your home properly to minimize heat loss and maximize the effectiveness of your stove.

By following these guidelines, you can ensure that your Englander stove operates at its highest efficiency, providing you with optimal heat output and fuel savings.

Now, let’s move on to how to calculate the BTU requirement for your space.

How to Calculate the BTU Requirement for Your Space

When it comes to determining the BTU requirement for a space, understanding the basics of BTU calculation is crucial. Factors such as room size, insulation, and desired temperature all play a role in determining the appropriate BTU output.

Advertisement

BTU Calculation Basics

Calculating BTUs for the Englander 10-CPM corn wood pellet stove is a straightforward process. When it comes to determining the BTU requirement for a stove, there are various calculation methods available.

One of the key aspects to understand is heat transfer. Heat is transferred from the stove to the surrounding area, and the BTU output of the stove determines how efficiently it can heat a space.

The most common method for calculating BTUs is by considering the square footage of the area you want to heat. By multiplying the square footage by a specific factor, you can estimate the BTU requirement.

However, it’s important to note that there are other factors affecting BTU, such as insulation, ceiling height, and windows. These factors can significantly impact the BTU calculation and should be taken into account when determining the appropriate size of the Englander 10-CPM corn wood pellet stove for your space.

Factors Affecting BTU

Insulation, ceiling height, and windows significantly impact the BTU calculation for a stove. These factors affect the efficiency of the stove by influencing the heat loss and heat gain within a room. To illustrate this point, consider the following table:

Advertisement
Factor Impact on BTU Calculation
Insulation Higher insulation levels retain heat better, resulting in increased BTU efficiency.
Ceiling Height Higher ceilings require more energy to heat the space, resulting in decreased BTU efficiency.
Windows Single-pane windows allow more heat transfer, leading to decreased BTU efficiency.

Tips for Optimizing the BTU Efficiency of the Englander 10-Cpm Stove

To maximize the BTU efficiency of your Englander 10-Cpm stove, you should regularly clean the vents and maintain proper airflow. Here are some tips for maintaining the Englander 10-Cpm stove and reaping the benefits of using a wood pellet stove:

  • Clean the vents: Regularly remove any dust or debris from the vents to ensure proper air circulation.

  • Inspect the exhaust system: Check the exhaust system for any blockages or buildup that could hinder the stove’s performance.

  • Clean the burn pot: Remove ashes and clean the burn pot to ensure efficient combustion.

  • Check the gaskets: Inspect and replace any worn-out gaskets to prevent air leakage.

Following these maintenance tips will help optimize the BTU efficiency of your Englander 10-Cpm stove and ensure it operates at its best, providing you with the benefits of a wood pellet stove.

Is the Englander 10-Cpm Corn Wood Pellet Stove Suitable for Use in British Homes?

The Englander 10-Cpm Corn Wood Pellet Stove is a popular choice for British homes looking for efficient and eco-friendly heating options. This stove is designed to meet the specific needs and requirements of British wood pellet stoves, ensuring it is a suitable and reliable option for use in homes across the UK.

How Many Btu Does the Englander 10-Cpm Corn Wood Pellet Stove Produce?

The Englander 10-CPM corn wood pellet stove can produce up to 50,000 BTU, making it an efficient heat source for homes. One of the reasons for British wood pellet stoves‘ popularity is their ability to produce high amounts of heat while being environmentally friendly.

Frequently Asked Questions

How Much Does the Englander 10-Cpm Corn Wood Pellet Stove Cost?

The price of the Englander 10-Cpm Corn Wood Pellet Stove varies depending on the retailer and any additional features you choose. It is important to read reviews to ensure its quality and performance.

Advertisement

What Are the Dimensions of the Englander 10-Cpm Corn Wood Pellet Stove?

The dimensions of the Englander 10-Cpm Corn Wood Pellet Stove can be found in the installation guide. It is important to refer to the guide for accurate measurements before purchasing or installing the stove.

Does the Englander 10-Cpm Stove Come With a Warranty?

The warranty for the Englander 10-Cpm corn wood pellet stove guarantees coverage for a specified period of time. It provides peace of mind and protection in case of any manufacturing defects or issues that may arise.

Can the Englander 10-Cpm Stove Be Used as a Primary Heat Source?

As the owner of an Englander 10-Cpm stove, I can attest to its potential as a primary heat source. Its efficiency and heat output make it a reliable option, but consider the pros and cons before making a decision.

Are There Any Special Maintenance Requirements for the Englander 10-Cpm Stove?

There are a few special maintenance requirements for the Englander 10-Cpm stove. Regular cleaning of the stove is necessary to ensure optimal performance and prevent buildup. It is important to follow the manufacturer’s guidelines for maintenance.

Conclusion

In conclusion, the Englander 10-Cpm Corn Wood Pellet Stove offers impressive BTU capacity for heating your space. With its efficient design and advanced technology, this stove delivers a powerful heat output that will keep you warm and cozy.

Advertisement

Factors such as fuel type, stove settings, and insulation can affect the BTU rating, so it’s important to consider these when calculating your space’s BTU requirement. By optimizing the BTU efficiency of the Englander 10-Cpm Stove and following our tips, you can enjoy maximum warmth and comfort.

So go ahead, fire up your stove and let it bring the heat!

Continue Reading
Advertisement

Affiliate Disclaimer

As an affiliate, we may earn a commission from qualifying purchases. We get commissions for purchases made through links on this website from Amazon and other third parties.

Vetted

Vetted3 months ago

Choosing the Best Wood Pellets: Reviews for 2023

- ad - Camp Chef Competition Blend BBQ Pellets, Hardwood Pellets for Grill, Smoke, Bake, Roast, Braise and BBQ, 20...

affordable and stylish fireplace affordable and stylish fireplace
Vetted3 months ago

HOMCOM Ethanol Fireplace Review: Affordable and Stylish

- ad - Midwest Hearth Universal Valve Key for Gas Fire Pits and Fireplaces - Polished Chrome (3-Inch) Amazon HOMCOM...

efficient and cozy heating efficient and cozy heating
Vetted3 months ago

LifePlus Electric Fireplace Heater Review

- ad - LifePlus Electric Fireplace Heater, Portable Wood Fireplace Stove with 3D Realistic Dancing Flame Effect, Tabletop Fireplace Space...

compact and cozy heating compact and cozy heating
Vetted3 months ago

Review: Mini Electric Fireplace Lanterns Space Heaters

- ad - I came across the Mini Electric Fireplace Lanterns Space Heaters and it made me curious, could this...

detailed review of homcom ethanol fireplace detailed review of homcom ethanol fireplace
Vetted3 months ago

HOMCOM Ethanol Fireplace Review

- ad - HOMCOM 19.75" Ethanol Fireplace, Freestanding Alcohol Fireplace Stove with 0.25 Gal Tank Capacity, Flame Snuffer - Black...

efficient cooking with versatile griddle efficient cooking with versatile griddle
Vetted3 months ago

Solo Stove Ranger Griddle Bundle Review

- ad - Onlyfire Griddle for Solo Stove Ranger, 14 Inch Double Sided Reversible Cast Iron Griddle Grill Pan with...

detailed review of outdoor fire pit detailed review of outdoor fire pit
Vetted3 months ago

Outdoor Fire Pit 21inch Bonfire Stove Review

- ad - Solo Stove Bonfire 2.0-19.5 Inch Smokeless Fire Pit with Removable Ash Pan - Portable Outdoor Fire Pit...

cisvio 32in fire pit cisvio 32in fire pit
Vetted3 months ago

CISVIO 32in Fire Pit Review: Perfect for Outdoor Gatherings

- ad - Cisvio Amazon Cisvio Amazon ULTRALOQ Amazon Have you ever experienced the comforting warmth of a flickering flame...

cozy outdoor patio stove cozy outdoor patio stove
Vetted3 months ago

FCH Fire Pit Review: Cozy Outdoor Patio Stove

- ad - As enthusiasts of outdoor activities, we are naturally drawn to the charm of a comfortable outdoor space....

portable and versatile fire pit portable and versatile fire pit
Vetted3 months ago

Noble Nest Tabletop Fire Pit Review: Portable & Versatile

- ad - Fire Sense 60873 Fire Pit Portable Folding Round Steel with Folding Legs Wood Burning Lightweight Included Carrying...

detailed review of bizzoelife 22inch portable fire pit detailed review of bizzoelife 22inch portable fire pit
Vetted3 months ago

Bizzoelife 22inch Portable Fire Pit Review

- ad - Are you searching for the ideal portable fire pit to enhance your outdoor adventures? Your search ends...

durable stylish fire pit durable stylish fire pit
Vetted3 months ago

KOL Corten Steel Fire Pit Review

- ad - Are you exhausted from searching for the ideal fire pit? Well, your search ends here! Let us...

Advertisement

Trending