Connect with us

Wood Stove

How To Install A Wood Stove

Published

on

An image showcasing a step-by-step installation guide for a wood stove

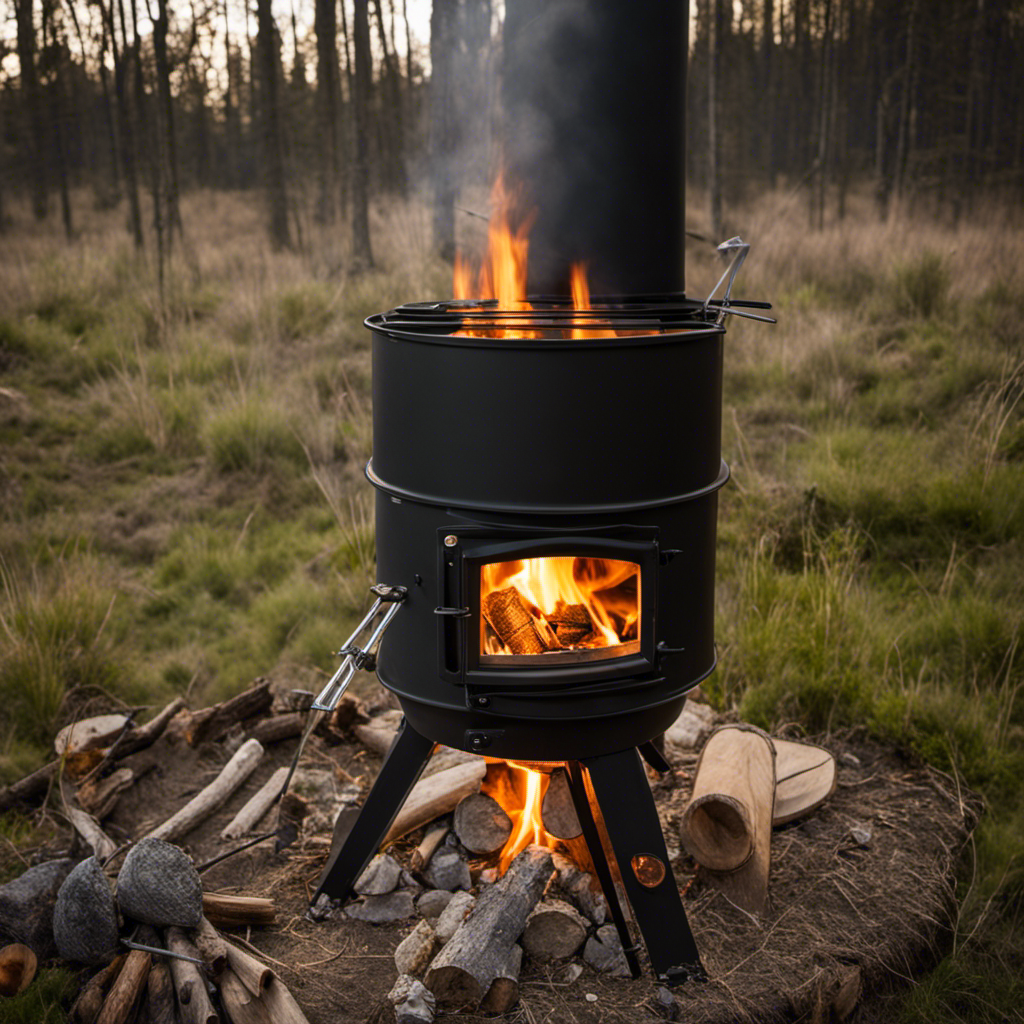
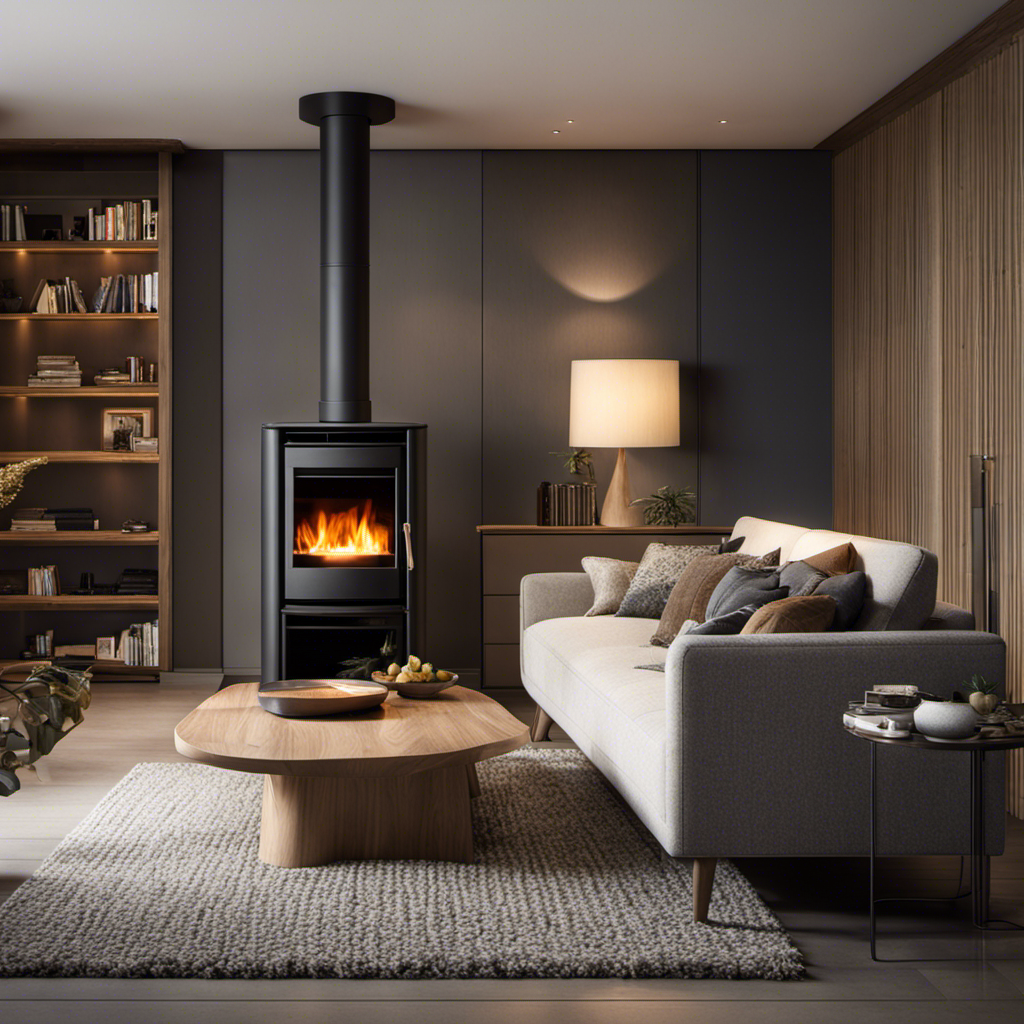
The warm glow and comforting crackle of a wood stove on a cold winter’s night have always enchanted me. Adding one to your home can be a fulfilling and sensible endeavor.

In this step-by-step guide, I’ll walk you through the process of selecting the right location, preparing the installation area, and connecting the stove to the chimney.

With proper ventilation and safety precautions in place, you’ll soon be enjoying the comfort and ambiance of your very own wood stove.

Key Takeaways

  • Assess ventilation options and consider clearances from combustible materials.
  • Clear away furniture and obstacles to create a safe and accessible space for installation.
  • Measure dimensions of the area and ensure proper fit.
  • Ensure proper ventilation and safety by maintaining clearances, using fireproof materials, and seeking professional installation.

Selecting the Right Location

I’m considering the best location for my wood stove installation. Selecting the right location is crucial for the efficient and safe operation of a wood stove. Here are the steps I followed to choose the perfect spot.

First, I assessed the ventilation options. Proper ventilation is essential to ensure that the wood stove functions effectively and minimizes the risk of carbon monoxide buildup. I checked for existing chimneys or flues that could be used for the stove. If none were available, I considered installing a new chimney or flue system. This involved evaluating the structural feasibility and the required clearances for the chimney installation.

Next, I looked for a location that had sufficient space and clearances. The wood stove should be placed away from combustible materials such as walls, furniture, and curtains. I measured the required clearances from the stove’s manufacturer specifications and local building codes to ensure safety.

Advertisement

Additionally, I considered the stove’s proximity to the main living areas. Placing it centrally will allow for better heat distribution throughout the house.

Lastly, I evaluated the accessibility of the location. It should be easily accessible for loading wood and cleaning the stove. I also considered the proximity to an outdoor area for storing firewood.

Preparing the Installation Area

Before beginning the installation process, I make sure to prepare the area where the wood stove will be placed.

Firstly, I clear away any furniture or obstacles to create a safe and accessible space.

Next, I measure the dimensions of the area to ensure that the wood stove will fit properly.

Advertisement

Clearing the Space

To make sure there’s enough space for the wood stove, I’ll need to clear out any furniture or clutter in the area. First, I’ll start by removing any debris on the floor, such as loose tiles, carpeting, or rugs. This will create a clean and level surface for the stove to sit on.

Next, I’ll clear away any obstacles that may hinder the installation process, such as shelves, cabinets, or other large furniture. It’s important to ensure that there’s ample space around the stove for proper ventilation and safety.

Additionally, I’ll check for any electrical outlets or wiring that may need to be relocated to avoid any potential hazards. By clearing the space thoroughly, I can ensure a smooth and safe installation process for the wood stove.

Measuring the Dimensions

Measuring the dimensions is crucial to ensure that the space is suitable for the stove. To start, I’ll measure the width, height, and depth of the area where the stove will be installed. This will help me choose the right size stove for the space.

Next, I’ll calculate the heat requirements for the room. To do this, I’ll consider factors such as the size of the room, insulation, and outside temperature. By using a heat calculation formula, I can determine the BTU (British Thermal Units) needed to effectively heat the space. This information is essential for selecting a stove that will provide adequate warmth.

Advertisement

Once the dimensions and heat requirements are determined, I can move forward with confidence, knowing that the stove I choose will fit properly and provide the desired level of heat.

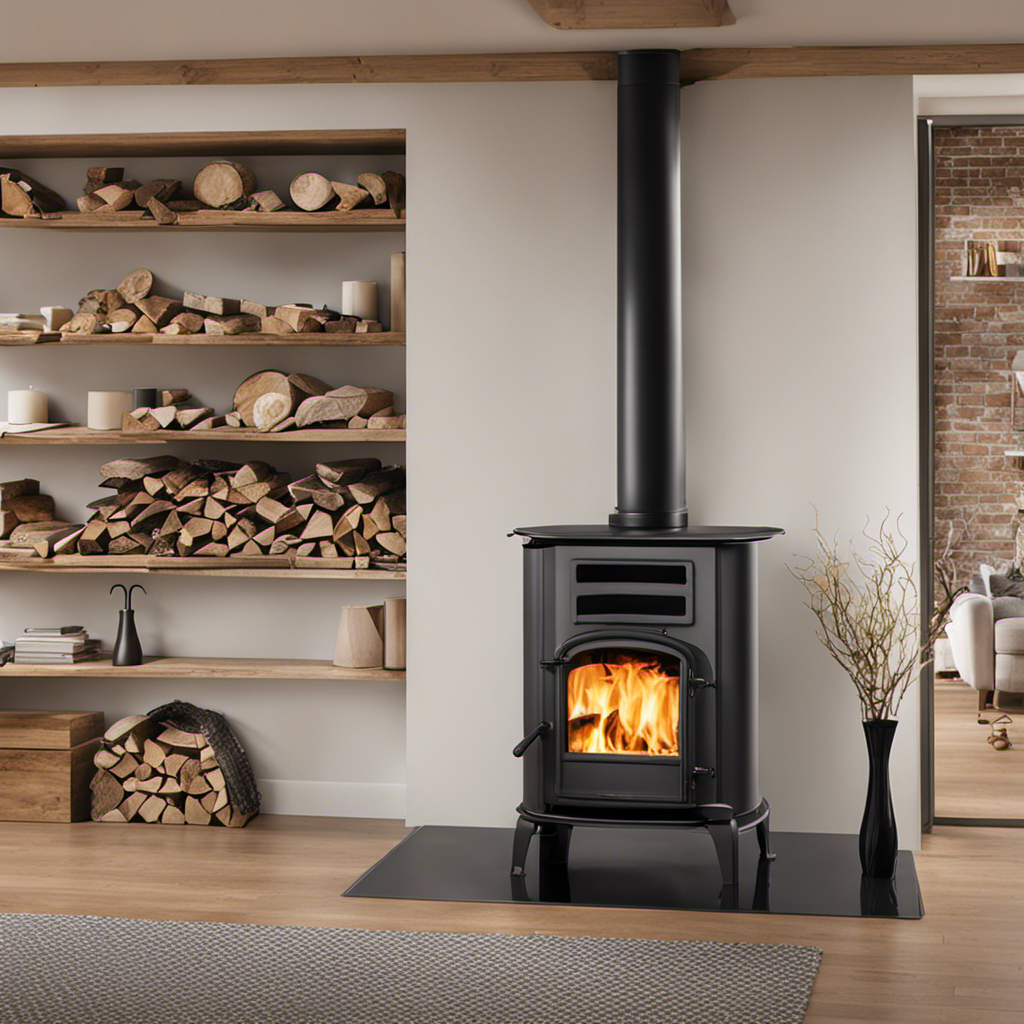
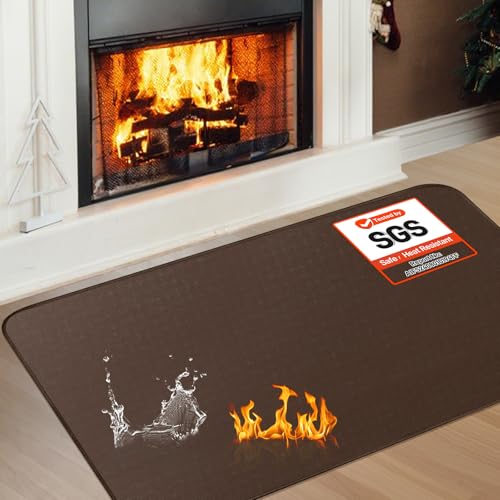
Floor Protection Options

I had to consider various floor protection options for the stove installation. It’s crucial to have fireproof materials and heat resistant flooring to ensure the safety and longevity of the wood stove. After thorough research and consultation with experts, I decided to go with a combination of materials.

Firstly, I installed a heavy-duty fireproof mat directly under the stove to protect the floor from stray embers or hot ashes. This mat is made from a durable and heat resistant material that can withstand high temperatures.

Additionally, I placed ceramic tiles around the stove area, as they’re known for their heat resistance properties. These tiles not only protect the floor but also add a decorative touch to the installation.

With the floor protection in place, I could confidently move on to installing the stovepipe and chimney.

Advertisement

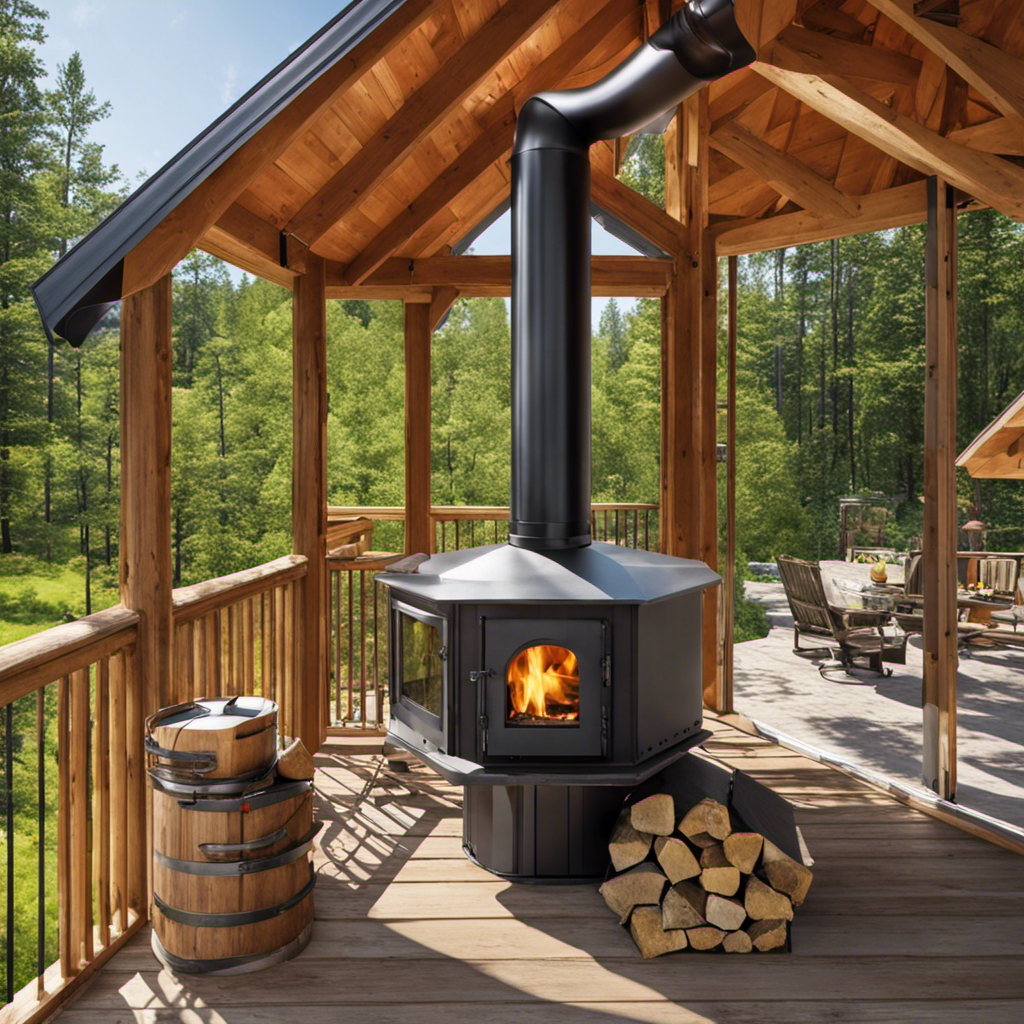
Installing the Stovepipe and Chimney

Attaching the stovepipe to the wood stove was straightforward and required a few simple steps. First, I made sure the stovepipe was the correct size and material for my wood stove. Then, I positioned the stovepipe collar on top of the stove and secured it in place with screws.

Next, I connected the first section of stovepipe to the collar, ensuring a tight fit by twisting the sections together. I repeated this process with additional sections, making sure to align the seams properly for a secure connection.

Once the stovepipe was installed, I turned my attention to chimney maintenance. I inspected the chimney for any signs of damage or blockages, such as creosote buildup or animal nests. I cleaned the chimney thoroughly using a chimney brush and removed any obstructions. It’s important to regularly clean the chimney to prevent the buildup of creosote, which can lead to chimney fires. Additionally, I checked the chimney cap to ensure it was secure and in good condition.

With the stovepipe and chimney properly installed and maintained, I was ready to move on to the next step: connecting the stove to the chimney.

Connecting the Stove to the Chimney

To connect the stove to the chimney, start by ensuring that the stove and chimney are positioned correctly and securely.

Advertisement

Next, attach the stovepipe to the flue collar on the stove, making sure it’s tightly sealed.

Proper Chimney Installation

Installing a chimney liner is crucial for proper ventilation and safety when using a wood stove. A chimney liner helps to protect the masonry of the chimney from the corrosive byproducts of combustion, improves draft, and prevents the risk of fire.

Here are the steps to properly install a chimney liner:

  • Measure the length of the chimney and select a liner that fits the dimensions.
  • Clean the chimney thoroughly to remove any debris or creosote buildup.
  • Insert the liner into the chimney, starting from the top and working your way down.
  • Connect the liner to the stove using a connector pipe.
  • Secure the liner in place using clamps or screws.
  • Insulate the liner to prevent condensation and improve efficiency.
  • Test the stove to ensure proper ventilation and draft.

Venting Requirements and Regulations

Now that we’ve discussed the proper chimney installation, let’s move on to the next important aspect of installing a wood stove: venting requirements and regulations.

It’s crucial to understand and comply with the venting regulations set by local building codes and fire safety regulations to ensure the safe and efficient operation of your wood stove.

  1. Determine the venting system: Choose between a single-wall or double-wall stove pipe. Double-wall pipes provide better insulation and reduce the risk of heat transfer to combustible materials.

  2. Clearances: Maintain proper clearances between the stove and any combustible materials, such as walls and ceilings. Follow the manufacturer’s instructions to determine the required clearances.

  3. Chimney height: The chimney must extend above the roofline to prevent downdrafts and ensure proper draft.

  4. Chimney liners: Depending on the local regulations, you may need to install a chimney liner to improve safety and efficiency.

Safety Considerations for Connection

I must prioritize safety when connecting the venting system for my wood stove. To ensure a secure and efficient installation, I follow these steps:

Advertisement
  • Use fireproof materials: It’s crucial to use fire-resistant materials, such as stainless steel or double-wall insulated pipes, for the venting system. This helps prevent the risk of fire and ensures durability.

  • Seek professional installation: Installing a wood stove venting system requires expertise to ensure proper connections and adherence to local regulations. Hiring a professional ensures a safe and compliant installation.

  • Inspect for leaks and blockages: After connecting the venting system, carefully inspect for any leaks or blockages. Ensure that all joints are tightly sealed and free from debris, as this can affect the stove’s performance and pose a safety hazard.

Ensuring Proper Ventilation

To ensure proper ventilation, I’ll need to make sure that the wood stove is positioned at least 36 inches away from any combustible materials. This is crucial for the safe operation of the stove and to prevent the risk of fires.

Here are the steps to ensure proper ventilation for your wood stove installation.

  1. Choose a suitable location: Select a spot in your home that allows for proper airflow and is away from any flammable materials like curtains or furniture. Make sure there’s enough space around the stove for easy access during maintenance and cleaning.

  2. Install a chimney: A chimney is essential for venting out the smoke and gases produced by the wood stove. It should be properly insulated and extend above the roofline to prevent downdrafts. Regular maintenance of the chimney is necessary to avoid blockages and ensure proper airflow.

  3. Use proper ventilation pipes: Connect the wood stove to the chimney using ventilation pipes. These pipes should be made of heat-resistant materials, such as stainless steel, and properly sealed to prevent any leaks. Ensure that the pipes are installed at the correct angle to promote the upward flow of smoke.

  4. Maintain the ventilation system: Regularly inspect and clean the chimney and ventilation pipes to remove any creosote buildup or debris that can obstruct airflow. This will help prevent common issues such as poor draft or smoke leakage.

Implementing Safety Precautions

Properly positioning the wood stove and maintaining a safe distance from combustible materials is essential for ensuring the safety of the installation. When installing a wood stove, it’s important to follow certain safety precautions to minimize the risk of fire and carbon monoxide poisoning.

Here are some steps to implement these precautions:

  • Place the wood stove at least three feet away from any combustible materials, such as furniture, curtains, or walls. This will reduce the risk of fire and prevent overheating of nearby objects.

  • Install a carbon monoxide detector near the wood stove to monitor the levels of this colorless and odorless gas. Carbon monoxide can be produced by incomplete combustion and is extremely dangerous. The detector will alert you if high levels of carbon monoxide are present in the room.

  • Ensure that you’ve a fire extinguisher nearby. In the event of a fire, you need to be able to quickly access a fire extinguisher to control the flames and prevent the fire from spreading.

Frequently Asked Questions

Can I Install a Wood Stove in a Mobile Home or Rv?

Yes, you can install a wood stove in a mobile home or RV. It’s important to consider wood stove maintenance to ensure safe and efficient operation.

Advertisement

The benefits of using a wood stove in a mobile home or RV include providing a reliable heat source, reducing energy costs, and creating a cozy atmosphere. However, it’s crucial to follow proper installation guidelines and consult with professionals to ensure proper ventilation, fire safety, and compliance with local regulations.

How Often Should I Clean the Chimney and Stovepipe?

Cleaning the chimney and stovepipe is an essential maintenance task for wood stove owners. Regular cleaning helps prevent chimney fires and ensures proper airflow.

The frequency of cleaning depends on factors such as the type of wood used and the frequency of stove usage. As a general rule, it’s recommended to clean the chimney and stovepipe at least once a year. However, if you notice excessive creosote buildup or reduced stove performance, it may be necessary to clean more frequently.

What Type of Wood Should I Use as Fuel for My Wood Stove?

When it comes to choosing the right wood for your wood stove, there are a few factors to consider.

Hardwoods like oak, maple, and ash are ideal for burning in a wood stove. They burn hotter and longer, providing more heat and requiring less frequent fueling.

Advertisement

Softwoods like pine and fir can be used, but they burn faster and produce less heat.

It’s important to properly season the wood before burning and to avoid using treated or painted wood, as they can release harmful chemicals when burned.

Can I Install a Wood Stove on a Second-Floor or Higher Level of a Building?

Installing a wood stove on upper levels can be a complex task. Safety considerations are paramount, as the weight of the stove and chimney must be properly supported. Consult with a professional to ensure the floor can handle the load and that proper clearances are maintained.

Additionally, a masonry or metal fireproof pad should be installed to protect the floor. Adequate ventilation is crucial to prevent carbon monoxide buildup. Hiring a certified installer is recommended for a successful and safe installation.

Are There Any Building Codes or Regulations I Need to Follow When Installing a Wood Stove?

When it comes to installing a wood stove, it’s important to follow building code requirements and safety regulations. These regulations ensure that the installation is done correctly and safely. Building codes typically outline specific guidelines for things like clearance distances, ventilation, and chimney installation.

Advertisement

Safety regulations may include requirements for fireproof materials and proper insulation. By adhering to these codes and regulations, you can ensure that your wood stove installation is up to standard and reduces the risk of accidents or damage.

Conclusion

In conclusion, installing a wood stove requires careful consideration and proper execution to ensure safety and efficiency. According to a survey conducted by the National Fire Protection Association, wood stoves are responsible for approximately 36% of residential fires caused by heating equipment.

By following the step-by-step instructions outlined in this article and implementing necessary safety precautions, homeowners can enjoy the warmth and beauty of a wood stove while minimizing the risk of fire hazards.

Logan’s affair with adventure began in childhood. He hailed from a small town where vast forests bordered one side and endless shores stretched on the other. His days were spent exploring uncharted woods, climbing tall trees, or listening to the tales of old sailors. This early immersion in a world brimming with stories and mysteries became the foundation of his passion for writing.

Continue Reading
Advertisement

Wood Stove

What Happens When Aluminum Is Put A Wood Stove

Published

on

By

An image showcasing the mesmerizing transformation of aluminum inside a wood stove

When I throw a thin aluminum strip into the powerful flames of my wood-burning stove, a captivating chemical reaction takes place right before my eyes. In this article, I will explore the scientific principles that can help us understand this mesmerizing phenomenon.

By exploring the thermal properties of aluminum, the combustion and oxidation processes, and the impact on the stove’s efficiency, we can uncover the intricate mechanisms at play.

However, we must also consider safety precautions when experimenting with this fiery interaction.

Let’s delve into the captivating world of aluminum and wood stove combustion.

Key Takeaways

  • Aluminum undergoes oxidation when exposed to oxygen in the air, and the intense heat in a wood stove accelerates this process.
  • The chemical reaction between aluminum and oxygen produces aluminum oxide, and the high temperature in the wood stove provides the energy for the reaction.
  • Aluminum has high thermal conductivity and is commonly used in industries like automotive, aerospace, and electronics for efficient heat transfer.
  • Using aluminum foil in a wood stove reflects heat back into the firebox, improves combustion, reduces energy consumption, helps distribute heat evenly, and can lower fuel consumption.

The Science Behind the Reaction

I can explain the science behind the reaction between aluminum and a wood stove.

When aluminum is put in a wood stove, a chemical reaction occurs due to the intense heat. Aluminum is a highly reactive metal, and when it comes into contact with oxygen in the air, it undergoes oxidation. The heat from the wood stove accelerates this process, causing the aluminum to react even more rapidly.

Advertisement

This chemical reaction produces aluminum oxide, which is a compound of aluminum and oxygen. The heat transfer in this reaction is significant, as the high temperature of the wood stove provides the energy needed for the reaction to take place.

Overall, the combination of the chemical reaction and heat transfer results in the aluminum undergoing a transformation in the wood stove.

Thermal Properties of Aluminum

Although aluminum is a metal, it has impressive thermal conductivity properties that make it an excellent choice for various heat transfer applications. The conductivity of aluminum is one of the highest among all metals, allowing it to efficiently transfer heat from one area to another. This is due to its crystal structure, which allows for the easy movement of heat-carrying electrons. Additionally, aluminum has a relatively low melting point of 660 degrees Celsius, making it suitable for applications where high temperatures are involved.

The high thermal conductivity of aluminum makes it particularly useful in industries such as automotive, aerospace, and electronics, where efficient heat transfer is crucial for optimal performance. In heat exchangers, for example, aluminum is commonly used as it can quickly absorb and distribute heat, ensuring efficient cooling. Similarly, in electronic devices, aluminum is often used as a heat sink material to dissipate excess heat generated by components.

Combustion and Oxidation Processes

The combustion of wood in a stove releases heat and carbon dioxide as byproducts. This process is driven by chemical reactions between the wood and oxygen in the air.

Advertisement

The heat generated during combustion is transferred to the surrounding environment through conduction, convection, and radiation. Chemical reactions occur when the wood is exposed to high temperatures, causing it to decompose into various volatile gases, such as methane, carbon monoxide, and hydrogen. These gases then react with oxygen to produce carbon dioxide and water vapor.

The heat transfer in a wood stove is primarily through convection, where hot gases rise and escape through the chimney, while cooler air is drawn in to replace it. This continuous cycle ensures efficient heat transfer and a steady supply of oxygen for the combustion process.

Impact on the Wood Stove’s Efficiency

Using aluminum foil in a wood stove can improve its efficiency, as it reflects heat back into the firebox. This simple technique can have a significant impact on heat distribution and energy consumption. Here are five reasons why using aluminum foil in a wood stove is beneficial:

Safety Considerations and Precautions

I take adequate safety precautions and carefully follow guidelines to ensure my well-being when using aluminum foil in my wood stove. Ventilation requirements are crucial when using aluminum foil as it can release toxic fumes if heated to high temperatures without proper airflow. It’s essential to ensure that the wood stove is properly vented to prevent the accumulation of harmful gases.

Additionally, handling and disposal of aluminum residue should be done with caution. Aluminum foil remnants should be cool before handling to avoid burns. Proper disposal methods should be followed, such as recycling the foil or disposing of it in designated waste bins.

Advertisement

Frequently Asked Questions

How Long Does It Take for Aluminum to Completely Burn in a Wood Stove?

The burn time for aluminum in a wood stove depends on various factors such as temperature and airflow. It can take anywhere from a few minutes to several hours for aluminum to completely burn. However, this process can release harmful emissions and negatively impact air quality.

Will Putting Aluminum in a Wood Stove Release Any Harmful Gases?

When aluminum is burned in a wood stove, it can release toxic fumes. The environmental impacts of this process include the emission of harmful gases and the potential for air pollution.

Can the Combustion of Aluminum in a Wood Stove Damage the Stove’s Interior?

The combustion of aluminum in a wood stove can potentially damage the stove’s interior and affect its performance. This is because the high heat generated during the combustion process can cause the aluminum to melt or warp, posing a fire hazard.

Is It Possible to Recycle the Aluminum Ash Left Behind After Burning It in a Wood Stove?

Recycling aluminum ash is possible, but the environmental impact of aluminum combustion must be considered. As an active participant in the process, I can tell you that proper recycling methods should be followed to reduce waste and promote sustainability.

What Are the Potential Risks of Using Aluminum in a Wood Stove, Both to the Stove Itself and to the Surrounding Environment?

Potential health hazards and environmental impact should be considered when using aluminum in a wood stove. The stove’s integrity may be compromised, leading to safety issues, and aluminum ash can release harmful toxins into the air, soil, and water.

Advertisement

Conclusion

In conclusion, when aluminum is put in a wood stove, it undergoes a combustion and oxidation process due to the high temperature. This reaction releases heat and produces aluminum oxide, which can impact the efficiency of the wood stove.

It’s important to consider safety precautions when introducing aluminum into a wood stove. Interestingly, the combustion of aluminum releases approximately 31,000 BTUs per pound, providing a visual representation of its potential energy output.

Continue Reading

Wood Stove

What Is The Twistable Knob On A Wood Stove For

Published

on

By

An image capturing the intricate details of a wood stove's twistable knob, showcasing its position on the stove, its textured grip, and the engraved temperature scale, enticing readers to learn about its purpose in our blog post

If you are the owner of a wood stove, have you ever questioned the function of the twistable knob?

Well, prepare to have your curiosity stoked. The twistable knob on a wood stove is like the conductor of an orchestra, controlling the airflow and ultimately the temperature inside your stove.

It’s a crucial instrument for achieving optimal heating efficiency. In this article, I will guide you through the purpose, function, and troubleshooting of this mysterious knob, ensuring you can make the most of your wood stove experience.

Key Takeaways

  • The twistable knob on a wood stove controls airflow and heat output by adjusting the amount of oxygen entering the combustion chamber.
  • It is connected to a damper that regulates air intake, opening the damper increases airflow and fire intensity, while closing it reduces airflow and fire intensity.
  • Turning the twistable knob counterclockwise increases the temperature, while turning it clockwise decreases the temperature.
  • Regular maintenance, including cleaning and lubrication, is necessary for proper functionality and optimizing the stove’s performance.

Understanding the Purpose of the Twistable Knob

I’m still not sure about the purpose of the twistable knob on a wood stove, but understanding its function seems crucial.

The twistable knob on a wood stove serves a vital role in controlling the airflow and heat output of the stove. It’s usually located on the front or side of the stove and can be easily adjusted to regulate the amount of oxygen that enters the combustion chamber. By turning the knob, you can increase or decrease the intensity of the fire, thus controlling the temperature inside the stove.

This feature is particularly useful for achieving optimal efficiency and preventing overheating. Different types of wood stove twistable knobs may include air intake knobs, damper knobs, and secondary air control knobs, each with their specific functions.

Advertisement

Proper maintenance and cleaning of wood stoves, including regular inspection and lubrication of the twistable knob, are essential to ensure its smooth operation and longevity.

How the Twistable Knob Controls Airflow

The twistable knob on a wood stove controls the airflow, allowing me to adjust the intensity of the fire. Understanding the mechanics of this twistable knob is essential to effectively control the combustion process in a wood stove.

The knob is connected to a damper, which regulates the amount of air that enters the stove. By twisting the knob, I can open or close the damper, thereby controlling the amount of oxygen that reaches the fire. Increasing the airflow by opening the damper will result in a more intense fire, while reducing the airflow by closing the damper will decrease the intensity.

This adjustment is crucial as it directly affects the combustion process. By managing the airflow, I can ensure efficient and clean burning, optimizing the stove’s performance.

Adjusting the Twistable Knob for Temperature Control

I can adjust the twistable knob by turning it counterclockwise to increase the temperature, or by turning it clockwise to decrease the temperature. The twistable knob is a crucial component of a wood stove as it allows me to control the amount of air reaching the fire, thus regulating the temperature. To ensure proper functionality and longevity of the twistable knob, regular maintenance is necessary. This includes checking for any debris or obstructions that may hinder its movement and cleaning it with a soft cloth. It’s also important to be aware of the different types of twistable knobs available. Some may have a simple design with arrows indicating the direction for temperature adjustment, while others may have numerical values for precise temperature control. Understanding the specific type of twistable knob on my wood stove will help me effectively adjust the temperature and maintain optimal performance.

Advertisement
Types of Twistable Knobs
Simple Design
Numerical Adjustment
Color-Coded
Digital Display
Multi-Function

The Importance of Properly Using the Twistable Knob

To effectively control the temperature of the wood stove, it’s crucial to properly turn and adjust the twistable knob.

The twistable knob on a wood stove is designed to regulate the airflow and therefore the heat output of the stove. It’s important to understand the mechanics of the knob and how it affects the stove’s performance.

Proper maintenance of the twistable knob is essential to ensure its smooth operation and prevent any malfunctions. Regular cleaning and lubrication are recommended to keep it functioning optimally.

Safety precautions must also be taken when handling the twistable knob. Always make sure to turn off the stove before adjusting the knob to avoid any accidents or burns.

Additionally, it’s important to be aware of the temperature range indicated on the knob and not exceed the recommended limits to prevent overheating or damage to the stove.

Advertisement

Troubleshooting Common Issues With the Twistable Knob

I’ve encountered several common issues with the twistable knob, such as it getting stuck or not turning smoothly. When faced with these problems, it’s essential to utilize troubleshooting techniques to address the issue effectively.

One common cause of a stuck twistable knob is the accumulation of debris or ash around the knob’s base. To resolve this, I recommend performing regular maintenance by cleaning the area around the knob using a soft brush or cloth.

Additionally, lubricating the knob’s mechanism with a high-quality graphite lubricant can improve its smooth operation. If the knob still refuses to turn smoothly, there might be a problem with the internal mechanism. In such cases, it’s advisable to seek professional assistance to avoid further damage.

Frequently Asked Questions

How Often Should I Adjust the Twistable Knob on My Wood Stove?

I adjust the twistable knob on my wood stove periodically to optimize heating efficiency. Cleaning the knob regularly ensures it functions properly. The twistable knob controls the airflow, allowing me to regulate the heat output of the stove.

Can I Use the Twistable Knob to Control the Intensity of the Fire?

Yes, the twistable knob on a wood stove can be used to control the intensity of the fire. By adjusting the knob, you can increase or decrease the amount of airflow to regulate the heat output.

Advertisement

What Happens if I Accidentally Break the Twistable Knob?

If the twistable knob on a wood stove is accidentally broken, it can be replaced. However, it is important to troubleshoot common issues with the knob first, such as checking for any debris or obstructions.

Is It Necessary to Have the Twistable Knob on a Wood Stove?

I wouldn’t dream of having a wood stove without the twistable knob. It’s absolutely necessary for controlling the airflow and regulating the temperature. Let me explain how this genius invention works.

Can the Twistable Knob Be Used to Control the Amount of Smoke Emitted From the Wood Stove?

Yes, the twistable knob on a wood stove can be used to control the amount of smoke emitted. By adjusting the knob, you can regulate the fire intensity, which directly affects the smoke production.

Does the Twistable Knob on a Wood Stove Affect the Amount of Ash Produced?

The twistable knob on a wood stove can indeed influence the amount of ash produced. By adjusting the knob, users can regulate the airflow and control the combustion process. Proper adjustment helps optimize burning efficiency and minimize excessive ash buildup in wood stoves, ensuring cleaner and more efficient heating.

Is a Catalytic or Non-Catalytic Wood Stove Better for Controlling Heat Output?

When it comes to controlling heat output, the choice between catalytic and non-catalytic wood stoves is a key factor. Catalytic vs non-catalytic wood stoves differ in their combustion process. Catalytic stoves use a catalyst to burn off smoke at lower temperatures, providing efficient and consistent heat. Non-catalytic stoves, on the other hand, provide a quicker and easier start-up but may have less precise heat control. Ultimately, the decision between the two depends on personal preferences and specific heating needs.

Advertisement

Conclusion

In conclusion, the twistable knob on a wood stove plays a crucial role in controlling the airflow and temperature within the stove. It acts as a metaphorical compass, guiding the user towards achieving the desired warmth and efficiency.

Just like a captain navigating through rough seas, understanding how to properly adjust and utilize the twistable knob is essential for a smooth and enjoyable wood stove experience.

So, remember to pay attention to this small but powerful tool to make the most out of your wood stove.

Continue Reading

Wood Stove

How To Remove Hearthstone Tribute Wood Stove Secondary Air Manifold

Published

on

By

An image that showcases the step-by-step process of detaching and removing the secondary air manifold from a Hearthstone Tribute Wood Stove

I’ve always enjoyed basking in the warm glow of my Hearthstone Tribute wood stove.

But recently, I noticed a decrease in its efficiency.

After some investigation, I discovered that the secondary air manifold might be clogged.

In this article, I’ll guide you through the process of removing the manifold, cleaning it, and inspecting for any issues.

By the end, your wood stove will be back to its optimal performance, keeping you cozy all winter long.

Advertisement

Key Takeaways

  • Prepare the stove by cleaning it thoroughly and disconnecting power sources
  • Use penetrating oil to loosen stuck or corroded bolts before removing the secondary air manifold
  • Regularly clean and inspect the manifold for debris, soot buildup, cracks, and leaks
  • When reinstalling the manifold, ensure the mating surfaces are clean, use a new gasket, and tighten the bolts evenly for a tight seal

Checking the Tools and Materials Needed

I need to make sure I’ve all the tools and materials required before starting the project. Safety precautions are essential when working with any heating appliance, so I’ll need safety goggles, gloves, and a dust mask to protect myself from any potential hazards.

Troubleshooting common issues may also require additional tools such as a flashlight, a screwdriver set, and pliers. It’s crucial to have these tools readily available to address any unexpected problems that may arise during the removal process.

Additionally, I’ll need to gather the necessary materials, including a new secondary air manifold, high-temperature silicone sealant, and a wire brush for cleaning.

Preparing the Stove for Manifold Removal

Before starting the removal process, it’s important to carefully clean the stove and disconnect the necessary components. This will ensure a smooth and efficient removal of the Hearthstone Tribute Wood Stove Secondary Air Manifold.

Here are a few key steps to follow when preparing the stove for removal:

  • Clean the stove thoroughly, removing any ash or debris that may have accumulated. This will prevent any dirt from entering the components during removal.

  • Disconnect the stove from any power sources and shut off the gas supply if applicable. Safety should always be the top priority when working with any appliance.

  • Troubleshoot common issues that may arise during removal, such as stuck or corroded bolts. Using penetrating oil and carefully applying pressure can help loosen stubborn parts.

Removing the Secondary Air Manifold

To successfully remove the secondary air manifold, carefully unscrew the bolts from the stove and gently slide it out from underneath the stove’s top plate.

Advertisement

The Hearthstone Tribute Wood Stove is a reliable and efficient heating source, but like any appliance, it may encounter common issues over time. Troubleshooting these issues is essential to ensure proper functioning.

Some common problems with the wood stove’s secondary air manifold include clogging and restricted airflow. Regular maintenance is key to maintaining the efficiency of the secondary air manifold.

It’s recommended to clean the manifold regularly by removing any buildup or debris. Additionally, checking for any leaks or cracks in the manifold and replacing damaged parts will help optimize its performance.

Cleaning and Inspecting the Manifold

The best way to ensure proper functioning of the secondary air manifold is to regularly clean and inspect it for any clogging or damage. The manifold plays a crucial role in the efficient operation of the wood stove, so it’s important to keep it in good condition.

Here are some key points to consider when inspecting the manifold:

Advertisement
  • Look for any signs of clogging, such as debris or soot buildup. A clogged manifold can restrict airflow and hinder the stove’s performance.

  • Check for any damage, such as cracks or leaks. These can lead to air leakage and affect the stove’s ability to generate heat.

  • Troubleshoot common issues, such as a misaligned or loose manifold. These problems can be easily fixed by adjusting or tightening the manifold.

Reinstalling the Secondary Air Manifold

After inspecting the secondary air manifold, I’ll reinstall it using a gasket and then secure it with bolts. When reinstalling the secondary air manifold, it’s important to ensure a proper seal to prevent any air leaks.

Start by cleaning the mating surfaces of the manifold and the stove body to remove any debris or old gasket material. Then, place a new gasket onto the manifold and align it with the bolt holes on the stove body. Carefully lower the manifold into position, making sure the gasket remains in place.

Once aligned, secure the manifold with the bolts, tightening them evenly to ensure a tight seal. Finally, check for any signs of air leaks and troubleshoot common issues such as loose bolts or a damaged gasket.

Frequently Asked Questions

How Long Does It Typically Take to Remove the Secondary Air Manifold From a Hearthstone Tribute Wood Stove?

Typically, it takes me about 15 minutes to remove the secondary air manifold from my Hearthstone Tribute wood stove. It’s a simple process that involves a few screws and careful maneuvering.

Can the Secondary Air Manifold Be Cleaned Without Removing It From the Stove?

Yes, the secondary air manifold can be cleaned without removing it from the stove. Regular maintenance and cleaning techniques for other parts of the wood stove are essential for optimal stove performance.

Advertisement

Is It Necessary to Inspect the Manifold for Any Specific Issues During the Cleaning Process?

Inspecting the manifold for specific issues during the cleaning process is necessary. Regularly inspecting the manifold is important to ensure its proper functioning and to identify any potential problems that may arise.

Are There Any Recommended Cleaning Agents or Solutions That Should Be Used When Cleaning the Secondary Air Manifold?

When cleaning the secondary air manifold of a Hearthstone Tribute Wood Stove, it is important to use recommended cleaning agents and follow the best cleaning techniques. This ensures a thorough and effective cleaning process.

Are There Any Common Mistakes to Avoid When Reinstalling the Secondary Air Manifold?

When reinstalling the secondary air manifold, it’s important to avoid common mistakes. One tip is to ensure a secure fit by tightening the screws evenly. Another is to double-check all connections for any leaks or gaps.

What is the Best Method to Remove Gunk from Wood Stove Windows?

When it comes to removing gunk from wood stove windows, there are several effective methods. One of the best approaches is to use a combination of vinegar and water. Simply mix equal parts of vinegar and water, apply the solution to the gunk, and let it sit for a few minutes. Then, scrub the residue off with a soft cloth or sponge. This method is not only affordable but also environmentally friendly.

Conclusion

After carefully removing and cleaning the secondary air manifold from your Hearthstone Tribute wood stove, you can reinstall it to ensure optimal performance.

Advertisement

Just like a conductor guiding an orchestra, the manifold plays a crucial role in directing the flow of air and fuel, enhancing the stove’s efficiency and heat output.

By maintaining and inspecting this component regularly, you can ensure that your wood stove continues to provide warmth and comfort for years to come.

Continue Reading

Trending