Connect with us

Wood Stove

How To Get The Most Heat Out Of A Wood Stove

Published

on

An image showcasing a roaring wood stove engulfed in vibrant orange flames

Were you aware that if a wood stove isn’t utilized properly, as much as 30% of the heat it generates can dissipate into thin air? Ensure you’re not letting that precious warmth slip away!

In this article, I’ll share my expert tips on how to get the most heat out of your wood stove. From understanding efficiency to maximizing airflow, choosing the right wood, and proper maintenance, you’ll learn everything you need to keep your home cozy and warm all winter long.

Key Takeaways

  • Proper insulation, such as firebricks and refractory cement, prevents heat loss and ensures generated heat stays inside the wood stove.
  • Maximizing airflow through regular cleaning and checking for obstructions in the flue or chimney enhances heat output and combustion efficiency.
  • Choosing dry and seasoned wood with lower moisture content improves combustion efficiency and increases heat output.
  • Proper wood stove placement, including placing it closer to the center of the room and using heat shields, optimizes heat distribution and prevents fire hazards.

Understanding Wood Stove Efficiency

How can I improve the efficiency of my wood stove?

One way to increase efficiency is by focusing on wood stove insulation and improving combustion efficiency. Proper insulation is crucial in preventing heat loss and ensuring that the generated heat stays inside the stove. Insulation materials like firebricks and refractory cement can help retain heat and distribute it evenly.

Additionally, improving combustion efficiency can also boost the stove’s efficiency. This can be achieved by using dry and seasoned wood, which burns more efficiently and produces less smoke. It’s also essential to ensure proper airflow by cleaning the stove regularly and checking for any obstructions in the flue or chimney.

By addressing wood stove insulation and improving combustion efficiency, you can maximize the heat output and make your wood stove more efficient overall.

Advertisement

Now, let’s explore how to maximize airflow for optimal heat.

Maximizing Airflow for Optimal Heat

I can increase the heat output of my wood stove by ensuring proper airflow throughout the system. Here are some tips to help you maximize airflow and get the most heat out of your wood stove:

  • Improving insulation for better heat retention: Insulating your stove and chimney can help prevent heat loss and ensure that more heat is directed into your living space.

  • Using a heat powered stove fan for increased airflow: These fans are designed to circulate the warm air produced by your wood stove, distributing it more effectively throughout the room.

  • Keeping the air vents open: Make sure the air vents on your stove are fully open to allow for a steady flow of oxygen, which is essential for efficient combustion and optimal heat output.

  • Cleaning the chimney regularly: A clean chimney ensures proper airflow and prevents the buildup of creosote, which can reduce the efficiency of your stove.

By following these tips, you can enhance the airflow in your wood stove and enjoy a higher heat output.

Now, let’s move on to the next section and discuss the importance of choosing the right wood for maximum heat output.

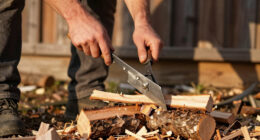
Choosing the Right Wood for Maximum Heat Output

I can optimize the heat output of my wood stove by carefully selecting the type of wood I burn. The wood species I choose and its moisture content have a significant impact on the amount of heat produced. Different wood species have varying levels of density and energy content, which directly affect their heat output. Additionally, the moisture content of the wood greatly influences its combustion efficiency. Wet or green wood contains high moisture levels, which results in a lower heat output as a significant amount of energy is used to evaporate the water. To illustrate the impact of wood species and moisture content on heat output, refer to the table below:

Advertisement
Wood Species Heat Output (BTUs per cord) Moisture Content (%)
Oak 26,000 20%
Pine 18,000 50%
Ash 24,000 15%
Maple 22,000 25%
Birch 20,000 30%

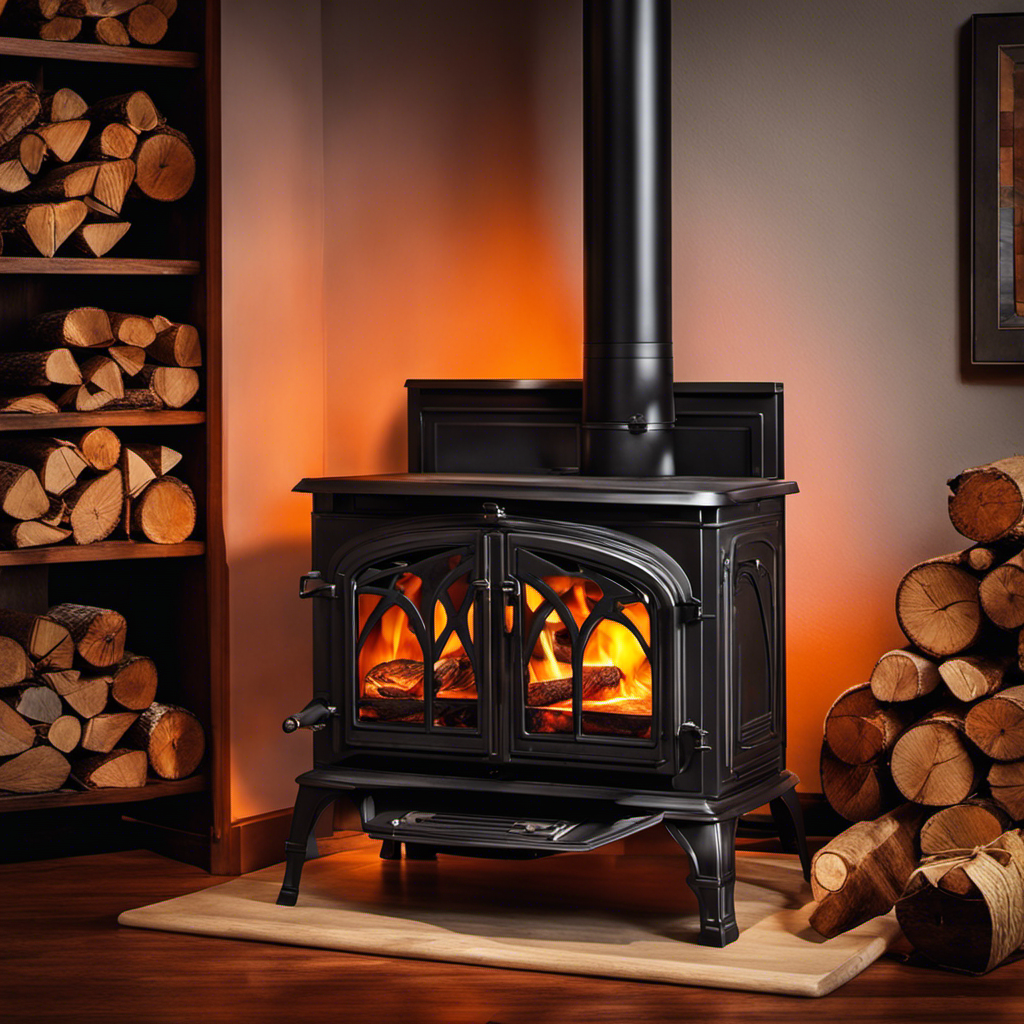
Proper Wood Stove Placement for Heat Distribution

Placing the wood stove closer to the center of the room and using a heat shield can help improve heat distribution. By doing so, you ensure that the warmth radiates evenly throughout the space, maximizing comfort and efficiency.

Here are some wood stove safety precautions and insulating tips to consider:

  • Keep a clear area around the stove to prevent any potential fire hazards.
  • Install a carbon monoxide detector nearby to ensure safe indoor air quality.
  • Use fire-resistant materials, such as a heat shield or ceramic tiles, to protect walls and floors from excessive heat.
  • Insulate your home properly to prevent heat loss and optimize the stove’s performance.

By implementing these measures, you can enjoy a more comfortable and safe wood stove experience while efficiently heating your home.

Now, let’s delve into essential maintenance tips for peak performance.

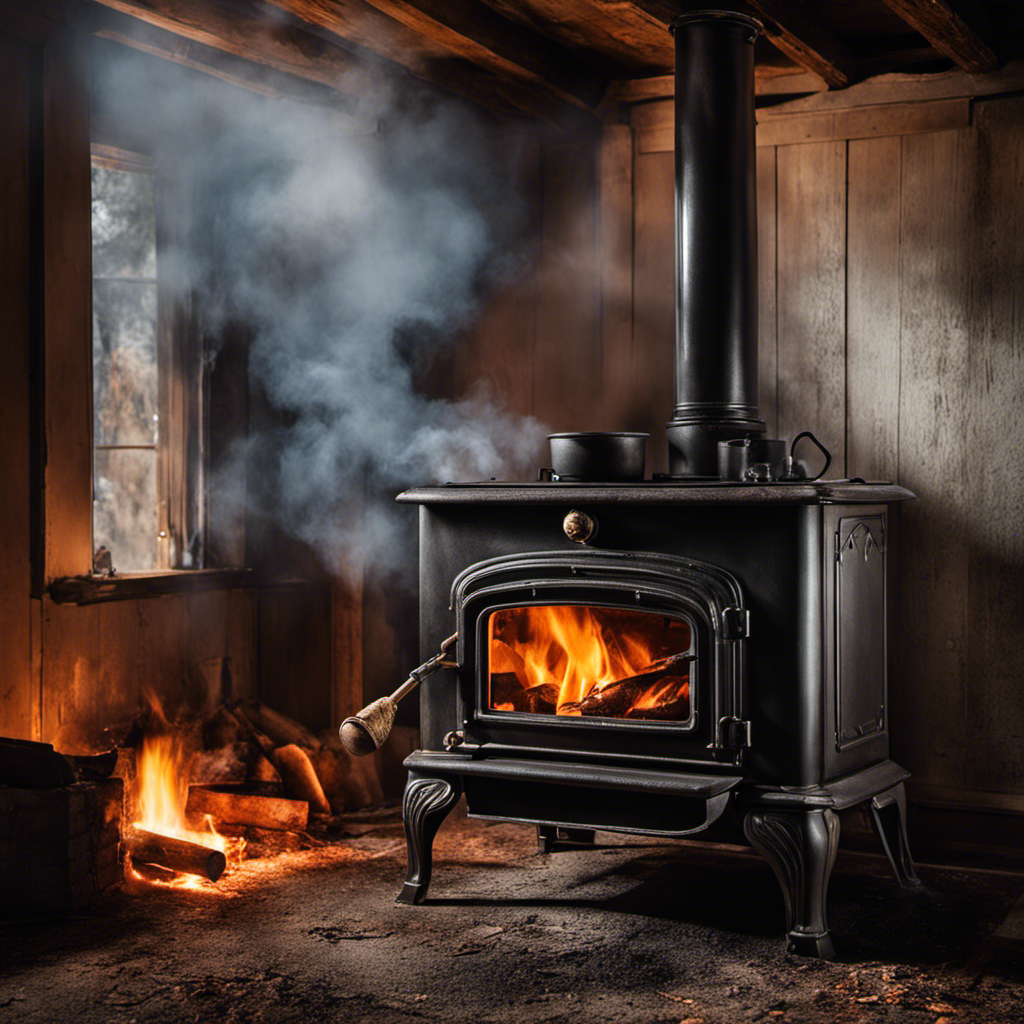
Essential Maintenance Tips for Peak Performance

As I inspect the wood stove, I realize that regular cleaning and proper airflow are crucial for maintaining its peak performance.

Regular cleaning of the wood stove is essential to remove any built-up creosote, ashes, and debris that can block airflow and reduce its efficiency. It’s important to clean the stove’s interior, including the firebox, baffle, and flue, as well as the exterior surfaces.

Advertisement

Additionally, chimney maintenance is vital to ensure proper ventilation and prevent potential hazards. Regular chimney inspections and cleanings are necessary to remove any creosote buildup or blockages that can cause poor airflow or even chimney fires.

Frequently Asked Questions

Can a Wood Stove Be Used as the Primary Source of Heat in a Home?

Yes, a wood stove can be used as the primary source of heat in a home. However, it’s important to consider wood stove efficiency and explore alternative heating options to maximize heat output and minimize energy consumption.

What Are Some Common Mistakes People Make When Using a Wood Stove?

Common mistakes when using a wood stove include neglecting regular maintenance, overloading the stove with wood, and not using proper safety precautions. It’s important to prioritize safety and follow guidelines for optimal heat output.

How Can I Prevent Creosote Buildup in My Wood Stove?

To prevent creosote buildup in my wood stove, regular maintenance is key. Cleaning the chimney, using dry and seasoned wood, and ensuring proper airflow will help maximize heat output and minimize the risk of creosote accumulation.

Is It Necessary to Have a Chimney for a Wood Stove?

No, a chimney is not necessary for a wood stove. There are chimney alternatives available, such as vent pipes or direct vent systems. These chimney-less wood stoves offer benefits like increased efficiency and flexibility in installation.

Advertisement

Are There Any Safety Precautions I Should Take When Using a Wood Stove?

When using a wood stove, it’s important to take safety precautions. Make sure to keep flammable materials away, use a fire-resistant barrier, and install a carbon monoxide detector. Consider alternative heating options for added safety.

Conclusion

So, there you have it, folks. After all this talk about maximizing heat output and efficiency, it turns out that the best way to get the most heat out of a wood stove is to simply avoid using it altogether.

Yes, you heard that right – the secret to getting the most heat is to not use the stove at all. Who’d have thought? But hey, at least now you have some interesting knowledge to share at your next bonfire.

Stay warm, or not, I guess.

Advertisement

Growing up surrounded by the vast beauty of nature, Sierra was always drawn to the call of the wild. While others sought the comfort of the familiar, she ventured out, embracing the unpredictable and finding stories in the heartbeat of nature.   At the epicenter of every remarkable venture lies a dynamic team—a fusion of diverse talents, visions, and passions. The essence of Best Small Wood Stoves is crafted and refined by such a trio: Sierra, Logan, and Terra. Their collective expertise has transformed the platform into a leading authority on small wood stoves, radiating warmth and knowledge in equal measure.

Continue Reading
Advertisement

Wood Stove

What Is The Flue On A Wood Stove

Published

on

By

An image depicting a close-up view of a wood stove, showcasing its flue—a narrow, vertical pipe with a metal cap—rising from the stove's top, releasing a faint trail of smoke into the air

I must confess, the chimney of a wood stove is truly an intriguing component. It’s more than just a simple pipe sticking out, it plays a vital role in ensuring your wood stove operates at its best and most efficient.

In this article, we’ll delve into the ins and outs of wood stove flues, exploring their types, purpose, components, maintenance, and troubleshooting tips.

So buckle up and get ready to become a flue expert!

Key Takeaways

  • The flue on a wood stove is a crucial component that expels harmful gases like carbon monoxide and allows for better airflow and combustion.
  • It helps prevent creosote buildup, which can be a fire hazard.
  • Using a chimney cap on the flue provides additional benefits by preventing rain, debris, and animals from entering the chimney.
  • Regular maintenance, including inspection, cleaning, and clearing obstructions, is essential for safe operation of the wood stove flue.

Types of Flues Commonly Used on Wood Stoves

I’ve heard that there are various types of flues commonly used on wood stoves. When it comes to chimney installation, it’s important to consider the type of flue that will work best for your wood stove.

One option is a clay tile flue liner, which is a popular choice due to its durability and affordability.

Another option is a stainless steel flue liner, which offers increased strength and resistance to corrosion.

Advertisement

Additionally, there are cast-in-place flue liners, which are created by pouring a cement-like mixture into the chimney. These liners provide excellent insulation and can be custom-fit to your chimney.

Ultimately, the type of flue liner you choose will depend on factors such as your budget, the condition of your chimney, and your specific heating needs.

Transitioning into the next section, understanding the different types of flues is essential for grasping the purpose and functionality of a wood stove flue.

The Purpose and Functionality of a Wood Stove Flue

I understand the purpose and functionality of a wood stove flue, as it helps to safely direct the smoke and gases out of the house and into the outdoors. The importance of proper ventilation in wood stove flues can’t be overstated.

Here are four reasons why it’s crucial:

Advertisement
  1. Safety: A well-ventilated flue ensures that harmful gases, like carbon monoxide, are efficiently expelled from the house, preventing potential health hazards.

  2. Efficiency: Proper ventilation allows for better airflow, leading to more efficient combustion and heat production. This results in a more effective and cost-efficient heating system.

  3. Preventing Creosote Buildup: Adequate ventilation helps to minimize the accumulation of creosote, a highly flammable substance that can lead to chimney fires.

  4. Benefits of using a chimney cap on wood stove flues: A chimney cap serves as a protective barrier against rain, snow, and debris, preventing potential damage to the flue and ensuring optimal performance.

Key Components of a Wood Stove Flue System

While discussing the key components of a wood stove flue system, it’s important to consider factors such as the chimney liner, damper, and cap.

The flue installation plays a crucial role in the overall performance and safety of a wood stove. A properly designed flue ensures efficient combustion and effective removal of smoke and gases from the stove.

The chimney liner, usually made of stainless steel or clay tiles, protects the chimney walls from heat and corrosion.

The damper, located at the top of the flue, controls the airflow and helps regulate the temperature inside the stove.

Lastly, the cap prevents rain, debris, and animals from entering the flue.

Advertisement

A well-designed flue system, combined with proper maintenance and regular cleaning, ensures the safe and efficient operation of a wood stove.

How to Properly Maintain and Clean Your Wood Stove Flue

To ensure the safe and efficient operation of your wood stove, it’s crucial to know how to properly maintain and clean your wood stove flue. The flue is an essential component of your wood stove system that helps remove smoke and gases from your home.

Here are four important steps to properly maintain and clean your wood stove flue:

  1. Regular Inspection: Inspect the flue for any signs of damage, such as cracks, loose bricks, or corrosion. These can affect the performance and safety of your wood stove.

  2. Cleaning: Regularly remove creosote buildup from the flue using a chimney brush or hiring a professional chimney sweep. Creosote is highly flammable and can lead to chimney fires if not properly cleaned.

  3. Clearing Obstructions: Ensure that the flue is clear of any debris, bird nests, or other obstructions that can block the airflow.

  4. Professional Inspection: Schedule a professional inspection at least once a year to thoroughly examine the flue system and address any potential issues.

Common Issues and Troubleshooting Tips for Wood Stove Flues

One common issue with wood stove flues is the accumulation of creosote, which can be prevented by regular cleaning and maintenance. Creosote is a highly flammable substance that builds up inside the flue as a result of burning wood. If left untreated, it can lead to chimney fires and pose a serious safety hazard.

To prevent this, it’s important to have a proper wood stove flue installation and to be aware of the signs of a blocked wood stove flue. Signs of a blocked flue include smoke backing up into the room, difficulty in starting or maintaining a fire, and a strong odor of burnt wood or smoke throughout the house.

Advertisement

Regular cleaning and maintenance, such as removing creosote buildup and ensuring proper ventilation, are crucial for the safe and efficient operation of a wood stove.

Frequently Asked Questions

How Do I Choose the Right Size Flue for My Wood Stove?

To choose the right size flue for your wood stove, you’ll need to calculate the flue diameter based on the stove size. Larger stoves require larger flues to ensure proper ventilation and efficient operation.

Can I Install a Wood Stove Flue Myself, or Should I Hire a Professional?

Can I install a wood stove flue myself, or should I hire a professional? It’s crucial to prioritize safety, as common mistakes in wood stove flue installation can lead to fire hazards. Consulting a professional is wise.

Are There Any Safety Precautions I Should Take When Using a Wood Stove Flue?

When using a wood stove flue, it’s important to prioritize safety. Regular flue maintenance and cleaning flue residue are key. Taking precautions like using proper protective gear and ensuring proper ventilation can help prevent potential hazards.

Should I Leave the Flue Open or Closed When the Wood Stove Is Not in Use?

When the wood stove is not in use, it is important to keep the flue closed. This prevents drafts and heat loss, leading to better energy efficiency. Opening the flue can result in wasted energy.

Advertisement

Can I Use the Same Flue for Multiple Wood Stoves in Different Rooms?

Yes, you can use the same flue for multiple wood stoves in different rooms. However, it’s important to choose the right flue materials and maintain cleanliness to ensure proper ventilation and prevent any safety hazards.

How Does the Flue Connect to the Franklin Wood Stove?

The connecting franklin wood stove offers a practical solution for ensuring proper ventilation and efficient heat distribution. By connecting the flue to the Franklin wood stove, it effectively channels the smoke and gases out of the room, while also allowing fresh air to enter. This connection plays a crucial role in maintaining a safe and cozy environment during cold winter nights.

Conclusion

In conclusion, the flue on a wood stove is a crucial component that ensures the safe and efficient operation of the stove. It acts as a chimney, allowing smoke and gases to escape while preventing drafts and keeping the heat inside.

Proper maintenance and regular cleaning of the flue are essential to avoid issues such as creosote buildup and chimney fires. By taking care of your wood stove flue, you can enjoy cozy and worry-free fires all winter long, creating a warm and inviting atmosphere in your home.

Advertisement

Continue Reading

Wood Stove

How To Put Together The Exhaust Pipe Of A Wood Stove

Published

on

By

An image capturing the step-by-step process of assembling the exhaust pipe of a wood stove

I’ve always treasured the cozy hug of a wood-burning stove on a cold winter evening.

But when it came time to put together the exhaust pipe, I felt a bit overwhelmed. How do all these components fit together?

Well, fear not! In this article, I’ll walk you through the step-by-step process of assembling the exhaust pipe for your wood stove.

With a few tools and some patience, you’ll be enjoying that toasty fire in no time.

Key Takeaways

  • Properly attach the flange, position the muffler, and align the tailpipe for correct installation of the exhaust pipe
  • Gather the right size and length of stainless steel pipes, elbows, and adapters for durability and resistance to high temperatures
  • Follow manufacturer’s guidelines and local building codes for preparing the wood stove and avoiding improper sizing or obstructions in the exhaust pipe
  • Connect and secure the exhaust pipe sections using high-temperature silicone sealant, twist-lock or slip-fit joints, and install a chimney cap for proper ventilation and maintenance of airflow

Understanding the Exhaust Pipe Components

I have learned about the three main components of an exhaust pipe: the flange, the muffler, and the tailpipe.

The flange is a flat, circular metal piece that connects the exhaust pipe to the wood stove. It provides a secure attachment point and ensures a proper seal.

Advertisement

The muffler is a cylindrical chamber that’s designed to reduce noise produced by the wood stove. It contains sound-absorbing materials and is attached to the flange.

The tailpipe is the section of the exhaust pipe that extends outside the wood stove. It allows the combustion gases to vent out of the room.

Proper installation techniques for the exhaust pipe involve securely attaching the flange, positioning the muffler correctly, and ensuring that the tailpipe is properly aligned.

Regular maintenance of the wood stove exhaust pipe includes cleaning out any debris or soot buildup and checking for any signs of damage or leaks.

Gathering the Necessary Tools and Materials

After carefully reviewing the instructions, I’m ready to start gathering the necessary tools and materials for assembling the exhaust pipe.

Advertisement

The first step is to choose the right size and length of the pipe. It’s crucial to ensure that the diameter of the exhaust pipe matches the outlet of the wood stove. This ensures proper airflow and efficiency. Additionally, the length of the pipe should be determined based on the distance between the stove and the exterior wall or chimney. It’s important to maintain proper ventilation and clearance for the wood stove.

Next, I’ll gather the necessary materials, such as stainless steel pipes, elbows, and adapters. These materials are durable and resistant to high temperatures.

With the right tools and materials in hand, I can now proceed with the assembly process.

Preparing the Wood Stove for Installation

Before starting the installation process, I need to ensure that the wood stove is properly prepared and ready for installation. The importance of proper ventilation for wood stoves can’t be overstated. Without proper ventilation, the wood stove can produce harmful gases, such as carbon monoxide, which can be extremely dangerous.

To ensure proper ventilation, it’s crucial to follow the manufacturer’s guidelines and local building codes. One common mistake to avoid when installing a wood stove exhaust pipe is improper sizing. The exhaust pipe should be the correct diameter and length to provide adequate airflow and prevent backdraft. Additionally, it’s important to avoid sharp bends or obstructions in the exhaust pipe, as this can restrict airflow and reduce the stove’s efficiency.

Advertisement

Connecting and Securing the Exhaust Pipe Sections

To properly install the wood stove, it’s essential to connect and secure the exhaust pipe sections using the manufacturer’s recommended methods. This ensures a safe and efficient operation of the stove.

Begin by attaching the first section of the exhaust pipe to the flue collar on the stove. Use high-temperature silicone sealant to create an airtight connection.

Then, connect additional sections of the pipe using twist-lock or slip-fit joints, making sure to align the seams properly. Once the pipe is assembled, install the chimney cap to prevent debris and animals from entering.

It’s crucial to maintain proper airflow throughout the exhaust system to avoid backdrafts and ensure optimal performance. Regularly inspect and clean the pipe for any obstructions or creosote buildup.

By following these steps, you can successfully connect and secure the exhaust pipe sections for your wood stove.

Advertisement

Now, let’s move on to testing and troubleshooting the exhaust pipe assembly.

Testing and Troubleshooting the Exhaust Pipe Assembly

I need to test the exhaust pipe assembly for any leaks, so I’ll check all the connections and use a smoke test to ensure everything is sealed properly.

Here are some troubleshooting techniques and common installation mistakes to be aware of:

  1. Improper connection: One of the most common mistakes isn’t properly connecting the exhaust pipe sections. This can lead to leaks and inefficient operation of the wood stove.

  2. Loose fittings: Another issue is having loose fittings. It’s crucial to ensure that all the connections are tight and secure to prevent any air or smoke leakage.

  3. Faulty gaskets: Faulty gaskets can also cause leaks. It’s important to inspect the gaskets and replace them if necessary.

Frequently Asked Questions

How Often Should the Exhaust Pipe of a Wood Stove Be Cleaned?

Cleaning the exhaust pipe of a wood stove is important for proper functioning and safety. It should be done regularly to prevent creosote buildup and reduce the risk of chimney fires.

Can I Use a Different Type of Pipe for the Wood Stove Exhaust?

Yes, you can use a different type of pipe for the wood stove exhaust. It is important to choose alternative pipe materials that are compatible with your specific stove model for proper ventilation and safety.

Advertisement

What Are the Potential Hazards of a Poorly Installed or Damaged Exhaust Pipe?

The potential dangers of a poorly installed or damaged exhaust pipe for a wood stove cannot be underestimated. Proper installation is of utmost importance to prevent hazards such as carbon monoxide poisoning and potential fire outbreaks.

Is It Necessary to Use High-Temperature Sealant When Connecting the Exhaust Pipe Sections?

Using high-temperature sealant when connecting wood stove exhaust pipe sections provides a secure and airtight connection, preventing leaks and improving efficiency. Alternatives like gaskets or tape may not provide the same level of durability and reliability.

How Can I Determine if There Is an Obstruction or Blockage in the Exhaust Pipe?

To troubleshoot exhaust pipe blockages, I check for signs of a blocked exhaust pipe. These signs include reduced airflow, smoke or fumes backing up into the room, and excessive soot or creosote buildup.

Conclusion

In conclusion, assembling the exhaust pipe of a wood stove is like connecting the limbs of a sturdy tree, ensuring a seamless flow of warmth and comfort.

Following the precise steps and using the necessary tools and materials, you can create a secure and efficient exhaust pipe assembly for your wood stove.

Advertisement

Remember to test and troubleshoot the system to ensure optimal performance and a cozy, crackling fire for many winters to come.

Continue Reading

Wood Stove

How To Install A Wood Stove Pipe Through A Metal Roof

Published

on

By

An image showcasing a step-by-step installation guide for a wood stove pipe through a metal roof

Were you aware that over two million homes in the United States depend on wood stoves for heating?

If you’re considering installing a wood stove pipe through your metal roof, you’ve come to the right place.

In this article, I will guide you through the precise steps and materials needed to ensure a safe and efficient installation.

With the right knowledge and tools, you’ll be able to enjoy the warmth and comfort of your wood stove without any worries.

Key Takeaways

  • Measure the opening of the wood stove to determine the appropriate size of the stove pipe.
  • Consider insulation options such as ceramic fiber insulation to minimize heat loss.
  • Prepare the metal roof by inspecting for damage, reinforcing weak areas, and applying a watertight sealant or flashing.
  • Ensure proper sealing and safety measures by inspecting the sealant application, checking the flashing, verifying insulation and clearance requirements, and removing flammable objects.

Choosing the Right Stove Pipe for Your Metal Roof

I’m considering the different options for choosing the right stove pipe for my metal roof. When selecting the correct diameter, it’s important to measure the opening of your wood stove to determine the appropriate size. This will ensure a proper fit and optimal performance.

Additionally, considering insulation options is crucial for maintaining the efficiency of your stove. Insulated stove pipes help to minimize heat loss and improve overall heating efficiency. There are various insulation materials available, such as ceramic fiber insulation, that can be wrapped around the stove pipe to provide extra protection.

Advertisement

Once the appropriate diameter and insulation options have been determined, it’s time to move on to gathering the necessary tools and materials for the installation process.

Gathering the Necessary Tools and Materials

I frequently gather all the tools and materials needed for the wood stove pipe installation process. It’s essential to have the right equipment and supplies to ensure a successful installation. Here are the four items I always make sure to have on hand:

  1. Tape Measure: Accurate measurements are crucial when installing a wood stove pipe. A tape measure allows me to determine the correct length needed for the pipe and ensure a proper fit.

  2. Tin Snips: Cutting the stove pipe to the correct size is necessary for a secure and efficient installation. Tin snips are the perfect tool for this task, allowing me to make precise cuts with ease.

  3. Screwdriver: A screwdriver is essential for securing the stove pipe connections. It ensures a tight fit and prevents any leaks or gaps that could compromise the efficiency of the wood stove.

  4. Chimney Brush: Before installing the stove pipe, it’s crucial to clean the chimney thoroughly. A chimney brush helps remove any built-up creosote and debris, ensuring optimal airflow and preventing potential hazards.

Preparing Your Metal Roof for Installation

Before beginning the installation process, I gather all the necessary tools and materials to prepare my metal roof for the wood stove pipe installation.

First and foremost, I make sure to inspect the roof for any damage or weak areas. If I find any, I reinforce them using roof reinforcement techniques such as adding additional supports or strengthening the structure.

Next, I carefully measure and mark the exact location where the stove pipe will penetrate the roof. Once the location is marked, I use sealing techniques to ensure a watertight seal around the pipe. This typically involves applying a high-quality sealant or flashing around the pipe and securing it tightly to the roof.

Advertisement

Taking these steps not only ensures a secure installation but also protects my home from potential leaks or damage.

Installing the Wood Stove Pipe Through the Metal Roof

To ensure a secure installation, I use a combination of sealant and flashing to tightly secure the wood stove pipe through the metal roof. Here are the steps I follow:

  1. Insulating the wood stove pipe: Before installing it through the metal roof, I make sure to insulate the pipe with high-temperature insulation. This helps prevent heat loss and protects the surrounding materials from excessive heat.

  2. Proper chimney cap installation: I attach a chimney cap on top of the wood stove pipe to prevent rain, debris, and animals from entering the chimney. This ensures the longevity and efficiency of the wood stove.

  3. Sealing the connection points: I carefully seal all the connection points between the wood stove pipe and the metal roof using a high-temperature sealant. This creates a tight and secure seal, preventing any leaks or drafts.

  4. Ensuring proper sealing and safety measures: Once the installation is complete, I thoroughly inspect the sealant and flashing, ensuring that there are no gaps or loose fittings. This ensures proper sealing and safety measures, allowing for safe and efficient operation of the wood stove.

Ensuring Proper Sealing and Safety Measures

After completing the installation, I carefully inspect the sealant and flashing to ensure proper sealing and safety measures.

Sealing techniques are crucial in preventing any leaks and maintaining the integrity of the wood stove pipe installation. I examine the sealant application, making sure it’s evenly distributed and fully covers any gaps or joints.

Additionally, I check the flashing around the pipe to ensure it’s securely fastened and provides a watertight seal.

Advertisement

Fire safety precautions are of utmost importance when installing a wood stove pipe. I verify that the pipe is properly insulated and has the required clearance from combustible materials.

I also ensure that there are no flammable substances or objects near the pipe that could pose a fire hazard.

Frequently Asked Questions

What Are the Common Mistakes to Avoid When Installing a Wood Stove Pipe Through a Metal Roof?

When installing a wood stove pipe through a metal roof, it’s important to avoid common mistakes like improper sealing and flashing, as well as using the incorrect pipe size or placement.

How Often Should I Inspect and Clean My Wood Stove Pipe to Maintain Its Efficiency?

I inspect and clean my wood stove pipe for optimal efficiency every year. To maintain its performance, I use a chimney brush to remove creosote buildup and check for any damage or leaks. Using alternative materials for installation is not recommended.

Can I Install a Wood Stove Pipe Through a Metal Roof if I Have an Attic Space?

Can I safely install a wood stove pipe through a metal roof if I have an attic space? Yes, it is possible to install a wood stove pipe through a metal roof with proper ventilation and clearances to ensure safety and efficiency.

Advertisement

Are There Any Specific Regulations or Codes I Need to Follow When Installing a Wood Stove Pipe Through a Metal Roof?

When installing a wood stove pipe through a metal roof, it is important to follow specific regulations and codes. These ensure a safe and proper installation. I will provide detailed instructions on how to follow these guidelines.

Can I Install a Wood Stove Pipe Through a Metal Roof Myself, or Should I Hire a Professional?

I can install a wood stove pipe through a metal roof myself, but hiring professionals is recommended. They have the expertise to ensure proper installation, adherence to regulations, and minimize the risk of potential issues.

How Can I Fix the Smell Coming from My Wood Stove Pipe?

If an unpleasant wood stove pipe smell is lingering in your home, there are a few solutions to consider. First, check for any leaks or cracks in the pipe and address them promptly. Secondly, ensure proper ventilation to prevent backdrafts. Regularly cleaning the stove pipe using a chimney brush can also minimize odors. Additionally, using seasoned firewood and avoiding burning wet or treated wood can help mitigate the smell.

What is the Cost of Installing a Wood Stove Pipe Through a Metal Roof?

The wood stove installation cost for a wood stove pipe through a metal roof can vary depending on factors such as the type of wood stove, roof material, and the complexity of the installation. It typically ranges between $500 to $1500, considering the specific requirements and labor involved.

Conclusion

In conclusion, installing a wood stove pipe through a metal roof requires careful consideration and the right materials. It’s important to choose the correct stove pipe for your metal roof and gather all necessary tools and materials beforehand.

Advertisement

Taking the time to properly prepare your metal roof and ensuring a secure installation will help prevent any leaks or safety hazards. Did you know that according to a study, a properly installed wood stove can reduce heating costs by up to 30%?

Continue Reading

Trending