Connect with us

Pellet Stoves

How to Clean Wood Pellet Litter

Published

on

An image showcasing the step-by-step process of cleaning wood pellet litter: a sturdy litter scoop sifting through the pellets, a gloved hand pouring water to dissolve clumps, and a clean litter box with fresh pellets

As a pet guardian, I’ve realized the importance of maintaining a clean litter box for my cat, which is vital not only for their well-being but also for the cleanliness of our shared living space. Bearing this in mind, I aim to impart my understanding of the correct method for cleaning wood pellet litter.

In this article, I’ll guide you through the necessary supplies, step-by-step instructions, and even troubleshooting tips. By the end of this article, you’ll have all the information you need to maintain a clean and healthy litter box for your furry friend.

So let’s dive in!

Key Takeaways

  • Wood pellet litter is highly absorbent and effectively controls odor.
  • It is biodegradable and eco-friendly, making it a sustainable choice.
  • Regular cleaning and maintenance of the litter box are essential to prevent odor buildup.
  • Using litter mats or trays can help minimize litter tracking and scatter.

Understanding Wood Pellet Litter

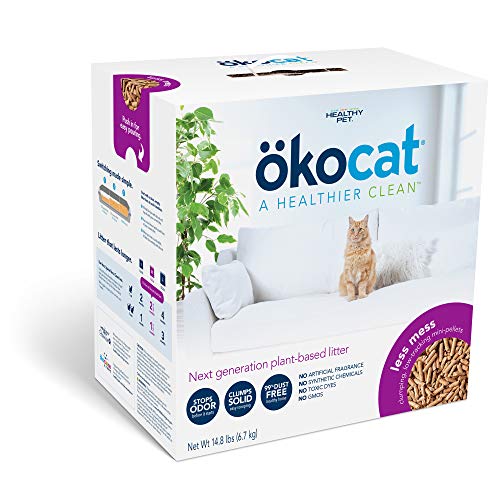
Wood pellet litter is a popular choice for cat owners due to its natural odor control properties. There are different types of wood pellets available, including pine, cedar, and hardwood. Pine pellets are the most common and readily available.

Advertisement

One of the advantages of wood pellet litter is that it absorbs moisture effectively, keeping your cat’s litter box dry and clean. The pellets also help to neutralize odors by trapping ammonia, resulting in a fresher-smelling environment for both you and your furry friend.

Another benefit is that wood pellet litter is biodegradable and environmentally friendly. It can be safely disposed of in compost or used as mulch in your garden.

Now that we understand the benefits of wood pellet litter, let’s move on to gathering the necessary supplies for cleaning it efficiently without causing any mess or hassle.

Gathering the Necessary Supplies

To gather everything you’ll need, make sure you have all the necessary supplies for cleaning up your wood pellet litter. The first item on the list is a litter scoop. This will help you remove any solid waste from the litter box easily.

Next, you’ll need a dustpan and brush to sweep up any stray pellets that may have been tracked outside of the box. A small broom can also come in handy for this task.

Advertisement

Additionally, consider having some disposable gloves on hand to protect your hands from any mess. If you’re looking to choose alternatives to traditional cleaning products, there are eco-friendly options available such as vinegar-based cleaners or enzyme cleaners specifically designed for pet messes.

By gathering these supplies and choosing alternatives that align with your preferences and values, you’ll be well-prepared to tackle the task of cleaning up your wood pellet litter.

Now let’s move on to preparing the litter box…

Preparing the Litter Box

Advertisement

Now, you’ll need to make sure the litter box is properly set up for your cat’s comfort. Here’s what you need to do:

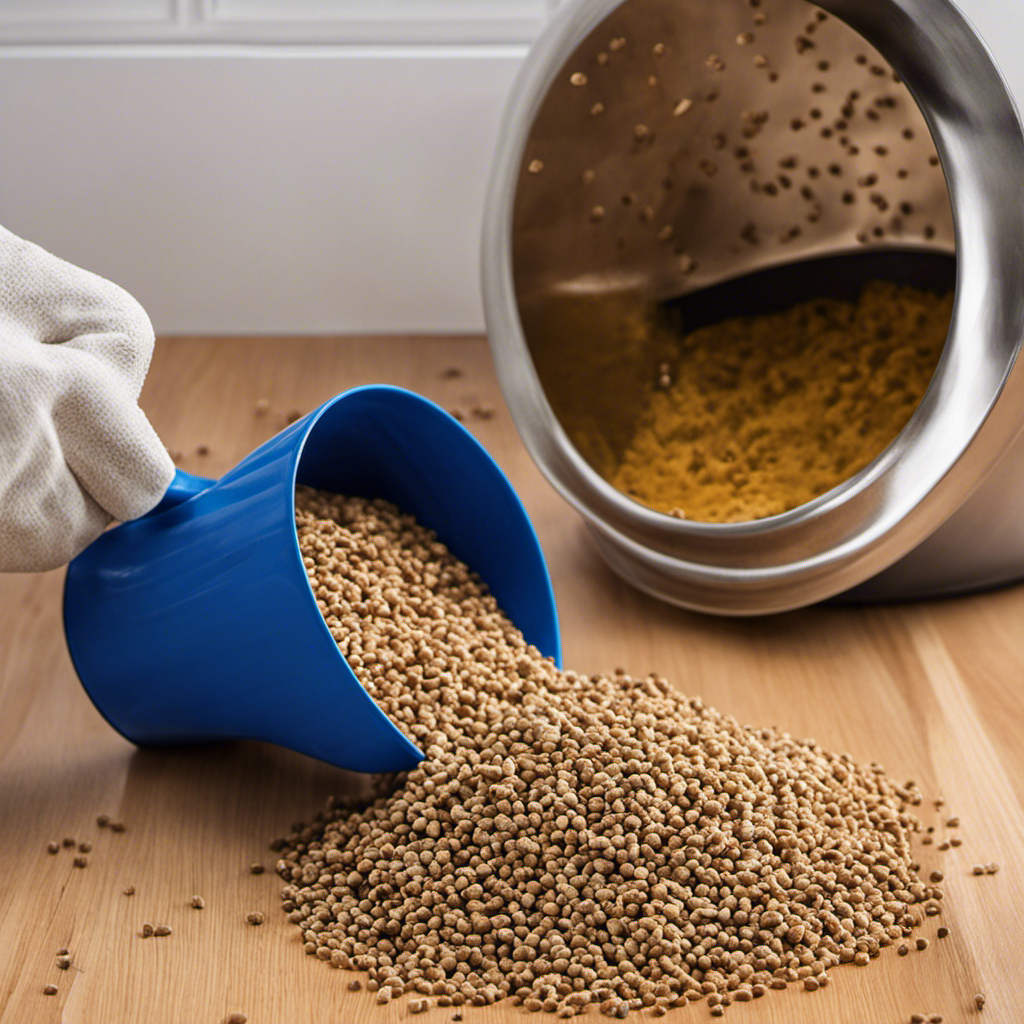
  1. Choose the right wood pellets: When preparing the litter box, it’s important to select wood pellets specifically designed for cats. Look for pellets made from natural, untreated wood that are safe for your feline friend.

  2. Fill the litter box: Start by pouring a layer of wood pellets into the bottom of the litter box. Aim for a depth of around 2-3 inches to provide enough absorbency and odor control.

  3. Spread evenly and fluff: Use a scoop or your hands to spread and fluff the pellets evenly across the surface of the litter box. This helps ensure maximum coverage and effectiveness in absorbing moisture and controlling odors.

By properly preparing the litter box with high-quality wood pellets, you can create a comfortable and hygienic environment for your cat.

Now let’s move on to removing solid waste without any delay.

Removing Solid Waste

When it’s time to clean the litter box, simply scoop out the solid waste using a plastic bag or scooper. Wood pellet litter is great for minimizing waste odor and preventing pellet dust from spreading around the house.

To remove solid waste, hold the bag or scooper over the litter box and carefully scoop up any clumps or feces. Be sure to scrape along the bottom of the box to get all of it. Dispose of the waste in a garbage bag that can be tied securely to prevent any odors from escaping.

Advertisement

Once you have removed all solid waste, you can move on to dealing with urine odor by following these simple steps…

Dealing With Urine Odor

When it comes to dealing with urine odor, there are several effective solutions that can help keep your space smelling fresh.

From using odor control tips to implementing specific products, there are various ways to tackle this issue.

Advertisement

In this discussion, I will provide detailed information on the best practices for odor control and share some effective urine odor solutions that have proven to be successful.

Odor Control Tips

To keep the litter box smelling fresh, it’s important to follow these odor control tips when cleaning wood pellet litter. Wood pellet litter is known for its natural odor elimination properties, but there are a few additional steps you can take to ensure maximum freshness.

One effective method is to mix baking soda into the litter before adding it to the box. Baking soda helps absorb and neutralize odors, keeping them from spreading throughout your home. Another natural alternative is using activated charcoal, which also absorbs unpleasant smells.

Here’s a table summarizing some odor control tips:

Tip Description
Use baking soda Mix it in with the wood pellet litter
Try activated charcoal Place it near the litter box
Clean regularly Scoop out waste daily and change litter weekly

Effective Urine Odor Solutions

Mixing baking soda or activated charcoal with the litter can help neutralize urine odors in the litter box. Here are four effective urine odor solutions that can easily be implemented to prevent unpleasant smells and keep your home smelling fresh:

Advertisement
  1. Add a tablespoon of baking soda to the litter box when you change the litter. Baking soda is known for its odor-absorbing properties and can help eliminate urine odors naturally.

  2. Sprinkle some activated charcoal over the litter. Activated charcoal is highly porous and can effectively absorb and trap odors, including those from urine.

  3. Use scented litter specifically designed to control urine odors. Look for litters with natural odor remedies like lavender or eucalyptus, which not only mask the smell but also provide a pleasant aroma.

  4. Clean the litter box regularly to remove any lingering odor-causing bacteria and trapped urine particles.

By implementing these urine odor prevention techniques, you can ensure a fresh-smelling environment for both you and your furry friend.

Now, let’s move on to addressing stuck or clumped pellets without causing any damage to your wood pellet litter…

Addressing Stuck or Clumped Pellets

If the wood pellets in your litter box are stuck or clumped together, try adding a small amount of water to loosen them.

This is an effective method for maintaining wood pellet litter and ensuring optimal performance.

Wood pellets can sometimes become compacted due to moisture or urine saturation, making it difficult for them to break down properly.

Advertisement

By adding some water, you can help dislodge the stuck or clumped pellets, allowing them to disintegrate and absorb any remaining moisture.

Simply sprinkle a small amount of water over the affected area and gently mix it into the litter.

The pellets will gradually loosen up and resume their original texture.

Once the pellets are loosened, you can proceed with cleaning the litter box by removing any waste and refreshing the litter as needed.

Cleaning the Litter Box

When cleaning the litter box, make sure to remove any waste and replace with fresh litter as needed. Proper litter box maintenance is essential for maintaining a clean and odor-free environment for your feline friend.

Advertisement

To begin, gather all necessary supplies such as gloves, scoop, and trash bag. Start by scooping out solid waste from the litter box using a designated scoop. Dispose of the waste in a plastic bag, tie it securely, and place it in an outdoor trash bin.

Next, inspect the remaining litter for clumps or soiled areas. Remove any clumped or soiled litter using the scoop and dispose of it in the same manner as before.

Finally, refill the litter box with fresh wood pellet litter to maintain a clean and comfortable space for your cat.

Now that we have covered proper cleaning techniques for the litter box, let’s move on to preventing litter tracking without causing any discomfort to your furry companion.

Preventing Litter Tracking

When it comes to minimizing litter scatter and controlling litter trails, there are a few key points to keep in mind.

Advertisement

First, choosing the right type of litter can make a big difference. Opt for clumping litters that are designed to stay put and minimize scatter.

Second, consider using a litter mat or tray to catch any excess litter as your cat exits the box. This will help prevent it from being tracked throughout your home.

Lastly, regular cleaning and maintenance of the litter box is essential in preventing trail as well as keeping your cat happy and healthy.

Minimizing Litter Scatter

To minimize litter scatter, make sure you’re using a high-sided litter box. This type of box helps to contain the litter and prevents it from being kicked out during your cat’s digging activities.

Here are some additional tips to reduce tracking and keep your home cleaner:

Advertisement
  • Place a mat or rug outside the litter box. This will help catch any loose litter on your cat’s paws before they have a chance to spread it around.

  • Regularly sweep or vacuum around the litter box area. By keeping the surrounding area clean, you can prevent scattered litter from being tracked throughout your home.

  • Consider using a litter tray with a lid. These enclosed trays help contain both odors and scatter, providing an additional barrier against tracking.

  • Opt for low-dust or dust-free litters. Dust particles can easily stick to your cat’s paws and contribute to tracking issues.

By following these tips, you can effectively minimize litter scatter and reduce tracking in your home.

Now let’s move on to controlling the trail of scattered litter without disrupting our furry friends’ routines.

Controlling Litter Trail

One way to control the trail of scattered litter is by using a litter mat. A litter mat is designed to trap and contain any loose litter that may be stuck to your cat’s paws as they exit the litter box. Not only does it prevent the spread of litter throughout your home, but it also helps in controlling odor and reducing dust.

By placing a litter mat outside or near the entrance of your cat’s litter box, you create a designated area for them to step on before entering the rest of your living space. The mat’s textured surface captures any loose particles, preventing them from being tracked around. Additionally, some litter mats are equipped with odor-absorbing properties, further controlling unpleasant smells.

Incorporating a high-quality litter mat into your cleaning routine is an effective way to maintain a clean and healthy environment for both you and your feline companion.

Advertisement

Maintaining a Clean and Healthy Environment

Keeping a clean and healthy environment is essential when using wood pellet litter. Not only does it ensure the comfort of your pet, but it also promotes their overall health and well-being.

Here are some important tips to maintain cleanliness and promote pet health:

  • Regularly scoop out solid waste: Remove any feces or clumps from the litter box daily to prevent odor buildup and bacterial growth.
  • Stir the pellets: Gently stir the pellets every day to help distribute moisture evenly and prevent ammonia odors.
  • Replace soiled pellets: As wood pellet litter absorbs liquid, it disintegrates into sawdust. Scoop out the wet sawdust regularly and replace with fresh pellets.
  • Maintain proper ventilation: Ensure that the litter box area has adequate airflow to minimize odors.

By following these practices, you can create a clean and healthy environment for your pet.

Now let’s explore some common troubleshooting issues that may arise when using wood pellet litter.

Troubleshooting Common Issues

When it comes to maintaining a clean and healthy environment for your pet, there are a few common issues that can arise with wood pellet litter.

In this discussion, I will address three key points: pellet clumping solutions, odor control tips, and preventing mold growth.

Advertisement

Pellet Clumping Solutions

There’s a simple solution to the problem of wood pellet litter not clumping. If you’re tired of dealing with messy and non-clumping litter, here are a few tips to help you out:

  1. Add moisture: Wood pellets need moisture to clump properly. Spraying a bit of water on the pellets can encourage them to form firm clumps.

  2. Try different brands: Not all wood pellet litters are created equal. Experiment with different brands until you find one that clumps well for your pet’s needs.

  3. Consider alternative options: If wood pellet litter continues to be an issue, there are alternative litter options available such as clay or silica gel litters that may provide better clumping performance.

Now that we’ve tackled the issue of pellet clumping prevention and explored alternative litter options, let’s move on to some odor control tips without compromising on cleanliness and convenience.

Odor Control Tips

When it comes to cleaning wood pellet litter, one important aspect to consider is odor control. No one wants their home to smell like a litter box! Luckily, there are several techniques you can use to keep the odors at bay.

One effective method is to regularly clean the litter box itself, removing any waste and replacing the soiled pellets. Additionally, you can sprinkle natural litter deodorizers on top of the pellets to help neutralize any unpleasant smells. These deodorizers often contain ingredients like baking soda or activated charcoal, which absorb odor-causing molecules.

By incorporating these odor control techniques into your routine, you can ensure that your home stays fresh and pleasant for both you and your furry friend.

Advertisement

Now that we’ve covered odor control tips, let’s move on to preventing mold growth in wood pellet litter without compromising its clumping ability.

Preventing Mold Growth

To prevent mold growth in your pet’s litter, it’s important to ensure proper ventilation and keep the litter box in a dry area. Mold thrives in moist environments, so reducing moisture retention is crucial. One way to achieve this is by using wood pellet litter, which has excellent moisture-absorbing properties. Additionally, regularly cleaning the litter box and scooping out any wet spots will help prevent mold from developing. Another effective method is placing a dehumidifier near the litter box to reduce humidity levels. Lastly, consider using a litter mat or liner to further minimize moisture buildup and make cleaning easier. By following these preventive measures, you can maintain a clean and mold-free environment for your furry friend.

Preventing Mold Growth
Ensure proper ventilation Keep litter box in a dry area Use wood pellet litter
Regularly clean and scoop wet spots Place dehumidifier nearby Maintain low humidity levels
Consider using a litter mat or liner

Frequently Asked Questions

How Often Should I Clean My Wood Pellet Litter Box?

I clean my wood pellet litter box every day to keep it fresh and odor-free. Properly disposing of the used litter is important for hygiene. Using wood pellet litter has many benefits for cats, such as being natural and environmentally friendly.

Can I Use Wood Pellet Litter for Multiple Cats?

Yes, you can use wood pellet litter for multiple cats. It’s important to note that you may need to clean the litter box more frequently due to increased usage. Regular maintenance is key for a clean and odor-free environment.

What Should I Do if My Cat Is Allergic to Wood Pellet Litter?

If my cat is allergic to wood pellet litter, I should consider alternative litter options that are hypoallergenic. Managing cat allergies involves finding a litter made from different materials, such as clay or corn.

Advertisement

Are Wood Pellet Litters Biodegradable?

Yes, wood pellet litters are biodegradable. They break down naturally over time, reducing their environmental impact. It’s great to know that my cat’s litter is eco-friendly and easy to clean!

Can I Flush Wood Pellet Litter Down the Toilet?

No, flushing wood pellet litter down the toilet is not recommended. It can cause clogs and damage to plumbing systems. Instead, dispose of it in a garbage bag or consider alternative uses for wood pellet litter, like composting or mulching.

Conclusion

In conclusion, maintaining a clean and healthy environment for your furry friend is essential when using wood pellet litter. By following the steps outlined in this article, you can ensure that your litter box stays fresh and odor-free.

Remember the adage, ‘A clean litter box is a happy litter box,’ as it visually represents the importance of cleanliness in providing a comfortable space for your pet.

With regular cleaning and proper maintenance, you can create a pleasant experience for both you and your cat.

Advertisement

Terra grew up with a soul deeply connected to nature. Her earliest memories are of sun-drenched meadows, whispering woods, and the rhythmic dance of waves on a moonlit night. Every gust of wind, rustling leaf, and distant horizon beckoned her with tales waiting to be told.

Continue Reading
Advertisement

Pellet Stoves

Can I Hook My New Pellet Stove up Where My Wood Stove Was

Published

on

By

An image showcasing a cozy living room, with a beautiful new pellet stove seamlessly integrated into the space where the old wood stove used to stand

As a seasoned homeowner, I frequently toy with the idea of replacing my reliable wood stove with a pellet stove, which is renowned for its higher efficiency and ease of use. However, I wonder, can the new pellet stove be installed in the precise location of my former wood stove?

In this article, we’ll explore the benefits of making the switch, assess the compatibility of your existing chimney, and delve into the necessary modifications for installation. Plus, we’ll discuss the crucial factors to consider when choosing the right location and whether to hire a professional or tackle the installation yourself.

Let’s dive in!

Key Takeaways

  • Switching from a wood stove to a pellet stove offers benefits such as increased efficiency and environmental friendliness.
  • Assess the compatibility of your existing chimney for a pellet stove using a checklist to ensure it meets necessary requirements.
  • Necessary chimney modifications may be required for proper venting and safety when installing a pellet stove.
  • Safety precautions should be taken during the removal and disposal of the old wood stove, including proper ventilation and contacting local waste management or recycling facilities.

Benefits of Switching From a Wood Stove to a Pellet Stove

There are several benefits of switching from a wood stove to a pellet stove.

Pellet stoves offer a more efficient and environmentally friendly heating option compared to wood stoves.

One of the main advantages is the convenience they provide. With a pellet stove, you don’t have to constantly feed it with firewood. Instead, you can simply load the hopper with pellets, and the stove will automatically feed them into the combustion chamber as needed. This eliminates the need for constant monitoring and refueling.

Advertisement

Additionally, pellet stoves produce less smoke and ash compared to wood stoves, resulting in cleaner indoor air quality. They also have a higher heating efficiency, as they can burn pellets more completely. This means you get more heat output per unit of fuel.

In the next section, we will discuss how to assess the compatibility of your existing chimney for a pellet stove.

Assessing the Compatibility of Your Existing Chimney for a Pellet Stove

When considering switching from a wood stove to a pellet stove, it’s crucial to assess the compatibility of your existing chimney. To do this, you can use a chimney compatibility checklist to ensure that your chimney meets the necessary requirements for a pellet stove installation.

In some cases, necessary chimney modifications may be required to ensure proper venting and safety for your pellet stove.

Chimney Compatibility Checklist

You’ll need to check the chimney compatibility checklist to ensure your new pellet stove can be hooked up where your wood stove was.

Advertisement

Chimney installation is a crucial aspect when it comes to pellet stove maintenance. Before making any modifications, it’s important to assess if your existing chimney is suitable for a pellet stove.

The checklist will guide you through the key points to consider. First, check the size and condition of the chimney. Pellet stoves require specific venting systems, so make sure your chimney meets the necessary standards.

Next, inspect the clearance requirements. Pellet stoves need proper clearance from combustible materials to ensure safe operation. Additionally, assess the condition of the chimney liner and ensure it is in good shape.

Necessary Chimney Modifications

To determine if necessary modifications are needed for your chimney, assess the condition of the chimney liner and ensure it meets the required standards for a pellet stove.

Chimney maintenance is crucial to ensure safe and efficient operation of your pellet stove. A damaged or deteriorated chimney liner can pose serious risks, such as carbon monoxide leakage or chimney fires. Regular inspections and cleanings are essential to identify any issues early on.

Advertisement

When considering the cost of chimney maintenance, it is important to factor in the potential savings from improved efficiency and reduced fuel consumption.

Understanding the necessary modifications for installing a pellet stove involves assessing the chimney’s size, draft, and clearance requirements. By making these necessary modifications, you can ensure a seamless and safe installation of your pellet stove.

Understanding the Necessary Modifications for Installing a Pellet Stove

Sure, it’s important to understand the necessary modifications for installing a pellet stove where your wood stove used to be. Here are three key modifications required for a successful installation process:

  1. Chimney liner: A pellet stove requires a specific type of chimney liner to ensure proper venting. This liner is typically made of stainless steel and is designed to accommodate the higher temperatures produced by the pellet stove.

  2. Electrical wiring: Unlike a traditional wood stove, a pellet stove requires electricity to operate. You will need to have an electrical outlet installed near the stove to power the ignition system, fans, and controls.

  3. Air intake and exhaust: Pellet stoves require both an air intake and an exhaust vent. These vents need to be properly positioned to ensure efficient combustion and proper ventilation.

Understanding these modifications will help you prepare for the installation of your new pellet stove. Once you have made the necessary adjustments, you can proceed with safely removing and disposing of your old wood stove.

Steps to Safely Remove and Dispose of Your Old Wood Stove

When it comes to removing an old wood stove, it’s crucial to prioritize safety precautions. Before starting the removal process, make sure to turn off the power supply and disconnect any gas lines or pipes.

Advertisement

Proper disposal methods should also be followed, such as contacting a professional to handle the removal and disposal of any hazardous materials.

Additionally, when considering the installation of a pellet stove, it’s important to take into account factors such as the size and location of the stove, ventilation requirements, and any necessary modifications to the existing chimney or flue system.

Safety Precautions for Removal

Before removing your wood stove and hooking up the pellet stove, it’s important to take safety precautions. Here are three key safety measures to consider during the removal process:

  1. Ensure proper ventilation: Before starting any work, make sure the area is well-ventilated to prevent the buildup of harmful gases. Open windows and doors to allow fresh air to circulate.

  2. Disconnect the power supply: Before removing the wood stove, turn off the power supply to avoid any electrical accidents. This will also prevent any sparks or electrical hazards during the removal process.

  3. Use protective gear: It’s crucial to wear appropriate safety gear, including gloves, goggles, and a dust mask, to protect yourself from potential injuries and harmful particles.

By following these removal precautions and safety measures, you can minimize the risk of accidents and ensure a safe transition to your new pellet stove.

Now, let’s explore the proper disposal methods for your old wood stove.

Advertisement

Proper Disposal Methods

To properly dispose of your old wood stove, you can contact your local waste management facility for guidance and instructions. They will be able to provide you with proper disposal methods that are both environmentally friendly and compliant with local regulations.

One option for disposing of your old wood stove is to recycle it. Many waste management facilities have recycling programs in place for metal appliances like wood stoves. Recycling not only helps to reduce waste in landfills, but it also allows for the extraction and reuse of valuable materials.

Another option is to donate your old wood stove if it is still in working condition. There may be individuals or organizations in need of a wood stove who would greatly appreciate your donation.

When considering installation of a pellet stove to replace your old wood stove, there are several important considerations to keep in mind.

Installation Considerations for Pellet Stove

One important consideration when installing a pellet stove is the availability of a proper ventilation system. Without proper ventilation, the stove may not function efficiently and can pose serious health risks.

Advertisement

Here are three key installation considerations for a pellet stove:

  1. Venting Requirements: Pellet stoves require a venting system to remove combustion gases. This can be achieved through a direct vent system, which uses an exterior wall for venting, or a chimney vent system, which utilizes an existing chimney. It is important to follow manufacturer guidelines and local building codes when choosing the appropriate venting option.

  2. Clearances: Pellet stoves require specific clearances from combustible materials such as walls, furniture, and curtains. Proper clearances ensure safe operation and prevent fire hazards. Be sure to carefully measure and adhere to the recommended clearances during installation.

  3. Maintenance Requirements: Regular maintenance is crucial for the safe and efficient operation of a pellet stove. This includes cleaning the stove and venting system, inspecting and replacing gaskets and seals, and checking for any signs of wear or damage. Following the manufacturer’s maintenance guidelines will help extend the lifespan of the stove and prevent costly repairs.

Considering these installation considerations and maintenance requirements will ensure a safe and efficient pellet stove.

Now, let’s move on to choosing the right location for your new pellet stove.

Choosing the Right Location for Your New Pellet Stove

Sure, you can hook up your new pellet stove in the same location where your wood stove used to be. Pellet stoves offer numerous benefits, such as their efficiency, low emissions, and convenience. However, before installing your pellet stove, there are some important factors to consider.

First, ensure that your chosen location has adequate space and clearance requirements for the stove. This is crucial for proper ventilation and safety. Additionally, consider the proximity to an exterior wall for venting purposes.

Advertisement

It is also important to have access to a power source, as pellet stoves require electricity to operate. Lastly, be mindful of any combustible materials nearby that could pose a fire hazard.

With these considerations in mind, you can confidently proceed with installing your new pellet stove and enjoy its many advantages. Now, let’s discuss the proper ventilation and clearance requirements for pellet stoves.

Proper Ventilation and Clearance Requirements for Pellet Stoves

Before installing your new pellet stove, it’s important to consider the proper ventilation and clearance requirements. This ensures that your stove operates efficiently and safely. Here are three key factors to keep in mind:

  1. Ventilation: Pellet stoves require proper ventilation to remove combustion gases. Make sure your stove is vented to the outside, using a dedicated vent pipe that meets local codes and regulations.

  2. Clearance: Pellet stoves need adequate clearance from combustible materials. Check the manufacturer’s guidelines for the specific clearance distances required for your stove model. This includes walls, furniture, and other objects that could potentially catch fire.

  3. Proper maintenance: Regular maintenance is essential for the optimal performance of your pellet stove. This includes cleaning the stove, inspecting components, and ensuring proper airflow. Following the manufacturer’s maintenance instructions will help prolong the lifespan of your stove.

By understanding these ventilation and clearance requirements, as well as practicing proper maintenance and troubleshooting techniques, you can enjoy the warmth and efficiency of your pellet stove.

Now, let’s explore the factors to consider when deciding between hiring a professional or undertaking a DIY installation.

Advertisement

Hiring a Professional Versus DIY Installation: Factors to Consider

Hiring a professional or doing it yourself: there are several factors to consider when deciding how to install your new pellet stove.

While DIY installation may seem like a cost-effective option, it’s important to weigh the risks and benefits.

Hiring professionals ensures that the installation is done correctly and safely, minimizing the chances of any potential hazards. They have the expertise and experience to handle the technical aspects of the installation process, such as connecting the stove to the chimney and ensuring proper ventilation.

Additionally, professionals can provide valuable advice on selecting the right location for your pellet stove and help you comply with any local building codes.

Investing in professional installation can give you peace of mind and ensure the longevity and efficiency of your new pellet stove.

Advertisement

Is it Safe to Replace a Wood Stove with a Pellet Stove in the Same Location?

Yes, placing a pellet stove after a wood stove in the same location is generally safe. However, it is important to ensure that the proper venting and clearance requirements are met for the new pellet stove. Consulting with a professional installer is recommended to guarantee a safe and effective transition.

Is it Safe to Replace a Wood Stove with a Pellet Stove in the Same Location?

Yes, it is safe to put a pellet stove where the wood stove is located. Both types of stoves require proper ventilation and safety precautions, but as long as the installation is done correctly and the necessary adjustments are made, it is a viable option.

Frequently Asked Questions

What Are the Cost Savings of Switching From a Wood Stove to a Pellet Stove?

When considering the cost comparison between a wood stove and a pellet stove, it’s important to note the fuel efficiency of each. Pellet stoves are generally more efficient, resulting in potential long-term cost savings.

How Do I Properly Clean and Maintain a Pellet Stove?

Proper pellet stove maintenance is crucial for optimal performance. Avoid common cleaning mistakes by regularly removing ash and cleaning the exhaust vent. Like a well-tuned instrument, a well-maintained pellet stove will provide warmth and efficiency.

Can I Use My Existing Wood Stove Hearth or Do I Need to Make Modifications?

Yes, you can use your existing wood stove hearth for your new pellet stove, but modifications may be needed. It’s important to consult the manufacturer’s guidelines and a professional to ensure proper installation and safety.

Advertisement

Are There Any Specific Building Codes or Permits Required for Installing a Pellet Stove?

Building codes and permits are necessary when installing a pellet stove. It is important to consult local regulations to ensure compliance. Proper installation and adherence to codes will ensure safety and efficiency.

Are Pellet Stoves Environmentally Friendly Compared to Wood Stoves?

Compared to wood stoves, pellet stoves are more efficient and environmentally friendly. They burn cleaner, produce less pollution, and have higher heating efficiency. However, proper installation is crucial for optimal performance.

Conclusion

In conclusion, transitioning from a wood stove to a pellet stove offers a multitude of benefits.

By assessing the compatibility of your existing chimney and understanding the necessary modifications, you can safely install your new pellet stove.

Proper location selection, ventilation, and clearance requirements must be considered for optimal performance.

Advertisement

While hiring a professional ensures expertise, DIY installation can be a cost-effective option for the technically inclined.

Embrace this efficient and eco-friendly heating solution, and experience the warmth and convenience it brings to your home.

Continue Reading

Pellet Stoves

Can a Pellet Stove Be Vented Thru the Chimney Where a Regular Wood Stove Was

Published

on

By

An image showcasing a modern pellet stove seamlessly vented through a chimney previously used by a traditional wood stove

I often ponder whether a chimney, initially intended for a wood stove, can also serve to vent a pellet stove. It appears to be a feasible option, yet I had my doubts regarding its effectiveness.

After doing some research, I’m excited to share that it is indeed possible! In this article, we’ll explore the benefits, steps, challenges, and safety considerations of venting a pellet stove through an existing wood stove chimney.

So, let’s dive in and find out if this retrofitting option is right for you.

Key Takeaways

  • Venting a pellet stove through an existing wood stove chimney can reduce installation costs and minimize heat loss.
  • Pellet stoves have higher efficiency ratings and lower environmental impact compared to wood stoves.
  • Pellet stoves require a specific type of chimney called a pellet vent, while wood stoves can use a masonry or prefabricated chimney.
  • Venting a pellet stove through an existing chimney may require resizing or modification, proper insulation, and regular cleaning and maintenance to ensure safe operation.

Benefits of Venting a Pellet Stove Through an Existing Wood Stove Chimney

You’ll be happy to know that venting your pellet stove through an existing wood stove chimney has several benefits.

First and foremost, it helps in improving insulation. By utilizing the existing chimney, you can avoid the need for additional venting materials, which reduces installation costs significantly.

This method also eliminates the need for creating a new hole in your home’s exterior, minimizing any potential heat loss.

Advertisement

Furthermore, venting through an existing wood stove chimney ensures that the exhaust gases are efficiently expelled from your home, maintaining indoor air quality.

Understanding the differences between pellet stoves and wood stoves is crucial in making an informed decision about which option suits your heating needs better.

Understanding the Differences Between Pellet Stoves and Wood Stoves

When comparing the efficiency of pellet stoves versus wood stoves, it is important to consider factors such as fuel consumption and heat output.

Pellet stoves are known for their high efficiency, with some models boasting an efficiency rating of over 90%. Wood stoves, on the other hand, tend to have lower efficiency ratings, typically ranging from 60% to 80%.

In terms of installation requirements, chimney compatibility is a key consideration for both pellet stoves and wood stoves. Pellet stoves require a specific type of chimney, known as a pellet vent, which is designed to handle the exhaust gases produced by the stove.

Advertisement

Wood stoves, on the other hand, can be vented through a traditional masonry chimney or a prefabricated chimney system.

Efficiency Comparison: Pellet Vs. Wood

To compare the efficiency of pellet stoves versus wood stoves, you should consider factors such as fuel consumption and heat output. Pellet stoves offer several benefits over traditional wood stoves. They are highly efficient and have a higher heat output, which means they can warm up a room faster and maintain a consistent temperature. Additionally, pellet stoves produce less smoke and particulate matter, resulting in a reduced environmental impact compared to wood stoves. To illustrate this comparison, consider the following table:

Factor Pellet Stoves Wood Stoves
Fuel Consumption Low High
Heat Output High Moderate
Environmental Impact Low High

As you can see, pellet stoves outperform wood stoves in terms of fuel consumption and environmental impact. Now, let’s move on to the installation requirements, specifically chimney compatibility.

Installation Requirements: Chimney Compatibility

If you’re considering installing a pellet stove, it’s important to ensure that your chimney is compatible with the venting requirements.

Chimney installation for a pellet stove differs from that of a regular wood stove, as there are specific venting regulations that must be adhered to.

Advertisement

The first thing to check is the size of your chimney flue. A pellet stove requires a chimney with a minimum diameter of 3 inches, while a wood stove usually requires a larger diameter.

Additionally, the chimney must be in good condition, free from any blockages or damage.

It’s also important to check if your chimney has a liner, as this may need to be replaced or modified to meet the venting regulations for a pellet stove.

Ensuring proper venting for a pellet stove in a wood stove chimney involves a few steps to guarantee safe and efficient operation.

Steps to Ensure Proper Venting for a Pellet Stove in a Wood Stove Chimney

Before installing a pellet stove in a wood stove chimney, make sure to follow these steps to ensure proper venting.

Advertisement

First, consider the venting options available for your pellet stove. There are two main types: direct venting and venting through an existing chimney.

If you choose to vent through an existing chimney, the installation process is slightly different. Start by inspecting the chimney thoroughly to ensure it is in good condition and meets the necessary requirements for pellet stove venting.

Next, clean the chimney thoroughly to remove any debris or creosote buildup. Install a stainless steel liner inside the chimney to create a proper venting system for the pellet stove.

Finally, connect the pellet stove to the liner using the appropriate adapter. By following these steps, you can ensure that your pellet stove is properly vented through the wood stove chimney.

When venting a pellet stove through an existing chimney, there are common challenges that may arise.

Advertisement

Common Challenges When Venting a Pellet Stove Through an Existing Chimney

When venting a pellet stove through an existing wood stove chimney, there are some common challenges that may arise. These challenges can be related to chimney compatibility and may require additional steps to ensure proper venting. Here are some of the venting challenges you may encounter:

  1. Size Compatibility: The size of the wood stove chimney may not be suitable for a pellet stove. It may be necessary to resize or modify the chimney to accommodate the different venting requirements of a pellet stove.

  2. Insulation: Pellet stoves require proper insulation to maintain optimal efficiency. The existing chimney may lack the necessary insulation, which can result in heat loss and reduced performance.

  3. Drafting Issues: Pellet stoves rely on a consistent draft for proper combustion. If the existing chimney does not provide sufficient draft, it may need to be modified or equipped with a draft inducer to ensure proper venting.

  4. Cleaning and Maintenance: Wood stove chimneys are designed to handle the byproducts of burning wood, which can be different from those produced by pellet stoves. Regular cleaning and maintenance may be necessary to prevent buildup and ensure safe and efficient operation.

Transitioning into the subsequent section about safety considerations when using a wood stove chimney for a pellet stove, it is important to be aware of potential risks and take necessary precautions.

Safety Considerations When Using a Wood Stove Chimney for a Pellet Stove

To ensure your safety when using a wood stove chimney for venting a pellet stove, it is crucial to be aware of potential risks and take necessary precautions. Improper installation can pose serious dangers and result in potential chimney damage. One of the main risks is the inadequate clearance between the pellet stove flue and the existing chimney walls. This can lead to heat transfer and potential overheating, causing damage to the chimney structure.

Another risk is the accumulation of creosote in the chimney, which can ignite and cause a chimney fire. To avoid these risks, it is important to consult with a professional and ensure proper installation and inspection of the chimney system.

By taking these precautions, you can safely and efficiently vent your pellet stove through a wood stove chimney.

Advertisement

When it comes to venting a pellet stove through a wood stove chimney, there are several tips for improving efficiency.

Tips for Improving Efficiency When Venting a Pellet Stove Through a Wood Stove Chimney

When considering venting a pellet stove through a wood stove chimney, there are several chimney compatibility considerations to keep in mind.

These include checking the size and condition of the chimney, ensuring proper clearance from combustible materials, and verifying that the chimney is designed to handle the exhaust temperature of a pellet stove.

Additionally, it is crucial to follow safety precautions when venting, such as installing a proper chimney cap, ensuring a secure connection between the stove and chimney, and regularly inspecting and cleaning the chimney to prevent any blockages or buildup that could lead to a potential fire hazard.

Chimney Compatibility Considerations

Although a pellet stove can be vented through a chimney where a regular wood stove was, it is important to consider chimney compatibility. When it comes to chimney installation for a pellet stove, there are a few key factors to keep in mind.

Advertisement

First, you need to ensure that the chimney is in good condition and meets the necessary safety requirements. Additionally, the size and type of the chimney should be compatible with the pellet stove’s venting options. This includes considering the diameter of the flue liner and the type of chimney cap or termination kit that is needed.

By ensuring that the chimney is compatible with the pellet stove, you can avoid potential issues and maximize the efficiency of your heating system.

Moving on to safety precautions when venting…

Safety Precautions When Venting

Make sure you check for any obstructions or blockages in the venting system before starting the pellet stove.

Venting alternatives for pellet stoves in urban areas are important to consider due to the environmental impact of pellet stove venting options. When it comes to venting a pellet stove in an urban area, there are several alternatives to consider. These alternatives include direct venting, power venting, and vent-free options.

Advertisement

Each option has its own advantages and disadvantages, which can impact the overall performance and efficiency of the pellet stove. It is crucial to choose the right venting option that not only meets your needs but also minimizes the impact on the environment.

Transitioning into the subsequent section about important factors to consider before retrofitting a wood stove chimney for a pellet stove, it is essential to assess the compatibility and condition of the existing chimney.

Important Factors to Consider Before Retrofitting a Wood Stove Chimney for a Pellet Stove

Before retrofitting your wood stove chimney for a pellet stove, there are important factors to consider. Venting challenges and maintenance requirements play a crucial role in the decision-making process.

One major challenge is ensuring that the wood stove chimney is compatible with the pellet stove’s venting system. Pellet stoves require a specific type of venting, such as a pellet vent or a flexible stainless-steel liner. It is essential to assess whether your existing chimney can accommodate these requirements.

Additionally, maintenance requirements for a pellet stove vented through a wood stove chimney differ from those of a traditional wood stove. Regular cleaning of the chimney and venting system is necessary to prevent the build-up of creosote and ensure proper airflow. Proper maintenance and cleaning are vital for the safe and efficient operation of your pellet stove.

Advertisement

Maintenance and Cleaning Requirements for a Pellet Stove Vented Through a Wood Stove Chimney

To ensure the safe and efficient operation of your pellet stove, you’ll need to regularly clean and maintain the venting system in your wood stove chimney. Proper maintenance and cleaning procedures are crucial to prevent any blockages or buildup that could lead to poor performance or even dangerous situations. Here are some key maintenance requirements and cleaning procedures to keep in mind:

Maintenance Requirements Cleaning Procedures
Inspect the chimney annually Remove any debris or soot buildup
Check for any cracks or damage Use a chimney brush to clean the flue
Ensure proper airflow and ventilation Clear any obstructions or nests
Replace any worn-out components Clean the chimney cap and spark arrestor
Regularly clean the ashtray and combustion chamber Vacuum or sweep the surrounding area

Following these maintenance requirements and cleaning procedures will help prolong the lifespan of your pellet stove and ensure its optimal performance. Remember to always consult your manufacturer’s guidelines for specific instructions.

Frequently Asked Questions

What Are the Benefits of Venting a Pellet Stove Through an Existing Wood Stove Chimney?

The benefits of venting a pellet stove through an existing wood stove chimney include cost savings, as no new venting system needs to be installed, and convenience, as the existing chimney can be utilized. Additionally, pellet stoves are more efficient and environmentally friendly compared to wood stoves.

What Are the Differences Between Pellet Stoves and Wood Stoves?

Pellet stoves and wood stoves have distinct differences. Pellet stoves offer convenience with automated fuel feeding, while wood stoves provide a traditional, cozy ambiance. Both have pros and cons, so it depends on personal preferences.

What Are Some Common Challenges When Venting a Pellet Stove Through an Existing Chimney?

Common challenges when venting a pellet stove through an existing chimney include proper sizing, air flow issues, and potential blockages. Installation tips include inspecting the chimney, using the correct venting materials, and ensuring proper clearances for safety.

Advertisement

What Safety Considerations Should Be Taken Into Account When Using a Wood Stove Chimney for a Pellet Stove?

Safety precautions must always be taken when using a wood stove chimney for a pellet stove. Regular maintenance is necessary to ensure proper ventilation and prevent potential hazards.

How Can Efficiency Be Improved When Venting a Pellet Stove Through a Wood Stove Chimney?

Improving efficiency when venting a pellet stove through a wood stove chimney can be challenging. Proper insulation, installation of an adapter, and regular maintenance are crucial to maximize efficiency and prevent any safety hazards.

Conclusion

In conclusion, venting a pellet stove through an existing wood stove chimney is a game-changer! The benefits are immense, from saving time and money to improving efficiency.

However, it’s crucial to understand the differences between pellet stoves and wood stoves and take the necessary steps to ensure proper venting. While there may be some challenges and safety considerations, the rewards are well worth it.

So, go ahead and retrofit that chimney for your pellet stove and experience a whole new level of warmth and comfort! Don’t miss out on this incredible opportunity!

Advertisement

Continue Reading

Pellet Stoves

Efficient Heat Distribution: Maximize Your Pellet Stove

Published

on

By

An image depicting a pellet stove venting system, showcasing a close-up of a stainless steel chimney pipe connected to the stove's exhaust outlet, surrounded by a well-insulated wall, with a clear view of outdoor air intake and termination cap

Fed up with the inconsistent temperatures in your home? We’re on hand to help!

In this article, we’ll explore effective strategies to maximize the efficiency of your pellet stove and achieve optimal heat distribution.

From increasing blower speed to keeping doors open, using fans, and even installing floor vents or a ducted pellet stove, we’ll provide data-driven tips to ensure balanced heat throughout your living space.

Let’s dive in and make your home cozy and comfortable!

Key Takeaways

  • Ensure proper ventilation and avoid setting the blower speed too high to prevent overheating.
  • Keep doors open between rooms and avoid blocking airflow to facilitate heat distribution.
  • Use floor and ceiling fans strategically to push and circulate hot air throughout the house.
  • Rearrange furniture to create clear paths for heat to travel and remove obstructions.

Increasing Blower Speed

Increasing the blower speed helps us distribute heat more evenly throughout our home. By increasing the blower speed, we can ensure that the warm air is pushed out more forcefully, allowing it to reach all areas of the house. This leads to more consistent temperatures and eliminates any cold spots.

The benefits of higher blower speeds include improved comfort and increased efficiency of the pellet stove. However, it’s important to be cautious not to run the blower too high, as this can lead to potential risks such as overheating. It’s essential to find the right balance and monitor the temperature to avoid any hazards.

Advertisement

Keeping Doors Open

By opening doors between rooms, we allow heat to freely travel and distribute throughout the house. This simple action can have a significant impact on energy consumption and the overall efficiency of our pellet stove.

Here are some potential drawbacks and limitations to consider:

  1. Uneven heating: While opening doors facilitates the movement of heat from the room with the stove to other areas of the house, it may not guarantee uniform heat distribution. Some rooms may still be cooler than others, especially if they’re further away from the stove.

  2. Drafts and air leakage: Open doors can create drafts and allow warm air to escape, leading to heat loss and increased energy consumption. Additionally, if there are gaps or poor insulation around the doors, cold air can infiltrate the rooms, requiring additional heating.

  3. Privacy and noise concerns: Keeping doors open between rooms may compromise privacy and increase noise transmission, especially in areas where quiet or seclusion is desired.

While keeping doors open can be a useful strategy for heat distribution, it’s essential to consider these potential drawbacks and limitations to make informed decisions about maximizing the efficiency of our pellet stove.

Using Floor and Ceiling Fans

Using floor and ceiling fans can help circulate warm air generated by a pellet stove throughout the home, ensuring more even temperatures in every room. Floor fans placed beneath the pellet stove push hot air into the room. Ceiling fans, when set on low and rotating clockwise, help circulate heat throughout the entire house by pulling warm air up from below. It is important to properly clean and maintain ceiling fans for optimal performance. Regularly dusting the fan blades and cleaning the fan motor can prevent dust buildup and ensure smooth operation. Additionally, lubricating the fan motor bearings can help reduce noise and increase longevity. During the winter months, using floor fans can provide additional benefits in terms of air circulation and temperature regulation.

Moving Furniture Around

When rearranging furniture, it’s important to create a clear path for heat to travel and ensure that no large pieces obstruct the flow of air in the room. To maximize airflow and achieve efficient heat distribution from the pellet stove, we must take certain furniture placement precautions:

Advertisement

  1. Rearrange furniture to create a clear path for heat flow.
  2. Remove large pieces of furniture obstructing the heat’s path.
  3. Ensure furniture isn’t blocking the flow of heat in the room.

By following these steps, we can optimize the circulation of warm air and prevent any hot or cold spots in the room.

This data-driven approach ensures that the pellet stove’s heating capacity is fully utilized, providing comfortable warmth throughout the space. So, when moving furniture around, remember to consider the importance of creating clear paths for heat flow and avoiding any obstructions that may hinder the efficiency of the heating system.

Installing Floor Vents or Ducted Pellet Stove

To ensure even heat distribution throughout the entire house, we can consider installing floor vents or a ducted pellet stove. Floor vents, located near the pellet stove, circulate heat up through the floors above, making them ideal for multi-story homes. They evenly distribute heat throughout the house and maintain a consistent temperature across different levels. On the other hand, a ducted pellet stove uses a series of ducts to circulate air evenly throughout the house. It is beneficial for rooms located further away from the pellet stove and ensures effective heat delivery to all areas of the home. However, the installation of floor vents or a ducted pellet stove may involve additional costs and require professional assistance. It is important to weigh the advantages and disadvantages before making a decision.

Advantages Disadvantages
Floor Vents Additional costs
– Even heat distribution Professional installation may be required
– Suitable for multi-story homes
– Consistent temperature across levels
Ducted Pellet Stove
– Effective heat delivery to all areas
– Beneficial for rooms further away
– Ensures even heat distribution

Option 1: Install Floor Vents

Installing floor vents near the pellet stove allows for even heat circulation throughout the house, making them a suitable option for multi-story homes. Here are the benefits of installing floor vents:

  1. Enhanced Heat Distribution: Floor vents located near the pellet stove circulate heat up through the floors above, ensuring that upper floors stay warm without overheating lower floors. This results in consistent temperature across different levels of the home.

  2. Cost-Effective Solution: Compared to other heating methods, the installation cost of floor vents is relatively low. They provide an efficient way to distribute heat throughout the house, reducing the need for additional heating sources.

  3. Improved Energy Efficiency: By evenly distributing heat, floor vents help maximize the efficiency of the pellet stove. This not only ensures that the entire house is comfortably heated, but also helps to reduce energy consumption and lower heating costs.

Overall, installing floor vents near the pellet stove is a practical and cost-effective solution to achieve efficient heat distribution in multi-story homes.

Option 2: Install a Ducted Pellet Stove

Now let’s explore Option 2: Install a Ducted Pellet Stove.

Advertisement

Ducted pellet stoves offer several advantages over floor vents. With a ducted pellet stove, a series of ducts is used to circulate air evenly throughout the house. This is particularly beneficial for rooms located further away from the pellet stove, ensuring effective heat delivery to all areas of the home.

Unlike floor vents that only circulate heat through the floors above, ducted pellet stoves bring heat to areas that aren’t in close proximity to the pellet stove. This means that every room in the house can enjoy the warmth and comfort provided by the pellet stove.

Additionally, ducted pellet stoves help maintain consistent temperature across different levels of the home, ensuring that there are no excessively hot or uncomfortably cold rooms.

Frequently Asked Questions

How Can I Determine the Appropriate Blower Speed for My Pellet Stove?

To determine the appropriate blower speed for your pellet stove, we recommend following these steps:

1) Ensure proper ventilation for adequate air circulation.

Advertisement

2) Avoid setting the blower speed too high to prevent overheating.

3) Be cautious of running the pellet stove for extended periods to maintain even heating.

4) Increasing the blower speed helps distribute heat more evenly throughout the home.

Can I Use Floor and Ceiling Fans Simultaneously to Maximize Heat Distribution?

Yes, using floor and ceiling fans simultaneously can maximize heat distribution effectiveness.

Floor fans placed beneath the pellet stove push hot air into the room, while ceiling fans, set on low and rotating clockwise, circulate heat throughout the entire house.

Advertisement

This combination helps distribute heat evenly, ensuring that all areas of the home receive adequate warmth.

However, caution should be exercised to avoid placing fans too close to the stove to prevent fire hazards.

Are There Any Specific Safety Precautions I Should Take When Using Floor and Ceiling Fans With My Pellet Stove?

When using floor and ceiling fans with a pellet stove, it’s important to take specific safety precautions.

Fan safety is paramount, so make sure to place fans at a safe distance from the stove to prevent fire hazards.

Avoid placing furniture or any other objects that could obstruct the airflow of the fans.

Advertisement

What Are the Potential Drawbacks of Installing Floor Vents Near the Pellet Stove?

When installing floor vents near the pellet stove, there are potential drawbacks to consider.

One drawback is that the heat distribution may not be as efficient as desired. This is because the heat may rise too quickly and not have enough time to circulate throughout the room before being dispersed through the floor vents.

Additionally, depending on the layout of the house, the heat may not reach all areas equally, resulting in uneven heating.

These drawbacks should be considered when deciding on the best heat distribution method for your pellet stove.

How Can I Assess Whether a Ducted Pellet Stove Is the Right Option for My Home?

Assessing whether a ducted pellet stove is the right option for our home involves considering its efficiency and energy consumption.

Advertisement

We can analyze its efficiency by examining how effectively it distributes heat throughout the house and how well it delivers heat to areas that aren’t in close proximity to the stove.

We can assess its energy consumption by comparing its energy usage to other heating options.

Conclusion

In conclusion, by implementing the strategies discussed in this article, you can effectively maximize the heat distribution of your pellet stove and create a comfortable living space.

For example, John, a homeowner in a two-story house, installed floor vents in key areas to evenly distribute heat throughout both levels. As a result, he no longer experienced hot and cold spots, creating a cozy environment for his family.

Remember, optimizing heat distribution is essential for maximizing the efficiency of your pellet stove.

Advertisement

Continue Reading

Trending