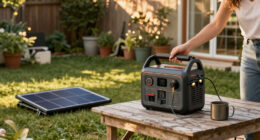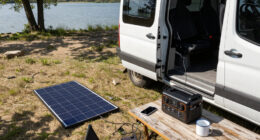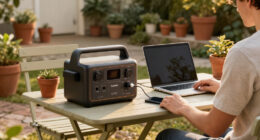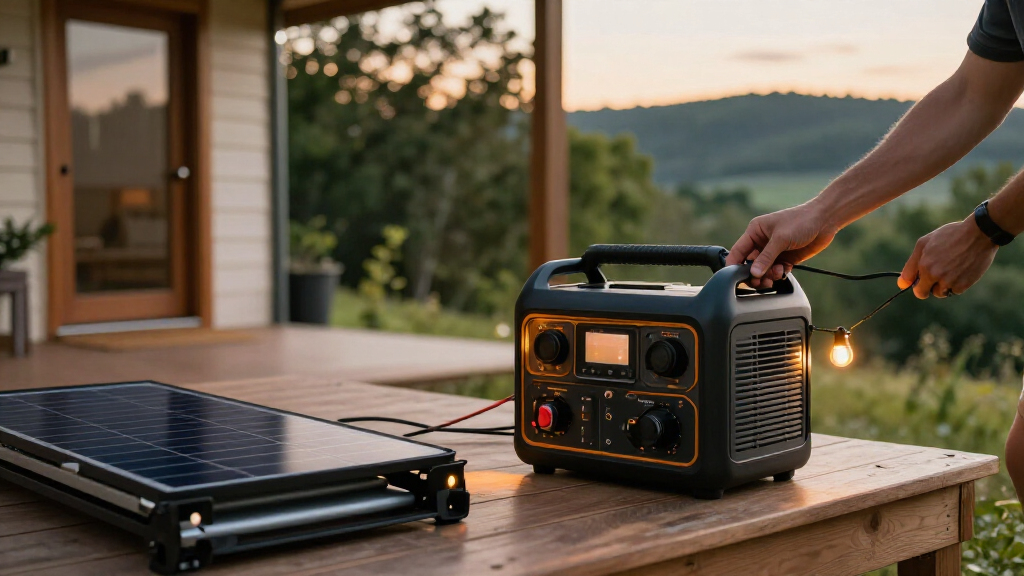
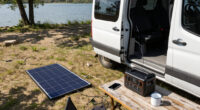
This guide helps beginners choose, set up, charge, and use a portable solar generator with a battery backup for camping, travel, or emergency power. You will learn to match the generator to your devices, connect compatible solar panels, manage the battery, and check that your setup is working. Allow 1–3 hours for planning and initial setup; the first full charge may take longer depending on sunlight, panel size, and battery level.

Get backup power and energy gear delivered free with Prime
- Fast, free delivery on millions of items
- Prime Video, Amazon Music and more included
- Member-only deals all year
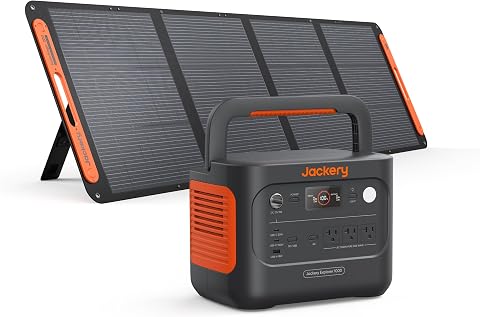
Jackery Solar Generator 1000 v2 and 200W Solar Panel, 1070Wh, 1500W AC
- ✔ Battery capacity: 1,070Wh
- ✔ AC output: 1,500W; 3,000W surge
- ✔ Weight: 23.8 lb

Jackery HomePower 3600 Plus & 2x200W Solar Panels, 3584Wh, 3600W AC Output
- ✔ Battery capacity: 3,584Wh
- ✔ AC output: 3,600W; 7,200W in parallel
- ✔ Weight: 77.2 lb

Jackery Explorer 300 Portable Power Station, 292Wh
- ✔ Battery capacity: 292Wh
- ✔ Rated output: 300W; 600W peak surge
- ✔ Weight: About 7.1 lb
Difficulty: Beginner | Time: 1–3 hours for planning and initial setup; charging time varies
What You’ll Need
Tools & Materials:
- Portable power station with a built-in battery and clearly labeled AC and DC outputs
- Compatible solar panel and the correct charging cable, if you plan to charge by solar
- Device labels or manuals showing voltage and power requirements
- Notebook or phone calculator for estimating energy use
- Dry, ventilated location for setup and charging
Knowledge:
- Basic ability to read appliance labels and follow product instructions
- Understanding that watts describe power use and watt-hours describe stored energy
Check the power station and panel manuals before connecting anything. Confirm that the panel’s connector, voltage, and permitted input range match the station. A power station stores electricity in its internal battery; it does not create more energy than it receives. Solar output changes with sunlight, shade, panel angle, and weather.
Jackery Solar Generator 1000 v2 and 200W Solar Panel, 1070Wh, 1500W AC
The Jackery Solar Generator 1000 v2 lands at the center of this comparison: it stores enough energy for more than small electronics, yet remains far easier to move than the 77.2-pound HomePower. Its 1,070Wh battery and 1,500W AC output give buyers room to power several devices or selected appliances, subject to each device’s draw and the station’s limits. That makes it a more versatile outage companion than the 300W Explorer 300, while still being plausible for camping or road trips at 23.8 pounds.The included 200W solar panel is a practical advantage over the Explorer 300, which arrives without one. The listing estimates about six hours to reach 80% from solar, though sunlight and setup affect results. AC charging is listed at 1.7 hours by default; the one-hour mode requires enabling emergency charging in the app and is described as a battery-health tradeoff. That flexibility is useful if we need to replenish quickly, but the app and the separate shipment of the station and panel add small setup considerations.Compared with the HomePower, the 1000 v2 gives up capacity, 240V parallel capability and expansion options in exchange for a much more manageable size. Compared with the Explorer, it is heavier and less convenient to carry over long distances, but better suited to meaningful backup loads. Choose it for a balanced mix of mobility and reserve power; skip it if your priority is either ultralight carry or multi-day household backup.
Pros:
- 1,070Wh capacity with 1,500W AC output offers a broad middle ground.
- Includes a 200W solar panel for off-grid recharging.
- LFP battery is specified for 4,000 charge cycles to 70% capacity.
- Three pure sine wave AC outlets plus USB-C, USB-A and car outputs.
Cons:
- At 23.8 pounds, it is heavier to carry than the Explorer 300.
- The one-hour AC charge mode must be enabled in the app; default charging is slower.
- Panel and power station may arrive in separate shipments.
Best for: Campers, road-trippers and households seeking a versatile battery backup for selected essentials, with a solar panel included.
Not ideal for: Buyers who need a very light packable unit, or those planning extended home backup for higher-demand loads.
Bottom line: For most buyers wanting both real backup capacity and a manageable solar kit, the 1000 v2 is the clearest all-around choice.
“For most buyers wanting both real backup capacity and a manageable solar kit, the 1000 v2 is the clearest all-around choice.”
Jackery HomePower 3600 Plus & 2x200W Solar Panels, 3584Wh, 3600W AC Output
When backup duration and appliance capability matter more than easy lifting, the Jackery HomePower 3600 Plus takes the lead. Its 3,584Wh capacity and 3,600W output are in a different class from the 1000 v2 and Explorer 300, and the supplied description lists expansion up to 21kWh per unit. That larger reserve can support a broader outage plan, while the 1000 v2 is the more practical compromise for frequent transport and smaller loads.This bundle includes two 200W solar panels, and the listing gives a four-hour solar recharge estimate. It also describes AC, hybrid AC-plus-DC and gas-generator charging options. Those choices can help when weather or grid access changes, although actual recharge times depend on available input and conditions. The advertised dual-voltage 120V and 240V operation is described for parallel use, so buyers should check the setup requirements before planning around 240V loads.Portability here means wheels and a telescoping handle, not a light carry: the unit weighs 77.2 pounds. That makes it better suited to moving between a garage and living space than loading into a backpack or routinely hauling to a campsite. The product description also refers to pairing with an MTS for home use; buyers should confirm what equipment their backup plan requires. Compared with the 1000 v2, the HomePower offers much more reserve and higher output but asks for more space and careful placement. Choose it for substantial backup; skip it if compact transport is central.
Pros:
- 3,584Wh capacity provides substantially more stored energy than the other two picks.
- 3,600W output and 7,200W parallel output support a more ambitious backup setup.
- Bundle includes two 200W solar panels.
- Wheels and telescoping handle help move the heavy unit across flat surfaces.
Cons:
- 77.2 pounds makes it much less portable than the 1000 v2 or Explorer 300.
- 240V operation is described for parallel use; buyers need to confirm system requirements.
- The MTS referenced for home backup may require additional planning.
Best for: Households prioritizing a large battery reserve, high AC output, solar input and expandable backup capacity.
Not ideal for: Anyone who needs a genuinely lightweight generator for hiking, frequent car loading or easy one-person lifting.
Bottom line: Choose the HomePower when backup scale outweighs carry weight and you have space to accommodate a large wheeled unit.
“Choose the HomePower when backup scale outweighs carry weight and you have space to accommodate a large wheeled unit.”
Jackery Explorer 300 Portable Power Station, 292Wh
The Jackery Explorer 300 is the clear choice when carrying comfort comes first and the backup plan is modest. At about 7.1 pounds with 292Wh capacity, it is much easier to pack than either larger station. It can keep smaller electronics going—such as a laptop, camera or phone—without the bulk of the 1000 v2. That lightness comes with a firm limit: the 300W rated output is not intended for many household appliances, and its energy reserve is less than a third of the 1000 v2’s.Its outputs cover common small-device needs: two AC outlets, USB-C, two USB-A ports and a 120W car port. The listing describes a 100W USB-C PD port, which can be convenient for compatible laptops without a separate AC adapter. The Explorer’s solar panel is not included, a meaningful distinction from both bundled kits in this roundup. With a compatible 100W panel, the product description estimates about 2.8 hours to 80%; a 40W panel is estimated at 7.5 hours. Those estimates depend on conditions, and a smaller panel may make replenishing the battery a slow process.There is a conflicting battery claim in the provided listing: one section describes upgraded LFP chemistry and over 4,000 cycles, while the product title and other details identify the unit as a 292Wh model without confirming that chemistry consistently. We would verify the battery specification for the exact version before relying on the cycle-life claim. Against the 1000 v2, this is a lighter but much more limited companion; against the HomePower, it is truly easy to carry but not a household backup system. Choose it for portable electronics, not appliance coverage.
Pros:
- About 7.1 pounds, the lightest unit in this comparison.
- 292Wh battery suits small electronics and short trips.
- 100W USB-C PD port supports compatible devices directly.
- Solar charging is available with compatible Jackery panels.
Cons:
- 300W rated output excludes many higher-draw appliances.
- Solar panel is sold separately.
- The supplied description gives inconsistent battery chemistry claims, so verify the exact version.
Best for: Travelers and campers who want a lightweight battery for phones, cameras, drones and compatible laptops.
Not ideal for: Households seeking to run appliances through an outage, or buyers who want a solar panel included in the kit.
Bottom line: The Explorer 300 is the most packable option here, but its small reserve and 300W ceiling keep it to electronics-focused backup.
“The Explorer 300 is the most packable option here, but its small reserve and 300W ceiling keep it to electronics-focused backup.”
As an Amazon Associate we earn from qualifying purchases.
Before You Start
List each device you want to power, including its watts and expected hours of use. For devices that run intermittently, estimate their average use over the period. Add the watt-hours for all devices to estimate the energy needed: watts multiplied by hours equals watt-hours. Leave extra capacity because conversion losses, cold weather, aging, and unexpected use can reduce available energy.
Check the station’s continuous output rating, surge rating, battery capacity, and output types. A device may need a brief surge when its motor starts, even if its normal draw is low. Do not plan to power equipment above the station’s ratings. Never connect a portable power station to household wiring through a wall outlet or improvised cable; use only a transfer system installed for that purpose by a qualified electrician.
Step-by-Step Instructions
Step 1: List the devices you need to power
Write down each device, its input voltage, its running watts, and how many hours you expect to use it. Look on the device label or in its manual. For USB devices, use the stated input rating or the charging information shown on the device. For a refrigerator, pump, fan, or other motor, check the manual for starting or surge power as well as running power.
Multiply each device’s watts by its expected hours of use, then add the results. For example, a 20-watt light used for 5 hours uses about 100 watt-hours. Treat the total as a planning estimate, not a guarantee, because actual draw and conversion losses vary.
Tip: Do not add the watt ratings of devices that will never run at the same time when checking the station’s output limit. Do add their energy use when calculating the battery capacity needed.
Check: You have a list of devices, a total estimated energy requirement, and the highest power draw you expect at one time.
Step 2: Match the station to your power needs
Compare your list with the station’s capacity, continuous output, surge rating, and available outlets. Choose a station with enough usable watt-hours for the planned period and enough continuous output for devices that may run together. Check that your plugs match the station’s AC, USB, or DC ports. If the station has an expansion battery, confirm that the model is supported and follow the maker’s instructions for adding it.
Read the published solar input limits and battery charging instructions before choosing a panel. A panel’s advertised wattage describes ideal test conditions; actual charging power is often lower. If you need power overnight or in cloudy weather, plan for a full battery before use and consider reducing consumption.
Tip: A large battery capacity does not mean the station can run every appliance. Capacity and output power are separate limits.
Check: Every planned device fits an available outlet and stays within the station’s running and surge ratings. The battery capacity covers the expected use with a reasonable reserve.
Step 3: Inspect the equipment and choose a safe location
Check the station, battery, panel, and cables for cracks, swelling, exposed wires, damaged plugs, or loose connectors. Do not use equipment with visible damage. Set the power station on a stable, dry surface with its ventilation openings clear. Keep it away from rain, standing water, heaters, open flames, and direct heat.
Place solar panels where they have open exposure to the sun and can be secured against wind. Keep the station sheltered from weather while letting it ventilate as its manual directs. Do not block cooling fans or leave the station in a hot enclosed vehicle.
Tip: If the battery is swollen, unusually hot, leaking, or giving off an odor, stop using it. Follow the manufacturer’s safety and service instructions.
Check: The equipment is undamaged, the station has clear airflow, and the panel can sit securely in a sunny location.
Step 4: Charge the battery before relying on it
Charge the station using the supplied AC adapter, vehicle charger, or another method approved by its manufacturer. Connect the charger to the station as described in the manual, then check the display for charging status and input power. If you are preparing for an outage or trip, charge it in advance and confirm the battery level is adequate for your planned use.
For solar charging, connect only a panel that the station supports. Check polarity, connector type, and voltage range before plugging it in. Keep the panel cable away from sharp edges and walkways. Follow the stated temperature limits for both charging and storage.
Tip: Do not assume that a panel is compatible because its plug fits. Incorrect voltage or wiring can damage equipment.
Check: The display shows that charging has started, and the battery percentage or estimated charge time changes as expected.
Step 5: Position and connect the solar panel
Unfold or set up the panel according to its instructions. Point it toward the strongest available sunlight, adjust its angle as the sun moves, and keep it out of shade. Even a small shadow across part of a panel can lower output. Secure the panel so wind cannot tip or carry it away.
With the station and panel arranged as their manuals specify, connect the panel cable to the station’s solar input. Check the display for solar input watts or a charging indicator. If there is no input, disconnect the panel and recheck the cable, port, sunlight, and compatibility before trying again.
Tip: Keep connectors clean and dry. Disconnect the panel before moving cables or changing connections, unless the manufacturer directs otherwise.
Check: The station reports solar input or shows that its battery is charging from the panel.
Step 6: Connect devices and check their draw
Turn off a device before plugging it into the station. Use the output that matches its requirements: AC for standard wall plugs, USB for supported electronics, or DC for compatible equipment. Turn the station output on if it has a separate output control, then switch on the device.
Read the station display for current output watts and remaining battery time. Connect devices one at a time so you can spot an overload or a device that draws more than expected. If the station beeps, shuts off an output, or shows an overload warning, disconnect the last device and check its power requirements.
Tip: Use the station’s DC or USB output when it matches the device. Converting battery power to AC and back can use additional energy.
Check: Each device runs normally, the station shows a load within its ratings, and no overload warning appears.
Step 7: Manage battery use and pack the system away
Check the remaining battery level and output during use. Turn off devices when they are not needed, and disconnect chargers or accessories that continue to draw power. If the battery is running low, prioritize essential devices and recharge using an approved source when available.
After use, switch off the station’s outputs, unplug devices, and disconnect the solar panel as directed by the manual. Store the station and cables in a cool, dry place within the maker’s stated temperature range. Check the manual for the recommended storage charge and periodic recharge schedule; battery care differs by model.
Tip: Do not store a lithium battery in a hot car or leave it fully depleted for a long period unless the manufacturer specifically instructs this.
Check: The outputs are off, cables are disconnected and undamaged, and the station is stored at the charge level and temperature stated in its manual.
Common Mistakes to Avoid
- Running several devices until the station shuts down. — Monitor output and battery level, and switch off nonessential loads before the battery is depleted.
Troubleshooting
Problem: The solar panel is connected, but the station shows no charging input.
Solution: Turn off or disconnect the panel as directed by the manual. Check sunlight and shading, reseat the cable, inspect connectors for dirt or damage, and confirm panel voltage and polarity fit the station’s solar input limits. Try an approved charging source to check whether the station accepts a charge.
Problem: The station shuts off when a device starts.
Solution: Check the device’s starting surge requirement against the station’s surge rating and confirm the correct output is active. Disconnect other loads and retry. If the device still exceeds the rating, use a station designed for that load.
Problem: The battery runs down sooner than expected.
Solution: Check the display for actual output watts and look for devices left on or drawing power while idle. Recalculate use from measured or stated watts and hours. Reduce the load, charge again, and leave more capacity for conversion losses and changing conditions.
Problem: The station becomes hot or stops charging in warm weather.
Solution: Move it to a shaded, ventilated location within the temperature limits in its manual. Clear the air openings and pause charging or use until it cools. Stop using it and contact the maker if it remains unusually hot or shows damage.
What Success Looks Like
Your setup is working when the station charges from an approved source, the display shows expected input or output, and each connected device runs without warnings or interruptions. The battery has enough remaining charge for the planned period, the station stays within its output limits, and the equipment remains dry, ventilated, and undamaged.
Next Steps
Record how much power your devices actually used and how quickly the panel charged the battery. Use those observations to adjust your runtime estimate and panel placement next time. Before travel or storm season, check the station’s charge level, inspect cables and connectors, and review the manufacturer’s storage and recharge guidance. Replace damaged cables or arrange service for damaged equipment before using the system again.
Frequently Asked Questions
Can a portable solar generator run a refrigerator?
It can if the refrigerator’s starting surge and running draw fit the station’s output ratings and its battery holds enough usable energy for the desired runtime. Check the refrigerator label or manual, then test it while watching the station display. Runtime varies with temperature, door openings, and compressor cycles.
How long does solar charging take?
Charging time depends on the battery’s starting level, panel output, sunlight, shade, angle, temperature, and the station’s input limit. Use the maker’s estimate as a starting point, then check the station’s displayed solar input. Cloud cover or partial shade can extend charging considerably.
Can I use the station while it is charging?
Many stations support charging and powering devices at the same time, but not all models do. Check the manual for this feature and any limits. Watch the display: if connected devices use more power than the panel supplies, the battery will still discharge.
Can I connect a portable power station to my home outlets?
Do not plug a station into a household wall outlet to power home wiring. That can create a backfeed hazard. To power selected household circuits, use a properly installed transfer switch or other approved system arranged by a qualified electrician, and follow the station maker’s instructions.