Wood Stove
How To Break In The Drolet Columbia Wood Stove
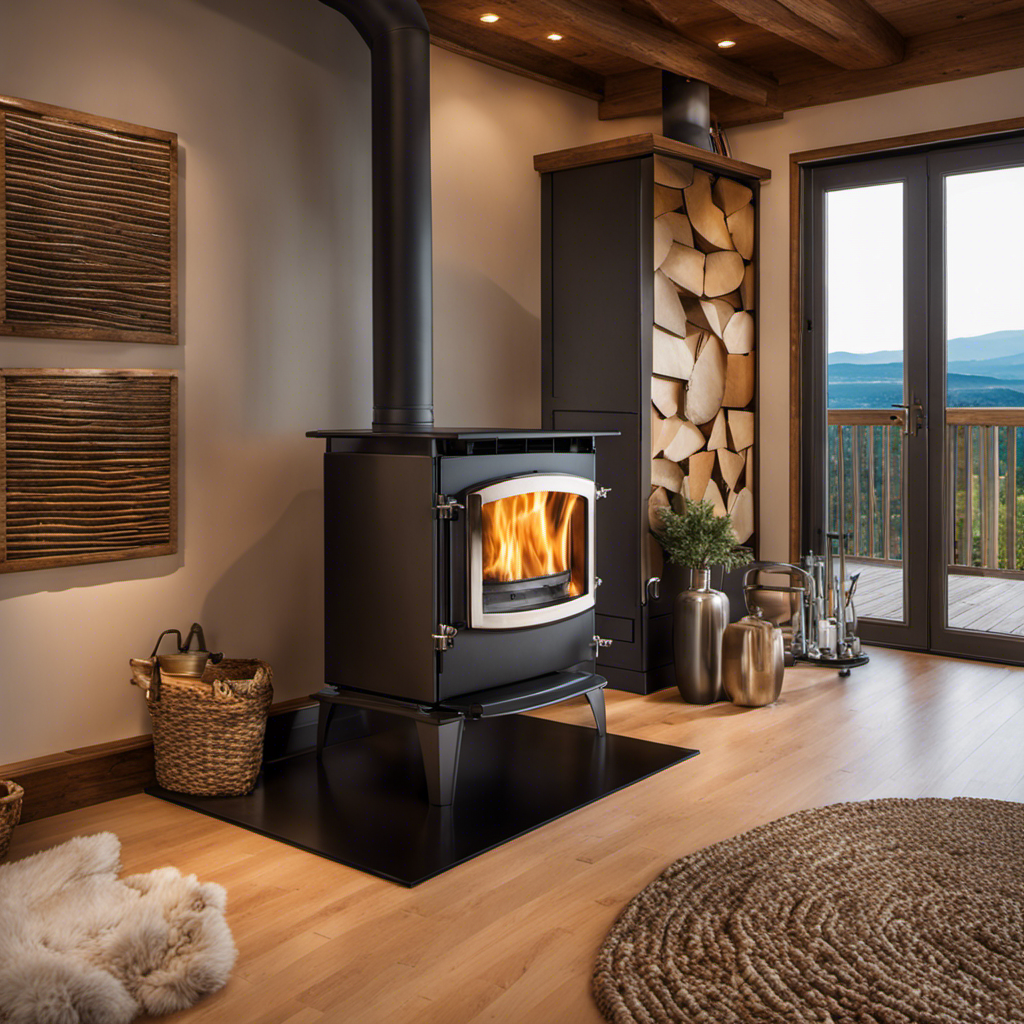
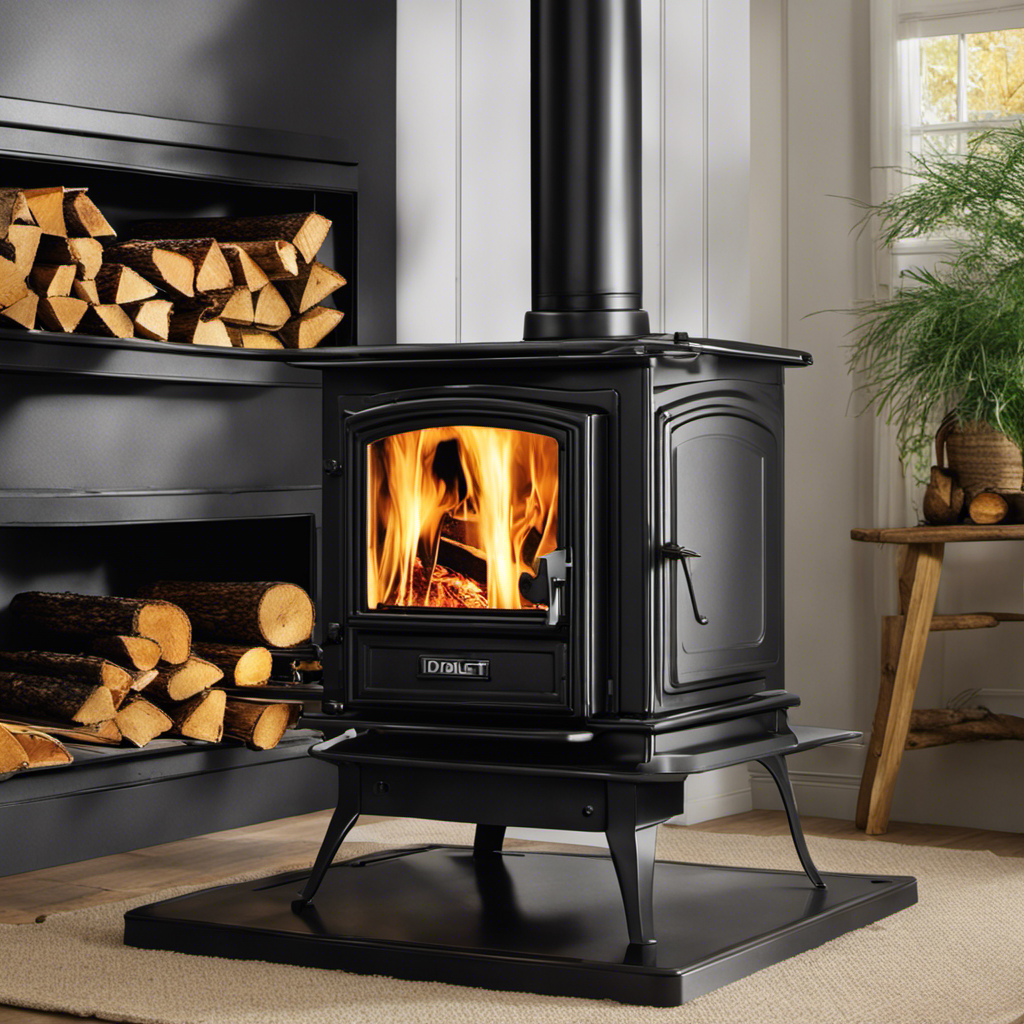
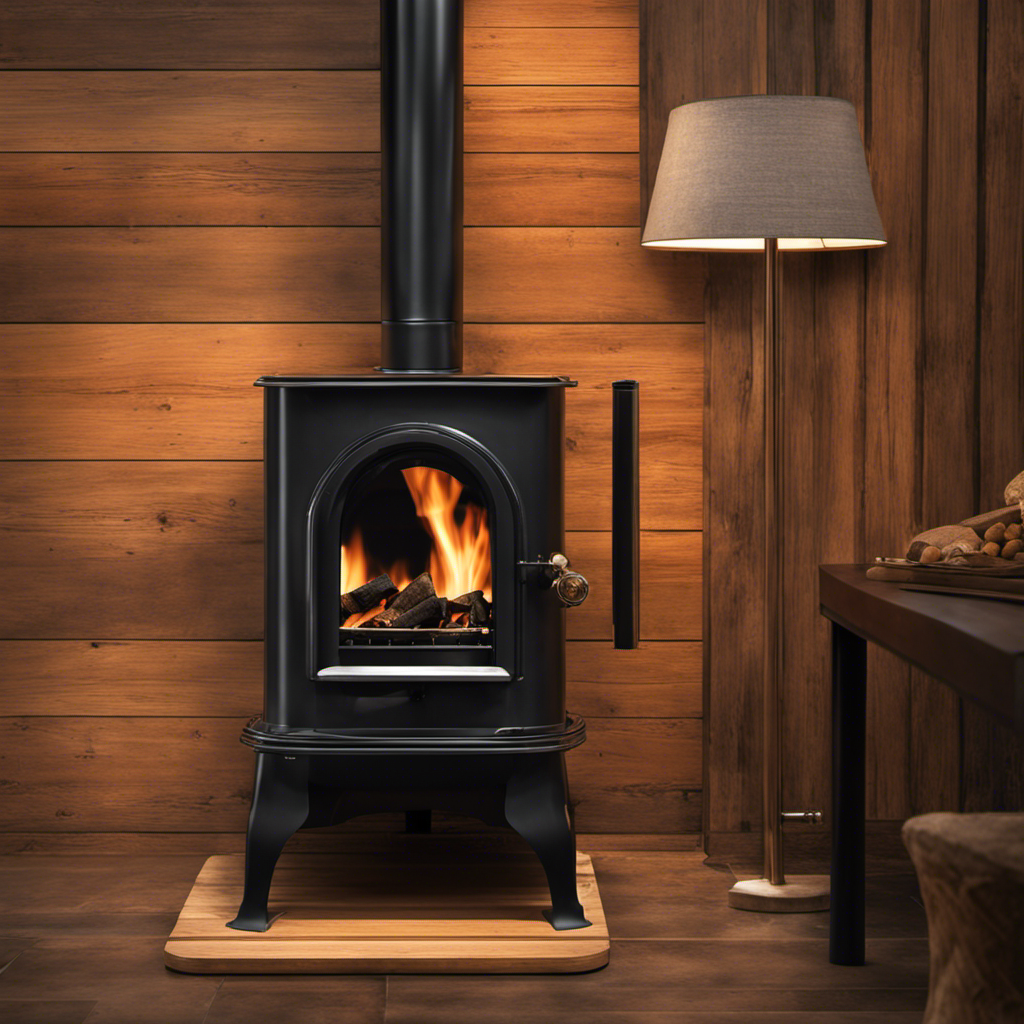
I’m excited to light up my brand new Drolet Columbia Wood Stove for the very first time.
But before I do, I know the importance of properly breaking it in. It’s all about maximizing performance and ensuring a long lifespan for this beauty.
So, in this article, I’ll share with you the steps I took to break in my Drolet Columbia Wood Stove, from initial preparation to temperature control and maintenance.
Let’s get started!
Key Takeaways
- Proper break-in techniques ensure longevity and optimal performance of the Drolet Columbia Wood Stove.
- Cleaning and seasoning the stove’s interior, as well as properly seasoning the wood, are important steps in preparing for initial use.
- Controlling the temperature during the break-in period is crucial to prevent overheating and ensure optimal performance.
- Regular cleaning and maintenance, including ash removal and glass cleaning, are necessary for the wood stove’s optimal functioning and safe operation.
Importance of Proper Break-In for the Drolet Columbia Wood Stove
I just learned about the importance of properly breaking in the Drolet Columbia Wood Stove, and I can’t wait to start using it. The proper break-in techniques are crucial to ensure the longevity and optimal performance of the wood stove.
When a new stove is first installed, it’s essential to follow the manufacturer’s guidelines for the break-in process. This involves progressively increasing the intensity and duration of the fires over a period of several days. By doing so, the stove’s components, such as the gaskets and paint, can properly cure and settle.
A well-broken-in wood stove offers several benefits, including improved efficiency, reduced emissions, and extended lifespan. It also helps to prevent potential damage and ensures safer operation.
Taking the time to break in the Drolet Columbia Wood Stove correctly will ensure many years of reliable and enjoyable use.
Preparing the Stove for Initial Use
After carefully reading the instructions, I began preparing the stove for initial use by cleaning the interior and seasoning the cast iron parts with vegetable oil. This is an important step in ensuring the longevity and optimal performance of the Drolet Columbia Wood Stove.
Here are three key points to consider during this process:
-
Seasoning the wood properly: Before using the stove, it’s crucial to let the wood dry and season for at least six months. This ensures that the wood burns efficiently and produces less smoke, reducing the risk of creosote buildup in the chimney.
-
Ensuring proper ventilation during the break-in period: It’s essential to provide adequate ventilation during the initial use of the stove. This allows for the paint to cure and prevents the release of potentially harmful fumes. Opening a window or using a fan can help achieve proper airflow.
-
Regular maintenance: Once the stove is in use, regular maintenance is necessary to keep it functioning optimally. This includes cleaning the ash pan, inspecting the gaskets, and checking for any signs of damage or wear. Regular maintenance ensures the stove’s efficiency and safety.
Controlling the Temperature During the Break-In Period
During the break-in period, it’s important to carefully monitor and adjust the temperature to prevent overheating and ensure optimal performance of the Drolet Columbia Wood Stove. This period is crucial for the stove to settle and for the paint to cure properly. To help you navigate this process, here are some tips for reducing smoke emissions and common mistakes to avoid during the break-in period:
Tips for Reducing Smoke Emissions | Common Mistakes to Avoid |
---|---|
Use properly seasoned firewood | Burning wet or green wood |
Open the air intake fully when starting a fire | Closing the damper too soon |
Maintain a hot fire with a steady flame | Letting the fire die down completely |
Regularly clean the stove and chimney | Neglecting regular maintenance |
Use a thermometer to monitor the stove’s temperature | Overheating the stove |
Cleaning and Maintenance Tips for the Drolet Columbia Wood Stove
While cleaning and maintaining the Drolet Columbia Wood Stove, it’s important to regularly remove ashes and debris to ensure optimal performance. Here are three essential cleaning techniques and troubleshooting tips for this wood stove:
-
Ash Removal: After each use, let the stove cool completely before removing the ashes. Use a metal scoop or shovel to carefully scoop out the ashes and debris from the firebox. Dispose of them in a metal container outdoors, away from any flammable materials.
-
Glass Cleaning: Over time, the glass on the door may become dirty and hinder the view of the fire. To clean it, use a non-abrasive glass cleaner and a soft cloth or paper towel. Gently scrub the glass in circular motions until all the grime is removed. Avoid using harsh chemicals or abrasive materials that could scratch the glass.
-
Troubleshooting Common Issues: If you experience issues like difficulty in starting the fire or poor heat output, check the air intake and exhaust vents for any obstructions. Ensure that the door gasket is properly sealed to prevent air leaks. If problems persist, consult the manufacturer’s manual or contact a professional for assistance.
Regular cleaning and maintenance of your Drolet Columbia Wood Stove won’t only prolong its lifespan but also ensure efficient and safe operation.
Extending the Lifespan of Your Drolet Columbia Wood Stove With Regular Break-In Procedures
I can extend the lifespan of my Drolet Columbia Wood Stove by following regular break-in procedures with the utmost care. When properly breaking in the stove, I’m not only ensuring its longevity but also maximizing efficiency in the long run.
The break-in process involves gradually increasing the stove’s temperature over several heating cycles, allowing the paint to cure and the gaskets to seal properly. By following these steps, I can prevent potential issues such as paint peeling, excessive smoke, or malfunctioning gaskets.
Additionally, troubleshooting common issues like a weak draft or smoke leakage can be addressed during the break-in period, ensuring a more efficient and trouble-free operation.
It’s crucial to pay attention to these procedures to guarantee the optimal performance and lifespan of my Drolet Columbia Wood Stove.
Frequently Asked Questions
Can I Use Any Type of Wood to Break in the Drolet Columbia Wood Stove?
Yes, you can use various types of firewood to break in the Drolet Columbia wood stove. However, it’s best to choose hardwoods like oak or maple for optimal efficiency and longevity during the break-in period.
How Long Does the Break-In Period Typically Last for the Drolet Columbia Wood Stove?
The break-in period for the Drolet Columbia wood stove typically lasts about 10-20 hours. It’s essential to follow safety guidelines during this time to ensure proper functioning and longevity of the stove.
Is It Necessary to Clean the Drolet Columbia Wood Stove During the Break-In Period?
During the break-in period for the Drolet Columbia Wood Stove, it is important to follow cleaning requirements to ensure optimal performance. Neglecting this step is one of the common mistakes that can affect the stove’s efficiency.
What Should I Do if I Notice Smoke Leaking From the Stove During the Break-In Period?
If smoke leaks from the Drolet Columbia Wood Stove during the break-in period, check the installation and seals, use well-seasoned hardwood, and follow the manufacturer’s guidelines. Cleaning isn’t necessary, but regular maintenance is.
Can I Use the Drolet Columbia Wood Stove for Cooking During the Break-In Period?
During the break-in period, it is not recommended to use the Drolet Columbia wood stove for cooking. Safety precautions should be followed, and it is best to allow the stove to properly break in before using it for cooking purposes.
Conclusion
In conclusion, proper break-in procedures are crucial for the Drolet Columbia Wood Stove to ensure optimal performance and longevity.
By preparing the stove, controlling the temperature during the break-in period, and following cleaning and maintenance tips, you can extend the lifespan of your stove.
Regular break-in procedures are essential for maximizing the efficiency and functionality of your Drolet Columbia Wood Stove.
Growing up surrounded by the vast beauty of nature, Sierra was always drawn to the call of the wild. While others sought the comfort of the familiar, she ventured out, embracing the unpredictable and finding stories in the heartbeat of nature.
At the epicenter of every remarkable venture lies a dynamic team—a fusion of diverse talents, visions, and passions. The essence of Best Small Wood Stoves is crafted and refined by such a trio: Sierra, Logan, and Terra. Their collective expertise has transformed the platform into a leading authority on small wood stoves, radiating warmth and knowledge in equal measure.
Wood Stove
How Do I Find The Cubic Foot Of A Wood Stove Fire Box
I’ve constantly wondered about the **cubic footage** of the firebox in a wood stove. Knowing the firebox size is key in selecting the perfect wood stove for effective heating. If you want a cozy home, pay attention to this detail.
In this article, I’ll share a step-by-step guide on how to measure the dimensions of the firebox and calculate its cubic foot. By following these instructions, you’ll be able to make an informed decision when selecting a wood stove for your heating needs.
Key Takeaways
- The size of the firebox impacts the efficiency and effectiveness of a wood stove.
- Accurate measurement of the firebox is essential in selecting the right wood stove.
- Measuring the length, width, and height of the firebox helps determine its cubic foot capacity.
- Choosing the right size wood stove for your firebox is important for heating efficiency.
Understanding the Importance of Measuring the Firebox
I’m realizing the significance of measuring the firebox for understanding its capacity. When exploring different firebox designs, it becomes evident that size matters.
A properly sized firebox offers numerous benefits that contribute to the overall efficiency and effectiveness of a wood stove. By accurately measuring the firebox, you can determine its cubic foot capacity, which directly impacts the amount of wood it can hold and burn at a given time.
A larger firebox allows for longer burn times and the ability to accommodate larger wood logs, reducing the need for frequent refueling. On the other hand, a smaller firebox may require more frequent refueling but can be beneficial for those with limited space or heating needs.
Understanding the importance of measuring the firebox is essential in selecting the right wood stove for your specific requirements.
Gathering the Necessary Tools for Measurement
To accurately measure the firebox, I’ll need to gather a tape measure and a notepad for recording the dimensions. Measuring accuracy is crucial in obtaining precise calculations for the cubic foot of a wood stove firebox. Common measurement mistakes can lead to inaccurate results and potential problems later on.
By following a step-by-step guide, we can ensure that our measurements are precise and reliable. Let’s start by measuring the length, width, and height of the firebox. I’ll then record these dimensions in a table for easy reference.
Once we’ve gathered all the necessary measurements, we can move on to calculating the cubic foot of the firebox. By paying attention to detail and avoiding common measurement mistakes, we can achieve accurate and reliable results.
Now, let’s move on to the step-by-step guide to measuring the firebox dimensions.
Step-by-Step Guide to Measuring the Firebox Dimensions
I’ll carefully measure the length, width, and height of the firebox to ensure accurate dimensions. Measuring accuracy is crucial when determining the cubic foot of a wood stove firebox. One common mistake people make isn’t measuring the firebox correctly, resulting in inaccurate calculations.
To begin, I’ll use a tape measure to measure the length of the firebox from one end to the other. Next, I’ll measure the width, ensuring to include any protrusions or irregularities. Finally, I’ll measure the height, starting from the bottom of the firebox to the top.
It’s important to be precise and avoid rounding off measurements. By following these steps and avoiding common mistakes, I can accurately determine the cubic foot of the wood stove firebox.
Calculating the Cubic Foot of the Firebox
Since the cubic foot of the firebox is calculated by multiplying the length, width, and height, it’s important to accurately measure all three dimensions. Calculating the cubic foot of a wood stove firebox requires precision and attention to detail. Here’s how you can ensure accuracy when estimating the volume:
Measure each dimension: Use a tape measure to determine the length, width, and height of the firebox. Take multiple measurements to account for any irregularities.
Convert measurements to feet: The cubic foot is the standard unit for volume, so make sure all measurements are in feet. Convert inches to feet by dividing by 12.
Multiply the dimensions: Once you have the measurements in feet, multiply the length, width, and height together to find the total volume in cubic feet.
Verify your calculations: Double-check your math to ensure accuracy. Any errors in the calculations will result in an inaccurate cubic foot measurement.
Tips for Choosing the Right Size Wood Stove for Your Firebox
Honestly, I think the most important tip for choosing the right size wood stove for your firebox is to carefully consider the dimensions and make sure it fits properly.
When it comes to heating efficiency, the size of the stove plays a crucial role. A stove that’s too small will struggle to heat your space efficiently, while a stove that’s too large will waste energy and overheat the room.
To determine the right size, you need to calculate the cubic foot of your firebox. Measure the length, width, and height, and multiply these dimensions together. This will give you the cubic foot measurement.
Additionally, consider your firewood storage capacity. A larger firebox will allow you to burn bigger logs, reducing the number of times you need to restock.
What is the size and capacity of the Cubic Grizzly Wood Stove fire box compared to other wood stoves?
The install cubic grizzly wood stove has a firebox size of 3.7 cubic feet and can accommodate logs up to 18 inches in length. This is larger than many other wood stoves, allowing for longer burn times and more heat production. The capacity and efficiency of this stove make it a popular choice for heating large spaces.
Frequently Asked Questions
What Are the Benefits of Measuring the Cubic Foot of a Wood Stove Firebox?
Measuring the cubic foot of a wood stove firebox offers several benefits. It allows you to properly size a wood stove for your firebox, ensuring optimal heat output and efficiency. Plus, it helps determine the amount of wood needed for burning.
Can I Use Any Measuring Tools I Have at Home, or Do I Need Specific Tools for Measuring the Firebox Dimensions?
I can use any measuring tools I have at home to measure the firebox dimensions, but it’s recommended to use specific measuring tools for accuracy.
Are There Any Safety Precautions I Should Take While Measuring the Firebox Dimensions?
When measuring the firebox dimensions, it’s important to prioritize safety precautions. Ensure the area is clear of flammable materials, wear protective gear, and use proper measuring tools to accurately determine the cubic foot of the wood stove firebox.
Can I Calculate the Cubic Foot of the Firebox if Its Shape Is Irregular?
To accurately calculate the volume of an irregularly shaped firebox, I recommend using the water displacement method. Fill the firebox with water, measure the amount used, and convert it to cubic feet.
How Do I Know if I Have Chosen the Right Size Wood Stove for My Firebox?
When choosing the right size wood stove for your firebox, there are several factors to consider. These include the size of the room, insulation, and heating needs. It’s important to carefully assess these factors to ensure optimal heat distribution and efficiency.
Conclusion
In conclusion, accurately measuring the cubic foot of a wood stove firebox is crucial in order to choose the right size wood stove for optimal heating efficiency.
By following the step-by-step guide provided and using the necessary tools, you can easily calculate the cubic foot of your firebox.
This will ensure that you select a wood stove that’s the perfect fit for your heating needs, adding sophistication and precision to your decision-making process.
Growing up surrounded by the vast beauty of nature, Sierra was always drawn to the call of the wild. While others sought the comfort of the familiar, she ventured out, embracing the unpredictable and finding stories in the heartbeat of nature.
At the epicenter of every remarkable venture lies a dynamic team—a fusion of diverse talents, visions, and passions. The essence of Best Small Wood Stoves is crafted and refined by such a trio: Sierra, Logan, and Terra. Their collective expertise has transformed the platform into a leading authority on small wood stoves, radiating warmth and knowledge in equal measure.
Wood Stove
How To Replace A Gasket On A Wood Stove
I’m facing an issue: the seal on my wood stove has lost its effectiveness. This problem is causing heat to escape, resulting in higher energy bills.
But fear not, because I’ve got the solution. In this article, I’ll show you how to replace that worn-out gasket on your wood stove. With just a few tools and some elbow grease, you’ll have your stove sealed up tight in no time.
So let’s get started and get that heat where it belongs – inside your home.
Key Takeaways
- Assess the condition of the gasket by checking its texture, flexibility, and looking for cracks or fraying.
- Gather the necessary tools and materials such as high-temperature resistant gasket material, specialized adhesive, utility knife, wire brush, and clean cloth.
- Remove the old gasket by gently scraping off loose sections, using a wire brush to remove residue, and cleaning the area with mild detergent and warm water.
- Install the new gasket by carefully positioning it onto the clean area, selecting the appropriate size, applying adhesive, and allowing it to cure before closing the stove or using it.
Assessing the Condition of the Gasket
I can feel the gasket to check for any signs of wear or damage. The lifespan of a gasket can vary depending on usage and maintenance, so it’s crucial to determine its condition before replacing it.
When assessing the gasket, I examine its texture and flexibility. A healthy gasket should feel smooth and supple, with no visible cracks or fraying. If the gasket is brittle, stiff, or shows signs of deterioration, such as crumbling or peeling, it’s a clear indication of wear and tear.
Additionally, I inspect the gasket for any gaps or irregularities in its seal when the door is closed. These signs help me determine whether it’s time to replace the gasket and ensure optimal functionality of the wood stove.
Gathering the Necessary Tools and Materials
To get started, I’ll need a few tools and materials for this gasket replacement project. Here is a list of items you’ll need:
Gasket material: Choosing the right gasket material is crucial for a successful replacement. Look for high-temperature resistant materials like fiberglass or ceramic fiber.
Gasket adhesive: You’ll need a specialized adhesive designed for high-temperature applications. Make sure it’s compatible with the gasket material you’ve chosen.
Utility knife: A sharp utility knife will help you remove the old gasket and trim the new one to the right size.
Wire brush: Before installing the new gasket, you need to prepare the stove surface by removing any debris or old adhesive. A wire brush will do the job effectively.
Clean cloth: It’s important to have a clean cloth to wipe off any dust or residue from the stove surface before applying the adhesive.
With these tools and materials, you’ll be ready to tackle the gasket replacement project with precision and efficiency.
Removing the Old Gasket
After carefully inspecting the condition of the old gasket, it was clear that it needed to be removed before continuing with the replacement process. To remove the old gasket, I first used a putty knife to gently scrape off any loose or deteriorated sections.
Then, I used a wire brush to remove any remaining gasket residue from the gasket area. It was important to be thorough in this step to ensure proper adhesion of the new gasket.
Once all the residue was removed, I cleaned the gasket area with a mild detergent and warm water to remove any dirt or grease. This step is crucial for a clean and secure gasket installation.
With the old gasket removed and the gasket area cleaned, I was now ready to move on to installing the new gasket.
Installing the New Gasket
With all the necessary preparations complete, I carefully positioned the new gasket onto the clean gasket area. Ensuring proper gasket placement is crucial for a successful installation.
Here are some common gasket installation mistakes to avoid:
Using the wrong size gasket: Measure your stove door or flue carefully and select the appropriate gasket size.
Forgetting to clean the surface: Before installing the new gasket, remove any remnants of the old gasket and clean the surface thoroughly.
Applying too much adhesive: Use a thin and even layer of high-temperature adhesive to secure the gasket in place. Excess adhesive can cause the gasket to bulge or fail.
Not allowing the adhesive to cure: Give the adhesive enough time to cure according to the manufacturer’s instructions before closing the stove or using it.
Neglecting regular maintenance: Even with a new gasket, regular maintenance is essential to ensure optimum performance and prevent future issues.
Testing and Maintaining the New Gasket
I regularly inspect and clean the new gasket to ensure it’s functioning properly. Testing methods for the gasket involve checking for any gaps or leaks that may compromise the seal.
One effective way to test the gasket is by performing a smoke test. To do this, I close all the stove’s openings and light a small piece of paper near the gasket area. If smoke escapes, it indicates a faulty seal.
Troubleshooting tips for the gasket include checking for any signs of wear, such as fraying or flattening. If any issues are found, I carefully remove the old gasket and replace it with a new one.
It’s crucial to follow the manufacturer’s instructions and use high-quality gasket material to ensure optimal performance and safety.
Can Measuring A Wood Stove Gasket Help in Replacing It?
When replacing a wood stove gasket, measuring the wood stove gasket is crucial to ensuring the new gasket will fit properly. Take accurate measurements to determine the required size for a snug and effective seal. This will help to prevent heat loss and ensure efficient stove operation.
Frequently Asked Questions
How Often Should I Replace the Gasket on My Wood Stove?
I replace the gasket on my wood stove every 1-2 years. Regular gasket maintenance is important to ensure proper sealing and prevent heat loss. Neglecting it can lead to reduced efficiency and potential damage.
Can I Use Any Type of Gasket Material for My Wood Stove?
Yes, you can use different types of gasket materials for your wood stove. However, it is important to consider the pros and cons of each material to ensure proper sealing and safety.
Is It Necessary to Clean the Area Where the Old Gasket Was Before Installing the New One?
Yes, it is necessary to clean the area where the old gasket was before installing the new one. This ensures proper adhesion and prevents any debris from interfering with the sealing process.
Can I Use Adhesive to Secure the New Gasket in Place?
Yes, I can use adhesive to secure the new gasket in place. However, it is important to follow best practices for securing gaskets and consider if adhesive is recommended for other stove repairs.
How Long Does It Take for the Adhesive to Dry Before I Can Use the Wood Stove Again?
It is crucial to allow proper drying time for the adhesive when replacing a gasket on a wood stove. Factors such as temperature and humidity can affect the drying time.
Conclusion
In conclusion, replacing a gasket on a wood stove is a necessary maintenance task that can be easily completed with the right tools and materials.
While some may argue that hiring a professional is the best option, this article has provided step-by-step instructions that make the process simple and achievable for anyone.
By following these precise and detailed directions, you can ensure the optimal functioning of your wood stove and extend its lifespan.
Growing up surrounded by the vast beauty of nature, Sierra was always drawn to the call of the wild. While others sought the comfort of the familiar, she ventured out, embracing the unpredictable and finding stories in the heartbeat of nature.
At the epicenter of every remarkable venture lies a dynamic team—a fusion of diverse talents, visions, and passions. The essence of Best Small Wood Stoves is crafted and refined by such a trio: Sierra, Logan, and Terra. Their collective expertise has transformed the platform into a leading authority on small wood stoves, radiating warmth and knowledge in equal measure.
Wood Stove
How To Make Your Wood Stove More Efficient
You might think that enhancing the efficiency of your wood stove is a complex and lengthy process. However, I can assure you that it is simpler than you realize.
In this article, I’ll guide you through simple steps to maximize the heat output of your wood stove. From choosing the right wood to improving airflow and insulating your stove, I’ll show you practical ways to enhance its efficiency.
With regular maintenance and cleaning, you’ll have your wood stove performing at its best in no time.
Key Takeaways
- Regular cleaning and inspection improve efficiency
- Burning dry and seasoned wood minimizes smoke production
- Choosing the right kind of wood maximizes heat output
- Improving airflow and combustion efficiency through regular maintenance and cleaning.
Understanding the Basics of Wood Stove Efficiency
I’m currently learning about the basics of wood stove efficiency.
One important aspect to consider is wood stove maintenance. Regular cleaning and inspection of your stove can greatly improve its efficiency. Removing any built-up soot and debris from the stove and chimney allows for better airflow and combustion, resulting in a more efficient burn.
Another way to improve efficiency is by reducing smoke emissions. Burning dry and seasoned wood helps to minimize smoke production, as wet or unseasoned wood tends to burn inefficiently and produce more smoke.
In addition, using the right kind of wood can maximize heat output. Hardwoods like oak or maple burn longer and hotter than softwoods like pine or spruce.
Choosing the Right Wood for Maximum Heat Output
Using hardwoods like oak or maple, and not softwoods like pine or spruce, is essential for achieving maximum heat output from your wood stove. Here are a few reasons why:
-
Seasoning wood properly:
Moisture content in wood affects its ability to burn efficiently. Hardwoods have a lower moisture content compared to softwoods, allowing them to burn hotter and produce more heat. -
Higher energy density:
Hardwoods have a higher energy density, meaning they contain more potential heat energy per volume. This results in a longer and more sustained burn, providing consistent heat output. -
Utilizing wood stove accessories for better heat distribution:
Accessories like heat fans or heat-powered stove fans can help circulate warm air throughout the room more effectively. This ensures that the heat produced by the wood stove is evenly distributed and maximized. -
Longer burn time:
Hardwoods burn slower than softwoods, resulting in a longer burn time. This means less frequent refueling and a more efficient use of wood.
Improving Airflow and Combustion Efficiency
How can I ensure proper airflow and maximize combustion efficiency in my wood stove?
One of the key factors in achieving efficient combustion is to ensure proper airflow. This can be achieved by regularly cleaning the air vents and chimney to remove any blockages that may hinder the flow of air.
Additionally, using eco-friendly fuel alternatives, such as compressed sawdust logs or wood pellets, can help improve combustion efficiency. These fuels are designed to burn more efficiently and produce less smoke and ash.
Another way to maximize efficiency is by increasing insulation around your wood stove. This can be done by installing a heat-resistant barrier or using a heat reflector to redirect the heat back into the room.
Insulating Your Wood Stove for Better Heat Retention
By insulating your wood stove and using a heat reflector, you can increase its heat retention and reduce energy waste. Here are some practical tips to make your wood stove more efficient:
-
Install a blower fan: A blower fan helps in better heat distribution by circulating the warm air throughout the room. This ensures that the heat is evenly spread, making your space more comfortable.
-
Use heat resistant glass: Upgrading to heat resistant glass for your wood stove door can significantly improve insulation. It prevents heat from escaping and allows you to enjoy the comforting sight of the fire without compromising on efficiency.
-
Seal any gaps or leaks: Inspect the areas around your wood stove for any gaps or leaks. Using high-temperature silicone or gaskets can help seal these openings, preventing heat loss.
-
Add insulation around the stove: Consider adding insulation around the walls, floor, and ceiling near the wood stove to further reduce heat loss. This will help keep the heat inside the room, making it more energy-efficient.
Regular Maintenance and Cleaning for Optimal Performance
I always ensure that I schedule regular maintenance and cleaning for my wood stove to maintain its optimal performance.
Cleaning techniques are essential to keep the stove functioning efficiently. One of the most common issues with wood stoves is a buildup of creosote, which can lead to chimney fires. To prevent this, I regularly clean the interior of the stove using a wire brush and remove any creosote buildup.
Additionally, I inspect the gaskets and seals to ensure they’re intact and replace them if necessary. Troubleshooting common issues such as a weak flame or difficulty in starting the fire can often be resolved by cleaning the air vents and removing any ash or debris.
Frequently Asked Questions
Can I Use My Wood Stove to Heat My Entire Home?
Yes, I can use my wood stove to heat my entire home. Wood stove installation offers many benefits for heating, including cost savings, cozy warmth, and the ability to rely less on other heating sources.
What Are the Potential Health Risks Associated With Using a Wood Stove?
Potential health risks associated with using a wood stove include poor indoor air quality, which can lead to respiratory issues and exacerbate existing conditions. Proper ventilation and regular maintenance can help mitigate these risks.
How Can I Prevent Creosote Buildup in My Chimney?
To prevent chimney fires and remove creosote buildup, regular cleaning and maintenance are essential. I recommend scheduling annual chimney inspections, using creosote removal techniques such as chimney brushes and creosote removal products.
Can I Use Alternative Fuels, Such as Pellets or Coal, in My Wood Stove?
Yes, you can use alternative fuels like pellets or coal in your wood stove. They offer benefits such as higher heat output and longer burn times. However, it’s important to follow the manufacturer’s guidelines for safe and efficient use.
What Safety Precautions Should I Take When Using a Wood Stove?
When using a wood stove, it’s important to prioritize safety. Proper ventilation is crucial to prevent carbon monoxide buildup. Regular wood stove maintenance, such as cleaning the chimney and inspecting for leaks, is essential for safe operation.
Conclusion
In conclusion, by implementing some simple strategies, you can greatly improve the efficiency of your wood stove.
Did you know that a well-insulated wood stove can reduce heat loss by up to 80%? This means more heat stays inside your home, resulting in lower energy costs and a warmer living space.
So, take the time to choose the right wood, improve airflow, insulate your stove, and perform regular maintenance to maximize its performance and save money in the long run.
Growing up surrounded by the vast beauty of nature, Sierra was always drawn to the call of the wild. While others sought the comfort of the familiar, she ventured out, embracing the unpredictable and finding stories in the heartbeat of nature.
At the epicenter of every remarkable venture lies a dynamic team—a fusion of diverse talents, visions, and passions. The essence of Best Small Wood Stoves is crafted and refined by such a trio: Sierra, Logan, and Terra. Their collective expertise has transformed the platform into a leading authority on small wood stoves, radiating warmth and knowledge in equal measure.
-
Wood Stove9 months ago
How To Build A Thermoelectric Generator For A Wood Stove
-
Wood Stove6 months ago
What Can I Use As Insulation On Wood Stove Pipes
-
Wood Stove2 months ago
How To Use Damper And Draft On Wood Stove
-
Wood Stove2 weeks ago
How Far Does Wood Stove Have To Be From Wall
-
Wood Stove9 months ago
How To Make A Heat Shield For A Wood Stove
-
Wood Stove1 month ago
When To Open And Close Damper On Wood Stove
-
Wood Stove9 months ago
How To Use The Flue On A Wood Stove
-
Wood Stove6 months ago
How To Install A Wood Stove Pipe And Chimney