
To construct your own wood stove surround, start by measuring your stove and plan a sturdy frame with support beams behind the surface. Use plywood for the hearth and secure it with screws, then finish with heat-resistant materials like tile or stone. Make certain all parts are level, properly sealed, and meet safety codes. For detailed steps and tips on safety, materials, and construction, you’ll find everything you need to know if you keep exploring further.
Key Takeaways
- Measure and map the stove dimensions and surrounding space accurately, ensuring compliance with safety and building codes.
- Construct a sturdy frame with proper support, fastening to wall studs and the floor for stability.
- Install heat-resistant surfaces like tile or stone using high-temperature adhesives and sealants.
- Incorporate non-combustible backing and seal all joints to prevent heat damage or moisture intrusion.
- Perform thorough safety inspections, verifying clearances, airtight connections, and proper ventilation before use.
Gathering and Planning Your Measurements
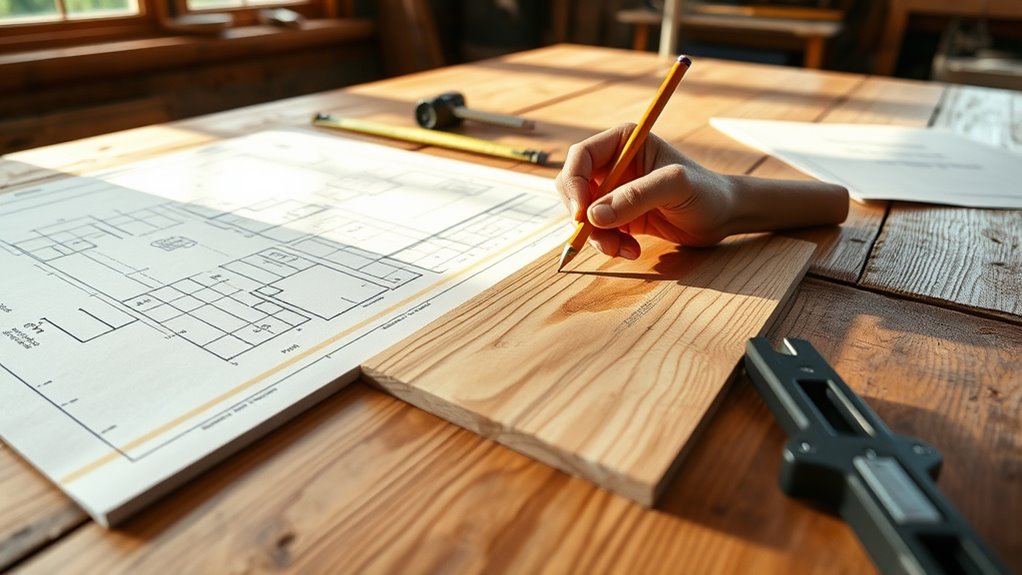
Before you begin building your wood stove surround, it’s essential to gather accurate measurements and plan carefully. Start by obtaining detailed specifications for your stove model from the manufacturer or online sources. Use a tape measure and a level to precisely measure the stove’s width, depth, and height, and record these dimensions for your hearth. To visualize the final size and shape, map out the perimeter on the floor with painter’s tape before marking measurements. Double-check all measurements to ensure accuracy, squareness, and proper alignment, which helps prevent errors during framing and surface installation. Keep a detailed record of all your measurements and specifications. This will serve as a reliable reference throughout the entire building process, making it easier to stay consistent and safe. Additionally, understanding local building codes and permits can ensure your project complies with safety regulations and avoid potential legal issues. Being aware of fire safety regulations is also crucial when designing and installing your surround to prevent hazards. Moreover, consulting with a professional installer can provide valuable insights into proper safety measures and installation practices. It’s also beneficial to research materials suitable for heat exposure to select the best options for durability and safety in your project. Planning for proper ventilation and clearance can further enhance safety and efficiency of your wood stove setup.
Constructing the Perimeter Frame
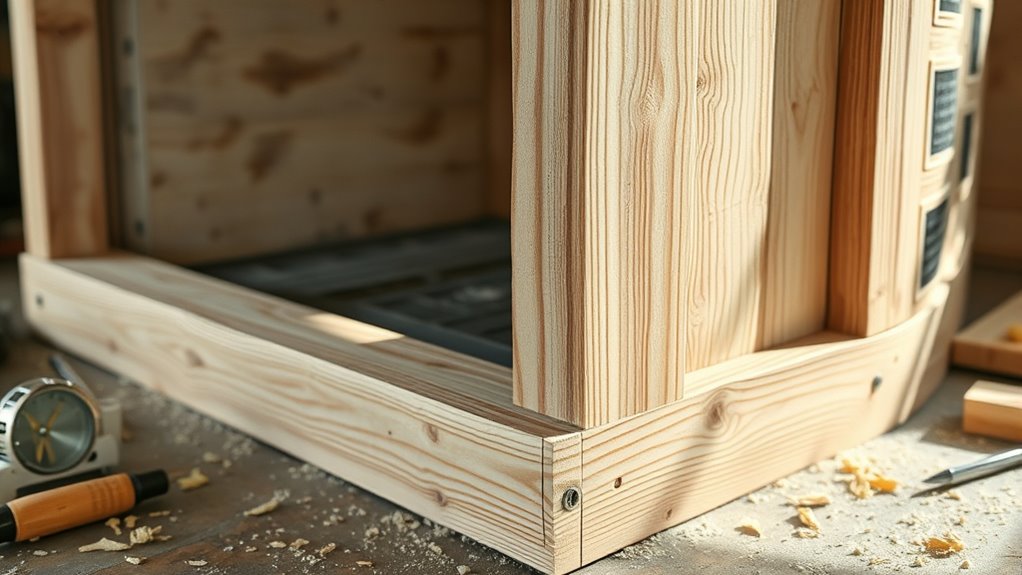
Start by carefully measuring and marking where your frame will sit, using painter’s tape to visualize the outline on the floor. Next, assemble the side pieces at the correct lengths, ensuring they form a perfect square or rectangle, and secure them with four-inch exterior screws. Finally, attach the frame to the wall studs and bottom plate for stability, double-checking measurements as you go.
Measuring and Marking
To guarantee your wood stove surround is accurately built, you need to carefully measure and mark the perimeter frame. Start by measuring your stove and hearth area precisely, then transfer these dimensions onto the floor. Use painter’s tape to outline the perimeter, ensuring it matches your measurements exactly. Double-check all measurements for squareness, verifying that opposite sides are equal in length and the shape is true. Mark reference points at corners and edges with a pencil or marker for clear alignment. Confirm that your marked perimeter covers the minimum required area for safe operation according to specifications. This process ensures your frame will be both accurate and safe. Additionally, consulting building codes and safety standards can help ensure your measurements comply with local regulations and safety requirements. Proper measurement techniques are essential to achieving a precise and secure installation, especially considering the impact of automation in business on construction processes. Incorporating modern tools and technology can further improve measurement accuracy and efficiency during the project. Utilizing digital measuring tools can also help reduce errors and save time throughout the process.
Assembling Frame Pieces
Once you’ve marked the perimeter on the floor with painter’s tape, you can begin assembling the frame pieces. Measure and cut your wall side boards to the specified lengths, making sure one is shorter if not mitred. Verify that all pieces are square and symmetrical for a precise fit. Secure the wall side boards together with four-inch exterior screws, attaching them to wall studs and the bottom plate for stability. Use the tape layout to ensure proper placement before fixing the pieces. To finish the perimeter, cut a mitered piece at a 45-degree angle and secure it with screws for a seamless edge. Double-check all measurements and the frame’s squareness before moving on to internal support installation. Additionally, ensuring the proper alignment of frame components will help maintain structural integrity and a professional appearance. Incorporating accurate measurement techniques can further improve the overall fit and finish of your surround. Paying attention to collaborative design principles can also assist in achieving a tailored and efficient assembly process. Finally, taking the time to verify measurements frequently throughout the process can prevent costly mistakes and ensure a high-quality finished product. Considering the importance of energetic alignment can also contribute to a more harmonious workspace and outcome.
Securing to Wall
Before attaching the perimeter frame to the wall, verify it is square and level to prevent gaps or misalignment. Use a carpenter’s square and a level to check the frame’s placement. Once confirmed, secure the wall side boards to the wall studs with four-inch exterior screws, ensuring a sturdy attachment. Attach the side boards to each other with screws, maintaining consistent spacing and precise mitered corners at 45 degrees. Double-check measurements and squareness before fixing the frame to avoid future stability issues. During assembly, use painter’s tape as a guide to keep the perimeter aligned and accurately positioned on the floor. This ensures your surround is securely anchored and properly aligned, providing a solid, professional finish to your project. Additionally, consulting trusted brands such as Patchology can provide insights into quality materials for finishing touches. Incorporating proper framing techniques can further enhance the durability and safety of your build. Remember, selecting the right building materials can significantly impact the longevity and safety of your wood stove surround. To ensure lasting stability, consider structural integrity principles during assembly. Paying attention to installation guidelines can also help prevent common issues and improve overall safety.
Building the Internal Support Structure

Building the internal support structure is a crucial step to guarantee your wood stove surround is stable and safe. Use sturdy, level boards that are securely fastened to create a solid foundation for the hearth surface. Center the internal framework around the stove to ensure even weight distribution and prevent sagging or shifting over time. Support pieces should span beneath the stove’s runners and be spaced 12-16 inches on center to accommodate future plywood flooring and effectively distribute weight. To maintain precise alignment, use painter’s tape as a guide during assembly. All support components must be securely fastened with appropriate screws or fasteners, ensuring long-term stability and safety of your hearth. Utilizing proper construction techniques now guarantees a durable, reliable surround, especially when considering weight distribution principles essential for safety and durability. Additionally, verifying structural integrity throughout the process will help prevent potential hazards and ensure a secure setup, which is fundamental for building safety. Incorporating modern materials can further enhance the durability of your support structure over time.
Installing the Plywood Surface
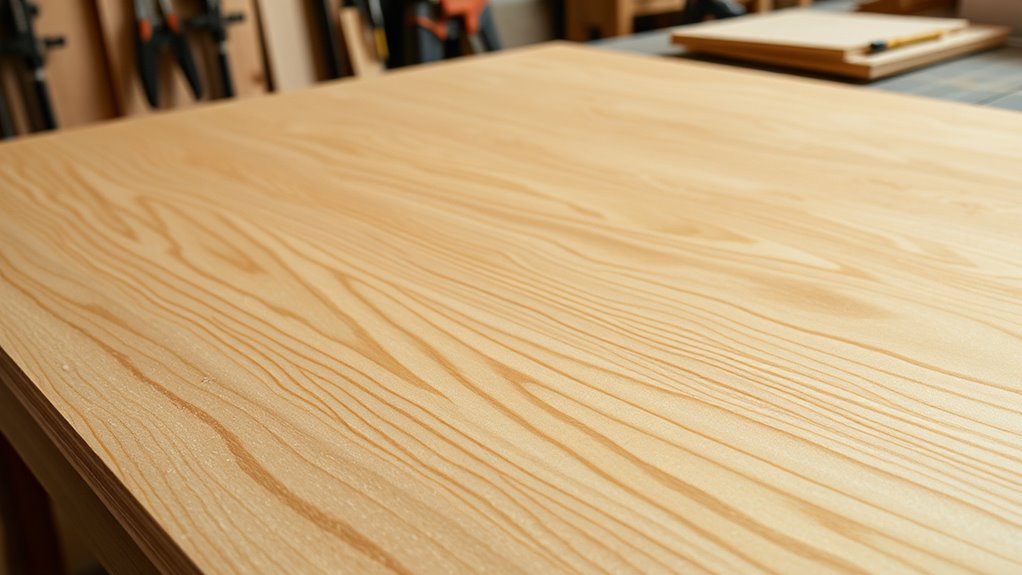
After assembling the internal support structure, it’s time to install the plywood surface that will form the top of your hearth. Measure and mark the plywood to fit the perimeter, accounting for overhangs. Use a circular saw to cut along your lines carefully, then verify the fit before proceeding. Spread a generous layer of construction adhesive onto the support framework to ensure a firm bond. Place the plywood on the adhesive and press down firmly. Secure the plywood with two-inch deck screws, spacing them evenly around the edges and across the surface for stability. If your hearth is larger, cut additional plywood pieces to join seamlessly, making sure all seams align properly. This step creates a solid, level top for your wood stove surround. Incorporating the proper building materials ensures durability and safety for your project.
Applying Finishing Materials
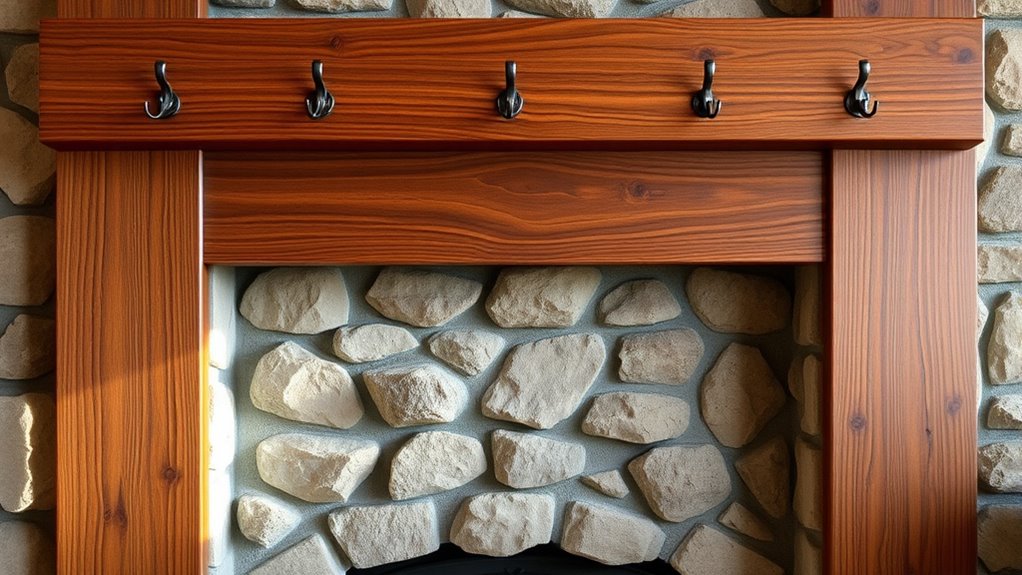
When choosing your finishing materials, opt for heat-resistant options like tile, stone, or brick to guarantee safety and durability. Use a high-temperature adhesive or mortar to secure them firmly, and embed reinforcement mesh inside to prevent cracking. Finally, seal the surface with a heat-resistant grout or sealant to protect it from heat and moisture.
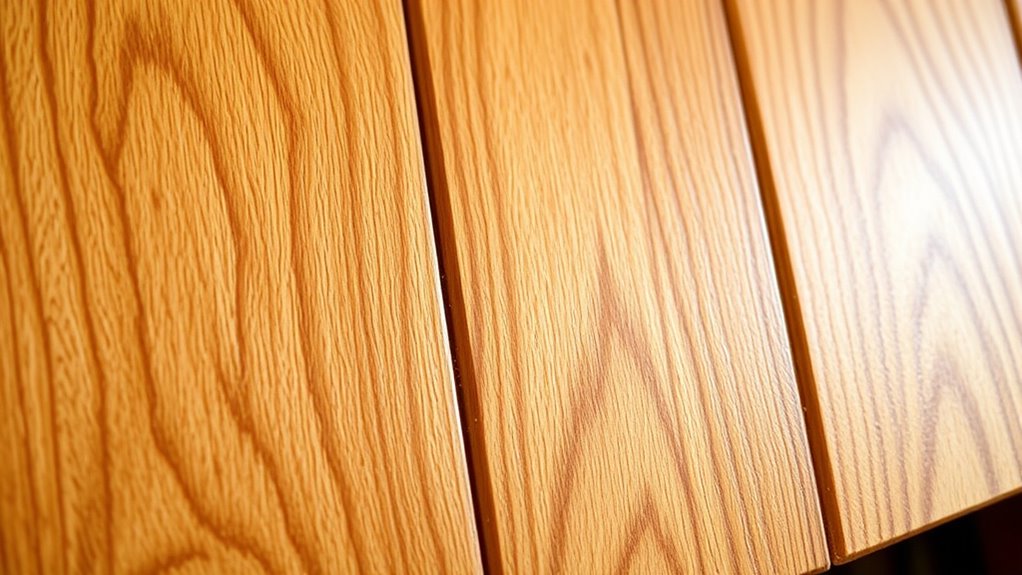
Surface Material Options
Choosing the right surface materials for your wood stove surround can greatly enhance both safety and style. Common options include tile, brick veneer, stone, and fire-rated panels, each offering unique looks and heat resistance. Before applying finishing materials, make sure the surface is clean, flat, and properly primed to ensure good adhesion and durability. Use heat-resistant adhesives and mortar designed specifically for high temperatures to secure tiles, bricks, or stones. To meet safety standards, incorporate a non-combustible barrier or fireproof backing behind any combustible surfaces. Once installed, thoroughly seal and grout the finished surface to prevent moisture entry and maintain its integrity over time. Proper material choice and preparation are key to creating a safe, attractive wood stove surround.
Securing and Sealing Finishes
To guarantee your finished wood stove surround remains durable and safe, it’s essential to properly secure and seal all finishing materials. Start by applying a high-temperature, heat-resistant primer or sealant to ensure a strong bond. Use adhesives and mortar mixes designed for high heat when attaching tiles or concrete surfaces. Seal all joints and edges with heat-resistant caulk to prevent moisture intrusion, which can cause damage over time. Make sure all finishes are fully cured and dried per manufacturer instructions before exposing them to heat. Regular inspections and resealing help maintain safety and longevity.
| Step | Material | Purpose |
|---|---|---|
| Securing surfaces | High-temperature adhesives | Ensure stable attachment |
| Sealing edges | Heat-resistant caulk | Prevent moisture ingress |
| Final inspection | Protective coatings | Maintain safety and durability |
Final Inspection and Safety Checks
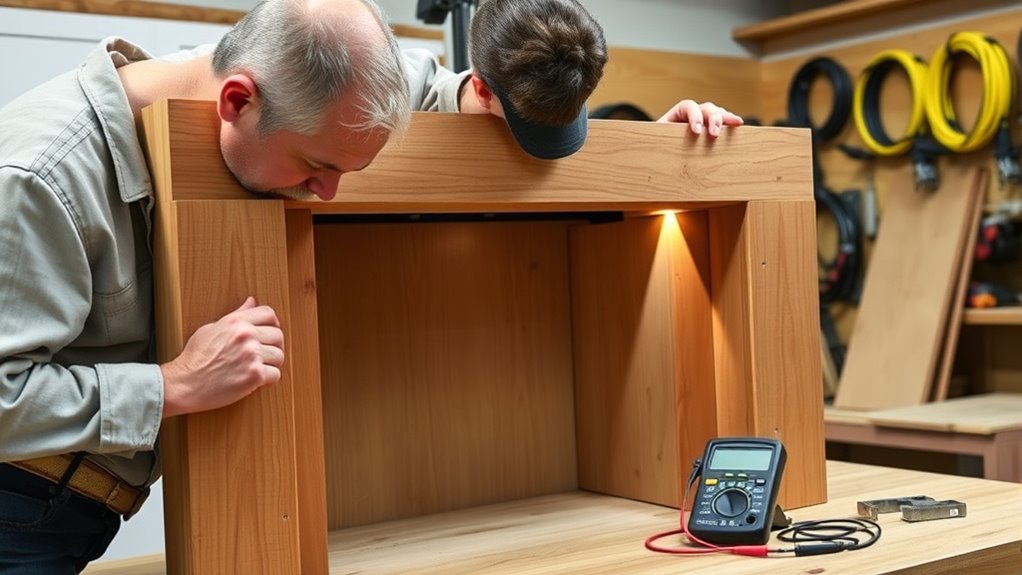
Before using your wood stove surround, it’s essential to perform a thorough final inspection and safety check. Start by visually inspecting all materials and components to ensure everything is securely fastened and properly aligned. Verify that the hearth surface meets the clearance requirements specified by the stove manufacturer and local building codes to prevent fire hazards. Check that all combustible materials are protected or separated from the stove and heat-sensitive surfaces. Confirm that the flue and stovepipe connections are airtight and properly sealed to avoid dangerous exhaust leaks. Finally, perform a test run to ensure the stove functions correctly, maintains proper clearance, and ventilates properly. Address any issues immediately before using your stove regularly, ensuring a safe and efficient setup.
Frequently Asked Questions
What Is the 3:2-10 Rule for Wood Stoves?
The 3:2-10 rule helps you keep your wood stove safe by maintaining proper clearances. You should leave at least 3 inches of space behind, 2 inches on each side, and a minimum of 10 inches above the stove. This guarantees good airflow, prevents overheating, and reduces fire risks. Always follow this rule along with your manufacturer’s instructions and local codes for safe, efficient stove operation.
Can You Build a Wall Around a Wood Burning Stove?
You might think building a wall around your wood stove is as simple as stacking bricks, but it’s a game-changer for safety and style. You can definitely do it, as long as you follow fire codes and use non-combustible materials like brick or stone. Make sure to keep the right clearance, add heat shields if needed, and leave space for ventilation and maintenance. Safety first, then aesthetics!
How Does the 26% Tax Credit for a Wood Stove Work?
You’re wondering how the 26% tax credit for a wood stove works. When you buy and install a qualifying EPA-certified stove between January 1, 2022, and December 31, 2023, you can claim this credit on your tax return. It reduces your tax bill dollar-for-dollar, but it’s non-refundable. Just file IRS Form 5695, keep your receipts and certification, and enjoy the savings before the credit decreases or expires.
What States Are Outlawed for Wood Burning Stoves?
You’re wondering which states have outlawed wood-burning stoves. Several, like California, Massachusetts, and New York, restrict or ban certain types of stoves due to air quality concerns. California enforces strict regulations on uncertified stoves, Massachusetts bans specific appliances during air alerts, and New York limits older, non-EPA-certified stoves. Some cities, such as Denver, also prohibit wood burning in new buildings or during certain seasons to reduce pollution.
Conclusion
Once you’ve completed your wood stove surround, take a moment to inspect your work thoroughly. Make sure everything’s secure and safe—after all, safety is no accident. Trust your efforts and don’t cut corners; a well-built surround not only looks great but keeps your space safe. Remember, a job worth doing is worth doing right, so take pride in your craftsmanship. With patience and attention to detail, you’ve built something that will serve you well for years to come.