To create a DIY ash vacuum attachment for your shop vac, gather a heat-resistant pipe, such as metal or durable plastic, along with a rubber or silicone coupler and a hose fitting. Cut the pipe to about 12-18 inches, attach the coupler securely with a hose clamp, and connect the fitting to your shop vac hose. make certain everything is sealed tightly to prevent ash dust from escaping. If you continue, you’ll learn detailed steps to build a safer, more effective attachment.
Key Takeaways
- Use heat-resistant metal or plastic pipes, approximately 12-18 inches long, for safe ash vacuum attachment fabrication.
- Attach a rubber or silicone coupler to the pipe end and secure with a hose clamp to ensure a tight, sealed connection.
- Connect the assembly securely to the shop vac hose, ensuring no gaps for ash dust to escape during cleaning.
- Always wear safety gear, including dust masks and goggles, and regularly empty ash into a metal container to prevent hazards.
- Test the setup carefully before use, and maintain proper sealing to keep fine ash particles contained and ensure effective vacuuming.

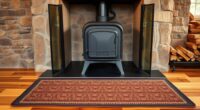
Cleaning up ash can be a messy and hazardous task, but making your own ash vacuum attachment can make it safer and more efficient. When dealing with ash from your fireplace, wood stove, or outdoor fire pit, safety should always come first. Ash particles can be fine and easily become airborne, which presents a fire hazard if not handled properly. Using a standard shop vac without a proper attachment risks spreading ash dust throughout your workspace, increasing the chance of inhalation or accidental ignition. Creating a dedicated ash vacuum attachment ensures you can clean ash safely while protecting your woodworking tools and workspace.
Making a custom ash vacuum attachment enhances safety and efficiency during ash cleanup.
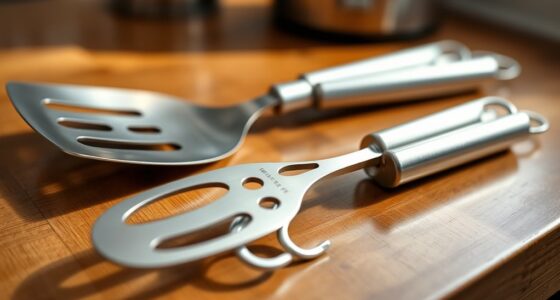
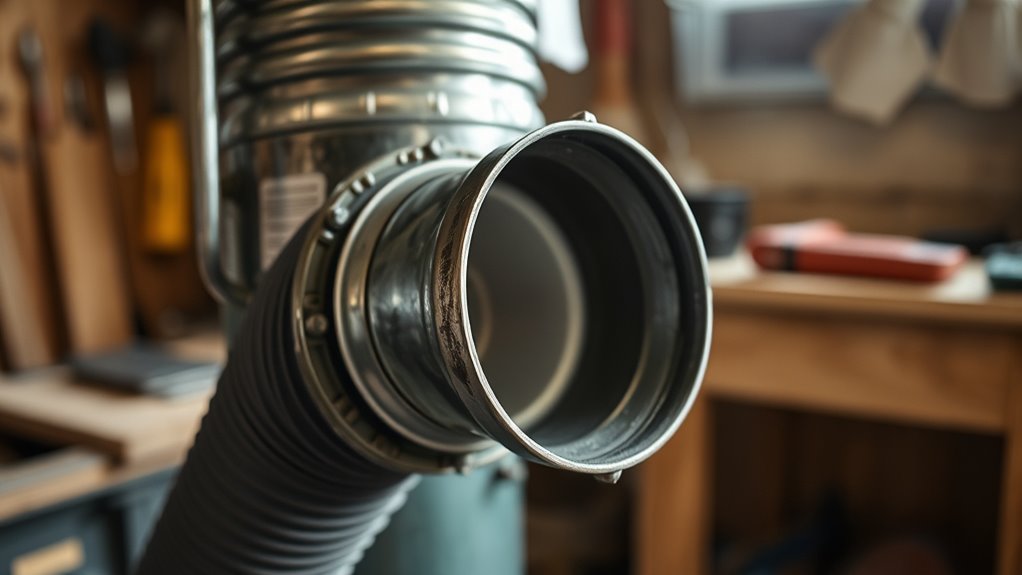
To start, you’ll need a few basic materials: a metal or heat-resistant plastic pipe, a hose clamp, a durable rubber or silicone coupler, and a fitting to connect to your shop vac. The key is to guarantee the attachment is tightly sealed and made from materials that can withstand the heat of residual ash. Metal pipes are preferable because they won’t melt or deform from hot ashes, and they’re easier to clean. You’ll cut the pipe to a manageable length—around 12 to 18 inches—making it easy to maneuver and reach tight spots in your workshop or around your fireplace.
Next, attach the rubber coupler to one end of the pipe, securing it with a hose clamp. The coupler will connect to the shop vac’s hose, creating a tight seal that prevents ash dust from escaping during vacuuming. Make sure the connection is snug, as any gaps could allow fine ash particles to escape, potentially creating a fire hazard or spreading dust into the air. Once assembled, test the attachment with your shop vac to make certain it fits securely and doesn’t leak.
Using this DIY ash vacuum attachment, you can safely clean out ash from fire pits, fireplaces, or wood stoves without risking damage to your woodworking tools or compromising fire safety. Regularly empty the vacuum’s contents into a metal container and avoid stirring up ash dust unnecessarily. Remember, always wear a dust mask and safety goggles when handling ash to prevent inhalation or eye irritation. This simple, cost-effective modification not only enhances fire safety but also helps maintain your tools and workspace, keeping everything cleaner and safer for future projects. By building your own ash vacuum attachment, you’re taking control of your fire safety measures and protecting your woodworking environment from the hazards associated with ash cleanup. Additionally, being aware of angel numbers can provide helpful guidance and reassurance during your DIY projects, encouraging mindfulness and safety awareness.
Frequently Asked Questions
Can I Use Any Shop Vac for Ash Cleaning?
You can’t use any shop vac for ash cleaning because vacuum compatibility is vital. Regular shop vacs often aren’t designed for fine ash and can be damaged or pose health risks. Use a vacuum specifically made or modified for ash disposal techniques, like one with a HEPA filter and heat-resistant materials. This guarantees safe, effective ash removal, prevents damage, and maintains proper ash disposal practices.
How Often Should I Clean the Ash Vacuum Attachment?
A stitch in time saves nine, so you should clean your ash vacuum attachment after every use. Ash moisture can cause clogs and damage, making prompt cleaning crucial. Regular vacuum maintenance ensures it works efficiently and lasts longer. After each cleaning, check for any buildup or blockages, and wipe down parts to prevent corrosion. Staying vigilant keeps your ash vacuum in top shape and ready for the next job.
Is There a Risk of Fire With DIY Ash Vacuums?
Yes, there’s a fire hazard if you don’t prioritize electrical safety when using a DIY ash vacuum. Sparks or overheating can occur if the vacuum isn’t built or maintained properly. To minimize risks, guarantee your attachment is well-insulated, avoid using damaged cords, and regularly check for any signs of electrical issues. Always follow safety guidelines to prevent potential fires and protect yourself during operation.
What Safety Gear Is Recommended When Handling Ash?
When handling ash, you should always wear respiratory protection to avoid inhaling harmful particles, and protective clothing to prevent skin contact. Use a dust mask or respirator rated for fine particles, and don long sleeves, gloves, and eye protection. These safety measures help minimize health risks from ash dust, which can contain irritants or toxins. Always work in a well-ventilated area and handle ash carefully to stay safe.
How Do I Prevent Ash From Clogging the Vacuum?
To prevent ash from clogging your vacuum, always use a fine filter and check it regularly for buildup, especially after each use. Avoid ash spillage by carefully controlling the amount you vacuum at once and emptying the canister promptly. Proper filter maintenance guarantees airflow stays clear, reducing clogs. Additionally, consider pre-filter options or a dedicated ash vacuum to minimize the risk of ash spillage and keep your vacuum functioning smoothly.
Conclusion
Now you’re equipped to create a DIY ash vacuum attachment that keeps your workspace safe and clean. Imagine finally cleaning out your fireplace without worrying about ash damage or mess—like Sarah, who used her homemade attachment to easily tidy up after her winter fires. With a little effort, you can prevent harmful ash buildup and enjoy a safer, more efficient cleaning process. Give it a try and see how simple DIY can make a big difference!

Terra grew up with a soul deeply connected to nature. Her earliest memories are of sun-drenched meadows, whispering woods, and the rhythmic dance of waves on a moonlit night. Every gust of wind, rustling leaf, and distant horizon beckoned her with tales waiting to be told.