Wood Stove
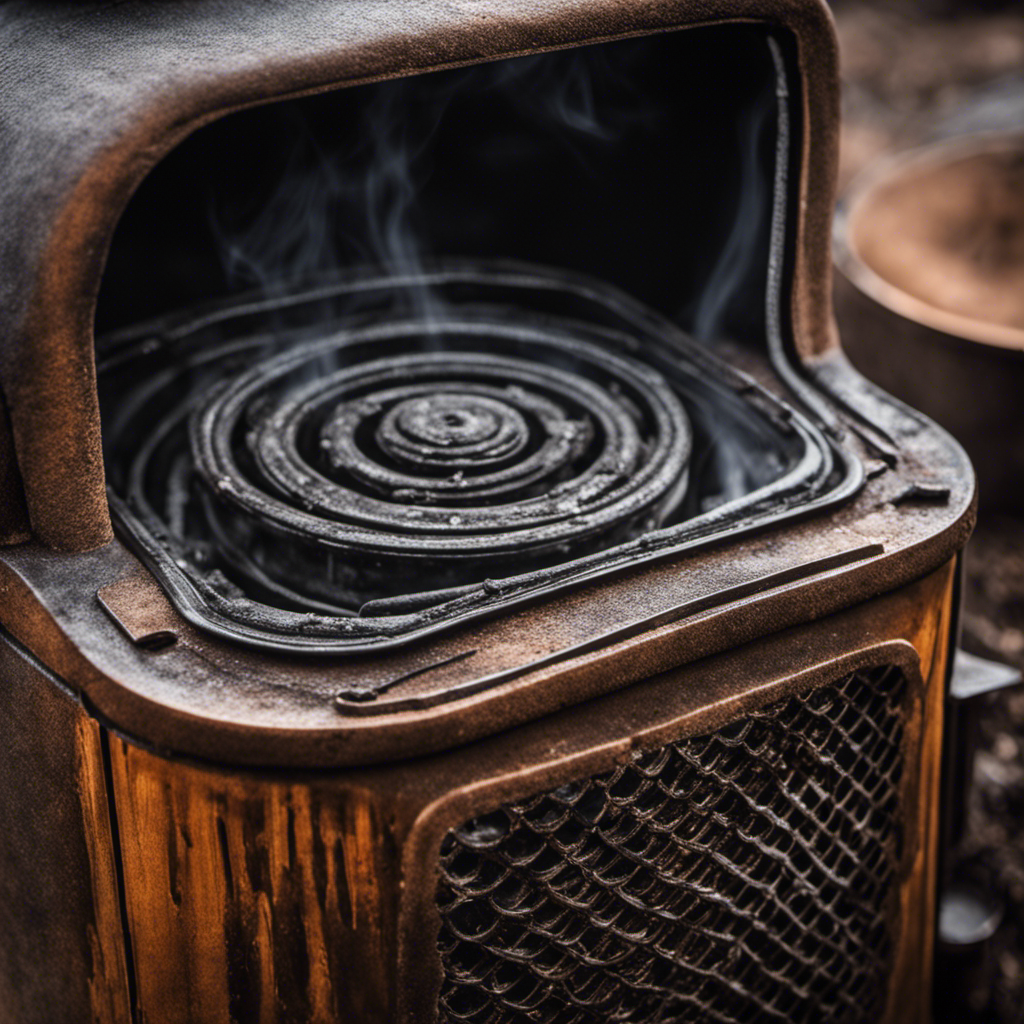
How To Clean Rust Off Wood Stove
As someone who uses a wood stove regularly, I can relate to the annoyance that rust can bring. It feels like a stubborn stain that never wants to disappear.
But fear not! In this article, I’ll show you the most effective methods to clean rust off your wood stove.
From natural remedies to chemical solutions, I’ve got you covered.
Plus, I’ll share some maintenance tips to prevent future rust.
Get ready to restore your wood stove to its former glory!
Key Takeaways
- Rust on a wood stove is caused by the reaction between iron or steel, oxygen, and moisture.
- Regularly wiping down the stove and applying a protective coating can help prevent rust.
- Natural remedies such as vinegar, lemon juice, and baking soda can be used to remove rust from a wood stove.
- Chemical solutions designed for wood stoves provide a gentler approach to rust removal compared to abrasive methods.
Understanding the Causes of Rust on a Wood Stove
I frequently notice rust on my wood stove, and I want to understand its causes.
Rust on metal surfaces, including the wood stove, is primarily caused by the reaction between iron or steel and oxygen in the presence of water or moisture. This process is called corrosion.
When the stove is exposed to moisture, either from high humidity or direct contact with water, the iron or steel begins to oxidize, forming rust.
Additionally, the combustion process within the stove can produce water vapor, which can contribute to the formation of rust.
To prevent rust formation, it’s important to keep the wood stove dry and minimize exposure to moisture. Regularly wiping down the stove after use and applying a protective coating, such as heat-resistant paint, can also help to prevent rust.
Preparing the Wood Stove for Rust Removal
After researching different methods, I learned that preparing the wood stove for rust removal is essential before applying any rust removal product. Taking the necessary pre-cleaning steps ensures that the rust removal process is effective and maximizes the lifespan of the wood stove. Here are the steps I found to be crucial in preparing the wood stove for rust removal:
-
Gather the necessary equipment:
-
Safety goggles and gloves to protect yourself
-
Wire brush or sandpaper to remove loose rust and debris
-
Rust converter or rust remover product
-
Paintbrush or sponge to apply the rust removal product
-
Begin by removing any loose rust and debris using the wire brush or sandpaper. This will create a clean surface for the rust removal product to adhere to.
-
Apply the rust remover product or rust converter evenly using a paintbrush or sponge. Make sure to follow the instructions on the product label for proper application and safety precautions.
Using Natural Remedies to Remove Rust From a Wood Stove
There are three natural remedies that can effectively remove rust from a wood stove: vinegar, lemon juice, and baking soda.
Vinegar, a weak acid, works by breaking down the rust and making it easier to remove. Simply soak a cloth in vinegar and scrub the rusted areas.
Lemon juice, with its citric acid content, also has rust removal properties. Apply lemon juice directly to the rusted spots and let it sit for a few minutes before scrubbing.
Baking soda, a mild abrasive, can be mixed with water to form a paste. Apply the paste to the rusted areas and scrub gently.
These natural remedies are cost-effective and environmentally friendly alternatives to harsh chemical solutions.
Transitioning to the next section, let’s explore the process of applying chemical solutions to eliminate rust on a wood stove.
Applying Chemical Solutions to Eliminate Rust on a Wood Stove
Although it requires caution, using a chemical solution can effectively eliminate rust on a wood stove. When dealing with rust, it’s important to explore different methods to find the most suitable one. While abrasive methods can be effective, they can also damage the surface of the wood stove. Chemical solutions, on the other hand, provide a gentler approach to rust removal.
Here are two key points to consider when using chemical solutions:
-
Choose the right solution: Look for a rust dissolver specifically designed for wood stoves. These solutions are formulated to effectively remove rust without causing damage to the surface.
-
Follow safety precautions: Chemical solutions can be hazardous if not used properly. Always wear protective gloves and goggles, and work in a well-ventilated area. Follow the instructions provided by the manufacturer for best results and safety.
Regular cleaning is vital for rust prevention on a wood stove. By keeping the stove clean and dry, you can minimize the chances of rust formation and maintain its longevity.
Preventing Rust on a Wood Stove: Maintenance Tips and Tricks
I find that applying a high-temperature paint coating every few years is an effective way to prevent rust on my wood stove.
Rust can be a common issue with wood stoves, especially when they’re exposed to moisture or high humidity.
To maintain the longevity of my wood stove, I follow a strict maintenance schedule that includes regular cleaning and inspection.
In addition to the paint coating, I also make sure to clean the stove thoroughly before applying the protective coating.
This involves removing any ash, soot, or debris from the stove’s surface and ensuring that it’s completely dry.
Frequently Asked Questions
How Long Does It Take for Natural Remedies to Remove Rust From a Wood Stove?
It typically takes natural remedies a few hours to overnight to remove rust from a wood stove. Commercial rust removers are highly effective, but vinegar is also a reliable option for removing rust from wood stoves.
Can I Use Household Cleaning Products to Remove Rust From a Wood Stove?
Sure, I can use household cleaning products to remove rust from a wood stove. Some of the best DIY methods include using vinegar or lemon juice and scrubbing with a soft cloth.
Are There Any Safety Precautions I Should Take When Applying Chemical Solutions to Eliminate Rust on a Wood Stove?
When applying chemical solutions to eliminate rust on a wood stove, it is important to follow safety precautions and best practices. This ensures your safety and prevents any damage to the stove.
How Often Should I Perform Maintenance on My Wood Stove to Prevent Rust?
To prevent rust on a wood stove, regular maintenance is key. Inspect for signs of rust damage like discoloration or flaking paint. Clean and dry the stove thoroughly, apply a rust inhibitor, and keep it protected from moisture.
Can I Prevent Rust on a Wood Stove by Painting It With High-Temperature Paint?
To prevent rust on a wood stove, painting it with high-temperature paint can be effective. However, there are pros and cons to consider. The paint provides a protective barrier, but it may require frequent touch-ups due to heat exposure.
Conclusion
In conclusion, by understanding the causes of rust on a wood stove and properly preparing it for rust removal, you can effectively eliminate rust using natural remedies or chemical solutions.
Additionally, regular maintenance and preventive measures can help prevent future rusting.
Just like a well-maintained wood stove, a rust-free stove can provide warmth and comfort, creating a cozy atmosphere in your home.
So, take the necessary steps to keep your wood stove in excellent condition and enjoy its reliable performance for years to come.
Growing up surrounded by the vast beauty of nature, Sierra was always drawn to the call of the wild. While others sought the comfort of the familiar, she ventured out, embracing the unpredictable and finding stories in the heartbeat of nature.
At the epicenter of every remarkable venture lies a dynamic team—a fusion of diverse talents, visions, and passions. The essence of Best Small Wood Stoves is crafted and refined by such a trio: Sierra, Logan, and Terra. Their collective expertise has transformed the platform into a leading authority on small wood stoves, radiating warmth and knowledge in equal measure.
Wood Stove
How To Install Wood Stove Pipe In Cathedral Siling
During the cold winter months, a great way to create a warm and inviting atmosphere in your living area is by installing a wood stove pipe on your cathedral ceiling.
I’ll show you the step-by-step process of how to do it safely and effectively.
With the right tools and materials, you’ll be able to enjoy the comforting heat of a wood stove while maintaining proper ventilation.
Let’s get started and make your home the ultimate retreat.
Key Takeaways
- The stove’s flue collar diameter should match the pipe diameter for a proper fit and to minimize leaks.
- Consider the size of the room and desired heat output when selecting the pipe diameter.
- Properly sized pipe ensures efficiency and heat output of the stove.
- Insulate the pipe to prevent heat loss and maintain safe temperatures.
Choosing the Right Wood Stove Pipe Size
I’m struggling to decide on the right wood stove pipe size for my installation. Selecting the appropriate wood stove pipe diameter is crucial for ensuring the efficiency and heat output of the stove.
There are a few factors to consider when choosing the wood stove pipe size. Firstly, the size of the stove’s flue collar should match the diameter of the pipe. This ensures a proper fit and minimizes the risk of leaks.
Secondly, the height and length of the chimney should be taken into account. A taller chimney may require a larger diameter pipe to accommodate the increased draft.
Lastly, the size of the room and the desired heat output should be considered. A larger diameter pipe can help to maximize heat distribution.
Gathering the Necessary Tools and Materials
To properly install the wood stove pipe in my cathedral ceiling, I’ll need a ladder and a tape measure. It’s important to ensure that the wood stove pipe is installed correctly to prevent any potential fire hazards.
One crucial aspect of the installation process is proper insulation. This helps to maintain the temperature inside the pipe and prevents any heat loss. Additionally, fireproofing techniques must be implemented to minimize the risk of a fire spreading through the ceiling. This can be achieved by using fire-resistant materials and ensuring that the pipe is installed at a safe distance from any combustible materials.
By following these guidelines, I can ensure a safe and efficient installation of the wood stove pipe.
Now that I’ve gathered the necessary tools and materials, I can move on to preparing the cathedral ceiling for installation.
Preparing the Cathedral Ceiling for Installation
Before beginning the installation process, I’ll need to carefully inspect the cathedral ceiling for any structural issues or potential obstacles. This step is crucial to ensure a safe and efficient installation of the wood stove pipe. Here are the key steps to preparing the insulation and sealing the roof:
- Check for any signs of water damage or leaks on the ceiling.
- Inspect the attic for proper insulation and ventilation.
- Seal any gaps or cracks in the roof to prevent air leaks and heat loss.
By properly preparing the insulation and sealing the roof, we can create a well-insulated and airtight space for the wood stove pipe installation. This will help maximize the efficiency of the stove and reduce the risk of any issues down the line.
With these preparations complete, we can now move on to the next step of installing the wood stove pipe.
Installing the Wood Stove Pipe
I’ll carefully connect the wood stove pipe to the stove, making sure to secure it tightly with the coordinating conjunction ‘and’. Proper installation of the wood stove pipe is crucial for the safe operation of your wood stove and chimney. The wood stove pipe serves as a conduit for the smoke and gases produced by the stove to exit your home. To ensure a successful installation, it is important to follow the manufacturer’s instructions and local building codes.
Here is a table that outlines the steps involved in installing the wood stove pipe:
Step | Description |
---|---|
1 | Measure and cut the pipe to the appropriate length, accounting for any necessary clearance. |
2 | Connect the pipe to the stove using a pipe collar or adapter. Ensure a tight fit. |
3 | Secure the pipe to the stove using screws or clamps. |
4 | Attach a chimney cap to the top of the pipe to prevent rain and debris from entering. |
5 | Inspect the entire installation for any gaps, leaks, or loose connections. Make necessary adjustments. |
Ensuring Safety and Proper Ventilation
I have thoroughly inspected the wood stove pipe installation to ensure proper ventilation and the safety of my home. When it comes to ensuring fire safety and maintaining proper airflow, there are a few key factors to consider:
Proper Clearances: It’s crucial to maintain the recommended clearance between the wood stove pipe and any combustible materials. This prevents the risk of fire and ensures the safety of your home.
Correct Pipe Size: Choosing the correct pipe size is important for maintaining proper airflow. A larger diameter pipe allows for better ventilation, reducing the risk of smoke backflow and improving the efficiency of your wood stove.
Insulation: Insulating the wood stove pipe is essential for preventing heat loss and maintaining safe temperatures. Insulation also helps to minimize the condensation of flue gases, reducing the risk of creosote buildup and chimney fires.
Frequently Asked Questions
How Often Should I Clean My Wood Stove Pipe?
I inspect my wood stove pipe regularly to determine if it needs cleaning. Signs of a dirty pipe include reduced draft, excessive smoke, and creosote buildup. I clean it at least once a year to prevent chimney fires.
Can I Install a Wood Stove Pipe in a Non-Cathedral Ceiling?
Installing a wood stove pipe in a non-cathedral ceiling is possible, but it may require additional steps and modifications. However, the advantages of a cathedral ceiling for wood stove pipe installation include better heat distribution and improved draft efficiency.
What Are the Different Types of Wood Stove Pipes Available?
There are several types of wood stove pipes available for installation. Some options include single wall pipes, double wall pipes, and insulated pipes. Proper installation is crucial for safety and efficiency. Here are some tips to consider.
How Do I Prevent Creosote Buildup in My Wood Stove Pipe?
How often should I clean my wood stove pipe to prevent creosote buildup? Regular cleaning is crucial to maintain optimal efficiency and reduce the risk of chimney fires. Cleaning frequency depends on usage and should be done at least once a year.
Can I Install a Wood Stove Pipe Without Professional Help?
Yes, I can install a wood stove pipe without professional help. However, it is crucial to follow safety precautions. It involves measuring, cutting, and assembling the components correctly to ensure proper ventilation and prevent any potential hazards.
What are the differences in installing wood stove pipe in a cathedral ceiling versus a standard ceiling?
When you install a wood stove pipe through a cathedral ceiling, the process is more complex compared to a standard ceiling. You will need to consider the angle and support structures of the cathedral ceiling to ensure a safe and secure installation.
Conclusion
After carefully choosing the right wood stove pipe size and gathering the necessary tools and materials, installing the wood stove pipe in a cathedral ceiling can be a daunting task. However, with proper preparation and attention to safety, it can be accomplished successfully.
Just like a skilled craftsman shaping a delicate sculpture, the wood stove pipe is carefully fitted and secured, ensuring a safe and efficient way to enjoy the warmth and comfort of a wood stove in your home.
Growing up surrounded by the vast beauty of nature, Sierra was always drawn to the call of the wild. While others sought the comfort of the familiar, she ventured out, embracing the unpredictable and finding stories in the heartbeat of nature.
At the epicenter of every remarkable venture lies a dynamic team—a fusion of diverse talents, visions, and passions. The essence of Best Small Wood Stoves is crafted and refined by such a trio: Sierra, Logan, and Terra. Their collective expertise has transformed the platform into a leading authority on small wood stoves, radiating warmth and knowledge in equal measure.
Wood Stove
How To Replace Wood Stove Gasket
Were you aware that a deteriorating wood stove gasket could decrease your stove’s effectiveness by as much as 20%? If you are noticing leaks or a decline in heat production, it could indicate that it is time to replace your gasket.
In this article, I’ll guide you through the step-by-step process of replacing your wood stove gasket. With the right tools and materials, you’ll be able to ensure a tight seal and maximize the performance of your wood stove.
Let’s get started!
Key Takeaways
- Wood stove gasket plays a significant role in stove efficiency and combustion control
- Well-maintained gasket reduces wood consumption and saves on energy costs
- Properly functioning gasket prevents escape of harmful gases like carbon monoxide
- Regular cleaning, inspection, and replacement ensure longevity and effectiveness of the gasket
Understanding the Importance of a Wood Stove Gasket
I really need to understand the importance of having a wood stove gasket to ensure optimal performance and safety.
Wood stove gasket maintenance plays a significant role in the efficiency of a wood stove. A gasket is a seal that fits between the door and the body of the stove, preventing air leakage and improving the stove’s overall performance. It creates an airtight seal, allowing better control over the combustion process and heat output.
A well-maintained gasket ensures that the stove burns fuel more efficiently, reducing the amount of wood needed and saving on energy costs. Furthermore, a properly functioning gasket prevents the escape of harmful gases, such as carbon monoxide, into the living space, ensuring the safety of the occupants.
Understanding the role of gaskets in wood stove efficiency is crucial for ensuring optimal performance and safety.
Gathering the Necessary Tools and Materials
To complete the task at hand, I need to gather all the required tools and materials, such as a gasket, adhesive, and a screwdriver.
Choosing the right gasket material is crucial when it comes to replacing a wood stove gasket. The gasket acts as a seal between the stove door and the body, ensuring that no air or smoke escapes. It’s important to select a gasket material that can withstand high temperatures and has good sealing properties.
Proper measuring techniques are essential to ensure a precise fit. Measuring the circumference of the stove door accurately will help you determine the correct length of gasket needed.
Taking the time to gather the necessary tools and materials, choosing the right gasket material, and using proper measuring techniques will ensure a successful wood stove gasket replacement.
Removing the Old Wood Stove Gasket
First, carefully loosen and remove the old wood stove gasket using a screwdriver or pliers. Before diving into the step-by-step instructions, let’s take a moment to gather the necessary tools needed for this task. You’ll need a screwdriver or pliers, a new wood stove gasket, and high-temperature adhesive.
Now, let’s get started with the removal process. Begin by locating the old gasket around the door or glass of your wood stove. Gently loosen the gasket using a screwdriver or pliers, making sure not to damage the surrounding surfaces. Slowly peel off the old gasket, ensuring that all remnants are removed. Clean the area with a brush or cloth to remove any debris or adhesive residue.
Now that the old gasket has been removed, we can move on to installing the new wood stove gasket.
Transition: With the old gasket successfully removed, let’s move on to the next step of installing the new wood stove gasket.
Installing the New Wood Stove Gasket
Now, I’ll carefully position and secure the new wood stove gasket using high-temperature adhesive and a screwdriver. Properly installing the gasket is crucial for ensuring the efficiency and safety of your wood stove.
Here are three important steps to follow:
-
Clean the surface: Before installing the new gasket, make sure to thoroughly clean the area where the old gasket was removed. This will ensure proper adhesion and prevent any debris from interfering with the installation.
-
Apply adhesive evenly: Using a high-temperature adhesive, apply a thin and even layer along the channel where the gasket will be placed. Be sure to follow the manufacturer’s instructions for the specific adhesive you’re using.
-
Press and secure: Carefully position the new gasket onto the adhesive, pressing it firmly to ensure a tight seal. Use a screwdriver to secure any retaining clips or screws that may be necessary.
By following these steps, you can install your wood stove gasket properly and avoid common installation issues.
Now, let’s move on to the next section where we’ll discuss maintaining and caring for your wood stove gasket.
Maintaining and Caring for Your Wood Stove Gasket
I regularly clean and inspect my wood stove gasket to ensure its longevity and effectiveness. Cleaning the wood stove gasket is an essential part of maintenance as it helps to remove any buildup of ash, debris, or creosote that can affect its performance.
To clean the gasket, I first make sure the stove is cool and then gently brush away any loose particles using a soft brush. Next, I dampen a cloth with warm soapy water and wipe down the gasket, being careful not to damage or pull it away from its position.
After cleaning, I thoroughly dry the gasket to prevent any moisture from causing mold or mildew.
Troubleshooting common wood stove gasket issues may involve inspecting for any signs of wear or damage such as fraying or gaps. If necessary, I’ll replace the gasket to ensure a proper seal and efficient operation of my wood stove.
Frequently Asked Questions
How Often Should the Wood Stove Gasket Be Replaced?
I usually replace my wood stove gasket every 1-2 years. Signs of a worn out gasket include fraying, cracking, or a loose fit. Regular maintenance and inspection can help prevent any issues.
Can I Use Any Type of Adhesive to Secure the New Gasket?
I can use different types of adhesive to secure the new wood stove gasket. However, it’s important to consider the pros and cons of each adhesive. Some may offer better heat resistance or durability.
Is It Necessary to Clean the Surface Before Installing the New Gasket?
Yes, it is necessary to clean the surface before installing the new gasket. This ensures proper adhesion and prevents any debris or old adhesive from interfering with the gasket’s performance.
Can I Reuse the Old Gasket if It Is Still in Good Condition?
Yes, you can reuse the old gasket if it is still in good condition. However, it is recommended to replace it with a new one for optimal performance. There are alternative gasket materials available that may be worth considering as well.
Will Replacing the Wood Stove Gasket Improve the Efficiency of the Stove?
Replacing the wood stove gasket can greatly improve the efficiency of the stove. It helps create a tight seal, preventing air leakage and maximizing heat output. This results in better performance and increased energy savings.
Conclusion
In conclusion, replacing the wood stove gasket is a crucial task that ensures your stove operates efficiently and safely. By understanding the importance of a well-functioning gasket and following the steps outlined in this article, you can easily maintain and care for your wood stove gasket.
Gather the necessary tools and materials, remove the old gasket, install the new one, and enjoy the warmth and comfort of your wood stove for years to come.
Growing up surrounded by the vast beauty of nature, Sierra was always drawn to the call of the wild. While others sought the comfort of the familiar, she ventured out, embracing the unpredictable and finding stories in the heartbeat of nature.
At the epicenter of every remarkable venture lies a dynamic team—a fusion of diverse talents, visions, and passions. The essence of Best Small Wood Stoves is crafted and refined by such a trio: Sierra, Logan, and Terra. Their collective expertise has transformed the platform into a leading authority on small wood stoves, radiating warmth and knowledge in equal measure.
Wood Stove
What Size Chimney Do I Need For A Wood Stove
As someone who is passionate about wood stoves, I frequently wonder, “What size chimney is required?” This is an essential factor for ensuring peak performance and safety.
In this article, we’ll delve into the factors that influence chimney size, such as the stove’s output requirements and the importance of proper height. We’ll also explore the correlation between diameter and efficient draft.
So if you’re seeking guidance on choosing the right chimney size for your wood stove, you’ve come to the right place.
Key Takeaways
- Chimney height calculation is based on factors such as roof height, number of elbows, and distance from stove to chimney.
- Proper chimney insulation is important for maintaining temperature and improving efficiency.
- Determining the stove’s output requirements involves measuring the dimensions of the space to be heated, calculating heat loss, and considering additional heat sources.
- The diameter of the chimney is determined by the type and design of the wood stove, and compliance with local building codes is necessary.
Factors Affecting Chimney Size for Wood Stoves
I need to consider several factors when determining the size of the chimney for my wood stove.
One important factor is the chimney height calculation. The height of the chimney is crucial for proper draft and efficient combustion. It’s calculated based on the height of the roof, the number of elbows in the chimney, and the distance between the stove and the chimney. A higher chimney ensures better draft and prevents smoke from entering the house.
Another important factor is the use of proper chimney insulation materials. Insulating the chimney helps to maintain the temperature inside, preventing the formation of creosote and improving efficiency.
By considering these factors, I can ensure that my wood stove operates optimally and safely.
Now, let’s move on to determining the stove’s output requirements.
Determining the Stove’s Output Requirements
To determine the appropriate size, I’ll have to calculate the stove’s output requirements. This involves considering the stove’s heating capacity and insulation level. Here are the steps I’ll take to calculate the stove’s heating capacity:
- Measure the dimensions of the space to be heated.
- Determine the desired temperature increase.
- Calculate the heat loss through walls, windows, and doors.
- Consider any additional heat sources in the space.
- Calculate the BTU (British Thermal Unit) requirements based on the above factors.
By accurately calculating the stove’s heating capacity, we can ensure that the chosen chimney size will effectively remove the combustion byproducts. This is crucial for maintaining good air quality and preventing dangerous situations.
Now let’s move on to discussing the importance of proper chimney height.
The Importance of Proper Chimney Height
Properly determining the height of the chimney ensures efficient ventilation and prevents the buildup of harmful combustion byproducts. Regular chimney maintenance is essential to ensure the safe and efficient operation of your wood stove.
One of the key benefits of regular chimney maintenance is the prevention of chimney fires. Creosote, a byproduct of wood combustion, can accumulate in the chimney and become highly flammable if not regularly cleaned.
Another common problem with chimneys is the presence of blockages, such as bird nests or debris, which can obstruct the flow of air and lead to poor ventilation. Regular inspections and cleaning can help identify and resolve these issues.
Additionally, the height of the chimney plays a crucial role in creating proper air flow and preventing downdrafts. It’s important to consult with a professional to determine the appropriate height for your chimney based on factors such as the stove’s output requirements and the building’s structure.
Understanding the Diameter for Efficient Draft
The diameter of the chimney affects the efficiency of airflow and can impact the draft. It’s crucial to consider the chimney size calculation when installing a wood stove to ensure optimal performance. Different types of wood stoves require different chimney sizes to function effectively.
Here are five important factors to consider when determining the diameter of the chimney:
- Type of wood stove: The size and design of the wood stove will dictate the necessary chimney diameter.
- Height of the chimney: The taller the chimney, the larger the diameter required to maintain proper draft.
- Insulation: Insulating the chimney can reduce heat loss and improve draft efficiency.
- Flue gases: The volume and temperature of flue gases produced by the wood stove influence the chimney size.
- Local building codes: Always check local regulations to ensure compliance with chimney size requirements.
Taking these factors into account will help you determine the appropriate diameter for your wood stove’s chimney, ensuring efficient airflow and a well-functioning draft.
Choosing the Right Chimney Size for Your Wood Stove
When determining the diameter for my chimney, I consider factors such as the type of stove, insulation, and local building codes. Proper chimney installation is crucial for the efficient operation of a wood stove and to ensure the safety of your home.
The size of the chimney plays a significant role in maintaining a good draft and preventing the buildup of harmful gases. The diameter of the chimney should be sized according to the stove’s manufacturer recommendations, taking into account the stove’s BTU output and the length and height of the chimney. It’s important to follow local building codes as they may specify minimum requirements for chimney size.
Regular chimney maintenance is also essential to ensure its continued efficiency and safety. This includes regular cleaning to remove creosote buildup and inspections to identify any potential issues such as cracks or blockages.
Frequently Asked Questions
Can I Use the Same Chimney for Multiple Wood Stoves in My House?
Yes, you can use the same chimney for multiple wood stoves in your house. However, it is recommended to have separate chimneys to ensure proper ventilation, reduce the risk of chimney compatibility issues, and improve the overall safety and efficiency of each wood stove.
Is It Necessary to Have a Chimney for a Wood Stove or Are There Alternatives?
Having a chimney for a wood stove has its pros and cons compared to alternative venting systems. Factors to consider when deciding include cost, installation requirements, efficiency, and safety.
How Does the Location of the Wood Stove Within the House Affect the Chimney Size?
When considering the location of a wood stove within the house, it is important to factor in various elements that will influence the size of the chimney needed.
Are There Any Building Codes or Regulations That Dictate the Minimum Chimney Size for a Wood Stove?
Building code regulations dictate the minimum chimney size for a wood stove. It is important to comply with these regulations to ensure proper ventilation and safety. The specific requirements may vary depending on your location.
Can I Install a Wood Stove Without a Chimney and Use a Venting System Instead?
I can’t install a wood stove without a chimney, but I can use a venting system instead. It’s like using a road for traffic flow. The pros are flexibility, but the cons are potential ventilation issues.
Conclusion
In conclusion, determining the proper chimney size for a wood stove is crucial for efficient operation and safety.
Factors such as the stove’s output requirements, chimney height, and diameter all play a significant role in ensuring a proper draft.
By investigating and understanding these factors, you can choose the right chimney size that allows for effective heat transfer and optimal performance of your wood stove.
Growing up surrounded by the vast beauty of nature, Sierra was always drawn to the call of the wild. While others sought the comfort of the familiar, she ventured out, embracing the unpredictable and finding stories in the heartbeat of nature.
At the epicenter of every remarkable venture lies a dynamic team—a fusion of diverse talents, visions, and passions. The essence of Best Small Wood Stoves is crafted and refined by such a trio: Sierra, Logan, and Terra. Their collective expertise has transformed the platform into a leading authority on small wood stoves, radiating warmth and knowledge in equal measure.
-
Wood Stove9 months ago
How To Build A Thermoelectric Generator For A Wood Stove
-
Wood Stove5 months ago
What Can I Use As Insulation On Wood Stove Pipes
-
Wood Stove1 month ago
How To Use Damper And Draft On Wood Stove
-
Wood Stove3 days ago
How Far Does Wood Stove Have To Be From Wall
-
Wood Stove8 months ago
How To Make A Heat Shield For A Wood Stove
-
Wood Stove1 month ago
When To Open And Close Damper On Wood Stove
-
Wood Stove9 months ago
How To Use The Flue On A Wood Stove
-
Wood Stove5 months ago
How To Install A Wood Stove Pipe And Chimney