
Enhancing your wood stove with a heat shield improves safety and efficiency by protecting nearby surfaces from heat damage. Choose from materials like vitreous enamel, brick, or stone for durability and style. Proper installation includes maintaining a safe air gap and secure fixing at recommended intervals, ensuring stability and effective heat reflection. Additionally, a well-designed heat shield can optimize space and save on costs. Keep going to discover how to select and install the perfect shield for your setup.
Key Takeaways
- Install a heat shield with at least 25mm air gap for safe heat dissipation and compliance with safety standards.
- Choose durable, heat-resistant materials like vitreous enamel, brick, or refractory concrete for effective protection.
- Fix the shield securely using non-combustible fixings spaced every 300-600mm to ensure stability during operation.
- Extend the shield at least 300mm above the stove and maintain 900mm clearance from combustible surfaces.
- A well-designed heat shield reflects radiant heat, improves stove efficiency, and optimizes space within your room.

Single Burn Rate Stove
Heats up to 900 sq. ft.
As an affiliate, we earn on qualifying purchases.
Understanding the Role of Heat Shields in Wood Stove Safety

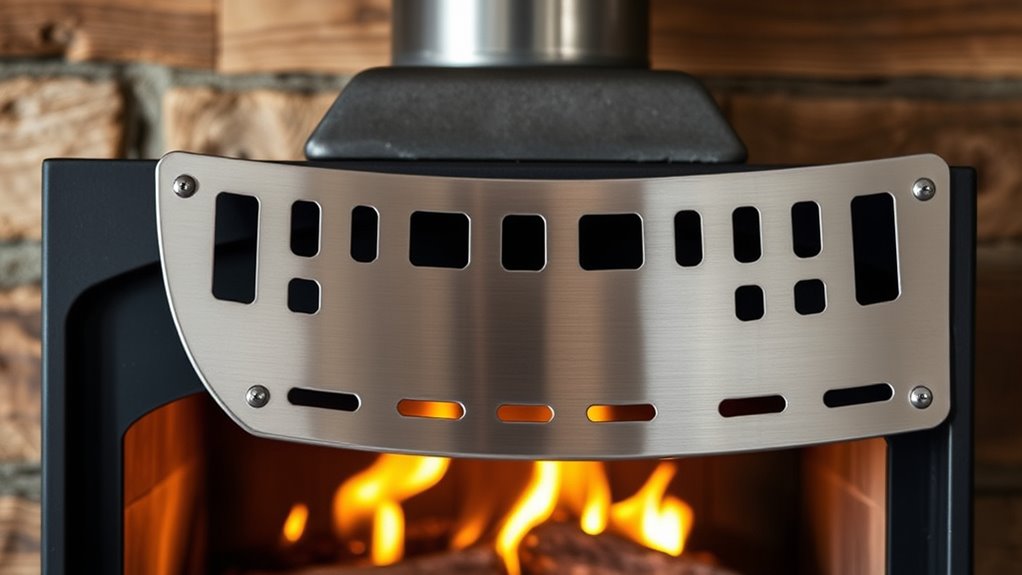
Heat shields play an essential role in ensuring the safety of your wood stove setup by protecting nearby walls and surfaces from excessive heat. A well-designed wood stove heat shield reduces fire hazards by preventing heat from reaching combustible materials. Proper installation is fundamental; it involves placing the shield with at least a 25mm air gap from the wall to allow airflow and prevent overheating. Materials like vitreous enamel, brick, or stone are popular choices because they’re non-combustible and heat-resistant. By reflecting and radiating heat away, the heat shield minimizes the risk of ignition and damage. Following regulatory standards, such as BS 8303:2018, guarantees that your heat shield is correctly installed for maximum safety and effectiveness in your wood stove system. Additionally, implementing natural language processing (NLP) techniques can help analyze feedback and improve safety guidelines related to heat shield installation. This approach can facilitate safety compliance and ensure consistent adherence to best practices, especially when evaluating installation standards and user feedback for ongoing safety enhancements. Incorporating accurate safety data can further optimize the design and placement of heat shields to enhance overall safety.

Guide Gear Outdoor Wood Burning Stove; Portable with Chimney Pipe for Cooking and Camping
OUTDOOR WOOD STOVE – We designed our camp stove for use outside. Perfect for use during camping trips...
As an affiliate, we earn on qualifying purchases.
Materials and Design Options for Effective Heat Shields
When choosing a heat shield, you’ll want to take into account durable materials like vitreous enamel, brick, or stone that can withstand high temperatures. These options also offer different aesthetic features, from sleek finishes to textured surfaces, allowing you to match your decor. Proper design, including size and installation, ensures the shield provides maximum safety and heat efficiency. Additionally, selecting materials that complement your farmhouse bedroom decor can enhance the overall ambiance of your space. Incorporating safety considerations into your design can further improve the effectiveness of your heat shield, ensuring it performs reliably over time. Understanding heat resistance of different materials ensures durability and long-term performance of your heat shield. Using materials with excellent thermal insulation properties can also help improve energy efficiency and protect surrounding areas from excessive heat.
Durable Material Choices
Choosing the right materials for your wood stove heat shield is essential to guarantee safety and efficiency. You want durable options that provide excellent thermal protection and fire resistance. Here are some top material choices:
- Vitreous enamel: Non-combustible, heat-resistant up to 650°C, and highly reflective, making it a popular choice for effective heat shields. Its thermal properties help maintain consistent temperatures and prevent heat transfer to surrounding structures. Additionally, vitreous enamel’s fire-resistant qualities make it suitable for high-temperature applications, ensuring safety over time. The material’s durability also contributes to a longer lifespan for your heat shield. Incorporating vitreous enamel coatings can also improve the aesthetic appeal of your heat shield, blending safety with style. Moreover, vitreous enamel’s corrosion resistance ensures the shield remains in good condition despite exposure to heat and moisture.
- Brick, stone, and tile: Traditional, durable, and offering excellent fire resistance and thermal mass for long-lasting protection.
- Refractory concrete and ceramic composites: Customizable options that combine heat resistance with visual versatility.
- Dual-skin designs with vitreous enamel coatings: Enhance thermal protection while adding aesthetic appeal.
Select materials with open air gaps of at least 25mm from walls and extend 300mm above the stove for [most favorable/ideal/maximum/optimal] safety.
Aesthetic Design Features
Vitreous enamel heat shields offer a versatile and visually appealing way to enhance your stove’s safety and style. With a range of surface finishes—solid colors, embossed textures, and crackle glaze effects—you can customize the design to match your decor. These shields include decorative elements like screen-printed graphics or textured glazes, transforming functional parts into stunning visual features. The vibrant, fade-resistant colors guarantee lasting aesthetic appeal, even after high-temperature firing. Whether you prefer a modern, minimalist, or traditional look, vitreous enamel options can be tailored to suit your style. By selecting the right decorative elements and finishes, you create a heat shield that not only protects but also elevates your fireplace’s overall visual enhancement. Additionally, considering support hours can help you get expert advice on selecting the best design options for your needs. Taking into account aesthetic design features ensures a cohesive and attractive integration with your interior design theme. Moreover, advancements in AI security highlight the importance of durable and resilient materials to withstand high temperatures and environmental stressors. Incorporating a variety of design options encourages creative practice in customizing your stove, making the process both functional and enjoyable. Exploring different material choices can further expand your customization possibilities, allowing for a truly personalized look.

Trailblazer Cookstove – Wood Fired Stovetop with Oven for Off-Grid Living, Camping, RV, Hunting, Prepping, Emergency Heat & Cooking
Heirloom Steel, Built to Last – Solid-steel construction, folding legs, and gasket-free door design proven in remote village...
As an affiliate, we earn on qualifying purchases.
Proper Installation Techniques for Maximum Protection
To guarantee maximum protection, you need to install the heat shield correctly, starting with maintaining at least a 25mm air gap from the wall for proper airflow. Use non-combustible fixings like metal brackets, securely anchored into the wall or floor, to keep the shield stable. Make sure the shield extends at least 300mm above the stove and reaches the hearth edge, following all safety and manufacturer guidelines. Additionally, ensure the installation complies with fire safety standards to prevent hazards. Properly selecting self-watering plant pots ensures consistent moisture levels and reduces maintenance efforts around your stove area. Incorporating knowledge from hackathons, such as collaborative problem-solving and innovation techniques, can also inspire creative solutions for custom stove accessories or safety enhancements. Selecting the right materials and ensuring proper vacuum cleaner performance metrics, such as adequate suction and filtration, can also help maintain a safe environment around your stove.
Ensure Adequate Air Gaps
Ensuring a proper air gap behind your heat shield is crucial for safe and efficient operation. An adequate air gap allows heat dissipation and reduces fire risk by preventing heat buildup. Proper installation involves maintaining this space consistently. To achieve this, consider these key points:
- Maintain at least a 25mm air gap between the heat shield and the wall surface.
- Use non-combustible fixings to keep the shield at the correct distance.
- Design the heat shield with an open top and bottom to promote convection.
- Ensure the shield extends at least 300mm above the stove’s top for added protection.
- Regularly inspect the air gap to ensure it remains free from obstructions, supporting proper heat dissipation.
- Understanding the importance of Gold IRA Rollovers can help diversify your retirement portfolio to include precious metals, which can serve as a hedge against inflation and economic uncertainty.
Use Non-Combustible Fixings
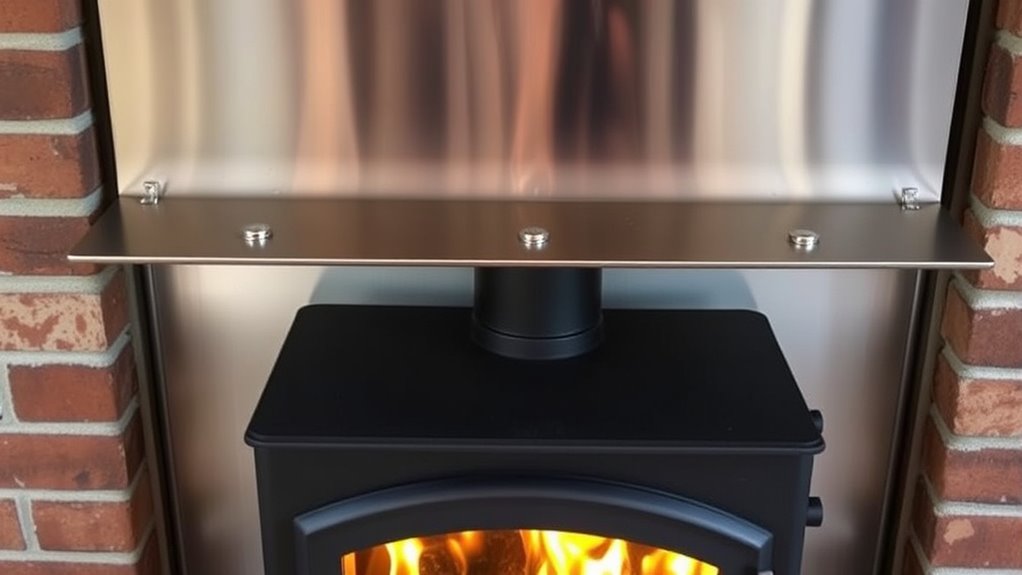
Using non-combustible fixings is key to securely installing your heat shield and ensuring it stays in place during operation. Choose non-combustible fixings like fireproof screws or steel brackets that are rated for high temperatures and compatible with your heat shield material, whether vitreous enamel or stone. Proper heat shield installation involves fixing the shield at regular intervals, typically every 300-600mm, to evenly distribute weight and maintain stability. Be sure to leave an air gap of at least 25mm behind the shield by using non-combustible spacers or brackets, which enhances safety. Always follow manufacturer instructions and safety standards, such as BS 8303:2018, to ensure your wall-mounted heat shields are securely and correctly positioned for maximum protection.
Follow Clearance Standards
How close should your heat shield be to the stove and surrounding surfaces to maximize safety? Following clearance standards is vital. Keep the heat shield at least 900mm away from combustible surfaces to prevent fire hazards. During installation, make certain there’s an air gap of at least 25mm between the heat shield and the wall for proper airflow and heat dissipation. The heat shield should also protrude at least 300mm above the stove’s top surface to provide adequate protection, complying with safety regulations. To meet safety standards, always:
- Maintain minimum clearance distances from combustible surfaces
- Allow proper air gaps for heat dissipation
- Ensure the heat shield extends sufficiently above the stove
- Follow manufacturer instructions and local building codes
Adhering to these guidelines guarantees safe, compliant installation and maximum protection.

YRenZ Upgraded Portable Wood Stove for Camping, Compact Tent Stove with Large Firebox, High Airtightness for Outdoor Cooking & Heating
【Upgraded Tent Camping Wood Stove】: Compact yet powerful wood stove for tents and outdoor use, with high airtightness,...
As an affiliate, we earn on qualifying purchases.
How Heat Shields Improve Energy Efficiency and Space Planning
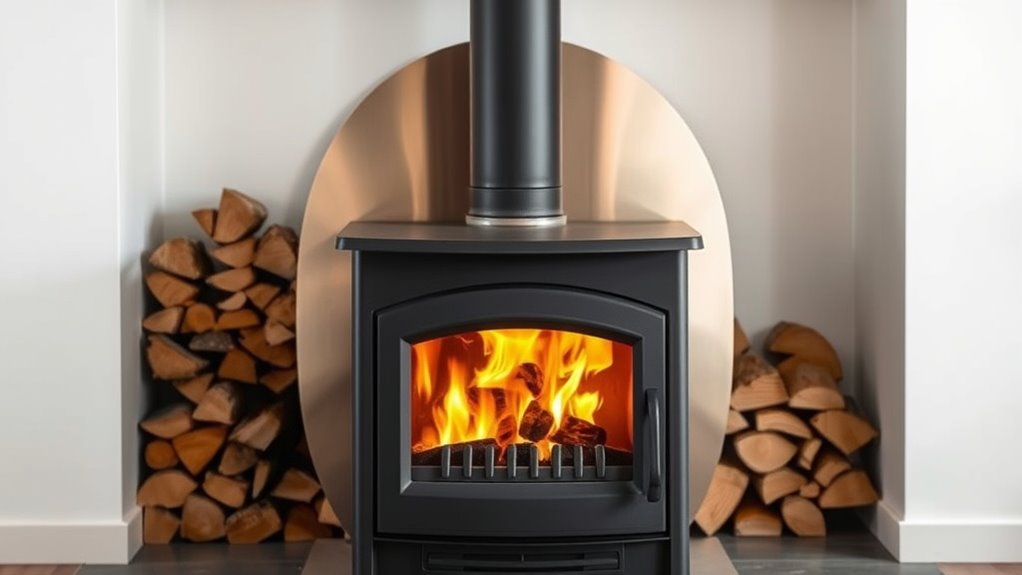
Heat shields considerably boost your wood stove’s energy efficiency by reflecting radiant heat back into the room, which minimizes heat loss and makes your heating more effective. By improving thermal protection, heat shields ensure more consistent warmth and better heat distribution. They also enable closer placement of the stove to walls, helping you optimize space planning in smaller or constrained areas. Proper installation of heat shields reduces the need for large clearances, lowering installation costs and allowing more flexible room layouts. The reflective properties of vitreous enamel heat shields enhance uniform heat distribution, further improving your stove’s performance. Overall, heat shields not only increase energy efficiency but also make your space safer and more adaptable, helping you get the most out of your wood stove.
Selecting the Right Heat Shield for Your Stove and Room
Selecting the right heat shield involves considering both safety standards and the specific needs of your stove and room. You want a heat shield made from non-combustible, heat-resistant materials like vitreous enamel, brick, or stone that meet fire safety standards such as BS 8303:2018. Next, confirm the shield’s dimensions suit your wood stoves’ size and heat output, with options in various sizes and finishes. Also, choose a shield that extends at least 300mm above the stove’s surface and reaches the edge of the hearth for proper clearance. Consider a rail-mounted vitreous enamel shield for easy installation, durability, and heat reflection. Finally, verify that it allows for at least a 25mm airflow gap from the wall and uses heat-resistant fixings for safe, efficient installation.
Enhancing Aesthetic Appeal With Stylish Heat Shield Choices
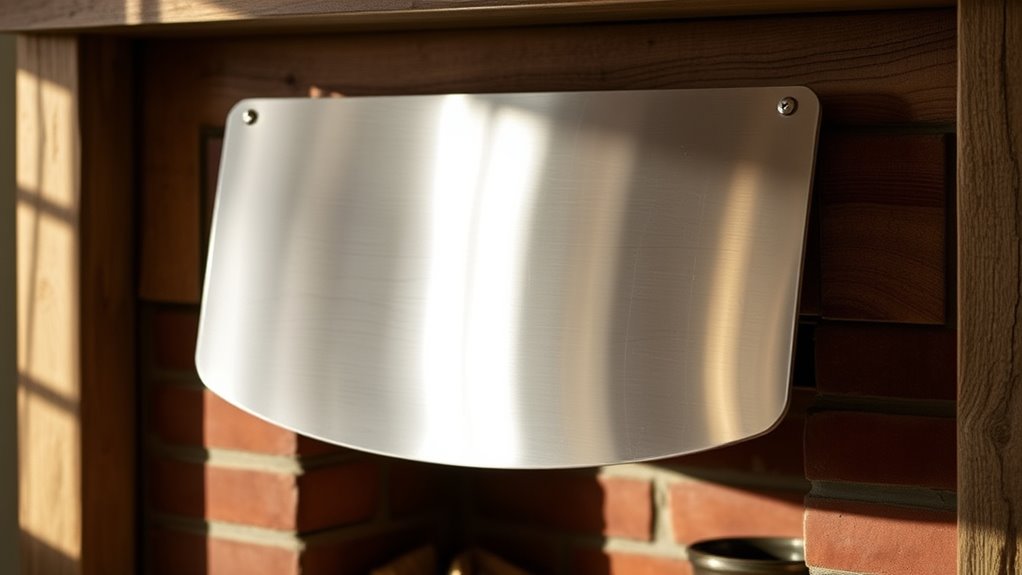
Enhancing the visual appeal of your wood stove area is easy with stylish vitreous enamel heat shields that combine safety with aesthetic versatility. These decorative heat shields come in various finishes—solid colors, embossed textures, and crackle glaze—allowing you to customize your interior decor. Sizes like 800mm x 1200mm and 1100mm x 1800mm, along with color options such as white, black, oyster, indigo, and duck egg, offer flexibility. Their dual skin design provides thermal protection while creating visually appealing surfaces with smooth or textured finishes. Decorative heat shields can also feature screen-printed graphics or patterns, transforming a functional safety element into a striking focal point. These vitreous enamel shields serve as stylish heat shield options that enhance your stove’s aesthetic appeal and interior decor.
| Finish Options | Size & Color Choices |
|---|---|
| Solid colors, embossed textures, crackle glaze | 800mm x 1200mm, 1100mm x 1800mm; white, black, oyster, indigo, duck egg |
Frequently Asked Questions
How Can I Make My Wood Stove Heat Better?
If you want to heat better with your wood stove, start by ensuring it’s well-maintained and operating efficiently. Use a heat shield behind the stove to reflect heat into the room, keeping a 25mm air gap. Position furniture and reflective surfaces nearby to boost heat circulation. Also, consider placing the stove closer to walls with proper insulation and maintaining good flue and firebox health for maximum warmth.
How Much Does a Heat Shield Reduce Clearance?
You’re wondering how much a heat shield can cut down clearance distances? Well, it can be astonishing! A properly installed shield can slash clearance requirements by up to 75%. That means reducing from 900mm to about 225mm or even less, depending on the material and design. Certified shields make it possible to bring distances down to just 75-95mm, giving you incredible flexibility and safer, more efficient stove placement.
Does a Wood Stove Need a Heat Shield?
You might wonder if your wood stove needs a heat shield. If your stove is close to combustible surfaces—especially under 900mm clearance—or has a high heat output over 7kW, a heat shield is often required. It helps reduce heat transfer, preventing fires and allowing closer placement to walls. Check your manufacturer’s guidelines and local safety codes to determine if installing a heat shield is necessary for your setup.
How High Does a Wood Stove Heat Shield Need to Be?
Did you know that a proper heat shield can improve your stove’s safety and efficiency? For your wood stove, the heat shield should typically stand at least 300mm (12 inches) above the top, ensuring it meets safety standards like BS 8303:2018. Many recommend a height between 300mm and 600mm for effective heat reflection, proper airflow, and preventing contact with combustible surfaces.
Conclusion
Adding a heat shield might seem like extra effort, but it’s a smart move for safety and efficiency. Don’t worry about complicated installation — with the right materials and techniques, you can do it yourself. A heat shield not only protects your walls but also helps your stove work more efficiently, saving you money. So, take the step today; your home and family will thank you for the added safety and comfort.