Wood Stove
When To Close Wood Stove Damper
As someone who loves wood stoves, I understand how crucial it is to pay attention to when you close the damper.
Picture this: a cozy evening by the fire, the crackling warmth filling the room.
But when is the right time to close the damper?
In this article, I’ll guide you through the factors to consider and the signs that indicate it’s time to close the damper.
By mastering this skill, you’ll maximize efficiency and experience the full benefits of your wood stove.
Key Takeaways
- The wood stove damper regulates airflow, affects the burning process and heat output, and controls the amount of oxygen supplied to the fire.
- Closing the damper at the right time helps conserve energy, ensures efficient operation and clean combustion, and prevents heat loss through the chimney.
- Factors to consider before closing the damper include temperature control, indoor air quality, energy efficiency, more even heat distribution, and potential pollutant buildup.
- Signs that indicate it’s time to close the damper include smoke billowing into the room, wasted energy and poor combustion, increased air pollution, leaving the damper fully open or partially closed, and forgetting to open the damper before starting a fire.
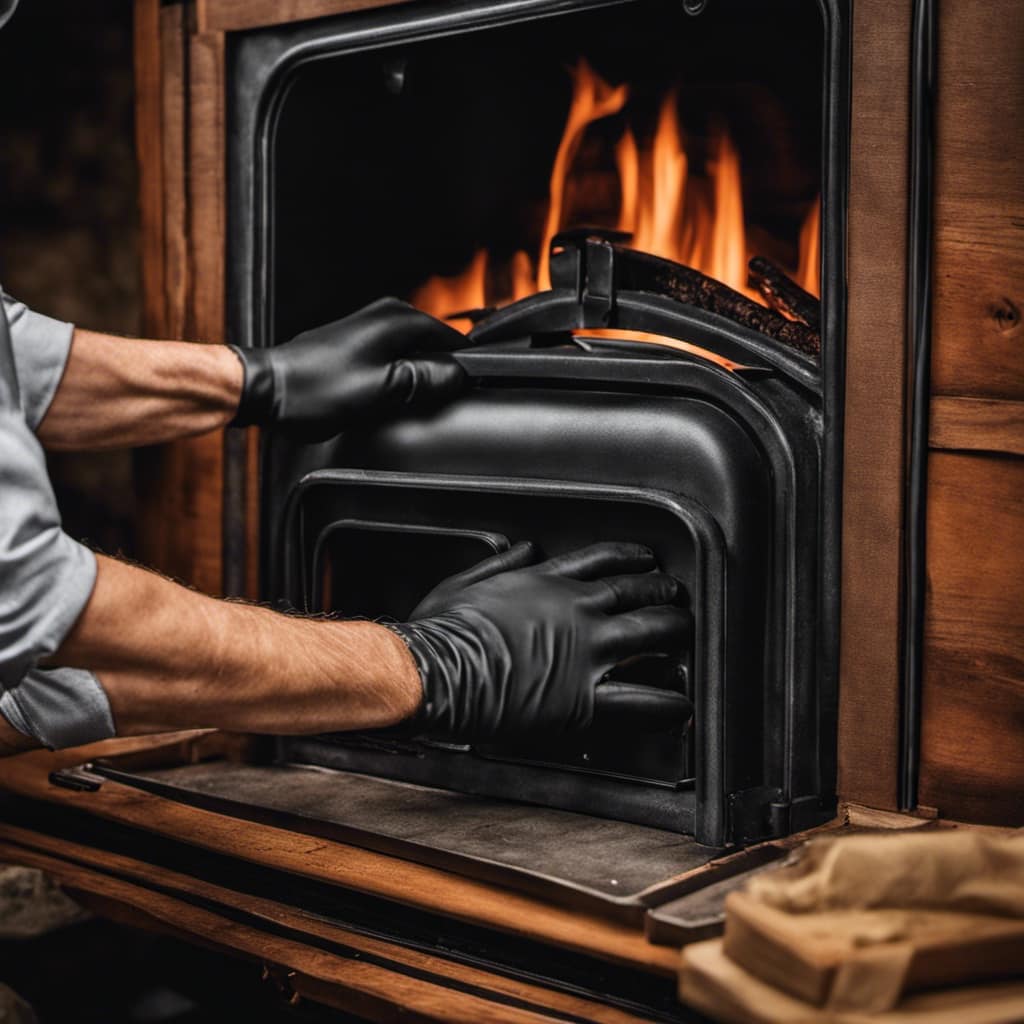
Understanding the Role of the Wood Stove Damper
I find it important to understand the role of the wood stove damper in order to operate it effectively.
Wood stove maintenance is crucial for optimal performance and safety.
The damper control plays a significant role in regulating the airflow, which directly affects the burning process and heat output.
By adjusting the damper, you can control the amount of oxygen supplied to the fire. This allows you to achieve the desired burn rate and temperature.
The damper also helps in conserving energy by preventing excessive heat loss through the chimney when the stove isn’t in use.
Proper damper control ensures efficient and effective operation of the wood stove, reducing the risk of smoke backdrafts and promoting clean combustion.
It’s essential to regularly inspect and clean the damper to ensure its smooth operation.
Factors to Consider Before Closing the Damper
Before making any decision, it’s important to consider the factors that may affect whether or not I should close the damper on my wood stove. Temperature control and indoor air quality are two key factors to keep in mind. Closing the damper can help to regulate the temperature inside the house, preventing excessive heat loss and ensuring a comfortable environment. However, it’s crucial to also consider the impact on indoor air quality. When the damper is closed, the combustion process may not be as efficient, leading to a build-up of pollutants such as carbon monoxide and particulate matter. To help make an informed decision, I’ve created a table that outlines the factors influencing whether or not to close the damper:
Factors to Consider | Pros | Cons |
---|---|---|
Temperature Control | More even heat distribution | Reduced airflow |
Indoor Air Quality | Improved air quality | Potential pollutant buildup |
Energy Efficiency | Reduced heat loss | Decreased combustion efficiency |
Considering these factors will help me make an educated decision about whether or not to close the damper on my wood stove.
Signs That Indicate It’s Time to Close the Damper
One telltale sign that it’s time to adjust the damper is when smoke starts to billow into the room. This indicates that the damper isn’t properly closed, allowing smoke to escape into the living space rather than being directed up the chimney.
Proper damper maintenance is crucial to ensure the efficient and safe operation of a wood stove. Neglecting to adjust the damper can result in wasted energy, poor combustion, and increased air pollution.
Common damper mistakes include leaving it fully open, partially closed, or forgetting to open it before starting a fire. It’s important to regularly inspect and adjust the damper as needed to maintain optimal performance.
Now let’s explore how to properly close the wood stove damper for efficient and safe operation.
How to Properly Close the Wood Stove Damper
To ensure efficient and safe operation, it’s important to properly adjust the damper on my wood stove. The damper plays a crucial role in controlling the airflow, which affects the combustion process and heat output.
When it’s time to close the damper, it’s essential to do it correctly to prevent issues such as smoke entering the room or heat escaping through the chimney.
To close the damper, I first make sure the fire has died down and the wood stove is cool. Then, I locate the damper handle and push it inwards or downwards, depending on the type of damper. I ensure it’s fully closed to minimize heat loss and maximize the stove’s efficiency.
Closing the damper at the right time brings several benefits, including improved heat retention, reduced energy consumption, and increased safety by preventing the backdraft of smoke or gases into the room.
Benefits of Closing the Damper at the Right Time
I enjoy the benefits of closing the damper at the right time, such as improved heat retention and reduced energy consumption. When the damper is closed properly, it prevents the escape of warm air from the room and keeps the heat inside, making the wood stove more energy efficient. Additionally, closing the damper helps in maintaining fire safety by controlling the airflow and reducing the risk of sparks or embers escaping from the stove. By following the manufacturer’s guidelines on when to close the damper, you can ensure optimal performance and safety.
Here is a table illustrating the benefits of closing the damper:
Benefits | Description |
---|---|
Improved Heat Retention | Closing the damper keeps the heat inside the room, making it more comfortable and cozy. |
Reduced Energy Consumption | By preventing the escape of warm air, closing the damper helps in saving energy and reducing heating costs. |
Enhanced Fire Safety | Controlling the airflow with a closed damper reduces the risk of sparks or embers escaping, ensuring a safer environment. |
Frequently Asked Questions
How Often Should I Clean My Wood Stove Damper?
I clean my wood stove damper every season or when I notice reduced airflow or excessive creosote buildup. Regular maintenance is important to ensure the damper functions properly and prevents potential fire hazards.
Can I Leave the Damper Open Overnight?
I always close the wood stove damper before going to bed for overnight safety. Leaving it open can cause burning embers to escape, increasing the risk of a fire hazard.
Will Closing the Damper Reduce the Heat Output of My Wood Stove?
Closing the damper on a wood stove will reduce the heat output and decrease the burn time. The position of the damper has a direct impact on the efficiency of the wood stove.
Is It Safe to Close the Damper While There Are Still Burning Embers in the Stove?
Closing the damper while there are still burning embers in the stove is not safe. It can lead to a buildup of carbon monoxide and other dangerous gases. Always wait until the fire is completely extinguished before closing the damper.
Should I Close the Damper Completely or Leave It Partially Open?
I usually close the wood stove damper completely to maximize efficiency and reduce heat loss. Leaving it partially open can lead to inadequate combustion, decreased heat output, and potential smoke or gas leakage.
Conclusion
Knowing when to close the wood stove damper is crucial for optimal functioning and safety. By understanding the role of the damper and considering factors like temperature and draft, you can determine the right time to close it.
Signs such as a steady burn and minimal smoke emission indicate it’s time to close the damper. Follow proper techniques to close the damper effectively, ensuring efficient heat retention and reduced energy consumption.
Closing the damper at the right time offers benefits like improved heating and reduced heat loss.
Growing up surrounded by the vast beauty of nature, Sierra was always drawn to the call of the wild. While others sought the comfort of the familiar, she ventured out, embracing the unpredictable and finding stories in the heartbeat of nature.
At the epicenter of every remarkable venture lies a dynamic team—a fusion of diverse talents, visions, and passions. The essence of Best Small Wood Stoves is crafted and refined by such a trio: Sierra, Logan, and Terra. Their collective expertise has transformed the platform into a leading authority on small wood stoves, radiating warmth and knowledge in equal measure.
Wood Stove
How Do I Find The Cubic Foot Of A Wood Stove Fire Box
I’ve constantly wondered about the **cubic footage** of the firebox in a wood stove. Knowing the firebox size is key in selecting the perfect wood stove for effective heating. If you want a cozy home, pay attention to this detail.
In this article, I’ll share a step-by-step guide on how to measure the dimensions of the firebox and calculate its cubic foot. By following these instructions, you’ll be able to make an informed decision when selecting a wood stove for your heating needs.
Key Takeaways
- The size of the firebox impacts the efficiency and effectiveness of a wood stove.
- Accurate measurement of the firebox is essential in selecting the right wood stove.
- Measuring the length, width, and height of the firebox helps determine its cubic foot capacity.
- Choosing the right size wood stove for your firebox is important for heating efficiency.
Understanding the Importance of Measuring the Firebox
I’m realizing the significance of measuring the firebox for understanding its capacity. When exploring different firebox designs, it becomes evident that size matters.
A properly sized firebox offers numerous benefits that contribute to the overall efficiency and effectiveness of a wood stove. By accurately measuring the firebox, you can determine its cubic foot capacity, which directly impacts the amount of wood it can hold and burn at a given time.
A larger firebox allows for longer burn times and the ability to accommodate larger wood logs, reducing the need for frequent refueling. On the other hand, a smaller firebox may require more frequent refueling but can be beneficial for those with limited space or heating needs.
Understanding the importance of measuring the firebox is essential in selecting the right wood stove for your specific requirements.
Gathering the Necessary Tools for Measurement
To accurately measure the firebox, I’ll need to gather a tape measure and a notepad for recording the dimensions. Measuring accuracy is crucial in obtaining precise calculations for the cubic foot of a wood stove firebox. Common measurement mistakes can lead to inaccurate results and potential problems later on.
By following a step-by-step guide, we can ensure that our measurements are precise and reliable. Let’s start by measuring the length, width, and height of the firebox. I’ll then record these dimensions in a table for easy reference.
Once we’ve gathered all the necessary measurements, we can move on to calculating the cubic foot of the firebox. By paying attention to detail and avoiding common measurement mistakes, we can achieve accurate and reliable results.
Now, let’s move on to the step-by-step guide to measuring the firebox dimensions.
Step-by-Step Guide to Measuring the Firebox Dimensions
I’ll carefully measure the length, width, and height of the firebox to ensure accurate dimensions. Measuring accuracy is crucial when determining the cubic foot of a wood stove firebox. One common mistake people make isn’t measuring the firebox correctly, resulting in inaccurate calculations.
To begin, I’ll use a tape measure to measure the length of the firebox from one end to the other. Next, I’ll measure the width, ensuring to include any protrusions or irregularities. Finally, I’ll measure the height, starting from the bottom of the firebox to the top.
It’s important to be precise and avoid rounding off measurements. By following these steps and avoiding common mistakes, I can accurately determine the cubic foot of the wood stove firebox.
Calculating the Cubic Foot of the Firebox
Since the cubic foot of the firebox is calculated by multiplying the length, width, and height, it’s important to accurately measure all three dimensions. Calculating the cubic foot of a wood stove firebox requires precision and attention to detail. Here’s how you can ensure accuracy when estimating the volume:
Measure each dimension: Use a tape measure to determine the length, width, and height of the firebox. Take multiple measurements to account for any irregularities.
Convert measurements to feet: The cubic foot is the standard unit for volume, so make sure all measurements are in feet. Convert inches to feet by dividing by 12.
Multiply the dimensions: Once you have the measurements in feet, multiply the length, width, and height together to find the total volume in cubic feet.
Verify your calculations: Double-check your math to ensure accuracy. Any errors in the calculations will result in an inaccurate cubic foot measurement.
Tips for Choosing the Right Size Wood Stove for Your Firebox
Honestly, I think the most important tip for choosing the right size wood stove for your firebox is to carefully consider the dimensions and make sure it fits properly.
When it comes to heating efficiency, the size of the stove plays a crucial role. A stove that’s too small will struggle to heat your space efficiently, while a stove that’s too large will waste energy and overheat the room.
To determine the right size, you need to calculate the cubic foot of your firebox. Measure the length, width, and height, and multiply these dimensions together. This will give you the cubic foot measurement.
Additionally, consider your firewood storage capacity. A larger firebox will allow you to burn bigger logs, reducing the number of times you need to restock.
What is the size and capacity of the Cubic Grizzly Wood Stove fire box compared to other wood stoves?
The install cubic grizzly wood stove has a firebox size of 3.7 cubic feet and can accommodate logs up to 18 inches in length. This is larger than many other wood stoves, allowing for longer burn times and more heat production. The capacity and efficiency of this stove make it a popular choice for heating large spaces.
Frequently Asked Questions
What Are the Benefits of Measuring the Cubic Foot of a Wood Stove Firebox?
Measuring the cubic foot of a wood stove firebox offers several benefits. It allows you to properly size a wood stove for your firebox, ensuring optimal heat output and efficiency. Plus, it helps determine the amount of wood needed for burning.
Can I Use Any Measuring Tools I Have at Home, or Do I Need Specific Tools for Measuring the Firebox Dimensions?
I can use any measuring tools I have at home to measure the firebox dimensions, but it’s recommended to use specific measuring tools for accuracy.
Are There Any Safety Precautions I Should Take While Measuring the Firebox Dimensions?
When measuring the firebox dimensions, it’s important to prioritize safety precautions. Ensure the area is clear of flammable materials, wear protective gear, and use proper measuring tools to accurately determine the cubic foot of the wood stove firebox.
Can I Calculate the Cubic Foot of the Firebox if Its Shape Is Irregular?
To accurately calculate the volume of an irregularly shaped firebox, I recommend using the water displacement method. Fill the firebox with water, measure the amount used, and convert it to cubic feet.
How Do I Know if I Have Chosen the Right Size Wood Stove for My Firebox?
When choosing the right size wood stove for your firebox, there are several factors to consider. These include the size of the room, insulation, and heating needs. It’s important to carefully assess these factors to ensure optimal heat distribution and efficiency.
Conclusion
In conclusion, accurately measuring the cubic foot of a wood stove firebox is crucial in order to choose the right size wood stove for optimal heating efficiency.
By following the step-by-step guide provided and using the necessary tools, you can easily calculate the cubic foot of your firebox.
This will ensure that you select a wood stove that’s the perfect fit for your heating needs, adding sophistication and precision to your decision-making process.
Growing up surrounded by the vast beauty of nature, Sierra was always drawn to the call of the wild. While others sought the comfort of the familiar, she ventured out, embracing the unpredictable and finding stories in the heartbeat of nature.
At the epicenter of every remarkable venture lies a dynamic team—a fusion of diverse talents, visions, and passions. The essence of Best Small Wood Stoves is crafted and refined by such a trio: Sierra, Logan, and Terra. Their collective expertise has transformed the platform into a leading authority on small wood stoves, radiating warmth and knowledge in equal measure.
Wood Stove
How To Replace A Gasket On A Wood Stove
I’m facing an issue: the seal on my wood stove has lost its effectiveness. This problem is causing heat to escape, resulting in higher energy bills.
But fear not, because I’ve got the solution. In this article, I’ll show you how to replace that worn-out gasket on your wood stove. With just a few tools and some elbow grease, you’ll have your stove sealed up tight in no time.
So let’s get started and get that heat where it belongs – inside your home.
Key Takeaways
- Assess the condition of the gasket by checking its texture, flexibility, and looking for cracks or fraying.
- Gather the necessary tools and materials such as high-temperature resistant gasket material, specialized adhesive, utility knife, wire brush, and clean cloth.
- Remove the old gasket by gently scraping off loose sections, using a wire brush to remove residue, and cleaning the area with mild detergent and warm water.
- Install the new gasket by carefully positioning it onto the clean area, selecting the appropriate size, applying adhesive, and allowing it to cure before closing the stove or using it.
Assessing the Condition of the Gasket
I can feel the gasket to check for any signs of wear or damage. The lifespan of a gasket can vary depending on usage and maintenance, so it’s crucial to determine its condition before replacing it.
When assessing the gasket, I examine its texture and flexibility. A healthy gasket should feel smooth and supple, with no visible cracks or fraying. If the gasket is brittle, stiff, or shows signs of deterioration, such as crumbling or peeling, it’s a clear indication of wear and tear.
Additionally, I inspect the gasket for any gaps or irregularities in its seal when the door is closed. These signs help me determine whether it’s time to replace the gasket and ensure optimal functionality of the wood stove.
Gathering the Necessary Tools and Materials
To get started, I’ll need a few tools and materials for this gasket replacement project. Here is a list of items you’ll need:
Gasket material: Choosing the right gasket material is crucial for a successful replacement. Look for high-temperature resistant materials like fiberglass or ceramic fiber.
Gasket adhesive: You’ll need a specialized adhesive designed for high-temperature applications. Make sure it’s compatible with the gasket material you’ve chosen.
Utility knife: A sharp utility knife will help you remove the old gasket and trim the new one to the right size.
Wire brush: Before installing the new gasket, you need to prepare the stove surface by removing any debris or old adhesive. A wire brush will do the job effectively.
Clean cloth: It’s important to have a clean cloth to wipe off any dust or residue from the stove surface before applying the adhesive.
With these tools and materials, you’ll be ready to tackle the gasket replacement project with precision and efficiency.
Removing the Old Gasket
After carefully inspecting the condition of the old gasket, it was clear that it needed to be removed before continuing with the replacement process. To remove the old gasket, I first used a putty knife to gently scrape off any loose or deteriorated sections.
Then, I used a wire brush to remove any remaining gasket residue from the gasket area. It was important to be thorough in this step to ensure proper adhesion of the new gasket.
Once all the residue was removed, I cleaned the gasket area with a mild detergent and warm water to remove any dirt or grease. This step is crucial for a clean and secure gasket installation.
With the old gasket removed and the gasket area cleaned, I was now ready to move on to installing the new gasket.
Installing the New Gasket
With all the necessary preparations complete, I carefully positioned the new gasket onto the clean gasket area. Ensuring proper gasket placement is crucial for a successful installation.
Here are some common gasket installation mistakes to avoid:
Using the wrong size gasket: Measure your stove door or flue carefully and select the appropriate gasket size.
Forgetting to clean the surface: Before installing the new gasket, remove any remnants of the old gasket and clean the surface thoroughly.
Applying too much adhesive: Use a thin and even layer of high-temperature adhesive to secure the gasket in place. Excess adhesive can cause the gasket to bulge or fail.
Not allowing the adhesive to cure: Give the adhesive enough time to cure according to the manufacturer’s instructions before closing the stove or using it.
Neglecting regular maintenance: Even with a new gasket, regular maintenance is essential to ensure optimum performance and prevent future issues.
Testing and Maintaining the New Gasket
I regularly inspect and clean the new gasket to ensure it’s functioning properly. Testing methods for the gasket involve checking for any gaps or leaks that may compromise the seal.
One effective way to test the gasket is by performing a smoke test. To do this, I close all the stove’s openings and light a small piece of paper near the gasket area. If smoke escapes, it indicates a faulty seal.
Troubleshooting tips for the gasket include checking for any signs of wear, such as fraying or flattening. If any issues are found, I carefully remove the old gasket and replace it with a new one.
It’s crucial to follow the manufacturer’s instructions and use high-quality gasket material to ensure optimal performance and safety.
Can Measuring A Wood Stove Gasket Help in Replacing It?
When replacing a wood stove gasket, measuring the wood stove gasket is crucial to ensuring the new gasket will fit properly. Take accurate measurements to determine the required size for a snug and effective seal. This will help to prevent heat loss and ensure efficient stove operation.
Frequently Asked Questions
How Often Should I Replace the Gasket on My Wood Stove?
I replace the gasket on my wood stove every 1-2 years. Regular gasket maintenance is important to ensure proper sealing and prevent heat loss. Neglecting it can lead to reduced efficiency and potential damage.
Can I Use Any Type of Gasket Material for My Wood Stove?
Yes, you can use different types of gasket materials for your wood stove. However, it is important to consider the pros and cons of each material to ensure proper sealing and safety.
Is It Necessary to Clean the Area Where the Old Gasket Was Before Installing the New One?
Yes, it is necessary to clean the area where the old gasket was before installing the new one. This ensures proper adhesion and prevents any debris from interfering with the sealing process.
Can I Use Adhesive to Secure the New Gasket in Place?
Yes, I can use adhesive to secure the new gasket in place. However, it is important to follow best practices for securing gaskets and consider if adhesive is recommended for other stove repairs.
How Long Does It Take for the Adhesive to Dry Before I Can Use the Wood Stove Again?
It is crucial to allow proper drying time for the adhesive when replacing a gasket on a wood stove. Factors such as temperature and humidity can affect the drying time.
Conclusion
In conclusion, replacing a gasket on a wood stove is a necessary maintenance task that can be easily completed with the right tools and materials.
While some may argue that hiring a professional is the best option, this article has provided step-by-step instructions that make the process simple and achievable for anyone.
By following these precise and detailed directions, you can ensure the optimal functioning of your wood stove and extend its lifespan.
Growing up surrounded by the vast beauty of nature, Sierra was always drawn to the call of the wild. While others sought the comfort of the familiar, she ventured out, embracing the unpredictable and finding stories in the heartbeat of nature.
At the epicenter of every remarkable venture lies a dynamic team—a fusion of diverse talents, visions, and passions. The essence of Best Small Wood Stoves is crafted and refined by such a trio: Sierra, Logan, and Terra. Their collective expertise has transformed the platform into a leading authority on small wood stoves, radiating warmth and knowledge in equal measure.
Wood Stove
How To Make Your Wood Stove More Efficient
You might think that enhancing the efficiency of your wood stove is a complex and lengthy process. However, I can assure you that it is simpler than you realize.
In this article, I’ll guide you through simple steps to maximize the heat output of your wood stove. From choosing the right wood to improving airflow and insulating your stove, I’ll show you practical ways to enhance its efficiency.
With regular maintenance and cleaning, you’ll have your wood stove performing at its best in no time.
Key Takeaways
- Regular cleaning and inspection improve efficiency
- Burning dry and seasoned wood minimizes smoke production
- Choosing the right kind of wood maximizes heat output
- Improving airflow and combustion efficiency through regular maintenance and cleaning.
Understanding the Basics of Wood Stove Efficiency
I’m currently learning about the basics of wood stove efficiency.
One important aspect to consider is wood stove maintenance. Regular cleaning and inspection of your stove can greatly improve its efficiency. Removing any built-up soot and debris from the stove and chimney allows for better airflow and combustion, resulting in a more efficient burn.
Another way to improve efficiency is by reducing smoke emissions. Burning dry and seasoned wood helps to minimize smoke production, as wet or unseasoned wood tends to burn inefficiently and produce more smoke.
In addition, using the right kind of wood can maximize heat output. Hardwoods like oak or maple burn longer and hotter than softwoods like pine or spruce.
Choosing the Right Wood for Maximum Heat Output
Using hardwoods like oak or maple, and not softwoods like pine or spruce, is essential for achieving maximum heat output from your wood stove. Here are a few reasons why:
-
Seasoning wood properly:
Moisture content in wood affects its ability to burn efficiently. Hardwoods have a lower moisture content compared to softwoods, allowing them to burn hotter and produce more heat. -
Higher energy density:
Hardwoods have a higher energy density, meaning they contain more potential heat energy per volume. This results in a longer and more sustained burn, providing consistent heat output. -
Utilizing wood stove accessories for better heat distribution:
Accessories like heat fans or heat-powered stove fans can help circulate warm air throughout the room more effectively. This ensures that the heat produced by the wood stove is evenly distributed and maximized. -
Longer burn time:
Hardwoods burn slower than softwoods, resulting in a longer burn time. This means less frequent refueling and a more efficient use of wood.
Improving Airflow and Combustion Efficiency
How can I ensure proper airflow and maximize combustion efficiency in my wood stove?
One of the key factors in achieving efficient combustion is to ensure proper airflow. This can be achieved by regularly cleaning the air vents and chimney to remove any blockages that may hinder the flow of air.
Additionally, using eco-friendly fuel alternatives, such as compressed sawdust logs or wood pellets, can help improve combustion efficiency. These fuels are designed to burn more efficiently and produce less smoke and ash.
Another way to maximize efficiency is by increasing insulation around your wood stove. This can be done by installing a heat-resistant barrier or using a heat reflector to redirect the heat back into the room.
Insulating Your Wood Stove for Better Heat Retention
By insulating your wood stove and using a heat reflector, you can increase its heat retention and reduce energy waste. Here are some practical tips to make your wood stove more efficient:
-
Install a blower fan: A blower fan helps in better heat distribution by circulating the warm air throughout the room. This ensures that the heat is evenly spread, making your space more comfortable.
-
Use heat resistant glass: Upgrading to heat resistant glass for your wood stove door can significantly improve insulation. It prevents heat from escaping and allows you to enjoy the comforting sight of the fire without compromising on efficiency.
-
Seal any gaps or leaks: Inspect the areas around your wood stove for any gaps or leaks. Using high-temperature silicone or gaskets can help seal these openings, preventing heat loss.
-
Add insulation around the stove: Consider adding insulation around the walls, floor, and ceiling near the wood stove to further reduce heat loss. This will help keep the heat inside the room, making it more energy-efficient.
Regular Maintenance and Cleaning for Optimal Performance
I always ensure that I schedule regular maintenance and cleaning for my wood stove to maintain its optimal performance.
Cleaning techniques are essential to keep the stove functioning efficiently. One of the most common issues with wood stoves is a buildup of creosote, which can lead to chimney fires. To prevent this, I regularly clean the interior of the stove using a wire brush and remove any creosote buildup.
Additionally, I inspect the gaskets and seals to ensure they’re intact and replace them if necessary. Troubleshooting common issues such as a weak flame or difficulty in starting the fire can often be resolved by cleaning the air vents and removing any ash or debris.
Frequently Asked Questions
Can I Use My Wood Stove to Heat My Entire Home?
Yes, I can use my wood stove to heat my entire home. Wood stove installation offers many benefits for heating, including cost savings, cozy warmth, and the ability to rely less on other heating sources.
What Are the Potential Health Risks Associated With Using a Wood Stove?
Potential health risks associated with using a wood stove include poor indoor air quality, which can lead to respiratory issues and exacerbate existing conditions. Proper ventilation and regular maintenance can help mitigate these risks.
How Can I Prevent Creosote Buildup in My Chimney?
To prevent chimney fires and remove creosote buildup, regular cleaning and maintenance are essential. I recommend scheduling annual chimney inspections, using creosote removal techniques such as chimney brushes and creosote removal products.
Can I Use Alternative Fuels, Such as Pellets or Coal, in My Wood Stove?
Yes, you can use alternative fuels like pellets or coal in your wood stove. They offer benefits such as higher heat output and longer burn times. However, it’s important to follow the manufacturer’s guidelines for safe and efficient use.
What Safety Precautions Should I Take When Using a Wood Stove?
When using a wood stove, it’s important to prioritize safety. Proper ventilation is crucial to prevent carbon monoxide buildup. Regular wood stove maintenance, such as cleaning the chimney and inspecting for leaks, is essential for safe operation.
Conclusion
In conclusion, by implementing some simple strategies, you can greatly improve the efficiency of your wood stove.
Did you know that a well-insulated wood stove can reduce heat loss by up to 80%? This means more heat stays inside your home, resulting in lower energy costs and a warmer living space.
So, take the time to choose the right wood, improve airflow, insulate your stove, and perform regular maintenance to maximize its performance and save money in the long run.
Growing up surrounded by the vast beauty of nature, Sierra was always drawn to the call of the wild. While others sought the comfort of the familiar, she ventured out, embracing the unpredictable and finding stories in the heartbeat of nature.
At the epicenter of every remarkable venture lies a dynamic team—a fusion of diverse talents, visions, and passions. The essence of Best Small Wood Stoves is crafted and refined by such a trio: Sierra, Logan, and Terra. Their collective expertise has transformed the platform into a leading authority on small wood stoves, radiating warmth and knowledge in equal measure.
-
Wood Stove9 months ago
How To Build A Thermoelectric Generator For A Wood Stove
-
Wood Stove6 months ago
What Can I Use As Insulation On Wood Stove Pipes
-
Wood Stove2 months ago
How To Use Damper And Draft On Wood Stove
-
Wood Stove2 weeks ago
How Far Does Wood Stove Have To Be From Wall
-
Wood Stove8 months ago
How To Make A Heat Shield For A Wood Stove
-
Wood Stove1 month ago
When To Open And Close Damper On Wood Stove
-
Wood Stove9 months ago
How To Use The Flue On A Wood Stove
-
Wood Stove6 months ago
How To Install A Wood Stove Pipe And Chimney