Connect with us

Wood Stove

What Is Cost Of Outside Air Intake For Vermont Castings Intrepid Ii Wood Stove

Published

on

Hey there!

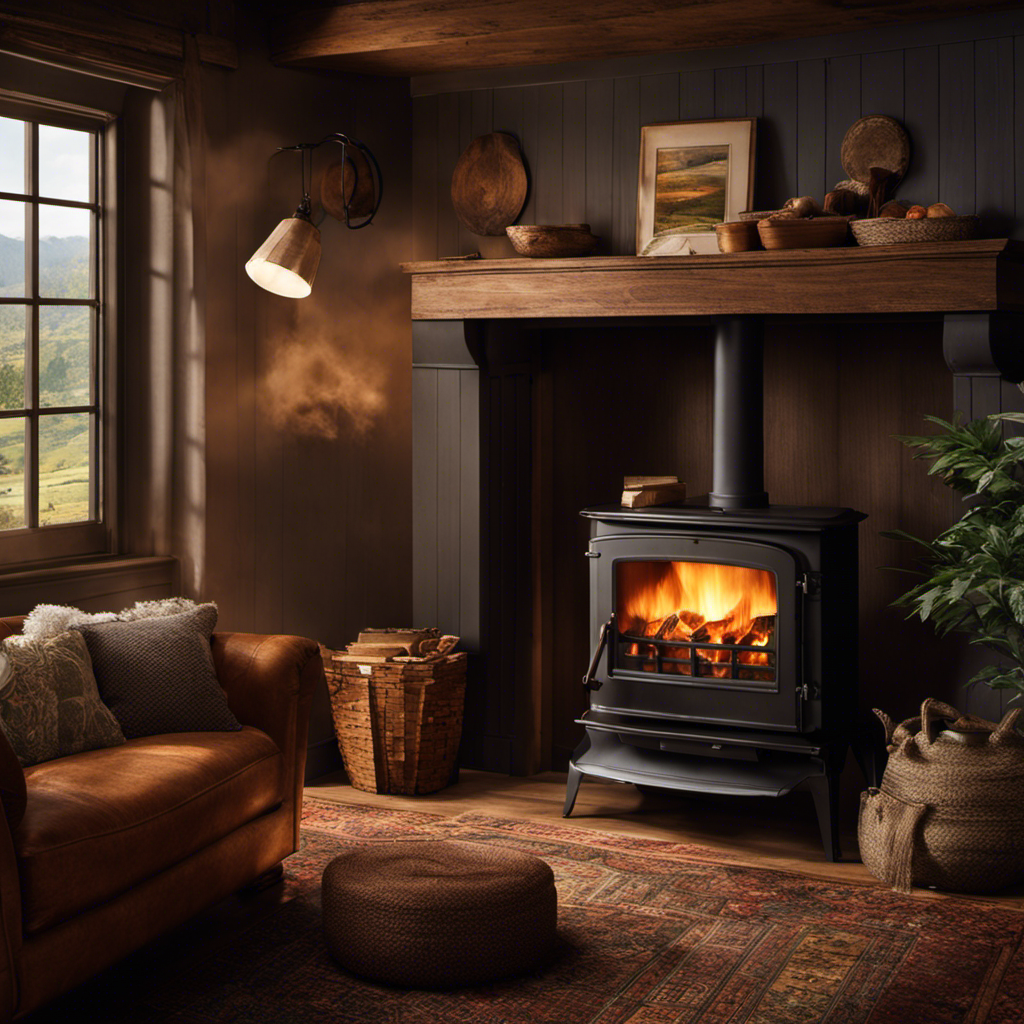
Wondering how much it’ll cost to install an outside air intake for your Vermont Castings Intrepid II wood stove? Well, you’re in luck!

In this article, I’ll break down the factors that affect the cost, give you average installation costs, compare it to traditional air intake, and highlight additional expenses to consider.

Plus, I’ll share some tips to help you save some money along the way.

wood stove fireplace inserts wood burning

Let’s get started!

Key Takeaways

  • Factors such as installation time, complexity of tasks, and ventilation requirements can affect the cost of outside air intake installation for Vermont Castings Intrepid II wood stove.
  • The average installation costs for outside air intake vary depending on project complexity, materials needed, location of the intake, type of building, and size of intake.
  • Outside air intake is more cost-effective than traditional air intake, with energy efficiency leading to cost savings over time and reduced maintenance.
  • Additional expenses to consider for outside air intake installation include labor, materials, permits, meeting necessary ventilation standards, careful planning, precise execution, and obtaining required permits.

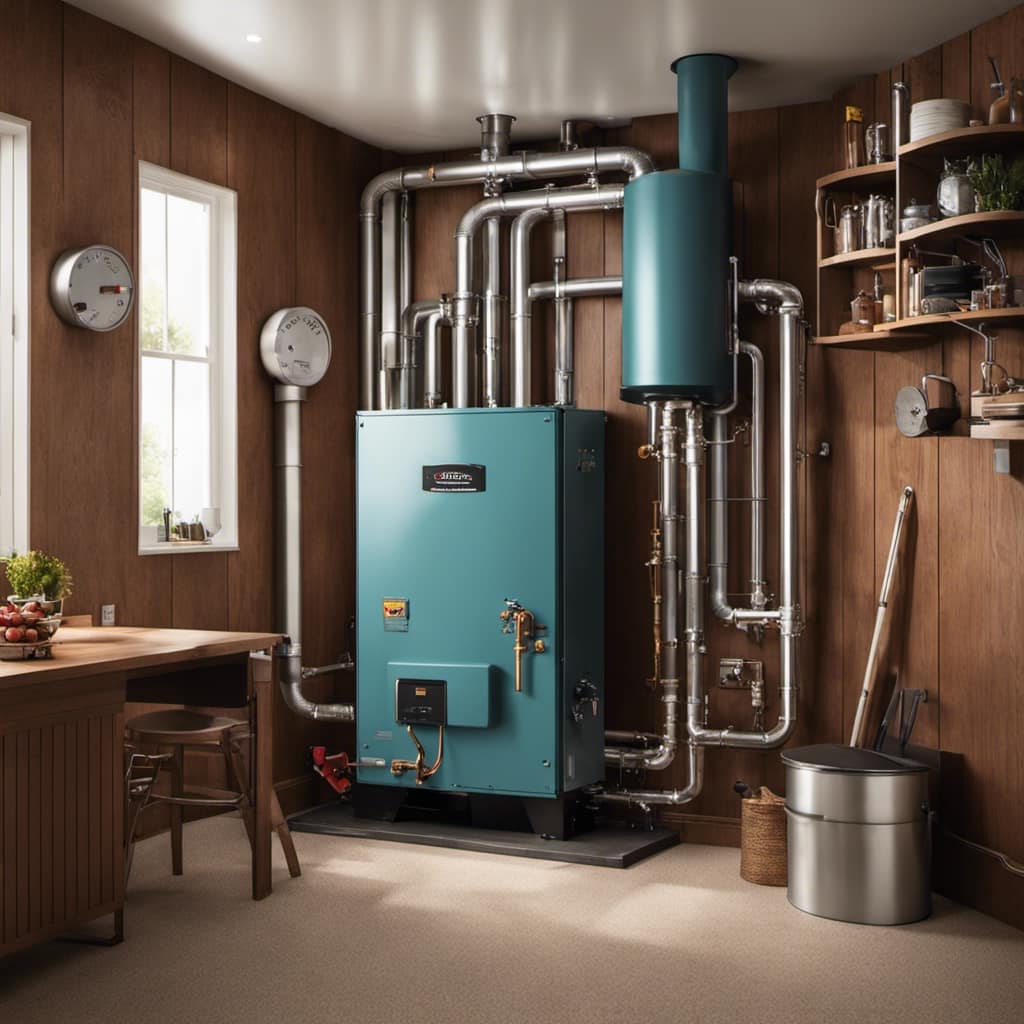
Factors Affecting the Cost of Outside Air Intake Installation

I’m currently researching the factors affecting the cost of installing an outside air intake for my wood stove. One of the key factors that influences the cost is the installation time. The process of installing an outside air intake involves several steps, including measuring and cutting the necessary holes in the wall or floor, connecting the intake pipe to the stove, and sealing any gaps to ensure proper ventilation. The complexity of these tasks and the skill level required can impact the overall time required for installation.

Additionally, another factor that affects the cost is the ventilation requirements of the wood stove. Different stoves have varying air intake needs, and this can affect the design and installation of the outside air intake system. Understanding these factors is crucial in determining the average installation costs for an outside air intake.

Average Installation Costs for Outside Air Intake

The average installation costs for an outside air intake can vary depending on the complexity of the project and the materials needed. Factors affecting installation include the location of the intake, the type of building, and the size of the intake needed. In general, the more complex the project, the higher the installation costs will be.

vermont castings defiant

The materials needed for the installation also play a role in determining the cost. For example, if specialized equipment or specific materials are required, the installation costs may increase.

Despite the potential costs, there are several benefits of outside air intake. It helps improve indoor air quality by bringing in fresh outdoor air, reduces energy consumption by providing natural ventilation, and enhances the overall comfort and health of the occupants.

Cost Comparison: Outside Air Intake Vs. Traditional Air Intake

Installing an outside air intake can be more cost-effective than a traditional air intake. There are several reasons for this:

  • Energy Efficiency: An outside air intake allows for better control of airflow, reducing energy consumption and resulting in cost savings over time.

    wood stove pipe cleaning kit

  • Reduced Maintenance: With a traditional air intake, there’s a higher likelihood of dust and debris entering the system, leading to more frequent cleaning and maintenance. An outside air intake helps minimize this issue, reducing maintenance costs.

  • Environmental Impact: Outside air intakes draw in fresh air from outside, which can improve indoor air quality and reduce the need for artificial cooling or heating, thus reducing the environmental impact.

Considering these factors, installing an outside air intake not only provides cost savings but also has a positive environmental impact. However, it’s important to consider the additional expenses associated with the installation process.

Additional Expenses to Consider for Outside Air Intake Installation

Considering the complexity of outside air intake installation, there are various costs to factor in, such as labor, materials, and permits.

wood stoves lowes

When it comes to installation requirements for proper ventilation, it’s essential to meet the necessary standards to ensure the safety and efficiency of the Vermont Castings Intrepid II wood stove. The installation process involves careful planning and precise execution to ensure a seamless integration with the stove.

This includes determining the optimal location for the outside air intake, ensuring proper sizing and insulation of the ductwork, and implementing appropriate safety measures. Additionally, obtaining the required permits adds to the overall cost.

Therefore, it’s crucial to consider these expenses when budgeting for the installation of an outside air intake for the Vermont Castings Intrepid II wood stove. By understanding the costs involved, homeowners can make informed decisions and explore tips for saving money on this essential installation.

Tips for Saving Money on Outside Air Intake for Vermont Castings Intrepid II Wood Stove

I’ve found that being resourceful and finding cost-effective alternatives can greatly reduce expenses when it comes to saving money on outside air intake for my Vermont Castings Intrepid II wood stove. Here are some money-saving strategies I’ve discovered for DIY installation:

wood stove definition

  • Utilize existing vents: Look for unused vents or openings in your home that can be repurposed as outside air intakes. This eliminates the need for additional materials and installation costs.

  • DIY ductwork: If you have some basic DIY skills, consider constructing your own ductwork using affordable materials like PVC pipes. This can significantly reduce the overall cost of the project.

  • Shop around for materials: Compare prices from different suppliers to find the best deals on insulation, ducts, and other necessary materials. Don’t forget to check for discounts and sales to maximize your savings.

Frequently Asked Questions

What Are the Benefits of Installing an Outside Air Intake for a Vermont Castings Intrepid II Wood Stove?

Installing an outside air intake for the Vermont Castings Intrepid II wood stove has numerous benefits. It improves combustion efficiency, reduces drafts and smoke backflow, and ensures a constant supply of fresh air. The installation can be done DIY or by a professional.

truck camping wood stove

Is the Installation of an Outside Air Intake for a Vermont Castings Intrepid II Wood Stove a DIY Project or Should It Be Done by a Professional?

Installing an outside air intake for a Vermont Castings Intrepid II wood stove can be a DIY project, but it is recommended to have a professional handle it due to potential risks and challenges.

How Does the Cost of Installing an Outside Air Intake Compare to the Cost of Operating a Wood Stove Without One?

When comparing the cost of installing an outside air intake for a wood stove to the cost of operating one without, a comprehensive cost analysis is needed. This will provide an accurate assessment of the potential savings and benefits.

Are There Any Specific Building Codes or Regulations That Need to Be Followed When Installing an Outside Air Intake for a Wood Stove?

There are specific building codes and regulations that need to be followed when installing an outside air intake for a wood stove. These regulations ensure proper ventilation and safety for the operation of the wood stove.

How Long Does the Installation Process Typically Take for an Outside Air Intake for a Vermont Castings Intrepid II Wood Stove?

The average installation time for an outside air intake for a Vermont Castings Intrepid II wood stove is typically around 3-4 hours. As for the cost comparison, it may vary depending on the specific requirements and local market rates.

wood stove insert cleaning

Conclusion

In conclusion, the cost of installing an outside air intake for the Vermont Castings Intrepid II wood stove can vary depending on several factors such as the complexity of the installation and the location of the stove. On average, the installation costs for outside air intake range from $200 to $500.

However, it’s important to consider the long-term benefits of an outside air intake, such as improved efficiency and reduced energy costs. By carefully considering additional expenses and implementing cost-saving measures, homeowners can make the most of their outside air intake installation.

Growing up surrounded by the vast beauty of nature, Sierra was always drawn to the call of the wild. While others sought the comfort of the familiar, she ventured out, embracing the unpredictable and finding stories in the heartbeat of nature.   At the epicenter of every remarkable venture lies a dynamic team—a fusion of diverse talents, visions, and passions. The essence of Best Small Wood Stoves is crafted and refined by such a trio: Sierra, Logan, and Terra. Their collective expertise has transformed the platform into a leading authority on small wood stoves, radiating warmth and knowledge in equal measure.

Continue Reading

Wood Stove

How Does A Circulator Wood Stove Work

Published

on

By

I’ve always been fascinated by the inner workings of circulator wood stoves. Imagine this scenario: it’s a cold winter night, and you’re huddled around the cozy warmth of your wood stove. But have you ever wondered how exactly it works?

In this article, we’ll delve into the components, combustion process, airflow, heat distribution, and maintenance of circulator wood stoves.

Get ready to uncover the secrets behind this efficient heating appliance.

Key Takeaways

  • The design of a circulator wood stove includes a firebox at the bottom, a grate for airflow, a baffle system, and cast iron or steel surfaces for heat absorption.
  • The combustion process in a circulator wood stove involves precise regulation of air intake and exhaust to reduce emissions.
  • Proper airflow control in a circulator wood stove is achieved through primary and secondary air inlets, which ignite and sustain combustion respectively.
  • Heat distribution in a circulator wood stove is achieved through strategically placed channels that direct hot air, resulting in even distribution of heat throughout the room.

The Components of a Circulator Wood Stove

I love the efficiency of my circulator wood stove’s components. The anatomy of a circulator wood stove consists of several key parts that work together to provide optimal heating.

wood burning stove small

The firebox, located at the bottom, is where the wood is burned. It has a grate that allows for proper airflow.

Above the firebox is the baffle system, which helps to increase the stove’s efficiency by directing the hot gases towards the stove’s surfaces.

These surfaces, made of cast iron or steel, absorb the heat and radiate it into the room.

The benefits of using a circulator wood stove are numerous. They provide a reliable and cost-effective heating solution, ensuring a steady and consistent warmth throughout the space.

catalytic wood stove

The efficient combustion process also reduces emissions and promotes a cleaner environment.

Understanding the Combustion Process

While the firebox and baffle system play important roles in a circulator wood stove, understanding the combustion process is crucial for optimal heating efficiency. The combustion process in a wood stove involves the burning of wood to produce heat. Here are three key aspects to consider:

  • Airflow Control: Properly controlling the airflow is essential to ensure efficient combustion. The circulator wood stove allows for precise regulation of air intake and exhaust, allowing for better control of the burning process.

  • Heat Transfer: The circulator design enhances heat transfer by maximizing the surface area exposed to the fire. This results in more efficient heating and less wasted energy.

    wood stove wiki

  • Environmental Impact: Wood stove combustion can have environmental consequences, such as air pollution and carbon emissions. However, circulator wood stoves are designed to minimize these impacts by promoting complete combustion and reducing smoke and particulate matter emissions.

Understanding the combustion process in a circulator wood stove allows users to maximize heating efficiency while minimizing the environmental impact.

The Role of Airflow in a Circulator Wood Stove

Controlling the airflow is crucial in a circulator wood stove, as it allows for efficient combustion and optimal heating. The key to achieving this is through proper airflow control mechanisms.

In a circulator wood stove, there are primary and secondary air inlets. The primary air is responsible for igniting the wood and providing initial combustion. On the other hand, the secondary air is used to enhance and sustain the combustion process.

wood stoves for sale cheap

By adjusting the primary and secondary air inlets, you can regulate the amount of oxygen that reaches the fire. This, in turn, affects the temperature and efficiency of the stove. When the airflow is properly controlled, a secondary combustion process occurs, which helps burn the remaining gases and particulates, resulting in a cleaner and more efficient burn. This ultimately contributes to reduced emissions and increased heat output.

Understanding the importance of airflow control is crucial in maximizing the efficiency and performance of a circulator wood stove.

Now that we’ve discussed the role of airflow in a circulator wood stove, let’s explore how heat is distributed within the stove.

How Heat Is Distributed in a Circulator Wood Stove

The distribution of heat in a circulator wood stove depends on the design and placement of the heat convection channels. These channels are responsible for creating convective airflow, which plays a crucial role in evenly distributing the heat throughout the room.

wood stove fireplace insert

Here are three key factors that contribute to effective heat distribution in a circulator wood stove:

  • Design of convection channels: The layout and size of the convection channels determine the direction and flow of the convective airflow. A well-designed stove will have strategically placed channels that allow for efficient heat transfer.

  • Placement of heat convection channels: The location of the convection channels within the stove also affects heat distribution. Channels that are positioned closer to the top of the stove help to direct hot air towards the ceiling, while those situated lower down aid in circulating warm air at ground level.

  • Insulation: Proper insulation within the stove prevents heat loss and ensures that more heat is directed towards the convection channels, maximizing heat distribution.

    cast iron wood burning stove

Understanding these factors is essential for maintaining and troubleshooting a circulator wood stove to ensure optimal heat distribution throughout your living space.

Maintaining and Troubleshooting a Circulator Wood Stove

I’ve found that regularly cleaning the flue and checking for any blockages is essential for maintaining and troubleshooting my circulator wood stove. When it comes to troubleshooting techniques, one of the first things I do is inspect the flue for any buildup of soot or creosote. This can restrict airflow and lead to poor combustion, resulting in decreased efficiency and increased emissions.

To clean the flue, I use a flue brush to remove any deposits, making sure to wear protective gloves and goggles. Another important aspect of maintenance is checking for any blockages in the air intake and exhaust vents. These can be cleared using a small brush or vacuum cleaner.

Frequently Asked Questions

How Long Does It Take for a Circulator Wood Stove to Heat up a Room?

It usually takes around 30 minutes for a circulator wood stove to heat up a room. The benefits of using a circulator wood stove for heating include efficient heat distribution, cost savings, and a cozy ambiance.

lopi wood stove for sale craigslist

Can a Circulator Wood Stove Be Used as the Primary Source of Heat in a Home?

Yes, a circulator wood stove can be used as the primary heat source in a home. However, it is important to follow circulator wood stove safety precautions. The advantages include cost savings and the cozy ambiance it creates.

Are Circulator Wood Stoves Energy-Efficient?

Circulator wood stoves are energy-efficient and cost-effective. They provide an efficient way to heat a home by circulating the warm air throughout the room. This helps to maximize heat distribution and minimize energy waste.

Can a Circulator Wood Stove Be Used in a Mobile Home or Rv?

A circulator wood stove can be used in a mobile home or RV, but there are limitations and safety concerns to consider. Mobile homes have specific requirements for wood stoves, and proper installation and ventilation are crucial for safety.

Do Circulator Wood Stoves Require a Chimney or Can They Be Vented Through a Wall?

Vented through a wall? Absolutely! Circulator wood stoves offer versatile heating options, making them perfect for any space. No need to worry about a chimney, just vent it through a wall and enjoy the warmth.

wood burning stove installation

Conclusion

In conclusion, a circulator wood stove is a highly efficient and effective heating appliance that utilizes the principles of combustion and airflow to distribute heat throughout a space.

By understanding the components and operation of this stove, one can effectively maintain and troubleshoot any issues that may arise.

With its ability to provide consistent and comfortable warmth, a circulator wood stove is a reliable choice for those seeking a reliable and efficient heating solution.

Continue Reading

Wood Stove

How To Blacken A Cast Iron Wood Stove

Published

on

By

  1. Importance of proper ventilation during the blackening process
  2. Benefits of using a specialized blackening solution instead of regular paint or coating

As a seasoned stove enthusiast, I’m here to show you how to transform your cast iron wood stove into a sleek, blackened masterpiece. Just like a phoenix rising from the ashes, your stove will emerge with a renewed sense of beauty and durability.

In this article, I will guide you through the process of preparing the stove surface, selecting the right blackening method, applying the solution, and protecting the finish for long-lasting results.

Get ready to turn up the heat and elevate your wood stove game!

Key Takeaways

  • Preparing the stove surface is important before blackening, including cleaning with a mild soap and water solution and gently scrubbing with a soft brush or sponge.
  • Consider professional blackening services for the best results, as they use specialized products and offer expertise and experience.
  • When applying the blackening solution, use a high-quality brush for even application, and pay attention to corners and crevices for complete coverage.
  • To maintain the blackened cast iron wood stove, regularly clean it with a soft bristle brush or sponge, use a mild dish soap and warm water for stubborn stains, and apply a high-temperature stove polish or sealant for added protection and shine.

Preparing the Stove Surface

I can’t wait to see how the stove surface turns out after I’ve prepared it properly. Cleaning the stove surface is the crucial first step in achieving a beautifully blackened cast iron wood stove.

lopi wood stove reviews

To ensure a clean surface, I recommend using a mild soap and water solution, avoiding harsh chemicals that can damage the cast iron. Gently scrub the surface using a soft brush or sponge, paying attention to any stubborn stains or residue.

Once the surface is clean, it’s time to move on to sanding. Sanding the stove surface helps to remove any rust or rough patches, creating a smooth and even base for the blackening process. Use a medium-grit sandpaper and work in circular motions, being careful not to apply too much pressure.

Make sure to thoroughly wipe away any dust or debris before moving on to the next step.

Choosing the Right Blackening Method

In my experience, finding the most effective method for achieving a desired darkened appearance on my cast iron stove has been crucial. There are alternative blackening techniques available, but for the best results, I highly recommend professional blackening services. These services offer numerous advantages that make them worth considering.

wood burner clearance sale

One advantage is the expertise and experience of professionals who understand the intricacies of blackening cast iron. They have the knowledge and tools to achieve a consistent and long-lasting blackened finish. Additionally, professional services often utilize specialized products that are specifically designed for cast iron, ensuring optimal results.

To highlight the advantages of professional blackening services, I have created a table below:

Advantages of Professional Blackening Services
Expertise and experience
Consistent and long-lasting finish
Specialized products for cast iron
Saves time and effort

Overall, while alternative blackening techniques may seem appealing, the advantages of professional blackening services make them the superior choice for achieving a desired darkened appearance on a cast iron stove.

Applying the Blackening Solution

Using a brush, I apply the blackening solution evenly onto the surface of the stove. This step is crucial in achieving a beautiful blackened finish that not only looks great but also protects the cast iron.

wood burning stove with blower

Here are some proper application techniques to ensure the best results:

  • Start by cleaning the stove thoroughly, removing any dust, dirt, or grease.
  • Use a high-quality brush to apply the blackening solution in long, even strokes.
  • Pay special attention to corners and crevices to ensure complete coverage.
  • Allow the solution to dry completely before buffing the surface with a soft cloth for a smooth finish.

Proper application and careful attention to drying and buffing will result in a blackened wood stove that not only looks stunning but also maintains its protective and durable qualities for years to come.

Curing and Protecting the Finish

Once the blackening solution has dried completely, I can protect the finish by applying a thin coat of sealant. This step is crucial in preventing rust and enhancing the stove’s appearance.

The sealant acts as a barrier, shielding the blackened surface from moisture and other elements that could cause corrosion. To ensure maximum protection, I use a high-quality sealant specifically designed for cast iron surfaces.

small wood stove

Before applying the sealant, I thoroughly clean the stove to remove any dust or debris that could affect its adhesion. Using a brush or sponge, I carefully apply the sealant in smooth, even strokes, making sure to cover all exposed areas.

Once applied, I allow the sealant to dry completely, usually overnight, before using the stove. This additional layer of protection not only keeps the stove looking beautiful but also extends its lifespan by preventing rust and deterioration.

Maintaining the Blackened Cast Iron Wood Stove

To keep the finish looking its best, I regularly clean and apply a sealant to my blackened wood stove. Cleaning techniques for a blackened cast iron wood stove are crucial to maintain its appearance and functionality.

Here are some tips to ensure its longevity:

wood stove factory
  • Use a soft bristle brush or sponge to remove any loose debris or ashes from the surface of the stove.
  • For stubborn stains, mix a solution of mild dish soap and warm water. Apply the solution to a cloth and gently scrub the stained area.
  • To prevent rust on a blackened cast iron wood stove, make sure to dry it thoroughly after cleaning. Any moisture left on the surface can cause rusting.
  • Apply a high-temperature stove polish or sealant to protect the finish and add a glossy shine. This will also help prevent rust and keep the stove looking new.

Frequently Asked Questions

Can I Use Any Type of Paint or Coating to Blacken My Cast Iron Wood Stove?

No, using any type of paint or coating is not recommended for blackening a cast iron wood stove. There are different methods available, each with their own pros and cons compared to painting.

How Long Should I Let the Blackening Solution Sit on the Stove Surface Before Wiping It Off?

To achieve optimal results when blackening a cast iron wood stove, it is crucial to allow the blackening solution to sit on the stove surface for the recommended drying time before wiping it off.

Can I Use the Blackening Method on a Stove That Has Already Been Painted or Coated?

Yes, you can use the blackening method on a stove that has already been painted or coated. However, it is important to take safety precautions while applying the blackening solution to protect yourself and the surface.

Is It Necessary to Wear Protective Gear While Applying the Blackening Solution?

It’s always wise to wear protective gear while applying the blackening solution. Ventilation is crucial to prevent inhaling fumes. A specialized blackening solution is recommended instead of regular paint or coating for better results.

wood stove fan repair

How Often Should I Reapply the Blackening Solution to Maintain the Finish on My Cast Iron Wood Stove?

To maintain the finish on your cast iron wood stove, it is recommended to reapply the blackening solution every 6-12 months. Look for high-quality products specifically designed for cast iron stoves.

Conclusion

In conclusion, blackening a cast iron wood stove is a simple process that can enhance its appearance and prolong its lifespan. By following the steps outlined in this article, you can achieve a beautiful and durable blackened finish.

Remember, a little elbow grease and the right blackening method can work wonders for your stove. So don’t hesitate to give it a try and turn your stove into a true gem that will warm your home for years to come.

As the saying goes, “A blackened stove is a sight to behold!” Embrace the beauty and elegance of a blackened stove, and let it become the centerpiece of your kitchen.

wood stove definition
Continue Reading

Wood Stove

How Can You Effectively Maintain an Outdoor Wood Stove for Cooking?

Published

on

By

An image showcasing a well-maintained outdoor wood stove nestled in a serene natural setting

We know that maintaining an outdoor wood stove for cooking can be a challenge, but with the right techniques, it becomes a breeze.

In this article, we will share practical tips and methods to keep your outdoor wood stove in top shape.

From cleaning methods and weather protection to regular inspections and rust prevention, we’ve got you covered.

So let’s dive in and learn how to effectively maintain your outdoor wood stove for a delightful cooking experience.

Key Takeaways

  • Regularly clean the stove’s interior and exterior surfaces to remove residue and prevent rust formation.
  • Inspect and maintain the weatherproof covers and insulation to protect the stove from damage and wear.
  • Apply a protective coating to prevent rust and corrosion during storage.
  • Use heat-resistant paints designed for outdoor use to prevent rust and extend the durability of the stove’s appearance.

Cleaning Methods for Your Outdoor Wood Stove

We’ve found that using a wire brush and a mixture of vinegar and water is the most effective way to clean our outdoor wood stove. Regular maintenance is crucial to ensure its longevity and efficiency.

When cleaning, start by removing any ashes or debris from the stove. Then, using a wire brush, scrub the interior and exterior surfaces to remove any built-up residue. The vinegar and water mixture is an excellent natural cleaner that helps break down grease and grime. Simply spray the mixture onto the surfaces and scrub away. Rinse thoroughly with water and allow the stove to dry completely before using it again.

Cleaning your outdoor wood stove regularly not only improves its performance but also ensures the safety of your cooking environment.

Now, let’s discuss weather protection for your outdoor wood stove.

Weather Protection for Your Outdoor Wood Stove

One important aspect of maintaining our outdoor wood stove is ensuring proper weather protection to prevent any damage caused by rain or snow. Protecting our wood stove from the elements is crucial to its longevity and functionality. There are several options available to weatherproof our outdoor wood stove, such as weatherproof covers and insulation.

To give you a clearer picture, here is a table comparing different weatherproof covers and insulation options:

Weatherproof Covers Insulation Options
Heavy-duty tarp Fiberglass
Waterproof cover Ceramic
Insulated jacket Rockwool
Vinyl cover Foam board
Aluminum cover Reflective foil

These covers and insulation options provide varying levels of protection against rain, snow, and cold temperatures. When choosing the right weatherproof cover or insulation for our outdoor wood stove, it is important to consider factors such as durability, efficiency, and ease of installation.

Proper Storage Techniques for Your Outdoor Wood Stove

Sometimes, we store our outdoor wood stove in a shed during the off-season to protect it from the elements, but other times we leave it outside with a weatherproof cover. Proper storage techniques are essential to ensure the longevity and efficiency of your outdoor wood stove.

Here are some tips to help you maintain your stove effectively:

  • Clean the stove thoroughly before storing it to prevent the buildup of dirt and debris.
  • Make sure to remove any ash and soot from the stove’s interior and exterior surfaces.
  • Apply a protective coating to the stove to prevent rust and corrosion during storage.
  • Create a maintenance schedule to remind you of regular cleaning and inspection tasks.

Regular Inspection of Your Outdoor Wood Stove

To ensure the safety and efficiency of our outdoor wood stove, we should regularly inspect it for any signs of damage or wear and tear. Regular maintenance is crucial in preventing damage and ensuring that the stove functions optimally. By performing routine inspections, we can identify any potential issues before they escalate into major problems.

Start by examining the exterior of the stove for any cracks, dents, or loose parts. Check the chimney and flue for obstructions and clean them if necessary. Inspect the firebox and grates for any signs of rust or corrosion. Clean out any ash or debris that may have accumulated inside.

Additionally, pay attention to the stove’s gaskets and seals. These components can deteriorate over time, leading to heat loss and decreased efficiency. Replace them if needed, ensuring a tight seal.

By regularly inspecting and maintaining our outdoor wood stove, we can prevent damage and ensure its longevity.

In the next section, we’ll discuss rust prevention techniques and the use of heat-resistant paints to further protect our stove.

Rust Prevention and Heat-Resistant Paints for Your Outdoor Wood Stove

When it comes to maintaining an outdoor wood stove, rust prevention is crucial for ensuring its longevity.

One effective method is to apply heat-resistant paints that not only protect against rust but also withstand the high temperatures generated by the stove.

However, it’s important to choose the right paint that’s specifically designed for outdoor use and can withstand the elements.

Best Rust Prevention Methods

We’ve found that applying a high-quality rust-resistant paint to our outdoor wood stove has been the best method for preventing rust and ensuring its longevity. Not only does this paint form a protective barrier against moisture and corrosion, but it also withstands the high temperatures generated by the stove.

In addition to using rust-resistant paint, here are some other effective methods for preventing rust on your outdoor wood stove:

  • Regular cleaning and removal of ashes and debris
  • Applying a rust inhibitor or protective coating to exposed metal surfaces
  • Keeping the stove covered when not in use to protect it from the elements
  • Inspecting the stove regularly for any signs of rust or damage and addressing them promptly

Choosing the Right Paint

Our top priority is finding a paint that is both rust-resistant and heat-resistant for our outdoor wood stove. When it comes to painting our stove, we need a high-quality paint that can withstand the extreme temperatures it will be exposed to. Heat resistant paint options are a great choice for this purpose. These paints are designed to withstand high temperatures without blistering or peeling, ensuring the longevity of our stove. Additionally, using a high-quality paint provides several benefits. It not only protects the stove from rust, but also enhances its appearance, making it more visually appealing. Furthermore, a durable paint can withstand the wear and tear of outdoor use, allowing us to enjoy our cooking experience without worrying about constant maintenance. In the table below, we have listed some popular heat resistant paint options that we can consider for our outdoor wood stove.

Paint Brand Temperature Resistance
Brand A Up to 1200°F
Brand B Up to 1500°F
Brand C Up to 1800°F
Brand D Up to 2000°F
Brand E Up to 2200°F

Longevity of Heat-Resistant Paints

In order to ensure the longevity of our outdoor wood stove, we should regularly inspect and maintain the heat-resistant paints by applying a rust preventative coating and conducting touch-ups as needed. This will help to protect the stove from the harsh elements and extend the durability of the paint.

Here are some practical tips to maintain the paint on your outdoor wood stove:

  • Clean the surface thoroughly before applying any coatings.
  • Apply a rust preventative coating to prevent corrosion and extend the life of the paint.
  • Conduct regular inspections to identify any areas that may need touch-ups.
  • Use a heat-resistant paint specifically designed for outdoor wood stoves to ensure maximum durability.

Obtaining Replacement Parts for Your Outdoor Wood Stove

When it comes to obtaining replacement parts for your outdoor wood stove, it’s important to find reliable options that will ensure the stove’s continued functionality.

We understand the frustration that can come with searching for specific components, but rest assured that there are cost-effective options available.

Reliable Replacement Parts

Although it may be challenging, we can find reliable replacement parts for our outdoor wood stove if we search online or contact the manufacturer. It’s important to have access to reliable suppliers when it comes to replacing parts for our outdoor wood stove.

Here are some tips to help us find the right replacement parts:

  • Research online: Utilize online platforms and websites that specialize in outdoor wood stove replacement parts. Look for websites with positive customer reviews and a wide selection of parts.

  • Contact the manufacturer: Reach out to the manufacturer directly to inquire about replacement parts. They may have specific recommendations or be able to provide the parts themselves.

  • Join online forums or communities: Engage with other outdoor wood stove owners who may have experience finding reliable suppliers. They can provide valuable insights and recommendations.

  • Seek professional advice: Consult with a professional or expert in outdoor wood stoves who can guide you towards reliable suppliers and offer maintenance tips for your stove.

Finding Specific Components

We can easily locate the specific components we need for our outdoor wood stove by reaching out to reliable suppliers or searching online. Finding suppliers who specialize in wood stove parts can ensure that we get high-quality components that are compatible with our stove model. It’s important to choose suppliers who have a good reputation and offer warranty options for their products.

Additionally, troubleshooting common issues with our outdoor wood stove can help us identify the specific components that need replacement. By understanding the functioning of the stove and referring to the user manual, we can identify the faulty parts and find suitable replacements.

Regular maintenance and cleaning of the stove can also prevent common issues and prolong the lifespan of the components.

Cost-Effective Options Available

There are several cost-effective options available to obtain replacement parts for our outdoor wood stove, such as purchasing from second-hand sellers or exploring discounted options online. When considering cost-saving measures for maintaining our wood stove, it’s important to explore alternative fuel sources. Here are some suggestions to help you save money while keeping your stove running efficiently:

  • Consider using reclaimed or salvaged wood as a fuel source. This can be obtained from construction sites, tree removal services, or even old furniture.
  • Explore the option of using wood pellets instead of traditional firewood. Wood pellets are made from compressed sawdust and are a more efficient and cost-effective fuel source.
  • Look into biofuels, such as corn or soybeans, which can be converted into pellets or briquettes for use in your wood stove.
  • Take advantage of community programs or initiatives that offer discounted or free firewood to help reduce costs.

By implementing these cost-saving measures and exploring alternative fuel sources, you can effectively maintain your outdoor wood stove without breaking the bank.

Transitioning into the subsequent section about safe wood fuels and airflow control, let’s now discuss how to ensure optimal performance and safety for your wood stove.

Safe Wood Fuels and Airflow Control for Your Outdoor Wood Stove

When using our outdoor wood stove, it’s important to understand how to safely control airflow and choose the right wood fuels. Proper wood stove maintenance and fuel selection are crucial for efficient and safe cooking.

To maintain your wood stove, regularly clean the stovepipe and chimney to prevent the buildup of creosote, which can lead to chimney fires. Additionally, inspect the gaskets and replace them if necessary to ensure a tight seal.

As for fuel selection, it’s best to use seasoned hardwoods like oak, maple, or birch. These woods burn longer and produce less smoke and creosote. Avoid using softwoods, as they burn quickly and can create excessive smoke.

Frequently Asked Questions

What Are the Best Cleaning Methods for Removing Stubborn Stains and Grease Buildup on an Outdoor Wood Stove?

To effectively maintain an outdoor wood stove for cooking, we use cleaning methods to remove stubborn stains and grease buildup. Additionally, preventing rust and using recommended heat resistant paints can help prolong the stove’s lifespan.

How Can I Protect My Outdoor Wood Stove From Extreme Weather Conditions Such as Heavy Rain and Snow?

To protect our outdoor wood stove from extreme weather conditions, we use protective covers and ensure proper positioning. This safeguards it against heavy rain and snow, preserving its functionality and longevity.

Are There Any Specific Techniques for Storing an Outdoor Wood Stove During the Offseason to Prevent Damage?

When it comes to storing techniques for an outdoor wood stove during the offseason to prevent damage, there are a few key steps to follow. Proper cleaning, covering, and storing in a dry location are essential.

How Often Should I Inspect My Outdoor Wood Stove for Any Potential Issues or Maintenance Needs?

We make sure to regularly inspect our outdoor wood stove for any potential issues or maintenance needs. It’s important to stay on top of things to ensure the stove is in good working condition.

What Are Some Effective Ways to Prevent Rust on an Outdoor Wood Stove, and What Types of Heat-Resistant Paints Are Recommended for This Purpose?

To prevent rust on an outdoor wood stove, we recommend regularly cleaning and drying it after use, applying a heat-resistant paint specifically designed for metal surfaces, and ensuring proper ventilation to prevent moisture buildup.

Conclusion

In conclusion, maintaining an outdoor wood stove for cooking is crucial for its longevity and efficiency. By regularly cleaning, protecting from weather, storing properly, inspecting, preventing rust, and using the right fuels and airflow control, you can ensure optimal performance.

Just like tending to a well-tuned instrument, caring for your outdoor wood stove will result in a harmonious cooking experience that will delight your taste buds and warm your soul. So, embrace the art of stove maintenance and let the culinary symphony begin!

Continue Reading

Trending