Connect with us

Wood Stove

What Are the Crucial Steps for Installing Wood Stoves in Compact Homes?

Published

on

An image showcasing a compact living space with a cozy corner dedicated to a wood stove installation

Ready to transform your tiny living area into a cozy haven complete with a wood stove? Search no more! This guide will walk you through the critical steps necessary to install wood stoves in small dwellings.

From finding the perfect spot to securing the stove, we’ll leave no stone unturned.

So, grab your tools and let’s dive into the world of wood stove installation. Get ready to embrace warmth and liberation in your very own home!

Key Takeaways

  • Properly evaluate the layout and choose the right spot for installation, considering ventilation, clearance requirements, and aesthetics.
  • Use heat shields to protect walls and furniture from the intense heat and improve energy efficiency and fire safety.
  • Follow proper techniques for cutting the roof penetration and installing the ventilation system to ensure safety and prevent hazards.
  • Secure the stove to the floor, check for potential leaks, run a first fire test, and prioritize regular maintenance for optimal performance and safety.

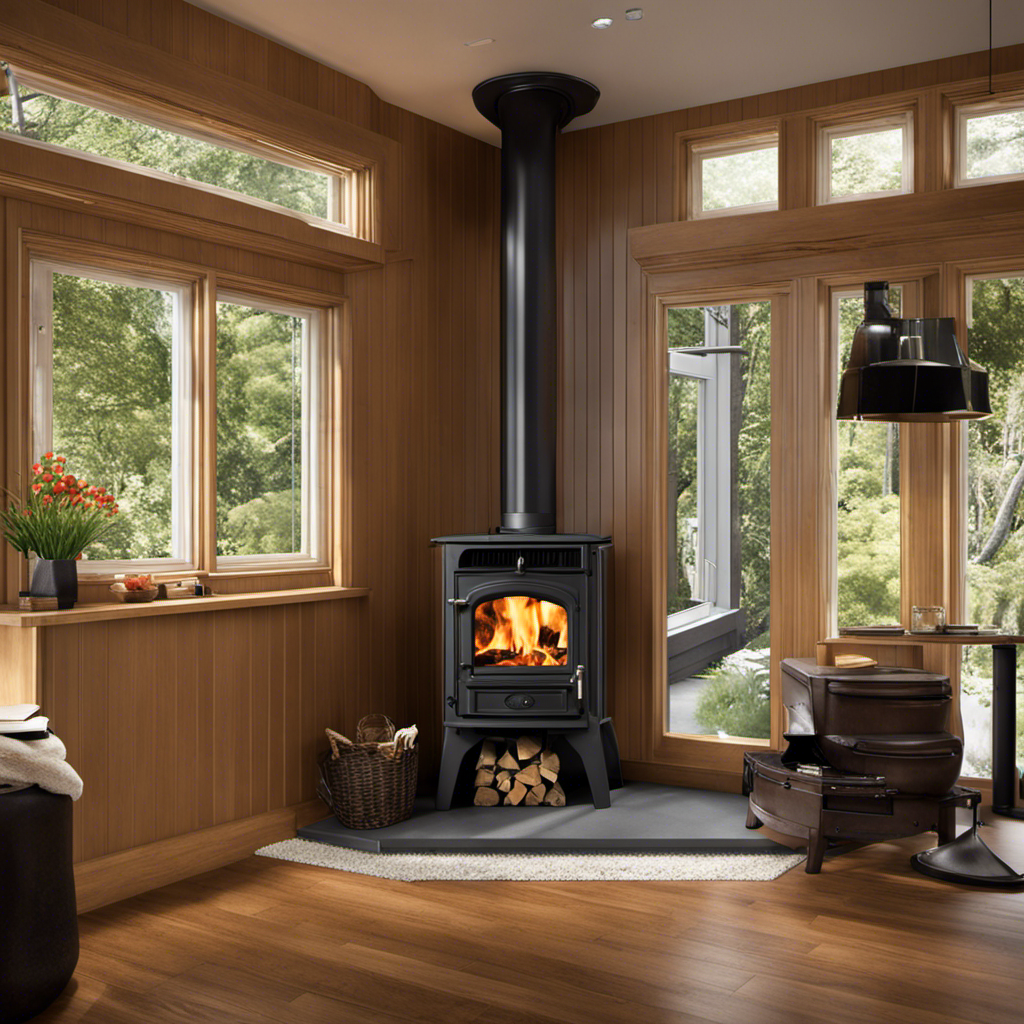
Finding the Right Spot

We’ve been researching different areas in our living room to find the perfect spot for our wood stove.

When it comes to finding the right location, there are a few important factors to consider.

First and foremost, you need to ensure that the area has proper ventilation. This is crucial for the safe operation of the wood stove and to prevent the buildup of harmful gases, such as carbon monoxide. Look for a spot near an exterior wall where you can easily install a vent or chimney.

Advertisement

Additionally, consider the layout of your living room and how the stove will fit in with your existing furniture and décor.

Finding the right location is essential for both functionality and aesthetics, so take the time to carefully evaluate your options.

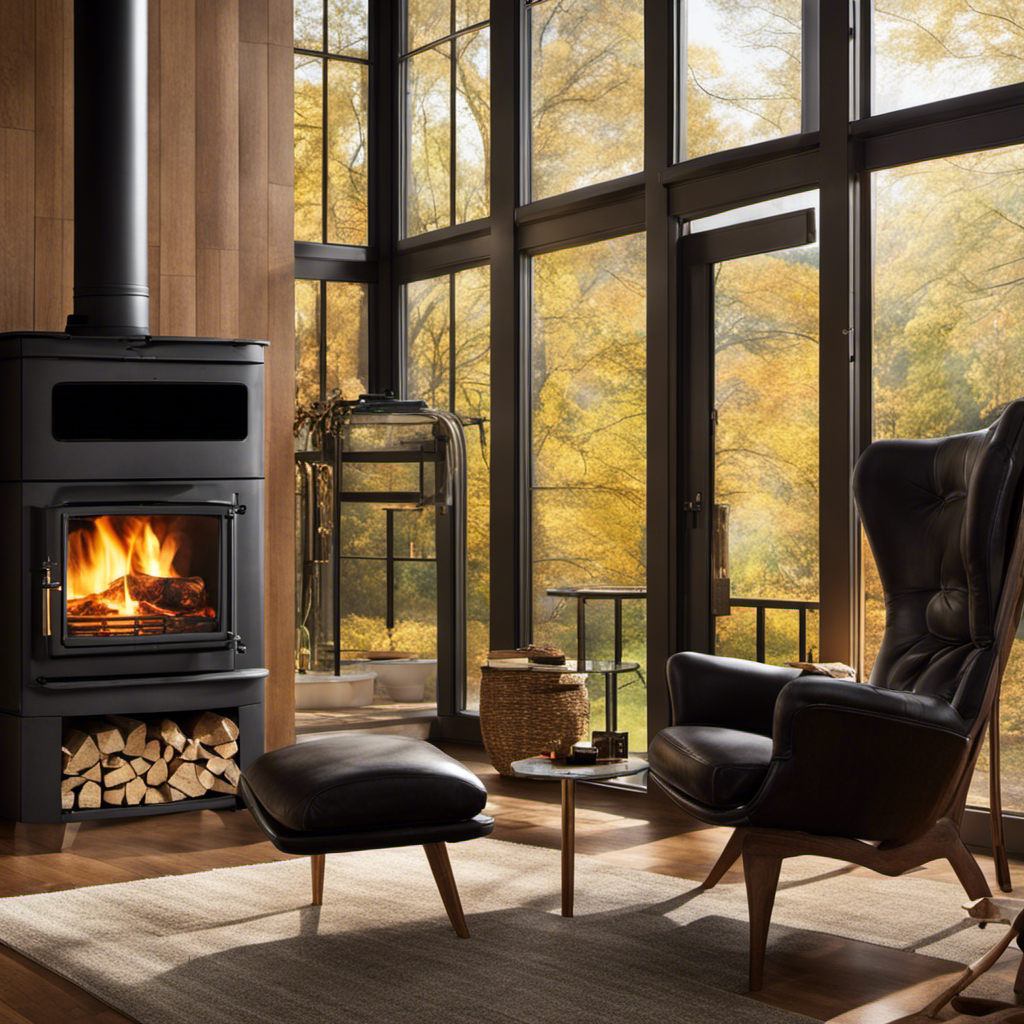
Clearing a Safe Area

Have we cleared enough space around the wood stove to ensure a safe area? Ensuring proper clearance requirements and fire safety precautions are crucial when installing wood stoves in compact homes. It is important to create a safe environment that minimizes the risk of fire and allows for efficient operation. To help guide you in this process, we have provided a table outlining the recommended clearance requirements for different components of a wood stove installation:

Component Clearance Requirement
Back Wall 18 inches
Side Walls 36 inches
Combustible Materials Above 36 inches

Installing Heat Shields

When it comes to installing heat shields, there are a few crucial points to keep in mind.

First, the choice of heat shield materials is important to ensure maximum safety and efficiency.

Advertisement

Second, proper installation techniques are key to ensure the heat shield is securely attached and provides adequate protection.

Lastly, it’s essential to follow the manufacturer’s guidelines and local building codes to ensure a successful installation.

Heat Shield Materials

The heat shield materials are essential for protecting our compact home from the intense heat of the wood stove. They serve as a barrier, preventing the heat from damaging the surrounding walls and furniture. Here are four key reasons why heat shield materials are crucial for a safe and effective wood stove installation:

  1. Heat Protection: The primary purpose of a heat shield is to protect the walls and other combustible materials from the extreme temperatures generated by the wood stove.

  2. Energy Efficiency: By reflecting the heat back into the room, heat shield materials improve the overall efficiency of the wood stove, ensuring that more heat is utilized rather than lost.

  3. Fire Safety: Installing a heat shield significantly reduces the risk of fire accidents, as it creates a non-combustible barrier between the stove and the surrounding materials.

  4. Aesthetics: Heat shield materials come in various designs and finishes, allowing you to choose one that complements the style of your compact home.

Proper installation techniques are crucial for maximizing the effectiveness of the heat shield and ensuring the safety of your home.

Proper Installation Techniques

We need to carefully follow the proper installation techniques in order to ensure the effectiveness and safety of our heat shields.

Advertisement

When installing heat shields, proper positioning is crucial. The heat shield should be placed at least 18 inches away from the combustible material, such as wood or drywall. This ensures that the heat is dispersed evenly and prevents any potential fire hazards.

Additionally, it’s important to take safety measures during installation. Wearing protective gear, such as gloves and goggles, can prevent any injuries. Following the manufacturer’s instructions and using the recommended tools and materials will also guarantee a proper installation.

By adhering to these guidelines, we can ensure the optimal performance of our heat shields and create a safe environment for our compact homes.

Now let’s move on to the next step: cutting the roof penetration.

Cutting the Roof Penetration

When it comes to cutting the roof penetration for installing a wood stove, there are several crucial points to consider.

Advertisement

First and foremost, we need to prioritize roofing safety precautions to ensure a secure and stable installation process.

Additionally, proper ventilation requirements must be met to prevent any potential hazards, such as carbon monoxide buildup.

Lastly, sealing and insulation techniques play a vital role in maintaining a comfortable and energy-efficient indoor environment.

Roofing Safety Precautions

Our team always takes roofing safety precautions seriously when working on cutting roof penetrations. Safety is our top priority, and we understand the importance of following proper procedures to ensure the well-being of our team members and the success of the project.

Here are four crucial safety measures we take when working with roofing equipment and tools:

Advertisement
  1. Personal Protective Equipment (PPE): We ensure that all team members wear appropriate PPE, including hard hats, safety glasses, gloves, and non-slip footwear. This protects them from potential hazards and reduces the risk of accidents.

  2. Fall Protection: We use fall protection systems such as harnesses, lanyards, and anchor points to prevent falls from roofs. This is especially important when working at heights or on steep slopes.

  3. Tool Safety: We regularly inspect and maintain our roofing tools to ensure they’re in good working condition. This includes checking for any damage or defects that could pose a safety risk.

  4. Proper Training: Our team undergoes regular training sessions to stay updated on the latest safety practices and techniques. This helps us identify potential hazards and respond appropriately in any situation.

Proper Ventilation Requirements

The importance of following the proper ventilation requirements for cutting the roof penetration can’t be overstated. When it comes to compact homes, ensuring adequate ventilation is even more crucial due to the limited space available.

Proper ventilation is essential to maintain a healthy and comfortable living environment, as it helps remove excess moisture, odors, and pollutants from the air. In compact homes, where space is at a premium, it’s necessary to carefully plan and design the ventilation system to maximize efficiency and effectiveness.

This may involve the use of mechanical ventilation systems, such as exhaust fans or ventilation hoods, as well as natural ventilation methods, such as windows or vents. Additionally, it’s important to regularly inspect and maintain the ventilation system to ensure it’s functioning properly and providing adequate airflow.

Sealing and Insulation Techniques

We will use high-quality sealing and insulation techniques to ensure a tight and energy-efficient seal around the roof penetration. Proper sealing and insulation are crucial for the installation of wood stoves in compact homes.

Here are four key techniques we’ll employ:

Advertisement
  1. Weatherstripping: We’ll apply weatherstripping around the roof penetration to prevent air leakage and maintain a consistent indoor temperature.

  2. Caulking: Our team will use high-grade caulking to seal any gaps or cracks in the roof penetration, ensuring that no heat escapes and no cold air enters the living space.

  3. Insulation materials: We’ll utilize insulation materials, such as spray foam or fiberglass, to effectively insulate the area around the roof penetration and reduce heat loss.

  4. Thermal barriers: To further enhance energy efficiency, we’ll install thermal barriers around the chimney pipe to prevent heat transfer to adjacent materials.

By implementing these sealing techniques and insulation methods, we’ll create a well-insulated and airtight system, maximizing the efficiency of the wood stove installation.

This seamless transition sets the stage for the next step: installing the chimney pipe.

Installing the Chimney Pipe

We need to measure the length of the chimney pipe before installing it in order to ensure a proper fit. Proper chimney installation is crucial for the safe and efficient operation of wood stoves in compact homes.

When it comes to chimney height requirements, it’s important to consider local building codes and regulations. These requirements are in place to ensure that smoke is properly vented and doesn’t pose a risk to the occupants or neighboring properties. The height of the chimney must be adequate to create proper draft and prevent backdrafting.

It’s also important to consider the distance between the chimney and any combustible materials to prevent fire hazards. By following these guidelines, we can ensure a safe and effective wood stove installation in our compact homes.

Advertisement

Securing the Stove to the Floor

After inspecting the floor, we should secure the stove using anchor bolts, ensuring it remains stable during use. Securing a wood stove is crucial for the safety and efficiency of your compact home. Here are four essential steps to follow when securing your stove:

  1. Choose the right anchor bolts: Select strong and durable anchor bolts that are appropriate for the weight of your stove. Consult the manufacturer’s guidelines for the recommended size and type.

  2. Locate the ideal position: Determine the best spot for your stove, considering factors such as proximity to combustible materials and proper ventilation. Mark the location on the floor.

  3. Prepare the floor: Ensure the floor is clean and level. Use a drill to create holes in the marked spots, matching the size of the anchor bolts.

  4. Secure the stove: Place the stove over the drilled holes and insert the anchor bolts through the stove’s base and into the floor. Tighten the bolts securely to ensure stability.

By following these securing methods and taking necessary measures for floor protection, you can enjoy the warmth and comfort of your wood stove while ensuring the safety of your compact home.

Stay liberated and cozy!

Checking for Potential Leaks

Let’s start by thoroughly inspecting the stove and its connections to ensure there are no potential leaks. When it comes to wood stoves, safety is of utmost importance. Potential dangers such as gas leaks or carbon monoxide poisoning can pose serious risks to our well-being.

To mitigate these risks, it’s crucial to take appropriate safety measures. Begin by carefully examining the stove’s connections, including the chimney, pipes, and ventilation system. Look for any signs of wear and tear, loose fittings, or cracks that could potentially lead to leaks. Additionally, ensure that all connections are secure and properly sealed.

Advertisement

It’s also essential to regularly check and maintain the stove to prevent any potential dangers. By being vigilant and thorough in our inspections, we can ensure the safety and well-being of everyone in our compact homes.

Running a First Fire Test

During the first fire test, we should carefully observe the stove’s performance and ensure that it’s operating efficiently. Here are some essential tips for conducting a safe and successful first fire:

  1. Safety first: Before starting the fire, make sure you have a fire extinguisher nearby and clear any flammable materials from the stove’s vicinity.
  2. Check for proper airflow: Ensure that the air vents and chimney are clear to allow for adequate airflow, which is crucial for efficient combustion.
  3. Monitor temperature: Keep an eye on the stove’s temperature to prevent overheating and potential damage to the surrounding area.
  4. Address any issues: If you notice any abnormal behavior, such as smoke coming into the room or a weak flame, troubleshoot the problem immediately to ensure safety.

Running a first fire test is crucial for identifying potential issues and ensuring the safe operation of your wood stove. Regular maintenance is equally important to maximize its efficiency and lifespan.

What are the key differences in installing a Fisher wood stove compared to other types of wood stoves in compact homes?

When installing Fisher wood stoves in compact homes, sizing is crucial. These stoves need proper clearances to combustible materials. Unlike other wood stoves, Fisher stoves have a unique design and may require more space for the flue pipe. Proper installation of Fisher wood stoves ensures safety and efficient heating.

Importance of Regular Maintenance

We should prioritize the importance of regular maintenance in order to ensure the efficient operation and longevity of our wood stove.

Regular cleaning is essential to keep our wood stove functioning optimally and to prevent potential health hazards.

Advertisement

When we neglect regular cleaning, soot and creosote can accumulate in the chimney, increasing the risk of chimney fires.

Additionally, a buildup of soot and debris inside the stove can hinder proper airflow and lead to poor combustion, resulting in lower heat output and increased smoke emissions.

By regularly cleaning the chimney, flue, and stove, we can minimize the risk of chimney fires, improve air quality in our homes, and maximize the efficiency of our wood stove.

It’s crucial to prioritize regular maintenance for both the safety of our homes and our overall well-being.

Frequently Asked Questions

How Much Clearance Is Required Between the Wood Stove and Combustible Materials?

For wood stove safety and proper wood stove installation, it’s crucial to have the right clearance between the wood stove and combustible materials. We’ll cover the specifics in our detailed installation guide.

Advertisement

Can a Wood Stove Be Installed in a Mobile Home?

Yes, a wood stove can be safely installed in a mobile home. It is crucial to follow proper installation guidelines, ensuring proper ventilation, clearances, and compliance with local codes for the safety of the occupants.

What Are the Different Types of Heat Shields and How Do They Work?

There are different types of heat shields that can be used when installing wood stoves. They serve the purpose of protecting the surrounding walls and floors from excessive heat generated by the stove.

Are There Any Specific Regulations or Permits Required for Installing a Wood Stove in a Compact Home?

There are specific regulations and permits required for installing a wood stove in a compact home. We’ll guide you through the process, ensuring compliance and providing the necessary documentation for a successful installation.

What Are the Signs of a Potential Chimney Leak and How Can It Be Fixed?

When it comes to chimney leak repair, there are several signs to look out for, such as water stains on the ceiling or walls. Common causes of chimney leaks include cracked chimney crowns or damaged flashing. Proper repair is essential to prevent further damage.

Conclusion

In the dance of installing a wood stove in a compact home, each step is crucial, like the footsteps of a seasoned ballroom dancer.

Advertisement

From finding the perfect spot to securing the stove and checking for leaks, attention to detail is key.

Just like a graceful waltz, regular maintenance keeps the fire burning brightly and the home cozy.

So, take these steps with confidence, and let the warmth of the wood stove embrace your compact space.

Logan’s affair with adventure began in childhood. He hailed from a small town where vast forests bordered one side and endless shores stretched on the other. His days were spent exploring uncharted woods, climbing tall trees, or listening to the tales of old sailors. This early immersion in a world brimming with stories and mysteries became the foundation of his passion for writing.

Continue Reading
Advertisement

Installation & Maintenance

How To Installation A Lowes Wood Stove Chimney

Published

on

By

An image capturing the step-by-step process of installing a Lowes wood stove chimney

During my quest to grasp the complexities of wood stove installation, I’ve learned that success hinges on ensuring the chimney is correctly set up.

In this guide, I’ll walk you through the step-by-step process of installing a Lowes wood stove chimney.

From understanding the components to choosing the right location, I’ll provide all the detailed instructions you need.

So, let’s roll up our sleeves and get ready to bring warmth and coziness to your home.

Key Takeaways

  • Components work together for proper ventilation
  • Regular cleaning and inspection are essential
  • Choose the right location and materials for safety and efficiency
  • Thoroughly prepare your home and follow local building codes and regulations

Understanding the Components of a Lowes Wood Stove Chimney

I understand the components of a Lowes wood stove chimney and how they work together to ensure proper ventilation. One common problem with chimneys is the buildup of creosote, a flammable substance that can cause chimney fires. To prevent this, regular cleaning and inspection are essential.

Another issue is blockage caused by debris, such as leaves or animal nests. This can restrict airflow and lead to poor ventilation. It’s important to install a chimney cap to prevent these blockages.

Advertisement

Additionally, safety precautions should be taken when using a wood stove chimney. This includes using a spark arrester to prevent sparks from igniting nearby combustible materials.

Regular maintenance and following safety guidelines will help ensure the efficient and safe operation of your Lowes wood stove chimney.

Choosing the Right Location for Your Wood Stove Chimney

There are two main factors to consider when choosing the right location for your wood stove chimney: safety and efficiency. It is important to select a location that minimizes the risk of fire and carbon monoxide buildup, while also maximizing the stove’s heating capabilities. Here are some essential safety precautions for wood stove chimney installation:

  1. Keep the chimney at least 2 feet above the highest point where it passes through the roof.
  2. Install a chimney cap to prevent birds, animals, and debris from entering.
  3. Use only approved materials for the chimney, such as stainless steel or insulated double-wall pipe.
  4. Ensure proper clearance from combustible materials, following manufacturer guidelines.
  5. Regularly inspect and clean the chimney to prevent creosote buildup.

By following these precautions and choosing the best materials for your wood stove chimney, you can enjoy a safe and efficient heating system for your home.

Safety Precautions Materials
Keep chimney above roof Stainless steel or insulated double-wall pipe
Install chimney cap Follow manufacturer guidelines for clearance
Regularly inspect and clean chimney

Preparing Your Home for Wood Stove Chimney Installation

To ensure a smooth and successful wood stove chimney installation, it’s essential to thoroughly prepare your home and gather all the necessary materials.

When it comes to choosing the right materials for your wood stove chimney, there are a few key factors to consider. First and foremost, you’ll want to make sure that the materials are rated for high temperatures to prevent any potential fire hazards. Additionally, it’s important to choose materials that are durable and long-lasting, as a chimney is a substantial investment.

Advertisement

Common mistakes to avoid during wood stove chimney installation include failing to properly measure and plan for the chimney’s height and clearance requirements. It’s also crucial to follow all local building codes and regulations to ensure that your installation is safe and compliant.

Step-by-Step Guide to Installing a Lowes Wood Stove Chimney

I carefully followed the step-by-step guide and successfully installed a Lowes wood stove chimney with ease and confidence. It was a rewarding experience, knowing that I was taking the necessary steps to ensure the safety and functionality of my wood stove.

However, installing the chimney is just the beginning. Proper maintenance is crucial for the chimney to work efficiently and prevent any potential problems. Here are some important maintenance tips to keep in mind:

  • Regularly inspect and clean the chimney to remove any creosote buildup.
  • Check for any cracks or damage that may occur over time and repair them promptly.
  • Ensure that the chimney cap is in good condition to prevent water and debris from entering.
  • Keep an eye out for signs of chimney fires, such as excessive smoke or a strong, pungent odor.

Is a Permit Required for Installing a Lowes Wood Stove Chimney?

Yes, a permit for wood stove installation is required when installing a Lowes wood stove chimney. This is to ensure safety and compliance with local building codes. It’s important to check with your local building department to understand the specific requirements for obtaining a permit for wood stove installation in your area.

Tips for Maintaining and Troubleshooting Your Wood Stove Chimney

Regularly inspecting and cleaning the chimney, as well as promptly repairing any cracks or damage, are essential for maintaining and troubleshooting your wood stove chimney.

One of the most common chimney problems is the buildup of creosote, a flammable substance that can lead to chimney fires. To prevent this, it’s recommended to have your chimney professionally cleaned at least once a year.

Advertisement

Additionally, make sure to check for any obstructions such as bird nests or debris that could block the airflow.

Another common issue is the development of cracks or leaks in the chimney, which can cause smoke to seep into your home. If you notice any cracks, it’s crucial to repair them immediately using a high-temperature sealant.

Frequently Asked Questions

Can I Install a Lowes Wood Stove Chimney Myself, or Do I Need to Hire a Professional?

I can install a Lowes wood stove chimney myself, but it’s important to consider the pros and cons. DIY installation saves money, but hiring a professional ensures proper installation and compliance with local regulations.

How Often Should I Clean My Lowes Wood Stove Chimney?

I clean my Lowes wood stove chimney as often as I clean my teeth, which is to say, regularly. Signs that it needs cleaning include excessive smoke, a strong odor, or a decrease in stove efficiency.

What Type of Wood Should I Use in My Wood Stove to Maximize Efficiency?

To maximize efficiency in my wood stove, I use hardwoods like oak or maple. They burn longer and release more heat. It’s important to properly season the wood and ensure it’s dry for optimal performance.

Advertisement

Are There Any Specific Building Codes or Regulations I Need to Adhere to When Installing a Wood Stove Chimney?

Building code requirements and safety regulations must be followed when installing a wood stove chimney. It is important to ensure the chimney is properly installed and meets all necessary standards to ensure safety and compliance.

What Should I Do if I Notice a Leak or Smoke Coming From My Wood Stove Chimney?

If I notice a leak or smoke coming from my wood stove chimney, I would first inspect the chimney for any visible damage or cracks. Then, I would proceed with repairing chimney leaks and troubleshooting chimney smoke as needed.

Conclusion

To wrap things up, installing a Lowes wood stove chimney can be a rewarding project for any homeowner. By understanding the components, choosing the right location, and following a step-by-step guide, you can enjoy the warmth and comfort of a wood stove in your home.

Remember to regularly maintain and troubleshoot your chimney to ensure its efficiency and safety. So go ahead, embrace the cozy atmosphere and start enjoying the benefits of a wood stove chimney!

Advertisement
Continue Reading

Wood Stove

How To Tell If Wood Stove Is To Hot

Published

on

By

An image capturing the intense glow emanating from a red-hot wood stove, the metal door slightly ajar, revealing dancing flames within

Sitting next to my wood-burning stove, I am enveloped by the warmth emanating from its bright, glowing embers.

But how do I know if it’s too hot?

In this article, I’ll guide you through the essential steps to determine if your wood stove is exceeding safe temperatures.

From checking the temperature gauge readings to observing smoke and flames, we’ll explore various methods to ensure your wood stove remains in a safe operating range.

Let’s keep our homes cozy and secure.

Advertisement

Key Takeaways

  • Monitoring the temperature gauge readings is crucial for maintaining optimal heat levels and preventing overheating.
  • Checking the exterior temperature of the wood stove using a digital thermometer helps ensure it is operating within safe limits.
  • Observing flame color, assessing airflow and draft, and monitoring smoke and flame characteristics are important for determining if the stove is operating at a safe temperature.
  • Regularly inspecting and maintaining the firebox and hearth is essential for the safety and efficiency of the wood stove.

Temperature Gauge Readings

I’m keeping an eye on the temperature gauge readings to make sure my wood stove doesn’t get too hot. Understanding heat distribution and the importance of proper airflow are key factors in maintaining the optimal temperature for a wood stove.

The temperature gauge provides crucial information about the heat levels inside the stove, allowing me to adjust the airflow accordingly. If the temperature exceeds the recommended range, it could lead to overheating and potential damage to the stove or surrounding areas.

Proper airflow ensures that the heat is distributed evenly throughout the stove, preventing hot spots and allowing for efficient combustion. By monitoring the temperature gauge readings, I can ensure that the wood stove operates at a safe and effective temperature, promoting both comfort and safety.

Now, let’s move on to checking the exterior temperature.

Checking the Exterior Temperature

There are a few ways to check the exterior temperature, but one option is to use a digital thermometer.

When using a digital thermometer to check the temperature of a wood stove, it’s important to take certain safety precautions. First, ensure that the stove is completely cool before attempting to measure the temperature. This will prevent any burns or injuries. Next, make sure to hold the thermometer at a safe distance from the stove to avoid any contact with hot surfaces.

Advertisement

It’s also important to regularly clean and maintain the thermometer to ensure accurate readings. This can be done by wiping it with a soft cloth and checking the battery life periodically.

By following these safety precautions and maintenance tips, you can effectively check the exterior temperature of your wood stove without any risks.

Now, let’s move on to observing smoke and flames.

Observing Smoke and Flames

I can see both thick smoke and bright flames coming out of the wood stove. As a wood stove enthusiast, I understand the importance of closely monitoring the flame color and assessing the airflow and draft in order to determine if the stove is operating at a safe temperature. By conducting a flame color analysis, we can gain valuable insights into the combustion process and the stove’s efficiency. A blue flame indicates complete combustion, while a yellow or orange flame suggests incomplete combustion and potential overheating. Additionally, assessing the airflow and draft is crucial. Proper airflow ensures efficient burning and prevents excessive heat buildup. Monitoring the smoke and flame characteristics allows us to make informed decisions and maintain the wood stove’s optimal operating conditions.

Flame Color Airflow Assessment Draft Assessment
Blue Adequate Strong
Yellow Insufficient Weak
Orange Insufficient Weak

Examining the Firebox and Hearth

When examining the firebox and hearth, it’s important to check for any signs of cracks or damage that could compromise the safety and efficiency of the wood stove. Firebox maintenance is crucial to ensure that the stove is functioning properly and to prevent any potential hazards.

Advertisement

Inspect the firebox for any cracks, as they can lead to heat loss and potential fire hazards. Additionally, check for any damage to the bricks or mortar, as this can also affect the stove’s efficiency.

The hearth design is also important, as it should be made of non-combustible materials and extend a safe distance from the stove. The hearth acts as a protective barrier, preventing any sparks or embers from reaching flammable surfaces.

Regularly inspecting and maintaining the firebox and hearth is essential for the safe and efficient operation of a wood stove.

Using a Heat-Sensing Device

I can easily determine the temperature of my wood stove using a heat-sensing device. By utilizing an infrared thermometer or a thermal imaging camera, I can accurately measure the heat produced by my wood stove.

Here is how I do it:

Advertisement

  1. Select the appropriate device: Depending on the level of accuracy and detail required, I choose either an infrared thermometer or a thermal imaging camera.

  2. Prepare the device: Ensure that the device is fully charged or has fresh batteries. Also, make sure that the lens or sensor is clean and free from any obstructions.

  3. Measure the temperature: Point the device towards the desired area on the wood stove and press the trigger or button to capture the temperature reading. Repeat this process for different parts of the stove, including the door, flue, and chimney.

Using an infrared thermometer or a thermal imaging camera provides me with valuable information about the temperature of my wood stove, allowing me to ensure its safe and efficient operation.

Frequently Asked Questions

How Often Should I Clean My Wood Stove to Ensure It Doesn’t Get Too Hot?

I clean my wood stove every 1-2 months to prevent it from overheating. Leaving a wood stove unattended while it’s burning can be dangerous as it can lead to a buildup of creosote and other combustible materials.

Can I Leave My Wood Stove Unattended While It Is Burning?

Leaving a wood stove unattended while it’s burning can pose serious safety concerns. It’s important to always monitor the stove to ensure it doesn’t overheat or cause any potential fire hazards.

What Are the Potential Dangers of a Wood Stove Getting Too Hot?

Potential health risks of an overheating wood stove include carbon monoxide poisoning and the risk of fire. Signs of an overheating wood stove may include excessive heat emanating from the stove, warping or discoloration of the stove, and unusual noises.

Are There Any Specific Types of Wood That Burn Hotter and Could Cause the Stove to Overheat?

Some types of wood, like oak or hickory, burn hotter and can potentially cause a wood stove to overheat. To prevent this, ensure proper ventilation, monitor the stove’s temperature, and use a heat-resistant barrier.

Advertisement

Is It Possible for a Wood Stove to Get Too Hot Even if the Temperature Gauge Readings Are Within the Recommended Range?

It is indeed possible for a wood stove to become too hot, even if the temperature gauge readings are within the recommended range. Signs of overheating in a wood stove and how to regulate the heat output are important to address.

Conclusion

In conclusion, it’s crucial to monitor the temperature of a wood stove to ensure safety and efficiency.

One interesting statistic to note is that according to a study conducted by the National Fire Protection Association, heating equipment, including wood stoves, is responsible for approximately 15% of home fire deaths in the United States.

By following the outlined methods for checking the temperature of a wood stove, homeowners can effectively prevent overheating and reduce the risk of fire accidents.

Advertisement

Continue Reading

Wood Stove

What Do I Need To Put A Wood Stove In My House

Published

on

By

An image showcasing a cozy, well-ventilated room with a sturdy brick chimney, a fireproof hearth, a supply of firewood neatly stacked nearby, and a wood stove perfectly positioned for optimal heating efficiency

As a homeowner, I’ve consistently been attracted to the cozy warmth and delightful allure of having a wood stove in my home.

But before I embark on this exciting project, I need to be well-informed about the necessary requirements. From safety considerations to permits and regulations, proper ventilation to clearances and placement, there’s a lot to consider.

In this article, I’ll guide you through the essential tools and materials needed to successfully install a wood stove in your home.

Let’s get started!

Key Takeaways

  • Follow manufacturer’s guidelines for installation and maintenance
  • Research and understand local building codes and regulations
  • Choose appropriate size and type of ventilation system
  • Maintain minimum distance between stove and combustible materials

Safety Considerations

I need to carefully consider the safety precautions before installing a wood stove in my house. Fire prevention is of utmost importance when it comes to wood stoves. To minimize the risk of fire, it’s crucial to follow the manufacturer’s guidelines for installation and maintenance. This includes ensuring proper clearance between the stove and any combustible materials, such as furniture or curtains.

Additionally, installing a fireproof hearth and using a spark arrestor on the chimney can further reduce fire hazards. Another significant safety concern is the risk of carbon monoxide poisoning. Wood stoves produce this odorless and deadly gas, so it’s essential to have a functioning carbon monoxide detector installed near the stove. Regular maintenance and proper ventilation are also necessary to prevent the accumulation of carbon monoxide. Taking these safety precautions will help ensure a secure wood stove installation.

Advertisement

Now, let’s move on to the next topic: permits and regulations.

Permits and Regulations

Obtaining the necessary permits and adhering to the local regulations is vital when installing a wood stove in my home. Building codes and insurance requirements play a crucial role in ensuring the safety and legality of the installation process.

Before beginning the installation, it’s essential to research and understand the specific building codes and regulations set by the local authorities. These codes outline the minimum standards for safety and provide guidelines for placement, clearance, and venting requirements. Failure to comply with these codes can result in fines, penalties, or even having to remove the wood stove altogether.

Additionally, insurance companies often require proof of compliance with building codes and regulations before providing coverage for any potential damages or accidents. Therefore, it’s crucial to obtain the necessary permits and adhere to the local regulations to ensure a safe and legal wood stove installation in my home.

Speaking of safety, proper ventilation is another critical aspect to consider when installing a wood stove.

Advertisement

Proper Ventilation

The article explains the importance of proper ventilation when installing a wood stove in my home. It’s crucial to have a well-designed ventilation system to ensure proper air circulation and prevent the buildup of harmful gases and pollutants.

Here are some key points to consider:

  • Choose the right size and type of ventilation system that suits your wood stove and the size of your home.
  • Install a chimney or flue pipe that’s properly insulated and meets the required safety standards.
  • Position the stove in an area that allows for efficient airflow and easy access for cleaning and maintenance.
  • Regularly clean and inspect the ventilation system to remove any creosote buildup and ensure optimal performance.

Proper ventilation is essential for the safe and effective operation of a wood stove. A well-designed system won’t only provide better air quality but also prevent potential hazards.

Clearances and Placement

Before installing my wood stove, I need to carefully consider clearances and placement to ensure proper safety and functionality. Clearances refer to the minimum distance required between the stove and any combustible materials. This includes walls, furniture, and flooring. To prevent any fire hazards, it’s crucial to have fireproof flooring, such as tile or brick, installed around the stove.

Additionally, the stove should be placed in an area where it can be easily accessed for maintenance and cleaning. Another important aspect is chimney installation. The stove should be connected to a properly sized and installed chimney that can effectively vent the smoke and gases produced.

It’s recommended to consult with a professional to ensure compliance with local codes and regulations for optimal safety and performance.

Advertisement

Tools and Materials Needed

What tools and materials do I need to properly install a wood stove in my house? Sourcing the right equipment is crucial for a successful installation process. Here are the essential tools and materials you’ll need:

  • Wood stove: Choose a model that suits your heating needs and fits the available space.
  • Chimney pipe: Ensure proper ventilation by selecting the correct size and type of chimney pipe.
  • Stovepipe: Connect the wood stove to the chimney pipe using a stovepipe, which should be made of durable materials.
  • Hearth pad: Protect your floor from heat and potential fire hazards with a non-combustible hearth pad.

To ensure a safe and efficient wood stove installation, it’s recommended to consult a professional or follow the manufacturer’s guidelines. Properly sourcing these tools and materials will help you enjoy the warmth and comfort of a wood stove in your home.

Frequently Asked Questions

How Much Does It Cost to Install a Wood Stove in a House?

Installing a wood stove in a house can vary in cost depending on factors such as stove type, installation materials, and labor. It is important to consider the cost comparison and environmental impact before making a decision.

Can I Install a Wood Stove Myself, or Do I Need to Hire a Professional?

Installing a wood stove requires expertise to ensure safety and efficiency. Hiring a professional offers the benefits of their knowledge and experience. Don’t risk it. Let the experts handle it.

Are There Any Specific Requirements for the Type of Wood I Can Use in a Wood Stove?

There are specific requirements for the type of wood used in a wood stove. It needs to be well-seasoned and dry, with a moisture content of less than 20%. Hardwoods like oak and maple are recommended.

How Often Do I Need to Clean and Maintain a Wood Stove?

I clean and maintain my wood stove regularly to ensure it functions properly. Cleaning frequency depends on usage, but I recommend at least once a month. Common maintenance issues include cleaning the chimney and replacing worn-out gaskets.

Advertisement

Are There Any Tax Incentives or Rebates Available for Installing a Wood Stove in My House?

Tax incentives and rebates may be available for installing a wood stove. These incentives are typically offered to promote energy efficiency and reduce reliance on fossil fuels. It’s important to research and comply with local regulations and requirements.

Conclusion

In conclusion, adding a wood stove to your house can be a great way to enhance both the aesthetics and functionality of your space.

However, it’s crucial to prioritize safety and follow all necessary permits and regulations. Proper ventilation, clearances, and placement are key factors to consider.

By taking these precautions and using the right tools and materials, you can enjoy the warmth and charm of a wood stove while ensuring a safe and comfortable environment for your home.

Advertisement

Continue Reading

Trending