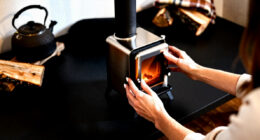
To install a stove pipe thermometer, first gather your tools—drill, thermometer, drill bit, and a measuring tape. Choose a flat, stable spot about 12-18 inches above the stove where the thermometer can be easily seen. Mark the spot, drill a precise hole, and insert the probe securely into the pipe. Finally, attach the thermometer firmly and check its position. For detailed step-by-step guidance, keep going to learn more about each stage.
Key Takeaways
- Choose a stable, accessible spot on the stove pipe at least 12-18 inches above the stove for accurate readings.
- Mark the drilling location on a flat section of the pipe using a pencil, measuring carefully for proper height.
- Drill a 1/4-inch hole in the pipe with a metal drill bit, drilling slowly and deburring edges afterward for safety.
- Insert the thermometer probe through the drilled hole, ensuring a snug fit and proper attachment to the pipe.
- Secure the thermometer with a magnet or screw, then verify it’s positioned correctly for easy reading and safe operation.

Single Burn Rate Stove
Heats up to 900 sq. ft.
As an affiliate, we earn on qualifying purchases.
Gathering the Necessary Tools and Materials
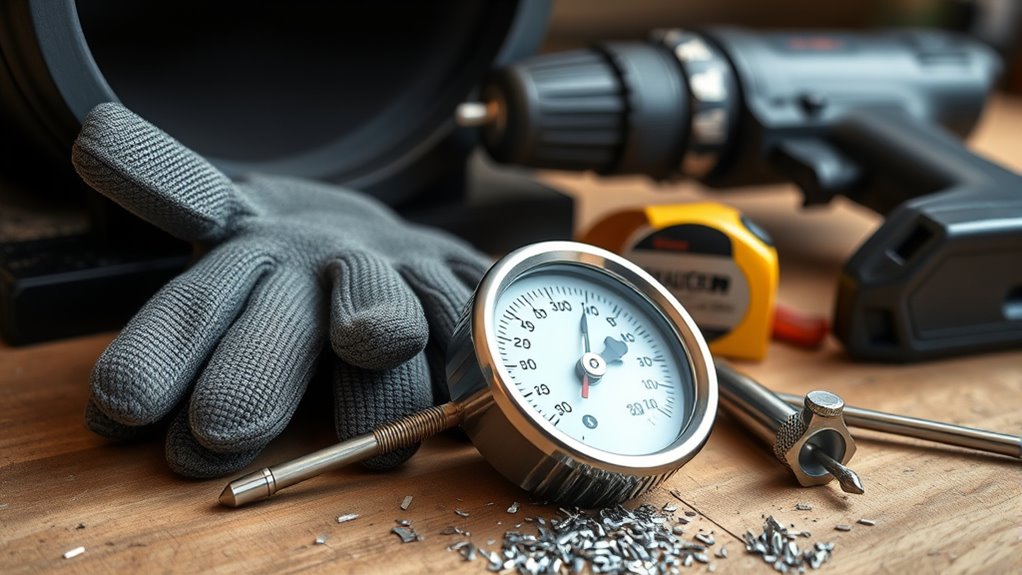
Before installing a stove pipe thermometer, you need to gather the essential tools and materials. First, get a sturdy stove pipe and a compatible thermometer designed for high temperatures. You’ll also need a drill with a 1/4-inch drill bit, ideally made for metal, to verify clean, accurate holes. A measuring tape helps you determine the correct height for installation, typically around 18 inches above the stove top. Keep a pencil handy to mark the exact spot on the pipe where you’ll drill. For safety, work gloves are recommended to protect your hands from hot or sharp-edged metal during the installation process. Having all these tools and materials ready will streamline your project and ensure a safe, efficient setup. Additionally, understanding environmental considerations such as proper placement can help maintain safe and sustainable use of your stove. Proper installation techniques are also crucial for accurate temperature readings and safety. Ensuring correct ventilation during installation will further enhance safety and performance.

Guide Gear Outdoor Wood Burning Stove; Portable with Chimney Pipe for Cooking and Camping
OUTDOOR WOOD STOVE – We designed our camp stove for use outside. Perfect for use during camping trips...
As an affiliate, we earn on qualifying purchases.
Choosing the Optimal Location for the Thermometer
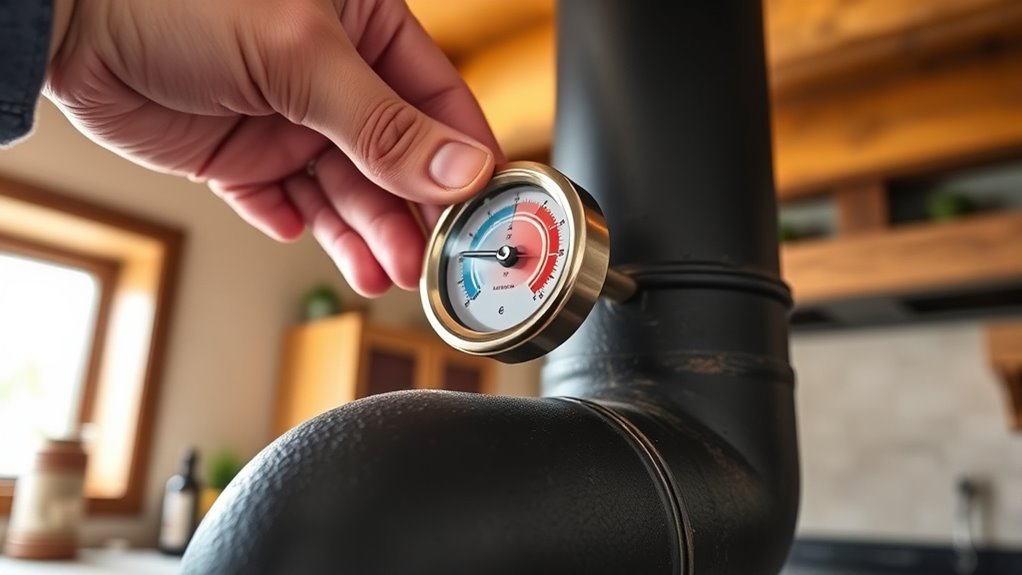
To guarantee accurate temperature readings and safe stove operation, you should choose a location for your thermometer that is both accessible and reliable. Position it at least 12 to 18 inches above the stove top to ensure accurate readings of the flue gases. Place the thermometer on a flat, stable section of the flue pipe or stove surface with clear visibility from the front, making it easy to monitor and adjust. Avoid areas prone to ash buildup, creosote deposits, or direct flames that could damage the device. Proper thermometer placement aligns with your stove manufacturer’s guidelines for maximum safety and efficiency. Use the table below to select the best spot:
| Location | Pros | Cons |
|---|---|---|
| Flat pipe section | Easy access, stable | May need repositioning |
| Near the stove top | Quick readings | Less accurate at high temps |
| Away from obstructions | Clear visibility | Harder to reach |
Additionally, considering the importance of data privacy in modern appliances can help ensure your stove’s controls and monitoring systems are secure. Implementing secure monitoring systems can prevent unauthorized access and enhance safety. Proper placement and secure connections are crucial for maintaining the accuracy of readings and overall safety of your heating system. Regular maintenance and calibration also contribute to consistent monitoring, ensuring your stove operates safely and efficiently.

YRenZ Upgraded Portable Wood Stove for Camping, Compact Tent Stove with Large Firebox, High Airtightness for Outdoor Cooking & Heating
【Upgraded Tent Camping Wood Stove】: Compact yet powerful wood stove for tents and outdoor use, with high airtightness,...
As an affiliate, we earn on qualifying purchases.
Marking the Drilling Spot on the Stove Pipe
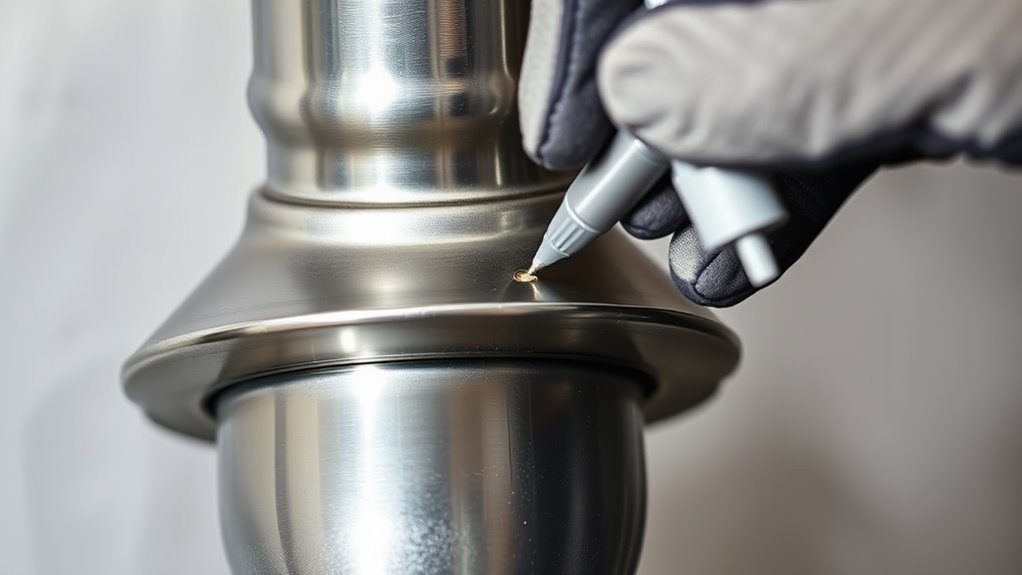
First, measure at least 18 inches above the stove top to find the correct height. Then, use a pencil to mark the spot where you’ll drill, making sure it’s clear and precise. To ensure accurate placement, consider the ergonomic aspects of your workspace to make the measurement process more comfortable. Additionally, take into account proper ventilation to prevent heat buildup around the thermometer installation area. Proper airflow is essential for accurate temperature readings and safety. Adequate air circulation can help maintain consistent readings and prevent overheating around the installed thermometer. It’s also helpful to consult the manufacturer’s instructions for specific placement guidelines to ensure optimal performance. Finally, double-check that the location is accessible, visible, and on a flat section of the pipe for a secure, accurate installation.
Measure for Proper Height
When marking the drilling spot on your stove pipe, start by measuring at least 12 to 18 inches above the stove top to find the best height for your thermometer. This measurement guarantees accurate temperature readings during installation. Use a measuring tape to mark a visible and accessible spot on the pipe, avoiding bends, joints, or creosote buildup areas. Confirm the selected location aligns with the manufacturer’s recommendations for peak performance. Make sure your mark is clear and precise before proceeding to drill. Proper height placement is essential for reliable temperature monitoring and safe stove operation. Additionally, understanding the essential elements of farmhouse bedroom design can inspire a cozy, rustic atmosphere for your space. Practicing space optimization techniques can also help keep your stove area tidy and functional, reducing clutter and ensuring safety. Being aware of the best placement guidelines ensures the thermometer remains effective and durable over time. Moreover, considering the preservation efforts of historic farmhouses can provide insights into maintaining your stove and surrounding areas for longevity and safety. Incorporating proper maintenance routines can further extend the life of your stove pipe and thermometer, ensuring consistent performance and safety.
Mark the Drilling Location
After determining the proper height for your thermometer, you can mark the exact spot on the stove pipe where you’ll drill. Use a pencil to carefully mark the drilling location, making certain it’s centered and accessible. Confirm that the spot is clear of obstructions and offers a good view for easy reading. Double-check your measurements to match safety guidelines and manufacturer recommendations. Choose a flat, stable section of the pipe for accurate readings and secure installation. To make the process easier, consider these tips:
- Measure at least 18 inches above the stove top
- Ensure the spot is reachable and visible
- Mark on a flat, stable part of the pipe
- Verify measurements before marking
- Make sure the location is free of obstructions
- Headphone compatibility with your stove pipe ensures a proper fit and accurate readings. Additionally, selecting a suitable installation site helps maintain proper thermometer function and safety standards.
- Consulting manufacturer guidelines can provide specific recommendations for your stove pipe model and ensure safe installation.
- Remember that choosing the right stove pipe section can influence the accuracy and durability of your thermometer installation.
- Selecting the correct stove pipe material can also impact the longevity and effectiveness of your thermometer setup.
Verify Visibility and Access
To guarantee you can easily monitor your stove’s temperature, it’s important to select a spot that’s clearly visible and accessible from the front. Check that the visibility of the stove thermometer won’t be blocked by stove components or decorations. Mark the drilling location with a pencil, ensuring it’s centered and on a flat, stable surface for secure installation. Choose a position that allows quick glances without leaning or reaching over the stove, enhancing access during operation. Confirm the marked spot is unobstructed and on a smooth area, preventing wobbling or misalignment. An ideal location balances visibility, easy access, and aesthetic appeal. Properly verifying these factors ensures your stove thermometer remains functional and easy to read, making ongoing monitoring straightforward and effective. Additionally, consider the installation process to ensure your thermometer stays secure over time, especially on stove pipes that may expand or contract with heat. Regular checks of the stove pipe area can help maintain accurate readings and prevent potential safety hazards. Incorporating proper mounting techniques can also extend the longevity and reliability of your thermometer.

Trailblazer Cookstove – Wood Fired Stovetop with Oven for Off-Grid Living, Camping, RV, Hunting, Prepping, Emergency Heat & Cooking
Heirloom Steel, Built to Last – Solid-steel construction, folding legs, and gasket-free door design proven in remote village...
As an affiliate, we earn on qualifying purchases.
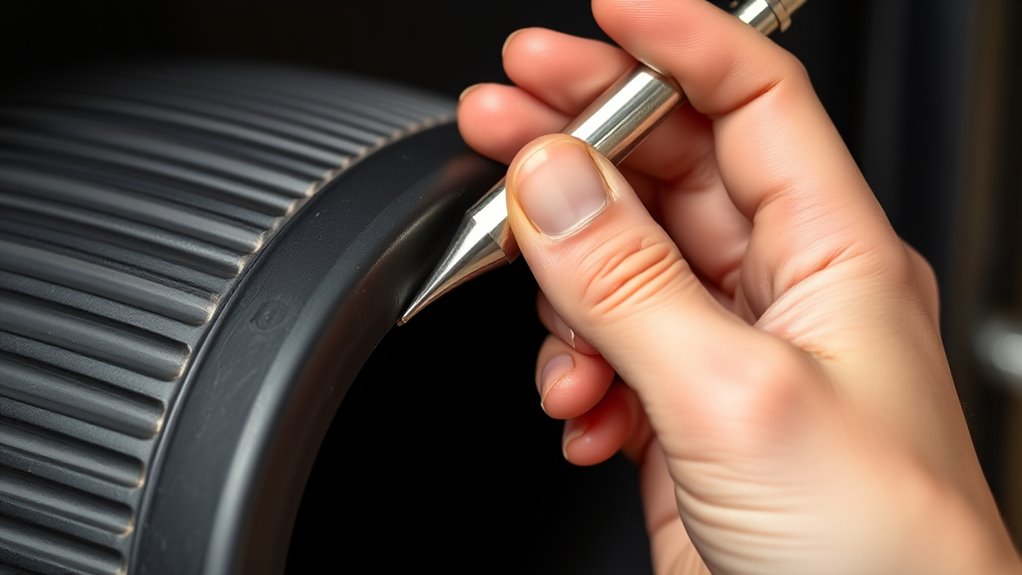
Drilling the Hole in the Pipe Safely and Accurately
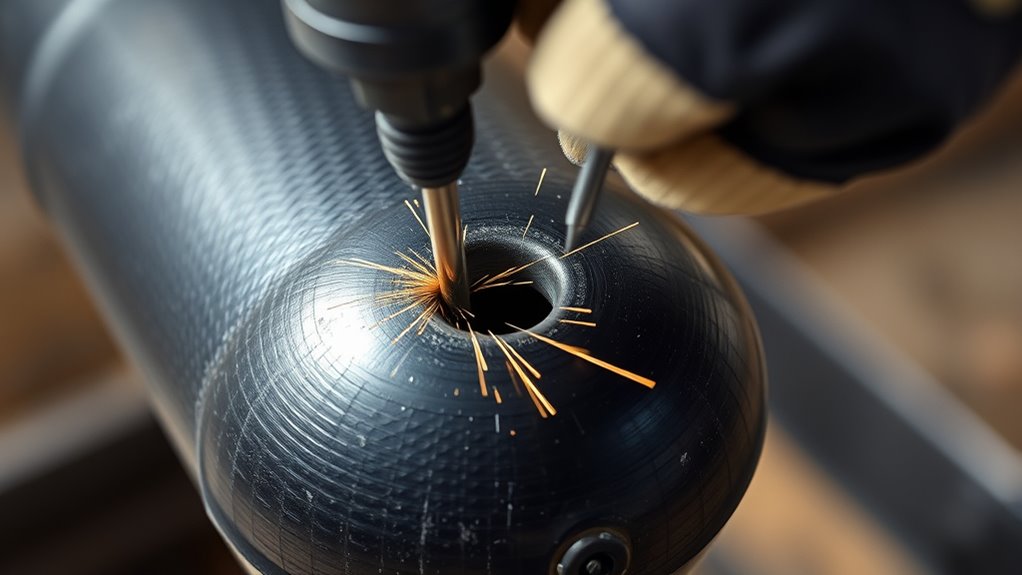
Choose a 1/4-inch drill bit suited for metal pipes to make a clean, accurate hole. Drill slowly with steady pressure, keeping the bit aligned with your mark. Afterward, smooth out any burrs to protect the thermometer probe and guarantee it fits snugly.
Selecting Proper Drill Bits
Selecting the right drill bit is essential for drilling a clean, precise hole in your stove pipe. For metal pipes, especially stainless steel, use a sharp, high-quality 1/4-inch drill bit designed specifically for metal. Before drilling, verify the bit is clean and free of debris to prevent slipping and uneven holes. Start drilling at a slow speed to maintain control and reduce heat, then gradually increase speed once the bit bites into the metal. Apply steady, even pressure to avoid wandering or damaging the pipe, and periodically withdraw the bit to clear metal shavings. Wear safety gloves and eye protection, and keep the drill perpendicular to the pipe for the best results. Proper drill bit selection makes the process safer and more accurate.
Ensuring Precise Drilling
How can you guarantee that your hole in the stove pipe is drilled safely and accurately? First, select a 1/4-inch drill bit suitable for metal. Mark the spot at least 18 inches above the stove top, aligning it with the pipe’s center for precise temperature readings. Drill slowly and steadily, applying light pressure to prevent deforming or cracking the stove pipe. For stainless steel pipes, ensure the drill bit is sharp and designed for stainless steel to avoid overheating or slipping. After drilling, carefully remove burrs or sharp edges with a deburring tool or fine file. To visualize, consider the table below:
| Step | Action | Purpose |
|---|---|---|
| 1 | Choose the right drill bit | Precise holes in stove pipe |
| 2 | Mark the drilling spot | Accurate placement |
| 3 | Drill slowly and steadily | Prevent damage |
| 4 | Use sharp drill bit for stainless steel | Avoid overheating |
| 5 | Deburr the hole | Protect thermometer stem |
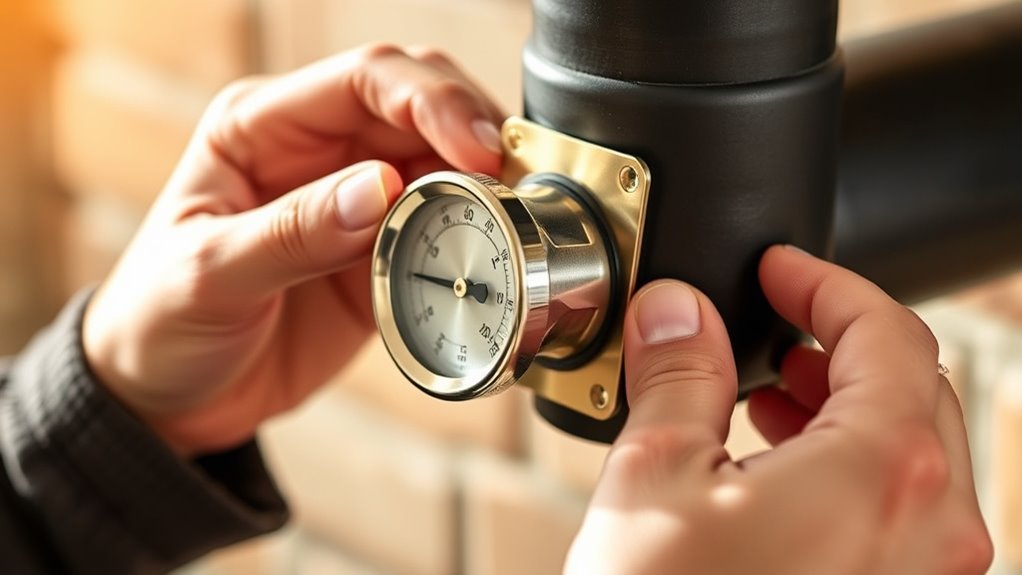
Installing the Thermometer Probe Into the Pipe
To install the thermometer probe into the pipe, start by identifying a flat, accessible spot at least 18 inches above the stove top. Carefully drill a 1/4-inch hole into the pipe’s outer wall, ensuring the hole is centered and on a flat section. If needed, drill a smaller 1/8-inch hole through the inner wall for better probe placement. Before inserting the probe, thread the magnet and eyelet onto it for secure attachment. Gently insert the probe into the drilled hole, making sure it fits snugly without gaps. Check that the thermometer remains firmly attached during stove operation. This method ensures you get an accurate temperature reading, helping you monitor your stove pipe’s heat effectively.
Securing the Thermometer in Place and Ensuring Proper Positioning
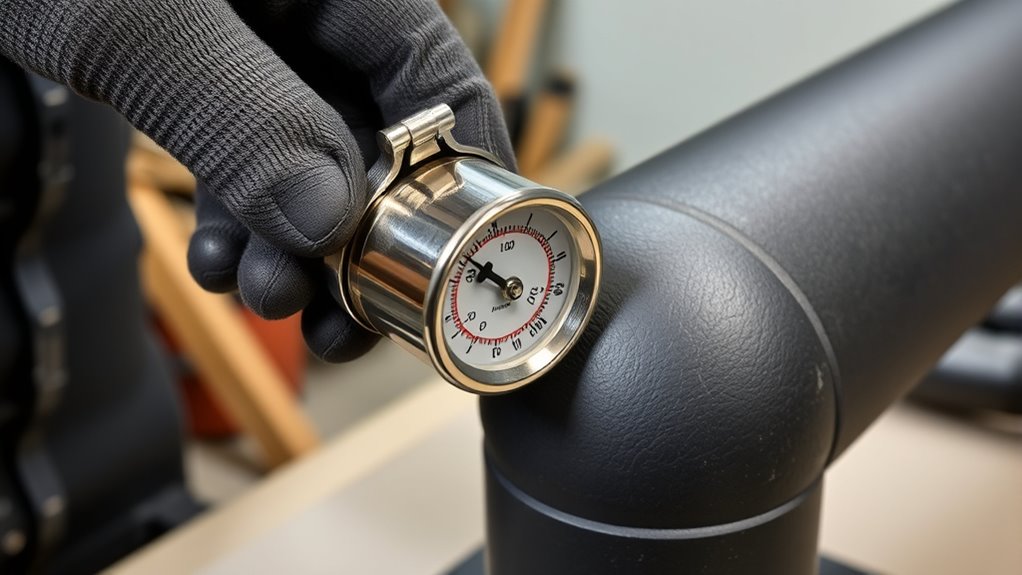
Once you’ve inserted the thermometer probe into the pipe, the next step is securing it firmly in place to guarantee accurate readings. Use the included magnet to attach the thermometer securely to the metal stove pipe. For extra security, drill a small hole through the pipe and insert a safety screw into the eyelet on the thermometer’s stem, if recommended by the manufacturer. Make certain the thermometer is positioned at least 12 inches above the stove top on a flat, stable surface for consistent measurement. Adjust the flip-up bail or handle to a convenient viewing angle without blocking airflow or access. Regularly check that the thermometer remains securely attached during stove operation and reposition as needed to prevent displacement, ensuring reliable and accurate temperature readings.
Verifying the Installation and Calibrating the Thermometer

After installing your stove pipe thermometer, verifying its accuracy before relying on it for temperature readings is essential. To do this, test the thermometers in a preheated oven set to a known temperature, like 450°F, and compare the reading to the oven’s display. Place the thermometer on a flat, stable surface such as a cast iron pan or steel plate inside the oven to guarantee consistent contact. If the thermometer’s reading differs by more than ±25°F, calibrate or replace it to keep your stove’s temperature measurements reliable. Remember to mark the current reading for future calibration adjustments. Regularly recheck your thermometers’ accuracy annually or after any damage to ensure your stove’s temperature readings stay precise and dependable.
Frequently Asked Questions
Where Do You Put the Thermometer on a Stove Pipe?
You should place the thermometer at least 12 to 18 inches above your stove top on the flue pipe for accurate readings. Position it on a flat, stable area, ideally on a corner that consistently registers higher temperatures. Drill a small hole to attach the probe securely, and make sure it’s easily visible from the front of the stove. This guarantees you can monitor temperature safely and accurately.
How Do You Install a Pipe Thermometer?
Installing a pipe thermometer involves drilling a small hole in your stove pipe, about 18 inches above the stove top. Insert the thermometer probe into the hole, making sure it’s centered for accurate readings. Attach the magnet or eyelet to secure it, and verify it’s positioned where you can easily see it. Regularly check that it’s stable and providing correct temperature readings to keep your stove operating safely.
What Height Should a Thermometer Be Mounted on a Wood Stove Pipe?
Imagine you’re monitoring your wood stove’s efficiency. You should mount the thermometer 12 to 18 inches above the stove top, following manufacturer’s instructions. For example, placing it at this height guarantees you get accurate temperature readings, helping you control burn rates and improve safety. Position it on a stable, flat section of the pipe or stove top, avoiding direct contact with flames or ash buildup for reliable results.
Where Is the Best Place to Put an Oven Thermometer?
You should place your oven thermometer on a flat, stable surface like a cast iron pan or stove top, usually near the center or a corner that consistently registers higher temperatures. Keep it at least 18 inches above the fire to avoid false readings. Position it where you can easily see it without opening the oven, and consider using multiple thermometers to monitor different areas for more accurate temperature control.
How High Should a Flue Thermometer Be?
You wonder how high to place a flue thermometer. To get accurate readings, install it 12 to 18 inches above your stove. This height ensures the thermometer is in the ideal zone for measuring flue gases, avoiding false readings caused by drafts or uneven heat. Positioning it within this range helps you monitor temperature trends consistently, making it easier to operate your stove safely and efficiently.
Conclusion
Installing a stove pipe thermometer helps you monitor your stove’s temperature effectively, guaranteeing safe and efficient operation. Did you know that proper thermometer placement can improve stove performance by up to 20%? By following these steps carefully, you’ll enhance your heating system’s safety and efficiency. Regularly checking and calibrating your thermometer ensures accurate readings, giving you peace of mind during colder months while maximizing your stove’s lifespan.