
To build an off-grid water heating coil for your stove, select a durable, high-conductivity material like copper or stainless steel, and position the coil where it gets maximum sunlight, preferably outdoors or south-facing. Connect it securely to your water lines, and insulate everything to reduce heat loss. Install safety features like a relief valve, and make certain all connections are leak-proof. If you want more detailed steps, keep exploring how to make your system efficient and safe.
Key Takeaways
- Select a high thermal conductivity material like copper or stainless steel for the coil, rated for outdoor and high-temperature use.
- Position the coil to maximize sunlight exposure, ideally south-facing outdoors, and secure it properly to prevent leaks.
- Connect the coil inlet and outlet to your water lines, ensuring water flows through the coil before reaching taps or appliances.
- Insulate the coil and piping to minimize heat loss during cloudy days or cold weather.
- Incorporate safety features such as pressure and temperature relief valves and regularly check for leaks and corrosion.
Creating an off-grid water heating coil is a practical way to guarantee a reliable hot water supply without relying on traditional energy sources. When designing this system, you want to harness sustainable options like solar thermal energy, which can efficiently heat water using sunlight. Solar thermal systems work by capturing solar energy with collectors and transferring that heat to water through a coil. By integrating a solar thermal coil into your stove setup, you ensure a continuous supply of hot water, especially during sunny days, reducing your dependence on electricity or fossil fuels.
Harness solar thermal energy with a coil for reliable, off-grid hot water.
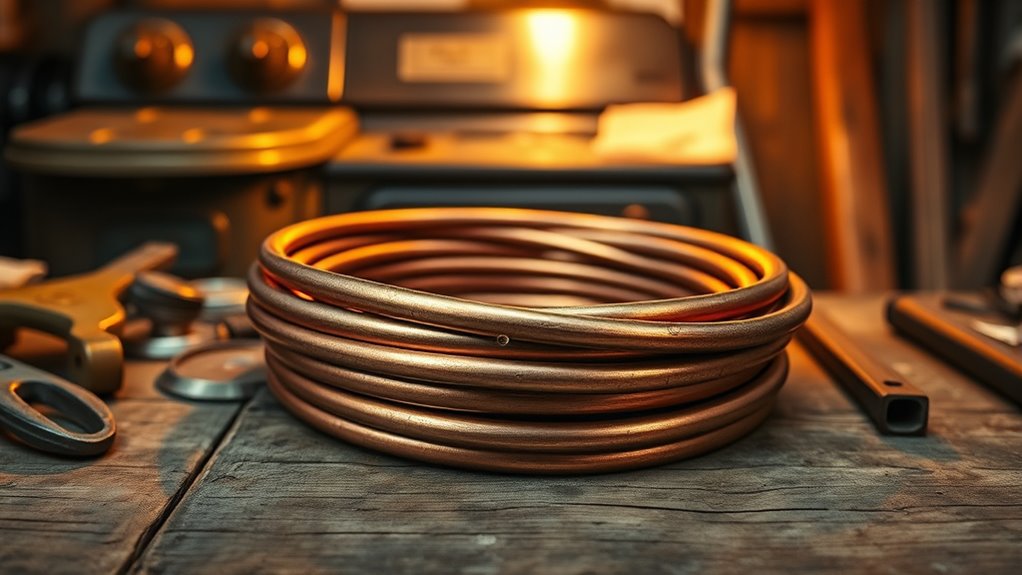
Choosing the right coil materials is vital for durability and efficiency. You should look for materials that withstand high temperatures, resist corrosion, and transfer heat effectively. Copper is often the preferred choice because of its excellent thermal conductivity and resistance to corrosion, making it ideal for solar thermal applications. Stainless steel is another option; it’s durable and resistant to rust, but it may not transfer heat as efficiently as copper. Some DIY enthusiasts opt for PEX tubing coated with a reflective material, but these are less common for solar thermal coils. Whatever material you choose, make sure it’s rated for high-temperature water and outdoor exposure, especially if your stove setup is outdoors or in an uninsulated space.
When constructing your coil, consider its placement and size. It should be positioned where it can absorb maximum sunlight if using solar thermal energy, such as on a south-facing roof or an unobstructed outdoor area. The coil’s diameter and length will depend on your hot water needs—larger coils provide more capacity but require more space and materials. You’ll want to wind the coil tightly but with enough spacing to allow for efficient heat transfer. Make sure all connections are secure and sealed to prevent leaks, which can compromise the system’s efficiency and safety. Incorporating proper insulation around the coil and piping can significantly improve heat retention, especially during colder times or overcast days.
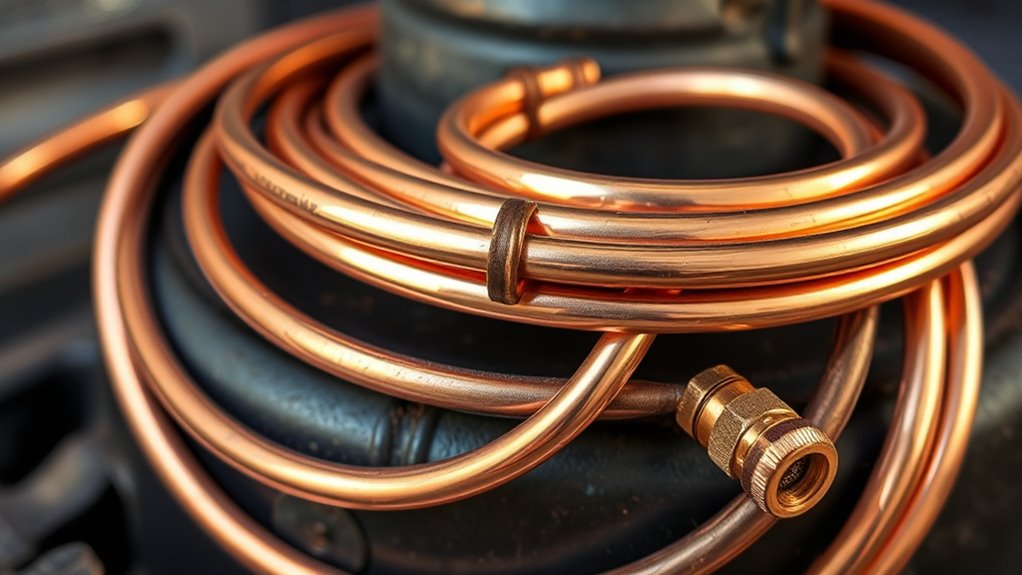
Installation involves integrating the coil with your stove’s existing water system. You’ll connect the coil inlet and outlet to your water line, ensuring the water flows through the coil before reaching your taps or appliances. Incorporate a temperature and pressure relief valve for safety, especially if your system heats water to high temperatures. To maximize solar thermal efficiency, insulate the coil and piping where possible, reducing heat loss during nighttime or cloudy days. As you build, test the system thoroughly, checking for leaks and ensuring the water heats evenly.
Frequently Asked Questions
What Safety Precautions Should I Take During Installation?
During installation, prioritize safety by wearing personal protection like gloves and eye goggles to prevent burns and injuries. Guarantee the power source is disconnected to avoid electrical hazards. Work in a well-ventilated area and handle tools carefully. Follow proper installation safety protocols, double-check all connections, and use insulated tools. Taking these precautions minimizes risks and ensures a safe, successful setup of your water heating coil.
Can This Coil Work With Any Type of Stove?
They say, “Don’t put all your eggs in one basket,” but with the right coil, you can adapt it to many stoves. This coil works with most stove types, thanks to its versatility in stove compatibility and coil adaptability. However, check your stove’s specifications first. Confirm the coil fits securely and heats efficiently. When in doubt, consult the manufacturer or an expert to avoid any mishaps.
How Long Does It Take to Heat a Specific Amount of Water?
It typically takes about 10 to 20 minutes to heat a specific amount of water, depending on the water temperature you want and your coil’s heating efficiency. Thicker water volumes require more time, while higher initial water temperatures reduce heating time. To speed things up, guarantee your coil is well-insulated and maintains good contact with the water, maximizing heating efficiency and reducing overall heating duration.
What Materials Are Best for Durability and Safety?
You want the best materials for durability and safety, so go for stainless steel or copper. They’re premium for corrosion resistance and stand the test of time—no sense in putting all your eggs in one basket. These materials are safe for water contact and easy to clean. Don’t cut corners; choosing the right material is like locking the barn door after the horse is gone.
How Do I Maintain the Coil for Long-Term Use?
To maintain your coil long-term, you should regularly perform coil cleaning to prevent mineral buildup and guarantee efficient heat transfer. Also, apply corrosion prevention measures like using protective coatings or selecting corrosion-resistant materials. Check for leaks or rust periodically, and address issues promptly. Keeping your coil clean and protected from corrosion will extend its lifespan and keep your off-grid water heating system running smoothly.
Conclusion
So, there you have it—your very own off-grid water heating coil, ready to turn your stove into a tiny power plant. Who knew that heating water could be so satisfying and eco-friendly? Now, you can enjoy the thrill of independence, one hot sip at a time. Just remember, it’s funny how something so simple can make you feel like a true pioneer—until it’s time to repair it, of course. Happy heating!