Pellet Stoves
How to Vent Wood Pellet Stoves
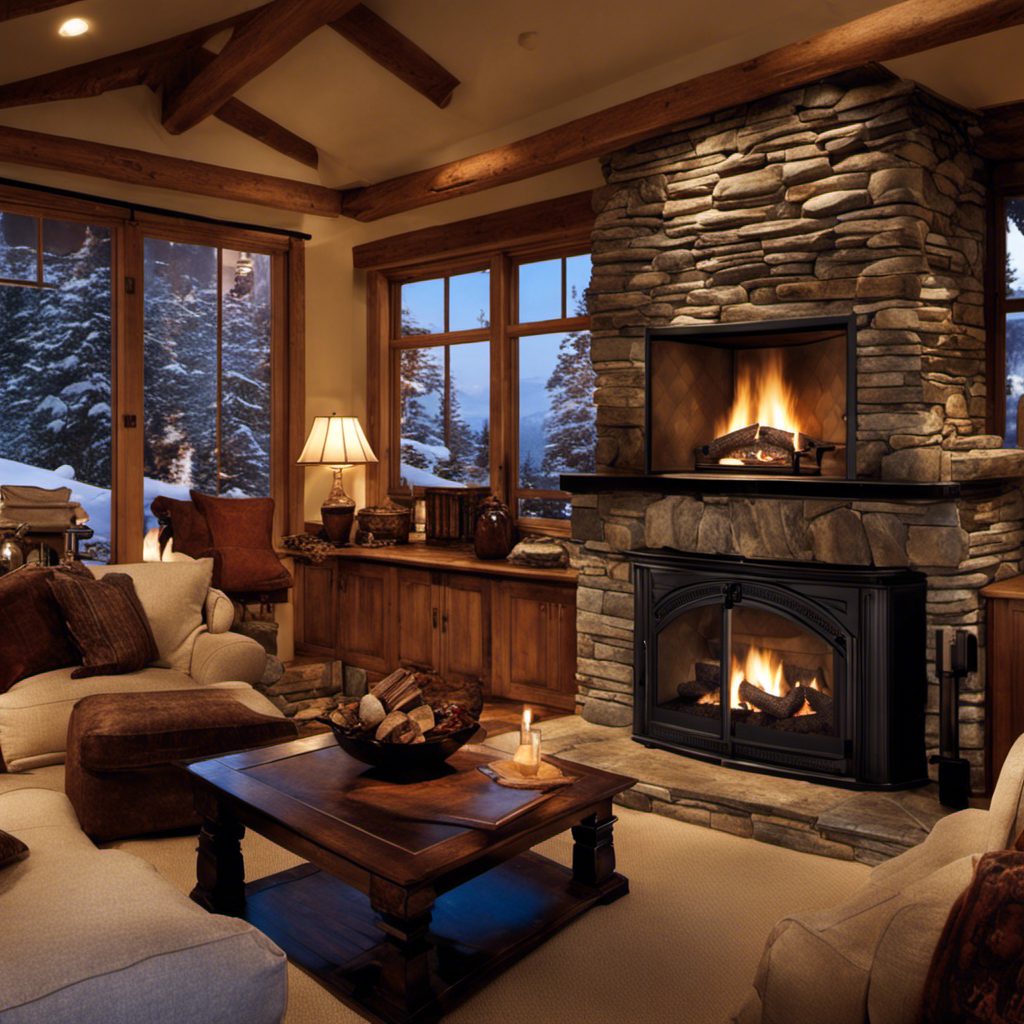
I possess insider knowledge regarding the proper ventilation techniques for wood pellet stoves, and trust me, it changes the game. If you’ve ever experienced challenges in keeping your home warm and cozy during the chilly winter months, then you recognize the importance of ensuring your stove is ventilated accurately.
In this article, I’ll walk you through the ins and outs of wood pellet stove ventilation, from understanding the different types of venting systems to selecting the right materials and troubleshooting common issues.
So buckle up, because we’re about to take your heating game to the next level.
Key Takeaways
- Proper ventilation is essential for safe and efficient operation of wood pellet stoves.
- Vertical, horizontal, and direct venting systems are the main types used for wood pellet stoves.
- Vertical venting reduces indoor air pollution and can be hidden, but may require complex modifications.
- Horizontal venting is easier to install and convenient for limited spaces, but may not be as efficient and requires proper clearance.
Understanding Wood Pellet Stove Ventilation
Understanding how wood pellet stoves require proper ventilation is crucial for safe and efficient operation. Wood pellet stove ventilation regulations play a significant role in ensuring the safe use of these heating appliances.
Proper ventilation is important because it helps remove harmful combustion byproducts, such as carbon monoxide, from your home. Without proper ventilation, these byproducts can accumulate and pose a serious health risk.
Additionally, proper ventilation promotes efficient combustion by allowing a steady flow of fresh air into the stove, helping it burn the pellets more effectively. It also helps prevent the buildup of creosote, a highly flammable substance that can lead to chimney fires.
Now that we understand the importance of proper ventilation, let’s explore the different types of venting systems for wood pellet stoves.
Types of Venting Systems for Wood Pellet Stoves
When it comes to venting a wood pellet stove, there are two main options to consider: vertical venting and horizontal venting.
Vertical venting involves running the vent pipe straight up and out through the roof. This option has its own set of advantages and considerations.
Horizontal venting, on the other hand, involves running the pipe horizontally through an exterior wall. Again, this option has its own pros and cons.
One popular choice is direct venting, which offers several benefits such as improved efficiency, increased safety, and easier installation.
Ultimately, the right venting system for your wood pellet stove will depend on factors like the layout of your home, local building codes, and personal preferences.
Vertical Vs Horizontal Venting
To properly vent your wood pellet stove, you should consider whether vertical or horizontal venting is more suitable for your specific situation. Here are the key points to consider when deciding between the two options:
-
Vertical Venting:
- Advantages: Vertical venting allows you to direct the exhaust gases upwards and out of your home, reducing the risk of indoor air pollution. It can also be more aesthetically pleasing as the vent pipe can be hidden behind walls or in chimneys.
- Disadvantages: Installing vertical venting may require more complex and expensive modifications to your home’s structure. It also requires a clear path for the vent pipe to reach the roof, which may not be feasible in all situations.
-
Horizontal Venting:
- Advantages: Horizontal venting is often easier and more cost-effective to install, as it doesn’t require modifications to your home’s structure. It can be a convenient option if you have limited space or obstacles preventing vertical venting.
- Disadvantages: Horizontal venting may not be as efficient as vertical venting, as it allows for the accumulation of condensation and debris in the pipe. It also requires proper clearance from combustible materials to ensure safety.
Considering these factors, you can make an informed decision on whether vertical or horizontal venting is the best choice for your wood pellet stove.
Transitioning to the subsequent section about the benefits of direct venting, it’s important to understand the advantages it offers over both vertical and horizontal venting methods.
Benefits of Direct Venting
If you’re looking for a safer and more efficient option, direct venting offers several benefits over vertical and horizontal venting methods.
One of the main advantages of direct venting is that it eliminates the need for a chimney. This means that you can install a wood pellet stove in any room of your house, without the need for extensive ductwork or modifications to your existing structure.
Another reason for choosing direct venting is that it provides superior air quality. With direct venting, the combustion air is drawn from outside the house, which prevents any fumes or pollutants from entering your living space.
Additionally, direct venting is highly efficient, as it allows for a more controlled and consistent airflow, resulting in better heat distribution and fuel consumption.
When it comes to choosing the right system, there are a few factors to consider.
Choosing the Right System
One important factor to consider when choosing the right system is your specific heating needs. There are several options available for venting wood pellet stoves, each with its advantages and considerations. To help you make an informed decision, let’s compare the advantages of different systems in the table below:
Venting Option | Advantages |
---|---|
Direct Venting | Provides greater efficiency and safety |
Power Venting | Allows for flexible installation options |
Natural Draft | Requires minimal maintenance and cost |
Pellet Stove Insert | Can be easily installed in an existing fireplace |
Horizontal Venting | Offers versatility in installation |
As you can see, each venting option has its benefits depending on your specific requirements. Now, let’s explore the venting options for different house structures, ensuring you choose the right venting system for your home.
Venting Options for Different House Structures
When it comes to venting options for wood pellet stoves in different house structures, there are several key points to consider.
Firstly, you have the choice between using a chimney or direct venting system.
Secondly, you need to determine whether a horizontal or vertical venting configuration is more suitable for your specific setup.
Lastly, if you have a multi-story home, there are additional considerations to keep in mind to ensure proper venting and safety.
Chimney Vs. Direct Venting
You should consider the advantages of direct venting for your wood pellet stove instead of relying solely on a chimney. Direct venting offers several benefits over traditional chimney installation. First, it provides a more efficient and controlled airflow, resulting in better combustion and heat distribution. Second, direct venting eliminates the need for a chimney, saving you the hassle and cost of chimney installation. Lastly, direct venting allows for greater flexibility in stove placement, as it can be vented horizontally or vertically.
To help you visualize the advantages of direct venting, here is a comparison table:
Advantages of Direct Venting | Disadvantages of Chimney Installation |
---|---|
Efficient airflow | Costly chimney installation |
Better combustion | Limited stove placement options |
Flexibility in venting | Maintenance and cleaning requirements |
Now that you understand the benefits of direct venting, let’s delve into the decision of whether to go horizontal or vertical.
Horizontal or Vertical?
To choose between horizontal or vertical venting, consider the space available in your home and the specific requirements of your stove’s installation.
When it comes to wood pellet stoves, both horizontal and vertical venting options have their advantages. However, there are some unique benefits to choosing horizontal venting.
One advantage of horizontal venting is that it allows for greater flexibility in terms of installation. If you have limited vertical space or obstacles like beams or walls, horizontal venting can be a more practical solution.
Additionally, horizontal venting can be less expensive and easier to install compared to vertical venting. It requires fewer materials and can be a more straightforward process.
However, it’s important to note that horizontal venting may not be suitable for multi-story homes or if you have a long horizontal run. It’s crucial to take these factors into consideration when deciding on the best venting option for your wood pellet stove.
Consideration for Multi-story
If your home has multiple levels, it’s important to consider the suitability of horizontal venting for your installation. When dealing with a multi-story house, there are a few key considerations to keep in mind.
One of the main installation challenges is ensuring that the horizontal venting system can properly exhaust the combustion gases from the wood pellet stove on all levels. This may require additional planning and modifications to the existing venting system. It’s crucial to consult with a professional to determine the best approach for your specific home layout.
By taking into account the multi-story considerations and addressing the installation challenges, you can ensure that your wood pellet stove operates safely and efficiently throughout your entire home.
Now, let’s move on to sizing and calculating ventilation requirements for your wood pellet stove.
Sizing and Calculating Ventilation Requirements
The first step in sizing and calculating ventilation requirements for wood pellet stoves is to determine the square footage of the space. This is crucial in order to accurately calculate the ventilation capacity needed for proper venting installation.
To ensure a successful ventilation system for your wood pellet stove, there are a few key factors to consider:
- Take into account the height of the ceilings, as this will affect the amount of air that needs to be circulated.
- Consider the insulation of the space, as well-insulated areas may require less ventilation.
- Evaluate the layout of the room and any potential obstructions that may impede the airflow.
By taking these factors into consideration when calculating ventilation capacity, you can ensure that your wood pellet stove operates efficiently and safely.
With the ventilation requirements determined, the next crucial step is to select the right venting materials for wood pellet stoves.
Selecting the Right Venting Materials for Wood Pellet Stoves
When selecting the right materials for your wood pellet stove’s ventilation system, consider factors such as durability, compatibility, and ease of installation. It’s crucial to choose venting materials that can withstand the high temperatures produced by the stove and are designed specifically for pellet stoves.
Stainless steel vent pipes are a popular choice due to their durability and resistance to corrosion. Additionally, make sure the venting materials you select are compatible with your particular stove model and meet the necessary safety standards.
Ease of installation is also important, so look for venting systems that offer simple and straightforward installation procedures. By carefully selecting the right venting materials, you can ensure proper ventilation for your wood pellet stove and maintain its efficiency and safety.
To install horizontal venting for wood pellet stoves, you’ll need to follow a few important steps.
Installing Horizontal Venting for Wood Pellet Stoves
To properly install horizontal venting for your wood pellet stove, start by choosing the right venting materials for your specific model. It is important to follow venting regulations to ensure safe and efficient operation of your stove. Here is a table outlining the materials commonly used for horizontal venting:
Material | Description | Benefits |
---|---|---|
Stainless Steel | Durable and resistant to corrosion | Long-lasting and reliable |
Aluminum | Lightweight and easy to install | Cost-effective |
Galvanized Steel | Affordable and easily available | Suitable for most setups |
When installing horizontal venting, make sure to carefully follow the manufacturer’s guidelines and local building codes. It is crucial to maintain proper clearances from combustible materials and ensure a secure and airtight connection between venting components. As horizontal venting requires a slight downward slope for condensation drainage, be mindful of the positioning and angles of the pipes. Now, let’s move on to vertical venting: tips and guidelines for proper installation.
Vertical Venting: Tips and Guidelines
When it comes to venting options for wood pellet stoves, horizontal venting is a popular choice for many homeowners. It offers flexibility in terms of installation and can be a great option for those who don’t have access to a vertical chimney.
However, if you already have an existing chimney, venting through it can be a convenient and cost-effective solution. In this discussion, I will delve into the different horizontal venting options available and provide guidance on venting through an existing chimney.
Horizontal Venting Options
There are several horizontal venting options available for wood pellet stoves. When it comes to venting options for small spaces, horizontal venting can be a great solution.
One of the advantages of horizontal venting is that it allows for flexibility in installation. With horizontal venting, you have the option to run the vent pipe through an exterior wall, which can be a convenient choice for homes with limited space or no existing chimney.
This type of venting is also beneficial for those who want to avoid the cost and hassle of installing a vertical vent system. However, it is important to ensure proper clearance and follow manufacturer guidelines for safe installation.
Now, let’s explore another popular venting option for wood pellet stoves: venting through an existing chimney.
Venting Through Existing Chimney
If you have an existing chimney, you can easily utilize it for venting your wood pellet stove. This option is popular among homeowners because it allows them to utilize an already existing structure, saving time and money.
Here are three benefits of venting through an existing chimney:
-
Cost-effective: Using an existing chimney eliminates the need for additional venting materials, reducing installation costs.
-
Efficient heating: Chimneys provide a natural draft that helps expel combustion gases, ensuring efficient heating and better stove performance.
-
Aesthetically pleasing: Venting through a chimney maintains the traditional look of a fireplace, adding a cozy and charming touch to your home.
However, it’s important to note that chimney venting may have some disadvantages compared to direct venting. Chimneys can be less energy efficient and require regular maintenance to prevent blockages or leaks. To ensure optimal performance, it’s crucial to properly seal and insulate venting systems.
Properly Sealing and Insulating Venting Systems
To properly seal and insulate venting systems for wood pellet stoves, it’s important to use high-quality materials. Effective sealing techniques and insulation methods ensure that the venting system functions optimally, preventing any leaks or heat loss.
One commonly used material for sealing is high-temperature silicone caulk, which creates an airtight seal around joints and connections. Additionally, foil tape can be used to seal any gaps or openings in the vent pipe.
Insulation is also crucial to minimize heat loss and improve the stove’s efficiency. Insulated vent pipe, such as double-wall stainless steel or ceramic fiber insulation, can be used to reduce heat transfer. It’s important to follow the manufacturer’s guidelines and local building codes when selecting and installing sealants and insulation.
With a properly sealed and insulated venting system, you can ensure safe and efficient operation of your wood pellet stove.
Transitioning into the subsequent section about maintaining and cleaning wood pellet stove ventilation, it’s important to regularly inspect and clean the venting system to ensure its continued effectiveness.
Maintaining and Cleaning Wood Pellet Stove Ventilation
After ensuring the proper sealing and insulation of your wood pellet stove venting system, it is essential to maintain and clean it regularly. This will help ensure the efficiency and safety of your stove. Here are some cleaning techniques and a maintenance schedule to keep in mind:
- Clean the vent pipes and flue regularly to prevent the buildup of creosote and other debris.
- Inspect the venting system for any signs of damage or blockages, such as nests or leaves.
- Check the exhaust vent outside to make sure it is clear and not obstructed by debris.
- Schedule an annual professional inspection and cleaning to ensure optimal performance and safety.
By following these cleaning techniques and sticking to a maintenance schedule, you can prolong the lifespan of your wood pellet stove and prevent potential issues.
Now, let’s move on to troubleshooting common venting issues with wood pellet stoves.
Troubleshooting Common Venting Issues With Wood Pellet Stoves
When troubleshooting common venting issues with wood pellet stoves, it’s important to check for any signs of blockages or damage in the venting system. Proper venting maintenance is crucial for the efficient and safe operation of your wood pellet stove.
One common issue is a blocked vent, which can prevent the proper flow of exhaust gases. Check for any debris or bird nests that may be obstructing the vent.
Another issue to look out for is a damaged vent pipe, which can lead to leaks and poor ventilation. Inspect the vent pipe for any cracks, holes, or loose connections.
Additionally, improper installation or sizing of the venting system can cause issues. Ensure that the venting system is correctly installed according to the manufacturer’s instructions.
Are There Different Methods for Venting Wood Pellet Stoves, or Is it the Same Process?
Yes, there are different methods to vent wood pellet stoves. The most common methods are venting through a chimney or through a wall. It is essential to follow manufacturer guidelines to ensure proper installation and safety. Proper venting is crucial for efficient operation of a wood pellet stove.
Frequently Asked Questions
How Often Should I Clean the Venting System of My Wood Pellet Stove?
I clean the venting system of my wood pellet stove every 6 months to ensure proper airflow and prevent buildup of debris. Regular cleaning and inspection are essential for optimal performance and safety.
Can I Use the Same Venting System for Multiple Wood Pellet Stoves in My House?
Using the same venting system for multiple wood pellet stoves in your house has its pros and cons. It can save money and simplify installation, but it may lead to decreased efficiency and potential safety hazards.
Are There Any Safety Concerns Regarding Wood Pellet Stove Venting?
There are safety concerns when venting wood pellet stoves. It’s important to follow proper installation guidelines to avoid carbon monoxide leaks or fire hazards. Common mistakes include improper sealing or using incorrect venting materials.
What Are the Signs That Indicate a Problem With the Venting System of a Wood Pellet Stove?
When the venting system of a wood pellet stove is not functioning properly, it can be as alarming as a smoke alarm going off in the middle of the night. Common venting issues can be avoided with proper maintenance.
Can I Install a Wood Pellet Stove in a House Without an Existing Chimney or Venting System?
Yes, you can install a wood pellet stove in a house without an existing chimney or venting system. There are several venting options available, such as direct venting or through the wall venting.
Conclusion
In conclusion, venting wood pellet stoves is crucial for their efficient and safe operation. By understanding the different types of venting systems and selecting the right materials, you can ensure proper ventilation in your home.
Sizing and calculating ventilation requirements is important to maintain optimal performance. Proper sealing and insulation of the venting system is necessary to prevent any leaks or drafts.
Regular maintenance and cleaning will help avoid common venting issues. Remember, with the right knowledge and care, your wood pellet stove will keep you warm and cozy for years to come.
So, don’t go cold turkey on venting – it’s the key to a toasty home!
Logan’s affair with adventure began in childhood. He hailed from a small town where vast forests bordered one side and endless shores stretched on the other. His days were spent exploring uncharted woods, climbing tall trees, or listening to the tales of old sailors. This early immersion in a world brimming with stories and mysteries became the foundation of his passion for writing.
Pellet Stoves
How Do You Cook a Turkey in a Traeger Wood Pellet Grill
I will walk you through the process of preparing a turkey using a Traeger wood pellet grill, expertly. This technique will help you create delicious outcomes that will impress your guests.
From choosing the right turkey size to preheating the grill and adding wood pellets for that delicious smoky flavor, I’ll cover all the steps.
Get ready to impress with a perfectly cooked turkey that’ll be the star of your next feast.
Key Takeaways
- Consider the number of guests and desired leftovers when choosing the turkey size and plan for 1-1.5 pounds of turkey per person.
- Brining enhances flavor and juiciness, while seasoning and marinating the turkey adds flavor and moisture.
- Trussing the turkey ensures even cooking by keeping the legs and wings close to the body and tying them together.
- Preheat the grill for a perfect sear, use high temperature for a crusty outside and juicy inside, and monitor the cooking temperature using a meat thermometer.
Choosing the Right Turkey Size
To choose the right turkey size, you’ll want to consider the number of guests you’ll be serving and the amount of leftovers you want. When it comes to choosing the right turkey size for your Traeger wood pellet grill, it’s important to keep in mind that the size of the grill will limit the size of the turkey you can cook.
A general rule of thumb is to plan for about 1 to 1.5 pounds of turkey per person. If you want leftovers, you might want to go for a larger turkey. Additionally, brining techniques can help enhance the flavor and juiciness of your turkey. Brining involves soaking the turkey in a saltwater solution for a period of time before cooking. This helps to season the turkey and keep it moist during the grilling process.
Now that you’ve chosen the right turkey size and considered brining techniques, let’s move on to preparing the turkey for grilling.
Preparing the Turkey for Grilling
When it comes to preparing a turkey for grilling, there are a few key points to keep in mind.
First, seasoning and marinating the bird is crucial for adding flavor and moisture. I like to use a combination of herbs, spices, and a marinade to infuse the meat with deliciousness.
Second, trussing the turkey ensures even cooking by keeping the legs and wings close to the body. This helps the meat cook more evenly and prevents any parts from drying out.
Lastly, preheating the grill is essential for achieving that perfect sear and ensuring the turkey cooks evenly. I recommend preheating the grill to a high temperature to create a nice crust on the outside while keeping the inside juicy and tender.
Seasoning and Marinating
First, make sure you have thoroughly seasoned and marinated your turkey before placing it in the Traeger wood pellet grill.
Seasoning and marinating are crucial steps in preparing a turkey for grilling, as they enhance the flavor and ensure a juicy and tender end result.
One popular technique is brining, which involves soaking the turkey in a saltwater solution infused with various herbs, spices, and aromatics. This process helps to lock in moisture and impart flavor deep into the meat.
Another method for flavor infusion is marinating, where you coat the turkey in a mixture of oil, herbs, spices, and acidic ingredients such as citrus juice or vinegar. This allows the flavors to penetrate the meat and adds a delicious kick.
Now that the turkey is seasoned and marinated, let’s move on to the next step of trussing for even cooking.
Trussing for Even Cooking
Now that the turkey is seasoned and marinated, it’s important to truss it for even cooking. Trussing is a technique used to secure the wings and legs of the turkey close to the body, ensuring that it cooks evenly.
To truss the turkey, start by tucking the wings underneath the bird. Then, cross the legs and tie them together with kitchen twine. Trussing not only helps the turkey cook more evenly, but it also gives it a neater appearance.
Preheating the Grill
To get your grill ready for cooking, make sure to preheat it to the desired temperature. Preheating is essential to ensure even cooking and to maximize the flavor of your turkey.
Here’s what you need to know about preheating your Traeger wood pellet grill:
-
Optimal preheating time:
-
Set your grill to the recommended temperature and allow it to preheat for 15-20 minutes.
-
This will ensure that the grill reaches the desired temperature and that the cooking surface is evenly heated.
-
Benefits of preheating:
-
Preheating helps to sear the turkey and lock in the juices, resulting in a moist and flavorful bird.
-
It also creates a consistent cooking environment, promoting even heat distribution and preventing hot spots.
Seasoning the Turkey
For a flavorful turkey, you’ll want to generously season the bird with a mixture of herbs and spices before placing it on the Traeger wood pellet grill. Seasoning is crucial to enhance the taste and juiciness of the turkey. One popular brining technique is to soak the bird in a saltwater solution overnight, allowing the flavors to penetrate the meat. If you prefer alternative seasoning methods, you can create a dry rub using a combination of herbs like rosemary, thyme, and sage, along with spices like garlic powder, paprika, and black pepper. This will create a beautiful crust on the turkey while infusing it with a delicious aroma. As you can see in the table below, there are several options for seasoning your turkey:
Brining Techniques | Alternative Seasoning Methods |
---|---|
Saltwater solution | Dry rub with herbs and spices |
Buttermilk brine | Citrus and herb marinade |
Beer brine | Honey and mustard glaze |
Apple cider brine | Soy sauce and ginger marinade |
Once the turkey is seasoned to perfection, it’s time to preheat the Traeger grill to ensure even cooking and a beautifully charred exterior.
Preheating the Traeger Grill
When it comes to preheating the Traeger grill, there are a few key points to consider.
First, the optimal preheating temperature can vary depending on what you’re cooking, but generally, a temperature of 375°F to 450°F works well for most recipes.
Second, the time required for preheating will depend on the size of your grill and the outside temperature, but typically, it takes around 15 to 20 minutes to reach the desired temperature.
Optimal Preheating Temperature
The optimal preheating temperature for cooking a turkey in a Traeger wood pellet grill is 375 degrees Fahrenheit. This temperature ensures that the turkey cooks evenly and achieves a delicious, golden brown exterior while remaining juicy and tender on the inside. Here are three reasons why this temperature is ideal for cooking a turkey in a Traeger grill:
-
Optimal Cooking Techniques: Cooking the turkey at 375 degrees Fahrenheit allows for the perfect balance between searing the skin and slow cooking the meat. This results in a crispy skin and moist, flavorful meat.
-
Alternative Cooking Methods: While some may opt for higher temperatures to speed up the cooking process, this can lead to dry and overcooked meat. By cooking at 375 degrees Fahrenheit, you can achieve a turkey that is cooked to perfection without sacrificing tenderness.
-
Enhanced Flavor: The Traeger wood pellet grill imparts a smoky flavor to the turkey, and cooking at 375 degrees Fahrenheit allows the flavors to develop gradually, resulting in a rich and delicious taste.
Now that we know the optimal preheating temperature, let’s move on to the next section and discuss the time required for preheating the Traeger grill.
Time Required for Preheating
To ensure that your turkey cooks evenly and achieves a delicious, golden brown exterior while remaining juicy and tender on the inside, it is important to preheat the Traeger grill for the recommended amount of time. The optimal preheating time for a Traeger grill is around 15-20 minutes. This allows the grill to reach the desired temperature and ensures that the heat is evenly distributed throughout the cooking chamber.
Here are some tips for efficient preheating:
-
Clean the grill: Before preheating, make sure to clean any residue or debris from the grill grates. This will help prevent any unwanted flavors and ensure a clean cooking surface.
-
Close the lid: Keeping the lid closed during preheating will help trap the heat inside the grill, allowing it to reach the desired temperature faster.
Tips for efficient preheating |
---|
Clean the grill |
Close the lid |
Benefits of Preheating
Using proper preheating techniques ensures that your food cooks evenly and retains its natural flavors.
Preheating your grill before cooking is essential for several reasons. Firstly, it helps to remove any residual dirt or debris from the grill grates, ensuring a clean cooking surface.
Secondly, preheating allows the grill to reach the desired temperature, which is crucial for proper cooking and avoiding undercooked or overcooked food. Temperature control is important when cooking a turkey on a Traeger wood pellet grill because it ensures that the meat is cooked to perfection, with a juicy and tender texture. Additionally, preheating helps to create those beautiful grill marks on the turkey, giving it that delicious smoky flavor.
Now that the grill is preheated, let’s move on to placing the turkey on the grill.
Placing the Turkey on the Grill
Start by carefully positioning your turkey on the grill grate of your Traeger wood pellet grill. Planning ahead is key to a successful turkey cook, so make sure you have enough room on the grill for your bird.
Preheat your Traeger to the desired temperature, usually around 325°F, and place the turkey on the grill, breast side up. Make sure the turkey is centered and not touching the sides of the grill for even cooking.
Temperature control is crucial during the cooking process, so keep an eye on the grill temperature and make adjustments as needed.
Now, let’s move on to monitoring the cooking temperature to ensure your turkey is cooked to perfection.
Monitoring the Cooking Temperature
Keep an eye on the temperature of the grill while the turkey is cooking to ensure it is cooked to perfection. Monitoring the cooking progress is crucial for a deliciously juicy turkey. To accurately monitor the temperature, I highly recommend using a meat thermometer.
Insert the thermometer into the thickest part of the turkey, avoiding contact with bones. This will give you an accurate reading of the internal temperature. The ideal temperature for a cooked turkey is 165°F (74°C).
As the turkey cooks, periodically check the temperature to ensure it is progressing as desired. This will help you avoid undercooking or overcooking the turkey.
Now that you have the cooking temperature under control, let’s talk about adding wood pellets for flavor.
Adding Wood Pellets for Flavor
Now that we have discussed monitoring the cooking temperature, let’s move on to the next step of cooking a turkey in a Traeger wood pellet grill: adding wood pellets for flavor.
One of the great benefits of using a Traeger grill is the ability to infuse your turkey with delicious smoky flavors. To achieve this, you will need to choose the right wood pellets that complement the taste of your turkey. Traeger offers a variety of wood flavors such as hickory, mesquite, apple, and cherry. Each wood imparts a unique aroma and taste to the meat.
Simply add the desired wood pellets to the pellet hopper, ensuring you have enough for the duration of the cook. The Traeger grill will automatically feed the pellets into the fire pot, creating a consistent smoke throughout the cooking process. This step is crucial in achieving that perfect smoky flavor in your turkey.
As we finish the smoking process, we can transition into the subsequent section about resting and carving the turkey.
Resting and Carving the Turkey
To ensure the juiciness of your turkey, let it rest for about 20 minutes before carving. This resting time allows the juices to redistribute throughout the meat, resulting in a more flavorful and tender bird. While it may be tempting to dig in right away, patience is key when it comes to carving your turkey.
Here are some carving techniques to ensure you get the most out of your bird:
-
Start by removing the legs and wings: Use a sharp knife to separate the leg and thigh from the body, then remove the wings.
-
Slice the breast meat: Make horizontal cuts along the breastbone to create thin slices of juicy white meat.
-
Separate the thigh and drumstick: Cut through the joint to separate the thigh and drumstick.
Resting and carving your turkey properly is essential for a delicious and visually appealing meal. Take your time, follow these techniques, and enjoy the fruits of your labor.
Can I Cook a Turkey in a Wood Pellet Pizza Oven?
Yes, you can cook a turkey in a wood pellet pizza oven. The consistent heat and smoky flavor from the wood pellets will result in a delicious and juicy turkey. Just make sure to monitor the temperature and use a meat thermometer to ensure it’s fully cooked.
Can the Same Method Used for a Wood Pellet Pizza Oven be Applied to Cooking a Turkey in a Traeger Wood Pellet Grill?
Yes, the same method for starting wood pellet pizza oven can be applied to cooking a turkey in a Traeger wood pellet grill. Both the wood pellet pizza oven and Traeger grill utilize wood pellets as fuel, and the methods for starting the fire and controlling the temperature are similar.
Frequently Asked Questions
What Are the Advantages of Cooking a Turkey in a Traeger Wood Pellet Grill Compared to Other Grilling Methods?
The advantages of cooking a turkey in a Traeger Wood Pellet Grill are numerous. With precise temperature control, even heat distribution, and the ability to infuse smoky flavors, it’s a game-changer for turkey cooking. Here are some tips and techniques to help you achieve the perfect turkey on a Traeger.
Can I Use a Frozen Turkey for Grilling on a Traeger Wood Pellet Grill?
Using a frozen turkey on a Traeger wood pellet grill is not recommended. Thawing the turkey before grilling ensures even cooking and prevents foodborne illness. There are alternative grilling methods for turkey that can yield delicious results.
How Long Does It Take to Cook a Turkey on a Traeger Wood Pellet Grill?
Cooking a turkey on a Traeger Wood Pellet Grill requires careful temperature control. The cooking time will depend on the size of the turkey, but typically takes around 4-6 hours at a temperature of 325°F.
Are There Any Specific Cooking Techniques or Tips for Achieving a Crispy Skin on the Turkey When Grilling on a Traeger Wood Pellet Grill?
To achieve crispy skin on a turkey when grilling on a Traeger Wood Pellet Grill, there are specific cooking techniques you can use. Preheat the grill, apply oil or butter to the skin, and cook at a high temperature for a shorter time.
Can I Use Marinades or Brines on the Turkey Before Grilling It on a Traeger Wood Pellet Grill?
Yes, you can use marinades or brines on the turkey before grilling it on a Traeger wood pellet grill. Marinating techniques enhance flavor, while brining benefits include moisture retention and tenderizing the meat.
Conclusion
In conclusion, cooking a turkey in a Traeger wood pellet grill is a feast for the senses. The tantalizing aroma of the seasoned turkey sizzling on the grill and the mouthwatering flavor infused by the wood pellets are just the beginning. The tender, juicy meat that melts in your mouth is the ultimate reward. It’s a culinary experience like no other.
With the right techniques and a little patience, you can create a masterpiece that will leave your taste buds singing with joy. So fire up that Traeger and get ready to impress your family and friends with a truly unforgettable turkey.
Logan’s affair with adventure began in childhood. He hailed from a small town where vast forests bordered one side and endless shores stretched on the other. His days were spent exploring uncharted woods, climbing tall trees, or listening to the tales of old sailors. This early immersion in a world brimming with stories and mysteries became the foundation of his passion for writing.
Pellet Stoves
How Do Wood Pellet Mills Work
I have always been fascinated by the operation of wood pellet mills and the intricate process they entail.
One example that comes to mind is a case study I recently came across. In this study, a wood pellet mill was able to efficiently grind and dry the wood material, pelletize it, and then cool and screen the resulting wood pellets.
The entire process was seamless and resulted in high-quality wood pellets that were ready for packaging and storage.
In this article, I will delve into the technical details of how wood pellet mills work and explore the environmental benefits they provide.
Key Takeaways
- Wood pellet mills grind wood into sawdust and compress it into small pellets.
- Different types of pellet mills, such as flat die mills and ring die mills, determine the efficiency and quality of the pellets.
- Wood pellets have high energy density, low moisture content, and reduced greenhouse gas emissions, making them an attractive option for renewable energy.
- The raw materials for wood pellet mills, such as sawdust, wood chips, and wood shavings, are obtained from sustainable sources and contribute to the reduction of waste and reliance on fossil fuels.
The Process of Wood Pellet Production
The process of wood pellet production involves several steps. First, wood is ground into sawdust. Next, the sawdust is compressed into small pellets. After that, the pellets are cooled and packaged for distribution. The design of pellet mills is important in determining the efficiency and quality of the pellets. There are different types of pellet mills available, such as flat die and ring die designs. Flat die mills are commonly used for small-scale production, while ring die mills are preferred for large-scale operations due to their higher capacity and durability.
Wood pellets have many advantages as a biomass energy source. They have a high energy density, low moisture content, and reduced greenhouse gas emissions compared to traditional fossil fuels. These qualities make wood pellets an attractive option for renewable energy.
Now, let’s discuss the raw materials used in wood pellet mills. These raw materials are crucial for producing high-quality pellets.
Raw Materials for Wood Pellet Mills
When it comes to wood pellet production, understanding the common raw materials used is crucial. These materials typically include sawdust, wood chips, and wood shavings, which are obtained from various sources such as sawmills, woodworking factories, and furniture manufacturers.
The pellet production process then involves grinding and drying the raw materials before compressing them into pellets, resulting in a highly efficient and sustainable fuel source.
Additionally, the use of wood pellets offers numerous environmental sustainability benefits, including reduced greenhouse gas emissions and reliance on fossil fuels, making it an attractive alternative for both residential and industrial heating.
Common Raw Materials
You can use different types of biomass, such as sawdust, wood chips, or agricultural waste, as raw materials for wood pellet mills. These materials are commonly used in wood pellet production techniques due to their availability and suitability for the process.
Sawdust, which is a byproduct of woodworking, is a popular choice because of its high lignin content, which acts as a natural binder during pelletization. Wood chips, on the other hand, are larger pieces of wood that can be obtained from logging or sawmills. Agricultural waste, including straw, corn stalks, and sugarcane bagasse, can also be used as raw materials.
These alternative uses for raw materials not only reduce waste but also contribute to the sustainability of the pellet production process. This ensures that the wood pellet industry remains environmentally friendly and economically viable.
Transitioning into the subsequent section about the "pellet production process," it is important to understand the various steps involved in turning these raw materials into wood pellets.
Pellet Production Process
Using biomass materials, such as sawdust, wood chips, or agricultural waste, can be a sustainable and environmentally friendly way to produce wood pellets. One of the major benefits of using wood pellets as a renewable energy source is their high energy density. Wood pellets have a higher energy content per unit mass than other biomass fuels, making them more efficient and cost-effective.
Wood pellet mills play a crucial role in the production process. These mills use specialized machinery to compress the biomass materials into compact pellets. The process involves grinding, drying, and pelletizing the raw materials, which are then cooled and packaged for use. Wood pellet mills can produce large quantities of pellets in a short period, making them a reliable and efficient fuel source.
Transitioning to the subsequent section about environmental sustainability benefits, the production of wood pellets helps reduce greenhouse gas emissions and dependence on fossil fuels.
Environmental Sustainability Benefits
The high energy density of wood pellets makes them an efficient and cost-effective renewable energy source. Here are four reasons why wood pellets contribute to environmental sustainability and the reduction of carbon emissions:
-
Renewable Energy Source: Wood pellets are made from sustainably sourced wood, such as sawdust and wood chips, which are byproducts of the timber industry. By utilizing this otherwise wasted material, we are reducing our reliance on non-renewable fossil fuels.
-
Carbon Neutral: When wood pellets are burned, they release carbon dioxide, but the amount emitted is equal to the carbon absorbed by the trees during their growth. This creates a carbon-neutral cycle, minimizing the net increase of greenhouse gases in the atmosphere.
-
Lower Emissions: Wood pellet combustion produces significantly fewer emissions compared to traditional fossil fuels like coal. This helps to improve air quality and reduce the overall carbon footprint.
-
Waste Reduction: Wood pellets are manufactured from wood waste, diverting it from landfills and reducing the environmental impact of waste disposal.
Transition: To produce wood pellets, the first step involves grinding and drying the wood material.
Grinding and Drying the Wood Material
In the grinding process, wood material is broken down into smaller particles to facilitate the pelletizing process. This involves the use of a hammer mill, which uses rotating hammers to strike and grind the wood.
Wood drying is a crucial step in the pellet production process as it reduces the moisture content of the wood material, making it easier to grind and improving the overall quality of the pellets produced.
Grinding Process Explained
To understand how wood pellet mills work, you’ll want to know about the grinding process. This crucial step in the production of wood pellets involves reducing the raw material into a fine powder. Here are the grinding techniques used in pellet mills to ensure optimal pellet mill efficiency:
-
Hammer mills: These machines use rotating hammers to pulverize the wood material, resulting in a consistent and uniform particle size.
-
Knife mills: Equipped with sharp blades, knife mills cut the wood into small pieces, ensuring a homogeneous and efficient grinding process.
-
Impact mills: By utilizing high-speed rotating blades or hammers, impact mills shatter the wood material into fine particles, enhancing the overall pellet mill efficiency.
The grinding process is vital in preparing the wood material for pellet production, but it is closely connected to the subsequent step – wood drying. Properly dried wood ensures optimal pellet quality and combustion efficiency.
Importance of Wood Drying
After the grinding process, it is crucial to ensure that the wood material has the right moisture content before it can be pelletized. Wood moisture refers to the amount of water present in the wood, and it plays a vital role in the pelletizing process. Wood with high moisture content is difficult to pelletize as it can lead to poor pellet quality and increased energy consumption during the pellet mill operation.
To reduce the wood moisture, various drying methods are employed. These methods include natural drying, kiln drying, and air drying. Natural drying involves exposing the wood to the sun and wind, while kiln drying utilizes heat and controlled humidity levels to remove moisture. Air drying involves stacking the wood and allowing air to circulate around it.
By reducing the wood moisture to the optimal level, the wood becomes more suitable for pellet production. It ensures that the pellets have the desired density and durability.
Now, let’s move on to the next section and explore the process of pelletizing the wood material.
Pelletizing the Wood Material
During the pelletizing process, the wood material is compressed and shaped into small pellets. Wood pellet density and the techniques used for pelletizing play a crucial role in determining the quality and efficiency of the final product.
Achieving the desired wood pellet density requires carefully selecting the raw materials, which should have a suitable moisture content and particle size distribution. Pelletizing techniques such as pressure and heat are employed to soften the lignin in the wood, allowing it to bind the particles together.
The compressed wood material is then forced through small holes in a die, creating uniform pellets of the desired size and shape. These pellets are then ready for the next stage of the process, which involves cooling and screening to ensure their quality and readiness for use.
Cooling and Screening the Wood Pellets
You can ensure the quality of the wood pellets by carefully cooling and screening them. Cooling efficiency is crucial in maintaining the integrity and durability of the pellets. Here are two methods to achieve optimal cooling:
-
Air Cooling:
-
The hot wood pellets are transferred to a cooling chamber.
-
Cold air is blown over the pellets, removing excess heat.
-
The cooled pellets are then ready for screening.
-
Water Cooling:
-
The wood pellets are submerged in a water bath.
-
The water absorbs the heat from the pellets, rapidly cooling them.
-
The pellets are then separated from the water and proceed to the screening stage.
Screening methods further enhance the quality of the wood pellets by removing any fines or oversized particles. This ensures uniform size and consistency, improving combustion efficiency.
Now, let’s delve into the next section, where we will explore the packaging and storage of wood pellets.
Packaging and Storage of Wood Pellets
The packaging and storage of wood pellets is crucial for maintaining their quality and preventing moisture damage.
One of the main concerns when it comes to packaging challenges is ensuring that the pellets are sealed properly to keep out any moisture. Moisture can lead to the degradation of the pellets, causing them to crumble or mold. To address this issue, storage solutions such as using waterproof bags or containers with airtight seals are commonly employed.
Additionally, it is important to store wood pellets in a dry and well-ventilated area to further prevent moisture build-up. Proper labeling and stacking techniques are also essential to ensure efficient storage and easy identification.
By implementing these packaging and storage solutions, the quality of wood pellets can be preserved, ultimately leading to better performance and customer satisfaction.
Transitioning into the subsequent section about the maintenance and troubleshooting of wood pellet mills, it is equally important to ensure the proper functioning and upkeep of the machinery to produce high-quality pellets.
Maintenance and Troubleshooting of Wood Pellet Mills
To keep your wood pellet mill running smoothly, regular maintenance is essential. Proper maintenance techniques can help prevent breakdowns and ensure optimal performance of your mill.
One important maintenance task is cleaning the mill regularly to remove any dust, debris, or foreign objects that may accumulate and cause clogging or damage.
Lubricating the moving parts, such as the rollers and bearings, is also crucial to reduce friction and extend the lifespan of these components.
Additionally, regularly inspecting the electrical connections and replacing worn-out or damaged parts can help prevent electrical issues and improve safety.
Troubleshooting tips can also be helpful in addressing common problems, such as uneven pellet size or low production rates.
By following these maintenance techniques and troubleshooting tips, you can maximize the efficiency and lifespan of your wood pellet mill.
Transition: In addition to the maintenance and troubleshooting aspects, wood pellet mills also offer significant environmental benefits.
Environmental Benefits of Wood Pellet Mills
In addition to their maintenance and troubleshooting aspects, wood pellet mills also have significant environmental benefits. Here are three reasons why wood pellet mills are considered an environmentally-friendly choice:
-
Reducing Carbon Emissions: Wood pellets are made from renewable biomass sources such as sawdust, wood chips, or agricultural waste. When burned as fuel, they release significantly fewer greenhouse gas emissions compared to fossil fuels like coal or oil. This helps to reduce the overall carbon footprint and combat climate change.
-
Renewable Energy Source: Wood pellets are derived from sustainable forestry practices, where trees are responsibly harvested and replanted. Unlike fossil fuels, which are finite resources, wood pellets offer a renewable energy source that can be continuously produced and utilized without depleting natural resources.
-
Waste Reduction: Wood pellet mills help to repurpose and utilize wood waste that would otherwise end up in landfills. By converting this waste into valuable fuel, wood pellet mills contribute to waste reduction and promote a more circular economy.
Overall, wood pellet mills play a crucial role in reducing carbon emissions, providing a renewable energy source, and minimizing waste, making them an environmentally-friendly option for meeting energy needs.
What is the process of making wood pellets in a wood pellet mill?
At wood pellet mill processes, raw materials like sawdust or wood chips are first ground into small particles. Then, the particles are fed into the wood pellet mill where they are compressed and heated to form pellets. The pellets are then cooled and screened before being ready for use.
What Are the Key Components of a Wood Pellet Mill and How Do They Function?
A wood pellet mill operation consists of several key components including the hammer mill for grinding raw materials, the pellet machine for compressing the materials into pellets, and the cooler and dryer for reducing moisture content. The final step involves the packaging machine for storing and transporting the finished wood pellets.
Frequently Asked Questions
Are Wood Pellets Safe to Use for Heating and Cooking?
Yes, wood pellets are safe to use for heating and cooking. They have environmental benefits and are cost-effective compared to other options. They provide efficient heat and are a renewable energy source.
How Long Do Wood Pellet Mills Typically Last?
Wood pellet mills typically last for several years, with the longevity depending on various factors such as maintenance, usage, and quality of the machine. These factors can significantly affect the lifespan of wood pellet mills.
Can Wood Pellet Mills Use Different Types of Wood as Raw Materials?
Different types of wood suitable for wood pellet production include hardwoods, softwoods, and agricultural residues. Benefits of using different types of wood in wood pellet mills include increased energy efficiency and reduced emissions.
What Is the Average Production Capacity of a Wood Pellet Mill?
On average, a wood pellet mill can produce around [insert production capacity] of wood pellets per hour. This production capacity is determined by the size and efficiency of the mill.
Are There Any Regulations or Certifications for Wood Pellet Mills to Ensure Their Quality and Environmental Impact?
Yes, there are regulations and certifications for wood pellet mills to ensure their quality and minimize their environmental impact. These measures are in place to promote sustainable practices and protect the environment.
Conclusion
So there you have it, folks. Wood pellet mills, the magical machines that turn wood into little nuggets of fuel. It’s truly a fascinating process.
From grinding and drying the wood material to pelletizing it and finally cooling and screening the wood pellets. And let’s not forget about the packaging and storage, because who doesn’t love a neatly packed bag of wood pellets?
But the real star of the show is the maintenance and troubleshooting of these mills, because let’s face it, nothing is perfect. But fear not, because the environmental benefits of wood pellet mills make it all worth it.
So next time you cozy up by the fire, remember the humble wood pellet mill that made it all possible.
Pellet Stoves
How Do You Adjust a Pellet Stove to Hard Wood
Having ample experience using pellet stoves, I frequently adjust mine to burn hardwood pellets efficiently. Although it may seem overwhelming to differentiate between hardwood and softwood pellets initially, with the appropriate expertise and strategies, this obstacle can be easily conquered.
In this article, I will guide you through the process of understanding the basics of pellet stove adjustments, identifying the differences between softwood and hardwood pellets, and fine-tuning the feed rate and air intake for optimal hardwood burning.
Plus, I’ll share tips on maintenance and cleaning to ensure longevity and performance.
Key Takeaways
- Choose hardwood pellets with low moisture content for better combustion
- Look for pellets made from dense hardwoods like oak or hickory for higher heat output
- Increase feed rate slightly if stove is not producing enough heat
- Decrease feed rate gradually if stove is producing too much heat
Understanding the Basics of Pellet Stove Adjustments
To understand the basics of pellet stove adjustments, you’ll need to familiarize yourself with the different settings and options available. Proper pellet stove troubleshooting begins with understanding how to control the temperature.
Most pellet stoves have a temperature control dial or digital display that allows you to adjust the heat output. By turning the dial or using the controls, you can increase or decrease the temperature as needed. It’s important to remember that each pellet stove may have slightly different controls or settings, so it’s best to consult the manufacturer’s manual for specific instructions.
Now that we understand the basics of pellet stove adjustments, let’s move on to identifying the differences between softwood and hardwood pellets.
Identifying the Differences Between Softwood and Hardwood Pellets
Identifying the differences between softwood and hardwood pellets can help improve the performance of your stove. When choosing the right pellet fuel for your stove, it is important to consider the heat output of the pellets.
Softwood pellets, made from coniferous trees like pine or spruce, tend to have a higher heat output compared to hardwood pellets. This is because softwood has a higher resin content, which results in a more efficient burn.
On the other hand, hardwood pellets, made from trees like oak or maple, may have a lower heat output but they burn longer and produce less ash. Understanding these differences can help you make an informed decision when selecting the pellets for your stove.
Now, let’s discuss adjusting the feed rate for optimal hardwood burning.
Adjusting the Feed Rate for Optimal Hardwood Burning
When adjusting the feed rate for optimal hardwood burning, it’s important to find the right balance for consistent heat output. Hardwood pellets can provide a longer burn time and higher heat output compared to softwood pellets.
To ensure efficient burning, consider the following:
- Hardwood pellet selection:
- Choose hardwood pellets with low moisture content for better combustion.
- Look for pellets made from dense hardwoods like oak or hickory for higher heat output.
Troubleshooting common feed rate issues:
- If the stove is not producing enough heat, increase the feed rate slightly.
- If the stove is producing too much heat, decrease the feed rate gradually.
By adjusting the feed rate accordingly, you can optimize the burning process and achieve consistent heat output.
Now, let’s move on to fine-tuning the air intake for efficient wood combustion.
Fine-Tuning the Air Intake for Efficient Wood Combustion
For optimal wood combustion, make sure you find the right balance in adjusting the air intake. Proper ventilation is of utmost importance to ensure efficient wood combustion.
When the air intake is adjusted correctly, it allows for the right amount of oxygen to reach the fire, promoting complete and efficient combustion. This helps in maximizing heat output and minimizing the production of harmful pollutants.
Additionally, it is crucial to consider the moisture content of the wood pellets used for combustion. High moisture content can negatively impact combustion efficiency, leading to reduced heat output and increased smoke emissions. Therefore, it is essential to use dry and seasoned wood pellets for optimal performance.
By fine-tuning the air intake and using low moisture content wood pellets, you can achieve efficient wood combustion and a more environmentally friendly operation.
Ensuring proper maintenance and cleaning further enhances longevity and performance, keeping your pellet stove operating at its best.
Ensuring Proper Maintenance and Cleaning for Longevity and Performance
Proper maintenance and cleaning are essential for ensuring the longevity and optimal performance of your pellet stove. Regular inspections are of utmost importance to identify any issues or potential problems that may affect its functionality. By conducting these inspections, you can address any concerns promptly and prevent further damage or breakdowns.
Additionally, using high-quality pellets can greatly enhance the performance of your stove. High-quality pellets burn more efficiently, producing more heat and leaving behind less residue. This not only improves the overall performance of your stove but also reduces the frequency of cleanings and maintenance required.
Therefore, investing in good quality pellets is not only beneficial for your stove but also saves you time and money in the long run.
Is Adjusting a Pellet Stove to Burn Hard Wood Different from Installing a Wood Pellet Stove?
Adjusting a pellet stove to burn hard wood is different from installing a wood pellet stove. The adjustment involves changing the fuel type and may require modifying the stove settings. On the other hand, wood pellet stove installation steps include assembling the stove, positioning the vent, and connecting it to the flue.
Can I Use Hard Wood Instead of Pellets in a Wood Pellet Stove?
Yes, you can use hard wood instead of pellets in a wood pellet stove. However, it is important to follow the manufacturer’s recommendations for fuel type to ensure efficient and safe operation. For more information, consult a wood pellet stove installation guide.
Frequently Asked Questions
Can I Use Softwood Pellets in a Pellet Stove Designed for Hardwood Pellets?
I can burn softwood pellets in my pellet stove designed for hardwood pellets, but there are advantages to using hardwood pellets. They tend to have higher heat output and produce less ash. Adjusting the stove may be necessary for optimal performance.
How Often Should I Clean My Pellet Stove?
When troubleshooting a pellet stove not igniting, it’s important to check the fuel supply, igniter, and air intake. Signs that a pellet stove needs cleaning include reduced heat output and excessive ash buildup.
What Kind of Maintenance Is Required for a Pellet Stove?
To properly maintain a pellet stove, regular maintenance is required. This includes cleaning the burn pot, removing ash buildup, and checking the exhaust vent for blockages. Troubleshooting issues may involve adjusting air intake or checking the fuel supply.
Can I Adjust the Feed Rate on My Pellet Stove to Burn Different Types of Wood?
To optimize pellet stove efficiency, I adjust the feed rate according to the type of wood I’m burning. By tweaking this setting, I can control the burn rate and ensure efficient combustion.
Are There Any Safety Precautions I Should Take When Adjusting My Pellet Stove?
When adjusting a pellet stove, it is important to take safety precautions. Ensure the stove is turned off and cooled down before making any adjustments. Follow the manufacturer’s instructions and wear protective gear if necessary.
Conclusion
In conclusion, adjusting a pellet stove to burn hardwood requires a combination of knowledge and precision. By understanding the basics of pellet stove adjustments and the differences between softwood and hardwood pellets, one can optimize the feed rate and air intake for efficient wood combustion.
Regular maintenance and cleaning are also essential for the longevity and performance of the stove.
So, if you’re looking to harness the full potential of your pellet stove with hardwood, don’t forget to fine-tune and maintain it like a pro.
-
Wood Stove9 months ago
How To Build A Thermoelectric Generator For A Wood Stove
-
Wood Stove6 months ago
What Can I Use As Insulation On Wood Stove Pipes
-
Wood Stove2 months ago
How To Use Damper And Draft On Wood Stove
-
Wood Stove2 weeks ago
How Far Does Wood Stove Have To Be From Wall
-
Wood Stove9 months ago
How To Make A Heat Shield For A Wood Stove
-
Wood Stove1 month ago
When To Open And Close Damper On Wood Stove
-
Wood Stove9 months ago
How To Use The Flue On A Wood Stove
-
Wood Stove6 months ago
How To Install A Wood Stove Pipe And Chimney