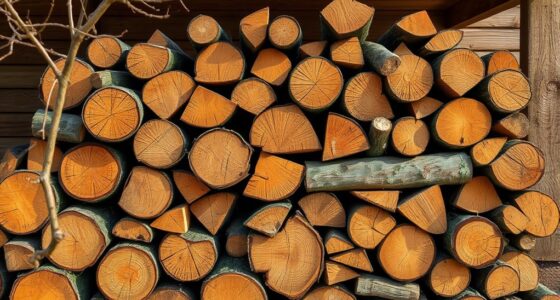
To use a moisture meter correctly, start by calibrating it according to the manufacturer’s instructions, ensuring accurate results. Choose the right probe for your material—pin-type for thicker surfaces or pinless for finished or delicate materials. Test multiple points for consistency and avoid damaged areas. Keep environmental factors like temperature and humidity in mind. When you’re ready, follow proper procedures to get reliable moisture information, and there’s more to discover for precise assessments.
Key Takeaways
- Calibrate the moisture meter according to the manufacturer’s instructions before each use for accurate readings.
- Select the appropriate probe type—pin or pinless—based on the material and surface being tested.
- For pin-type probes, insert pins at multiple spots to obtain representative moisture readings.
- Place the device flat against the surface or insert pins fully, ensuring proper contact for stable measurements.
- Take multiple readings across different areas and compare results with material-specific moisture content thresholds.
Using a moisture meter correctly is essential for obtaining accurate readings, whether you’re checking wood, drywall, or other materials. To do this effectively, you need to understand the importance of proper reading calibration and selecting the right probes. Reading calibration ensures your device provides precise measurements, which is crucial when assessing moisture levels accurately. Before using the meter, always verify that it’s calibrated according to the manufacturer’s instructions. Many meters have a calibration feature or require periodic calibration with a known moisture reference. Neglecting this step can lead to skewed readings, potentially causing you to make incorrect assessments about moisture content.
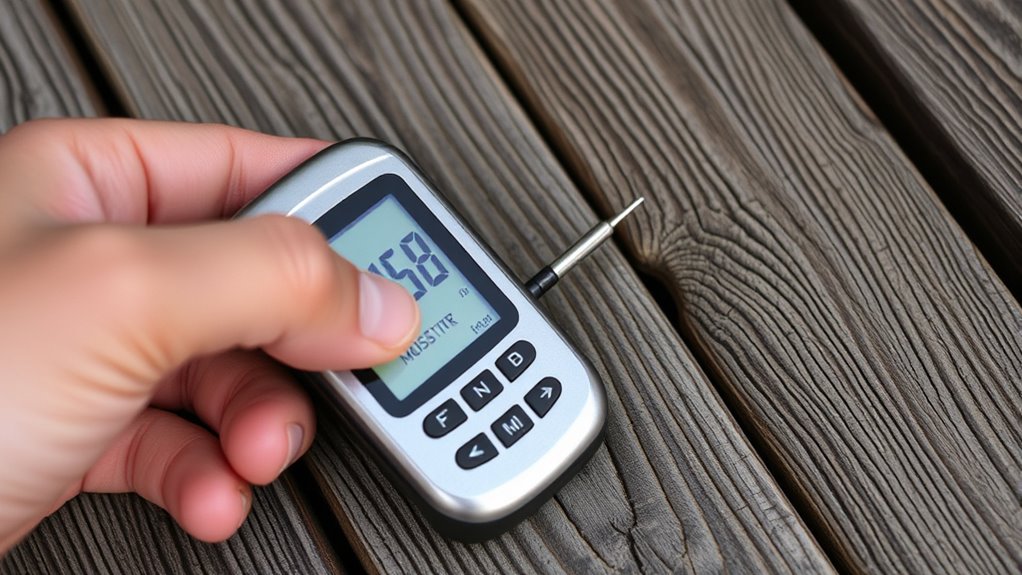
Selecting probes is equally vital because different materials and measurement scenarios demand specific types of probes. Most moisture meters come with either pin or pinless probes, each suited for particular tasks. Pin-type probes involve inserting metal pins into the material to measure electrical resistance, which correlates with moisture content. When selecting probes, choose the appropriate length and number for your application; longer pins are better for thicker materials, while shorter pins work well with thin surfaces. Pinless probes, on the other hand, use electromagnetic sensors to scan the surface without damaging it, making them ideal for finished surfaces like drywall or hardwood floors. Always ensure the probes are compatible with your device and suitable for the material you’re testing.
Choosing the right probes ensures accurate moisture readings for various materials and testing scenarios.
When you’re ready to take a reading, start by calibrating your moisture meter if necessary. Follow the instructions to guarantee the device is set correctly, especially if you’ve recently moved it between different materials or environments. For pin-type probes, insert the pins into the material at several points to get a representative reading, avoiding areas that might be damaged or uneven. For pinless meters, simply place the device flat against the surface and hold it steady until the reading stabilizes. Remember that moisture levels can vary across a surface, so take multiple readings for a more accurate assessment. Additionally, understanding resources and tools available can help you select the right equipment for your needs. Using proper testing techniques can further improve the reliability of your results.
It is also beneficial to familiarize yourself with material-specific moisture content thresholds to interpret your readings effectively. Always document your readings and compare them with the recommended moisture content levels for the specific material. Keep in mind that environmental factors like temperature and humidity can influence your results, so consider these variables during your testing. Properly calibrated meters and appropriate probes help you avoid false readings, saving you time and preventing costly mistakes. By paying close attention to reading calibration and selecting the right probes, you guarantee your moisture assessments are reliable, enabling better decisions whether you’re repairing, inspecting, or evaluating building materials.
Frequently Asked Questions
Can Moisture Meters Be Used on All Types of Materials?
Moisture meters can’t be used on all types of materials due to material compatibility issues. They work best with porous materials like wood, drywall, and concrete, which absorb moisture evenly. Non-porous surfaces like plastics or metals may give inaccurate readings because they don’t absorb moisture the same way. Always check the moisture absorption characteristics of your material to make certain of accurate readings and avoid damaging the meter or getting false results.
How Often Should I Calibrate My Moisture Meter?
You should calibrate your moisture meter regularly, ideally before each use or at least once a month, depending on how often you work with it. Follow the manufacturer’s calibration frequency recommendations for accuracy. For maintenance tips, keep the device clean, store it properly, and check calibration against known moisture standards periodically to guarantee precise readings. Proper calibration maintains your meter’s reliability and extends its lifespan.
What Is the Ideal Moisture Level for Hardwood Floors?
The ideal moisture level for a wood floor is between 6% and 9% moisture content. You want to keep the moisture content balanced to prevent issues like warping or gaps. Use your moisture meter regularly to check the wood floor’s moisture levels, especially during seasonal changes. Maintaining this range helps make sure your hardwood floors stay stable, durable, and looking great for years.
Are Digital Moisture Meters More Accurate Than Analog Ones?
Digital moisture meters generally offer better digital accuracy, making them more precise for measuring moisture levels. They often display readings instantly and have advanced features like data storage. However, analog reliability remains strong, especially in tough environments, as they don’t rely on batteries or electronic components. Your choice depends on your needs: if accuracy and quick readings matter most, go digital; for durability, analog meters are reliable.
How Do Environmental Conditions Affect Moisture Readings?
Environmental conditions like humidity influence moisture readings, causing higher readings in humid environments and lower ones in dry conditions. Temperature effects also play a role; warmer temperatures can lead to lower moisture readings, while cooler temperatures may increase them. To get accurate results, you should calibrate your moisture meter regularly, avoid testing in extreme weather, and allow materials to reach ambient conditions before measuring. This guarantees your readings truly reflect the material’s moisture content.
Conclusion
Now that you know how to use a moisture meter correctly, you’re like a detective uncovering hidden secrets within materials. With each precise reading, you’re peeling back the layers of mystery, ensuring your projects stay strong and dry. Think of your moisture meter as your trusty compass, guiding you through the fog of uncertainty. Keep practicing, and soon you’ll master this tool, turning damp dilemmas into dry victories with confidence and clarity.

Terra grew up with a soul deeply connected to nature. Her earliest memories are of sun-drenched meadows, whispering woods, and the rhythmic dance of waves on a moonlit night. Every gust of wind, rustling leaf, and distant horizon beckoned her with tales waiting to be told.