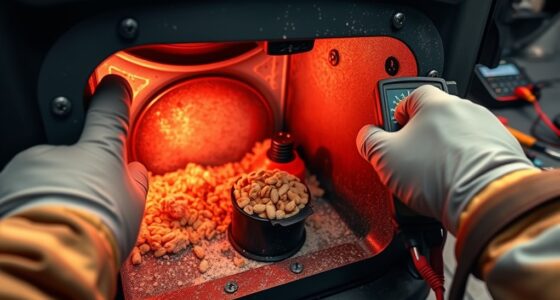
Pellets & Pellet Stoves
How to Use Chunk Wood in Pellet Grill

I absolutely love the rich, smoky flavor that chunk wood adds to my meals when using a pellet grill. It’s like adding a touch of nature’s essence to every bite.
In this article, I’ll share with you the benefits of using chunk wood in a pellet grill and guide you through selecting the right type, preparing it for optimal flavor, and properly loading it into your grill.
Get ready to elevate your grilling game and savor the irresistible taste of perfectly cooked food infused with the essence of real wood smoke.
Key Takeaways
- Chunk wood adds smoky flavor and enhances taste in pellet grills.
- Choosing the right type of wood based on flavor profiles and pairing with meat is important.
- Proper wood sizing ensures optimal combustion and smoke production.
- Preparing and seasoning chunk wood before grilling enhances the flavor profile.
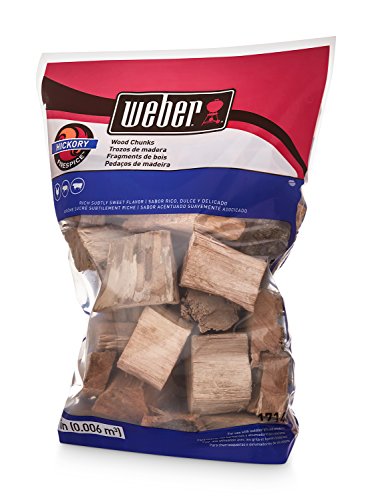
Benefits of Using Chunk Wood in a Pellet Grill
Chunk wood in a pellet grill gives you the benefits of adding smoky flavor and enhancing the taste of your grilled food. When it comes to wood selection, choosing the right type is crucial for achieving maximum flavor infusion.
Different types of wood impart different flavors, so it’s important to consider what kind of taste you want to achieve. For example, mesquite wood provides a strong and bold smoky flavor, while fruit woods like apple or cherry offer a sweeter and more delicate taste.
The size and quality of the chunk wood also play a role in the flavor outcome. Selecting high-quality chunk wood that is properly seasoned will ensure optimal smoke production and consistent results.
Now that we understand the benefits of using chunk wood in a pellet grill, let’s explore how to select the right type for your grilling needs.
Transitioning into selecting the right type of chunk wood for your pellet grill, it’s important to consider factors such as personal preference and compatibility with different meats or dishes without compromising on quality or taste.
Selecting the Right Type of Chunk Wood for Your Pellet Grill
When it comes to selecting the right type of chunk wood for your pellet grill, there are three key factors to consider: wood flavor profiles, heat distribution efficiency, and proper wood sizing.
Wood flavor profiles vary depending on the type of wood used, with options ranging from bold and smoky to mild and fruity.
Heat distribution efficiency is important for ensuring even cooking temperatures throughout the grill, so choosing chunk wood that burns consistently and evenly is crucial.
Additionally, proper wood sizing is essential for optimal combustion and smoke production, as chunks that are too large or too small can affect both heat output and flavor infusion.
Wood Flavor Profiles
To really enhance the flavor of your food, you’ll want to consider the different wood flavor profiles available for your pellet grill. Here are some factors to consider when choosing wood flavors for your grilling preferences:
-
Intensity: Some woods have a stronger flavor than others. For a more subtle taste, try fruitwoods like apple or cherry. If you prefer a bolder smoky flavor, mesquite or hickory might be your go-to choices.
-
Pairing with Meat: Different types of meat pair well with specific wood flavors. For example, poultry and fish tend to pair nicely with lighter woods like cedar or alder. Heartier meats like beef and pork can handle stronger woods like oak or pecan.
By selecting the right wood flavor profile based on intensity and meat pairing, you can create mouthwatering dishes that will impress your guests.
Now let’s move on to discussing the heat distribution efficiency of pellet grills.
When it comes to heat distribution efficiency in pellet grills…
Heat Distribution Efficiency
The heat distribution in pellet grills can greatly impact the cooking process, ensuring that your food is evenly cooked and full of flavor. Achieving efficient heat distribution is crucial for a successful cookout, as it allows for consistent temperatures throughout the grill. This not only ensures that your food cooks evenly but also helps in achieving optimal smoke control.
To understand the importance of heat distribution efficiency, let’s take a look at this table:
Temperature Zone | Characteristics | Benefits |
---|---|---|
Direct Heat | Intense, high heat | Perfect for searing |
Indirect Heat | Gentle, even heat | Ideal for slow cooking |
Smoke Zone | Low temperature | Infuses smoky flavors |
Proper Wood Sizing
Ensure you have the right size of wood for optimal cooking results. When using chunk wood in a pellet grill, it is important to consider the ideal wood size for efficient and flavorful cooking.
The ideal size of chunk wood is around 2-3 inches in diameter. This allows for even heat distribution and ensures that the wood burns consistently throughout the cooking process.
To prepare your chunk wood, start by cutting larger pieces into smaller chunks using a saw or an axe. It’s important to note that chunk wood should be seasoned properly before use to enhance its flavor profile. Soaking the chunks in water or marinating them in your favorite seasoning can add an extra layer of taste to your dishes.
By preparing and seasoning your chunk wood correctly, you can achieve optimal flavor and enhance your grilling experience without any hassle.
When it comes to using chunk wood in a pellet grill, ensure that you have the right size of wood for optimal cooking results. The ideal size of chunk wood is approximately 2-3 inches in diameter as this promotes even heat distribution and consistent burning throughout the cooking process.
To prepare your chunk wood, begin by cutting larger pieces into smaller chunks using either a saw or an axe. This will help ensure that each piece is of uniform size and ready for use.
It’s worth noting that properly seasoning your chunk wood can greatly enhance its flavor profile when used on a pellet grill. Consider soaking the chunks in water for a few hours or marinating them with your preferred seasonings prior to use.
How to Prepare and Season Chunk Wood for Optimal Flavor
Preparing and seasoning chunk wood is key for achieving optimal flavor in your pellet grill. Here are some important steps to follow when preparing wood chunks:
- Start with dry, seasoned wood to avoid excessive smoke and bitter flavors.
- Cut the wood into manageable chunks, about 2-3 inches in size, for even burning and smoke distribution.
- Remove any bark from the wood as it can produce a harsh taste.
- Soak the wood chunks in water for at least 30 minutes before grilling to prevent them from burning too quickly.
- Experiment with different types of wood, such as hickory or apple, to add unique flavors to your dishes.
By properly preparing your wood chunks, you can enhance the flavor of your grilled food.
Now let’s move on to tips for properly loading and arranging chunk wood in your pellet grill.
Tips for Properly Loading and Arranging Chunk Wood in Your Pellet Grill
When loading and arranging chunk wood in your pellet grill, it’s important to create a balanced distribution for even heat and smoke production. This ensures that your food is cooked thoroughly and has a consistent, smoky flavor.
To achieve optimal heat distribution, start by layering the bottom of the grill with small chunks of wood. This creates a solid foundation for the larger pieces to rest on.
Next, arrange the larger chunks evenly across the grill surface, leaving space between them for airflow. This allows for better temperature control as the air can circulate around each piece of wood, ensuring efficient combustion and heat dispersal.
By following these tips, you can ensure that your pellet grill provides consistent heat and smoke throughout your cooking process.
Now let’s explore how to control temperature and smoke using chunk wood in a pellet grill without compromising flavor or texture.
Controlling Temperature and Smoke Using Chunk Wood in a Pellet Grill
When it comes to using chunk wood in a pellet grill, there are several key points to consider for optimal results.
First, controlling the smoke intensity is crucial for achieving the desired flavor profile. I will discuss different methods and techniques that can be used to adjust and regulate the smoke output based on personal preferences and the type of wood being used.
Additionally, temperature regulation plays a significant role in ensuring consistent cooking results. I will provide helpful tips on how to maintain and adjust the temperature inside the pellet grill throughout the cooking process.
Lastly, choosing the right size of chunk wood is important for efficient burning and maximum smoke production. I will explain what an ideal chunk wood size looks like and how it can impact both smoke intensity and temperature control in a pellet grill.
Smoke Intensity Control
To control the smoke intensity in your pellet grill, you’ll want to adjust the dampers and use fewer wood chunks.
The dampers are essential for regulating airflow, which directly affects the amount of smoke produced. By opening the dampers, more oxygen is allowed into the grill, resulting in a higher combustion rate and more intense smoke flavor. On the other hand, closing the dampers restricts airflow, reducing smoke production and intensity.
Additionally, using fewer wood chunks can help control smoke intensity. Instead of filling up the entire hopper with chunks, try using half or even quarter amounts. This will result in less wood combustion and milder smoke infusion into your food.
By adjusting both the dampers and wood chunk usage, you can achieve optimal smoke control techniques while still enjoying deliciously flavorful grilled dishes.
Now let’s move on to temperature regulation tips…
Temperature Regulation Tips
Adjust the airflow by opening or closing the dampers to regulate the temperature in your pellet grill. This is one of the most crucial tips for temperature control.
By adjusting the airflow, you can increase or decrease the amount of oxygen that enters the grill, which directly affects the temperature. If you notice temperature fluctuations, it could be due to an incorrect damper setting.
Troubleshooting these fluctuations involves checking if the dampers are fully open or closed and making adjustments accordingly. Additionally, ensure that there are no obstructions in the grill’s air vents that may impede proper airflow.
Properly regulating the temperature will result in consistent cooking results and prevent overcooking or undercooking your food.
Speaking of temperature control, another factor that influences it is using chunk wood in your pellet grill.
Ideal Chunk Wood Size
In order to achieve the best results when using chunk wood in a pellet grill, it is important to consider the ideal size of the wood. The ideal chunk wood size for a pellet grill is around 1-2 inches in diameter and 3-4 inches in length. This size allows for optimal airflow and combustion, resulting in consistent heat and smoke production.
Using chunk wood in a pellet grill offers several benefits. Firstly, it adds an authentic smoky flavor to your food that cannot be replicated with pellets alone. Additionally, chunk wood provides longer burn times, allowing you to cook for extended periods without needing to constantly replenish the fuel. It also creates more intense heat, which is perfect for searing meats or achieving a nice crust on vegetables.
Now let’s move on to monitoring and maintaining the fire with chunk wood in a pellet grill…
Monitoring and Maintaining the Fire With Chunk Wood in a Pellet Grill
You can easily monitor and maintain the fire in your pellet grill by using chunk wood. One of the key factors in achieving a successful cook is maintaining the right fire temperature throughout the process.
With chunk wood, you have better control over the fire as it burns slowly and evenly, providing a consistent heat source. To monitor the fire temperature, keep an eye on the grill’s built-in thermometer or use a digital meat probe to gauge the internal temperature of your food.
If you encounter any fire issues such as low flames or excessive smoke, troubleshoot by adjusting the airflow vents or removing any debris obstructing the burn pot.
Achieving the Perfect Smoky Flavor With Chunk Wood in a Pellet Grill
When it comes to achieving the perfect smoky flavor in a pellet grill, using chunk wood can make all the difference.
One of the key benefits of using chunk wood is that it burns slower and produces a more consistent smoke, resulting in a richer and more flavorful taste.
To get the most out of your chunk wood, it’s important to follow some tips. Soak the chunks before use and place them strategically in the grill for optimal smoke production.
Benefits of Chunk Wood
Using chunk wood in your pellet grill offers several benefits. First, it enhances the smoky flavor of your food, providing a distinct taste that cannot be achieved with other fuel sources. Different types of wood, such as hickory or mesquite, offer unique flavors that can complement various dishes.
Second, chunk wood provides a longer burn time compared to pellets. This means you can enjoy a longer cooking time without needing to frequently refill the hopper. This is especially useful for low and slow cooking methods, such as smoking large cuts of meat.
Third, using chunk wood in your pellet grill creates a more natural and authentic taste. It harnesses the natural flavors of different woods, allowing you to create mouth-watering meals that are reminiscent of traditional barbecue.
Lastly, chunk wood offers versatility. You can use it in conjunction with pellets or as the sole fuel source in your pellet grill. This gives you the flexibility to achieve different levels of smoke intensity based on your preference.
Now that we understand the benefits of using chunk wood in our pellet grills, let’s explore some useful tips for getting the most out of this technique without any complicated steps involved.
Tips for Using
Now that we’ve covered the benefits of using chunk wood in our pellet grills, let’s explore some helpful tips to maximize its effectiveness.
Proper storage is crucial to maintain the quality and flavor of your chunk wood. It is best to store it in a dry, well-ventilated area, away from any moisture or potential sources of ignition. This will prevent mold growth and ensure the safety of your wood chunks.
When handling chunk wood, always wear protective gloves and use caution to avoid splinters or injuries. Additionally, be mindful of the size and weight of the chunks you use in your grill, as larger pieces may take longer to ignite and produce smoke.
Enhancing Smoky Flavor
To enhance the smoky flavor on your grill, it’s important to choose quality ingredients and seasonings. One of the key factors in achieving a delicious smoky taste is using smoke infusion techniques.
This can be done by adding wood chips or chunks to your grill, which will release aromatic smoke that permeates the food. When it comes to flavor pairing suggestions, there are plenty of options to explore.
For meats like beef and pork, hickory or mesquite wood chips add a bold and robust flavor. If you’re grilling poultry or seafood, fruit woods like apple or cherry can complement their lighter flavors beautifully.
By experimenting with different wood types and combinations, you can create unique and mouthwatering dishes that are bursting with smoky goodness.
Now let’s move on to adjusting cooking times and techniques when using chunk wood in a pellet grill…
Adjusting Cooking Times and Techniques When Using Chunk Wood in a Pellet Grill
If you’re using chunk wood in your pellet grill, you’ll need to adjust your cooking times and techniques accordingly. Chunk wood burns differently than typical pellets, so it’s important to understand how this affects your cooking process.
First, be aware that chunk wood may require longer cooking times due to its density. This means you’ll need to plan accordingly and give yourself some extra time for the food to cook thoroughly.
Additionally, since chunk wood produces a more intense smoky flavor, you might want to experiment with reducing the amount of wood used or adjusting the temperature settings on your grill to prevent overpowering the food with smoke.
By making these adjustments, you can maximize the delicious smoky flavor while still achieving perfectly cooked meals on your pellet grill.
When it comes to cleaning and maintaining your pellet grill when using chunk wood, proper care is crucial.
Cleaning and Maintaining Your Pellet Grill When Using Chunk Wood
Proper care is crucial for cleaning and maintaining your pellet grill when using chunk wood. To keep your grill in top shape, there are a few cleaning techniques and maintenance tips you should follow.
Firstly, after each use, make sure to remove any remaining ash from the firebox. This can be done by simply vacuuming or using a brush to sweep it away.
Additionally, it’s important to clean the grates thoroughly to prevent any buildup of residue or grease. A wire brush works well for this task.
Lastly, don’t forget about the exterior of your grill! Wipe it down with a damp cloth to remove any dirt or debris.
By regularly following these cleaning techniques and maintenance tips, you’ll ensure that your pellet grill stays in great condition for years to come.
Now that we’ve covered how to properly clean and maintain your pellet grill when using chunk wood, let’s move on to exploring different recipes and flavors with this versatile cooking method.
Exploring Different Recipes and Flavors With Chunk Wood in a Pellet Grill
Now that we’ve covered how to clean and maintain your pellet grill when using chunk wood, let’s dive into the exciting world of recipes and flavors you can explore with this versatile cooking method.
When it comes to exploring different cooking methods with a pellet grill and chunk wood, the possibilities are endless. One of my favorite ways to experiment is by trying out different wood combinations.
For example, pairing hickory with apple wood can create a sweet and smoky flavor profile perfect for pork ribs or chicken. If you’re feeling adventurous, try mixing mesquite with cherry wood for a bold and tangy taste that complements beef brisket beautifully.
Don’t be afraid to get creative in the kitchen and discover new flavor combinations that will take your dishes to the next level. Happy grilling!
Frequently Asked Questions
Can I Use Any Type of Wood in a Pellet Grill?
Yes, you can use different types of wood in a pellet grill. Using chunk wood in a pellet grill has several benefits, including adding smoky flavor and enhancing the taste of your food.
How Often Should I Add More Chunk Wood to My Pellet Grill?
Chunk wood in a pellet grill is like adding fuel to a fire. Its burn time depends on factors like moisture content and size of the chunks. You can use chunk wood without pellets, but it won’t provide as consistent heat.
Can I Mix Different Types of Chunk Wood for a Unique Flavor?
Yes, you can mix different types of chunk wood to create a unique flavor when using a pellet grill. Experimenting with mixing wood flavors is a great way to enhance the taste of your food.
Is There a Specific Temperature Range I Should Aim for When Using Chunk Wood in a Pellet Grill?
When using chunk wood in a pellet grill, it’s important to aim for a specific temperature range. This ensures that the wood burns efficiently and imparts its unique flavor to the food. The benefits of using chunk wood include enhanced smoky taste and aroma.
How Do I Clean the Ash and Residue From Chunk Wood in My Pellet Grill?
To clean the ash and residue from chunk wood in my pellet grill, I follow these best practices. First, I let the grill cool down completely. Then, I use a brush to sweep out the ash and wipe down any remaining residue. This helps maintain and extend the lifespan of my chunk wood.
Conclusion
In conclusion, using chunk wood in a pellet grill is a game-changer for barbecue enthusiasts. The smoky flavor and enhanced cooking experience it brings are simply unmatched.
By selecting the right type of chunk wood, preparing it properly, and loading it correctly in your pellet grill, you can achieve mouthwatering results every time. Don’t forget to control the temperature and smoke levels for optimal cooking.
So go ahead, fire up that pellet grill with some chunk wood and get ready to wow your taste buds! It’s time to elevate your grilling game like never before!
Growing up surrounded by the vast beauty of nature, Sierra was always drawn to the call of the wild. While others sought the comfort of the familiar, she ventured out, embracing the unpredictable and finding stories in the heartbeat of nature.
At the epicenter of every remarkable venture lies a dynamic team—a fusion of diverse talents, visions, and passions. The essence of Best Small Wood Stoves is crafted and refined by such a trio: Sierra, Logan, and Terra. Their collective expertise has transformed the platform into a leading authority on small wood stoves, radiating warmth and knowledge in equal measure.
Pellets & Pellet Stoves
How to Remove the Inside Wall Brick Like of Wood Pellet Stove to Clean

I’ve got a fascinating statistic for you: did you know that cleaning the inside wall brick of a wood pellet stove can increase its efficiency by up to 20%?
In this article, I’ll be sharing step-by-step instructions on how to remove the inside wall brick of your wood pellet stove for a thorough cleaning. With just a few tools and some elbow grease, you’ll be able to keep your stove running smoothly and effectively.
Let’s get started!
Key Takeaways
- Turn off and cool down the stove before starting the cleaning process.
- Use the appropriate tools and materials, and follow safety precautions throughout the cleaning.
- Thoroughly clean the burn pot by disconnecting it from electrical connections and removing it from the combustion chamber.
- When cleaning the inside wall brick, remove screws or clips holding the brick, choose the right cleaning method, and inspect for cracks or damage before sealing the bricks to prevent moisture penetration.
Tools and Materials Needed
To remove the inside wall brick, you’ll need a few tools and materials. The tools required include a flathead screwdriver, a hammer, a chisel, and a vacuum cleaner with a brush attachment.
As for the materials, you’ll need a drop cloth or tarp to protect the surrounding area from debris and dust. Cleaning techniques are also essential for this process.
Start by disconnecting the stove from the power source and removing any loose debris from the inside. Then, use the flathead screwdriver to gently pry the bricks loose. If they are stubborn, tap the screwdriver with the hammer to loosen them further.
Once the bricks are removed, vacuum the area to remove any remaining dust or debris. With the bricks removed, you can now proceed to prepare the stove for cleaning, ensuring optimal performance and longevity.
Preparing the Stove for Cleaning
Before starting, make sure you have all the necessary tools for preparing your stove for cleaning. Cleaning your wood pellet stove is an important maintenance task that ensures its optimal performance.
To begin, ensure that the stove is turned off and has completely cooled down. This will prevent any accidental burns or injuries.
Next, gather a vacuum cleaner with a brush attachment, a soft cloth or sponge, a stove cleaner specifically designed for wood pellet stoves, and a pair of gloves to protect your hands. It is essential to follow safety precautions during the cleaning process to avoid any mishaps.
The next section will guide you through the process of removing the burn pot, an important step in cleaning your wood pellet stove.
Removing the Burn Pot
When it comes to removing the burn pot from your wood pellet stove, there are a few techniques that can make the process easier.
One method is to simply lift the burn pot out of the stove, while another involves using a screwdriver or wrench to unscrew any bolts or fasteners holding the pot in place.
Once the pot is removed, it’s important to clean it thoroughly to ensure optimal performance and efficiency of your stove.
Burn Pot Removal Techniques
First, make sure you’ve turned off and unplugged the wood pellet stove before attempting to remove the burn pot. Burn pot maintenance is crucial for the proper functioning of your wood pellet stove.
Troubleshooting common issues often requires removing and inspecting the burn pot. To remove the burn pot, locate the access panel on the stove’s exterior. Open the panel and carefully disconnect the burn pot from its electrical connections.
Next, detach the burn pot from the stove’s combustion chamber by unscrewing the retaining bolts. Gently lift the burn pot out of the stove, being cautious not to spill any residual pellets.
With the burn pot removed, you can now proceed to clean it thoroughly, ensuring optimal performance and longevity of your wood pellet stove.
Cleaning the Burn Pot
Once you’ve disconnected the burn pot, it’s important to carefully inspect and remove any debris or ash. Burn pot maintenance is crucial for the proper functioning of your wood pellet stove. Troubleshooting burn pot issues often starts with a thorough cleaning.
Begin by using a small brush or vacuum to remove loose debris from the burn pot. Be sure to pay attention to the corners and crevices where ash can accumulate. Next, use a damp cloth to wipe down the inside walls of the burn pot, removing any stubborn residue. This will help prevent clogs and ensure optimal combustion.
Now, let’s move on to disassembling the inside wall brick, which is an essential step in maintaining your wood pellet stove’s efficiency.
Disassembling the Inside Wall Brick
To remove the inside wall brick, follow these steps:
- Turn off the wood pellet stove and allow it to cool down completely.
- Put on protective gloves and goggles before starting the disassembly process.
- Locate the screws or clips that hold the brick in place.
- Use a screwdriver or pliers to carefully remove the screws or clips, taking care not to damage the surrounding components.
- Once the screws or clips are removed, gently pry the brick away from the stove, starting at one corner and working your way around.
- Take your time during this process to avoid causing any further damage.
- Once the brick is detached, set it aside for cleaning.
Now, let’s move on to the cleaning process:
- Remove any debris or soot from the inside wall brick to ensure optimal performance and efficiency.
Cleaning the Inside Wall Brick
When it comes to cleaning techniques for bricks, there are a few key points to keep in mind.
First, it’s important to choose the right cleaning method based on the type of brick and the level of dirt or stains.
Second, using a mixture of water and a mild detergent can help remove surface dirt and grime.
Lastly, regular maintenance tips for bricks include inspecting for cracks or damage, sealing the bricks to prevent moisture penetration, and avoiding harsh chemicals that can cause discoloration or erosion.
Cleaning Techniques for Bricks
If you’re looking to clean the bricks inside your wood pellet stove, start by gathering the necessary supplies. You’ll need a stiff-bristle brush, a vacuum cleaner with a brush attachment, warm water, mild detergent, and a sponge or cloth.
Begin by using the brush to scrub off any loose soot and debris from the bricks. Then, use the vacuum cleaner to remove the loosened particles.
Next, mix some warm water with a small amount of mild detergent and dampen the sponge or cloth with the solution. Gently scrub the bricks using circular motions, focusing on areas with stubborn soot stains. Rinse the bricks with clean water and pat them dry with a towel.
Now that your bricks are clean, let’s move on to maintenance tips for keeping them in great condition.
Maintenance Tips for Bricks
After cleaning, it’s important to regularly inspect the bricks for any signs of damage or wear. Proper maintenance is crucial to ensure the longevity and structural integrity of your bricks.
One key aspect of brick maintenance is to choose the right cleaning methods. Different types of bricks may require specific cleaning solutions and techniques to prevent damage. For example, acidic cleaners should be avoided on certain types of bricks as they can cause discoloration or erosion. It is also essential to remove any dirt or debris from the surface before applying any cleaning products.
Regularly inspecting the bricks allows you to identify any cracks, chips, or loose mortar that may require repair. It is recommended to conduct these inspections at least once a year to catch any issues early on and prevent further damage.
By regularly maintaining and inspecting your bricks, you can ensure their longevity and keep them in optimal condition for years to come.
Moving on to inspecting for damage or wear…
Inspecting for Damage or Wear
First, check for any signs of damage or wear on the inside wall brick of your wood pellet stove. Inspecting for cracks is crucial as they can compromise the integrity of the brick and affect the stove’s performance. Carefully examine the surface, paying close attention to any hairline cracks or larger fractures.
Additionally, check for rust, especially around the edges or corners of the brick. Rust can indicate moisture damage and may require further investigation. If you notice any damage or rust, it is essential to address it promptly to prevent further deterioration.
Once you have thoroughly inspected the inside wall brick, you can proceed to reassembling it, ensuring a secure fit and proper alignment.
Reassembling the Inside Wall Brick
To ensure a secure fit and proper alignment, make sure you carefully position and connect the inside wall brick of your wood pellet stove. Reassembling the inside wall brick requires attention to detail and following specific techniques to ensure a successful installation.
Here are some helpful reassembling techniques and troubleshooting tips:
- Clean the inside of the stove thoroughly before reassembling to remove any debris or build-up.
- Check the condition of the gaskets and replace them if necessary to ensure a tight seal.
- Use high-temperature adhesive or cement to secure the inside wall brick in place.
By following these reassembling techniques and troubleshooting tips, you can ensure that your wood pellet stove functions efficiently and safely.
Now, let’s move on to the next section, where we will discuss replacing the burn pot.
Replacing the Burn Pot
Replacing the burn pot is a simple task that can be done by carefully disconnecting the old pot and installing the new one in its place.
Before replacing the burn pot, it’s important to troubleshoot any issues with it. If the burn pot is not igniting properly or is producing excessive smoke, it may need to be cleaned. A regular cleaning schedule for the burn pot is recommended to maintain optimal performance.
To replace the burn pot, first, ensure that the stove is cool and disconnected from the power source. Then, remove the access panel and locate the burn pot. Carefully disconnect any wires or connections attached to the burn pot.
Next, remove the old burn pot and install the new one in its place. Finally, reconnect any wires or connections and replace the access panel.
With the burn pot replaced, we can now move on to finishing up and testing the stove.
Finishing Up and Testing the Stove
Now that the burn pot has been replaced, it’s time to finish up by reconnecting any wires or connections and testing the stove for proper functioning. Before moving forward, it’s important to ensure everything is properly connected and secured. Start by referring to the manufacturer’s manual for specific instructions on wiring and connections. Once everything is reconnected, it’s time to test the stove for efficiency and troubleshoot any common issues. Here is a table that provides a step-by-step guide for testing the stove:
Step | Action |
---|---|
1 | Power on the stove and set the desired temperature. |
2 | Observe the ignition process. The stove should ignite quickly and smoothly. |
3 | Monitor the flame pattern. It should be consistent and stable. |
4 | Check the exhaust for any smoke or unusual odors. |
5 | Verify that the stove is maintaining the desired temperature. |
Frequently Asked Questions
Can I Clean the Inside Wall Brick of a Wood Pellet Stove Without Disassembling It?
I can’t clean the inside wall brick of a wood pellet stove without disassembling it. However, there may be alternative cleaning methods or professional cleaning services available to ensure a thorough and effective cleaning process.
How Often Should I Clean the Inside Wall Brick of My Wood Pellet Stove?
To properly clean the inside wall brick of a wood pellet stove, you’ll need a few tools. First, make sure the stove is cool. Then, use a vacuum or brush to remove any debris. Repeat this process as often as necessary for optimal performance.
Can I Use Regular Household Cleaners to Clean the Inside Wall Brick of My Wood Pellet Stove?
I wouldn’t recommend using regular household cleaners on wood pellet stove walls. Instead, opt for suitable alternatives like vinegar or mild soap mixed with water. Regular maintenance and avoiding excessive heat can prolong the lifespan of the bricks.
Are There Any Safety Precautions I Should Take When Cleaning the Inside Wall Brick of My Wood Pellet Stove?
When it comes to proper maintenance and cleaning of wood pellet stoves, it’s important to prioritize safety. Before removing the inside wall brick, ensure the stove is completely cooled down to avoid any potential accidents.
Is It Necessary to Replace the Burn Pot Every Time I Clean the Inside Wall Brick of My Wood Pellet Stove?
No, it is not necessary to replace the burn pot every time I clean the inside wall brick of my wood pellet stove. However, regular burn pot maintenance tips and alternative cleaning methods for wood pellet stoves are recommended.
Conclusion
In conclusion, cleaning the inside wall brick of a wood pellet stove is an important maintenance task that should be done regularly to ensure optimal performance.
By following the steps outlined in this article and using the necessary tools and materials, you can successfully remove, clean, and reassemble the inside wall brick.
One interesting statistic to note is that a clean inside wall brick can improve the efficiency of a wood pellet stove by up to 20%. This improvement results in significant cost savings and a more comfortable living environment.
Pellets & Pellet Stoves
How to Replace a Pellet Stove With Wood Stove

I know what you’re thinking – replacing a pellet stove with a wood stove sounds like a daunting task. But let me assure you, with the right tools and a bit of know-how, it can be a straightforward process.
In this article, I’ll walk you through each step, from assessing the requirements of both stoves to connecting the wood stove to the chimney or flue.
So, let’s dive in and learn how to make the switch and enjoy the warmth and charm of a wood-burning stove in your home.
Key Takeaways
- Assess the requirements and gather the necessary tools and materials for the installation.
- Prepare the space by measuring dimensions, clearing debris, ensuring proper ventilation, and addressing any obstructions or flammable materials.
- Disconnect and remove the pellet stove safely, taking precautions to avoid damage or injury.
- Prepare for the wood stove installation by clearing flammable materials, ensuring a sturdy floor, checking for combustible materials in walls or ceiling, and maintaining proper clearance.
Assessing the Pellet Stove and Wood Stove Requirements
To properly assess the requirements for both your pellet stove and wood stove, you’ll need to consider factors such as size, ventilation, and fuel availability. Evaluating costs and comparing heating efficiency are also crucial in making an informed decision.
First, measure the dimensions of your current pellet stove to determine the appropriate size for the wood stove. Take into account the clearance requirements and ensure that the space can accommodate the new stove.
Next, evaluate the ventilation system. Wood stoves require a chimney or flue to safely exhaust the smoke. Check if your existing setup meets the necessary specifications or if modifications are needed.
Lastly, consider fuel availability. Pellet stoves use wood pellets, while wood stoves require firewood. Determine which option is more readily accessible and cost-effective for you.
With these factors in mind, you can proceed to gather the necessary tools and materials for the installation process.
Gathering the Necessary Tools and Materials
Before starting the process of replacing a pellet stove with a wood stove, it’s crucial to gather all the necessary tools and materials.
The essential tools needed for this project include a screwdriver, pliers, tape measure, and a level.
Additionally, a required materials checklist should include items such as a wood stove, stove pipe, chimney cap, fireproof sealant, and stove cement.
Essential Tools Needed
The essential tools you’ll need for the job include a wrench, a screwdriver, and a level. These tools are crucial for the smooth and safe replacement of a pellet stove with a wood stove. Let’s compare these tools and their importance in the process.
Tool | Purpose | Safety Precautions |
---|---|---|
Wrench | Used to tighten and loosen bolts and nuts | Wear protective gloves to prevent injuries |
Screwdriver | Used to remove screws and fasteners | Ensure the screwdriver is the correct size and in good condition |
Level | Ensures the stove is properly aligned and balanced | Place the level on a flat surface for accurate readings |
Required Materials Checklist
Now that we’ve covered the essential tools, let’s take a look at the materials checklist you’ll need for this task.
When assessing pellet stove requirements, it is important to consider the size and heating capacity of the wood stove you choose as a replacement. First, you will need to measure the square footage of the area you wish to heat to determine the appropriate stove size.
Additionally, consider the type of wood stove that best suits your needs, such as a freestanding stove or an insert. You will also require a chimney liner, stovepipe, and a hearth pad or floor protection.
Don’t forget to gather everything necessary, including firebricks, fireproof caulk, and high-temperature paint, to ensure a successful installation without compromising safety.
Gathering Everything Necessary
Make sure you’ve got all the required items like firebricks, fireproof caulk, and high-temperature paint to successfully install your new stove. Before starting the installation process, it is crucial to assess the space where the pellet stove currently sits. Measure the dimensions of the area to ensure that your new wood stove will fit properly. Additionally, inspect the surroundings for any potential hazards or obstructions that may need to be addressed before proceeding.
To prepare for the installation, it is important to remove any debris or objects that may hinder the process. Clear the area around the pellet stove, ensuring there are no loose items or flammable materials nearby. Thoroughly clean the space, removing dust, dirt, and any accumulated debris. This will help create a safe and clean environment for the installation of your new wood stove.
Proceeding to the next section, disconnecting and removing the pellet stove requires careful attention to detail and following proper procedures.
Disconnecting and Removing the Pellet Stove
First, I’ll discuss the process of disconnecting the electrical and ventilation systems when removing a pellet stove. This involves turning off the power supply and disconnecting any electrical connections. It’s also important to properly seal off the ventilation pipes.
Next, I’ll explain the importance of safely removing the pellet stove without causing any damage or injury. This includes carefully disconnecting the stove from the flue and removing any remaining pellets or debris from the stove and surrounding area.
Disconnecting Electrical and Ventilation
Before you begin, make sure to turn off the electricity and disconnect the ventilation system.
To safely disconnect the electrical connections, start by locating the circuit breaker for the pellet stove and switch it off. This will prevent any accidental electrical shocks during the removal process.
Next, carefully disconnect the power supply cord from the outlet. Ensure that the cord is not tangled or obstructed by any objects.
Moving on to the ventilation system, you will need to remove the ventilation ducts that are connected to the pellet stove. Use a screwdriver or a wrench to loosen the screws or bolts securing the ducts in place. Gently pull the ducts away from the stove while being cautious not to damage them.
Now that the electrical connections are disabled and the ventilation ducts are removed, you can proceed to the next section on removing the pellet stove safely.
Removing Pellet Stove Safely
Once the electrical connections and ventilation ducts are taken care of, you can safely proceed with the removal of the pellet stove. Before beginning the removal process, it is important to take certain precautions to ensure your safety. Here are some key steps to safely remove a pellet stove:
Precautions During Removal |
---|
Turn off the power supply to the stove |
Wear protective gloves and goggles |
Disconnect the stove from the venting system |
Empty the pellet hopper and remove any remaining pellets |
Remove the front panel and disconnect the electrical connections |
Preparing for Wood Stove
To ensure a smooth installation, it’s important to assess the space and make sure there is proper ventilation for the new stove. When preparing the space for a wood stove installation, there are several safety precautions to keep in mind.
Firstly, clear the area surrounding the installation site of any flammable materials, such as curtains or furniture. Next, ensure that the floor is sturdy and can support the weight of the wood stove. Additionally, check for any combustible materials in the walls or ceiling that may need to be addressed prior to installation.
Lastly, make sure there is adequate clearance between the wood stove and any nearby walls or furniture to prevent overheating and potential fire hazards. By taking these necessary precautions, you can create a safe and functional environment for your wood stove installation.
In the next section, we will discuss the steps to physically prepare the space for the wood stove installation.
Preparing the Space for the Wood Stove Installation
You’ll need to clear out any furniture or other items from the area where the wood stove will be installed. This is important to ensure proper ventilation and clearance for the stove.
When choosing the right location for the wood stove, consider factors such as proximity to combustible materials, accessibility for maintenance, and the layout of your home. It is recommended to place the stove in a central location to maximize heat distribution.
Once the area is cleared, measure the dimensions of the stove and mark the location on the floor. Ensure that there is enough space around the stove for proper ventilation and clearance as per the manufacturer’s recommendations.
With the space prepared, it’s time to move on to the installation of the wood stove and venting system, ensuring a safe and efficient heating solution for your home.
Installing the Wood Stove and Venting System
After clearing the area and marking the dimensions for installation, it’s time to begin installing the wood stove and venting system. Here are some important steps to follow:
- Ensure that the stove is positioned correctly, allowing for proper clearance from combustible materials.
- Assemble the venting components, including the stovepipe, thimble, and chimney cap.
- Connect the stovepipe to the flue collar on the wood stove, ensuring a secure fit.
When installing the wood stove, it’s important to troubleshoot common issues that may arise. These can include improper clearance, insufficient draft, or leaks in the venting system. By addressing these issues promptly, you can ensure the safe and efficient operation of your wood stove.
Now that the wood stove and venting system are in place, we can move on to connecting the wood stove to the chimney or flue.
Connecting the Wood Stove to the Chimney or Flue
Once the venting components are securely assembled, it’s time to connect the stovepipe to the chimney or flue for proper ventilation. When connecting the wood stove to the existing chimney, it is crucial to select the right size flue for the wood stove. This ensures efficient and safe operation. The size of the flue should match the size of the wood stove’s flue collar. If the flue is too small, it can lead to poor draft and increased risk of smoke backflow. On the other hand, if the flue is too large, it can result in decreased efficiency and potential overheating. To help you select the right size flue, refer to the table below:
Wood Stove Size (BTU) | Flue Size (inches) |
---|---|
Up to 25,000 | 6 |
25,000 – 60,000 | 8 |
60,000 – 100,000 | 10 |
Over 100,000 | 12 |
Testing and Fine-tuning the Wood Stove for Optimal Performance
To ensure optimal performance, it’s important to test and fine-tune the wood stove. Testing methods play a crucial role in identifying any issues or inefficiencies that may affect the stove’s functionality.
One common testing method is the smoke test. This involves igniting a small fire in the stove and observing the smoke that is emitted. Ideally, the smoke should be minimal and clear. If there is excessive smoke or a strong odor, it may indicate a problem with the stove’s ventilation or combustion.
Another important aspect of testing is checking the stove’s temperature distribution. This can be done using a surface thermometer to measure the heat output in various areas of the stove.
Troubleshooting tips include adjusting the air vents, ensuring proper fuel supply, and cleaning the stove regularly to prevent buildup and improve overall efficiency.
Frequently Asked Questions
How Much Does It Cost to Replace a Pellet Stove With a Wood Stove?
Replacing a pellet stove with a wood stove can vary in cost depending on the specific installation requirements. Factors such as the type of wood stove, labor fees, and any necessary modifications to the existing setup can influence the overall cost.
Can I Use the Existing Chimney for the Wood Stove Installation?
Yes, you can use the existing chimney for the wood stove installation. It is important to properly install the wood stove with the existing chimney to ensure safety and efficiency.
Are There Any Specific Building Codes or Regulations I Need to Follow When Replacing a Pellet Stove With a Wood Stove?
When replacing a pellet stove with a wood stove, it is crucial to follow building codes and regulations. Familiarize yourself with local codes to ensure proper installation. Consider the pros and cons of switching fuels for optimal heat efficiency.
What Are the Advantages of Using a Wood Stove Over a Pellet Stove?
Using a wood stove instead of a pellet stove has advantages like increased heat output and the ability to burn different types of wood. It provides a more versatile and efficient heating option.
Do I Need to Hire a Professional to Replace a Pellet Stove With a Wood Stove, or Can I Do It Myself?
I can replace a pellet stove with a wood stove, but it is recommended to hire a professional. Steps to replace: disconnect power, remove pellet stove, install wood stove, connect power.
Conclusion
In conclusion, replacing a pellet stove with a wood stove requires careful assessment, proper tools and materials, and step-by-step installation.
While some may argue that the process is complicated and time-consuming, the benefits of a wood stove, such as increased heat output and a traditional ambiance, far outweigh any initial challenges.
By following the outlined steps and seeking professional assistance if needed, homeowners can successfully make the switch and enjoy the warmth and comfort of a wood stove in their homes.
Pellets & Pellet Stoves
How to Put Out a Silo Wood Pellet Fire

As a fire safety expert, I’ve seen firsthand the devastation that a silo wood pellet fire can cause. It’s a situation that requires immediate action and a clear plan of attack.
In this article, I’ll guide you step-by-step on how to put out a silo wood pellet fire, ensuring the safety of yourself and those around you.
From assessing the fire to controlling the air supply, using fire extinguishers to calling for emergency assistance, we’ll cover it all.
Don’t panic – I’ve got you covered.
Key Takeaways
- Regularly inspect the silo and surrounding areas for fire hazards and maintain equipment to prevent fires.
- Install fire detection systems like smoke alarms and heat sensors to quickly assess and understand the fire situation.
- Manage air vents and ventilation properly to control airflow and prevent fire risks.
- Choose the right type and size of fire extinguisher, aim at the base of the flames, and sweep from side to side to effectively put out a silo wood pellet fire.
Safety Precautions
Before attempting to put out the silo wood pellet fire, it’s important to take necessary safety precautions.
Fire prevention is key to avoid accidents and ensure the safety of everyone involved. Regularly inspect the silo and surrounding areas for any potential fire hazards, such as flammable materials or electrical issues. Install fire detection systems, like smoke alarms and heat sensors, to quickly identify any signs of fire. Additionally, keep firefighting equipment accessible and regularly maintained. This includes fire extinguishers, fire blankets, and water hoses.
By having these safety measures in place, you can minimize the risk of a fire getting out of control.
Now, let’s move on to assessing the fire and determining the best course of action.
Assessing the Fire
When assessing a fire, it’s important to quickly determine the extent of the danger. Evaluating the damage and identifying the causes are crucial steps in understanding the situation and taking appropriate action. To help you assess the fire effectively, I have prepared a table below that outlines key factors to consider:
Factors to Consider | Importance | Examples |
---|---|---|
Size of the fire | High | Small flames vs. large inferno |
Smoke production | High | Thick, black smoke vs. light, white smoke |
Heat intensity | High | Intense heat vs. moderate heat |
Structural integrity | High | Collapsed walls vs. intact structure |
Controlling the Air Supply
When it comes to controlling the air supply in a silo wood pellet fire, two key points to consider are air vents and temperature regulation.
Proper airflow is essential for maintaining safety in these situations. In this discussion, we will explore the importance of managing air vents and temperature to ensure the right airflow and prevent any potential hazards.
Air Vents and Temperature
To control the temperature, you’ll need to adjust the air vents on the silo wood pellet fire. Proper air vent maintenance is essential for effective temperature regulation. By manipulating the air vents, you can increase or decrease the airflow, which directly impacts the fire’s intensity and heat output. Here is a table outlining the different air vent settings and their corresponding effects on temperature:
Air Vent Setting | Temperature |
---|---|
Fully Open | High |
Partially Open | Medium |
Closed | Low |
Proper Airflow for Safety
Make sure you regularly clean and clear the air vents to maintain proper airflow for safety. Proper ventilation is crucial in ensuring that any potential fire is contained and suppressed effectively.
When air vents are clogged or obstructed, it can hinder the flow of air, which may lead to poor combustion and an increased risk of fire. By regularly cleaning and clearing the air vents, you ensure that there is adequate airflow, allowing for optimal combustion and reducing the chances of a fire occurring.
However, even with proper ventilation, accidents can still happen. In such cases, it is essential to know how to use fire extinguishers effectively to quickly and efficiently suppress the fire before it spreads and causes further damage.
Using Fire Extinguishers
When it comes to using fire extinguishers, proper selection is crucial. You need to choose the right type of extinguisher for the specific type of fire you are dealing with.
Additionally, it is important to know how to apply the extinguisher effectively to maximize its effectiveness in suppressing the fire.
Proper Extinguisher Selection
Using the wrong extinguisher can be dangerous, so it’s important to choose the proper one for a silo wood pellet fire. When it comes to fire prevention and suppression, selecting the right extinguisher is crucial. Here are three key factors to consider:
-
Class A: Look for an extinguisher specifically designed for Class A fires, which involve ordinary combustible materials like wood pellets.
-
Size: Ensure the extinguisher is large enough to handle the size of the fire. A small extinguisher may not be effective in fully extinguishing a silo fire.
-
Reach: Opt for an extinguisher with a long reach or an extended hose, as silos can be tall and difficult to access.
By carefully considering these factors, you can choose an extinguisher that is suitable for combating a silo wood pellet fire.
Now, let’s discuss how to apply the extinguisher effectively to extinguish the fire.
Applying Extinguisher Effectively
To effectively apply the extinguisher, remember to aim at the base of the flames and sweep from side to side. This technique ensures that the fire’s fuel source is targeted and extinguished. When dealing with a silo wood pellet fire, it is crucial to understand the importance of proper application. Here is a table outlining the steps for applying an extinguisher effectively:
Step | Action |
---|---|
1 | Aim at the base of the flames |
2 | Sweep from side to side |
3 | Maintain a safe distance |
4 | Monitor the fire for re-ignition |
5 | Ensure proper ventilation of exhaust systems |
Calling for Emergency Assistance
If you can’t control the wood pellet fire in the silo, you should immediately call for emergency assistance. Don’t hesitate to contact your local fire department for their professional expertise in handling such situations. They are trained to respond to emergency calls and have the necessary equipment to extinguish fires effectively.
When contacting the fire department, provide them with detailed information about the fire, such as the location, size, and any potential hazards. Stay on the line until they advise you on what to do next. Remember, the safety of yourself and others is of utmost importance, so it’s crucial to rely on the expertise of emergency responders in these situations.
Now, let’s discuss some preventive measures to avoid future fires in the silo.
Preventing Future Fires
One way to prevent future fires in the silo is by regularly inspecting and maintaining the equipment. Fire prevention is crucial in ensuring the safety and efficiency of the silo.
Regular maintenance procedures should be followed to identify any potential hazards or issues that could lead to a fire. This includes checking for any signs of wear and tear on the equipment, such as frayed wires or malfunctioning sensors.
It is also important to clean the silo regularly to remove any dust or debris that could ignite and cause a fire.
Frequently Asked Questions
What Are the Common Causes of Silo Wood Pellet Fires?
Common causes of silo wood pellet fires include poor maintenance, improper storage, and electrical malfunctions. To prevent these fires, regular inspections, proper ventilation, and following manufacturer guidelines for installation and usage are essential.
Can the Fire Spread to Other Parts of the Property?
The fire can spread to other parts of the property if not properly contained. It is crucial to have an emergency response plan in place to quickly and effectively address the situation.
Is It Safe to Attempt to Put Out the Fire Without Professional Help?
It’s important to consider the dangers of DIY fire extinguishing. Attempting to put out a silo wood pellet fire alone can be risky. Seek professional help to ensure your safety and the safety of your property.
How Long Does It Typically Take to Extinguish a Silo Wood Pellet Fire?
To effectively extinguish a silo wood pellet fire, you’ll need the right tools and equipment. It’s important to act quickly and follow proper safety protocols. The time it takes to put out the fire can vary depending on the size and severity.
Are There Any Specific Maintenance Practices That Can Help Prevent Silo Wood Pellet Fires in the Future?
Maintenance practices are crucial for fire prevention in silo wood pellet storage. Regular inspections, cleaning, and ensuring proper ventilation are key. Additionally, implementing temperature monitoring systems and following safety guidelines can help prevent future fires.
Conclusion
In conclusion, putting out a silo wood pellet fire requires careful assessment and control of the air supply. It is important to use fire extinguishers and, if necessary, call for emergency assistance. By following these safety precautions and taking immediate action, you can prevent further damage and ensure the safety of yourself and others.
Remember, just like a firefighter rushing into a burning building, it is important to act swiftly and decisively when faced with a fire. Stay vigilant and be prepared to tackle any fire that may arise in the future.
-
Pellets & Pellet Stoves4 months ago
How to Make a Pellet Basket for Wood Burning Stoves
-
Wood Stove3 months ago
When To Open And Close Damper On Wood Stove
-
Pellets & Pellet Stoves3 months ago
Why Is My Wood Pellet Stove Putting so Much Soot
-
Wood Stove3 months ago
Where To Install Damper On Wood Stove
-
Wood Stove2 months ago
How Does A Circulator Wood Stove Work
-
Pellets & Pellet Stoves4 months ago
How to Convert Wood Stove to Pellet Stove
-
BestSmallWoodStoves.com Selected3 months ago
Choosing the Best Wood Pellets: Reviews for 2023
-
Wood Stove3 months ago
What Works To Clean Creosote Off Of Wood Stove Glass