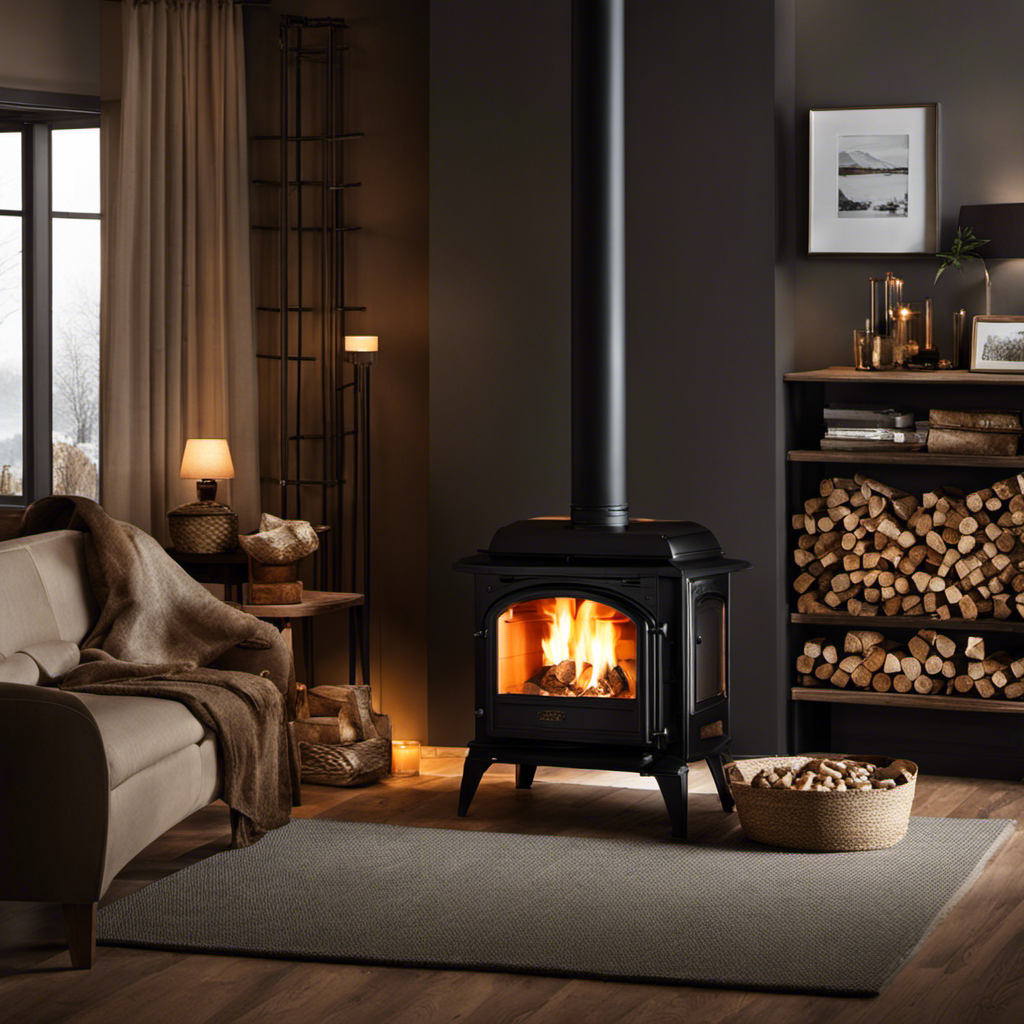
Pellets & Pellet Stoves
How to Turn on a Wood Pellet Stove

Like the flick of a match igniting a bonfire, turning on a wood pellet stove is a transformative experience. As an avid enthusiast, I’ll guide you through the steps to master this art.
With a deep understanding of the basics, proper preparation, and a little patience, you’ll soon be basking in the cozy warmth of your wood pellet stove.
So, let’s dive in and uncover the secrets to effortlessly starting and enjoying the comforting embrace of this remarkable appliance.
Key Takeaways
- Regular maintenance is crucial for proper stove functioning
- Thoroughly clean the stove before turning it on
- Properly store wood pellets in a dry area
- Gather necessary tools for igniting the fire
Understanding the Basics
Before you can turn on a wood pellet stove, it’s important to understand the basics. Understanding maintenance and troubleshooting common issues will ensure that your stove functions properly and efficiently.
Regular maintenance, such as cleaning and inspecting the stove, is crucial to prevent any potential problems. This includes removing ash buildup, checking the hopper for pellets, and ensuring proper ventilation.
Troubleshooting common issues, like a failure to ignite or a weak flame, can often be resolved by checking the fuel supply, cleaning the burn pot, or adjusting the air intake.
By familiarizing yourself with these maintenance tasks and troubleshooting techniques, you’ll be better equipped to address any issues that may arise when turning on your wood pellet stove.
Now, let’s move on to preparing the stove for operation.
Preparing the Stove
To start the process, gather all the necessary materials for getting the wood pellet stove ready.
Before turning on the stove, it is important to clean it thoroughly. Remove any ash or debris from the burn pot and the ash pan. Use a brush or vacuum cleaner to clean the exhaust vents and the glass door.
Next, check for any common issues that may prevent the stove from functioning properly. Ensure that the power cord is securely plugged in and that the circuit breaker is not tripped. If the stove still does not turn on, check the fuel supply and make sure the hopper is properly filled with wood pellets.
With the stove clean and any issues resolved, it’s time to load the wood pellets, providing a steady supply of fuel for the stove to burn.
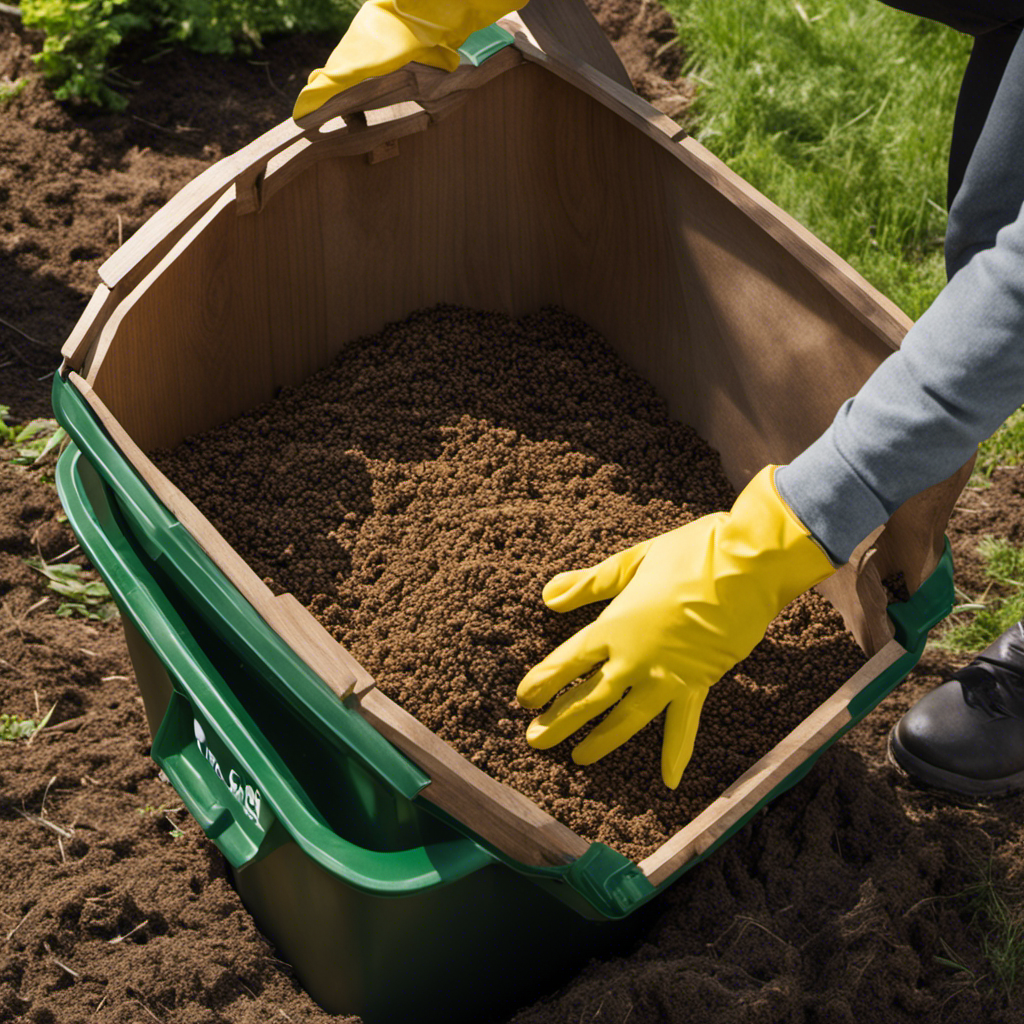
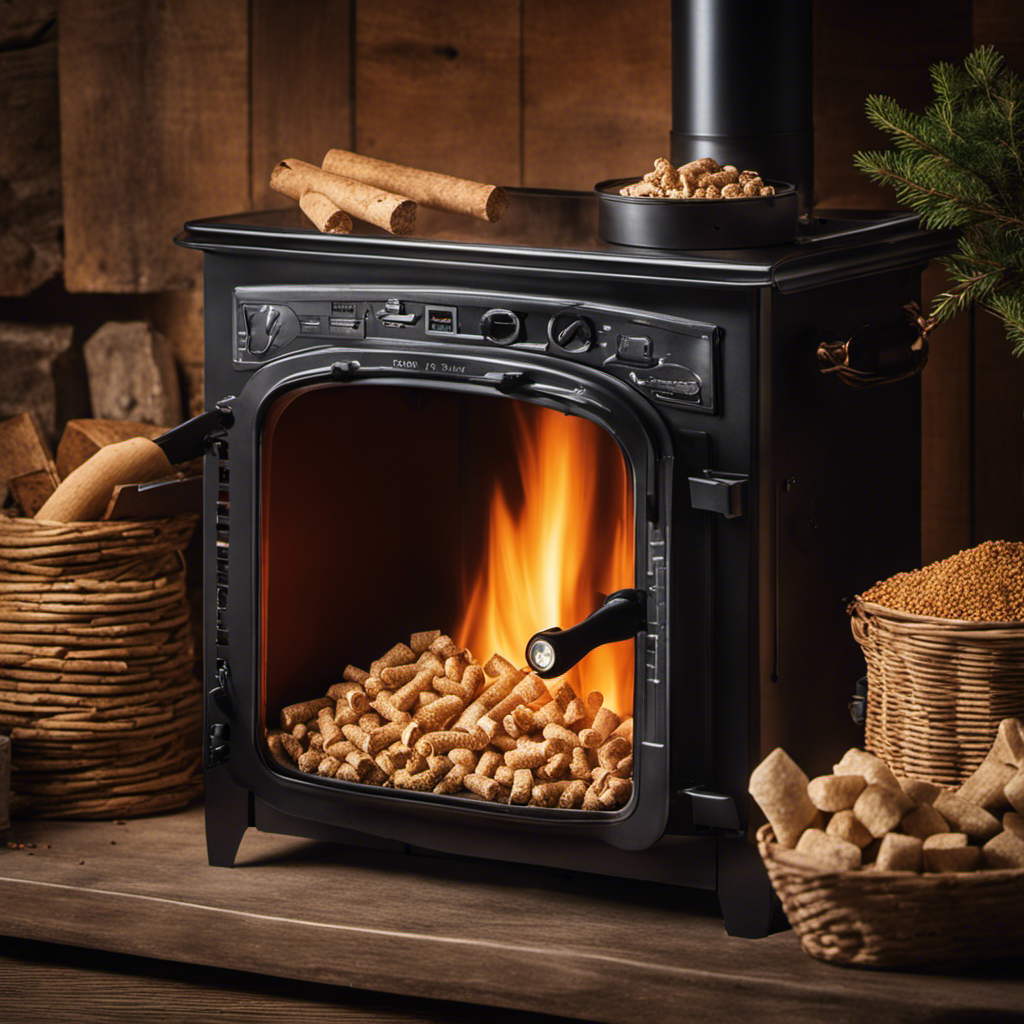
Loading the Wood Pellets
Once the necessary materials have been gathered, it’s important to properly load the fuel supply. One common fuel source for wood pellet stoves is wood pellets, which are small, cylindrical pieces of compressed wood. Before loading the pellets into the stove, it is crucial to ensure proper wood pellet storage. Keep the pellets in a dry, well-ventilated area, away from moisture and direct sunlight. Now, let’s move on to loading the pellets into the stove. Here is a table that illustrates the proper loading process and some troubleshooting tips for common issues:
Step | Loading Process | Troubleshooting Tips |
---|---|---|
1 | Open the hopper | Check for any blockages or debris in the hopper |
2 | Pour the pellets into the hopper | Ensure that the pellets are dry and free of dust |
3 | Close the hopper | Make sure it is securely closed to prevent pellet spillage |
4 | Check the pellet feed system | Ensure that the feed system is working properly and delivering pellets into the combustion chamber |
With the wood pellets properly loaded, we can now transition into the subsequent section about igniting the stove.
Igniting the Stove
First, you’ll need to gather the necessary tools for igniting the fire in your wood pellet stove. You’ll need a long fireplace match or a fireplace lighter, as well as some newspaper or fire starters to help get the fire going. To start, open the stove door and remove the ash pan, ensuring it is empty.
Next, crumple up a few sheets of newspaper or place a couple of fire starters in the firebox. Now, carefully light the paper or fire starters using the match or lighter, making sure to keep your face and hands away from the flame. Once the fire is going, close the stove door and adjust the temperature and airflow settings to your desired level.
Troubleshooting tip: If the fire doesn’t ignite, make sure the pellets are dry and the stove is clean and free from any blockages.
Now, let’s move on to adjusting the temperature and airflow to ensure efficient and effective heating.
Adjusting the Temperature and Airflow
Now, you’ll want to make sure the temperature and airflow settings are adjusted properly for efficient and effective heating.
To start, it’s important to keep your wood pellet stove clean. Regularly cleaning the stove will ensure optimal performance and prevent any potential issues.
Begin by removing the ashes and debris from the firebox. Use a brush or vacuum to clean the stove’s interior and remove any buildup.
Additionally, inspect the exhaust vent and flue pipe for any blockages or obstructions.
Now, let’s move on to troubleshooting common issues. If you’re experiencing poor heat output, check the temperature settings and ensure they are set correctly.
If the stove isn’t igniting, check the airflow settings and make sure they are open enough for sufficient oxygen supply.
Frequently Asked Questions
How Often Should I Clean the Ash From My Wood Pellet Stove?
I clean the ash from my wood pellet stove about once a week to ensure proper airflow and efficiency. Regular wood chips or sawdust should not be used as they can damage the stove and affect its performance.
Can I Use Regular Wood Chips or Sawdust Instead of Wood Pellets in a Pellet Stove?
Using wood chips or sawdust in a pellet stove can be risky. While it may seem like a convenient alternative, it can cause clogs and damage to the stove. Stick to wood pellets for optimal performance and efficiency.
Is It Safe to Leave My Wood Pellet Stove Unattended While It’s Running?
It is not safe to leave a wood pellet stove unattended while it’s running. Safety precautions should always be taken when operating any type of heating device. However, there are many benefits to using a wood pellet stove, such as energy efficiency and cost savings.
Can I Install a Wood Pellet Stove in a Mobile Home or Rv?
Installing a wood pellet stove in a tiny home or RV has several advantages. It provides efficient heating, reduces reliance on electricity, and can be a cost-effective and eco-friendly option.
Can I Use My Wood Pellet Stove as the Primary Source of Heat for My Entire Home?
Sure, using a wood pellet stove as the primary source of heat for your entire home is possible. However, it requires regular wood pellet stove maintenance and offers benefits like energy efficiency and cost savings.
Conclusion
In conclusion, turning on a wood pellet stove is a simple yet fascinating process. By understanding the basics, preparing the stove, loading the wood pellets, and igniting the stove, you can create a warm and cozy atmosphere in your home.
Don’t forget to adjust the temperature and airflow to achieve the perfect balance. So, are you ready to experience the magic of a wood pellet stove?
Get ready to be amazed by the warmth and comfort it brings into your life.
Growing up surrounded by the vast beauty of nature, Sierra was always drawn to the call of the wild. While others sought the comfort of the familiar, she ventured out, embracing the unpredictable and finding stories in the heartbeat of nature.
At the epicenter of every remarkable venture lies a dynamic team—a fusion of diverse talents, visions, and passions. The essence of Best Small Wood Stoves is crafted and refined by such a trio: Sierra, Logan, and Terra. Their collective expertise has transformed the platform into a leading authority on small wood stoves, radiating warmth and knowledge in equal measure.
Pellets & Pellet Stoves
How to Remove the Inside Wall Brick Like of Wood Pellet Stove to Clean

I’ve got a fascinating statistic for you: did you know that cleaning the inside wall brick of a wood pellet stove can increase its efficiency by up to 20%?
In this article, I’ll be sharing step-by-step instructions on how to remove the inside wall brick of your wood pellet stove for a thorough cleaning. With just a few tools and some elbow grease, you’ll be able to keep your stove running smoothly and effectively.
Let’s get started!
Key Takeaways
- Turn off and cool down the stove before starting the cleaning process.
- Use the appropriate tools and materials, and follow safety precautions throughout the cleaning.
- Thoroughly clean the burn pot by disconnecting it from electrical connections and removing it from the combustion chamber.
- When cleaning the inside wall brick, remove screws or clips holding the brick, choose the right cleaning method, and inspect for cracks or damage before sealing the bricks to prevent moisture penetration.
Tools and Materials Needed
To remove the inside wall brick, you’ll need a few tools and materials. The tools required include a flathead screwdriver, a hammer, a chisel, and a vacuum cleaner with a brush attachment.
As for the materials, you’ll need a drop cloth or tarp to protect the surrounding area from debris and dust. Cleaning techniques are also essential for this process.
Start by disconnecting the stove from the power source and removing any loose debris from the inside. Then, use the flathead screwdriver to gently pry the bricks loose. If they are stubborn, tap the screwdriver with the hammer to loosen them further.
Once the bricks are removed, vacuum the area to remove any remaining dust or debris. With the bricks removed, you can now proceed to prepare the stove for cleaning, ensuring optimal performance and longevity.
Preparing the Stove for Cleaning
Before starting, make sure you have all the necessary tools for preparing your stove for cleaning. Cleaning your wood pellet stove is an important maintenance task that ensures its optimal performance.
To begin, ensure that the stove is turned off and has completely cooled down. This will prevent any accidental burns or injuries.
Next, gather a vacuum cleaner with a brush attachment, a soft cloth or sponge, a stove cleaner specifically designed for wood pellet stoves, and a pair of gloves to protect your hands. It is essential to follow safety precautions during the cleaning process to avoid any mishaps.
The next section will guide you through the process of removing the burn pot, an important step in cleaning your wood pellet stove.
Removing the Burn Pot
When it comes to removing the burn pot from your wood pellet stove, there are a few techniques that can make the process easier.
One method is to simply lift the burn pot out of the stove, while another involves using a screwdriver or wrench to unscrew any bolts or fasteners holding the pot in place.
Once the pot is removed, it’s important to clean it thoroughly to ensure optimal performance and efficiency of your stove.
Burn Pot Removal Techniques
First, make sure you’ve turned off and unplugged the wood pellet stove before attempting to remove the burn pot. Burn pot maintenance is crucial for the proper functioning of your wood pellet stove.
Troubleshooting common issues often requires removing and inspecting the burn pot. To remove the burn pot, locate the access panel on the stove’s exterior. Open the panel and carefully disconnect the burn pot from its electrical connections.
Next, detach the burn pot from the stove’s combustion chamber by unscrewing the retaining bolts. Gently lift the burn pot out of the stove, being cautious not to spill any residual pellets.
With the burn pot removed, you can now proceed to clean it thoroughly, ensuring optimal performance and longevity of your wood pellet stove.
Cleaning the Burn Pot
Once you’ve disconnected the burn pot, it’s important to carefully inspect and remove any debris or ash. Burn pot maintenance is crucial for the proper functioning of your wood pellet stove. Troubleshooting burn pot issues often starts with a thorough cleaning.
Begin by using a small brush or vacuum to remove loose debris from the burn pot. Be sure to pay attention to the corners and crevices where ash can accumulate. Next, use a damp cloth to wipe down the inside walls of the burn pot, removing any stubborn residue. This will help prevent clogs and ensure optimal combustion.
Now, let’s move on to disassembling the inside wall brick, which is an essential step in maintaining your wood pellet stove’s efficiency.
Disassembling the Inside Wall Brick
To remove the inside wall brick, follow these steps:
- Turn off the wood pellet stove and allow it to cool down completely.
- Put on protective gloves and goggles before starting the disassembly process.
- Locate the screws or clips that hold the brick in place.
- Use a screwdriver or pliers to carefully remove the screws or clips, taking care not to damage the surrounding components.
- Once the screws or clips are removed, gently pry the brick away from the stove, starting at one corner and working your way around.
- Take your time during this process to avoid causing any further damage.
- Once the brick is detached, set it aside for cleaning.
Now, let’s move on to the cleaning process:
- Remove any debris or soot from the inside wall brick to ensure optimal performance and efficiency.
Cleaning the Inside Wall Brick
When it comes to cleaning techniques for bricks, there are a few key points to keep in mind.
First, it’s important to choose the right cleaning method based on the type of brick and the level of dirt or stains.
Second, using a mixture of water and a mild detergent can help remove surface dirt and grime.
Lastly, regular maintenance tips for bricks include inspecting for cracks or damage, sealing the bricks to prevent moisture penetration, and avoiding harsh chemicals that can cause discoloration or erosion.
Cleaning Techniques for Bricks
If you’re looking to clean the bricks inside your wood pellet stove, start by gathering the necessary supplies. You’ll need a stiff-bristle brush, a vacuum cleaner with a brush attachment, warm water, mild detergent, and a sponge or cloth.
Begin by using the brush to scrub off any loose soot and debris from the bricks. Then, use the vacuum cleaner to remove the loosened particles.
Next, mix some warm water with a small amount of mild detergent and dampen the sponge or cloth with the solution. Gently scrub the bricks using circular motions, focusing on areas with stubborn soot stains. Rinse the bricks with clean water and pat them dry with a towel.
Now that your bricks are clean, let’s move on to maintenance tips for keeping them in great condition.
Maintenance Tips for Bricks
After cleaning, it’s important to regularly inspect the bricks for any signs of damage or wear. Proper maintenance is crucial to ensure the longevity and structural integrity of your bricks.
One key aspect of brick maintenance is to choose the right cleaning methods. Different types of bricks may require specific cleaning solutions and techniques to prevent damage. For example, acidic cleaners should be avoided on certain types of bricks as they can cause discoloration or erosion. It is also essential to remove any dirt or debris from the surface before applying any cleaning products.
Regularly inspecting the bricks allows you to identify any cracks, chips, or loose mortar that may require repair. It is recommended to conduct these inspections at least once a year to catch any issues early on and prevent further damage.
By regularly maintaining and inspecting your bricks, you can ensure their longevity and keep them in optimal condition for years to come.
Moving on to inspecting for damage or wear…
Inspecting for Damage or Wear
First, check for any signs of damage or wear on the inside wall brick of your wood pellet stove. Inspecting for cracks is crucial as they can compromise the integrity of the brick and affect the stove’s performance. Carefully examine the surface, paying close attention to any hairline cracks or larger fractures.
Additionally, check for rust, especially around the edges or corners of the brick. Rust can indicate moisture damage and may require further investigation. If you notice any damage or rust, it is essential to address it promptly to prevent further deterioration.
Once you have thoroughly inspected the inside wall brick, you can proceed to reassembling it, ensuring a secure fit and proper alignment.
Reassembling the Inside Wall Brick
To ensure a secure fit and proper alignment, make sure you carefully position and connect the inside wall brick of your wood pellet stove. Reassembling the inside wall brick requires attention to detail and following specific techniques to ensure a successful installation.
Here are some helpful reassembling techniques and troubleshooting tips:
- Clean the inside of the stove thoroughly before reassembling to remove any debris or build-up.
- Check the condition of the gaskets and replace them if necessary to ensure a tight seal.
- Use high-temperature adhesive or cement to secure the inside wall brick in place.
By following these reassembling techniques and troubleshooting tips, you can ensure that your wood pellet stove functions efficiently and safely.
Now, let’s move on to the next section, where we will discuss replacing the burn pot.
Replacing the Burn Pot
Replacing the burn pot is a simple task that can be done by carefully disconnecting the old pot and installing the new one in its place.
Before replacing the burn pot, it’s important to troubleshoot any issues with it. If the burn pot is not igniting properly or is producing excessive smoke, it may need to be cleaned. A regular cleaning schedule for the burn pot is recommended to maintain optimal performance.
To replace the burn pot, first, ensure that the stove is cool and disconnected from the power source. Then, remove the access panel and locate the burn pot. Carefully disconnect any wires or connections attached to the burn pot.
Next, remove the old burn pot and install the new one in its place. Finally, reconnect any wires or connections and replace the access panel.
With the burn pot replaced, we can now move on to finishing up and testing the stove.
Finishing Up and Testing the Stove
Now that the burn pot has been replaced, it’s time to finish up by reconnecting any wires or connections and testing the stove for proper functioning. Before moving forward, it’s important to ensure everything is properly connected and secured. Start by referring to the manufacturer’s manual for specific instructions on wiring and connections. Once everything is reconnected, it’s time to test the stove for efficiency and troubleshoot any common issues. Here is a table that provides a step-by-step guide for testing the stove:
Step | Action |
---|---|
1 | Power on the stove and set the desired temperature. |
2 | Observe the ignition process. The stove should ignite quickly and smoothly. |
3 | Monitor the flame pattern. It should be consistent and stable. |
4 | Check the exhaust for any smoke or unusual odors. |
5 | Verify that the stove is maintaining the desired temperature. |
Frequently Asked Questions
Can I Clean the Inside Wall Brick of a Wood Pellet Stove Without Disassembling It?
I can’t clean the inside wall brick of a wood pellet stove without disassembling it. However, there may be alternative cleaning methods or professional cleaning services available to ensure a thorough and effective cleaning process.
How Often Should I Clean the Inside Wall Brick of My Wood Pellet Stove?
To properly clean the inside wall brick of a wood pellet stove, you’ll need a few tools. First, make sure the stove is cool. Then, use a vacuum or brush to remove any debris. Repeat this process as often as necessary for optimal performance.
Can I Use Regular Household Cleaners to Clean the Inside Wall Brick of My Wood Pellet Stove?
I wouldn’t recommend using regular household cleaners on wood pellet stove walls. Instead, opt for suitable alternatives like vinegar or mild soap mixed with water. Regular maintenance and avoiding excessive heat can prolong the lifespan of the bricks.
Are There Any Safety Precautions I Should Take When Cleaning the Inside Wall Brick of My Wood Pellet Stove?
When it comes to proper maintenance and cleaning of wood pellet stoves, it’s important to prioritize safety. Before removing the inside wall brick, ensure the stove is completely cooled down to avoid any potential accidents.
Is It Necessary to Replace the Burn Pot Every Time I Clean the Inside Wall Brick of My Wood Pellet Stove?
No, it is not necessary to replace the burn pot every time I clean the inside wall brick of my wood pellet stove. However, regular burn pot maintenance tips and alternative cleaning methods for wood pellet stoves are recommended.
Conclusion
In conclusion, cleaning the inside wall brick of a wood pellet stove is an important maintenance task that should be done regularly to ensure optimal performance.
By following the steps outlined in this article and using the necessary tools and materials, you can successfully remove, clean, and reassemble the inside wall brick.
One interesting statistic to note is that a clean inside wall brick can improve the efficiency of a wood pellet stove by up to 20%. This improvement results in significant cost savings and a more comfortable living environment.
Pellets & Pellet Stoves
How to Replace a Pellet Stove With Wood Stove

I know what you’re thinking – replacing a pellet stove with a wood stove sounds like a daunting task. But let me assure you, with the right tools and a bit of know-how, it can be a straightforward process.
In this article, I’ll walk you through each step, from assessing the requirements of both stoves to connecting the wood stove to the chimney or flue.
So, let’s dive in and learn how to make the switch and enjoy the warmth and charm of a wood-burning stove in your home.
Key Takeaways
- Assess the requirements and gather the necessary tools and materials for the installation.
- Prepare the space by measuring dimensions, clearing debris, ensuring proper ventilation, and addressing any obstructions or flammable materials.
- Disconnect and remove the pellet stove safely, taking precautions to avoid damage or injury.
- Prepare for the wood stove installation by clearing flammable materials, ensuring a sturdy floor, checking for combustible materials in walls or ceiling, and maintaining proper clearance.
Assessing the Pellet Stove and Wood Stove Requirements
To properly assess the requirements for both your pellet stove and wood stove, you’ll need to consider factors such as size, ventilation, and fuel availability. Evaluating costs and comparing heating efficiency are also crucial in making an informed decision.
First, measure the dimensions of your current pellet stove to determine the appropriate size for the wood stove. Take into account the clearance requirements and ensure that the space can accommodate the new stove.
Next, evaluate the ventilation system. Wood stoves require a chimney or flue to safely exhaust the smoke. Check if your existing setup meets the necessary specifications or if modifications are needed.
Lastly, consider fuel availability. Pellet stoves use wood pellets, while wood stoves require firewood. Determine which option is more readily accessible and cost-effective for you.
With these factors in mind, you can proceed to gather the necessary tools and materials for the installation process.
Gathering the Necessary Tools and Materials
Before starting the process of replacing a pellet stove with a wood stove, it’s crucial to gather all the necessary tools and materials.
The essential tools needed for this project include a screwdriver, pliers, tape measure, and a level.
Additionally, a required materials checklist should include items such as a wood stove, stove pipe, chimney cap, fireproof sealant, and stove cement.
Essential Tools Needed
The essential tools you’ll need for the job include a wrench, a screwdriver, and a level. These tools are crucial for the smooth and safe replacement of a pellet stove with a wood stove. Let’s compare these tools and their importance in the process.
Tool | Purpose | Safety Precautions |
---|---|---|
Wrench | Used to tighten and loosen bolts and nuts | Wear protective gloves to prevent injuries |
Screwdriver | Used to remove screws and fasteners | Ensure the screwdriver is the correct size and in good condition |
Level | Ensures the stove is properly aligned and balanced | Place the level on a flat surface for accurate readings |
Required Materials Checklist
Now that we’ve covered the essential tools, let’s take a look at the materials checklist you’ll need for this task.
When assessing pellet stove requirements, it is important to consider the size and heating capacity of the wood stove you choose as a replacement. First, you will need to measure the square footage of the area you wish to heat to determine the appropriate stove size.
Additionally, consider the type of wood stove that best suits your needs, such as a freestanding stove or an insert. You will also require a chimney liner, stovepipe, and a hearth pad or floor protection.
Don’t forget to gather everything necessary, including firebricks, fireproof caulk, and high-temperature paint, to ensure a successful installation without compromising safety.
Gathering Everything Necessary
Make sure you’ve got all the required items like firebricks, fireproof caulk, and high-temperature paint to successfully install your new stove. Before starting the installation process, it is crucial to assess the space where the pellet stove currently sits. Measure the dimensions of the area to ensure that your new wood stove will fit properly. Additionally, inspect the surroundings for any potential hazards or obstructions that may need to be addressed before proceeding.
To prepare for the installation, it is important to remove any debris or objects that may hinder the process. Clear the area around the pellet stove, ensuring there are no loose items or flammable materials nearby. Thoroughly clean the space, removing dust, dirt, and any accumulated debris. This will help create a safe and clean environment for the installation of your new wood stove.
Proceeding to the next section, disconnecting and removing the pellet stove requires careful attention to detail and following proper procedures.
Disconnecting and Removing the Pellet Stove
First, I’ll discuss the process of disconnecting the electrical and ventilation systems when removing a pellet stove. This involves turning off the power supply and disconnecting any electrical connections. It’s also important to properly seal off the ventilation pipes.
Next, I’ll explain the importance of safely removing the pellet stove without causing any damage or injury. This includes carefully disconnecting the stove from the flue and removing any remaining pellets or debris from the stove and surrounding area.
Disconnecting Electrical and Ventilation
Before you begin, make sure to turn off the electricity and disconnect the ventilation system.
To safely disconnect the electrical connections, start by locating the circuit breaker for the pellet stove and switch it off. This will prevent any accidental electrical shocks during the removal process.
Next, carefully disconnect the power supply cord from the outlet. Ensure that the cord is not tangled or obstructed by any objects.
Moving on to the ventilation system, you will need to remove the ventilation ducts that are connected to the pellet stove. Use a screwdriver or a wrench to loosen the screws or bolts securing the ducts in place. Gently pull the ducts away from the stove while being cautious not to damage them.
Now that the electrical connections are disabled and the ventilation ducts are removed, you can proceed to the next section on removing the pellet stove safely.
Removing Pellet Stove Safely
Once the electrical connections and ventilation ducts are taken care of, you can safely proceed with the removal of the pellet stove. Before beginning the removal process, it is important to take certain precautions to ensure your safety. Here are some key steps to safely remove a pellet stove:
Precautions During Removal |
---|
Turn off the power supply to the stove |
Wear protective gloves and goggles |
Disconnect the stove from the venting system |
Empty the pellet hopper and remove any remaining pellets |
Remove the front panel and disconnect the electrical connections |
Preparing for Wood Stove
To ensure a smooth installation, it’s important to assess the space and make sure there is proper ventilation for the new stove. When preparing the space for a wood stove installation, there are several safety precautions to keep in mind.
Firstly, clear the area surrounding the installation site of any flammable materials, such as curtains or furniture. Next, ensure that the floor is sturdy and can support the weight of the wood stove. Additionally, check for any combustible materials in the walls or ceiling that may need to be addressed prior to installation.
Lastly, make sure there is adequate clearance between the wood stove and any nearby walls or furniture to prevent overheating and potential fire hazards. By taking these necessary precautions, you can create a safe and functional environment for your wood stove installation.
In the next section, we will discuss the steps to physically prepare the space for the wood stove installation.
Preparing the Space for the Wood Stove Installation
You’ll need to clear out any furniture or other items from the area where the wood stove will be installed. This is important to ensure proper ventilation and clearance for the stove.
When choosing the right location for the wood stove, consider factors such as proximity to combustible materials, accessibility for maintenance, and the layout of your home. It is recommended to place the stove in a central location to maximize heat distribution.
Once the area is cleared, measure the dimensions of the stove and mark the location on the floor. Ensure that there is enough space around the stove for proper ventilation and clearance as per the manufacturer’s recommendations.
With the space prepared, it’s time to move on to the installation of the wood stove and venting system, ensuring a safe and efficient heating solution for your home.
Installing the Wood Stove and Venting System
After clearing the area and marking the dimensions for installation, it’s time to begin installing the wood stove and venting system. Here are some important steps to follow:
- Ensure that the stove is positioned correctly, allowing for proper clearance from combustible materials.
- Assemble the venting components, including the stovepipe, thimble, and chimney cap.
- Connect the stovepipe to the flue collar on the wood stove, ensuring a secure fit.
When installing the wood stove, it’s important to troubleshoot common issues that may arise. These can include improper clearance, insufficient draft, or leaks in the venting system. By addressing these issues promptly, you can ensure the safe and efficient operation of your wood stove.
Now that the wood stove and venting system are in place, we can move on to connecting the wood stove to the chimney or flue.
Connecting the Wood Stove to the Chimney or Flue
Once the venting components are securely assembled, it’s time to connect the stovepipe to the chimney or flue for proper ventilation. When connecting the wood stove to the existing chimney, it is crucial to select the right size flue for the wood stove. This ensures efficient and safe operation. The size of the flue should match the size of the wood stove’s flue collar. If the flue is too small, it can lead to poor draft and increased risk of smoke backflow. On the other hand, if the flue is too large, it can result in decreased efficiency and potential overheating. To help you select the right size flue, refer to the table below:
Wood Stove Size (BTU) | Flue Size (inches) |
---|---|
Up to 25,000 | 6 |
25,000 – 60,000 | 8 |
60,000 – 100,000 | 10 |
Over 100,000 | 12 |
Testing and Fine-tuning the Wood Stove for Optimal Performance
To ensure optimal performance, it’s important to test and fine-tune the wood stove. Testing methods play a crucial role in identifying any issues or inefficiencies that may affect the stove’s functionality.
One common testing method is the smoke test. This involves igniting a small fire in the stove and observing the smoke that is emitted. Ideally, the smoke should be minimal and clear. If there is excessive smoke or a strong odor, it may indicate a problem with the stove’s ventilation or combustion.
Another important aspect of testing is checking the stove’s temperature distribution. This can be done using a surface thermometer to measure the heat output in various areas of the stove.
Troubleshooting tips include adjusting the air vents, ensuring proper fuel supply, and cleaning the stove regularly to prevent buildup and improve overall efficiency.
Frequently Asked Questions
How Much Does It Cost to Replace a Pellet Stove With a Wood Stove?
Replacing a pellet stove with a wood stove can vary in cost depending on the specific installation requirements. Factors such as the type of wood stove, labor fees, and any necessary modifications to the existing setup can influence the overall cost.
Can I Use the Existing Chimney for the Wood Stove Installation?
Yes, you can use the existing chimney for the wood stove installation. It is important to properly install the wood stove with the existing chimney to ensure safety and efficiency.
Are There Any Specific Building Codes or Regulations I Need to Follow When Replacing a Pellet Stove With a Wood Stove?
When replacing a pellet stove with a wood stove, it is crucial to follow building codes and regulations. Familiarize yourself with local codes to ensure proper installation. Consider the pros and cons of switching fuels for optimal heat efficiency.
What Are the Advantages of Using a Wood Stove Over a Pellet Stove?
Using a wood stove instead of a pellet stove has advantages like increased heat output and the ability to burn different types of wood. It provides a more versatile and efficient heating option.
Do I Need to Hire a Professional to Replace a Pellet Stove With a Wood Stove, or Can I Do It Myself?
I can replace a pellet stove with a wood stove, but it is recommended to hire a professional. Steps to replace: disconnect power, remove pellet stove, install wood stove, connect power.
Conclusion
In conclusion, replacing a pellet stove with a wood stove requires careful assessment, proper tools and materials, and step-by-step installation.
While some may argue that the process is complicated and time-consuming, the benefits of a wood stove, such as increased heat output and a traditional ambiance, far outweigh any initial challenges.
By following the outlined steps and seeking professional assistance if needed, homeowners can successfully make the switch and enjoy the warmth and comfort of a wood stove in their homes.
Pellets & Pellet Stoves
How to Put Out a Silo Wood Pellet Fire

As a fire safety expert, I’ve seen firsthand the devastation that a silo wood pellet fire can cause. It’s a situation that requires immediate action and a clear plan of attack.
In this article, I’ll guide you step-by-step on how to put out a silo wood pellet fire, ensuring the safety of yourself and those around you.
From assessing the fire to controlling the air supply, using fire extinguishers to calling for emergency assistance, we’ll cover it all.
Don’t panic – I’ve got you covered.
Key Takeaways
- Regularly inspect the silo and surrounding areas for fire hazards and maintain equipment to prevent fires.
- Install fire detection systems like smoke alarms and heat sensors to quickly assess and understand the fire situation.
- Manage air vents and ventilation properly to control airflow and prevent fire risks.
- Choose the right type and size of fire extinguisher, aim at the base of the flames, and sweep from side to side to effectively put out a silo wood pellet fire.
Safety Precautions
Before attempting to put out the silo wood pellet fire, it’s important to take necessary safety precautions.
Fire prevention is key to avoid accidents and ensure the safety of everyone involved. Regularly inspect the silo and surrounding areas for any potential fire hazards, such as flammable materials or electrical issues. Install fire detection systems, like smoke alarms and heat sensors, to quickly identify any signs of fire. Additionally, keep firefighting equipment accessible and regularly maintained. This includes fire extinguishers, fire blankets, and water hoses.
By having these safety measures in place, you can minimize the risk of a fire getting out of control.
Now, let’s move on to assessing the fire and determining the best course of action.
Assessing the Fire
When assessing a fire, it’s important to quickly determine the extent of the danger. Evaluating the damage and identifying the causes are crucial steps in understanding the situation and taking appropriate action. To help you assess the fire effectively, I have prepared a table below that outlines key factors to consider:
Factors to Consider | Importance | Examples |
---|---|---|
Size of the fire | High | Small flames vs. large inferno |
Smoke production | High | Thick, black smoke vs. light, white smoke |
Heat intensity | High | Intense heat vs. moderate heat |
Structural integrity | High | Collapsed walls vs. intact structure |
Controlling the Air Supply
When it comes to controlling the air supply in a silo wood pellet fire, two key points to consider are air vents and temperature regulation.
Proper airflow is essential for maintaining safety in these situations. In this discussion, we will explore the importance of managing air vents and temperature to ensure the right airflow and prevent any potential hazards.
Air Vents and Temperature
To control the temperature, you’ll need to adjust the air vents on the silo wood pellet fire. Proper air vent maintenance is essential for effective temperature regulation. By manipulating the air vents, you can increase or decrease the airflow, which directly impacts the fire’s intensity and heat output. Here is a table outlining the different air vent settings and their corresponding effects on temperature:
Air Vent Setting | Temperature |
---|---|
Fully Open | High |
Partially Open | Medium |
Closed | Low |
Proper Airflow for Safety
Make sure you regularly clean and clear the air vents to maintain proper airflow for safety. Proper ventilation is crucial in ensuring that any potential fire is contained and suppressed effectively.
When air vents are clogged or obstructed, it can hinder the flow of air, which may lead to poor combustion and an increased risk of fire. By regularly cleaning and clearing the air vents, you ensure that there is adequate airflow, allowing for optimal combustion and reducing the chances of a fire occurring.
However, even with proper ventilation, accidents can still happen. In such cases, it is essential to know how to use fire extinguishers effectively to quickly and efficiently suppress the fire before it spreads and causes further damage.
Using Fire Extinguishers
When it comes to using fire extinguishers, proper selection is crucial. You need to choose the right type of extinguisher for the specific type of fire you are dealing with.
Additionally, it is important to know how to apply the extinguisher effectively to maximize its effectiveness in suppressing the fire.
Proper Extinguisher Selection
Using the wrong extinguisher can be dangerous, so it’s important to choose the proper one for a silo wood pellet fire. When it comes to fire prevention and suppression, selecting the right extinguisher is crucial. Here are three key factors to consider:
-
Class A: Look for an extinguisher specifically designed for Class A fires, which involve ordinary combustible materials like wood pellets.
-
Size: Ensure the extinguisher is large enough to handle the size of the fire. A small extinguisher may not be effective in fully extinguishing a silo fire.
-
Reach: Opt for an extinguisher with a long reach or an extended hose, as silos can be tall and difficult to access.
By carefully considering these factors, you can choose an extinguisher that is suitable for combating a silo wood pellet fire.
Now, let’s discuss how to apply the extinguisher effectively to extinguish the fire.
Applying Extinguisher Effectively
To effectively apply the extinguisher, remember to aim at the base of the flames and sweep from side to side. This technique ensures that the fire’s fuel source is targeted and extinguished. When dealing with a silo wood pellet fire, it is crucial to understand the importance of proper application. Here is a table outlining the steps for applying an extinguisher effectively:
Step | Action |
---|---|
1 | Aim at the base of the flames |
2 | Sweep from side to side |
3 | Maintain a safe distance |
4 | Monitor the fire for re-ignition |
5 | Ensure proper ventilation of exhaust systems |
Calling for Emergency Assistance
If you can’t control the wood pellet fire in the silo, you should immediately call for emergency assistance. Don’t hesitate to contact your local fire department for their professional expertise in handling such situations. They are trained to respond to emergency calls and have the necessary equipment to extinguish fires effectively.
When contacting the fire department, provide them with detailed information about the fire, such as the location, size, and any potential hazards. Stay on the line until they advise you on what to do next. Remember, the safety of yourself and others is of utmost importance, so it’s crucial to rely on the expertise of emergency responders in these situations.
Now, let’s discuss some preventive measures to avoid future fires in the silo.
Preventing Future Fires
One way to prevent future fires in the silo is by regularly inspecting and maintaining the equipment. Fire prevention is crucial in ensuring the safety and efficiency of the silo.
Regular maintenance procedures should be followed to identify any potential hazards or issues that could lead to a fire. This includes checking for any signs of wear and tear on the equipment, such as frayed wires or malfunctioning sensors.
It is also important to clean the silo regularly to remove any dust or debris that could ignite and cause a fire.
Frequently Asked Questions
What Are the Common Causes of Silo Wood Pellet Fires?
Common causes of silo wood pellet fires include poor maintenance, improper storage, and electrical malfunctions. To prevent these fires, regular inspections, proper ventilation, and following manufacturer guidelines for installation and usage are essential.
Can the Fire Spread to Other Parts of the Property?
The fire can spread to other parts of the property if not properly contained. It is crucial to have an emergency response plan in place to quickly and effectively address the situation.
Is It Safe to Attempt to Put Out the Fire Without Professional Help?
It’s important to consider the dangers of DIY fire extinguishing. Attempting to put out a silo wood pellet fire alone can be risky. Seek professional help to ensure your safety and the safety of your property.
How Long Does It Typically Take to Extinguish a Silo Wood Pellet Fire?
To effectively extinguish a silo wood pellet fire, you’ll need the right tools and equipment. It’s important to act quickly and follow proper safety protocols. The time it takes to put out the fire can vary depending on the size and severity.
Are There Any Specific Maintenance Practices That Can Help Prevent Silo Wood Pellet Fires in the Future?
Maintenance practices are crucial for fire prevention in silo wood pellet storage. Regular inspections, cleaning, and ensuring proper ventilation are key. Additionally, implementing temperature monitoring systems and following safety guidelines can help prevent future fires.
Conclusion
In conclusion, putting out a silo wood pellet fire requires careful assessment and control of the air supply. It is important to use fire extinguishers and, if necessary, call for emergency assistance. By following these safety precautions and taking immediate action, you can prevent further damage and ensure the safety of yourself and others.
Remember, just like a firefighter rushing into a burning building, it is important to act swiftly and decisively when faced with a fire. Stay vigilant and be prepared to tackle any fire that may arise in the future.
-
Pellets & Pellet Stoves4 months ago
How to Make a Pellet Basket for Wood Burning Stoves
-
Wood Stove3 months ago
When To Open And Close Damper On Wood Stove
-
Pellets & Pellet Stoves3 months ago
Why Is My Wood Pellet Stove Putting so Much Soot
-
Wood Stove3 months ago
Where To Install Damper On Wood Stove
-
Wood Stove2 months ago
How Does A Circulator Wood Stove Work
-
Pellets & Pellet Stoves4 months ago
How to Convert Wood Stove to Pellet Stove
-
BestSmallWoodStoves.com Selected3 months ago
Choosing the Best Wood Pellets: Reviews for 2023
-
Wood Stove3 months ago
What Works To Clean Creosote Off Of Wood Stove Glass