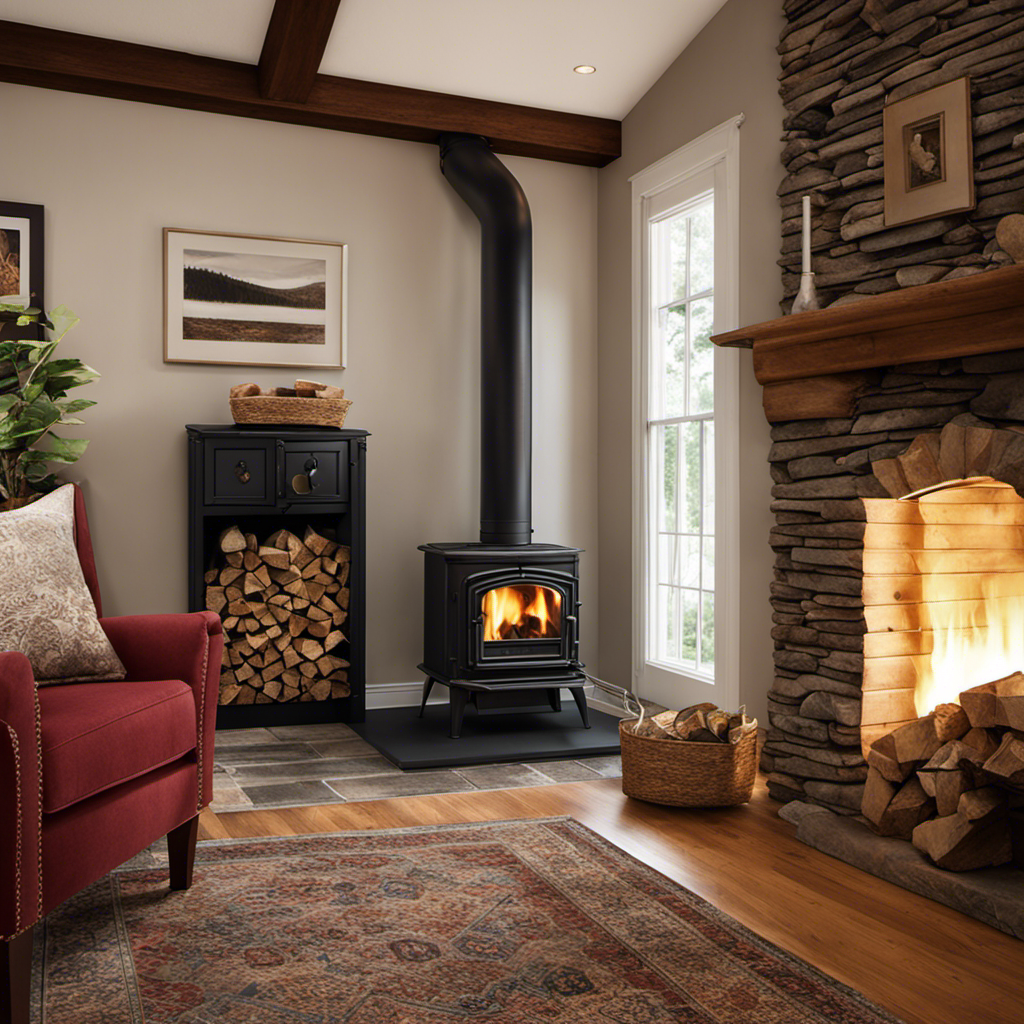

You may believe that substituting a pellet stove with a wood stove appears to be a daunting task. Nevertheless, I want to ease your concerns by saying that with the right tools and a bit of understanding, it becomes an effortless process.
In this article, I’ll walk you through each step, from assessing the requirements of both stoves to connecting the wood stove to the chimney or flue.
So, let’s dive in and learn how to make the switch and enjoy the warmth and charm of a wood-burning stove in your home.
Key Takeaways
- Assess the requirements and gather the necessary tools and materials for the installation.
- Prepare the space by measuring dimensions, clearing debris, ensuring proper ventilation, and addressing any obstructions or flammable materials.
- Disconnect and remove the pellet stove safely, taking precautions to avoid damage or injury.
- Prepare for the wood stove installation by clearing flammable materials, ensuring a sturdy floor, checking for combustible materials in walls or ceiling, and maintaining proper clearance.

Duravent 6" DuraPlus Through the Wall Kit
Through-the-wall vertical chimney installation kit for 6" DuraPlus chimney pipe
As an affiliate, we earn on qualifying purchases.
As an affiliate, we earn on qualifying purchases.
Assessing the Pellet Stove and Wood Stove Requirements
To properly assess the requirements for both your pellet stove and wood stove, you’ll need to consider factors such as size, ventilation, and fuel availability. Evaluating costs and comparing heating efficiency are also crucial in making an informed decision.
First, measure the dimensions of your current pellet stove to determine the appropriate size for the wood stove. Take into account the clearance requirements and ensure that the space can accommodate the new stove.
Next, evaluate the ventilation system. Wood stoves require a chimney or flue to safely exhaust the smoke. Check if your existing setup meets the necessary specifications or if modifications are needed.
Lastly, consider fuel availability. Pellet stoves use wood pellets, while wood stoves require firewood. Determine which option is more readily accessible and cost-effective for you.
With these factors in mind, you can proceed to gather the necessary tools and materials for the installation process.

DuraVent DuraPlus Triple-Wall Chimney Stove Pipe, 6" x 36" – Galvanized Steel Vent and Exhaust Connector for Wood, Oil, Coal or Gas Stoves, Twist-Lock Installation, High-Temperature Venting System
Triple-wall pipe works to ensure that as you ignite your wood-burning stove, the comforting warmth it provides is…
As an affiliate, we earn on qualifying purchases.
As an affiliate, we earn on qualifying purchases.
Gathering the Necessary Tools and Materials
Before starting the process of replacing a pellet stove with a wood stove, it’s crucial to gather all the necessary tools and materials.
The essential tools needed for this project include a screwdriver, pliers, tape measure, and a level.
Additionally, a required materials checklist should include items such as a wood stove, stove pipe, chimney cap, fireproof sealant, and stove cement.
Essential Tools Needed
The essential tools you’ll need for the job include a wrench, a screwdriver, and a level. These tools are crucial for the smooth and safe replacement of a pellet stove with a wood stove. Let’s compare these tools and their importance in the process.
| Tool | Purpose | Safety Precautions |
|---|---|---|
| Wrench | Used to tighten and loosen bolts and nuts | Wear protective gloves to prevent injuries |
| Screwdriver | Used to remove screws and fasteners | Ensure the screwdriver is the correct size and in good condition |
| Level | Ensures the stove is properly aligned and balanced | Place the level on a flat surface for accurate readings |
Required Materials Checklist
Now that we’ve covered the essential tools, let’s take a look at the materials checklist you’ll need for this task.
When assessing pellet stove requirements, it is important to consider the size and heating capacity of the wood stove you choose as a replacement. First, you will need to measure the square footage of the area you wish to heat to determine the appropriate stove size.
Additionally, consider the type of wood stove that best suits your needs, such as a freestanding stove or an insert. You will also require a chimney liner, stovepipe, and a hearth pad or floor protection.
Don’t forget to gather everything necessary, including firebricks, fireproof caulk, and high-temperature paint, to ensure a successful installation without compromising safety.
Gathering Everything Necessary
Make sure you’ve got all the required items like firebricks, fireproof caulk, and high-temperature paint to successfully install your new stove. Before starting the installation process, it is crucial to assess the space where the pellet stove currently sits. Measure the dimensions of the area to ensure that your new wood stove will fit properly. Additionally, inspect the surroundings for any potential hazards or obstructions that may need to be addressed before proceeding.
To prepare for the installation, it is important to remove any debris or objects that may hinder the process. Clear the area around the pellet stove, ensuring there are no loose items or flammable materials nearby. Thoroughly clean the space, removing dust, dirt, and any accumulated debris. This will help create a safe and clean environment for the installation of your new wood stove.
Proceeding to the next section, disconnecting and removing the pellet stove requires careful attention to detail and following proper procedures.

Red Devil 0466 Fireplace & Stove Repair Sealant, 10.1 oz.
WITHSTANDS TEMPERATURES UP TO 1000°F: Ideal for patching fire bricks and sealing wood burning stoves
As an affiliate, we earn on qualifying purchases.
As an affiliate, we earn on qualifying purchases.
Disconnecting and Removing the Pellet Stove
First, I’ll discuss the process of disconnecting the electrical and ventilation systems when removing a pellet stove. This involves turning off the power supply and disconnecting any electrical connections. It’s also important to properly seal off the ventilation pipes.
Next, I’ll explain the importance of safely removing the pellet stove without causing any damage or injury. This includes carefully disconnecting the stove from the flue and removing any remaining pellets or debris from the stove and surrounding area.
Disconnecting Electrical and Ventilation
Before you begin, make sure to turn off the electricity and disconnect the ventilation system.
To safely disconnect the electrical connections, start by locating the circuit breaker for the pellet stove and switch it off. This will prevent any accidental electrical shocks during the removal process.
Next, carefully disconnect the power supply cord from the outlet. Ensure that the cord is not tangled or obstructed by any objects.
Moving on to the ventilation system, you will need to remove the ventilation ducts that are connected to the pellet stove. Use a screwdriver or a wrench to loosen the screws or bolts securing the ducts in place. Gently pull the ducts away from the stove while being cautious not to damage them.
Now that the electrical connections are disabled and the ventilation ducts are removed, you can proceed to the next section on removing the pellet stove safely.
Removing Pellet Stove Safely
Once the electrical connections and ventilation ducts are taken care of, you can safely proceed with the removal of the pellet stove. Before beginning the removal process, it is important to take certain precautions to ensure your safety. Here are some key steps to safely remove a pellet stove:
| Precautions During Removal |
|---|
| Turn off the power supply to the stove |
| Wear protective gloves and goggles |
| Disconnect the stove from the venting system |
| Empty the pellet hopper and remove any remaining pellets |
| Remove the front panel and disconnect the electrical connections |
Preparing for Wood Stove
To ensure a smooth installation, it’s important to assess the space and make sure there is proper ventilation for the new stove. When preparing the space for a wood stove installation, there are several safety precautions to keep in mind.
Firstly, clear the area surrounding the installation site of any flammable materials, such as curtains or furniture. Next, ensure that the floor is sturdy and can support the weight of the wood stove. Additionally, check for any combustible materials in the walls or ceiling that may need to be addressed prior to installation.
Lastly, make sure there is adequate clearance between the wood stove and any nearby walls or furniture to prevent overheating and potential fire hazards. By taking these necessary precautions, you can create a safe and functional environment for your wood stove installation.
In the next section, we will discuss the steps to physically prepare the space for the wood stove installation.

Calculated Industries 1194 AirShim XL Inflatable Pry Bar and Leveling Tool
CONTRACTOR-GRADE inflatable air wedges for window, door and cabinet installations; longer cushion lifts loads higher, faster, resists folding
As an affiliate, we earn on qualifying purchases.
As an affiliate, we earn on qualifying purchases.
Preparing the Space for the Wood Stove Installation
You’ll need to clear out any furniture or other items from the area where the wood stove will be installed. This is important to ensure proper ventilation and clearance for the stove.
When choosing the right location for the wood stove, consider factors such as proximity to combustible materials, accessibility for maintenance, and the layout of your home. It is recommended to place the stove in a central location to maximize heat distribution.
Once the area is cleared, measure the dimensions of the stove and mark the location on the floor. Ensure that there is enough space around the stove for proper ventilation and clearance as per the manufacturer’s recommendations.
With the space prepared, it’s time to move on to the installation of the wood stove and venting system, ensuring a safe and efficient heating solution for your home.
Installing the Wood Stove and Venting System
After clearing the area and marking the dimensions for installation, it’s time to begin installing the wood stove and venting system. Here are some important steps to follow:
- Ensure that the stove is positioned correctly, allowing for proper clearance from combustible materials.
- Assemble the venting components, including the stovepipe, thimble, and chimney cap.
- Connect the stovepipe to the flue collar on the wood stove, ensuring a secure fit.
When installing the wood stove, it’s important to troubleshoot common issues that may arise. These can include improper clearance, insufficient draft, or leaks in the venting system. By addressing these issues promptly, you can ensure the safe and efficient operation of your wood stove.
Now that the wood stove and venting system are in place, we can move on to connecting the wood stove to the chimney or flue.
Connecting the Wood Stove to the Chimney or Flue
Once the venting components are securely assembled, it’s time to connect the stovepipe to the chimney or flue for proper ventilation. When connecting the wood stove to the existing chimney, it is crucial to select the right size flue for the wood stove. This ensures efficient and safe operation. The size of the flue should match the size of the wood stove’s flue collar. If the flue is too small, it can lead to poor draft and increased risk of smoke backflow. On the other hand, if the flue is too large, it can result in decreased efficiency and potential overheating. To help you select the right size flue, refer to the table below:
| Wood Stove Size (BTU) | Flue Size (inches) |
|---|---|
| Up to 25,000 | 6 |
| 25,000 – 60,000 | 8 |
| 60,000 – 100,000 | 10 |
| Over 100,000 | 12 |
Testing and Fine-tuning the Wood Stove for Optimal Performance
To ensure optimal performance, it’s important to test and fine-tune the wood stove. Testing methods play a crucial role in identifying any issues or inefficiencies that may affect the stove’s functionality.
One common testing method is the smoke test. This involves igniting a small fire in the stove and observing the smoke that is emitted. Ideally, the smoke should be minimal and clear. If there is excessive smoke or a strong odor, it may indicate a problem with the stove’s ventilation or combustion.
Another important aspect of testing is checking the stove’s temperature distribution. This can be done using a surface thermometer to measure the heat output in various areas of the stove.
Troubleshooting tips include adjusting the air vents, ensuring proper fuel supply, and cleaning the stove regularly to prevent buildup and improve overall efficiency.
Can the Process for Replacing the Door Seal on a Wood Burning Pellet Stove also be Applied for Replacing a Pellet Stove with a Wood Stove?
Yes, the process for replacing the door seal on a wood burning pellet stove can also be applied for replacing a pellet stove with a wood stove. The wood burning pellet stove seal replacement process involves removing the old seal, cleaning the area, and carefully installing the new seal for a secure fit.
Frequently Asked Questions
How Much Does It Cost to Replace a Pellet Stove With a Wood Stove?
Replacing a pellet stove with a wood stove can vary in cost depending on the specific installation requirements. Factors such as the type of wood stove, labor fees, and any necessary modifications to the existing setup can influence the overall cost.
Can I Use the Existing Chimney for the Wood Stove Installation?
Yes, you can use the existing chimney for the wood stove installation. It is important to properly install the wood stove with the existing chimney to ensure safety and efficiency.
Are There Any Specific Building Codes or Regulations I Need to Follow When Replacing a Pellet Stove With a Wood Stove?
When replacing a pellet stove with a wood stove, it is crucial to follow building codes and regulations. Familiarize yourself with local codes to ensure proper installation. Consider the pros and cons of switching fuels for optimal heat efficiency.
What Are the Advantages of Using a Wood Stove Over a Pellet Stove?
Using a wood stove instead of a pellet stove has advantages like increased heat output and the ability to burn different types of wood. It provides a more versatile and efficient heating option.
Do I Need to Hire a Professional to Replace a Pellet Stove With a Wood Stove, or Can I Do It Myself?
I can replace a pellet stove with a wood stove, but it is recommended to hire a professional. Steps to replace: disconnect power, remove pellet stove, install wood stove, connect power.
Conclusion
In conclusion, replacing a pellet stove with a wood stove requires careful assessment, proper tools and materials, and step-by-step installation.
While some may argue that the process is complicated and time-consuming, the benefits of a wood stove, such as increased heat output and a traditional ambiance, far outweigh any initial challenges.
By following the outlined steps and seeking professional assistance if needed, homeowners can successfully make the switch and enjoy the warmth and comfort of a wood stove in their homes.