Connect with us

Wood Stove

How To Remove Handle Off Lopi Wood Stove

Published

on

An image showcasing a step-by-step visual guide on removing the handle from a Lopi wood stove

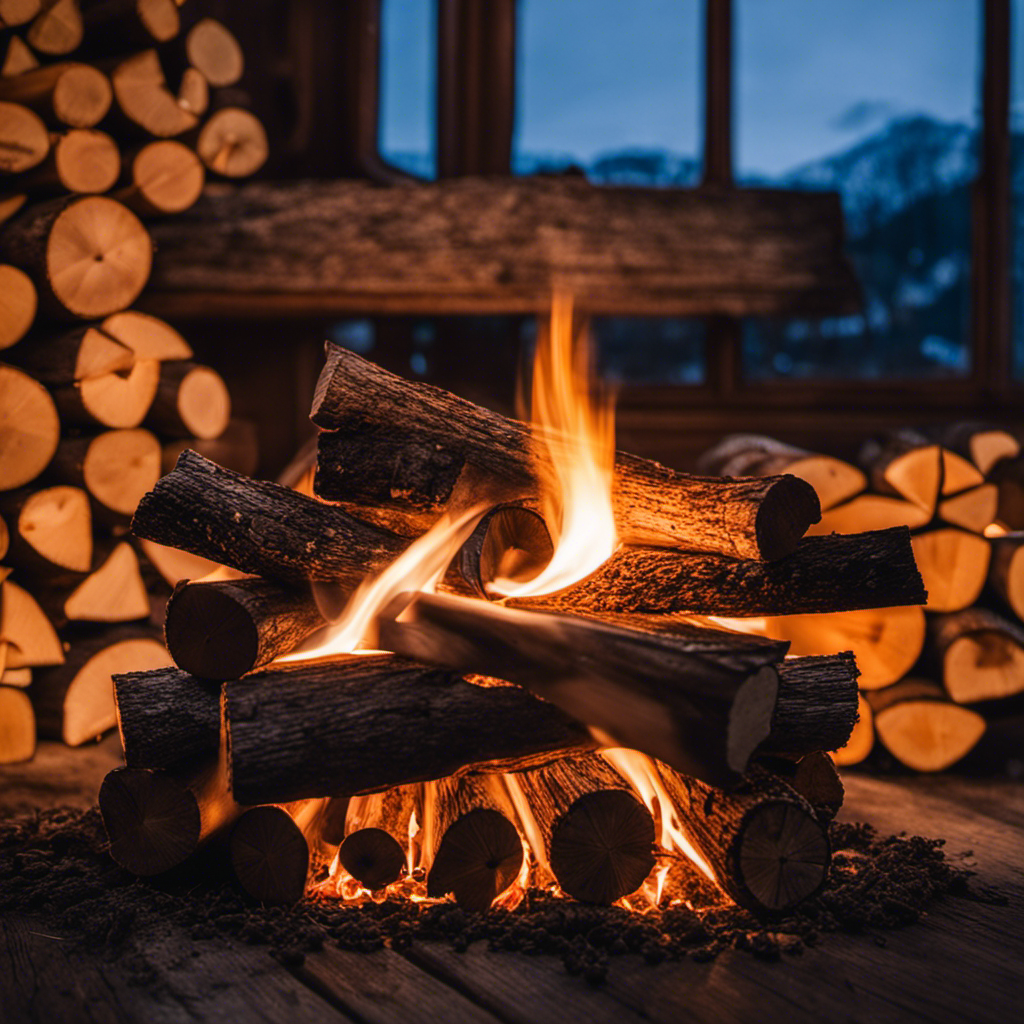
I’ve owned my Lopi wood stove for quite some time now, and recently, I’ve observed that the handle is beginning to wear out. It has become crucial to detach the handle and perform an in-depth cleaning.

In this article, I’ll walk you through the steps on how to remove the handle from your Lopi wood stove. With a few simple tools and a little bit of patience, you’ll have that handle off and looking like new in no time.

Key Takeaways

  • Gather the necessary tools and materials, including a Phillips head screwdriver, pliers, gloves, clean cloth or towel, and a small container for screws and small parts.
  • Prepare the wood stove by letting it cool down completely, preheating it to loosen stuck parts, placing a protective covering, and examining the handle and identifying the type of screws or bolts.
  • Remove the screws or bolts securing the handle, troubleshoot any handle issues before replacing, ensure proper functioning of the new handle, and smoothly detach the handle from the wood stove.
  • Clean and maintain the removed handle by thoroughly cleaning it with a damp cloth and mild soap for metal handles, drying it thoroughly, using gentle wood cleaner and a soft cloth for wooden handles, and regularly checking for loose screws or bolts and tightening if necessary.

Gathering the Necessary Tools and Materials

I need to gather all the necessary tools and materials to safely remove the handle off my Lopi wood stove.

The first tool I’ll need is a screwdriver, preferably a Phillips head, to remove the screws holding the handle in place.

Additionally, I’ll need a pair of pliers to grip and hold any small parts that may come loose during the process.

To ensure my safety, I’ll also gather a pair of gloves to protect my hands from any potential sharp edges or hot surfaces.

Advertisement

In terms of materials, I’ll need a clean cloth or towel to place under the stove handle to catch any debris or small parts that may drop during the removal.

Lastly, I’ll have a small container to hold the screws and any other small pieces that come off during the process, ensuring that nothing gets lost or misplaced.

With these necessary tools and materials, I can confidently proceed with removing the handle from my Lopi wood stove.

Preparing the Wood Stove for Handle Removal

Positioning the clean cloth under the wood stove handle, I carefully begin preparing for its removal. To ensure a smooth process, there are a few important steps to take before attempting to remove the handle.

  • Preheating the wood stove: Before starting, it’s crucial to let the stove cool down completely. However, to facilitate the handle’s removal, preheating the wood stove for a few minutes can help loosen any stuck or tightened parts.

  • Protecting the surrounding area: As I work on removing the handle, I make sure to place a protective covering, such as a cloth or a sheet, on the floor or any nearby furniture. This will prevent any scratches or damages from occurring during the removal process.

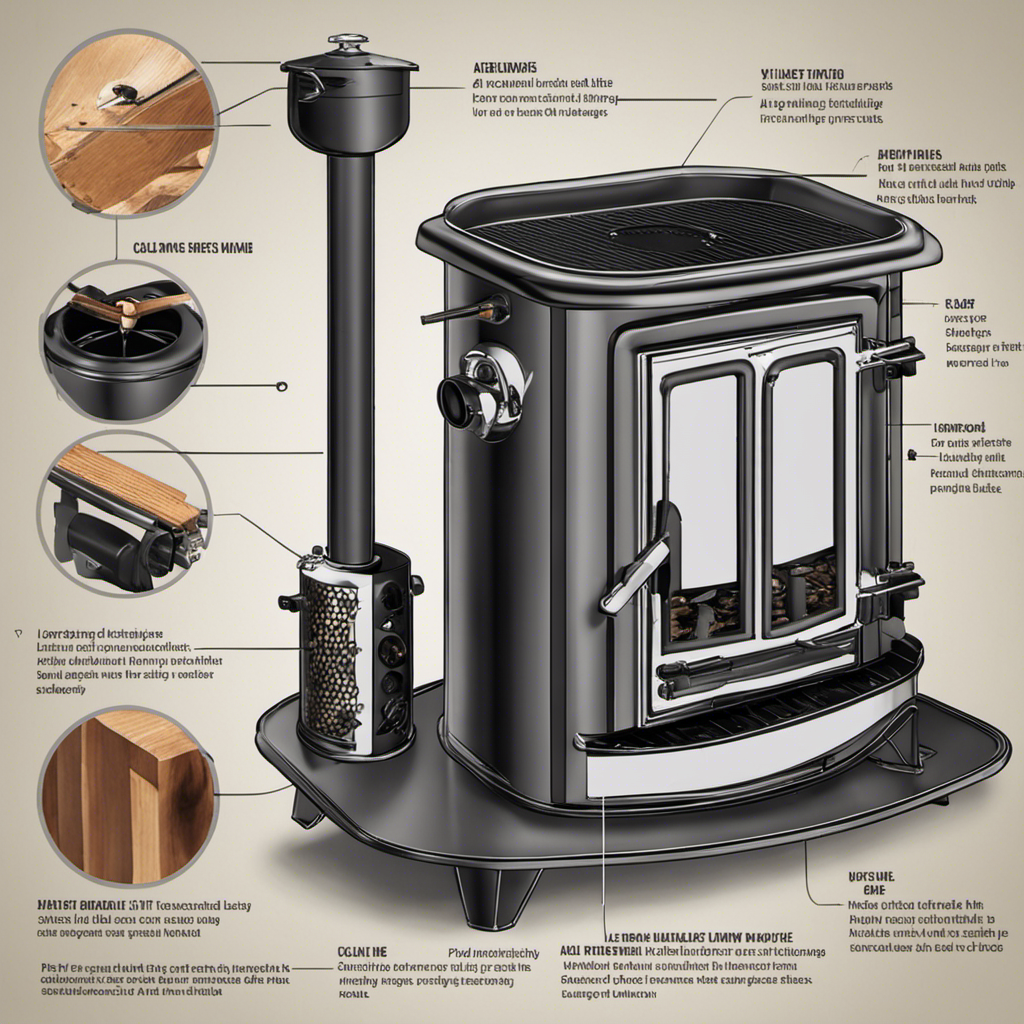
  • Inspecting the handle and surrounding screws or bolts: Before proceeding further, I thoroughly examine the handle and identify the type of screws or bolts securing it. This knowledge will assist me in choosing the appropriate tools for removal.

Removing the Screws or Bolts Securing the Handle

To remove the handle, carefully unscrew or loosen the bolts securing it, and then detach it from the wood stove.

Advertisement

When replacing the handle with a new one, it’s important to first troubleshoot common handle issues to ensure that the problem isn’t with the wood stove itself. Common handle issues may include loose or stripped screws, a broken handle, or difficulty in operating the handle.

By addressing these issues before replacing the handle, you can ensure that the new handle will function properly and provide a safe and efficient operation of your wood stove.

Once the bolts are unscrewed or loosened, the handle can be easily detached from the wood stove, allowing for a smooth transition to the next step in the handle replacement process.

Detaching the Handle From the Wood Stove

I can simply unscrew the bolts and detach the handle from the wood stove. Removing the handle is a crucial step in installing handle replacements or troubleshooting common handle removal issues. Here’s how I do it:

  • Ensure the stove is cool: Before attempting to remove the handle, it’s important to make sure the stove has cooled down completely to avoid any burns or injuries.

  • Locate the bolts: Most wood stoves have bolts securing the handle to the stove. These bolts are typically located on the sides or the front of the stove.

  • Use the appropriate tools: To remove the bolts, I use a wrench or screwdriver, depending on the type of bolts used. It’s important to use the correct tool to avoid damaging the bolts or the handle.

Cleaning and Maintenance Tips for the Removed Handle

After removing the handle, it’s important to thoroughly clean and maintain it to ensure its longevity and functionality. Cleaning techniques for the handle may vary depending on the material it’s made of.

Advertisement

For metal handles, a simple wipe down with a damp cloth and mild soap should suffice. Be sure to dry it thoroughly to prevent any rust or corrosion.

If the handle is made of wood, avoid using harsh chemicals that can damage the finish. Instead, use a gentle wood cleaner and a soft cloth to remove any dirt or grime.

Regular maintenance is also crucial for the handle’s overall performance. Check for any loose screws or bolts and tighten them if necessary.

If the handle is beyond repair, consider exploring handle replacement options to ensure your wood stove remains in top condition.

Frequently Asked Questions

How Often Should I Remove the Handle From My Lopi Wood Stove for Cleaning?

I remove the handle from my Lopi wood stove for cleaning every few months. It’s important to disconnect the stove from its power source before removing the handle to ensure safety.

Advertisement

Can I Use Any Type of Screwdriver to Remove the Screws Securing the Handle?

I can use any screwdriver to remove the screws securing the handle on my Lopi wood stove. However, it’s important to note that different types of screwdrivers may require different techniques for proper removal.

Can I Remove the Handle Without Disconnecting the Stove From Its Power Source?

Yes, you can remove the handle without disconnecting the stove from its power source. To do so, make sure the stove is turned off and use the appropriate tools to safely remove the handle screws.

Is It Necessary to Wear Gloves While Removing the Handle?

Yes, it is necessary to wear gloves when removing the handle of a hot wood stove. Not wearing gloves can pose risks such as burns or injuries. Safety should always be a priority when handling hot objects.

How Long Does It Usually Take to Remove the Handle From a Lopi Wood Stove?

On average, it takes about 5-10 minutes to remove the handle from a wood stove, regardless of the brand. Common challenges include rusted screws and tight fittings, but with the right tools and technique, it can be done smoothly.

Conclusion

After following the steps outlined in this article, you should now be able to remove the handle from your Lopi wood stove with ease.

Advertisement

Just remember to gather the necessary tools and materials, prepare the stove properly, and carefully remove the screws or bolts securing the handle.

With a little effort and attention to maintenance, you can keep your wood stove in top condition and enjoy the warmth and comfort it provides like a well-tended fire in the hearth of your home.

Logan’s affair with adventure began in childhood. He hailed from a small town where vast forests bordered one side and endless shores stretched on the other. His days were spent exploring uncharted woods, climbing tall trees, or listening to the tales of old sailors. This early immersion in a world brimming with stories and mysteries became the foundation of his passion for writing.

Continue Reading
Advertisement

Wood Stove

How Do You Move A 500 Lb Wood Stove

Published

on

By

An image showcasing two strong individuals, sweating and straining, as they carefully navigate a narrow staircase, one step at a time, with their hands gripping a massive 500 lb wood stove, its rustic charm contrasting against the modern surroundings

Have you ever considered the formidable challenge of relocating a 500-pound wood-burning stove? Well, I’m here to inform you that it’s no small feat! However, don’t worry. I have compiled a comprehensive guide, detailing every step, to help you with this task.

From assessing the weight and size of the stove to gathering the necessary equipment and tools, I’ll walk you through the whole process.

So, grab your gloves and get ready to flex those muscles – we’re about to make moving a wood stove a breeze!

Key Takeaways

  • Assess the structural integrity of the wood stove before moving it
  • Use appropriate lifting equipment and tools to safely transport the stove
  • Prepare the area and ensure safety by clearing obstacles and securing the surroundings
  • Follow proper lifting techniques and take breaks to prevent injuries and fatigue

Assessing the Weight and Size of the Wood Stove

I just measured the weight and size of the wood stove, and it’s definitely heavier than I expected. Evaluating the structural integrity of the stove is essential before attempting to move it. This involves checking for any cracks, loose parts, or weakened areas that could compromise its stability during the move.

Once the stove’s condition has been assessed, it’s important to determine the appropriate moving technique. For a heavy stove like this, it’s crucial to have a plan in place to ensure a safe and successful move. This could involve using furniture sliders, a dolly, or enlisting the help of additional people.

Gathering the Necessary Equipment and Tools

To safely transport the wood stove, it’s important to gather both the proper equipment and tools. Here are four essential items you’ll need:

Advertisement
  • Choosing the right lifting straps: Make sure to select lifting straps that are strong and durable enough to support the weight of the wood stove. Look for straps with a high weight capacity and secure fastening mechanisms.

  • Using a furniture dolly: A furniture dolly is an excellent tool for moving heavy objects like a wood stove. Make sure the dolly is sturdy and has a weight capacity that can handle the stove’s weight. Secure the stove onto the dolly using straps or ropes for added stability.

  • Moving blankets or padding: Protecting the wood stove during transport is crucial to avoid any damages. Wrap the stove with moving blankets or padding to prevent scratches or dents.

  • Gloves and safety goggles: It’s essential to protect yourself during the moving process. Wear gloves to provide a better grip and protect your hands from any sharp edges. Safety goggles will protect your eyes from any debris or dust.

By gathering these necessary equipment and tools, you’ll be well-prepared to safely transport your wood stove.

Now, let’s move on to preparing the area and ensuring safety for the next steps.

Preparing the Area and Ensuring Safety

Before starting the process, make sure to clear out any obstacles and secure the area to ensure safety.

Ensuring stability and protecting the surrounding area are crucial steps when moving a 500 lb wood stove.

Begin by removing any furniture or objects that may hinder your path.

Advertisement

Make sure the floor is clean and free of debris to avoid slips or falls.

Next, secure the surrounding area by using furniture sliders or plywood sheets to protect the flooring from scratches or damage.

It’s also essential to have a clear path and ample space for maneuvering the stove.

Once the area is prepared, you can proceed with lifting and moving the wood stove, which we’ll discuss in the next section.

Lifting and Moving the Wood Stove

Moving the heavy wood stove requires proper lifting technique and a sturdy dolly. When attempting to lift the stove, it’s important to follow these lifting techniques to minimize potential risks:

Advertisement
  • Bend your knees and keep your back straight to avoid straining your back muscles.
  • Use your leg muscles to lift the stove, rather than relying on your back.
  • Lift with a partner to evenly distribute the weight and prevent accidents.
  • Take breaks and avoid overexertion to prevent fatigue and reduce the risk of injury.

By following these lifting techniques, you can ensure a safe and successful move of the wood stove.

Now, let’s discuss how to secure and position the wood stove in its new location.

Securing and Positioning the Wood Stove in Its New Location

I’ll make sure to anchor the wood stove securely in its new location to prevent any accidents. Securing the wood stove is crucial to ensure that it stays in place and doesn’t pose any risks.

One of the most effective securing techniques is to use anchor bolts. These bolts are drilled into the floor or the wall behind the stove and provide a strong hold. It’s important to choose the right size and type of anchor bolts suitable for the weight and dimensions of your wood stove.

Additionally, proper positioning is essential for the stove’s performance and safety. Make sure to leave enough space around the stove for ventilation and easy access for maintenance. Also, consider placing it on a non-combustible surface to minimize fire hazards.

Frequently Asked Questions

How Much Does a Typical 500 Lb Wood Stove Cost?

Typically, the cost of a 500 lb wood stove ranges from $1000 to $3000, depending on the brand and features. Some of the best brands known for quality wood stoves include Vermont Castings, Jotul, and Hearthstone.

Advertisement

Can I Move a 500 Lb Wood Stove by Myself?

I can move a 500 lb wood stove by myself, but it’s not recommended. It’s safer to use moving equipment like dollies or hire professionals who specialize in moving heavy items.

What Are the Common Mistakes to Avoid When Moving a Wood Stove?

When moving a wood stove, it’s important to avoid common mistakes. Use moving equipment like dollies or sliders to ease the process. Remember to employ proper lifting techniques to prevent injury.

Are There Any Special Considerations for Moving a Wood Stove up or Down a Flight of Stairs?

Moving a wood stove upstairs requires careful planning and safety precautions. Protecting the stove and preventing damage is crucial. Start by assessing the weight and dimensions of the stove, and use proper lifting techniques to avoid injury.

How Often Should a Wood Stove Be Professionally Inspected and Serviced?

I recommend having a professional inspect and service your wood stove annually. Regular maintenance ensures optimal performance, reduces the risk of chimney fires, and prolongs the lifespan of the stove. DIY inspections may miss potential issues.

Conclusion

Moving a 500 lb wood stove may seem like a daunting task, but with the right equipment and precautions, it can be accomplished safely. By assessing the weight and size of the stove, gathering the necessary tools, and preparing the area, you can ensure a smooth and successful move.

Advertisement

Remember to lift with your legs and not your back, and use straps or dollies to assist in the process. With careful planning and execution, you’ll have your wood stove in its new location in no time, ready to provide warmth and comfort.

Continue Reading

Wood Stove

How To Wire Up A Brunco 190 Wood Stove

Published

on

By

An image depicting a step-by-step guide for wiring a Brunco 190 Wood Stove

The cozy embrace of a wood stove on cold evenings has long been dear to me. However, when it came to installing my Brunco 190, the task seemed somewhat overwhelming.

That’s why I created this guide to help others navigate the electrical requirements and successfully wire their own wood stove.

In just a few simple steps, you’ll be able to enjoy the comforting heat of your Brunco 190 with confidence.

Let’s get started!

Key Takeaways

  • Consult the owner’s manual or contact the manufacturer for specific electrical requirements.
  • Gather the necessary tools and materials, including wire cutters, connectors, and the appropriate wire gauge.
  • Ensure proper grounding to prevent electrical shocks and fire hazards.
  • Perform testing and troubleshooting to ensure proper wiring connection and electrical supply.

Understanding the Electrical Requirements

I need to understand the electrical requirements in order to properly wire up my Brunco 190 wood stove. When it comes to electrical safety precautions, it’s crucial to have a clear understanding of what’s required.

The first step is to consult the owner’s manual or contact the manufacturer to gather information about the specific electrical requirements for the stove. This will include details about the voltage, amperage, and wiring configuration needed. It’s important to ensure that the electrical circuit can handle the load of the stove without overloading or causing any safety hazards.

Advertisement

In order to ensure the proper installation and compliance with local electrical codes, it’s recommended to hire a certified electrician who specializes in wood stove installations. They’ll have the knowledge and expertise to safely wire up the stove and ensure it meets all necessary electrical requirements.

Gathering the Necessary Tools and Materials

To properly wire up my Brunco 190 wood stove, I’ll need to gather all of the necessary tools and materials, such as wire cutters and connectors. Before starting the wiring process, it’s essential to select the appropriate wire gauge. This depends on the stove’s electrical requirements and the distance from the power source. Choosing the correct wire gauge ensures the safe and efficient operation of the wood stove.

Additionally, ensuring proper grounding is crucial for preventing electrical shocks and fire hazards. Grounding the stove involves connecting it to a grounding rod or an existing grounding system in the house.

Once I’ve gathered all the tools and materials and have selected the appropriate wire gauge, I can proceed to the next step of preparing the wood stove for wiring.

Preparing the Wood Stove for Wiring

Before starting the wiring process, I’ll first need to carefully inspect and clean the wood stove, ensuring that it’s free from any debris or obstructions. This is an important step to ensure the safety and efficiency of the wiring. Here are four key things to keep in mind while preparing the wood stove for wiring:

Advertisement
  1. Inspect the stove for any signs of damage or wear. Look for loose or frayed wires, cracks, or any other issues that could affect the wiring process.

  2. Remove any ashes or leftover wood from the stove. This will help prevent any potential fire hazards and make it easier to access the areas where the cables will be installed.

  3. Clean the stove thoroughly, both inside and outside. Use a soft brush or cloth to remove dust, dirt, and grease. This will provide a clean surface for the cables to be insulated and connected.

  4. Ensure that the area around the wood stove is clear of any flammable materials. Keep a safe distance from curtains, furniture, and other combustible objects to prevent accidents.

Wiring the Brunco 190 Wood Stove

After carefully inspecting and preparing the wood stove, I can now begin wiring it up. Before connecting the power, it’s important to take safety precautions to avoid any accidents or electrical issues. Here is a step-by-step guide on how to wire up the Brunco 190 Wood Stove:

Step Procedure
1 Turn off the power supply to the stove to ensure your safety during the wiring process.
2 Connect the power cord to the designated terminals on the back of the stove. Make sure to follow the manufacturer’s instructions for proper wiring.
3 Run the power cord through a conduit to protect it from damage and secure it to the wall.
4 Finally, double-check all connections to ensure they are secure and properly insulated before restoring power to the stove.

Testing and Troubleshooting the Wiring Connection

I am currently in the process of testing and troubleshooting the wiring connection for the Brunco 190 Wood Stove. It’s crucial to ensure that the wiring is correctly installed and functioning properly for the stove to work efficiently and safely.

Here are four important steps I’m following to resolve any connection issues:

  1. Visual Inspection: I thoroughly examine the wiring for any visible signs of damage, such as frayed or exposed wires.

  2. Continuity Testing: Using a multimeter, I check for continuity to verify if the wires are connected and conducting electricity as intended.

  3. Voltage Testing: I measure the voltage across the wires to confirm if the electrical supply is reaching the stove.

  4. Grounding Test: I assess the grounding connection to ensure proper electrical safety.

Frequently Asked Questions

How Much Does the Brunco 190 Wood Stove Weigh and How Do I Safely Transport It?

The weight of the Brunco 190 wood stove is crucial to consider for safe transportation. To transport it safely, make sure to have a sturdy dolly or cart and secure it properly to prevent any accidents.

Are There Any Specific Building Codes or Regulations That I Need to Consider When Wiring the Wood Stove?

When it comes to wiring a wood stove, building code considerations and safety regulations are crucial. I remember learning this the hard way when I didn’t follow the rules and ended up with a dangerous electrical situation.

Advertisement

Can I Install a Thermostat to Control the Temperature of the Wood Stove?

Yes, you can install a thermostat to control the temperature of the wood stove. It’s a great way to ensure that the stove maintains a comfortable temperature and prevents overheating.

What Are the Recommended Maintenance and Cleaning Procedures for the Wood Stove’s Electrical Components?

Recommended maintenance procedures for the wood stove’s electrical components include regularly inspecting for any loose connections or damaged wires, cleaning off dust and debris, and ensuring proper ventilation. Cleaning procedures involve using a soft cloth to wipe down the components and avoiding the use of harsh chemicals.

Can I Connect the Wood Stove to a Generator or Solar Power System for Backup Power?

Yes, you can connect the wood stove to a generator or solar power system for backup power. It’s important to follow the manufacturer’s instructions and consult a professional electrician to ensure proper installation and safety.

Conclusion

In the dance of electrical connections, wiring up a Brunco 190 wood stove becomes a symphony of precision and understanding. Like a maestro, we gather the tools and materials, prepare the stove for its electrical journey, and carefully wire it up.

With each connection, we bring warmth and life to the stove, creating a harmonious bond between electricity and fire. Through testing and troubleshooting, we ensure a flawless performance, allowing the wood stove to shine brightly in its purpose.

Advertisement
Continue Reading

Wood Stove

How To Unbolt A Blaze King Wood Stove Door

Published

on

By

An image capturing the intricate process of removing a Blaze King wood stove door

I’ve come to understand the importance of effectively managing a wood stove to maintain a warm and welcoming environment at home. In the guide that follows, I’ll be sharing my knowledge on how to master this undertaking successfully.

Did you know that the door of a Blaze King wood stove may need to be unbolted for maintenance or repairs? With the right tools and a little know-how, you’ll be able to remove and reassemble the door with ease, ensuring your wood stove remains in top condition.

Let’s get started!

Key Takeaways

  • Use a wrench to loosen the bolts on the door hinges and remove them carefully.
  • Ensure the wood stove is cool and clean before removing the door.
  • Inspect the bolts, hinges, and hinge pins for any damage or rust.
  • Gently detach the door from the stove body and set it aside in a safe place.

Tools and Materials Needed

I’ll need a wrench to loosen the bolts on the Blaze King wood stove door.

Before starting, make sure you have all the necessary tools and materials. Here’s a list of what you’ll need:

  • A wrench, preferably a socket wrench, to fit the bolt size
  • A small container to hold the bolts and nuts
  • A soft cloth or towel to protect the stove’s surface.

Step by step, here’s how to unbolt the door:

  1. First, locate the bolts on the door hinges.
  2. Then, use the wrench to loosen the bolts by turning them counterclockwise.
  3. Once all the bolts are loose, carefully remove them and place them in the container.
  4. Finally, gently lift the door off its hinges.

With the door unbolted, you can now proceed to prepare the wood stove for door removal.

Preparing the Wood Stove for Door Removal

I can begin preparing the wood stove for door removal by carefully cleaning the stove’s surface and removing any debris. Before I start, I ensure that the stove is cool and not in use.

Advertisement

Using a soft cloth, I gently wipe the stove’s surface to remove any dirt or dust. This step is essential to prevent any particles from getting inside the stove during the door removal process.

Next, I inspect the stove for any damage or wear. I check for any cracks or signs of deterioration that may affect the door’s removal. If I notice any issues, I address them before proceeding further.

Once I’m satisfied with the surface cleaning and inspection, I’m ready to move on to removing the bolts and hinges, which will allow me to detach the door from the wood stove.

Removing the Bolts and Hinges

To remove the bolts and hinges, I carefully unscrew the four bolts
and use a screwdriver to detach the hinges from the wood stove door.

This process is crucial for troubleshooting issues with a Blaze King wood stove door,
especially if the hinges are rusty. Rusty hinges can cause the door
to become stiff or difficult to open and close.

Advertisement

By removing the bolts and hinges, I can inspect them for any signs of rust or damage.
If I notice rust, I can clean it off using a wire brush and apply a lubricant to prevent future rusting.

Troubleshooting issues with the door hinges is essential to ensure smooth operation
and prevent any potential safety hazards.

Detaching the Door From the Stove Body

Inspecting the stove body and examining any potential damage is crucial before detaching the door to ensure a smooth and safe process. Proper maintenance for a Blaze King wood stove door is essential to avoid common issues with wood stove door detachment.

Here are four steps to successfully detach the door:

  1. Begin by carefully removing any screws or bolts that secure the door to the stove body.

  2. Gently pull the door away from the stove body, being mindful of any resistance or stuck parts.

  3. Inspect the hinges and hinges pins for wear or damage, as these can cause difficulty in detaching the door.

  4. Once the door is detached, set it aside in a safe place to prevent any accidental damage or injury.

By following these steps and ensuring proper maintenance, you can safely detach the door from your Blaze King wood stove.

Advertisement

Now, let’s move on to reassembling the door and the final steps.

Reassembling the Door and Final Steps

After carefully inspecting the hinges and hinge pins, it’s time to reassemble the door and complete the final steps.

When reassembling the door of a Blaze King wood stove, it’s crucial to secure the hinges properly to ensure proper functionality and safety. Start by aligning the door with the stove body, making sure the hinge pins are inserted into their respective holes. Once in place, gently push the door towards the stove until it fully closes.

Next, tighten the hinge screws using a screwdriver, ensuring that they’re securely fastened. It’s important to check that the door opens and closes smoothly without any friction or resistance.

Finally, test the door by gently pulling and pushing on it to ensure that it’s securely attached and operating correctly.

Advertisement

Frequently Asked Questions

How Do I Know When It’s Time to Remove the Door of My Blaze King Wood Stove?

When signs of wear and tear start appearing on my Blaze King wood stove door, I know it’s time to remove it. I follow these steps to safely unbolt the door and ensure proper maintenance.

Can I Remove the Door of My Blaze King Wood Stove Without Any Assistance?

Certainly! Removing the door of a Blaze King wood stove without assistance is possible. However, if you encounter any issues such as bolt stripping, troubleshooting might be required to ensure a successful removal.

Are There Any Special Precautions I Should Take Before Removing the Door of My Blaze King Wood Stove?

Before removing the door of my Blaze King wood stove, I take some precautions. I ensure the stove is completely cool and use protective gloves. The only tool required is a wrench to unbolt the door.

What Should I Do if I Accidentally Strip the Bolts While Removing the Door of My Blaze King Wood Stove?

If I accidentally strip the bolts while removing the door of my Blaze King wood stove, I would first try using a rubber band or a hammer to grip the stripped bolt. If that fails, I may need to resort to drilling it out.

Can I Replace the Hinges on My Blaze King Wood Stove Door if They Become Damaged or Worn Out?

Yes, you can replace the hinges on a Blaze King wood stove door if they become damaged or worn out. There are alternative methods to remove the door, but replacing the hinges is a more permanent solution.

Advertisement

Conclusion

After following these steps, you’ll be amazed at how effortlessly you can unbolt a Blaze King wood stove door. The process may seem daunting at first, but with the right tools and a little know-how, it becomes a breeze.

Remember to take your time and be patient as you detach the bolts and hinges.

Once you’ve reassembled the door, you’ll feel like a seasoned pro, ready to enjoy the warmth and comfort of your wood stove.

Continue Reading

Trending