Connect with us

Wood Stove

How To Remove Ash From Wood Stove

Published

on


Hi, everyone!

Ever wondered how to get rid of that pesky ash from your wood stove? Well, look no further! With my tried-and-true tips, you’ll have your wood stove looking clean and good as new in no time.

I’ll take you through the step-by-step process, provide you with the necessary safety precautions, and even give you some maintenance tips to prevent ash buildup in the future.

So, let’s roll up our sleeves and get that wood stove shining!wood stove fans and blowers

Key Takeaways

  • Removing ash regularly improves stove efficiency and performance.
  • Safety precautions such as proper ventilation and avoiding flammable materials are important when removing ash.
  • The tools and supplies needed for ash removal include an ash shovel, stiff brush, vacuum cleaner with HEPA filter, non-abrasive cleaning solution, and damp cloth.
  • The step-by-step process for ash removal includes allowing the stove to cool completely, using an ash shovel to remove loose debris, transferring ash to a designated metal bucket for disposal, and disposing of ash away from flammable materials.

Benefits of Removing Ash Regularly

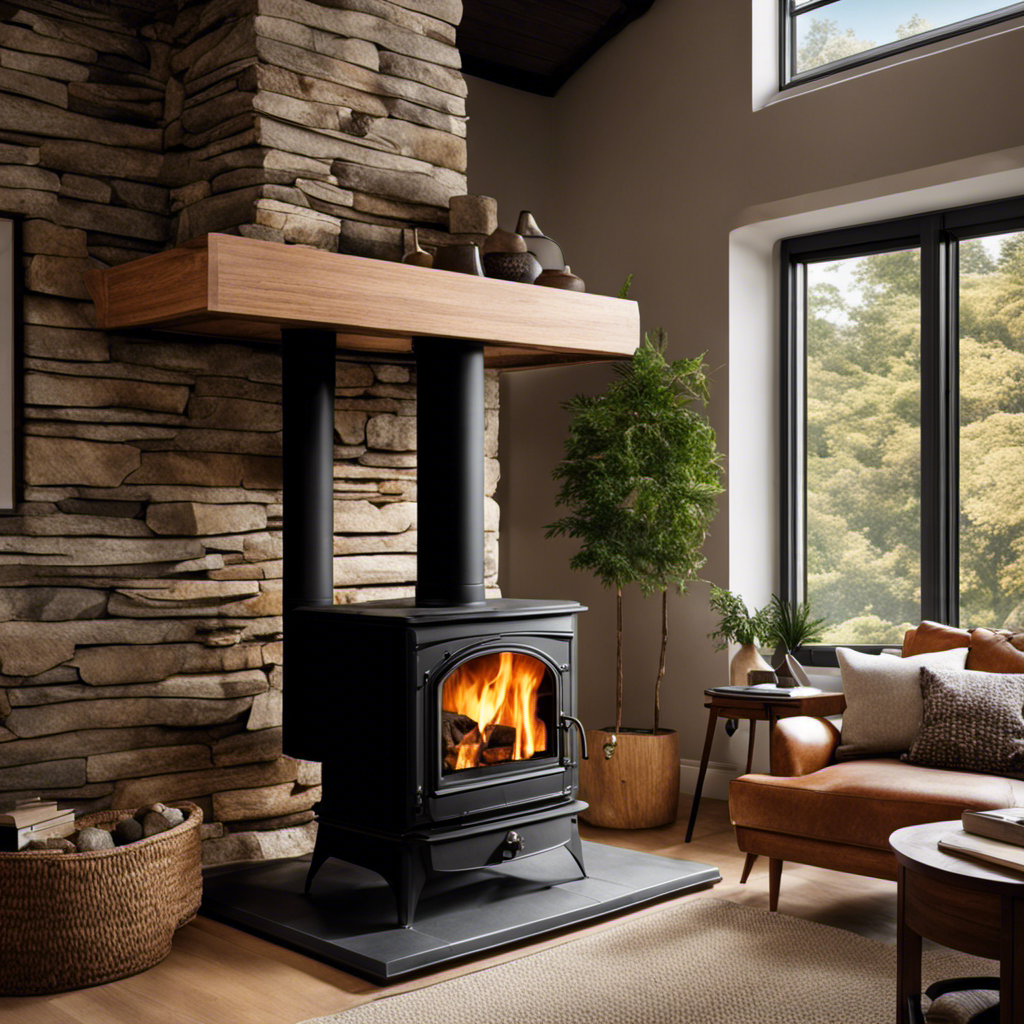
I find that regularly removing ash from my wood stove has several benefits. Not only does it improve the overall efficiency and performance of the stove, but it also helps to maintain a clean and safe environment.

When ash builds up in the stove, it can hinder the airflow, making it harder for the fire to burn properly. This can result in less heat being produced and wasted energy. Additionally, a buildup of ash can increase the risk of a fire hazard. Embers can easily ignite the accumulated ash, leading to a potential house fire.

Advertisement

Necessary Safety Precautions

Before starting the cleaning process, it’s important to ensure that I have the proper safety gear and precautions in place. Ventilation is crucial when removing ash from a wood stove. It’s essential to open windows or use exhaust fans to create a flow of fresh air, preventing the buildup of harmful gases like carbon monoxide.

Common mistakes to avoid during ash removal include using flammable materials near the stove, such as paper or cardboard, which could easily ignite. Another mistake is not allowing the ashes to cool completely before disposal, as hot embers can cause fires.wood stove fans ecofan

Taking these precautions will help keep me safe during the cleaning process.

Now, let’s move on to the tools and supplies you’ll need.

Tools and Supplies You’ll Need

To properly clean a stove, you’ll need specific tools and supplies. Here are the essential items you’ll need for cleaning your wood stove:

  1. Ash shovel: This tool is designed to scoop and remove ash from the stove without spreading it around.wood burner stove

  2. Stiff brush: Use a brush with stiff bristles to scrub off any stubborn soot or residue.

  3. Vacuum cleaner: A vacuum with a HEPA filter is ideal for sucking up fine ash particles without releasing them back into the air.

  4. Cleaning solution: Choose a non-abrasive cleaner specifically formulated for wood stoves to remove grease and grime without damaging the surface.

When it comes to cleaning techniques, start by removing any loose debris with the ash shovel. Then, use the brush to scrub away any remaining ash or soot.

Advertisement
wood stove fireplace inserts near me

Next, use the vacuum cleaner to remove any fine particles. Finally, wipe down the stove with a damp cloth and the cleaning solution to ensure a thorough clean.

Remember to follow proper ash disposal methods to prevent any fire hazards.

Step-by-Step Process for Ash Removal

Using the ash shovel, I scoop up any loose debris from the stove. It’s important to remove the ash properly to ensure both safety and cleanliness.

First, I make sure that the stove is completely cool before starting the cleaning process. Then, I carefully scoop the ash into a metal bucket designated specifically for ash disposal. This bucket should be kept outside, away from any flammable materials, until the ash cools completely.wood stove fan amazon

Once cooled, I transfer the ash to a sealed bag or container. It’s crucial to avoid disposing of ash in plastic bags or containers, as it can still retain heat and potentially cause a fire.

Maintenance Tips to Prevent Ash Buildup

I always make sure to clean out the ash from my wood stove regularly to prevent any buildup. Not only does this help prevent damage to the stove, but it also maximizes its efficiency. Here are some maintenance tips that I follow to keep my wood stove in optimal condition:

  1. Empty the ash pan: After each use, I remove the ash pan and dispose of the ashes in a metal container. This prevents any leftover embers from reigniting and causing damage.

  2. Clean the firebox: Using a brush or vacuum, I thoroughly clean the firebox to remove any loose ash. This ensures proper airflow and prevents clogs.lopi wood stove for sale craigslist

  3. Inspect the gaskets: I check the gaskets around the door and glass regularly to ensure they’re intact. Damaged gaskets can lead to heat loss and reduced efficiency.

  4. Schedule professional maintenance: Once a year, I have a professional inspect and clean my wood stove to identify any potential issues and ensure it’s operating at its best.

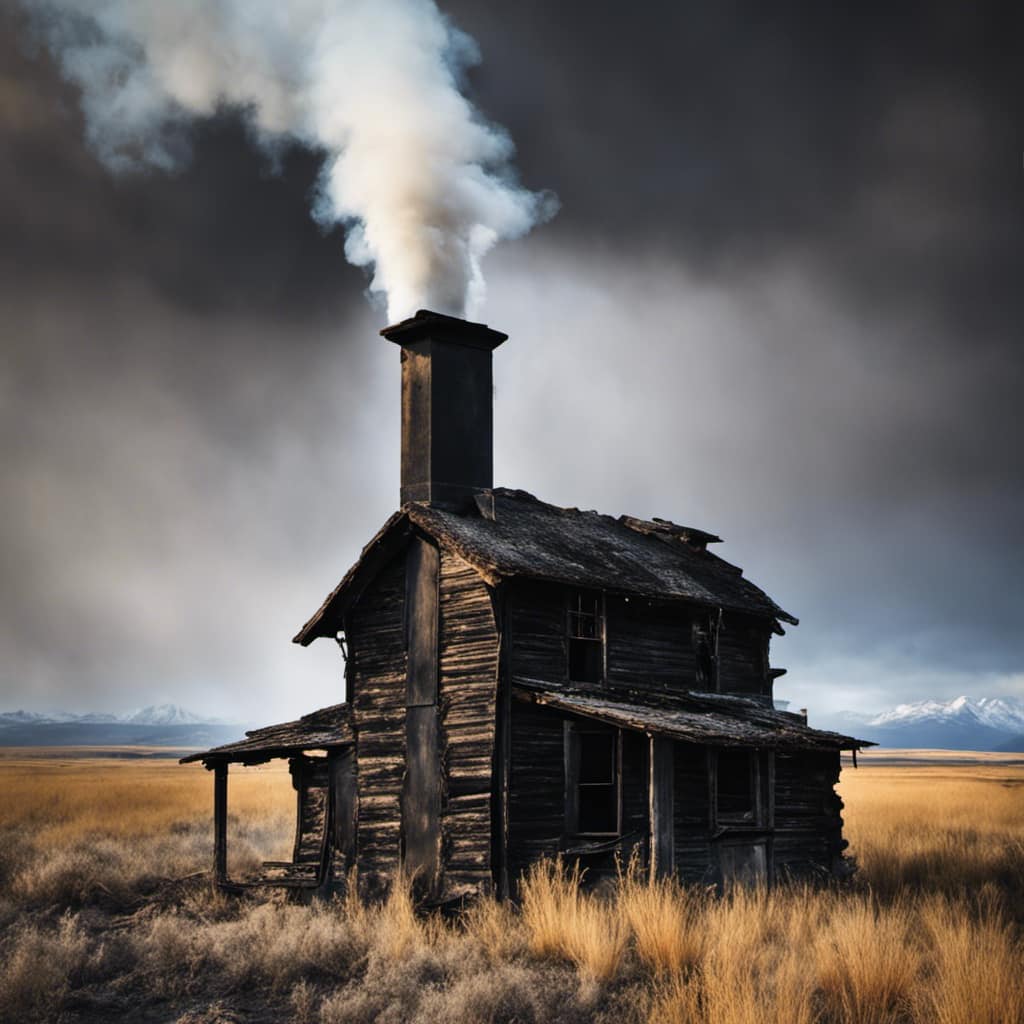
Can capping off a wood stove pipe affect the removal of ash from the wood stove?

When considering capping off a wood stove pipe, it’s important to follow a capping off wood stove pipe tutorial to ensure proper ventilation and prevent the build-up of ash in the wood stove. Improper capping off can disrupt the removal of ash, leading to potential safety hazards.

Advertisement

Frequently Asked Questions

Can I Use Water to Remove Ash From My Wood Stove?

Yes, you can use water to remove ash from your wood stove. However, there are both pros and cons to consider. Water can help to minimize dust, but it may also create a messy sludge that is difficult to clean.

How Often Should I Clean Out the Ash From My Wood Stove?

Cleaning out the ash from my wood stove is an essential task to maintain its efficiency. I use the appropriate tools, like a shovel and a metal bucket, to safely remove the ash. Regular cleaning ensures optimal performance.wood burning stove with blower

Is It Necessary to Wear Protective Gloves When Removing Ash From the Wood Stove?

Wearing gloves when removing ash from a wood stove is necessary, not overkill. It’s important to protect your hands while cleaning to avoid burns and irritation from the ash.

Can I Reuse the Ash for Any Other Purposes?

Yes, you can reuse the ash for other purposes. It can be used for composting, as it enriches the soil with nutrients. Additionally, ash can be used as a natural deodorizer to absorb odors in your home.

How Can I Dispose of the Ash Safely and Responsibly?

When it comes to disposing of ash from a wood stove, it’s important to consider the environmental impact. There are various safe disposal methods available that can help minimize any potential harm.

Conclusion

In conclusion, regularly removing ash from your wood stove is essential for maintaining its efficiency and preventing possible hazards. By following the step-by-step process and using the necessary tools and supplies, you can easily and safely remove ash buildup.

Advertisement
wood burning stove

Remember to take necessary safety precautions and consider these maintenance tips to prevent future ash accumulation. By keeping your wood stove clean, you can ensure optimal performance and enjoy the benefits of a warm and cozy home.

Growing up surrounded by the vast beauty of nature, Sierra was always drawn to the call of the wild. While others sought the comfort of the familiar, she ventured out, embracing the unpredictable and finding stories in the heartbeat of nature.   At the epicenter of every remarkable venture lies a dynamic team—a fusion of diverse talents, visions, and passions. The essence of Best Small Wood Stoves is crafted and refined by such a trio: Sierra, Logan, and Terra. Their collective expertise has transformed the platform into a leading authority on small wood stoves, radiating warmth and knowledge in equal measure.

Continue Reading
Advertisement

Wood Stove

How To Unbolt A Blaze King Wood Stove Door

Published

on

By

An image capturing the intricate process of removing a Blaze King wood stove door

I’ve come to understand the importance of effectively managing a wood stove to maintain a warm and welcoming environment at home. In the guide that follows, I’ll be sharing my knowledge on how to master this undertaking successfully.

Did you know that the door of a Blaze King wood stove may need to be unbolted for maintenance or repairs? With the right tools and a little know-how, you’ll be able to remove and reassemble the door with ease, ensuring your wood stove remains in top condition.

Let’s get started!

Key Takeaways

  • Use a wrench to loosen the bolts on the door hinges and remove them carefully.
  • Ensure the wood stove is cool and clean before removing the door.
  • Inspect the bolts, hinges, and hinge pins for any damage or rust.
  • Gently detach the door from the stove body and set it aside in a safe place.

Tools and Materials Needed

I’ll need a wrench to loosen the bolts on the Blaze King wood stove door.

Before starting, make sure you have all the necessary tools and materials. Here’s a list of what you’ll need:

  • A wrench, preferably a socket wrench, to fit the bolt size
  • A small container to hold the bolts and nuts
  • A soft cloth or towel to protect the stove’s surface.

Step by step, here’s how to unbolt the door:

  1. First, locate the bolts on the door hinges.
  2. Then, use the wrench to loosen the bolts by turning them counterclockwise.
  3. Once all the bolts are loose, carefully remove them and place them in the container.
  4. Finally, gently lift the door off its hinges.

With the door unbolted, you can now proceed to prepare the wood stove for door removal.

Preparing the Wood Stove for Door Removal

I can begin preparing the wood stove for door removal by carefully cleaning the stove’s surface and removing any debris. Before I start, I ensure that the stove is cool and not in use.

Advertisement

Using a soft cloth, I gently wipe the stove’s surface to remove any dirt or dust. This step is essential to prevent any particles from getting inside the stove during the door removal process.

Next, I inspect the stove for any damage or wear. I check for any cracks or signs of deterioration that may affect the door’s removal. If I notice any issues, I address them before proceeding further.

Once I’m satisfied with the surface cleaning and inspection, I’m ready to move on to removing the bolts and hinges, which will allow me to detach the door from the wood stove.

Removing the Bolts and Hinges

To remove the bolts and hinges, I carefully unscrew the four bolts
and use a screwdriver to detach the hinges from the wood stove door.

This process is crucial for troubleshooting issues with a Blaze King wood stove door,
especially if the hinges are rusty. Rusty hinges can cause the door
to become stiff or difficult to open and close.

Advertisement

By removing the bolts and hinges, I can inspect them for any signs of rust or damage.
If I notice rust, I can clean it off using a wire brush and apply a lubricant to prevent future rusting.

Troubleshooting issues with the door hinges is essential to ensure smooth operation
and prevent any potential safety hazards.

Detaching the Door From the Stove Body

Inspecting the stove body and examining any potential damage is crucial before detaching the door to ensure a smooth and safe process. Proper maintenance for a Blaze King wood stove door is essential to avoid common issues with wood stove door detachment.

Here are four steps to successfully detach the door:

  1. Begin by carefully removing any screws or bolts that secure the door to the stove body.

  2. Gently pull the door away from the stove body, being mindful of any resistance or stuck parts.

  3. Inspect the hinges and hinges pins for wear or damage, as these can cause difficulty in detaching the door.

  4. Once the door is detached, set it aside in a safe place to prevent any accidental damage or injury.

By following these steps and ensuring proper maintenance, you can safely detach the door from your Blaze King wood stove.

Advertisement

Now, let’s move on to reassembling the door and the final steps.

Reassembling the Door and Final Steps

After carefully inspecting the hinges and hinge pins, it’s time to reassemble the door and complete the final steps.

When reassembling the door of a Blaze King wood stove, it’s crucial to secure the hinges properly to ensure proper functionality and safety. Start by aligning the door with the stove body, making sure the hinge pins are inserted into their respective holes. Once in place, gently push the door towards the stove until it fully closes.

Next, tighten the hinge screws using a screwdriver, ensuring that they’re securely fastened. It’s important to check that the door opens and closes smoothly without any friction or resistance.

Finally, test the door by gently pulling and pushing on it to ensure that it’s securely attached and operating correctly.

Advertisement

Frequently Asked Questions

How Do I Know When It’s Time to Remove the Door of My Blaze King Wood Stove?

When signs of wear and tear start appearing on my Blaze King wood stove door, I know it’s time to remove it. I follow these steps to safely unbolt the door and ensure proper maintenance.

Can I Remove the Door of My Blaze King Wood Stove Without Any Assistance?

Certainly! Removing the door of a Blaze King wood stove without assistance is possible. However, if you encounter any issues such as bolt stripping, troubleshooting might be required to ensure a successful removal.

Are There Any Special Precautions I Should Take Before Removing the Door of My Blaze King Wood Stove?

Before removing the door of my Blaze King wood stove, I take some precautions. I ensure the stove is completely cool and use protective gloves. The only tool required is a wrench to unbolt the door.

What Should I Do if I Accidentally Strip the Bolts While Removing the Door of My Blaze King Wood Stove?

If I accidentally strip the bolts while removing the door of my Blaze King wood stove, I would first try using a rubber band or a hammer to grip the stripped bolt. If that fails, I may need to resort to drilling it out.

Can I Replace the Hinges on My Blaze King Wood Stove Door if They Become Damaged or Worn Out?

Yes, you can replace the hinges on a Blaze King wood stove door if they become damaged or worn out. There are alternative methods to remove the door, but replacing the hinges is a more permanent solution.

Advertisement

Conclusion

After following these steps, you’ll be amazed at how effortlessly you can unbolt a Blaze King wood stove door. The process may seem daunting at first, but with the right tools and a little know-how, it becomes a breeze.

Remember to take your time and be patient as you detach the bolts and hinges.

Once you’ve reassembled the door, you’ll feel like a seasoned pro, ready to enjoy the warmth and comfort of your wood stove.

Continue Reading

Wood Stove

How To Use Flue Wood Stove

Published

on

By

An image showcasing a cozy living room with a traditional flue wood stove as the focal point

I’ve always been enchanted by the distinct allure of the gentle crackles and mild warmth emanating from a wood stove. There’s an undeniable magic in huddling near the dancing flames during a cool night.

But using a flue wood stove requires some know-how. In this article, I’ll guide you through the essential steps to effectively and safely use your flue wood stove.

From selecting the right wood to adjusting the damper, we’ll cover everything you need to know for a toasty and efficient fire.

Let’s get started!

Key Takeaways

  • Select seasoned hardwoods like oak, maple, or hickory for efficient burning.
  • Properly store wood off the ground in a dry and well-ventilated area to prevent rot and mold growth.
  • Thoroughly clean the chimney and regularly remove ashes to maintain proper air circulation.
  • Ensure the flue is clear and unobstructed, and consider installing a chimney cap for safety.

Selecting the Right Wood for Your Flue Wood Stove

I love using my flue wood stove, but I’m not sure if I’m selecting the right wood for it. When it comes to choosing firewood for your flue wood stove, there are a few factors to consider.

First, you want to make sure the wood is seasoned properly. Green or wet wood won’t burn efficiently and can cause excessive smoke and creosote buildup in your flue. It’s best to use well-seasoned hardwoods like oak, maple, or hickory, which have a lower moisture content.

Advertisement

Additionally, proper wood storage is crucial for maintaining the quality of your firewood. Wood should be stored off the ground, in a dry and well-ventilated area, to prevent rot and mold growth.

Preparing the Firebox and Chimney for Use

To ensure a safe and efficient fire, I always start by thoroughly cleaning the firebox and chimney before using my flue wood stove. Cleaning the chimney is crucial to prevent the buildup of creosote, a highly flammable substance that can cause chimney fires. I use a chimney brush to remove any soot and debris, ensuring that the flue is clear and unobstructed.

Maintaining the firebox is equally important, as it allows for proper air circulation and prevents the risk of a dangerous buildup of ash and debris. I regularly remove ashes and clean the firebox using a fireplace shovel and brush.

By following these steps, I can ensure that my flue wood stove operates safely and efficiently.

Now, let’s move on to lighting and maintaining a safe fire in your flue wood stove.

Advertisement

Lighting and Maintaining a Safe Fire in Your Flue Wood Stove

How can you properly light and maintain a safe fire in your flue wood stove?

When it comes to fire safety, it’s crucial to follow the right procedures for lighting and maintaining a fire in your flue wood stove.

First, ensure that your flue is open and the damper is fully functional to allow for proper ventilation.

Next, gather dry kindling and small pieces of wood to start the fire. Place the kindling in the center of the firebox, followed by the small pieces of wood arranged in a crisscross pattern.

Use a long match or fireplace lighter to ignite the kindling. Once the fire is established, add larger pieces of wood slowly, ensuring that the fire is well-ventilated and not smoldering.

Advertisement

Remember to regularly remove ashes and clean the flue for optimal performance and fire safety.

Adjusting the Damper for Optimal Heat and Efficiency

The key to maximizing heat and efficiency in your flue wood stove is adjusting the damper. The damper controls the airflow, which directly affects the combustion process and heat output. To achieve optimal damper settings, start by fully opening the damper before lighting the fire. Once the fire is established, gradually adjust the damper to control the burn rate and heat output.

If you notice excessive smoke or a weak flame, the damper may be closed too much, restricting airflow. On the other hand, if the fire burns too quickly or produces too much heat, the damper may be open too wide. Troubleshooting common damper issues involves making small adjustments and observing the fire’s behavior. By finding the perfect balance, you can ensure efficient heat production in your flue wood stove.

To continue enjoying the benefits of your flue wood stove, it’s essential to regularly clean and maintain it for longevity. Cleaning the flue and chimney removes creosote buildup, reducing the risk of chimney fires. Use a chimney brush and rods to remove the soot and debris. Additionally, clean the stove’s interior by removing ashes and wiping down the surfaces. Inspect the stove’s components for any signs of damage or wear and replace as necessary.

Maintaining proper airflow and ensuring a tight seal on the stove’s doors and gaskets are also crucial for efficient operation. By implementing a regular cleaning and maintenance routine, you can extend the lifespan of your flue wood stove and continue enjoying its warmth and efficiency for years to come.

Advertisement

Cleaning and Maintaining Your Flue Wood Stove for Longevity

I always make sure to clean and maintain my flue wood stove regularly to ensure its longevity. Proper cleaning and maintenance not only prolongs the lifespan of the stove but also ensures its optimal performance.

Here are some essential steps and tips to help you clean and maintain your flue wood stove effectively:

  • Use cleaning tools such as a wire brush, stove polish, and glass cleaner to remove soot, ash, and creosote buildup from the stove’s surfaces.
  • Inspect and clean the flue pipe regularly to prevent blockages and improve the stove’s efficiency.
  • Troubleshoot common issues like a weak draft or excessive smoke by checking the chimney cap, damper, and air vents for any obstructions.

Frequently Asked Questions

How Do I Properly Season Firewood for Use in a Flue Wood Stove?

To properly season firewood for a flue wood stove, it is essential to let it dry for at least 6 months. Seasoned firewood burns efficiently, produces more heat, and reduces the amount of smoke and creosote buildup in the flue.

Can I Use Softwood in My Flue Wood Stove?

Yes, I can use softwood in my flue wood stove, but it’s better to use hardwood. Hardwood burns longer and produces more heat, making it more efficient for heating.

Are There Any Specific Safety Precautions I Should Take When Lighting a Fire in My Flue Wood Stove?

When lighting a fire in my flue wood stove, I always take proper fire safety precautions. This includes using well-seasoned firewood to prevent excessive smoke and creosote buildup, which can be a fire hazard.

How Do I Know if My Damper Is Functioning Correctly and How Can I Adjust It?

To ensure my damper is functioning correctly, I check for any blockages or build-up and make sure it opens and closes smoothly. If I need to adjust it, I refer to the stove’s manual for specific instructions.

Advertisement

Is There a Recommended Schedule for Cleaning and Maintaining My Flue Wood Stove to Ensure Its Longevity?

There is a recommended cleaning schedule and tips for maintaining a flue wood stove to ensure its longevity. Regular cleaning, inspection, and proper use of the stove can help prevent issues and prolong its lifespan.

Conclusion

In the journey of using a flue wood stove, selecting the right wood is like choosing the path to success.

Preparing the firebox and chimney is like laying a strong foundation for your dreams.

Lighting and maintaining a safe fire is like nurturing your aspirations with care.

Adjusting the damper is like finding the perfect balance in life.

Advertisement

Cleaning and maintaining the stove is like preserving the wisdom gained along the way.

Embrace these steps, and your flue wood stove will guide you towards a warm and fulfilling future.

Continue Reading

Wood Stove

Why Is My Wood Stove Insert Not Dampening Down Enough

Published

on

By

An image showcasing a closed wood stove insert with visible flames and intense heat escaping from the gaps around the door

As I sit next to the snapping flames, it becomes clear to me that my wood stove insert is not successfully diminishing the noise. It feels similar to attempting to soothe a wild horse, as the fire continues to resist any efforts at being subdued.

In this article, I will delve into the possible culprits behind this stubborn behavior: air leakages, inadequate insulation, damaged dampers, improper firewood selection, and insufficient combustion air supply.

Join me as we unravel the mysteries of taming the fiery beast within our wood stoves.

Key Takeaways

  • Air leakages and improper seals can prevent the wood stove insert from dampening down properly.
  • Inadequate insulation can lead to poor draft control and incomplete combustion.
  • Damaged or faulty dampers can affect airflow control and result in excessive heat output.
  • Improper firewood selection, such as high moisture content, can hinder combustion and increase smoke production.

Possible Air Leakages

I’m worried about possible air leakages in my wood stove insert, causing it to not dampen down enough.

One of the main factors affecting the dampening down of a wood stove insert is the airflow control. If there are air leakages, it can disrupt the proper regulation of airflow, leading to difficulties in dampening down the fire.

To address this issue, it’s essential to ensure that the seals around the stove and the chimney are intact. Regular chimney maintenance is crucial to prevent any air leakages. Inspecting and repairing any damaged gaskets or seals can help improve the efficiency of the wood stove insert and enhance the dampening down process.

Advertisement

Inadequate Insulation

The insulation in my wood stove insert is inadequate, causing heat loss and inefficient burning. This issue can be attributed to a few key factors:

  • Insufficient insulation: The lack of proper insulation allows heat to escape from the wood stove insert, resulting in wasted energy and reduced heating efficiency.

  • Poor draft control: Inadequate insulation can also lead to poor draft control, causing difficulty in regulating the airflow and combustion process within the stove. This can result in incomplete combustion and increased emissions.

  • Increased fuel consumption: Due to the inadequate insulation, the wood stove insert requires more fuel to maintain desired temperatures, leading to higher heating costs and environmental impact.

To address these problems, it’s necessary to improve the insulation of the wood stove insert. This will enhance heat retention, optimize draft control, and promote efficient burning. Additionally, it’s important to check for any damaged or faulty dampers, as they can also contribute to heat loss and inefficient burning.

Damaged or Faulty Dampers

I’ll check for any damaged or faulty dampers to see if they’re causing the issue with my wood stove insert. Damaged dampers can lead to poor airflow control, resulting in insufficient dampening down of the wood stove. This can lead to excessive heat output and difficulty in controlling the burn rate. Faulty dampers can also contribute to smoke escaping into the room, causing discomfort and potential health hazards.

Additionally, it’s important to consider the possibility of a damaged chimney or incorrect installation, as these can also affect the performance of the wood stove insert. A damaged chimney can hinder proper ventilation, while incorrect installation may lead to improper sealing, resulting in air leaks and reduced efficiency.

Therefore, thorough inspection of the dampers, chimney, and installation is crucial to identify and resolve any issues with the wood stove insert.

Advertisement

Improper Firewood Selection

Since I’ve been experiencing difficulties with my wood stove insert, I need to ensure that I’m not using improperly selected firewood. When it comes to selecting firewood for your wood stove insert, it’s important to consider two key factors: moisture content and wood density.

  • Moisture Content:

  • Optimal moisture content for firewood is around 20%.

  • High moisture content leads to poor combustion and excessive smoke.

  • Use a moisture meter to check the moisture level of your firewood.

  • Wood Density:

  • Dense firewood burns longer and produces more heat.

  • Hardwoods like oak and hickory have higher density.

  • Avoid softwoods like pine, as they’ve lower density.

Insufficient Combustion Air Supply

I’m experiencing a draft issue with my wood stove insert, so I can’t seem to get enough combustion air. This can be a result of ventilation issues or inadequate maintenance. To address this problem, it’s important to understand the role of combustion air and how it affects the operation of a wood stove insert.

Ventilation Issues Inadequate Maintenance
Clogged Chimney Dirty Air Intake
Blocked Air Vents Damaged Gasket
Insufficient Draft Neglected Cleaning

Ventilation issues can arise from a clogged chimney or blocked air vents, limiting the flow of fresh air into the stove. Inadequate maintenance, such as a dirty air intake or damaged gasket, can also impede proper combustion air supply. Neglected cleaning can lead to an accumulation of debris and ash, further restricting airflow. To ensure sufficient combustion air, it is crucial to regularly clean and maintain the wood stove insert, addressing any ventilation issues promptly.

Frequently Asked Questions

Can a Wood Stove Insert Be Too Large for a Room, Causing It to Not Dampen Down Enough?

Yes, a wood stove insert can be too large for a room, which can affect its ability to dampen down. Wood stove insert sizing should be appropriate for the room size to ensure optimal performance.

Are There Any Specific Maintenance Steps I Can Take to Prevent Air Leakages in My Wood Stove Insert?

Are there specific maintenance steps I can take to prevent air leakages in my wood stove insert? Proper insulation and regular inspection of gaskets, seals, and dampers can help ensure optimal performance and minimize air leaks.

Advertisement

How Can I Determine if My Wood Stove Insert Has a Damaged or Faulty Damper?

To determine if my wood stove insert has a damaged or faulty damper, I can perform a thorough damper inspection. By using troubleshooting techniques, I can identify any issues that may be causing insufficient dampening.

Are There Any Guidelines for Selecting the Right Type of Firewood to Ensure Proper Dampening in a Wood Stove Insert?

When selecting firewood for a wood stove insert, it is important to consider the type of wood and its moisture content. Best practices for dampening involve using seasoned hardwoods with a moisture content of around 20%.

What Are the Signs of Insufficient Combustion Air Supply in a Wood Stove Insert, and How Can It Be Addressed?

When my wood stove insert wasn’t dampening down enough, I realized it was due to insufficient combustion air supply. To address this, I cleaned the air intake vents and adjusted them for better airflow.

Conclusion

In conclusion, if your wood stove insert isn’t dampening down enough, it could be due to possible air leakages, inadequate insulation, damaged or faulty dampers, improper firewood selection, or insufficient combustion air supply.

It’s important to address these issues to ensure optimal performance and efficiency. Remember, a stitch in time saves nine, so don’t delay in resolving these problems to enjoy a cozy and well-regulated fire.

Advertisement

Continue Reading

Trending