Connect with us

Wood Stove

How To Put A Wood Stove In A Canvas Tent

Published

on

An image depicting a cozy canvas tent with a wood stove installation guide

I’ve always cherished camping in my canvas tent, but as the temperatures started to drop, I found myself craving a warm and cozy space. It was then that I discovered the brilliant notion of setting up a wood stove in my tent.

In this article, I’ll share with you the step-by-step process of choosing the right stove, preparing your tent, installing the chimney, and setting up the stove inside.

Get ready to transform your camping experience with this ultimate DIY project.

Key Takeaways

  • Consider availability of fuel, convenience, and personal preference when choosing the right wood stove and fuel for a canvas tent.
  • Properly measure and prepare the canvas tent for a proper fit and safe installation of the wood stove.
  • Install the chimney and ventilation system with appropriate size and length, considering the height of the tent and distance from flammable materials.
  • Position the wood stove in the center of the tent for maximum heat distribution and safety, using heat-resistant materials for improved insulation.

Choosing the Right Wood Stove for Your Canvas Tent

I’m trying to figure out which wood stove is the best fit for my canvas tent.

When it comes to wood stove fuel, there are a few options to consider.

The most common fuel for wood stoves is firewood, which is readily available and can provide a cozy, warm heat. However, firewood can be bulky to transport and may require some effort to gather and chop.

Advertisement

Another option is wood pellets, which are compressed sawdust and can be more convenient to store and handle. However, they may not provide the same ambiance as a traditional firewood stove.

As for the pros and cons of wood stove heating, one advantage is that wood stoves can provide a reliable source of heat, even in power outages. However, they require regular maintenance, such as cleaning out ash and ensuring proper ventilation to prevent carbon monoxide buildup.

Overall, choosing the right wood stove for your canvas tent depends on factors such as availability of fuel, convenience, and personal preference.

Preparing and Measuring the Tent for Wood Stove Installation

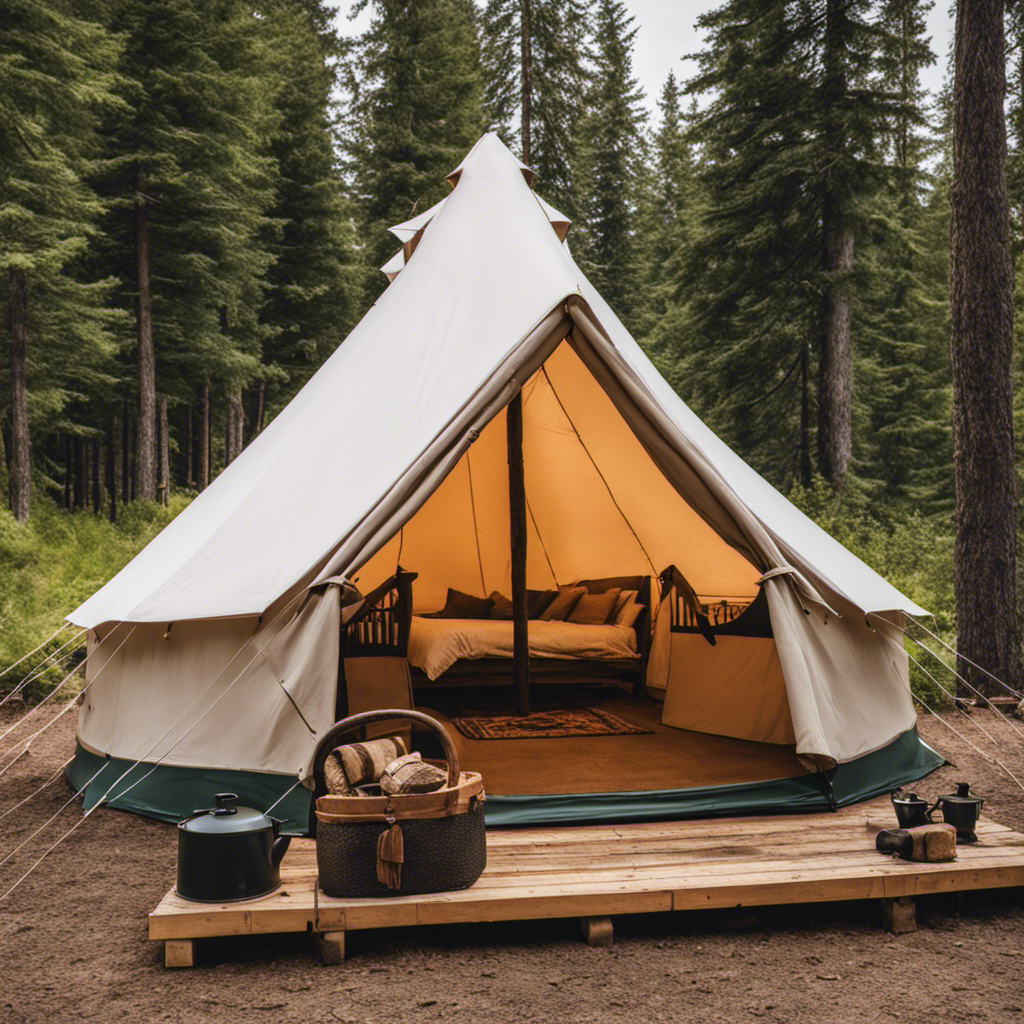
Usually, before installing a wood stove in my canvas tent, I carefully measure and prepare the tent to ensure a proper fit and safe installation. Canvas tents are known for their durability and ability to withstand various weather conditions.

When it comes to insulation options, there are a few choices available. One option is to use an insulated stove jack, which is a specially designed piece that fits around the stovepipe and prevents heat loss. Another option is to use insulation blankets or pads, which can be placed on the walls and roof of the tent to provide additional insulation. These options help to keep the heat inside the tent, making it more comfortable during colder months.

Advertisement

Now that the tent is prepared and insulated, it’s time to move on to installing the chimney and ventilation system.

Installing the Chimney and Ventilation System

I have carefully chosen the appropriate size and length of the chimney and ventilation system to ensure proper airflow and efficient operation.

When installing the chimney, it’s crucial to consider the height of the canvas tent and the distance it should be from any flammable materials.

I’ll also be installing a chimney cap to prevent rain or debris from entering the system.

To ensure optimal performance, I’ll insulate the chimney using a high-temperature insulation material to minimize heat loss and improve the overall efficiency of the wood stove.

Advertisement

By insulating the chimney, I can maximize the heat output inside the tent and reduce the risk of any external surfaces becoming too hot.

Now, let’s move on to setting up the wood stove inside the canvas tent.

Setting Up the Wood Stove Inside the Canvas Tent

Carefully and thoughtfully, we can position the wood stove in the center of the canvas tent, ensuring maximum heat distribution and safety.

When setting up a wood stove in a canvas tent, it’s important to consider insulation and alternative heating options.

To improve insulation, we can use heat-resistant materials such as fireproof blankets or reflective insulation panels around the stove. These materials will help retain heat and prevent it from escaping, ensuring a warm and comfortable environment inside the tent.

Advertisement

Additionally, it’s essential to have alternative heating options in case of emergencies or when the wood stove isn’t sufficient. This can include portable propane heaters or electric heaters powered by a generator.

Safety Tips and Maintenance for Wood Stove Usage in a Canvas Tent

To ensure the safety and longevity of our wood stove in the canvas tent, regular inspections and cleanings are necessary. Here are some tips for fire prevention and carbon monoxide detection:

  • Inspections:

  • Check the stovepipe for any signs of damage or blockage, such as creosote buildup or bird nests.

  • Examine the stove for any cracks or leaks that could lead to a fire hazard.

  • Cleanings:

  • Remove any ashes and debris from the stove and stovepipe regularly to prevent blockages and improve airflow.

  • Clean the stove’s glass window to maintain visibility and ensure proper combustion.

Fire Prevention:

  • Keep flammable materials at a safe distance from the stove.
  • Always use a fireproof mat or floor protector underneath the stove to prevent accidental fires.

Carbon Monoxide Detection:

  • Install a carbon monoxide detector in the tent to alert you of any dangerous levels of this odorless gas.
  • Test the detector regularly and replace batteries as needed.

Frequently Asked Questions

How Do You Properly Clean and Maintain a Wood Stove in a Canvas Tent?

To properly clean and maintain a wood stove, start by removing all ashes and debris. Use a wire brush to scrub the stove’s interior and remove any soot buildup. Regularly check and clean the stovepipe for any blockages to ensure proper ventilation.

Can a Wood Stove Be Used in a Canvas Tent During Heavy Rain or Snowfall?

Using a wood stove in a canvas tent during heavy rain or snowfall is both safe and effective. It can provide warmth and be used as a cooking source during inclement weather.

Are There Any Specific Fire Safety Precautions That Need to Be Taken When Using a Wood Stove in a Canvas Tent?

When using a wood stove in a canvas tent, it is crucial to take fire safety precautions. Regular maintenance and inspection of the stove, proper ventilation and clearances, and using a fireproof mat are essential to ensure safety.

Advertisement

What Are Some Alternative Heating Options for a Canvas Tent if a Wood Stove Is Not Suitable?

If a wood stove is not suitable for your canvas tent, there are alternative fuel options such as propane heaters or electric heaters. However, it’s important to still follow safety precautions to prevent any accidents.

Are There Any Specific Regulations or Permits Required for Installing a Wood Stove in a Canvas Tent?

Regulations and permits are necessary when installing a wood stove in a canvas tent. It’s crucial to comply with local guidelines to ensure safety. Proper ventilation, clearances, and fireproof materials are important considerations to meet the requirements.

Conclusion

In conclusion, when it comes to installing a wood stove in a canvas tent, there are several important considerations to keep in mind.

Firstly, it is crucial to choose the right stove for your tent. This includes considering the size and capacity of the stove, as well as any specific features or requirements you may have. Taking the time to research and select the appropriate stove will ensure that it fits well within your tent and provides the desired heating capabilities.

Secondly, accurate measurements of the tent are essential for a successful installation. This includes measuring the dimensions of both the floor space and the height of the tent. Proper measurements will help you determine the best location for the stove and ensure that it does not pose any safety risks.

Advertisement

Another crucial aspect of installing a wood stove in a canvas tent is setting up the chimney and ventilation system correctly. This involves carefully following the manufacturer’s instructions and ensuring that the chimney is properly secured and insulated. Adequate ventilation is important to prevent the buildup of carbon monoxide and other harmful gases.

Lastly, once the stove and chimney are installed, it is important to pay close attention to safety and maintenance. This includes regularly cleaning the stove and chimney to prevent the buildup of creosote and other debris. It is also important to practice safe usage habits, such as keeping flammable materials away from the stove and using a fireproof mat or barrier underneath.

By following these steps, you can enjoy the warmth and coziness of a wood stove in your canvas tent with confidence and peace of mind.

Growing up surrounded by the vast beauty of nature, Sierra was always drawn to the call of the wild. While others sought the comfort of the familiar, she ventured out, embracing the unpredictable and finding stories in the heartbeat of nature.   At the epicenter of every remarkable venture lies a dynamic team—a fusion of diverse talents, visions, and passions. The essence of Best Small Wood Stoves is crafted and refined by such a trio: Sierra, Logan, and Terra. Their collective expertise has transformed the platform into a leading authority on small wood stoves, radiating warmth and knowledge in equal measure.

Continue Reading
Advertisement

Wood Stove

How To Unbolt A Blaze King Wood Stove Door

Published

on

By

An image capturing the intricate process of removing a Blaze King wood stove door

I’ve come to understand the importance of effectively managing a wood stove to maintain a warm and welcoming environment at home. In the guide that follows, I’ll be sharing my knowledge on how to master this undertaking successfully.

Did you know that the door of a Blaze King wood stove may need to be unbolted for maintenance or repairs? With the right tools and a little know-how, you’ll be able to remove and reassemble the door with ease, ensuring your wood stove remains in top condition.

Let’s get started!

Key Takeaways

  • Use a wrench to loosen the bolts on the door hinges and remove them carefully.
  • Ensure the wood stove is cool and clean before removing the door.
  • Inspect the bolts, hinges, and hinge pins for any damage or rust.
  • Gently detach the door from the stove body and set it aside in a safe place.

Tools and Materials Needed

I’ll need a wrench to loosen the bolts on the Blaze King wood stove door.

Before starting, make sure you have all the necessary tools and materials. Here’s a list of what you’ll need:

  • A wrench, preferably a socket wrench, to fit the bolt size
  • A small container to hold the bolts and nuts
  • A soft cloth or towel to protect the stove’s surface.

Step by step, here’s how to unbolt the door:

  1. First, locate the bolts on the door hinges.
  2. Then, use the wrench to loosen the bolts by turning them counterclockwise.
  3. Once all the bolts are loose, carefully remove them and place them in the container.
  4. Finally, gently lift the door off its hinges.

With the door unbolted, you can now proceed to prepare the wood stove for door removal.

Preparing the Wood Stove for Door Removal

I can begin preparing the wood stove for door removal by carefully cleaning the stove’s surface and removing any debris. Before I start, I ensure that the stove is cool and not in use.

Advertisement

Using a soft cloth, I gently wipe the stove’s surface to remove any dirt or dust. This step is essential to prevent any particles from getting inside the stove during the door removal process.

Next, I inspect the stove for any damage or wear. I check for any cracks or signs of deterioration that may affect the door’s removal. If I notice any issues, I address them before proceeding further.

Once I’m satisfied with the surface cleaning and inspection, I’m ready to move on to removing the bolts and hinges, which will allow me to detach the door from the wood stove.

Removing the Bolts and Hinges

To remove the bolts and hinges, I carefully unscrew the four bolts
and use a screwdriver to detach the hinges from the wood stove door.

This process is crucial for troubleshooting issues with a Blaze King wood stove door,
especially if the hinges are rusty. Rusty hinges can cause the door
to become stiff or difficult to open and close.

Advertisement

By removing the bolts and hinges, I can inspect them for any signs of rust or damage.
If I notice rust, I can clean it off using a wire brush and apply a lubricant to prevent future rusting.

Troubleshooting issues with the door hinges is essential to ensure smooth operation
and prevent any potential safety hazards.

Detaching the Door From the Stove Body

Inspecting the stove body and examining any potential damage is crucial before detaching the door to ensure a smooth and safe process. Proper maintenance for a Blaze King wood stove door is essential to avoid common issues with wood stove door detachment.

Here are four steps to successfully detach the door:

  1. Begin by carefully removing any screws or bolts that secure the door to the stove body.

  2. Gently pull the door away from the stove body, being mindful of any resistance or stuck parts.

  3. Inspect the hinges and hinges pins for wear or damage, as these can cause difficulty in detaching the door.

  4. Once the door is detached, set it aside in a safe place to prevent any accidental damage or injury.

By following these steps and ensuring proper maintenance, you can safely detach the door from your Blaze King wood stove.

Advertisement

Now, let’s move on to reassembling the door and the final steps.

Reassembling the Door and Final Steps

After carefully inspecting the hinges and hinge pins, it’s time to reassemble the door and complete the final steps.

When reassembling the door of a Blaze King wood stove, it’s crucial to secure the hinges properly to ensure proper functionality and safety. Start by aligning the door with the stove body, making sure the hinge pins are inserted into their respective holes. Once in place, gently push the door towards the stove until it fully closes.

Next, tighten the hinge screws using a screwdriver, ensuring that they’re securely fastened. It’s important to check that the door opens and closes smoothly without any friction or resistance.

Finally, test the door by gently pulling and pushing on it to ensure that it’s securely attached and operating correctly.

Advertisement

Frequently Asked Questions

How Do I Know When It’s Time to Remove the Door of My Blaze King Wood Stove?

When signs of wear and tear start appearing on my Blaze King wood stove door, I know it’s time to remove it. I follow these steps to safely unbolt the door and ensure proper maintenance.

Can I Remove the Door of My Blaze King Wood Stove Without Any Assistance?

Certainly! Removing the door of a Blaze King wood stove without assistance is possible. However, if you encounter any issues such as bolt stripping, troubleshooting might be required to ensure a successful removal.

Are There Any Special Precautions I Should Take Before Removing the Door of My Blaze King Wood Stove?

Before removing the door of my Blaze King wood stove, I take some precautions. I ensure the stove is completely cool and use protective gloves. The only tool required is a wrench to unbolt the door.

What Should I Do if I Accidentally Strip the Bolts While Removing the Door of My Blaze King Wood Stove?

If I accidentally strip the bolts while removing the door of my Blaze King wood stove, I would first try using a rubber band or a hammer to grip the stripped bolt. If that fails, I may need to resort to drilling it out.

Can I Replace the Hinges on My Blaze King Wood Stove Door if They Become Damaged or Worn Out?

Yes, you can replace the hinges on a Blaze King wood stove door if they become damaged or worn out. There are alternative methods to remove the door, but replacing the hinges is a more permanent solution.

Advertisement

Conclusion

After following these steps, you’ll be amazed at how effortlessly you can unbolt a Blaze King wood stove door. The process may seem daunting at first, but with the right tools and a little know-how, it becomes a breeze.

Remember to take your time and be patient as you detach the bolts and hinges.

Once you’ve reassembled the door, you’ll feel like a seasoned pro, ready to enjoy the warmth and comfort of your wood stove.

Continue Reading

Wood Stove

How To Use Flue Wood Stove

Published

on

By

An image showcasing a cozy living room with a traditional flue wood stove as the focal point

I’ve always been enchanted by the distinct allure of the gentle crackles and mild warmth emanating from a wood stove. There’s an undeniable magic in huddling near the dancing flames during a cool night.

But using a flue wood stove requires some know-how. In this article, I’ll guide you through the essential steps to effectively and safely use your flue wood stove.

From selecting the right wood to adjusting the damper, we’ll cover everything you need to know for a toasty and efficient fire.

Let’s get started!

Key Takeaways

  • Select seasoned hardwoods like oak, maple, or hickory for efficient burning.
  • Properly store wood off the ground in a dry and well-ventilated area to prevent rot and mold growth.
  • Thoroughly clean the chimney and regularly remove ashes to maintain proper air circulation.
  • Ensure the flue is clear and unobstructed, and consider installing a chimney cap for safety.

Selecting the Right Wood for Your Flue Wood Stove

I love using my flue wood stove, but I’m not sure if I’m selecting the right wood for it. When it comes to choosing firewood for your flue wood stove, there are a few factors to consider.

First, you want to make sure the wood is seasoned properly. Green or wet wood won’t burn efficiently and can cause excessive smoke and creosote buildup in your flue. It’s best to use well-seasoned hardwoods like oak, maple, or hickory, which have a lower moisture content.

Advertisement

Additionally, proper wood storage is crucial for maintaining the quality of your firewood. Wood should be stored off the ground, in a dry and well-ventilated area, to prevent rot and mold growth.

Preparing the Firebox and Chimney for Use

To ensure a safe and efficient fire, I always start by thoroughly cleaning the firebox and chimney before using my flue wood stove. Cleaning the chimney is crucial to prevent the buildup of creosote, a highly flammable substance that can cause chimney fires. I use a chimney brush to remove any soot and debris, ensuring that the flue is clear and unobstructed.

Maintaining the firebox is equally important, as it allows for proper air circulation and prevents the risk of a dangerous buildup of ash and debris. I regularly remove ashes and clean the firebox using a fireplace shovel and brush.

By following these steps, I can ensure that my flue wood stove operates safely and efficiently.

Now, let’s move on to lighting and maintaining a safe fire in your flue wood stove.

Advertisement

Lighting and Maintaining a Safe Fire in Your Flue Wood Stove

How can you properly light and maintain a safe fire in your flue wood stove?

When it comes to fire safety, it’s crucial to follow the right procedures for lighting and maintaining a fire in your flue wood stove.

First, ensure that your flue is open and the damper is fully functional to allow for proper ventilation.

Next, gather dry kindling and small pieces of wood to start the fire. Place the kindling in the center of the firebox, followed by the small pieces of wood arranged in a crisscross pattern.

Use a long match or fireplace lighter to ignite the kindling. Once the fire is established, add larger pieces of wood slowly, ensuring that the fire is well-ventilated and not smoldering.

Advertisement

Remember to regularly remove ashes and clean the flue for optimal performance and fire safety.

Adjusting the Damper for Optimal Heat and Efficiency

The key to maximizing heat and efficiency in your flue wood stove is adjusting the damper. The damper controls the airflow, which directly affects the combustion process and heat output. To achieve optimal damper settings, start by fully opening the damper before lighting the fire. Once the fire is established, gradually adjust the damper to control the burn rate and heat output.

If you notice excessive smoke or a weak flame, the damper may be closed too much, restricting airflow. On the other hand, if the fire burns too quickly or produces too much heat, the damper may be open too wide. Troubleshooting common damper issues involves making small adjustments and observing the fire’s behavior. By finding the perfect balance, you can ensure efficient heat production in your flue wood stove.

To continue enjoying the benefits of your flue wood stove, it’s essential to regularly clean and maintain it for longevity. Cleaning the flue and chimney removes creosote buildup, reducing the risk of chimney fires. Use a chimney brush and rods to remove the soot and debris. Additionally, clean the stove’s interior by removing ashes and wiping down the surfaces. Inspect the stove’s components for any signs of damage or wear and replace as necessary.

Maintaining proper airflow and ensuring a tight seal on the stove’s doors and gaskets are also crucial for efficient operation. By implementing a regular cleaning and maintenance routine, you can extend the lifespan of your flue wood stove and continue enjoying its warmth and efficiency for years to come.

Advertisement

Cleaning and Maintaining Your Flue Wood Stove for Longevity

I always make sure to clean and maintain my flue wood stove regularly to ensure its longevity. Proper cleaning and maintenance not only prolongs the lifespan of the stove but also ensures its optimal performance.

Here are some essential steps and tips to help you clean and maintain your flue wood stove effectively:

  • Use cleaning tools such as a wire brush, stove polish, and glass cleaner to remove soot, ash, and creosote buildup from the stove’s surfaces.
  • Inspect and clean the flue pipe regularly to prevent blockages and improve the stove’s efficiency.
  • Troubleshoot common issues like a weak draft or excessive smoke by checking the chimney cap, damper, and air vents for any obstructions.

Frequently Asked Questions

How Do I Properly Season Firewood for Use in a Flue Wood Stove?

To properly season firewood for a flue wood stove, it is essential to let it dry for at least 6 months. Seasoned firewood burns efficiently, produces more heat, and reduces the amount of smoke and creosote buildup in the flue.

Can I Use Softwood in My Flue Wood Stove?

Yes, I can use softwood in my flue wood stove, but it’s better to use hardwood. Hardwood burns longer and produces more heat, making it more efficient for heating.

Are There Any Specific Safety Precautions I Should Take When Lighting a Fire in My Flue Wood Stove?

When lighting a fire in my flue wood stove, I always take proper fire safety precautions. This includes using well-seasoned firewood to prevent excessive smoke and creosote buildup, which can be a fire hazard.

How Do I Know if My Damper Is Functioning Correctly and How Can I Adjust It?

To ensure my damper is functioning correctly, I check for any blockages or build-up and make sure it opens and closes smoothly. If I need to adjust it, I refer to the stove’s manual for specific instructions.

Advertisement

Is There a Recommended Schedule for Cleaning and Maintaining My Flue Wood Stove to Ensure Its Longevity?

There is a recommended cleaning schedule and tips for maintaining a flue wood stove to ensure its longevity. Regular cleaning, inspection, and proper use of the stove can help prevent issues and prolong its lifespan.

Conclusion

In the journey of using a flue wood stove, selecting the right wood is like choosing the path to success.

Preparing the firebox and chimney is like laying a strong foundation for your dreams.

Lighting and maintaining a safe fire is like nurturing your aspirations with care.

Adjusting the damper is like finding the perfect balance in life.

Advertisement

Cleaning and maintaining the stove is like preserving the wisdom gained along the way.

Embrace these steps, and your flue wood stove will guide you towards a warm and fulfilling future.

Continue Reading

Wood Stove

Why Is My Wood Stove Insert Not Dampening Down Enough

Published

on

By

An image showcasing a closed wood stove insert with visible flames and intense heat escaping from the gaps around the door

As I sit next to the snapping flames, it becomes clear to me that my wood stove insert is not successfully diminishing the noise. It feels similar to attempting to soothe a wild horse, as the fire continues to resist any efforts at being subdued.

In this article, I will delve into the possible culprits behind this stubborn behavior: air leakages, inadequate insulation, damaged dampers, improper firewood selection, and insufficient combustion air supply.

Join me as we unravel the mysteries of taming the fiery beast within our wood stoves.

Key Takeaways

  • Air leakages and improper seals can prevent the wood stove insert from dampening down properly.
  • Inadequate insulation can lead to poor draft control and incomplete combustion.
  • Damaged or faulty dampers can affect airflow control and result in excessive heat output.
  • Improper firewood selection, such as high moisture content, can hinder combustion and increase smoke production.

Possible Air Leakages

I’m worried about possible air leakages in my wood stove insert, causing it to not dampen down enough.

One of the main factors affecting the dampening down of a wood stove insert is the airflow control. If there are air leakages, it can disrupt the proper regulation of airflow, leading to difficulties in dampening down the fire.

To address this issue, it’s essential to ensure that the seals around the stove and the chimney are intact. Regular chimney maintenance is crucial to prevent any air leakages. Inspecting and repairing any damaged gaskets or seals can help improve the efficiency of the wood stove insert and enhance the dampening down process.

Advertisement

Inadequate Insulation

The insulation in my wood stove insert is inadequate, causing heat loss and inefficient burning. This issue can be attributed to a few key factors:

  • Insufficient insulation: The lack of proper insulation allows heat to escape from the wood stove insert, resulting in wasted energy and reduced heating efficiency.

  • Poor draft control: Inadequate insulation can also lead to poor draft control, causing difficulty in regulating the airflow and combustion process within the stove. This can result in incomplete combustion and increased emissions.

  • Increased fuel consumption: Due to the inadequate insulation, the wood stove insert requires more fuel to maintain desired temperatures, leading to higher heating costs and environmental impact.

To address these problems, it’s necessary to improve the insulation of the wood stove insert. This will enhance heat retention, optimize draft control, and promote efficient burning. Additionally, it’s important to check for any damaged or faulty dampers, as they can also contribute to heat loss and inefficient burning.

Damaged or Faulty Dampers

I’ll check for any damaged or faulty dampers to see if they’re causing the issue with my wood stove insert. Damaged dampers can lead to poor airflow control, resulting in insufficient dampening down of the wood stove. This can lead to excessive heat output and difficulty in controlling the burn rate. Faulty dampers can also contribute to smoke escaping into the room, causing discomfort and potential health hazards.

Additionally, it’s important to consider the possibility of a damaged chimney or incorrect installation, as these can also affect the performance of the wood stove insert. A damaged chimney can hinder proper ventilation, while incorrect installation may lead to improper sealing, resulting in air leaks and reduced efficiency.

Therefore, thorough inspection of the dampers, chimney, and installation is crucial to identify and resolve any issues with the wood stove insert.

Advertisement

Improper Firewood Selection

Since I’ve been experiencing difficulties with my wood stove insert, I need to ensure that I’m not using improperly selected firewood. When it comes to selecting firewood for your wood stove insert, it’s important to consider two key factors: moisture content and wood density.

  • Moisture Content:

  • Optimal moisture content for firewood is around 20%.

  • High moisture content leads to poor combustion and excessive smoke.

  • Use a moisture meter to check the moisture level of your firewood.

  • Wood Density:

  • Dense firewood burns longer and produces more heat.

  • Hardwoods like oak and hickory have higher density.

  • Avoid softwoods like pine, as they’ve lower density.

Insufficient Combustion Air Supply

I’m experiencing a draft issue with my wood stove insert, so I can’t seem to get enough combustion air. This can be a result of ventilation issues or inadequate maintenance. To address this problem, it’s important to understand the role of combustion air and how it affects the operation of a wood stove insert.

Ventilation Issues Inadequate Maintenance
Clogged Chimney Dirty Air Intake
Blocked Air Vents Damaged Gasket
Insufficient Draft Neglected Cleaning

Ventilation issues can arise from a clogged chimney or blocked air vents, limiting the flow of fresh air into the stove. Inadequate maintenance, such as a dirty air intake or damaged gasket, can also impede proper combustion air supply. Neglected cleaning can lead to an accumulation of debris and ash, further restricting airflow. To ensure sufficient combustion air, it is crucial to regularly clean and maintain the wood stove insert, addressing any ventilation issues promptly.

Frequently Asked Questions

Can a Wood Stove Insert Be Too Large for a Room, Causing It to Not Dampen Down Enough?

Yes, a wood stove insert can be too large for a room, which can affect its ability to dampen down. Wood stove insert sizing should be appropriate for the room size to ensure optimal performance.

Are There Any Specific Maintenance Steps I Can Take to Prevent Air Leakages in My Wood Stove Insert?

Are there specific maintenance steps I can take to prevent air leakages in my wood stove insert? Proper insulation and regular inspection of gaskets, seals, and dampers can help ensure optimal performance and minimize air leaks.

Advertisement

How Can I Determine if My Wood Stove Insert Has a Damaged or Faulty Damper?

To determine if my wood stove insert has a damaged or faulty damper, I can perform a thorough damper inspection. By using troubleshooting techniques, I can identify any issues that may be causing insufficient dampening.

Are There Any Guidelines for Selecting the Right Type of Firewood to Ensure Proper Dampening in a Wood Stove Insert?

When selecting firewood for a wood stove insert, it is important to consider the type of wood and its moisture content. Best practices for dampening involve using seasoned hardwoods with a moisture content of around 20%.

What Are the Signs of Insufficient Combustion Air Supply in a Wood Stove Insert, and How Can It Be Addressed?

When my wood stove insert wasn’t dampening down enough, I realized it was due to insufficient combustion air supply. To address this, I cleaned the air intake vents and adjusted them for better airflow.

Conclusion

In conclusion, if your wood stove insert isn’t dampening down enough, it could be due to possible air leakages, inadequate insulation, damaged or faulty dampers, improper firewood selection, or insufficient combustion air supply.

It’s important to address these issues to ensure optimal performance and efficiency. Remember, a stitch in time saves nine, so don’t delay in resolving these problems to enjoy a cozy and well-regulated fire.

Advertisement
Continue Reading

Trending