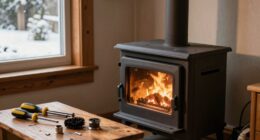

As someone deeply passionate about DIY endeavors, the transformative power of fire has always fascinated me.
Imagine, if you will, harnessing the energy of wood pellets to create a highly efficient and eco-friendly heating solution.
In this article, I’ll guide you through the step-by-step process of making your very own wood pellet burner. From selecting the right materials to testing and adjusting the burner, I’ll share my knowledge and experience to help you create a burner that’s both functional and safe.
Let’s dive in!
Key Takeaways
- Proper material selection is crucial for durability, heat resistance, and safety of the wood pellet burner.
- Careful consideration of the size and placement of fuel chamber, air intake, and exhaust vents is important for optimal efficiency.
- Assembly and installation should follow manufacturer’s instructions for proper functioning of the auger system.
- Regular troubleshooting, maintenance, and cleaning are necessary to ensure efficient operation and prevent issues with the combustion chamber, air intake, and exhaust system.

FLASLD 9×12in Heat Shield Thermal Barrier Blanket Insulation Reflective Material High Temp Protection Carbon Felt for Stove Welders, Stuff for DIY Alcohol Burners, Heat Resistant Up To 1800°F
Fireproof felt is made of flame retardant fabric material, won't melt or burn up to 1800°F(1000℃), used on…
As an affiliate, we earn on qualifying purchases.
As an affiliate, we earn on qualifying purchases.
Choosing the Right Materials
When choosing the right materials for your wood pellet burner, it’s important to consider factors such as durability and heat resistance. Selecting materials that can withstand high temperatures and maintain their structural integrity is crucial for the safety and efficiency of your burner.
I have found that using stainless steel for the burner body and heat exchanger is an excellent choice. Stainless steel offers excellent heat resistance and is highly durable, ensuring that your burner will last for a long time.
Additionally, using ceramic insulation around the combustion chamber can help to maintain high temperatures while preventing heat loss. These safety considerations are essential when designing the burner structure, as they ensure that the materials can handle the intense heat produced during the combustion process.
With the right materials in place, we can now move on to designing the burner structure.

Lyrufexon Ceramic Fiber Insulation, 24"x15.7"x1" Thick, 2600F Fireproof Insulation Blanket for Wood Stove Baffle, Fireplace, Pellet Stove, Chimney, Furnace, Boiler, Pizza Ovens and Forge
MORE APPLICATIOONS:Wood Stove Baffle, Fireplace, Pellet Stove, Chimney, Furnace, Boiler, Pizza Ovens, Forge & Many More
As an affiliate, we earn on qualifying purchases.
As an affiliate, we earn on qualifying purchases.
Designing the Burner Structure
To design the structure, you’ll need to consider the size and placement of the fuel chamber, air intake, and exhaust vents. These elements are crucial for achieving optimal burner efficiency and optimizing combustion.
The fuel chamber should be adequately sized to accommodate the wood pellets and ensure a steady fuel supply. It should be positioned in a way that allows for easy loading and maintenance.
The air intake should be strategically placed to provide sufficient oxygen for combustion. This will help in achieving complete and efficient burning of the wood pellets.
Additionally, the exhaust vents should be designed to allow for the efficient removal of combustion gases while minimizing heat loss.
With careful consideration of these factors, the burner structure can be designed to maximize burner efficiency and optimize combustion.
Assembling the fuel hopper is the next step in the process.
Pellet BBQ Smoker Hopper Assembly Kit, 250W 110V Electric Wood Pellet Smoker Grill Part Pellet Smoker Conversion Kit with Digital Temperature Controller for BBQ Smoke Bake Roast Braise Grill
Durable & Sturdy: The cold-rolled plate shell with spraying 600 ℃ high-temperature black sand grain powder, the stainless…
As an affiliate, we earn on qualifying purchases.
As an affiliate, we earn on qualifying purchases.
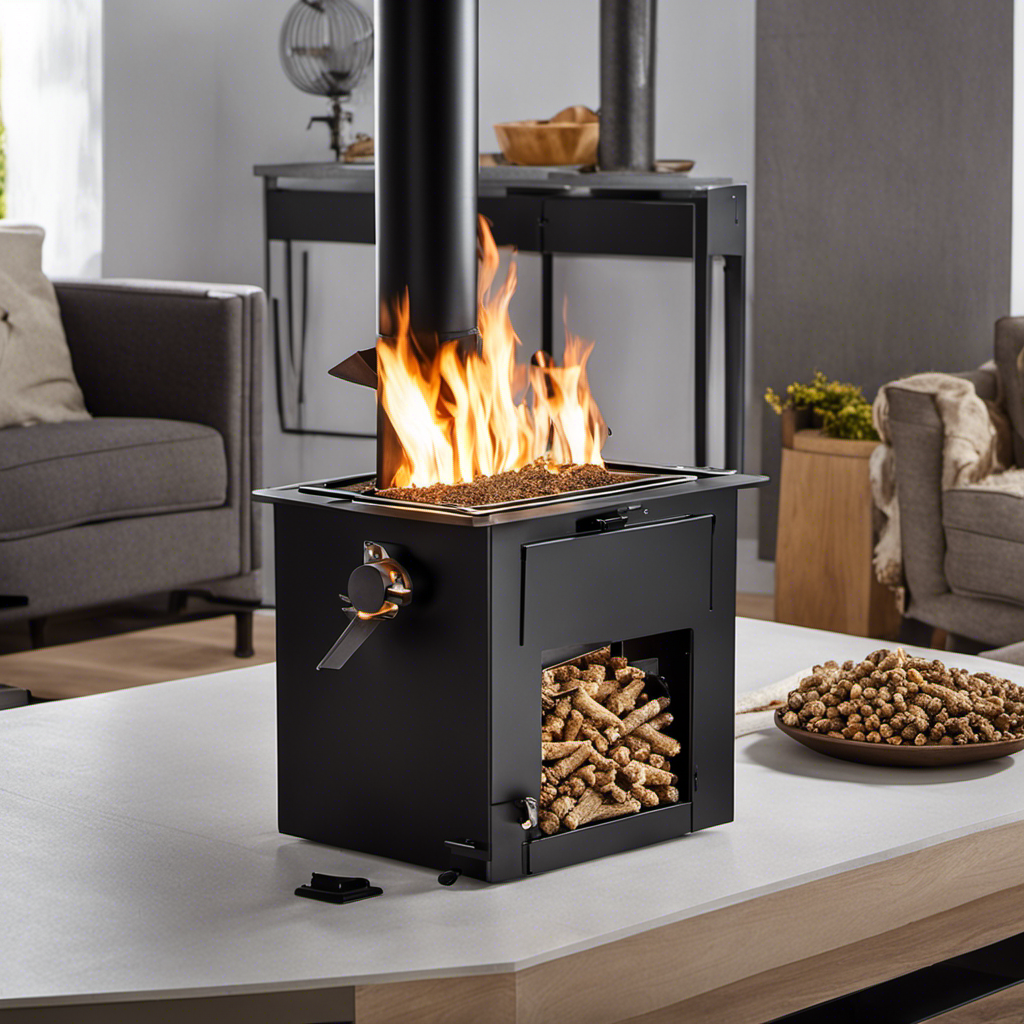
Assembling the Fuel Hopper
You’ll need to start by assembling the fuel hopper, ensuring that all the necessary components fit together securely. The fuel hopper is a crucial part of the wood pellet burner, as it stores and feeds the pellets into the combustion chamber.
Here are the key steps to follow for assembling the fuel hopper:
- Begin by selecting a suitable fuel hopper design that matches the specifications of your wood pellet burner.
- Check the fuel hopper capacity to ensure it can hold an adequate amount of pellets for extended burn time.
- Assemble the hopper walls and secure them using screws or bolts, ensuring a tight and sturdy fit.
- Attach the hopper lid, making sure it is properly sealed to prevent any pellet spillage during operation.
With the fuel hopper assembled, you can now move on to installing the auger system, which is responsible for transferring the pellets from the hopper to the combustion chamber.

Fire Burn Pot and Hot Rod Ignitor,Auger Motor, Induction Fan Kit, for Traeger and Pit Boss Wood Pellet Grill Parts Replacement
Perfect Fits: Compatible for Traeger and Pit Boss pellet grills (except PTG), Fits Model: Texas Elite Series, Pro…
As an affiliate, we earn on qualifying purchases.
As an affiliate, we earn on qualifying purchases.
Installing the Auger System
When it comes to installing an auger system, proper installation is crucial for optimal performance.
In my experience, I have found that following the manufacturer’s instructions and guidelines is the best approach. This includes properly aligning and securing the auger, ensuring all connections are tight and secure, and testing the system before finalizing the installation.
If any issues arise, troubleshooting the auger system is essential to identify and resolve any problems that may affect its functionality. This may involve checking for obstructions, inspecting the motor and gearbox, and verifying the power supply.
Overall, a well-installed and properly maintained auger system is essential for efficient operation of any equipment it is used with.
Proper Auger System Installation
Make sure that the auger system is properly installed for efficient operation.
The correct installation of the auger system is crucial for maintaining its performance and optimizing the overall efficiency of your wood pellet burner.
To ensure proper installation, follow these steps:
-
Position the auger motor securely: Place the motor in a stable location, ensuring it is securely mounted to prevent any vibrations or movement during operation.
-
Align the auger tube: Align the auger tube with the pellet hopper and the combustion chamber, making sure it is straight and properly connected to both ends.
-
Check the motor wiring: Double-check that the motor wiring is correctly connected to the power source, following the manufacturer’s guidelines.
By following these installation guidelines, you will set the foundation for a reliable and efficient auger system.
Now, let’s move on to troubleshooting any potential issues that may arise during the operation of your wood pellet burner.
Auger System Troubleshooting
To troubleshoot any issues with the auger system, start by checking the motor wiring and ensuring it is correctly connected to the power source. This is a crucial step in auger system maintenance and repair. A loose or faulty connection can disrupt the flow of pellets and cause the system to malfunction.
Once you have verified the wiring, examine the auger itself for any signs of damage or blockages. Clear any debris or obstructions that may be hindering the movement of the auger.
Additionally, inspect the motor for any signs of wear or overheating. Regularly lubricating the motor and ensuring it is properly aligned with the auger will help prevent issues.
Constructing the Combustion Chamber
The next step is attaching the combustion chamber to the base of the wood pellet burner. Constructing the combustion chamber is a critical part of building a functional wood pellet burner. It is where the fuel is burned and converted into heat energy. The chamber needs to be carefully designed to ensure efficient combustion and minimize any combustion issues that may arise. To help troubleshoot combustion issues, I have created a table below that outlines common problems and their potential solutions. By understanding these issues and taking appropriate measures, you can optimize the performance of your wood pellet burner and ensure a consistent and reliable heat source.
| Combustion Issue | Potential Solution |
|---|---|
| Insufficient airflow | – Check air intake vents for blockages |
| – Clean or replace air filters | |
| – Adjust fan speed or damper settings | |
| Incomplete combustion | – Check fuel quality and moisture content |
| – Ensure proper ignition and flame stability | |
| – Adjust air-to-fuel ratio for optimal combustion | |
| Excessive smoke | – Clean or replace combustion chamber |
| – Adjust air-to-fuel ratio to achieve cleaner burn | |
| – Inspect and clean exhaust system |
With the combustion chamber securely attached, we can now move on to the next section on building the heat exchanger. This component plays a crucial role in transferring the heat generated in the combustion chamber to the surrounding environment.
Building the Heat Exchanger
Attach the heat exchanger to the combustion chamber, ensuring a secure connection for optimal heat transfer.
The heat exchanger plays a crucial role in extracting maximum heat from the wood pellets during combustion. To ensure its efficiency, regular maintenance is essential.
Cleaning the heat exchanger regularly helps prevent the build-up of soot and other debris, which can hinder heat transfer. Inspecting the seals and gaskets is also important to ensure there are no leaks that could compromise its performance. Additionally, checking for any signs of corrosion or damage is crucial to maintain the heat exchanger’s integrity.
Regular maintenance not only improves the heat exchanger’s efficiency but also prolongs its lifespan.
With the heat exchanger securely attached, we can now move on to creating the air supply system.
Creating the Air Supply System
After building the heat exchanger, it’s time to focus on creating the air supply system for the wood pellet burner. This system is crucial for maintaining the proper combustion process and ensuring efficient heat output.
Here are the steps to follow:
-
Install an air intake valve: This valve regulates the amount of air entering the burner and allows for adjustments based on heating requirements.
-
Connect the air intake valve to the blower: The blower will provide the necessary air pressure to support combustion.
-
Check for air leaks: Ensure that all connections are secure and there are no leaks in the air supply system. Any leaks can cause inefficient burning and potential safety hazards.
-
Regular maintenance: Clean the air intake valve and blower regularly to prevent clogging and ensure optimal performance.
Now that the air supply system is in place, the next section will focus on wiring the ignition system for the wood pellet burner.
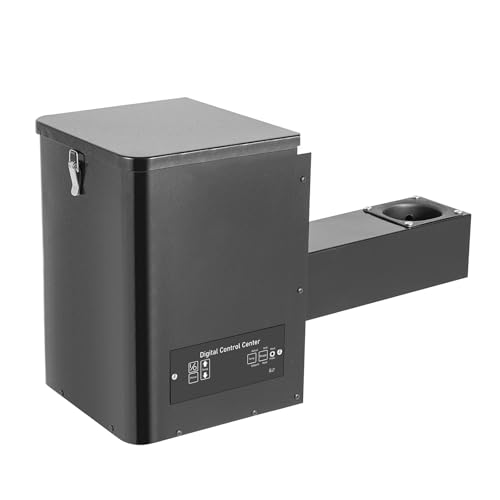
Wiring the Ignition System
When it comes to wiring the ignition system, it is crucial to prioritize safety precautions. As someone who has worked extensively with wiring in various projects over the years, I can’t stress enough the importance of following proper safety protocols.
From wearing protective gear to ensuring the power is off before starting any work, taking these precautions will greatly minimize the risk of accidents or electrical mishaps.
Additionally, troubleshooting common issues is an inevitable part of any wiring project, and having a solid understanding of the most common problems and how to fix them can save you time and frustration. Through my experience, I have encountered various issues such as loose connections, faulty wiring, and blown fuses, and I am eager to share my knowledge on how to effectively troubleshoot and resolve these issues.
Safety Precautions for Wiring
To ensure safety while wiring the wood pellet burner, you’ll need to double-check all electrical connections. Electrical hazards are a real concern when working with any appliance, and the wood pellet burner is no exception. One of the most important safety measures is proper grounding. This helps to prevent electrical shocks and ensures that any excess electricity is safely routed away. Here are some grounding techniques to follow:
| Grounding Technique | Description |
|---|---|
| Connect to Grounding Rod | Install a grounding rod and connect the burner’s ground wire to it. This provides a direct path for electrical discharge. |
| Use Grounding Strap | Attach a grounding strap between the burner and a grounded metal object, such as a water pipe or a metal stake driven into the ground. |
| Check for Continuity | Use a multimeter to test for continuity between the burner’s ground wire and the grounding point. This ensures a solid connection. |
Troubleshooting Common Issues
Let’s take a look at some common issues that can arise when troubleshooting the wood pellet burner.
When it comes to troubleshooting fuel issues, there are a few things to keep in mind. First, check the fuel level in the hopper to ensure it is not empty. Next, inspect the fuel delivery system for any clogs or blockages that may be preventing the pellets from reaching the burn pot. Additionally, make sure the fuel is dry and free from any moisture that could cause it to clump together.
On the other hand, troubleshooting ignition problems requires a different approach. Check the igniter to ensure it is clean and functioning properly. Ensure that the fuel is being fed into the burn pot correctly and that the air intake is not obstructed.
By addressing these common issues, you can get your wood pellet burner up and running smoothly.
Now, let’s move on to testing and adjusting the burner to optimize its performance.
Testing and Adjusting the Burner
You should start by evaluating and fine-tuning the burner’s performance during the testing phase. This is a crucial step in ensuring that your wood pellet burner functions optimally.
To begin, you can employ various testing methods, such as measuring the temperature, air-to-fuel ratio, and combustion efficiency. By carefully analyzing these factors, you can identify any areas that require adjustment or improvement.
For example, if the temperature is not reaching the desired level, you may need to adjust the airflow or fuel feed rate. Additionally, you can optimize the burner’s performance by monitoring and adjusting the combustion process, ensuring efficient and clean burning.
By thoroughly testing and fine-tuning the burner during this phase, you can lay the foundation for its long-term reliability and effectiveness.
Now, let’s delve into the crucial maintenance and safety guidelines for your wood pellet burner.
Maintenance and Safety Guidelines
When it comes to maintaining a safe and efficient wood pellet burner, proper ventilation is crucial. Without adequate airflow, the burner can become a fire hazard, leading to potential damage or even injury.
In order to ensure proper ventilation, it is important to regularly clean and clear any debris or obstructions from the air intake and exhaust vents.
Additionally, regular cleaning and lubrication of the burner’s components will not only help to improve its performance but also extend its lifespan.
Proper Ventilation for Safety
Ensure that the ventilation system is properly installed and functioning to maintain safety while using the wood pellet burner. Here are three important ventilation requirements and safety precautions to keep in mind:
-
Adequate airflow: The ventilation system should provide sufficient air exchange to prevent the build-up of harmful gases, such as carbon monoxide. Make sure that the air intake and exhaust vents are clear of any obstructions.
-
Proper ducting: The ventilation ducts should be properly sized and installed to effectively remove combustion byproducts. Ensure that the ducts are sealed tightly to prevent any leaks, which could lead to the release of dangerous gases into your living space.
-
Regular maintenance: Routinely inspect and clean the ventilation system to ensure optimal performance. This includes checking for any blockages, cleaning or replacing filters, and ensuring that the fan is operating smoothly.
By following these ventilation requirements and safety precautions, you can enjoy the warmth and comfort of your wood pellet burner while minimizing any potential risks.
Now, let’s move on to some essential cleaning and lubrication tips to keep your burner running smoothly.
Cleaning and Lubrication Tips
To keep your ventilation system functioning properly, it’s essential to regularly clean and lubricate the necessary components. Proper maintenance ensures optimal performance and extends the lifespan of your ventilation system. When it comes to cleaning techniques, start by removing any dust or debris that may have accumulated on the vents or fan blades. Use a soft brush or a vacuum cleaner with a brush attachment to gently remove the dirt. For lubrication, refer to the table below for the recommended lubrication methods for different components of your ventilation system. Remember to follow the manufacturer’s instructions and use the appropriate lubricant for each part. Regular cleaning and lubrication will ensure smooth operation and prevent any potential issues with your ventilation system.
| Component | Cleaning Technique | Lubrication Method |
|---|---|---|
| Fan Blades | Soft brush or vacuum cleaner | Lightweight oil or silicone lubricant |
| Bearings | Clean with a damp cloth | High-temperature grease |
| Dampers | Wipe clean with a damp cloth | Dry lubricant or silicone spray |
Frequently Asked Questions
How Long Does It Take to Build a Wood Pellet Burner?
It takes me about a week to build a wood pellet burner from scratch. The necessary materials include a metal housing, a pellet hopper, a combustion chamber, and an exhaust system.
Can a Wood Pellet Burner Be Used for Other Purposes Besides Heating?
A wood pellet burner, like a versatile chef, can do more than just heat. It can also cook, providing a delicious meal with a side of potential environmental benefits.
Are There Any Specific Safety Precautions to Take When Operating a Wood Pellet Burner?
When operating a wood pellet burner, it is crucial to prioritize safety. Some safety measures include regular maintenance, keeping the area around the burner clear, and ensuring proper ventilation to prevent any accidents or hazards.
What Are the Advantages of Using a Wood Pellet Burner Compared to Other Heating Methods?
Compared to other heating methods, wood pellet burners have several advantages. They are more efficient, environmentally friendly, and cost-effective. They also provide consistent heat and are easy to use and maintain.
Can a Wood Pellet Burner Be Used in a Residential Setting or Is It More Suitable for Industrial Use?
A wood pellet burner can be used in both residential and industrial settings. Compared to other heating methods, it offers greater efficiency. In my experience, it’s like a reliable workhorse that efficiently warms up any space, whether it’s a cozy home or a large industrial facility.
Conclusion
In conclusion, constructing a wood pellet burner is a rewarding and efficient way to heat your space. By carefully choosing the right materials and designing a well-structured burner, you can ensure optimal performance.
Installing the necessary components and wiring the ignition system will guarantee a smooth start-up. Remember to test and adjust the burner to achieve the desired heat output.
And most importantly, always prioritize maintenance and follow safety guidelines.
So, why settle for traditional heating methods when you can have a custom wood pellet burner that brings warmth and comfort to your home?