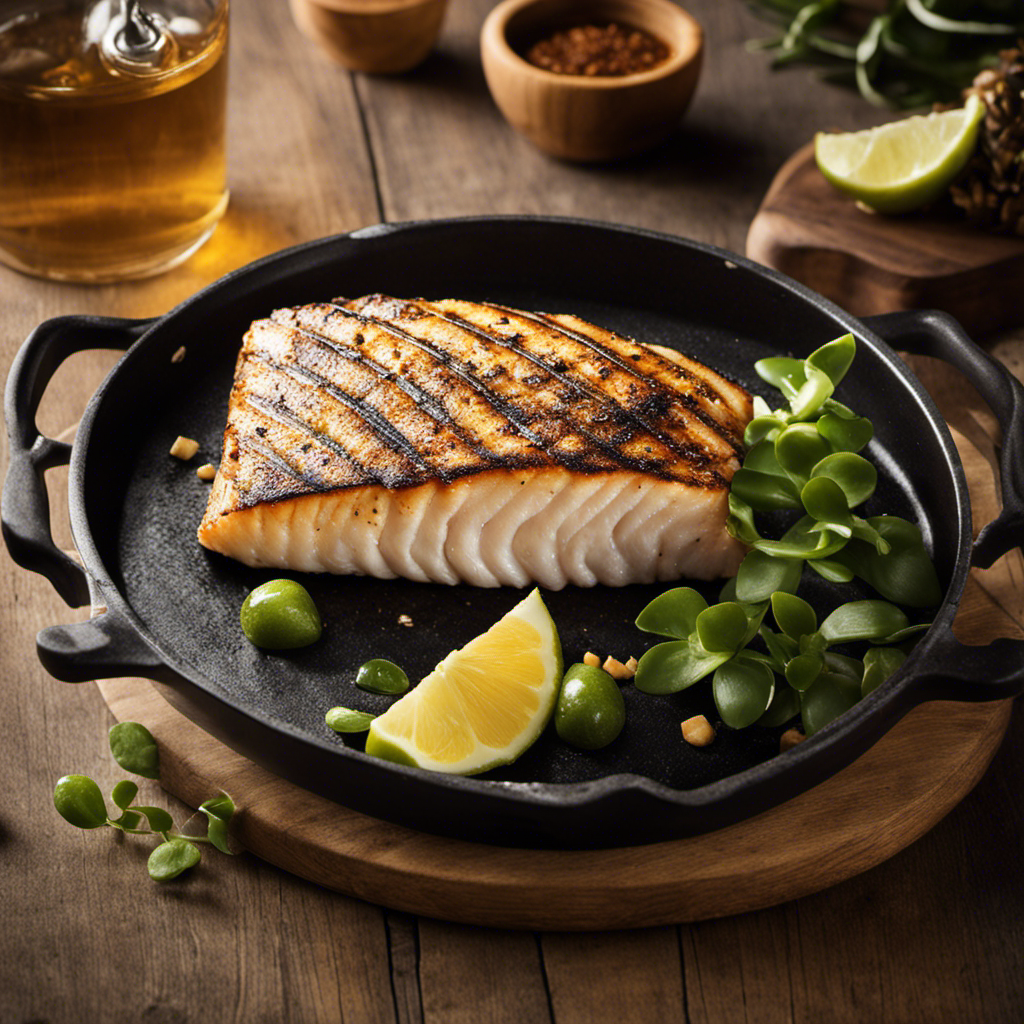

I immensely love cooking halibut on my wood pellet grill, leading to an exceptionally tasty and juicy fish outcome.
In this article, I’m going to share my tried-and-true method for fixing halibut in a wood pellet grill. From choosing the perfect cut to seasoning and cooking it just right, I’ll guide you through each step.
Get ready to impress your taste buds with perfectly grilled halibut that’s bursting with flavor. Let’s get started!
Key Takeaways
- Choosing the right cut of halibut is crucial for grilling success
- Preparing the wood pellet grill properly ensures optimal cooking conditions
- Resting the halibut before serving enhances flavor and moisture retention
- Proper seasoning, preheating, and oiling of the grill grates are important steps for grilling halibut perfectly

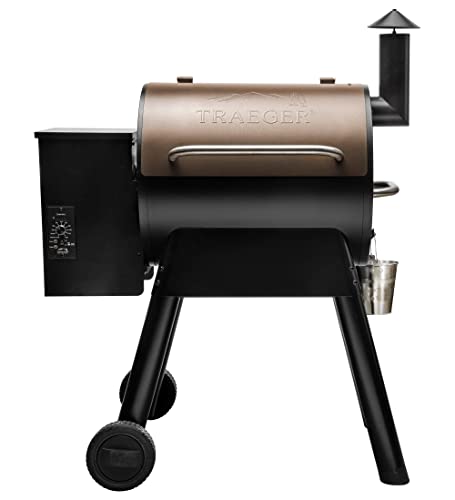
Traeger Grills Apple 100% All-Natural Wood Pellets for Smokers and Pellet Grills, BBQ, Bake, Roast, 18 lb. Bag
- Flavor Profile: Subtly sweet apple wood flavor
- Premium Quality: All-natural hardwood pellets from America
- Optimized Burn: Balanced, dependable burn with perfect smoke
As an affiliate, we earn on qualifying purchases.
As an affiliate, we earn on qualifying purchases.
Choosing the Perfect Halibut Cut
I prefer using a thick halibut steak for grilling on the wood pellet grill. When it comes to halibut cuts, a thick steak is ideal because it retains its moisture and flavor during the grilling process. The thickness of the steak allows for more even cooking and prevents the fish from drying out.
To ensure the perfect halibut steak for grilling, it’s important to select a fresh and high-quality piece of fish. Look for steaks that are firm, with a vibrant color and a mild sea-like aroma. Avoid any cuts that appear discolored or have a strong fishy smell.
When it comes to grilling techniques, I find that a wood pellet grill provides the best results. The smoky flavor from the wood pellets adds an extra layer of deliciousness to the halibut. Preheat the grill to a medium-high heat and oil the grates to prevent sticking.
Place the halibut steak directly on the grates and cook for about 4-6 minutes per side, depending on the thickness. The fish should be opaque and easily flake with a fork when done.
Preparing the Wood Pellet Grill for Cooking
Before we start cooking, it’s important to prepare the wood pellet grill properly.
First, I make sure to clean the grill grates thoroughly using a grill brush to remove any residue from previous use.
Next, I check the hopper and fill it with the right type of wood pellets that will enhance the flavor of the food I’m cooking.
Grill Maintenance Tips
To keep my grill in top condition, I always make sure to clean the grates after each use. Proper grill maintenance is essential to ensure optimal performance and longevity. Here are some grill cleaning techniques and troubleshooting tips to keep your grill running smoothly:
-
Clean the grates: Use a grill brush to scrape off any food residue and debris from the grates. For stubborn stains, soak the grates in warm soapy water and scrub with a sponge.
-
Check the burners: Inspect the burners for any clogs or blockages. Clear any obstructions with a wire brush or pipe cleaner.
-
Clean the drip pan: Remove and clean the drip pan regularly to prevent grease buildup and potential fire hazards.
-
Inspect the gas lines: Ensure the gas lines are securely connected and there are no leaks. Use a solution of soapy water to check for any bubbles, indicating a gas leak.
By following these grill maintenance tips, you can prevent common issues and ensure your grill is ready for the next cookout.
Now, let’s move on to choosing the right pellets for your wood pellet grill.
Choosing the Right Pellets
When it comes to selecting the best pellets for my wood pellet grill, I consider factors such as flavor, quality, and compatibility with my desired cooking style. Choosing the right wood flavor is crucial in enhancing the taste of the food. Some popular wood flavors include hickory, mesquite, and applewood, each imparting a unique smoky flavor to the grilled dishes. Quality is important to ensure that the pellets burn efficiently and produce consistent heat. Look for pellets made from pure hardwood with no fillers or additives. Lastly, compatibility with my cooking style is essential for maintaining temperature consistency throughout the grilling process. To help you choose the right pellets for your wood pellet grill, here is a comparison table:
| Wood Flavor | Quality | Compatibility |
|---|---|---|
| Hickory | High | Excellent |
| Mesquite | Medium | Good |
| Applewood | High | Excellent |
Now that we’ve discussed choosing the right pellets, let’s move on to seasoning and marinating the halibut for a delicious and flavorful meal.
Seasoning and Marinating the Halibut
I always love adding a little bit of lemon juice and garlic to my halibut before grilling it. It adds a burst of freshness and flavor that enhances the natural taste of the fish. When it comes to marinating techniques and seasoning options for halibut, there are several ways to go about it.
Here are four ideas to get you started:
-
Classic Lemon and Herb: Squeeze fresh lemon juice over the halibut and sprinkle it with chopped herbs like parsley, dill, and thyme. Let it marinate for at least 30 minutes before grilling.
-
Spicy Cajun: Mix together paprika, cayenne pepper, garlic powder, and onion powder to create a flavorful Cajun seasoning. Rub it onto the halibut, making sure to coat both sides, and let it sit for an hour before grilling.
-
Asian-inspired Soy Ginger: Combine soy sauce, grated ginger, minced garlic, and a touch of honey to create a savory marinade. Let the halibut soak in this mixture for 1-2 hours before grilling.
-
Mediterranean Herb: Mix together olive oil, lemon zest, minced garlic, and a blend of dried herbs like oregano, thyme, and basil. Coat the halibut in this mixture and let it marinate for 1 hour before grilling.
Now that we’ve seasoned and marinated our halibut, it’s time to move on to setting the right temperature and cooking time.
Setting the Right Temperature and Cooking Time
Now I need to make sure I set the right temperature and cooking time for the halibut. Cooking halibut on a wood pellet grill requires precise techniques to ensure the fish is cooked to perfection.
The wood pellet grill provides a unique smoky flavor that enhances the taste of the halibut. To start, I preheat the grill to 400°F, which is the ideal temperature for cooking halibut. This high heat helps to sear the fish and lock in its natural juices, resulting in a moist and flavorful dish.
Next, I prepare the halibut by brushing it with some olive oil and seasoning it with salt and pepper. This simple seasoning enhances the natural flavors of the fish without overpowering it. For those looking for a more adventurous flavor, there are plenty of other options to explore. Adding a squeeze of lemon juice or a sprinkle of fresh herbs like dill or parsley can elevate the taste of the halibut.
Once the grill has reached the desired temperature, I place the halibut directly on the grates. I cook it for about 4-6 minutes per side, depending on the thickness of the fillets. The halibut should be opaque and flake easily with a fork when it’s done. Overcooking can lead to dry and rubbery fish, so it’s important to keep a close eye on the cooking time.
Placing the Halibut on the Grill Grates
Placing the fish directly on the grates allows for even cooking and adds a smoky flavor to the halibut.
When grilling halibut on a wood pellet grill, it’s important to use the right cooking techniques to achieve the perfect texture and taste.
Here are some tips to help you get those delicious grill marks and a moist, flavorful fish:
-
Preheat the grill: Before placing the halibut on the grates, make sure your wood pellet grill is preheated to the desired temperature. This ensures that the fish cooks evenly and prevents sticking.
-
Oil the grates: To prevent the halibut from sticking to the grill, lightly oil the grates using a brush or spray. This also helps create beautiful grill marks on the fish.
-
Place the fish diagonally: Position the halibut diagonally on the grates, as this allows for more even cooking and ensures that each side gets those desirable grill marks.
-
Avoid flipping too soon: Let the halibut cook for a few minutes on one side before flipping. This allows the grill marks to form and helps prevent the fish from falling apart.
Flipping and Basting the Halibut
To achieve a perfectly cooked halibut with a moist and flavorful interior, it is important to flip and baste the fish during the grilling process. Flipping the halibut ensures that it cooks evenly on both sides, while basting helps to keep the fish moist and infuse it with additional flavor. There are a few different flipping and basting techniques that can be used when grilling halibut.
When it comes to flipping the halibut, it is best to use a wide spatula to carefully lift and turn the fish. This helps to prevent it from falling apart or sticking to the grill grates. It is important to flip the fish gently to avoid damaging the delicate flesh.
In terms of basting, you can use a variety of ingredients to add flavor to the halibut. A simple mixture of olive oil, lemon juice, and herbs is a classic option. You can also experiment with different marinades or glazes to enhance the taste of the fish. To baste the halibut, use a brush or spoon to evenly coat the fish with the basting mixture. Be sure to baste both sides of the fish as you flip it.
Here is a table summarizing the flipping and basting techniques for grilling halibut:
| Flipping Techniques | Basting Techniques |
|---|---|
| Use a wide spatula | Brush or spoon |
| Lift and turn gently | Evenly coat fish |
| Avoid damaging flesh | Baste both sides |
Checking for Doneness and Avoiding Overcooking
When it comes to checking for doneness and avoiding overcooking, there are a few key things to keep in mind.
First, always follow cooking time recommendations provided in the recipe or by the manufacturer.
Secondly, using a meat thermometer is crucial to ensure the internal temperature reaches the desired level.
Lastly, allowing the cooked halibut to rest for a few minutes before serving helps retain its juices and ensures a moist and flavorful result.
Cooking Time Recommendations
I find that following the recommended cooking times for halibut on a wood pellet grill ensures the perfect level of tenderness and flakiness. Here are some grilling techniques and alternative cooking methods to consider:
-
Direct grilling: This method involves placing the halibut directly on the grill grates, allowing for a quick and even cooking process.
-
Indirect grilling: By placing the fish on a foil-lined baking sheet or using a grill basket, you can cook the halibut indirectly, resulting in a more gentle and delicate texture.
-
Smoking: Adding wood pellets to your grill can infuse the halibut with a subtle smoky flavor, enhancing its natural taste.
-
Cedar plank grilling: Placing the fish on a soaked cedar plank before grilling creates a unique and delicious flavor profile.
By incorporating these grilling techniques and alternative cooking methods, you can elevate your halibut dishes to new heights.
Now, let’s move on to the next step – using a meat thermometer to ensure the fish is cooked to perfection.
Using a Meat Thermometer
Using a meat thermometer ensures that my halibut is cooked to the perfect temperature, resulting in a tender and flavorful dish. Achieving the perfect cook can be challenging, as undercooking or overcooking can ruin the texture and taste of the fish. To avoid these pitfalls, here are some tips for using a meat thermometer effectively:
- Insert the thermometer into the thickest part of the halibut, making sure not to touch any bones.
- Wait for the reading to stabilize, which usually takes a few seconds.
- For halibut, the ideal internal temperature is 145°F (63°C).
- Remove the halibut from the heat source once it reaches the desired temperature.
- Let the halibut rest for a few minutes before serving to allow the juices to redistribute.
Resting Before Serving
After grilling the halibut to perfection, it’s important to allow it to rest before serving. This crucial step ensures that the flavors are fully developed and the fish remains tender. Here’s why resting is essential:
-
Allowing the halibut to cool: Resting the halibut helps to lower its internal temperature. This prevents the fish from continuing to cook and becoming dry.
-
Temperature management while resting: During the resting period, the residual heat in the halibut continues to distribute evenly. This helps to even out any temperature discrepancies and ensures a consistent level of doneness throughout the fish.
-
Flavor development: Resting allows the flavors to meld together, intensifying the taste of the halibut. It also allows any marinades or seasonings to penetrate deeper into the fish.
-
Retaining juiciness: Resting helps the halibut retain its moisture by allowing the juices to redistribute. This results in a moist and succulent bite.
Resting and Serving the Grilled Halibut
After grilling the halibut, I let it rest for a few minutes before serving. This resting period is crucial as it allows the flavors to settle and the juices to redistribute, resulting in a more tender and flavorful fish.
During this time, I prepare the serving suggestions to complement the perfectly grilled halibut.
To serve the grilled halibut, I like to keep it simple yet delicious. One option is to drizzle it with a squeeze of fresh lemon juice to enhance the natural flavors of the fish. Another suggestion is to serve it with a tangy and refreshing salsa made from diced tomatoes, red onions, cilantro, and a hint of lime juice. The acidity of the salsa balances the richness of the halibut, creating a harmonious combination.
Alternatively, I sometimes opt for a creamy dill sauce to accompany the grilled halibut. This sauce is made by combining mayonnaise, Greek yogurt, fresh dill, lemon zest, and a pinch of salt and pepper. The creamy texture and subtle herbaceousness of the dill perfectly complement the delicate flavors of the halibut.
As the resting period comes to an end, the grilled halibut is ready to be served with any of these delicious suggestions.
Now, let’s move on to some tips and tricks for achieving perfectly grilled halibut on a wood pellet grill.
Tips and Tricks for Perfectly Grilled Halibut on a Wood Pellet Grill
I find that achieving perfectly grilled halibut on my wood pellet grill requires a few key tips and tricks. Here are some techniques I’ve learned for choosing fresh halibut and grilling it to moist perfection:
-
Selecting Fresh Halibut:
- Look for firm, translucent flesh with a mild, oceanic smell.
- Avoid any fish with a fishy odor or slimy texture.
- Opt for halibut steaks or fillets that are evenly thick for even cooking.
-
Preparing the Halibut:
- Pat the halibut dry with paper towels to remove excess moisture.
- Season both sides generously with salt, pepper, and your favorite herbs or spices.
- Let the seasoned halibut sit at room temperature for 15-20 minutes to ensure even cooking.
-
Preheating and Grilling:
- Preheat your wood pellet grill to a medium-high heat (around 400°F).
- Lightly oil the grill grates to prevent sticking.
- Place the halibut directly on the grill grates and cook for 4-6 minutes per side, depending on thickness.
-
Checking for Doneness:
- Use a meat thermometer to check the internal temperature, aiming for 135°F.
- The halibut should be opaque and easily flake with a fork when done.
By following these tips, you’ll be able to enjoy perfectly grilled halibut that’s moist and full of flavor.
Happy grilling!
Can Wood Pellet Noise Affect the Cooking Process of Halibut in a Wood Pellet Grill?
The wood pellet noise issue may not directly affect the cooking process of halibut in a wood pellet grill. However, excessive noise could indicate a problem with the grill’s motor or auger, which could potentially impact the grill’s ability to maintain a consistent and even cooking temperature.
What are the benefits of using wood over pellets when grilling halibut in a wood pellet grill?
When grilling halibut in a wood pellet grill, the benefits of using wood over pellets are many. Wood imparts a rich, smoky flavor to the fish that cannot be achieved with pellets. Additionally, cooking with wood provides a more authentic and traditional grilling experience, enhancing the overall flavor and experience.
Frequently Asked Questions
Can I Use Any Type of Halibut Cut for Grilling on a Wood Pellet Grill?
Yes, you can use different cuts of halibut for grilling on a wood pellet grill. The key is to choose a cut that’s thick enough to withstand the high heat without overcooking.
I recommend using halibut steaks or fillets that are at least 1 inch thick. This will ensure that the fish stays moist and tender during grilling.
As for marinade durations, it’s best to marinate the halibut for at least 30 minutes to allow the flavors to penetrate the fish.
How Long Should I Marinate the Halibut Before Grilling It?
When it comes to grilling halibut on a wood pellet grill, there are a few key steps to ensure a delicious result.
First, it’s important to properly season the halibut before grilling it. This can be done by marinating it for at least 30 minutes to allow the flavors to penetrate the fish.
As for the best grilling techniques, using a medium-high heat and cooking the halibut for about 4-5 minutes per side should give you a perfectly cooked and flavorful dish.
What Type of Wood Pellets Should I Use for Grilling Halibut?
When grilling halibut on a wood pellet grill, it’s important to choose the right type of wood pellets to enhance the flavor. There are various flavors available, such as hickory, mesquite, and applewood, each providing a unique taste to the fish.
To achieve a smoky flavor, I recommend using hickory or mesquite wood pellets. These give the halibut a rich and robust taste that pairs perfectly with its delicate texture.
Experiment with different flavors to find your favorite!
How Do I Know if the Halibut Is Cooked Through Without Overcooking It?
When it comes to cooking halibut on a wood pellet grill, it’s important to ensure that it’s cooked evenly without drying it out. To prevent sticking, I recommend preheating the grill and lightly oiling the grates.
As for determining if the halibut is cooked through, using a meat thermometer is key. Insert it into the thickest part of the fish, and when it reaches an internal temperature of 145°F, it’s ready to be enjoyed!
Can I Grill Other Types of Seafood on a Wood Pellet Grill Using the Same Method?
Grilling shrimp on a wood pellet grill and grilling salmon on a wood pellet grill can both be done using the same method as grilling halibut. The wood pellet grill provides a smoky flavor that enhances the taste of the seafood.
Make sure to preheat the grill and oil the grates to prevent sticking. Cook the shrimp and salmon until they’re opaque and flake easily with a fork.
It’s a delicious and easy way to enjoy a variety of seafood dishes.
Conclusion
Grilling halibut on a wood pellet grill is a delicious and flavorful way to enjoy this delicate fish. By following the steps outlined in this article, you can achieve perfectly grilled halibut every time.
Just imagine the smoky aroma and the tender, juicy meat of the halibut, infused with the flavors of the wood pellets. It’s like taking a bite of summer, right in your own backyard.
So fire up that grill and get ready to impress your friends and family with your culinary skills.